Contents
Rocky Linux
CentOS, which was positioned as a downstream of RHEL (Red Hat Enterprise Linux), will no longer be supported for CentOS 8 on December 31, 2021.
There are three distributions (AlmaLinux, RockyLinux, and CentOS Stream 8) that are attracting attention as a destination for migrating from CentOS, but this time we will build a server using the latest version of RockyLinux 8.4 for the following reasons.
CentOS Stream 8
Stability concerns with RHEL upstream
Support period until May 31, 2024
AlmaLinux
AlmaLinux is a free RHEL clone that is being developed by CloudLinux, the developer of CloudLinux OS, a commercial Linux distribution, with the goal of binary compatibility with the current version of RHEL.
Support period until 2029
Rocky Linux
It is a free RHEL clone by the project started by Gregory Kurtzer, the founder of CentOS, and is being developed by the community as a "production downstream version of RHEL".
The company is also eager to acquire sponsors, including Amazon Web Services (AWS) and Google Cloud.
Support period until 2029
Rocky Linux installation(Use a Linux-only PC)
1.Rocky Linux 8.4 download
Rocky Linux 8 installation image can be downloaded as Rocky-8.4-x86_64-dvd1.iso from the following site
http://dl.rockylinux.org/vault/rocky/8.4/isos/x86_64/
2.Install Rocky Linux 8.4
Change the BIOS setting to boot from the installation USB media.
2.1 Initial installation screen
The screen will look like this: Press the "Install Rocky Linux 8" key at the top and go to "Select Language".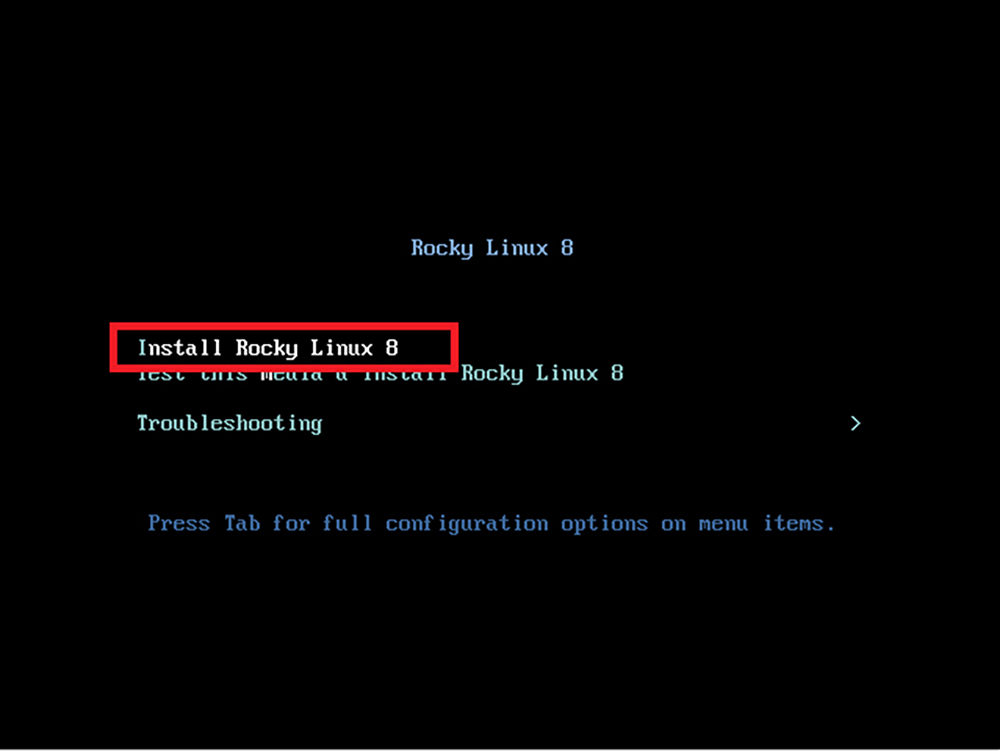
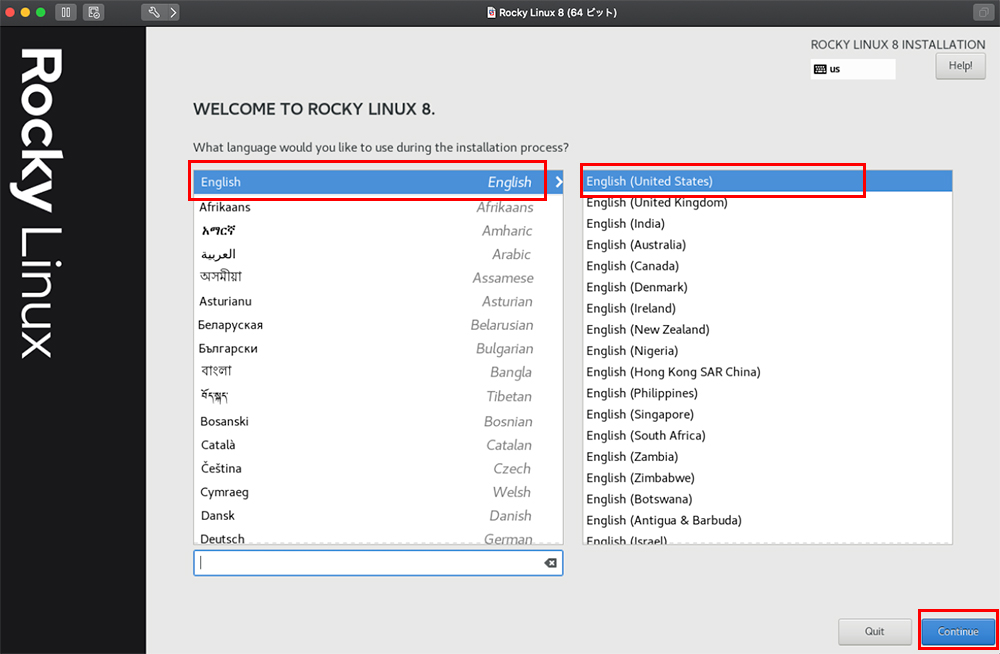
2.2 Select Language
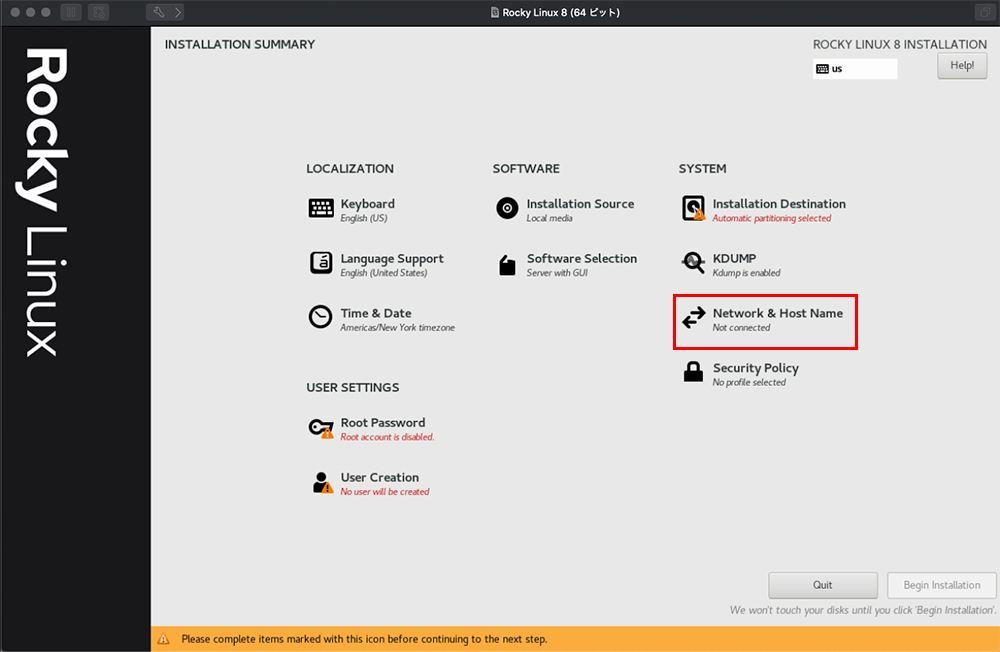
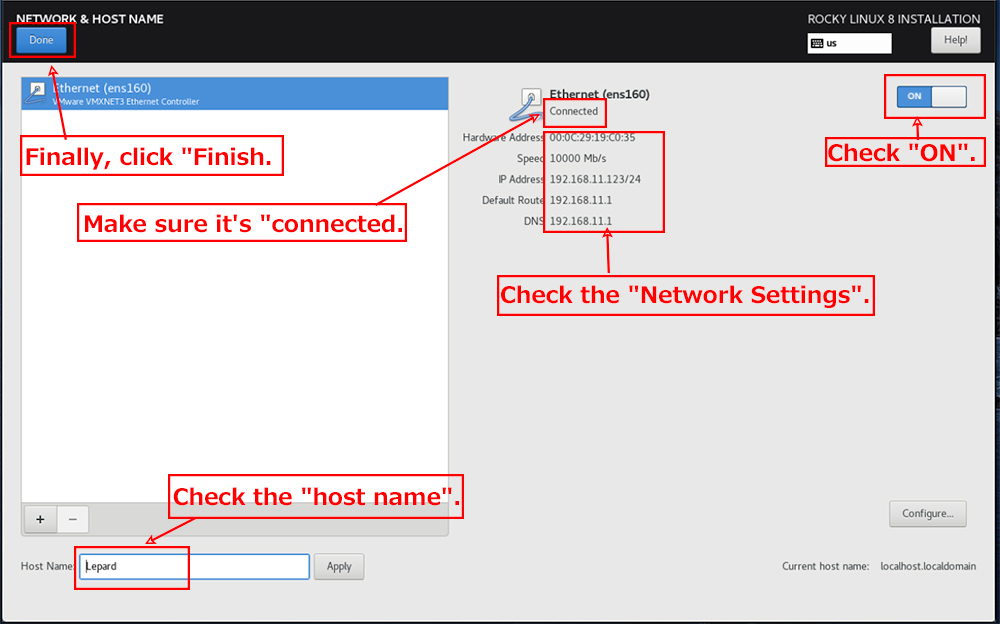
2.3 Network and Hostname" settings

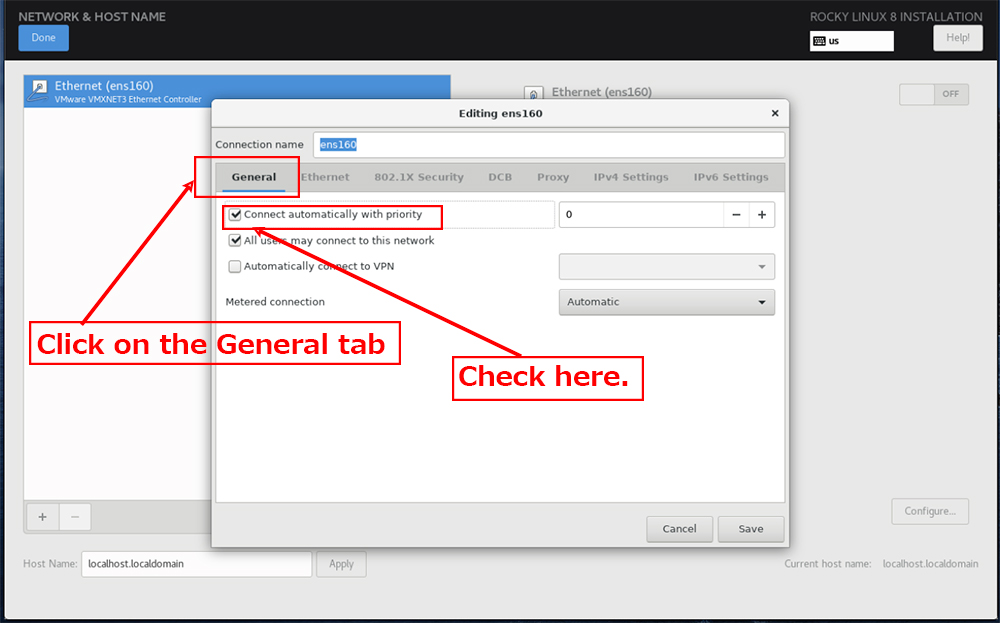
Select IPV4
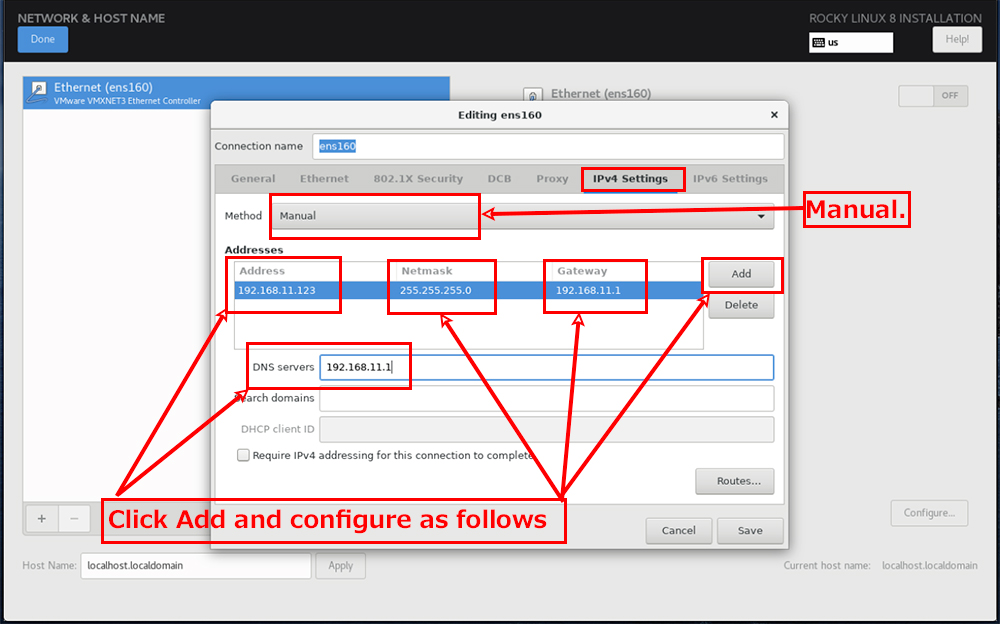
Click Add.
Address:It depends on your router, but for example, if your router's IP is "192.168.11.1
For example, if your router's IP is 192.168.11.1, you can specify any number in the "#" part of "192.168.11.#".
Netmask:255.255.255.0
Gateway:Basically, specify the IP of the router(Most of them are "192.168.11.1" or "192.168.0.1".)
DNS servers : Enter the primary DNS or router address specified by your provider.
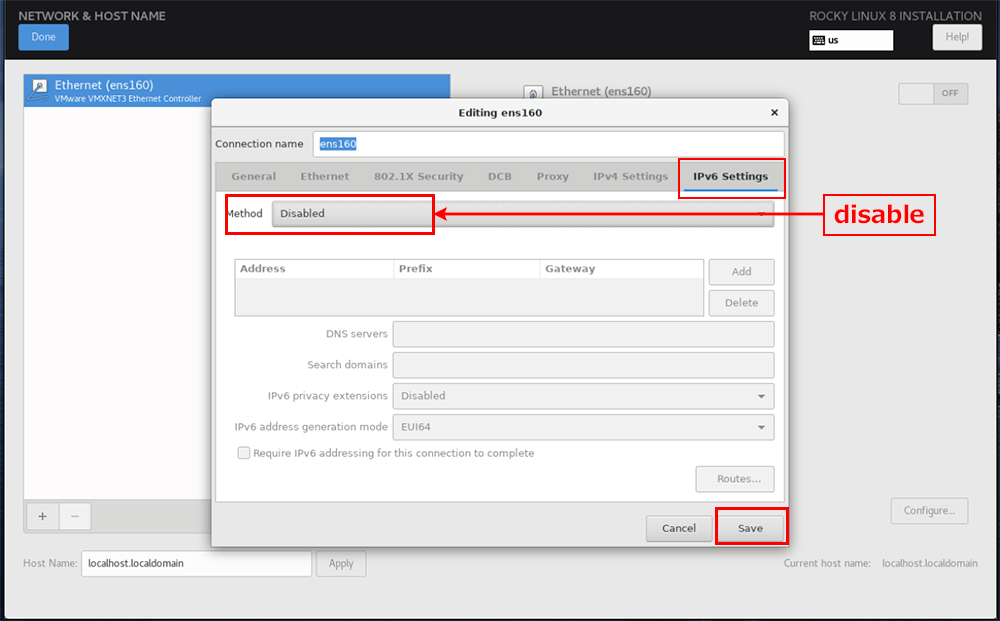
Setting up IPv6
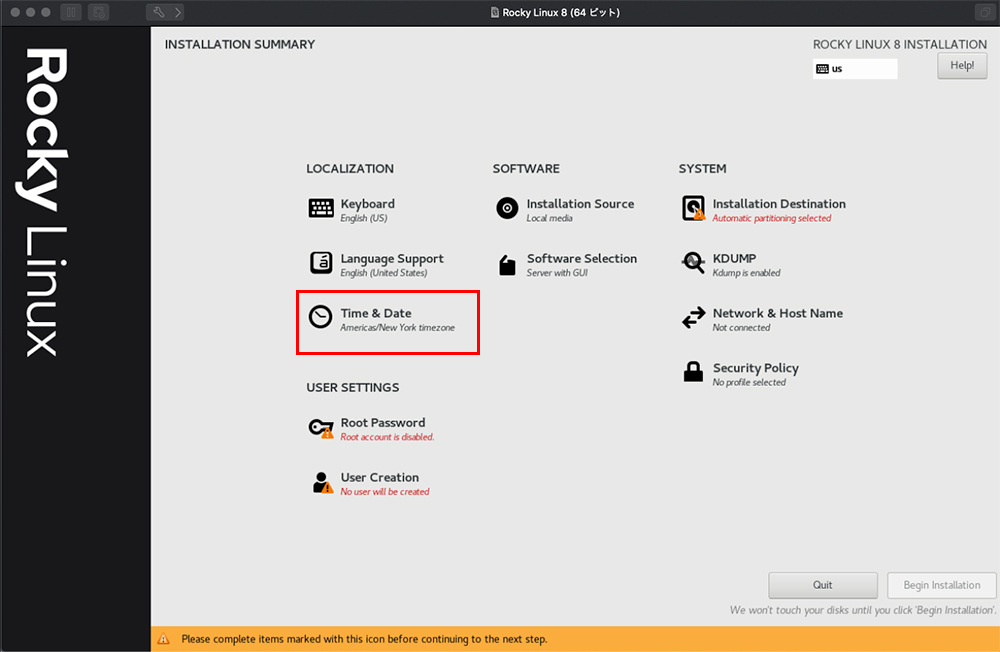
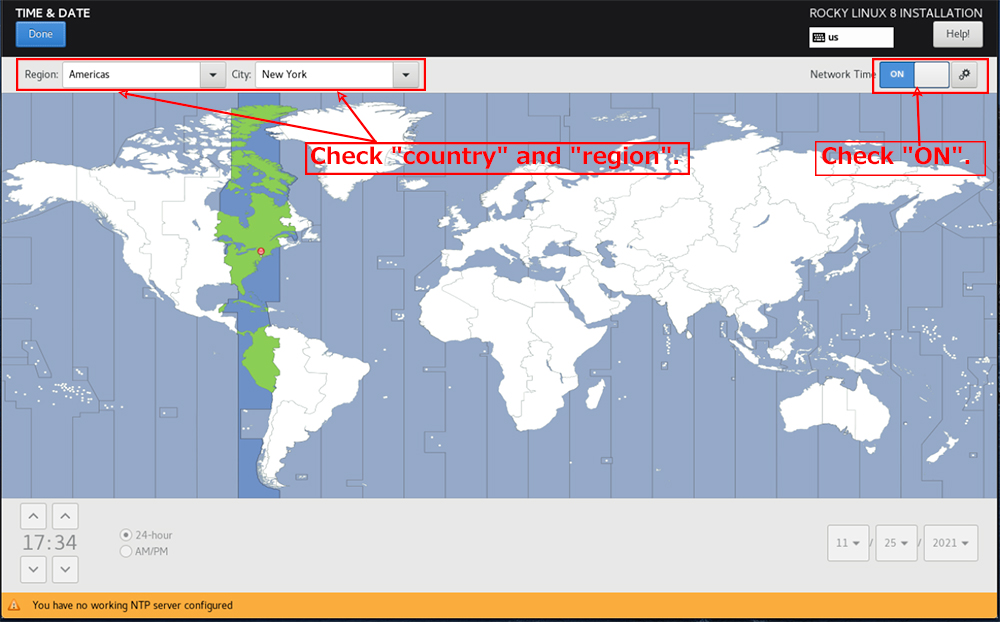
2.4 Date and Time" settings
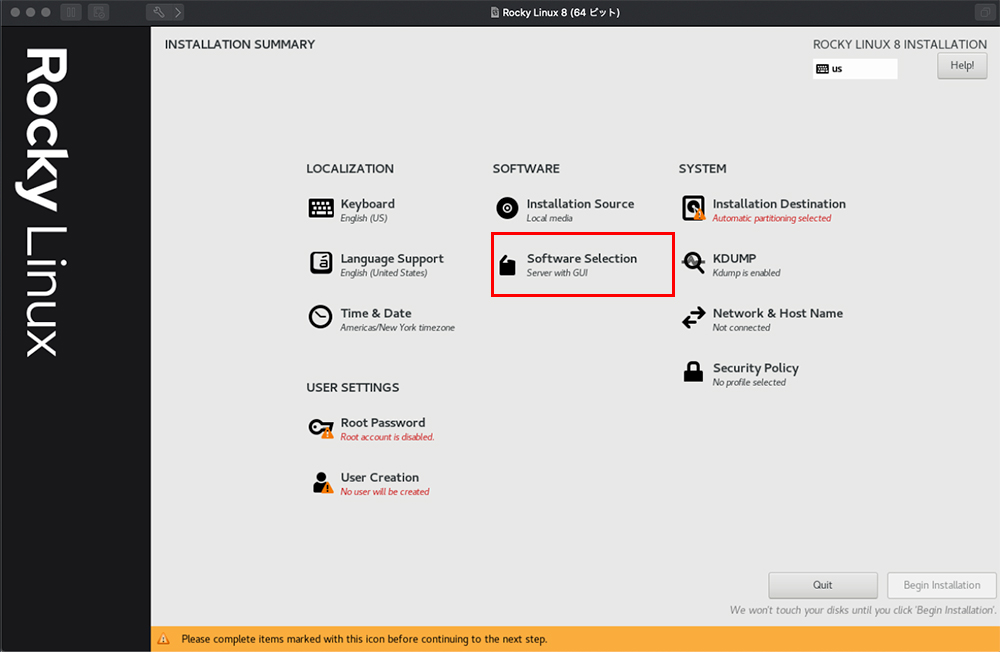
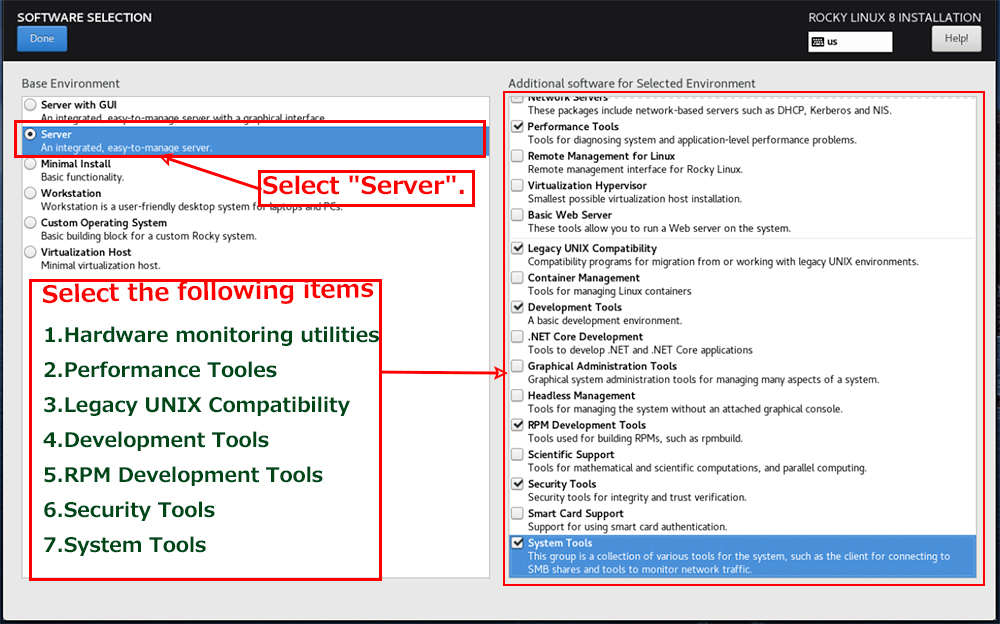
2.5 Software Selection" settings
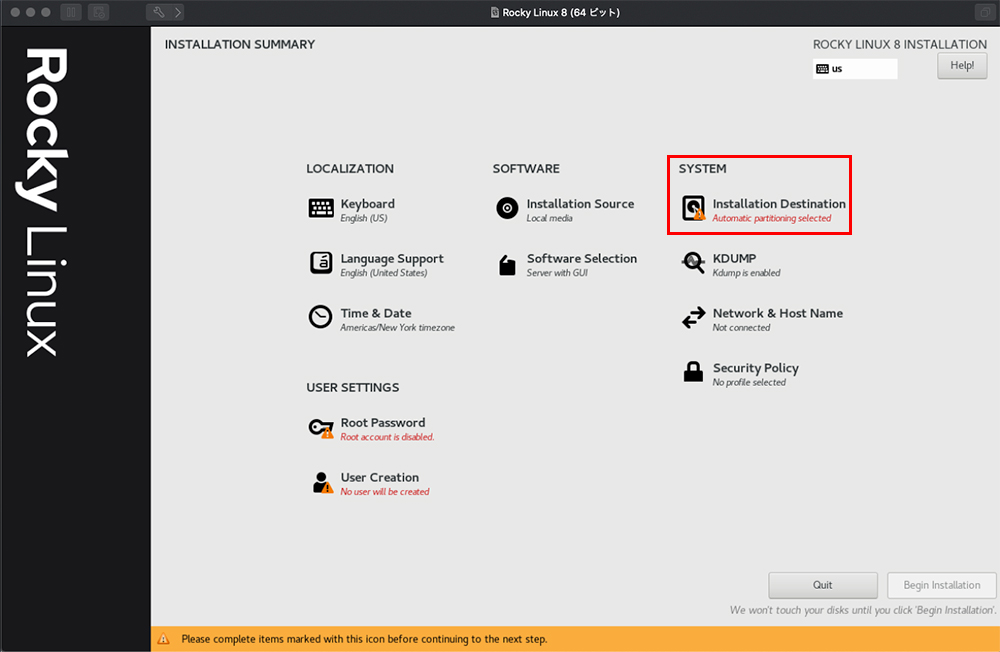
2.6 Set the "Install Location".

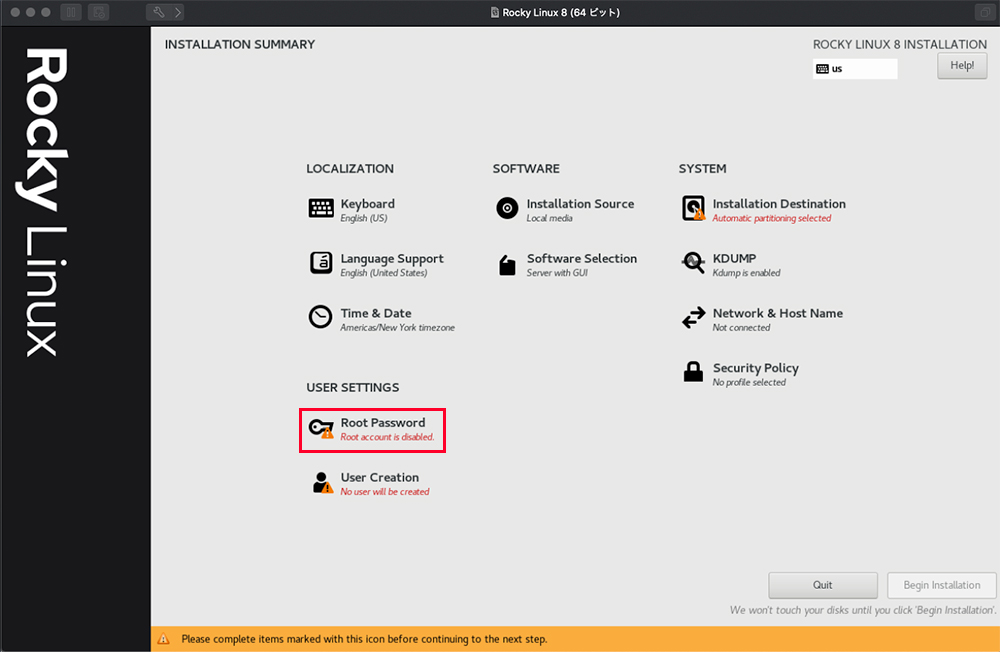
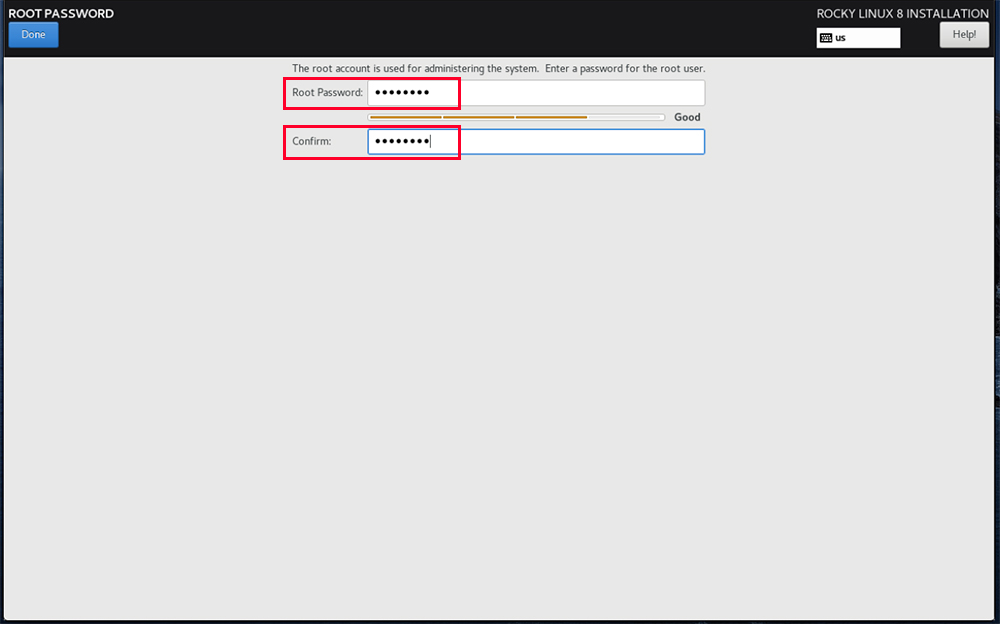
2.7 Set the "root password".
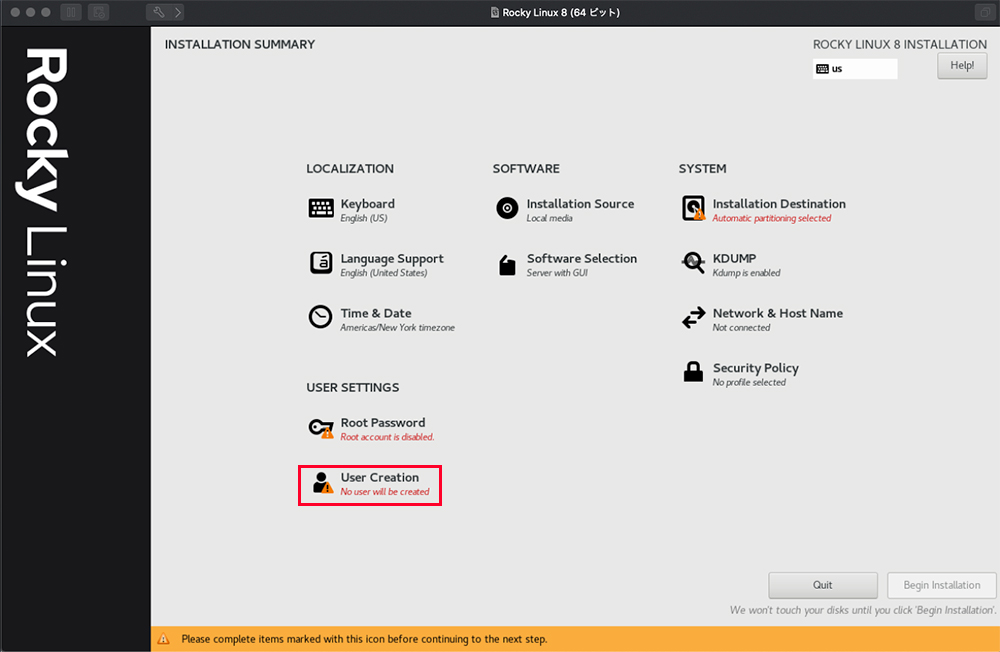
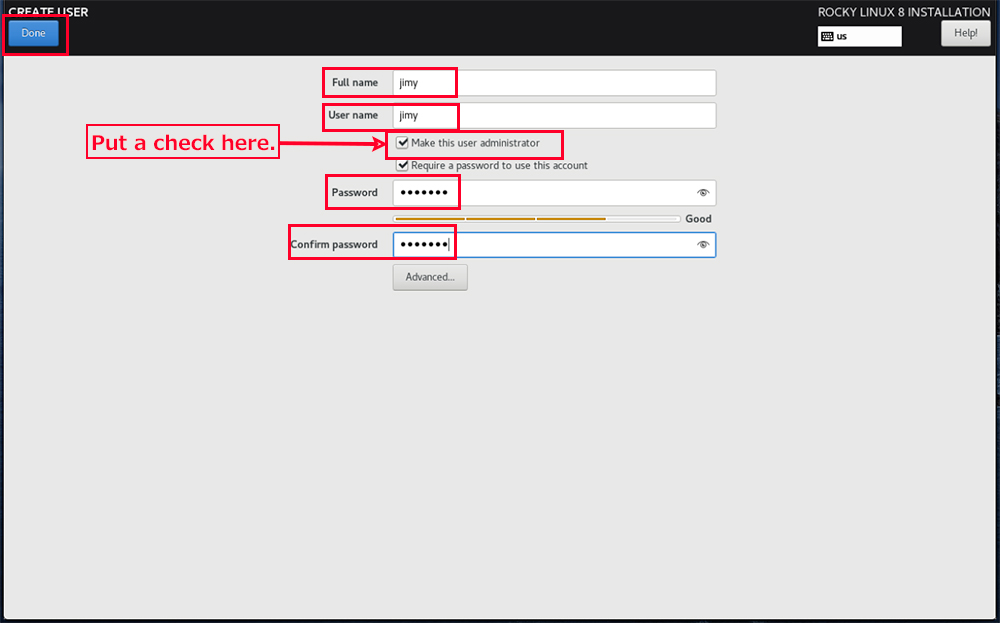
2.8 Setting up "Create User".
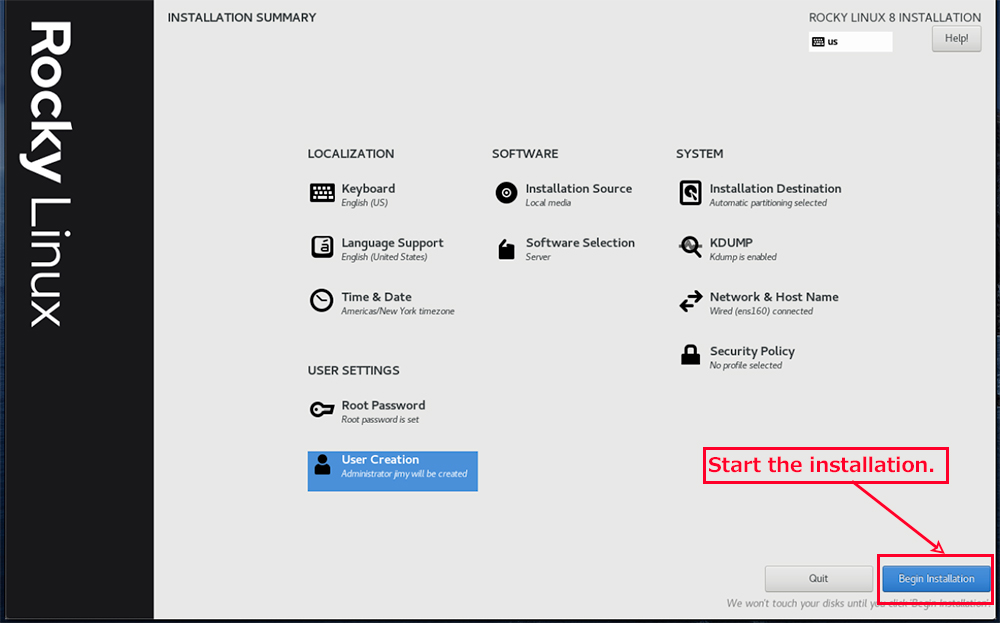
2.9 Start installation.
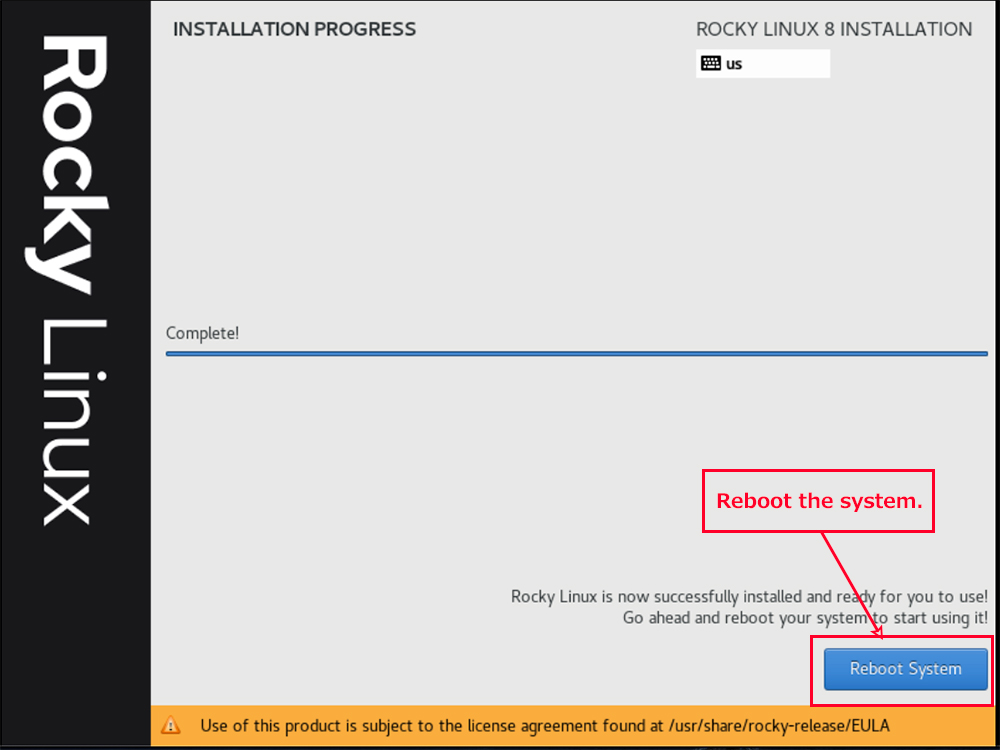
Finish the installation and reboot.
After rebooting, you will see the followingThe "hostname login:" screen will appear.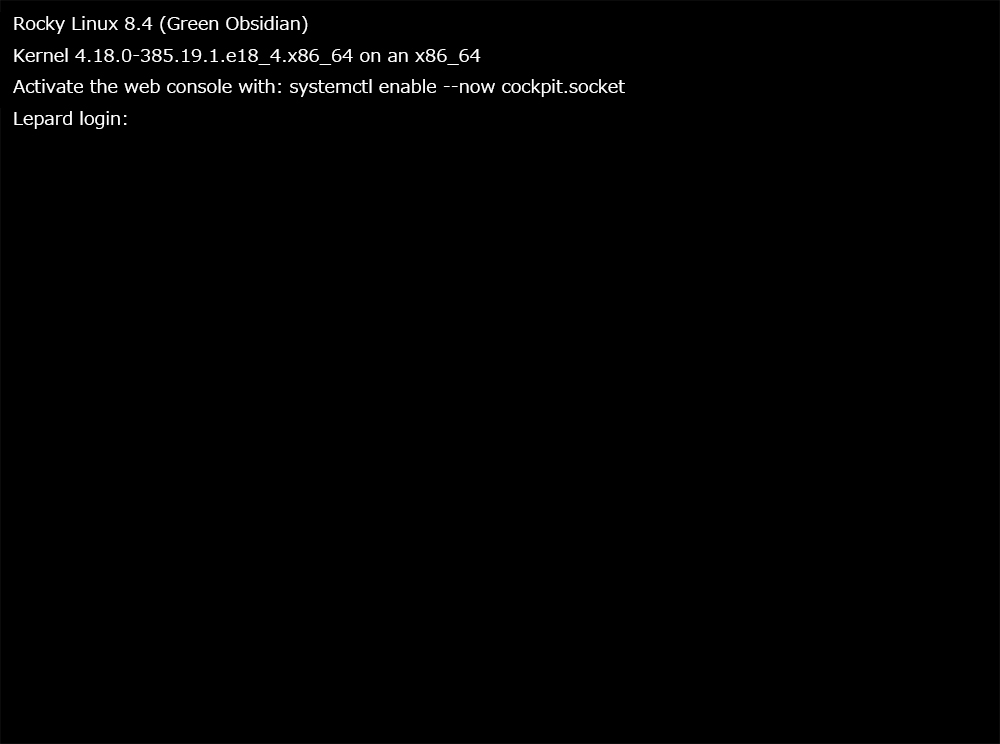
Log in with the user name and password of the general user you just created.
When you see the bash prompt "$", your login is complete.