FreeBSD
FreeBSD is UNIX-like open source OS software. In particular, its performance as a network operating system exceeds that of Linux-based systems, and it maintains stable performance even under high loads.
FreeBSD is designed to be robust and sturdy with an emphasis on practicality, making it suitable for operating FTP, WWW, and e-mail servers for major companies and services.
In this project, we will install FreeBSD 13.2, released on April 11, 2023, and build the server.
Features
High-speed, high-performance multi-platform capable of withstanding high workloads
Adopted by many major companies
Network security measures can be applied by restricting access
Capable of operating small to large servers
More than 33,000 dedicated software applications from commercial to personal use
Install
1.Download Installation Image
Go to the FreeBSD distribution site (http://ftp-archive.freebsd.org/pub/FreeBSD-Archive/old-releases/ISO-IMAGES/) and
Select "FreeBSD-13.2-RELEASE-amd64-dvd1.iso" and download
2.Create boot disk
Create a boot disk from the downloaded FreeBSD-13.2-RELEASE-amd64-dvd1.iso (DVD disk)
Download FreeBSD-13.2-RELEASE-amd64-memstick.img and use an image writer such as Win32 Disk Imager to create the file on a USB flash drive.
3.Change BIOS settings and boot from the created boot media
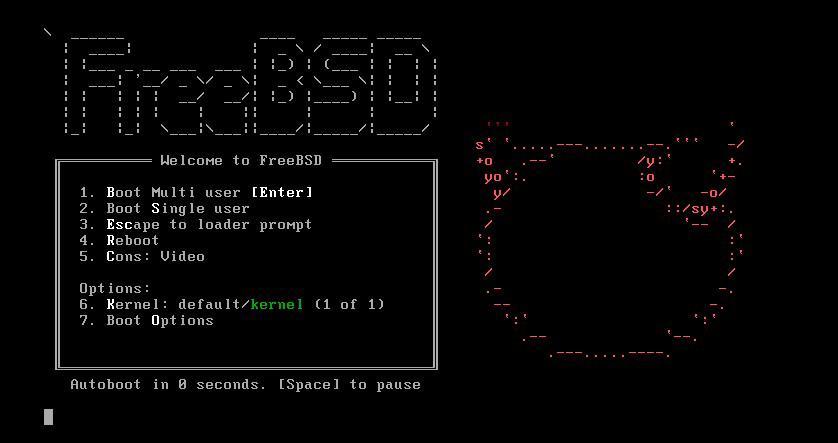
4.Initial startup screen
Keep Enter
5.Click "Install"

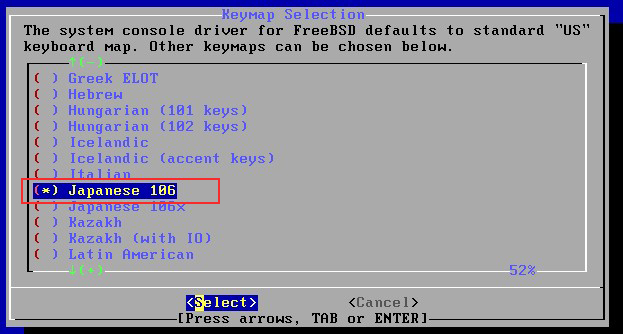
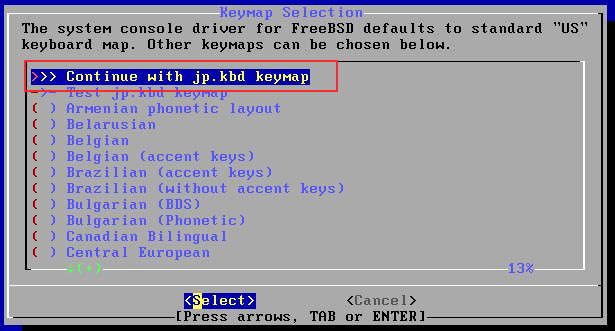
6.keymap selection
For Japanese keyboard, mark "Japanese 106" and click "Select"
7.Move the cursor to "Contunue ---" and click "Select"
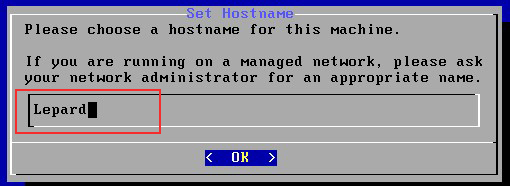
8.Set Hostname--In the Set Hostname screen, enter any hostname
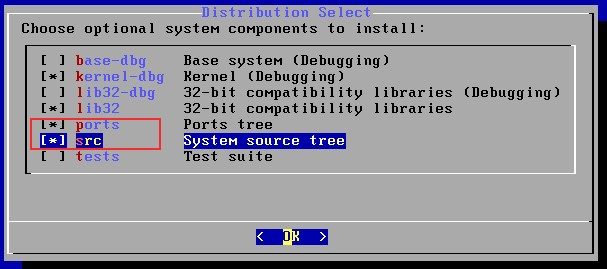
9.Select distribution--mark "ports" and "src" as shown below and click OK
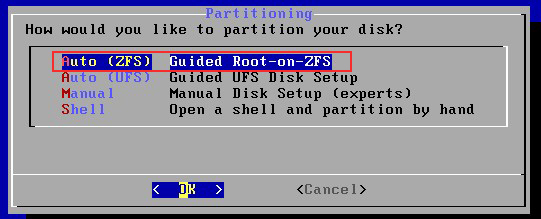
10.Disk Partitioning
Set to "Auto(ZFS)" and click OK
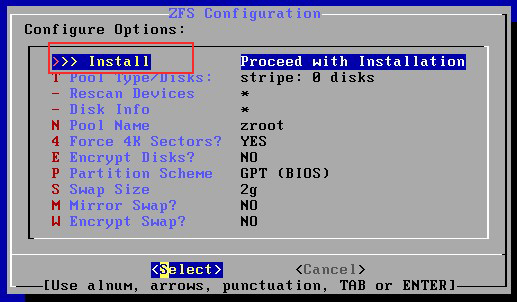
11.Installing ZFS
Select "Install" and click "Select"
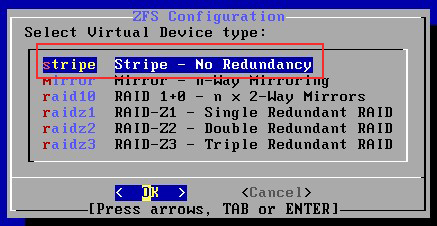
12.Virtual device type settings
Click OK as default
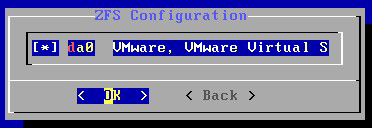
13.Drive Selection
Select the disk to install and click OK, this time installing to Vmware Workstation.
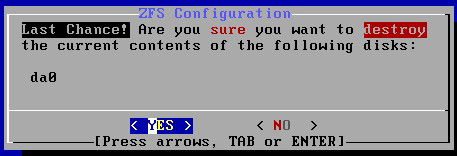
14.Final confirmation
Click "YES" if you like.
15.Installation begins

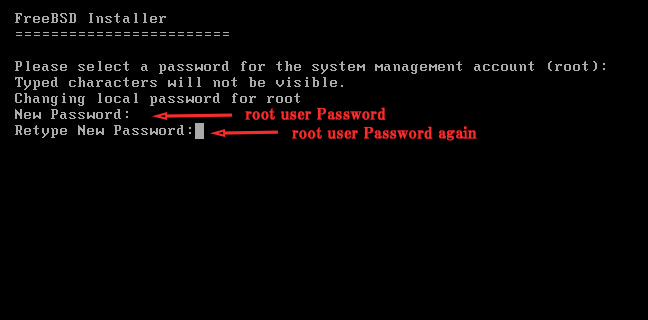
16.Password setting for root user
Leave a note or something so you don't forget.
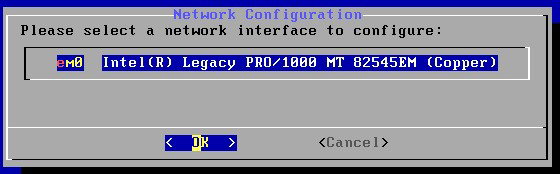
17.Network Interface Selection
Confirm the name of the network interface to be used and click OK.
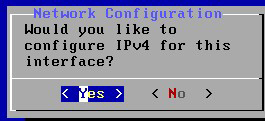
18.Confirmation of continued IPv4 network configuration
This time, select Yes
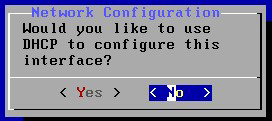
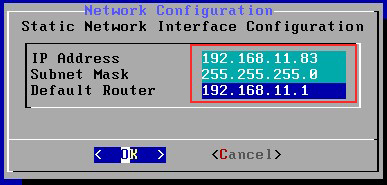
19.Select whether the network address is a static IP address or DHCP
Select "No" this time to use a fixed IP address to build a server.
Enter the following and click OK
・IP Address : Local address to be fixed (e.g.; 192.168.11.83)
・Subnet Mask : 255.255.255.0
・Default Router : Your router address (e.g. 192.168.11.1)
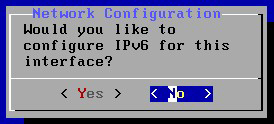
20.IPv6 Settings
Select "No" because IPv6 is not used this time.
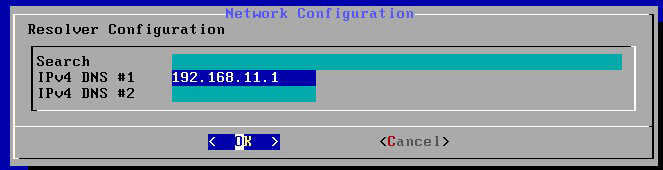
21.DNS Server Settings
DNS Address Settings
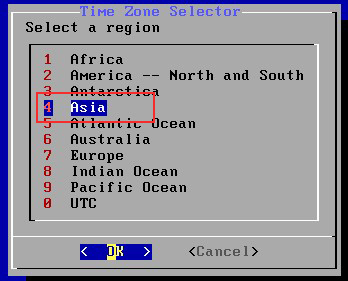
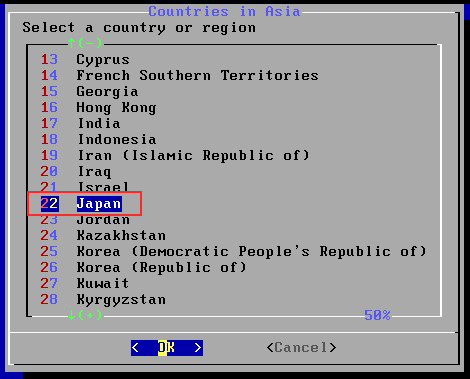
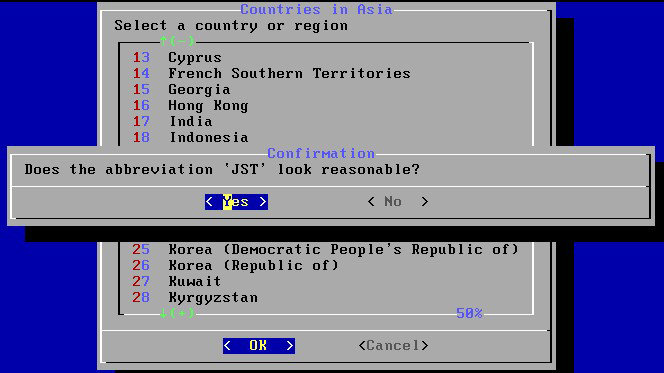
22.Set time zone Select "4 Asia" and "22 Japan"
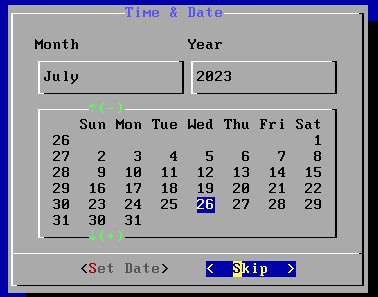
23.Date Setting
Confirm and click "Skip
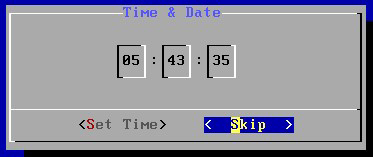
24.Time setting
Even if the time is not correct, the time will be synchronized later, so click "Skip" here.
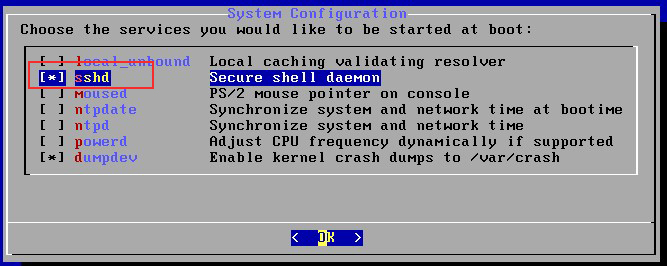
25.System Settings
Confirm that "sshd" is marked and click "OK".
26.Security Settings
Click "OK" as default

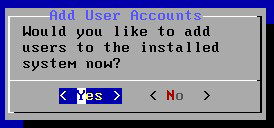
27.Inquire about adding a general user
Select "Yes" to add this time.
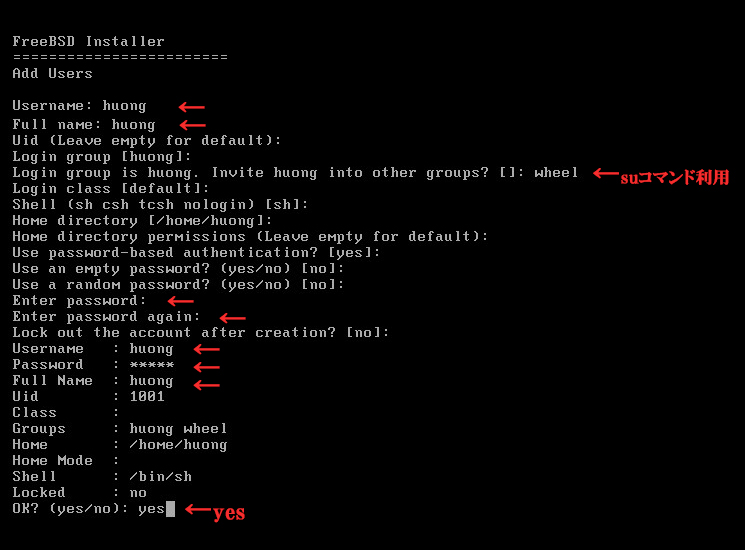
28.General User Information Settings
Username : Any name
Full name : Any name
other groups : Set "wheel" to be able to switch to root user with su command
Other defaults are fine, just use an empty Enter.
Finally, confirm and enter "yes" if you are sure.
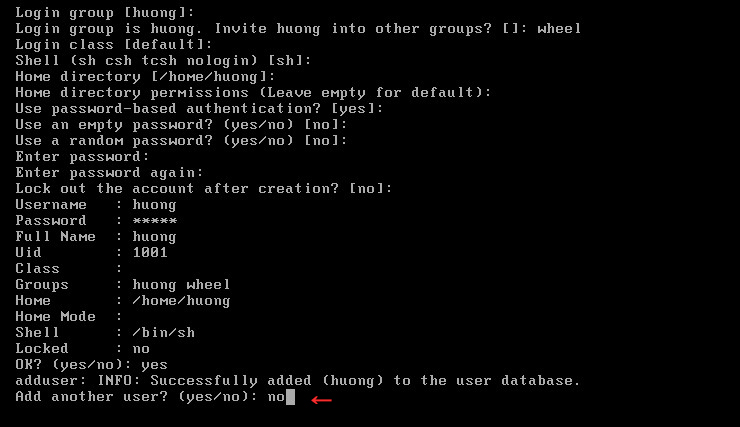
Add another user? no" if you do not want to add another user.
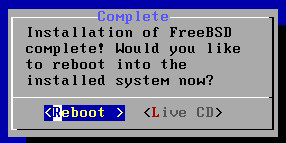
29.Exit and restart
Select "Exit" and click OK.
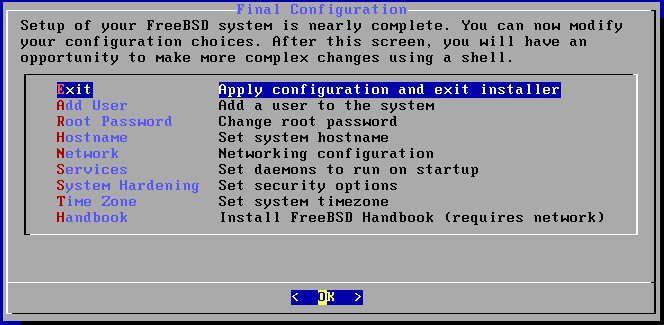
Inquire whether to reset, or select "No" if not.
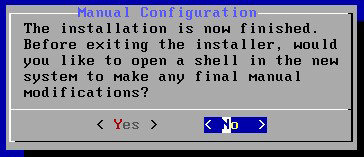
Click "Reboot" to reboot.