Clamav (anti-virus software)Install
1.Clamav install
|
1 |
# dnf -y install clamav clamd clamav-update |
2.Clam AntiVirus Configuration File Edit
|
1 2 3 4 5 6 7 8 9 10 11 12 13 14 15 |
# vi /etc/clamd.d/scan.conf ●Line 14 # Default: disabled LogFile /var/log/clamd.scan ← ●Line 77 # Default: disabled PidFile /run/clamd.scan/clamd.pid ← Uncomment ●Line 96 # Path to a local socket file the daemon will listen on. # Default: disabled (must be specified by a user) LocalSocket /run/clamd.scan/clamd.sock ← Uncomment ●Line 219 # Run as another user (clamd must be started by root for this option to work) # Default: don't drop privileges #User clamscan ← Add # at the beginning of the line and comment it out (to make it work with root privileges) |
|
1 2 3 4 5 6 7 8 9 10 |
# vi /etc/freshclam.conf ●Line 75 Insert a "#" at the beginning of the line "DatabaseMirror database.clamav.net" and Add "DatabaseMirror db.jp.clamav.net" #DatabaseMirror database.clamav.net DatabaseMirror db.jp.clamav.net ●Per line 151 Add "NotifyClamd /etc/clamd.d/scan.conf" #NotifyClamd /path/to/clamd.conf NotifyClamd /etc/clamd.d/scan.conf |
|
1 2 3 4 5 6 7 8 9 10 11 12 13 14 15 16 17 18 |
# freshclam ClamAV update process started at Tue Nov 15 22:26:07 2022 daily database available for download (remote version: 26721) Time: 2.0s, ETA: 0.0s [========================>] 57.42MiB/57.42MiB Testing database: '/var/lib/clamav/tmp.f66ae4b7b1/clamav-5b2074eb770037f8af73ec465fa90afa.tmp-daily.cvd' ... Database test passed. daily.cvd updated (version: 26721, sigs: 2010985, f-level: 90, builder: raynman) main database available for download (remote version: 62) Time: 2.2s, ETA: 0.0s [========================>] 162.58MiB/162.58MiB Testing database: '/var/lib/clamav/tmp.f66ae4b7b1/clamav-7eef55af4647980784217f3fdb5265fa.tmp-main.cvd' ... Database test passed. main.cvd updated (version: 62, sigs: 6647427, f-level: 90, builder: sigmgr) bytecode database available for download (remote version: 333) Time: 0.1s, ETA: 0.0s [========================>] 286.79KiB/286.79KiB Testing database: '/var/lib/clamav/tmp.f66ae4b7b1/clamav-783274ccd0088f883a151661e5cc8228.tmp-bytecode.cvd' ... Database test passed. bytecode.cvd updated (version: 333, sigs: 92, f-level: 63, builder: awillia2) WARNING: Clamd was NOT notified: Can't connect to clamd through /run/clamd.scan/clamd.sock: No such file or directory |
|
1 2 3 4 5 6 7 8 9 10 11 12 13 14 15 16 17 18 19 20 21 22 23 24 25 26 27 28 29 |
# systemctl start clamd@scan ← clamd start # systemctl enable clamd@scan ← Automatic clamd startup configuration Created symlink /etc/systemd/system/multi-user.target.wants/clamd@scan.service → /usr/lib/systemd/system/clamd@.service. # systemctl is-enabled clamd@scan enabled # systemctl status clamd@scan ← operation check ● clamd@scan.service - clamd scanner (scan) daemon Loaded: loaded (/usr/lib/systemd/system/clamd@.service; enabled; vendor pr> Active: active (running) since Tue 2022-11-15 22:27:56 JST; 21s ago Docs: man:clamd(8) man:clamd.conf(5) https://www.clamav.net/documents/ Main PID: 6745 (clamd) Tasks: 2 (limit: 10938) Memory: 1.2G CPU: 13.688s CGroup: /system.slice/system-clamd.slice/clamd@scan.service mq6745 /usr/sbin/clamd -c /etc/clamd.d/scan.conf Nov 15 22:27:56 Lepard clamd[6745]: ELF support enabled. Nov 15 22:27:56 Lepard clamd[6745]: Mail files support enabled. Nov 15 22:27:56 Lepard clamd[6745]: OLE2 support enabled. Nov 15 22:27:56 Lepard clamd[6745]: PDF support enabled. Nov 15 22:27:56 Lepard clamd[6745]: SWF support enabled. Nov 15 22:27:56 Lepard clamd[6745]: HTML support enabled. Nov 15 22:27:56 Lepard clamd[6745]: XMLDOCS support enabled. Nov 15 22:27:56 Lepard clamd[6745]: HWP3 support enabled. Nov 15 22:27:56 Lepard clamd[6745]: Self checking every 600 seconds. Nov 15 22:27:56 Lepard systemd[1]: Started clamd scanner (scan) daemon. |
■Download a test virus and perform a virus scan
|
1 2 3 4 5 6 7 8 9 10 11 12 13 14 15 16 |
# wget http://www.eicar.org/download/eicar.com # clamscan --infected --remove --recursive /root/eicar.com: Win.Test.EICAR_HDB-1 FOUND /root/eicar.com: Removed. ----------- SCAN SUMMARY ----------- Known viruses: 8643026 Engine version: 0.103.7 Scanned directories: 1 Scanned files: 11 Infected files: 1 Data scanned: 0.02 MB Data read: 0.01 MB (ratio 2.00:1) Time: 25.292 sec (0 m 25 s) Start Date: 2022:11:15 22:29:40 End Date: 2022:11:15 22:30:05 |
|
1 2 3 4 5 6 7 8 9 10 11 12 13 14 15 16 17 18 19 20 21 22 23 24 |
# mkdir -p /var/www/system # cd /var/www/system Create clamscan.sh in /var/www/system with the following contents # vi /var/www/system/clamscan.sh #!/bin/bash PATH=/usr/bin:/bin # excludeopt setup excludelist=/var/www/system/clamscan.exclude if [ -s $excludelist ]; then for i in `cat $excludelist` do if [ $(echo "$i"|grep \/$) ]; then i=`echo $i|sed -e 's/^\([^ ]*\)\/$/\1/p' -e d` excludeopt="${excludeopt} --exclude-dir=$i" else excludeopt="${excludeopt} --exclude=$i" fi done fi # signature update freshclam # virus scan clamscan --recursive --remove ${excludeopt} / |
|
1 2 3 4 |
# chmod 700 clamscan.sh # echo "/sys/" >> /var/www/system/clamscan.exclude # echo "/proc/" >> /var/www/system/clamscan.exclude Exclude sys and proc directories. |
|
1 2 |
# crontab -e 0 1 * * * /var/www/system/clamscan.sh > /dev/null 2>&1 |
Mail Server Install
1. Postfix
1.1 Install
Install Postfix and build an SMTP server
|
1 |
# dnf -y install postfix |
|
1 2 3 4 |
# rpm -qa | grep postfix postfix-3.5.9-18.el9.x86_64 postfix-perl-scripts-3.5.9-18.el9.x86_64 pcp-pmda-postfix-5.3.5-8.el9.x86_64 |
|
1 2 3 4 |
# systemctl enable postfix.service Created symlink /etc/systemd/system/multi-user.target.wants/postfix.service → /usr/lib/systemd/system/postfix.service. # systemctl is-enabled postfix.service enabled |
|
1 2 |
# cp -p /etc/postfix/main.cf `date '+/etc/postfix/main.cf.%Y%m%d'` # cp -p /etc/postfix/master.cf `date '+/etc/postfix/master.cf.%Y%m%d'` |
To prevent unauthorized mail relay, configure Postfix to require authentication for outgoing mail as well, using Dovecot's SASL function.
|
1 2 3 4 5 6 7 8 9 10 11 12 13 14 15 16 17 18 19 20 21 22 23 24 25 26 27 28 29 30 31 32 33 34 35 36 37 38 39 40 41 42 |
# vi /etc/postfix/main.cf ●Added per line 96 #myhostname = virtual.domain.tld myhostname = mail.<Domain> ●Add your domain name around line 103 #mydomain = domain.tld mydomain = <Domain> ●Delete comment out per line 118 myorigin = $mydomain ●Change per line 135 inet_interfaces = all ●Comment out around line 183 and add to line 184. #mydestination = $myhostname, localhost.$mydomain, localhost mydestination = $myhostname, localhost.$mydomain, localhost, $mydomain ●Added per line 287 #mynetworks = 168.100.189.0/28, 127.0.0.0/8 #mynetworks = $config_directory/mynetworks #mynetworks = hash:/etc/postfix/network_table mynetworks = 192.168.11.0/24, 127.0.0.0/8 ←192.168.11.0/24 to suit your environment ●Uncomment per line 440 Set the mail storage format. #home_mailbox = Mailbox home_mailbox = Maildir/ ●Added per line 447 #mail_spool_directory = /var/mail mail_spool_directory = /var/spool/mail ●Added per line 593 #smtpd_banner = $myhostname ESMTP $mail_name #smtpd_banner = $myhostname ESMTP $mail_name ($mail_version) smtpd_banner = $myhostname ESMTP unknown ●Add the following to the last line # Limit send/receive mail size to 10M message_size_limit = 10485760 # Limit mailbox size to 1G mailbox_size_limit = 1073741824 # SMTP-Auth Settings smtpd_sasl_type = dovecot smtpd_sasl_path = private/auth smtpd_sasl_auth_enable = yes smtpd_sasl_security_options = noanonymous smtpd_sasl_local_domain = $mydomain smtpd_recipient_restrictions = permit_mynetworks, permit_auth_destination, permit_sasl_authenticated, reject |
Allow SMTP port (port 25)
|
1 2 3 4 |
# firewall-cmd --add-service=smtp --permanent success # firewall-cmd --reload success |
|
1 |
# systemctl restart --now postfix |
2.Dovecot
|
1 |
# dnf -y install dovecot |
|
1 2 3 4 5 6 7 8 |
# cp -p /etc/dovecot/dovecot.conf `date '+ /etc/dovecot/dovecot.conf.%Y%m%d'` # vi /etc/dovecot/dovecot.conf ●Add per line 25 # protocols = imap pop3 lmtp protocols = imap pop3 ●Line 30 : Uncomment # Remove [::] if listening for IPv4 only listen = * |
2.3 Edit 10-auth.conf file
|
1 2 3 4 5 6 |
# vi /etc/dovecot/conf.d/10-auth.conf ●Line 10 : Uncomment and change Plain text authentication is also allowed disable_plaintext_auth = no ●Line 100 : Add auth_mechanisms = plain login |
|
1 2 3 |
# vi /etc/dovecot/conf.d/10-mail.conf ●Line 31 : Add mail_location = maildir:~/Maildir |
|
1 2 3 4 5 6 7 8 |
# vi /etc/dovecot/conf.d/10-master.conf ●Line 107-109 : Uncommented and added # Postfix smtp-auth unix_listener /var/spool/postfix/private/auth { mode = 0666 user = postfix group = postfix } |
|
1 2 3 4 |
# vi /etc/dovecot/conf.d/10-ssl.conf ●Per line 8 Change "ssl = required" to "ssl = yes" ssl = yes |
|
1 2 3 4 5 |
# systemctl enable dovecot.service Created symlink /etc/systemd/system/multi-user.target.wants/dovecot.service → /usr/lib/systemd/system/dovecot.service. # systemctl is-enabled dovecot.service Enabled # systemctl start dovecot.service |
|
1 2 3 |
# firewall-cmd --permanent --add-service=pop3 # firewall-cmd --permanent --add-service=imap # firewall-cmd --reload |
3.Create mail user and check operation
3.1 advance preparation
①new user
When a new user is added, set up the system to automatically send and receive e-mail.
|
1 2 3 4 |
# mkdir -p /etc/skel/Maildir/{new,cur,tmp} # chmod -R 700 /etc/skel/Maildir/ # echo "~/Maildir/"> /etc/skel/.forward # chmod 600 /etc/skel/.forward |
Configure the already created users to be able to send and receive e-mail.
|
1 2 3 4 |
# mkdir -p /home/huong/Maildir/{new,cur,tmp} # chown -R huong:huong /home/huong/Maildir/ # chmod 700 /home/huong/Maildir # chmod 700 /home/huong/Maildir/{new,cur,tmp} |
|
1 2 3 4 5 6 7 8 9 10 11 |
Mail Client Install # dnf -y install s-nail # echo 'export MAIL=$HOME/Maildir' >> /etc/profile.d/mail.sh Add user [linux] # useradd linux # passwd linux Changing password for user linux. New password: Retype new password: passwd: all authentication tokens updated successfully. |
①Log in as an email user and send a test email.
|
1 2 3 4 5 6 7 8 9 10 11 |
# su - linux $ mail linux@localhost Subject: Test Mail To: linux@localhost mail test ^D ------- (Preliminary) Envelope contains: To: linux@localhost Subject: Test Mail Send this message [yes/no, empty: recompose]? y |
|
1 2 3 4 5 6 7 8 9 10 11 12 13 14 15 |
$ mail s-nail version v14.9.22. Type `?' for help /home/linux/Maildir: 1 message 1 new ?N 1 linux@korodes.com 2022-11-16 10:05 14/404 14/408 "Test Mail " & 1 [-- Message 1 -- 14 lines, 408 bytes --]: Date: Thu, 10 Nov 2022 10:05:38 +0900 To: linux@localhost Subject: Test Mail Message-Id: <20221116010538.E97D0C351F@mail.korodes.com> From: linux@korodes.com mail test & |
Set up and confirm your account in Mozilla Thunderbird(For OS user huong as mail user)
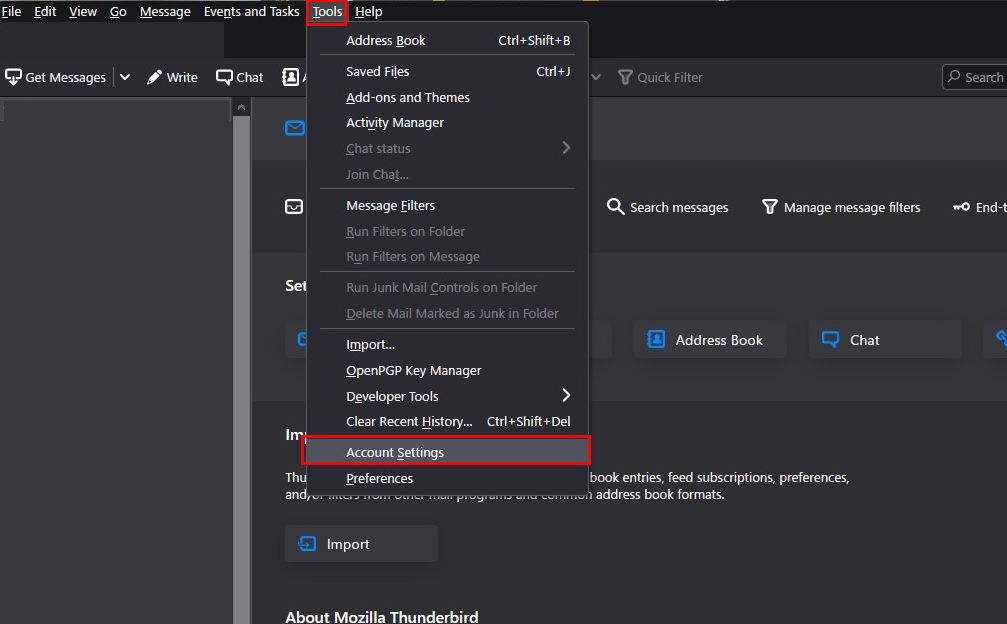
①Start Thunderbird, and click "Tools", "Account Settings".
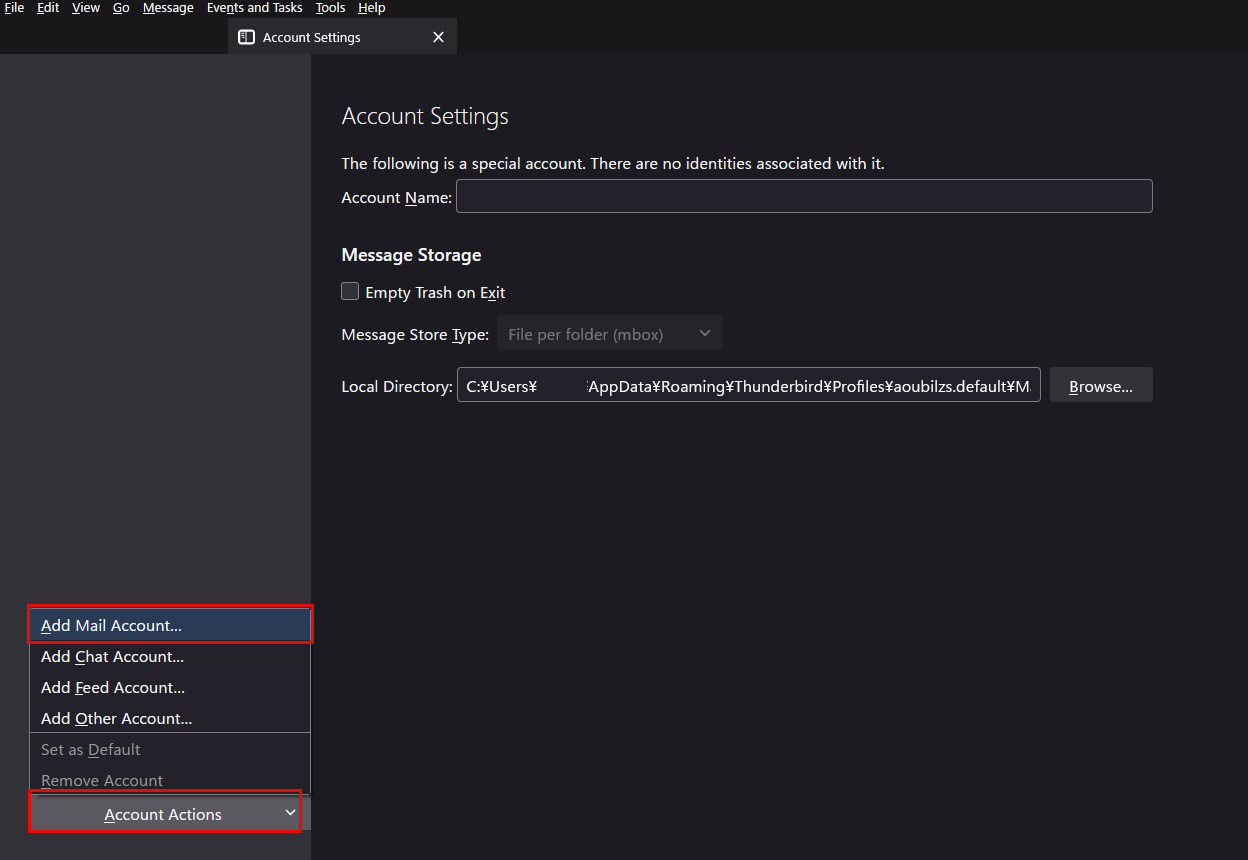
②「Account Actions」「Add Mail Account」
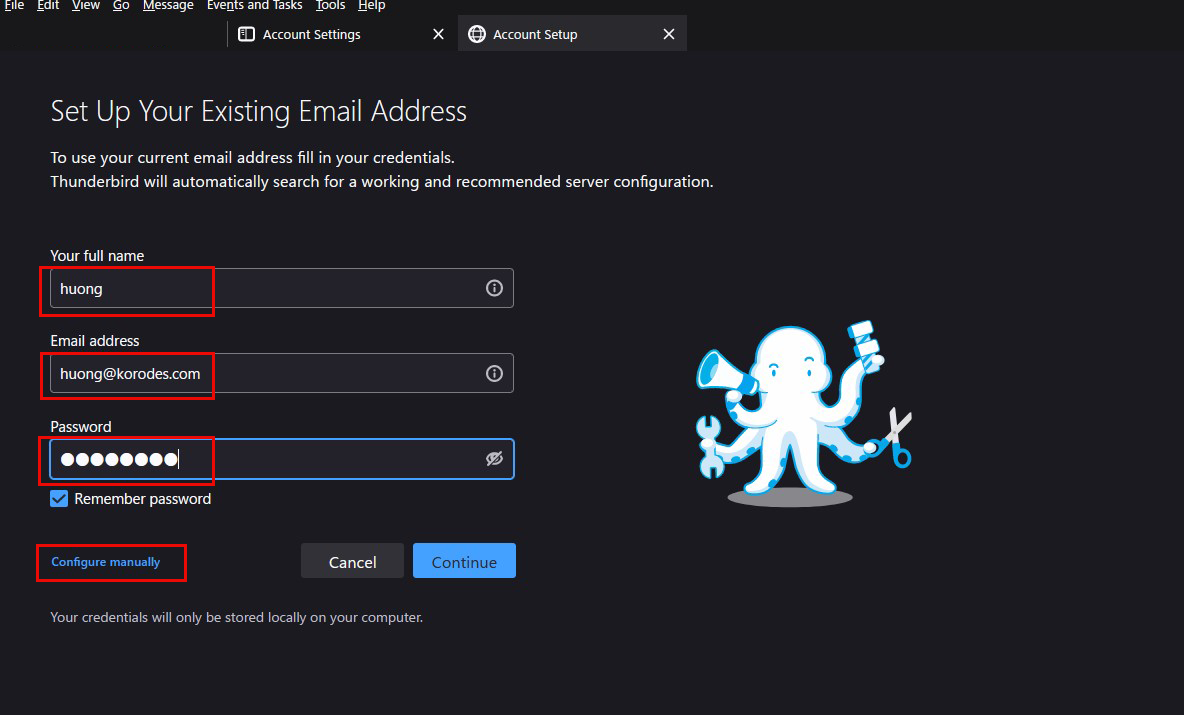
③Enter the following items
Your full name : Any name
Email addtess : "huong@korodes.com" arbitrary name added earlier
Password : Password for user huong
Click on "Configure manually"
④Set "INCOMMING SERVER" and "OUTGOING SERVER" as shown below and click "Re-test".
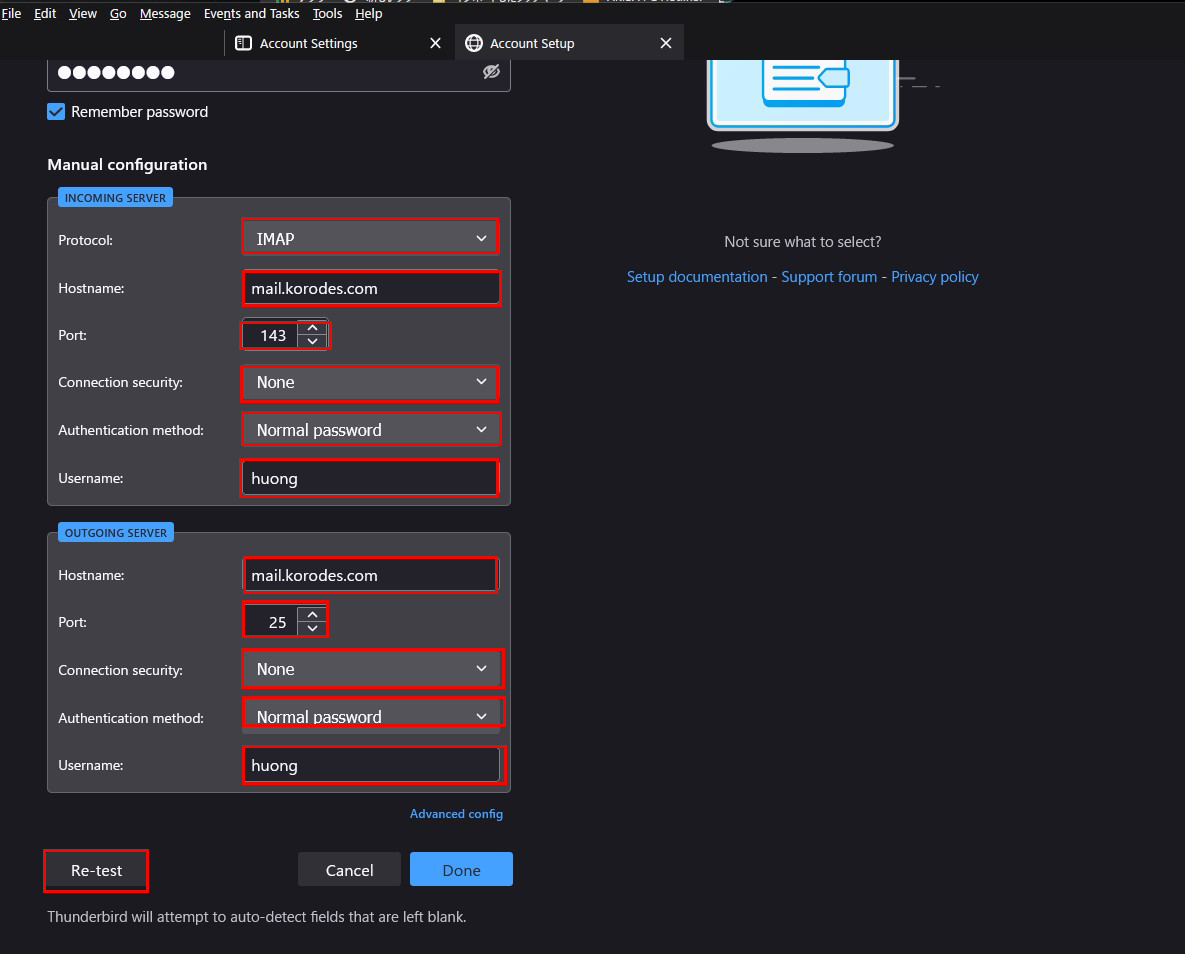
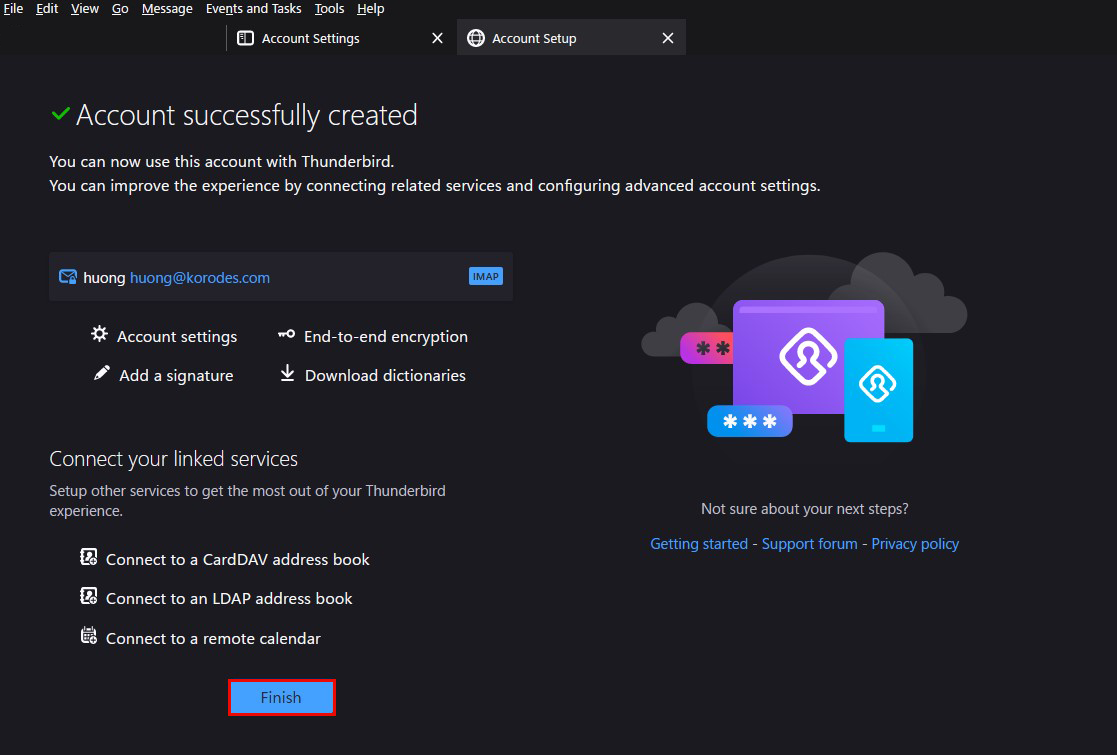
⑤"The following settings were found by probinfg the given server " display
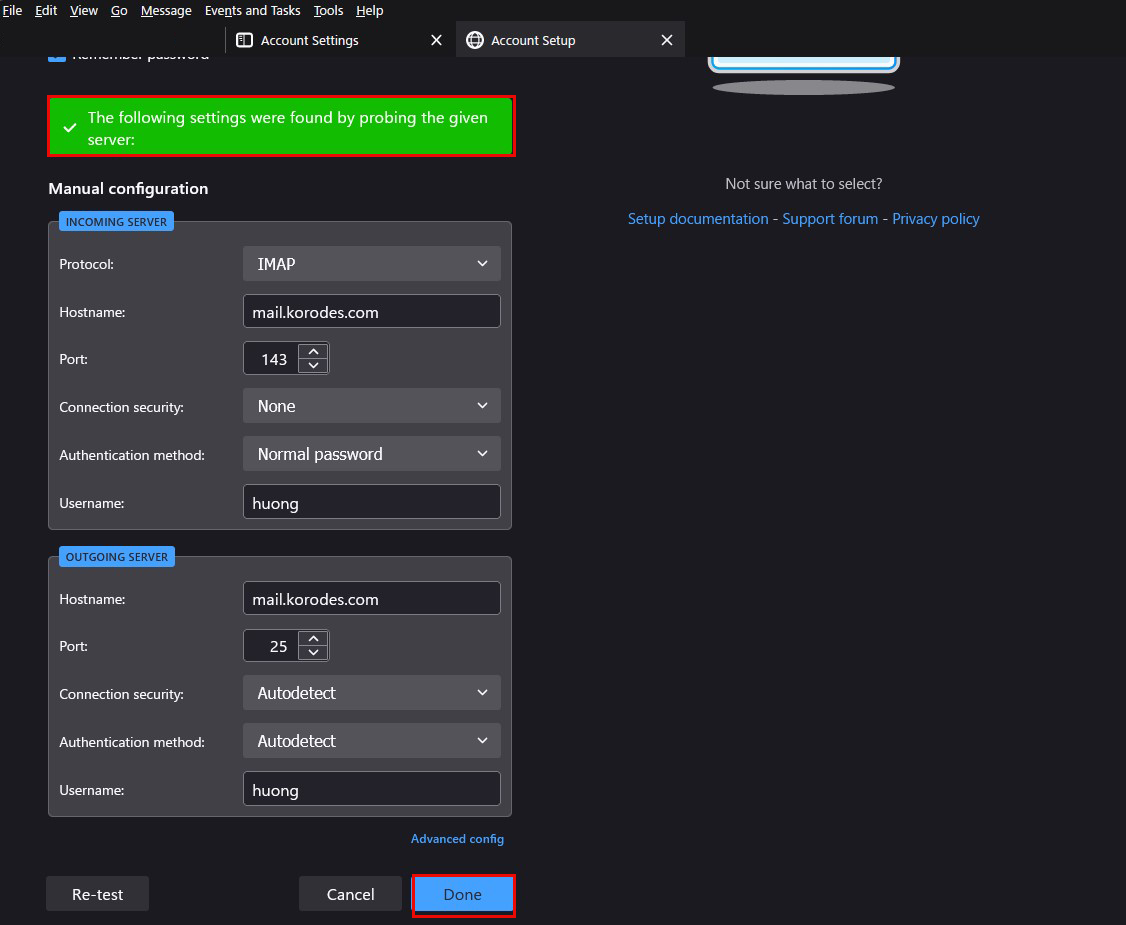
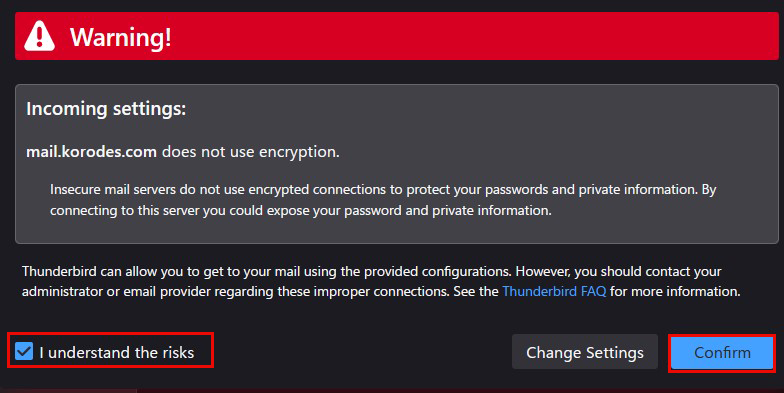
After clicking "Done", the following "Warning" appears, but there is no problem, so click "Confirm".
⑥"Account syccessfuly created" is displayed, click "Finish