FTP Server Inatall
1. vsftpd Install
|
1 |
# dnf -y install vsftpd |
2. vsftpd configuration
Save the unedited vsftpd.conf with .bak
|
1 |
# cp /etc/vsftpd/vsftpd.conf /home/huong/vsftpd.conf.bak |
①Edit configuration file
|
1 2 3 4 5 6 7 8 9 10 11 12 13 14 15 16 17 18 19 20 21 22 23 |
# vi /etc/vsftpd/vsftpd.conf ●Line 12 : No anonymous login (confirmed) anonymous_enable=NO ●Line 39:Log transfer records (confirmation) xferlog_enable=YES ●Line 82,83 : Uncomment ( Allow transfer in ASCII mode ) ascii_upload_enable=YES ascii_download_enable=YES ●Line 100,101:Uncomment ( chroot enabled ) chroot_local_user=YES chroot_list_enable=YES ●Line 103 : Uncomment ( chroot list file specified ) chroot_list_file=/etc/vsftpd/chroot_list ●Line 109 : Uncomment ( Enable batch transfer by directory ) ls_recurse_enable=YES ●Line 114 : Change ( Enable IPv4 ) listen=YES ●Line 123 : Change (IPv6 is disabled) listen_ipv6=NO ### Add to last line ### # Use local time use_localtime=YES |
②Add users to allow directory access to upper level
|
1 |
# echo "huong" >> /etc/vsftpd/chroot_list |
③Specify IP addresses to allow connections in /etc/hosts.allow
|
1 |
# echo "vsftpd:192.168.11.0/24" >> /etc/hosts.allow |
Write vsftpd:ALL (deny all connections) in /etc/hosts.deny
|
1 |
# echo "vsftpd:ALL" >> /etc/hosts.deny |
④Enable vsftpd autostart and start it
|
1 2 |
# systemctl enable vsftpd Created symlink /etc/systemd/system/multi-user.target.wants/vsftpd.service → /usr/lib/systemd/system/vsftpd.service. |
|
1 |
# systemctl start vsftpd |
⑤From windows side, check if you can connect with FileZilla.
Open the ftp port with firewall before connecting
Open the ftp port with firewall before connecting
|
1 2 |
# firewall-cmd --permanent --add-service=ftp # firewall-cmd –reload |
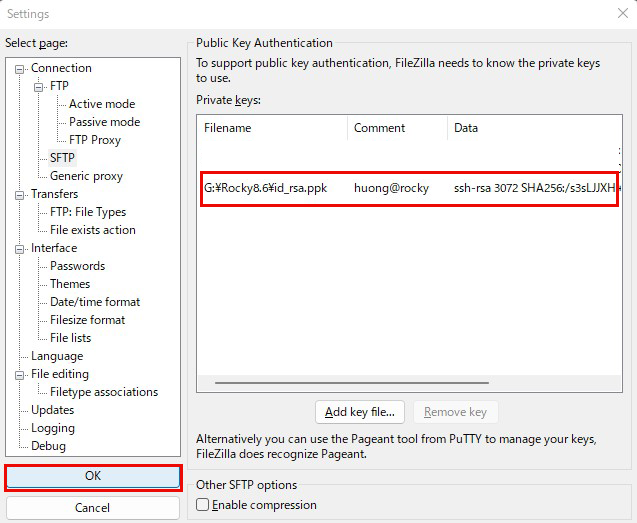
Start FileZilla and change FileZilla settings first, menu "Edit" "Settings
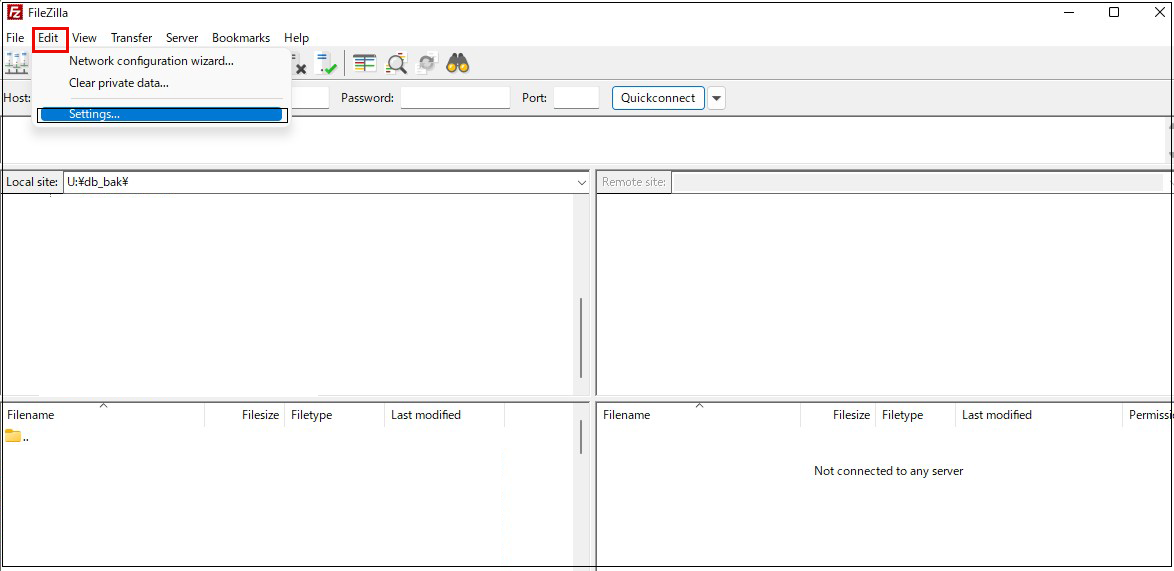
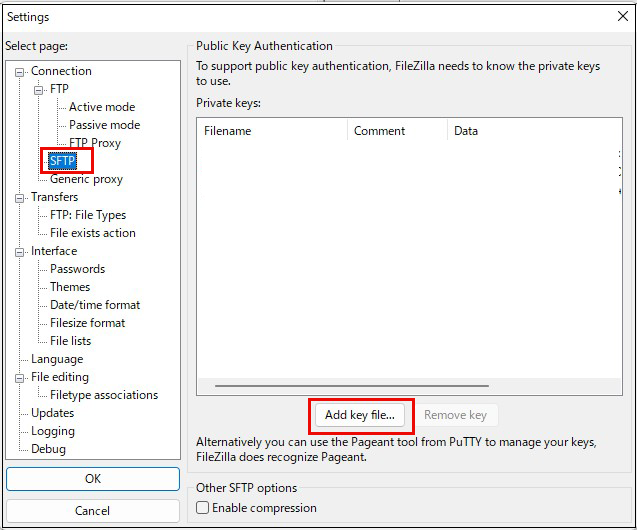
"Connection" "SFTP" in the left pane
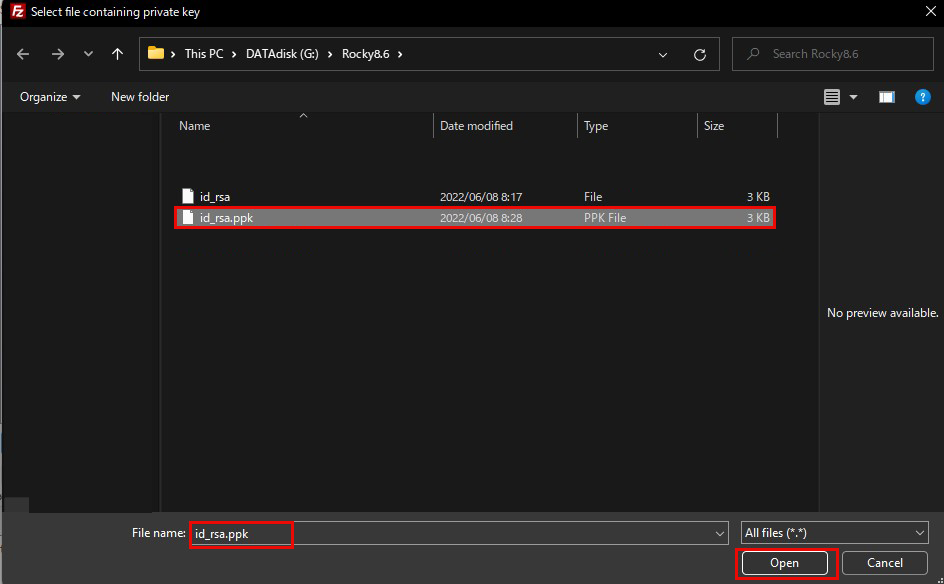
Click "Add key File" in the right pane
Click "Add key File" in the right pane
Open "id_rsa.ppk" saved in Windows
Click "OK
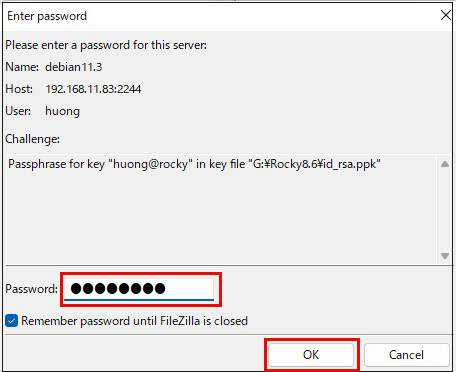
In the "Password" field, enter the password you set when you created your SSH public key.
Return to the initial screen and select "Site Manager" from the "File" menu.
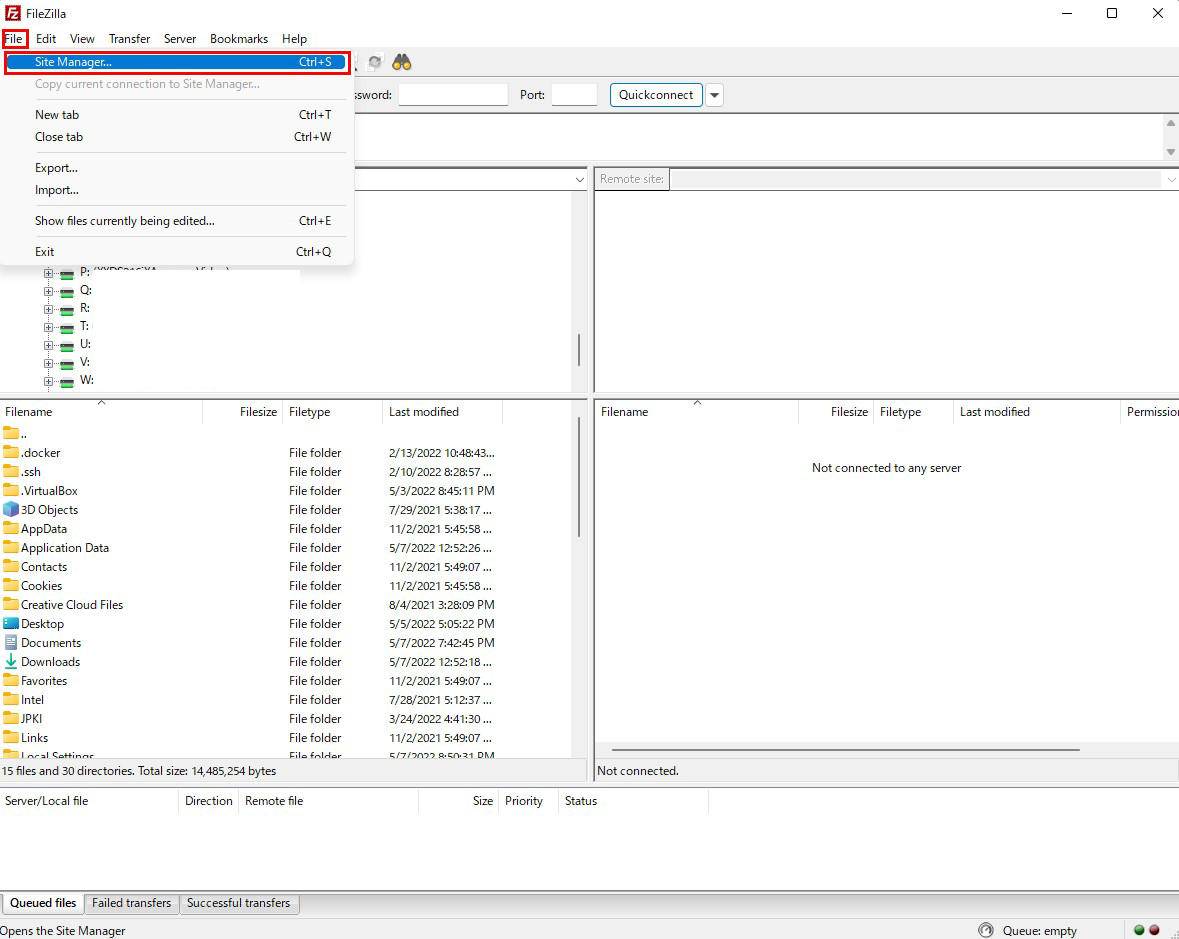
Click on "New site ↓
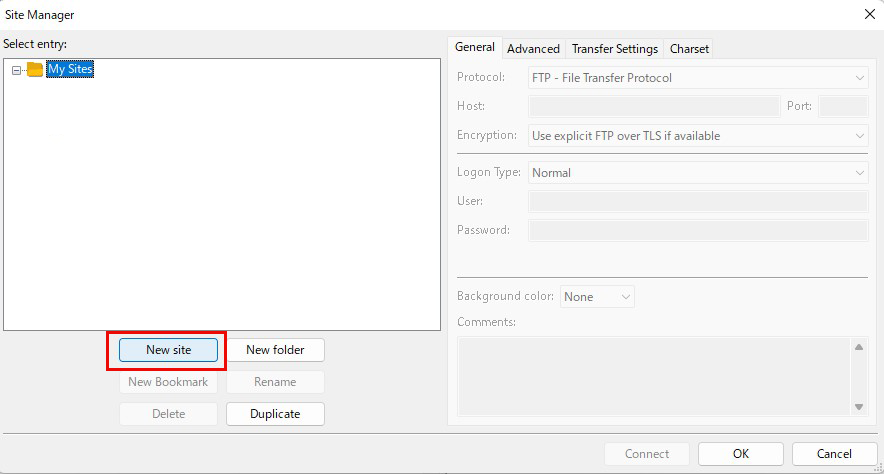
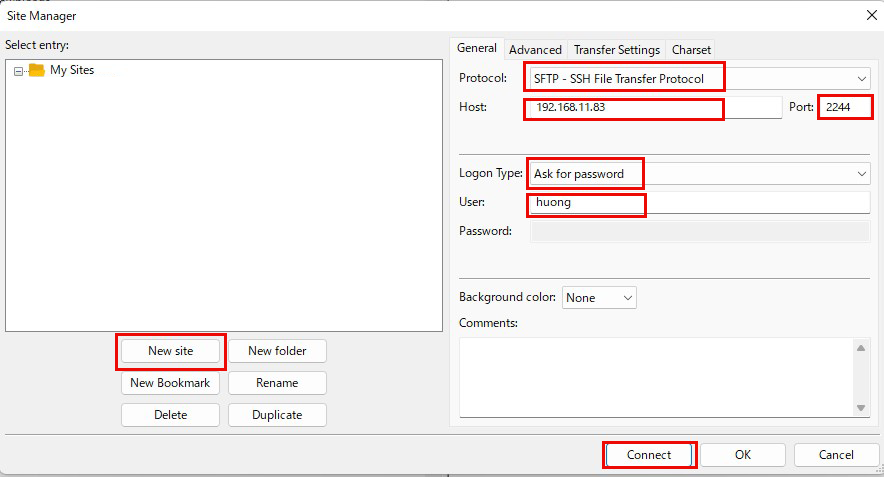
Enter the following settings for each item and click "Connect
Protocol : SFTP-SSH File Transfer Protocol
Host : Server IP Address
Port : 2244(Preconfigured SSH port number)
Logon Type : Ask for password
User : General user name (server login user)
Protocol : SFTP-SSH File Transfer Protocol
Host : Server IP Address
Port : 2244(Preconfigured SSH port number)
Logon Type : Ask for password
User : General user name (server login user)
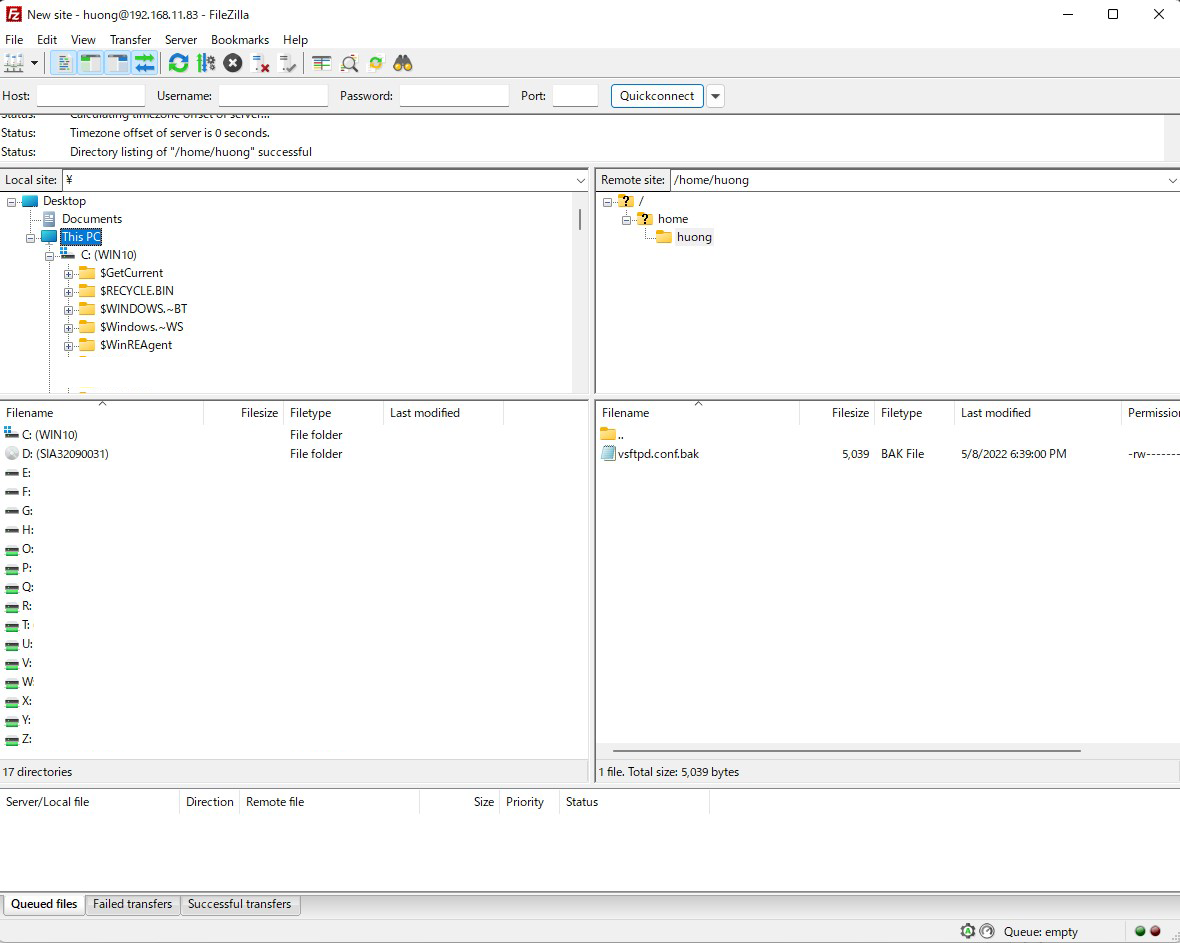
If the connection is successful, the server directory is displayed on the right and the Windows directory on the left. ↓