CentOS7.9 Install
1.CentOS 7.9 Download
CentOS7.9 installation image can be downloaded from the following site
https://www.centos.org/download/
![](https://korodes.com/wp-content/uploads/2023/02/08a25157276b6d741c1b8ccd10f19e47.jpg)
![](https://korodes.com/wp-content/uploads/2023/02/f275694d30624f941d0b45fce07fac14.jpg)
![](https://korodes.com/wp-content/uploads/2023/02/3a3db5761f5c5dbbe7c6766fbcffcec4.jpg)
2.CentOS7.9 Install
Create an installation USB media from the downloaded "CentOS-7-x86_64-DVD-2009.iso" and change the BIOS settings to boot from the USB media.
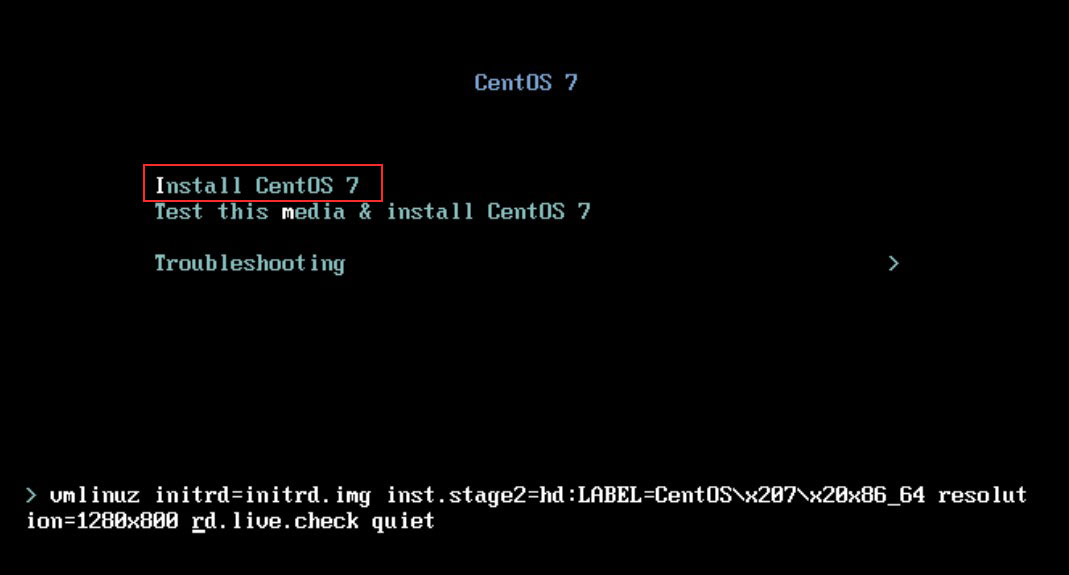
2.1 Initial installation screen
Select "Install CentOS 7" at the top
![](https://korodes.com/wp-content/uploads/2023/02/470cd55d1a59ac1663e1c5beaba0bd41.jpg)
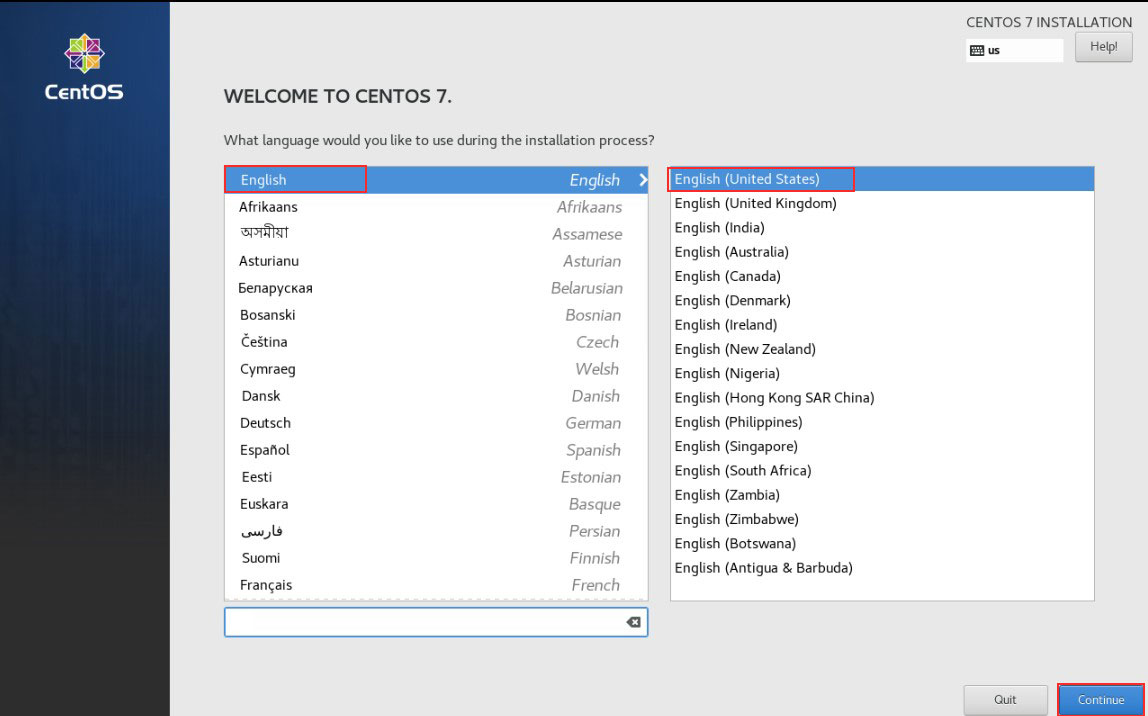
2.2 Language Selection
Select the default "English" to build the server.
![](https://korodes.com/wp-content/uploads/2023/02/b2194da659ea2cb2a37020c913e6a173.jpg)
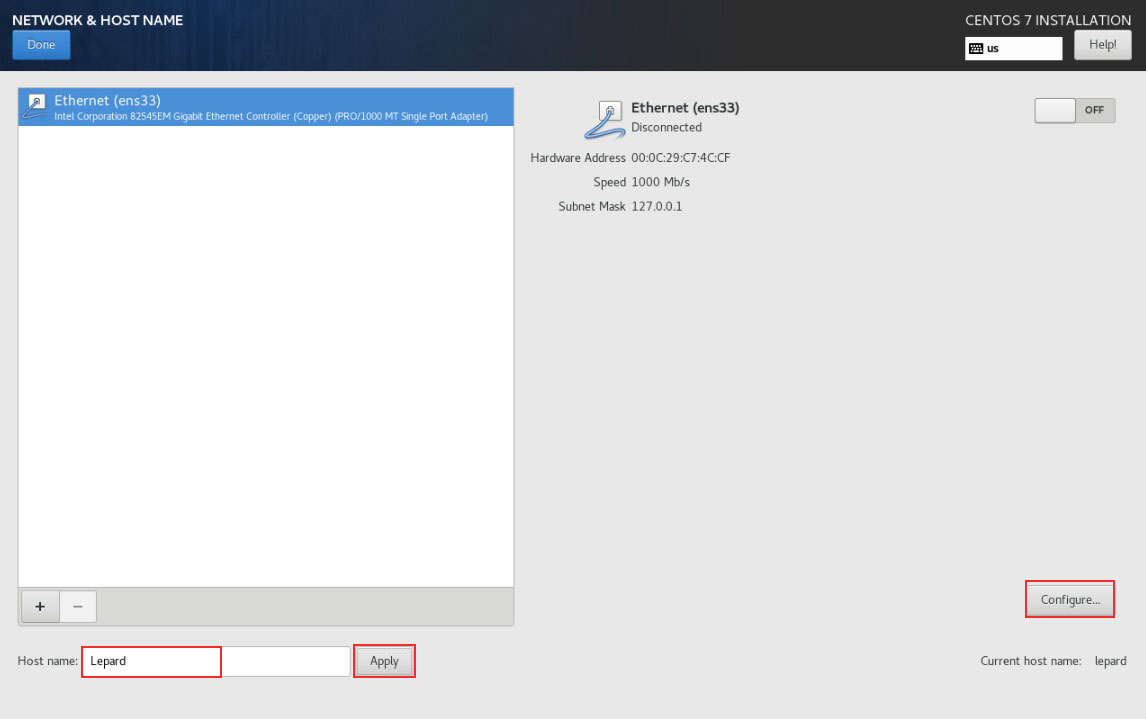
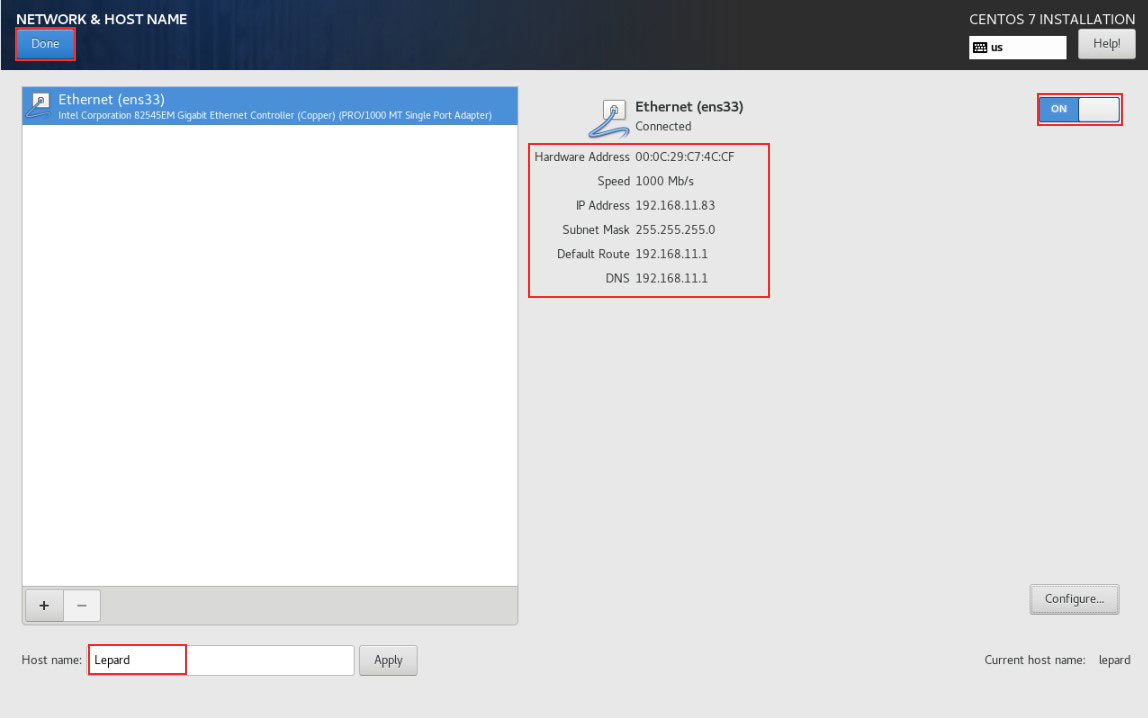
2.3 「Network & Host Name」setting
![](https://korodes.com/wp-content/uploads/2023/02/2252ccae1429501a033e0b44fa657539.jpg)
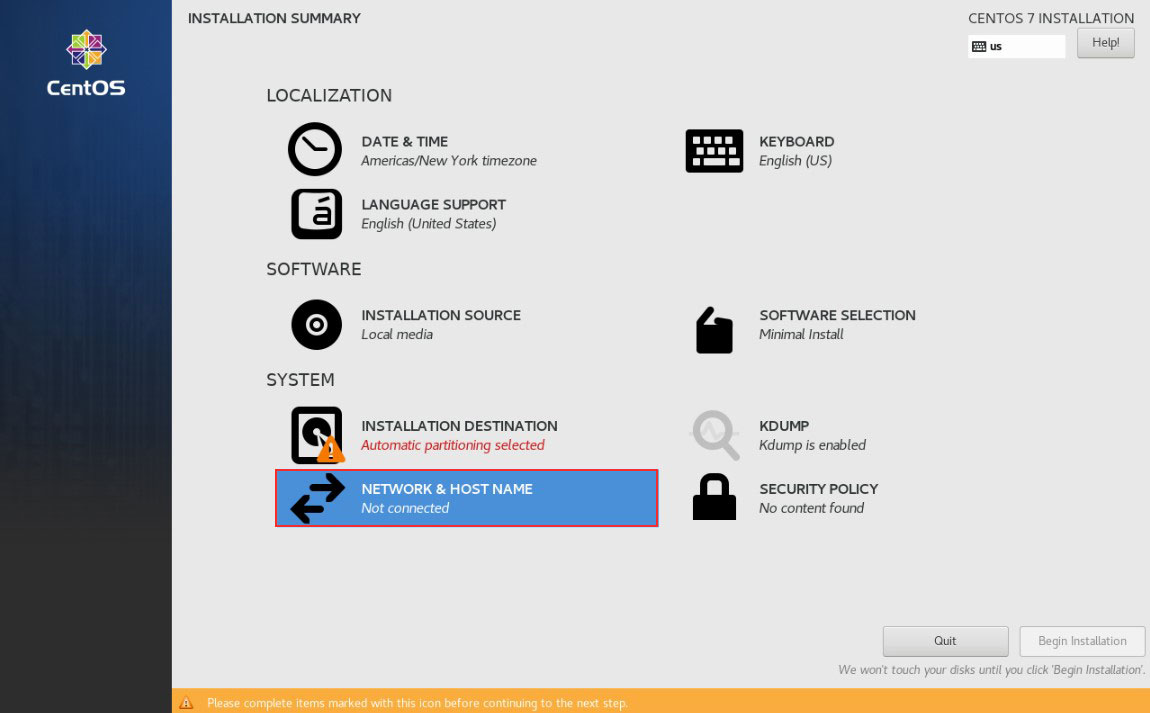
Decide [Host Name] arbitrarily, click the [Apply] button, and then click the [Configure] button to configure the details.
![](https://korodes.com/wp-content/uploads/2023/02/96d3d8492c21f8ffccd57f448cda9273.jpg)
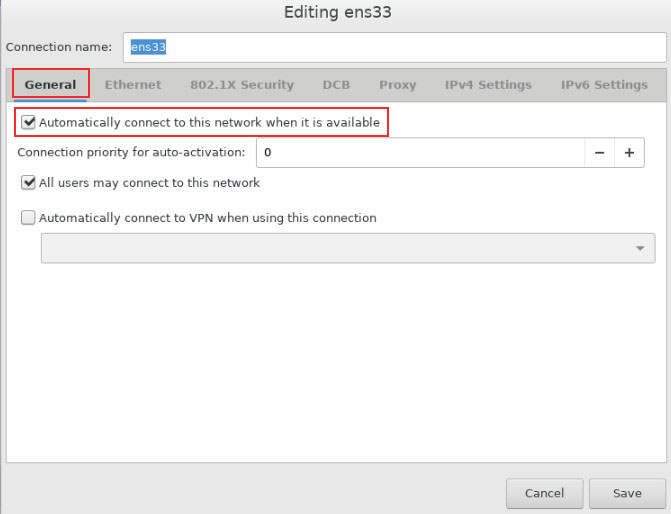
[Automatically…….] in the [General] tab check the box
![](https://korodes.com/wp-content/uploads/2023/02/2293a63c5171ecef48d9dc66495a4f52.jpg)
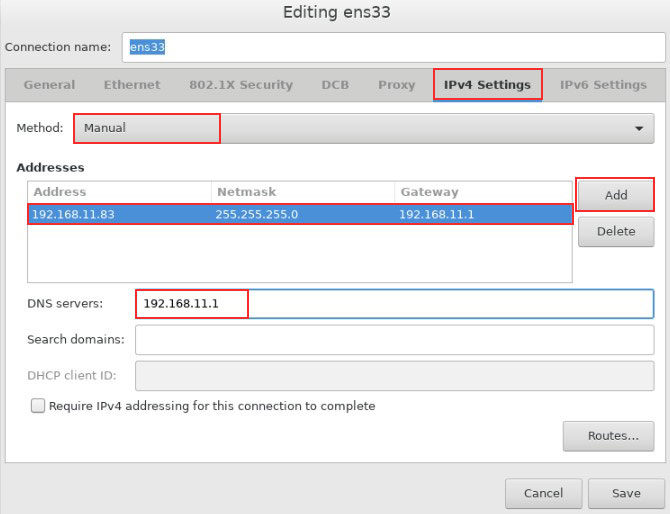
In the [IPv4 Settings] tab, set [Method] to [Manual].
Click the [Add] button and fill in [Address][Netmask][Gateway][DNS servers]
![](https://korodes.com/wp-content/uploads/2023/02/6e5d94d843ed7b14c8f7b7778bc14661.jpg)
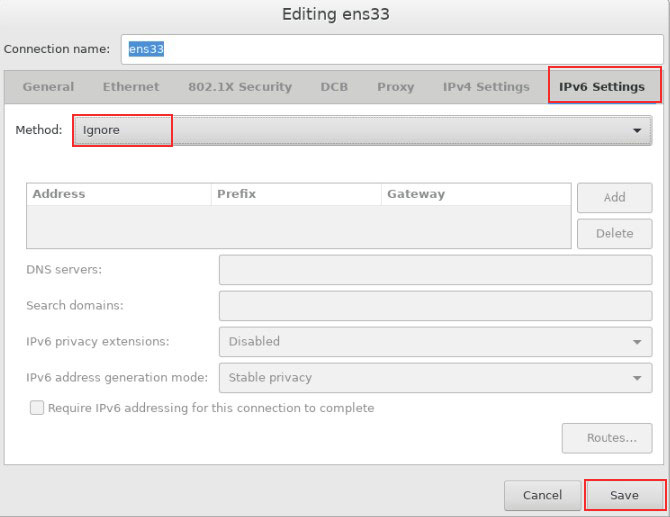
In the [IPV6 Settings] tab, set [Method] to [Ignore] and click the [Save] button.
![](https://korodes.com/wp-content/uploads/2023/02/83a58d25a048db38f20399427c0080f2.jpg)
Confirm each setting and click "Done" to return to the original screen.
![](https://korodes.com/wp-content/uploads/2023/02/6bd841a026896ceda55e64de0dd73584.jpg)
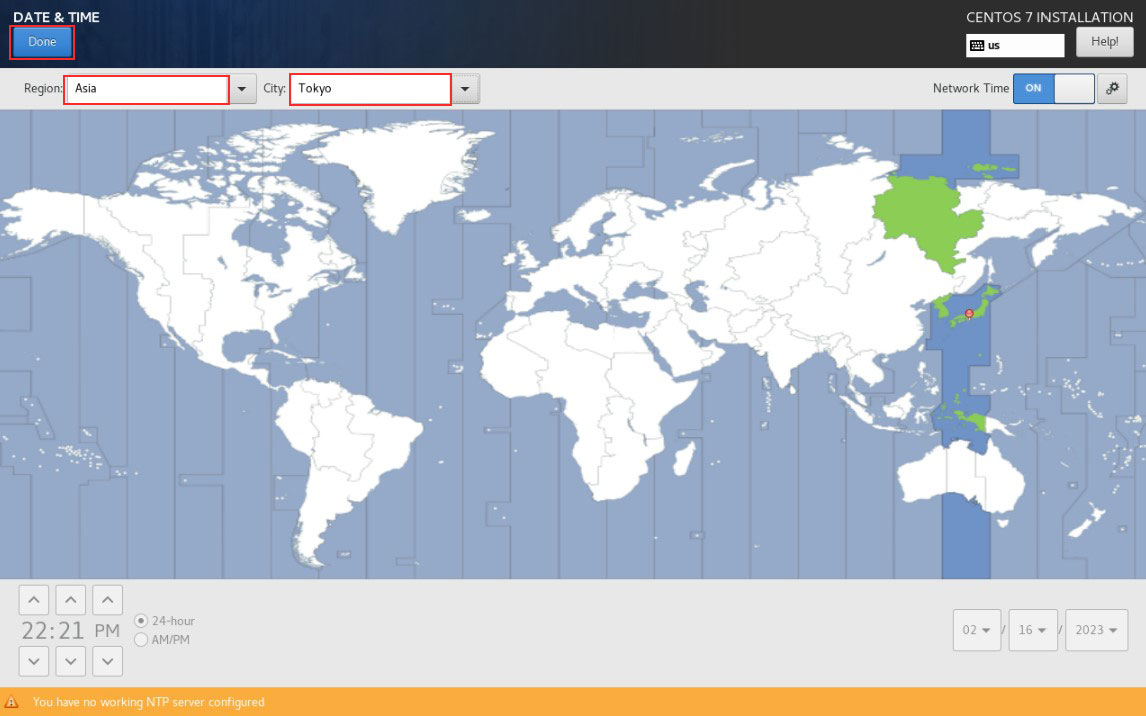
2.4 「DATE & TIME」setting
![](https://korodes.com/wp-content/uploads/2023/02/4c12284ea3c91ee8e145b8263c9f6425.jpg)
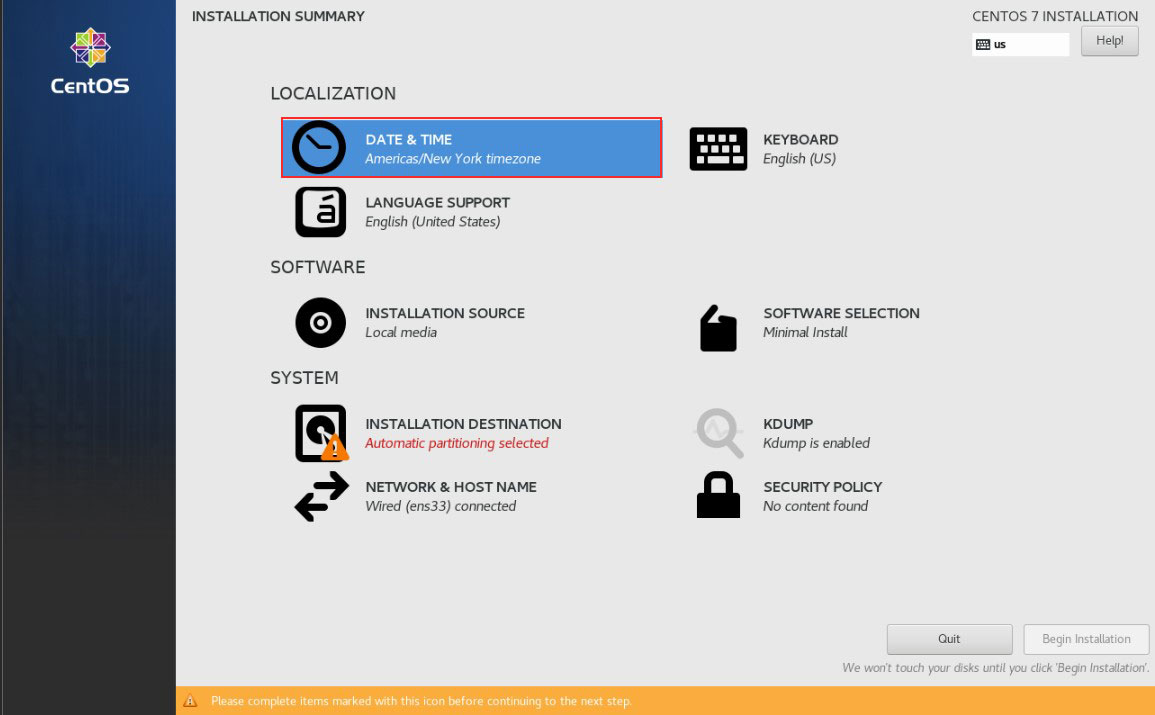
Confirm that [Region] is set to [Asia] and [City] is set to [Tokyo], then click [Done].
![](https://korodes.com/wp-content/uploads/2023/02/b2212c806b8e1cad1265752089479f91.jpg)
2.5 「KEYBOARD」setting
![](https://korodes.com/wp-content/uploads/2023/02/d4584377f164f76926c1f4bc46da181d.jpg)
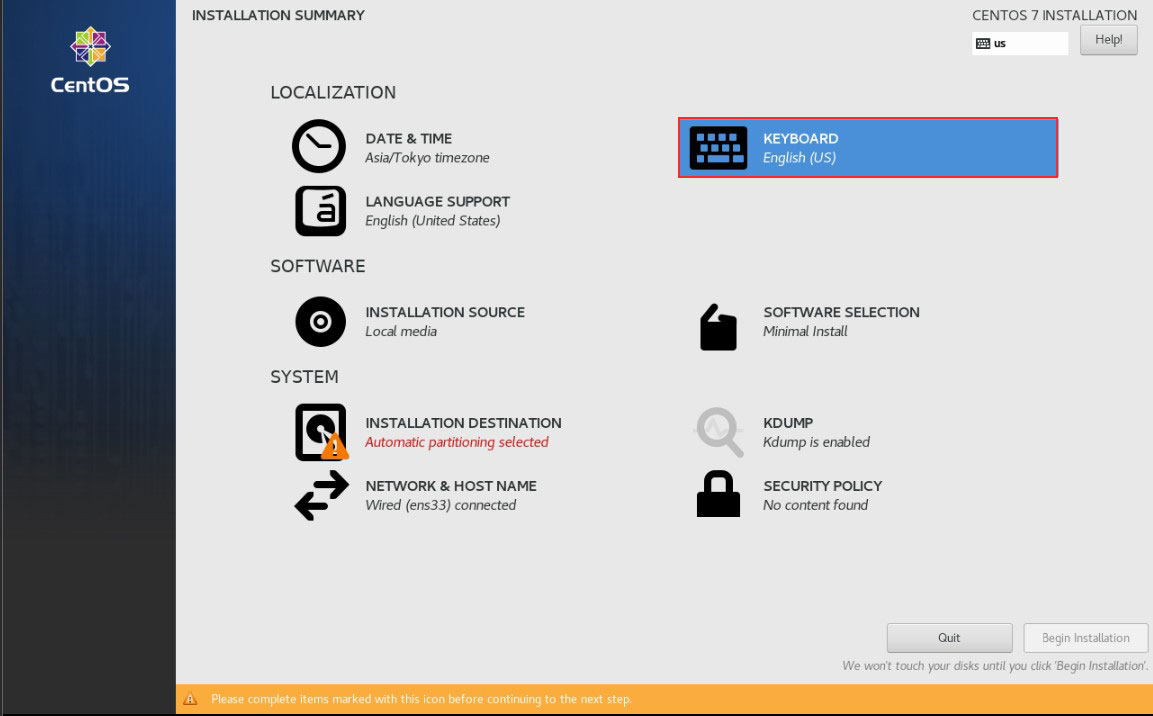
Click the [+] button
![](https://korodes.com/wp-content/uploads/2023/02/fc9b917846bbf094c6b5fcf38f5b64fe.jpg)
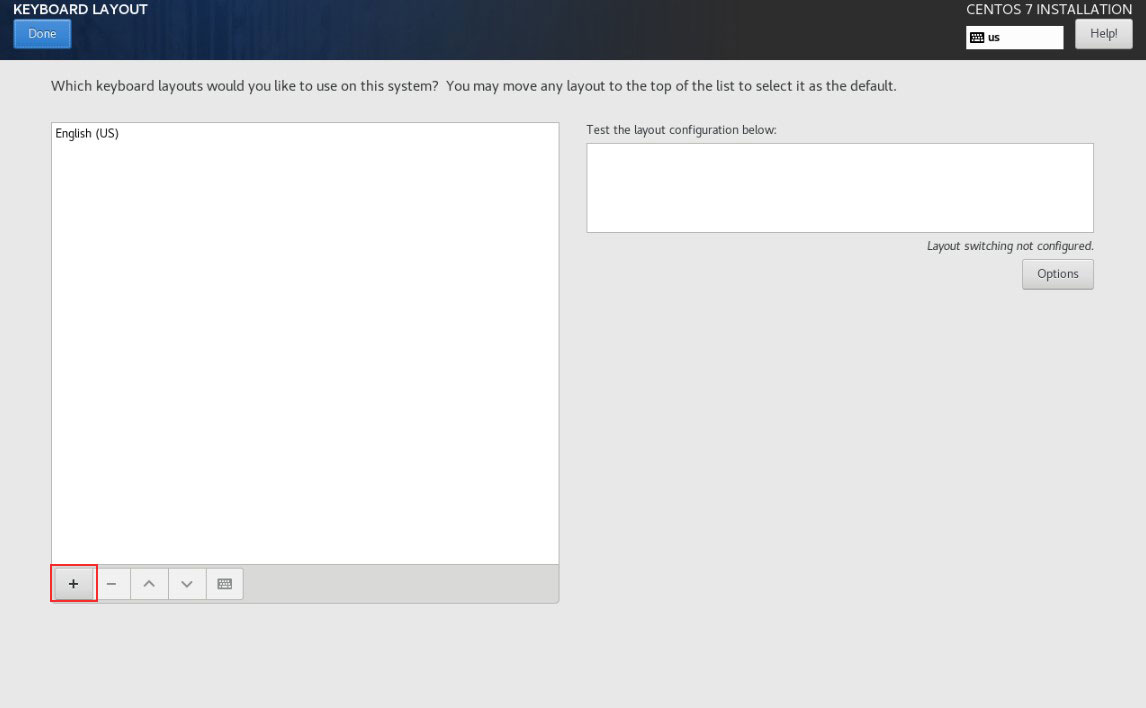
Under "ADD A KEYBOARD LAYOUT," select "Japanese" and click the "ADD" button.
![](https://korodes.com/wp-content/uploads/2023/02/a775e5972d6c7776de7d31cc28e669e1.jpg)
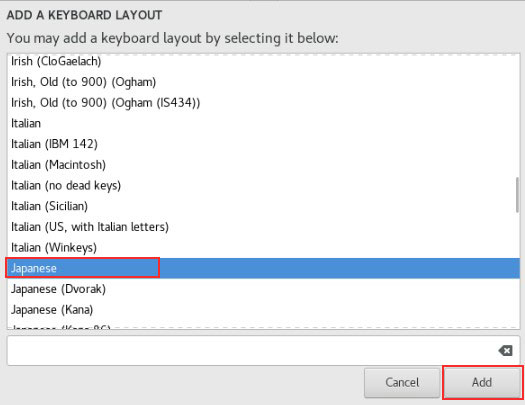
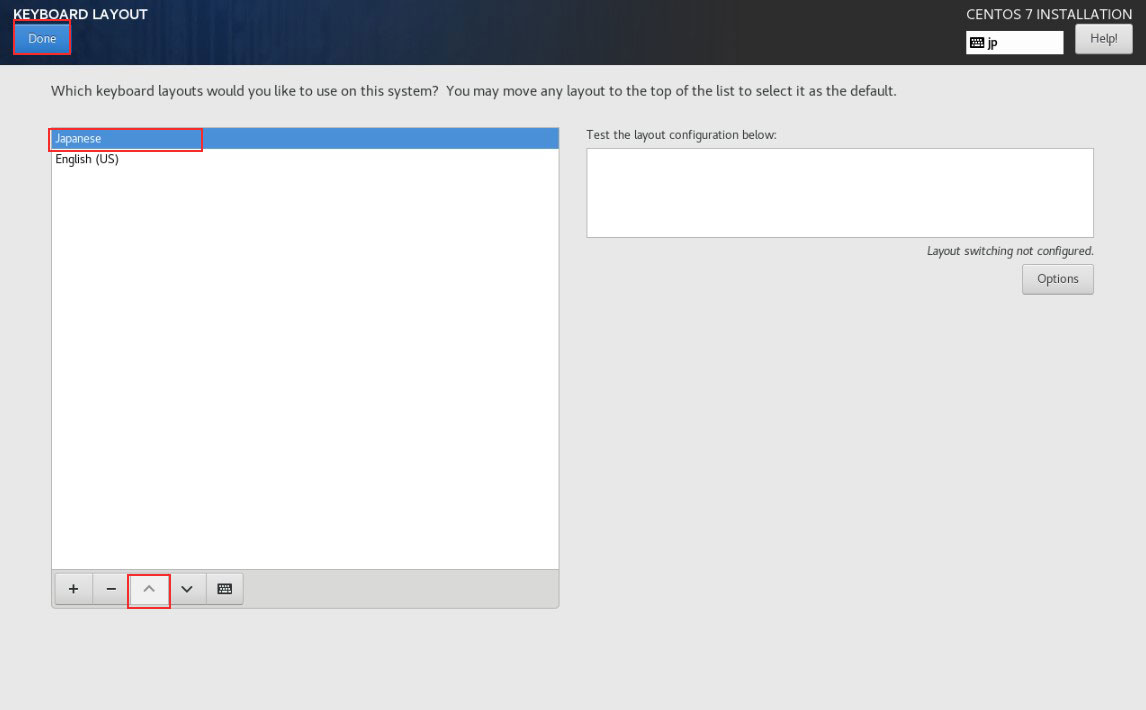
Click the [^] button, put [Japanese] at the top, and click [Done]
2.6 Software to be installed「SOFTWARE SELECTION」
![](https://korodes.com/wp-content/uploads/2023/02/599d5aa39f2f1b05d033cf0af187a653.jpg)
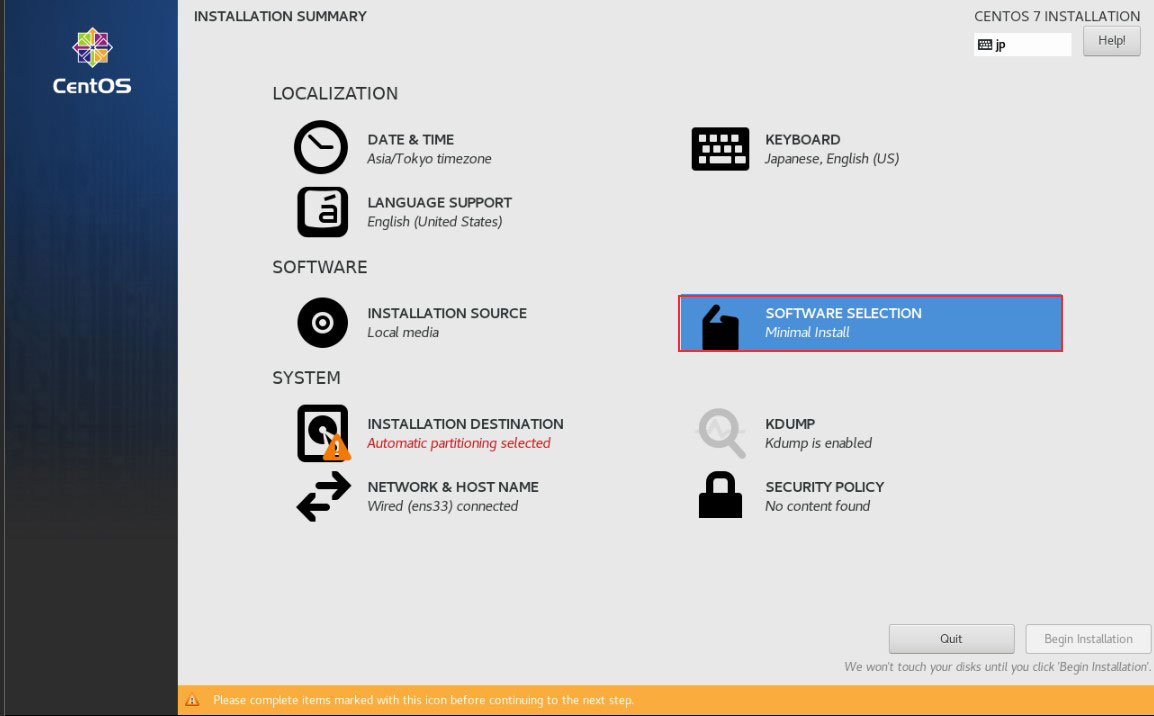
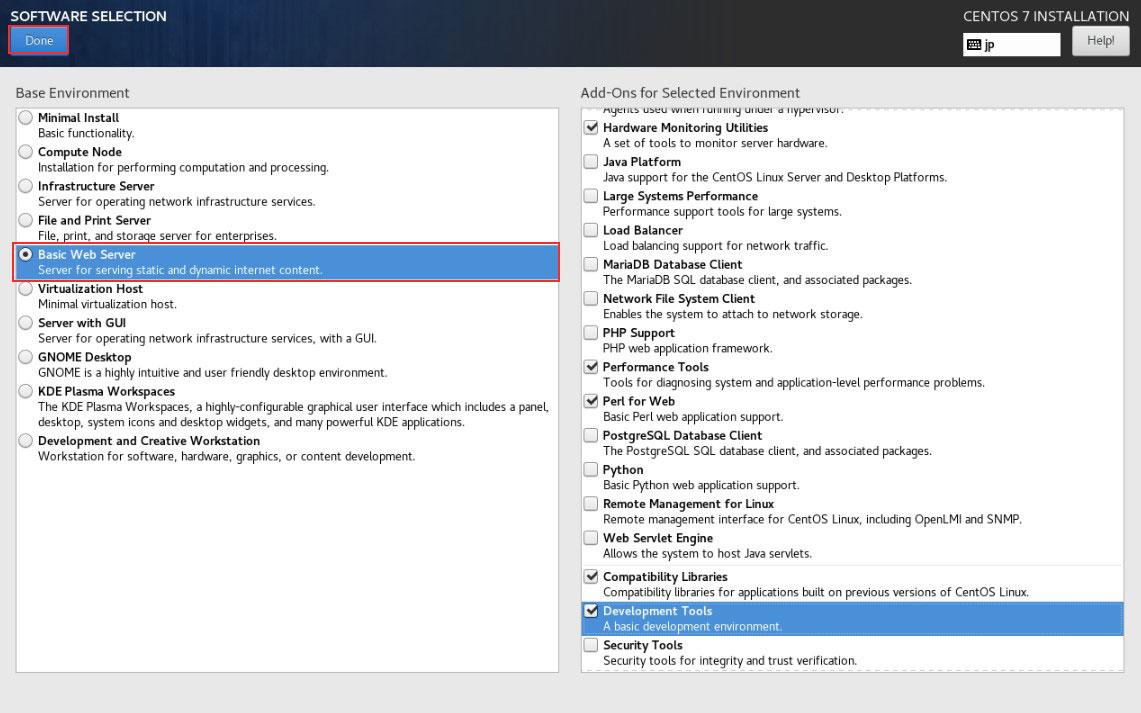
Select [Base Environment] as [Basic Web Server], select the following software in the right column, and click [Done].
・Hardware Monitoring Utilities
・Performance Tools
・Perl for Web
・Compatibility Liblaries
・Deblopment Tools
![](https://korodes.com/wp-content/uploads/2023/02/858d4091d511f48a9eabe162eb49262e.jpg)
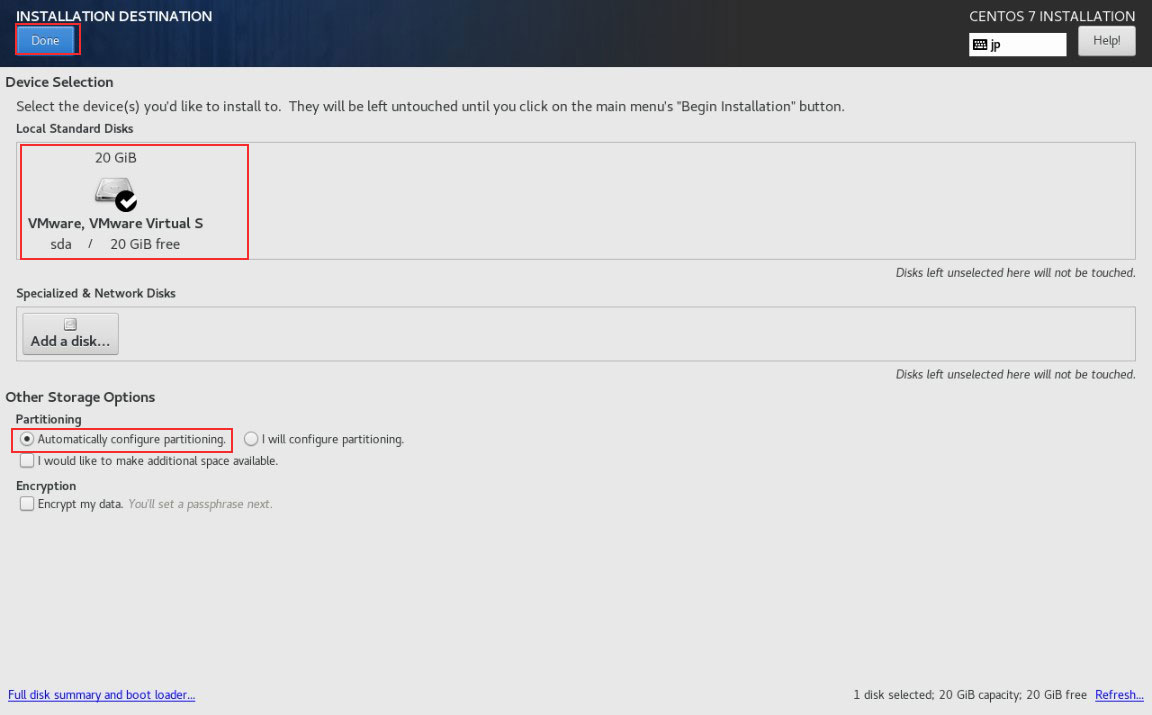
2.7 Disk to install「INSTALLATION DESTINATION]
![](https://korodes.com/wp-content/uploads/2023/02/5a24c23b397c69457b0a7277a0662d3f.jpg)
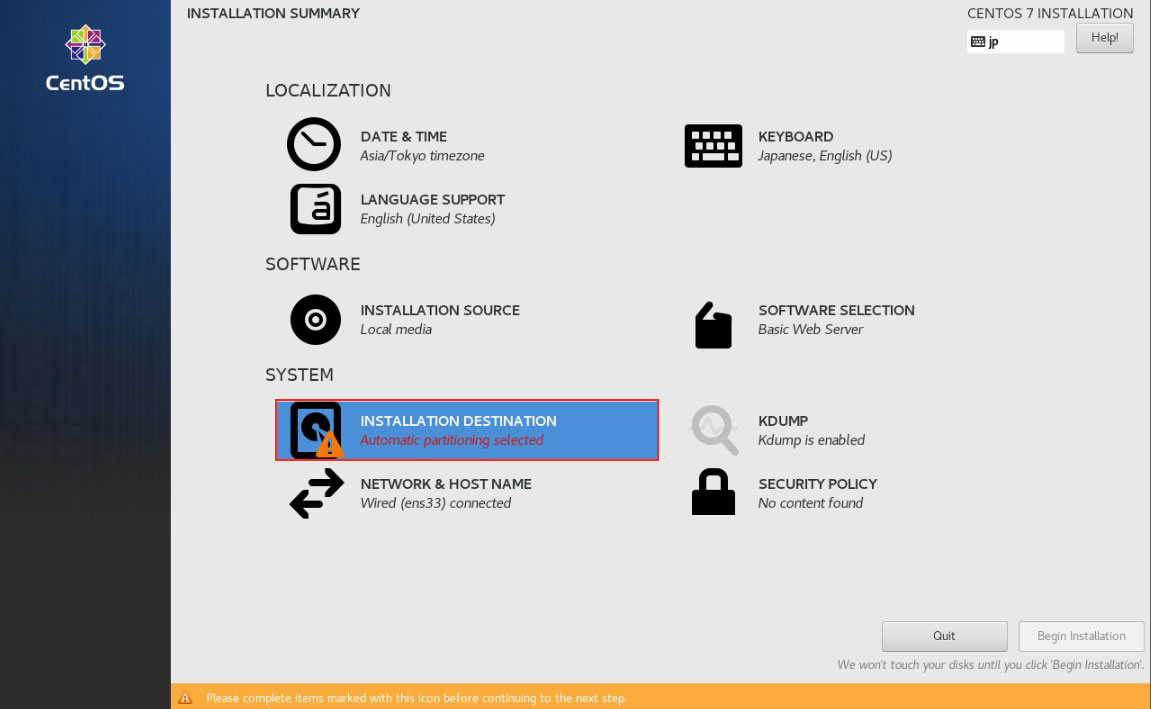
Select the disk to install, check [Automatically…..] checkbox and click "Done".
![](https://korodes.com/wp-content/uploads/2023/02/a2cc1246943417f9252833b68925486c.jpg)
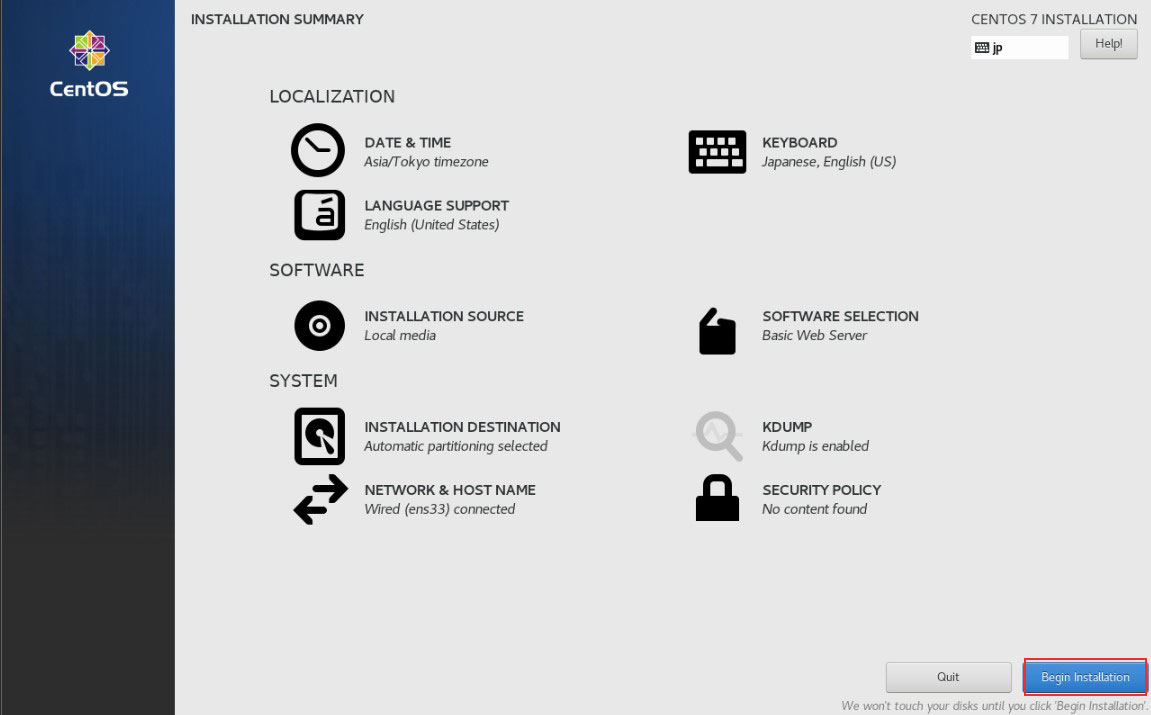
2.8 「Begin Installation] click
![](https://korodes.com/wp-content/uploads/2023/02/cce34acb05cbc22dd1e3db2e865897f6.jpg)
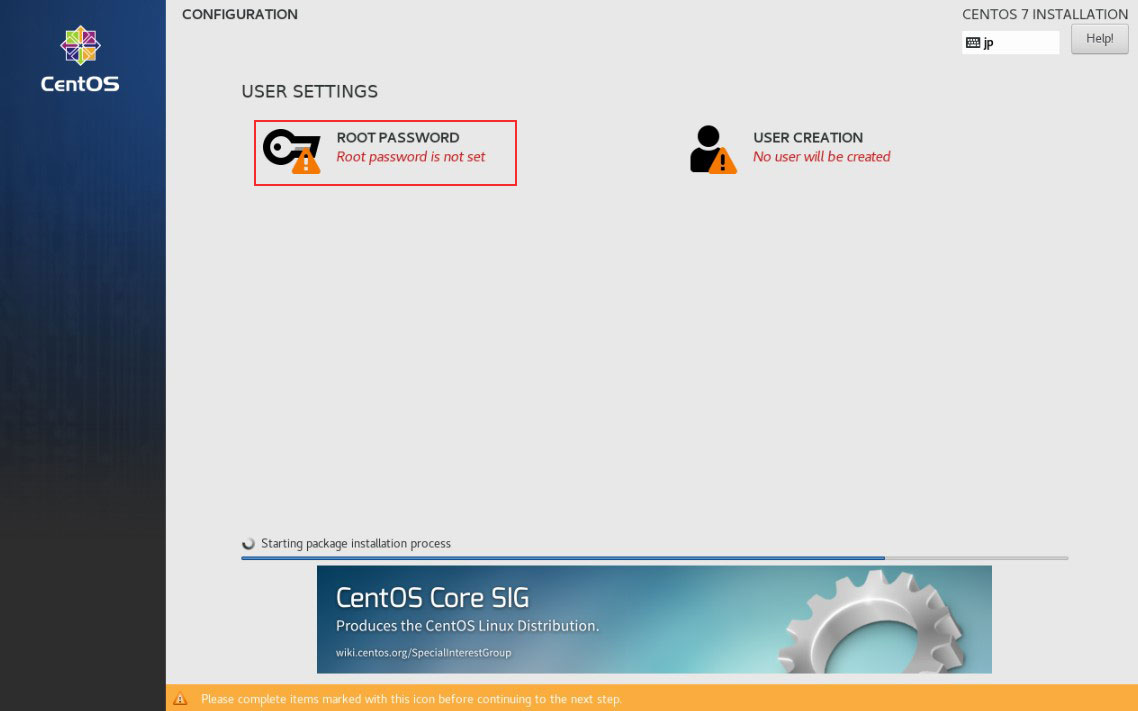
Root user password setting [ROOT PASSWORD]click
![](https://korodes.com/wp-content/uploads/2023/02/95026ec49392bf64b0cbe1a8fa974f82.jpg)
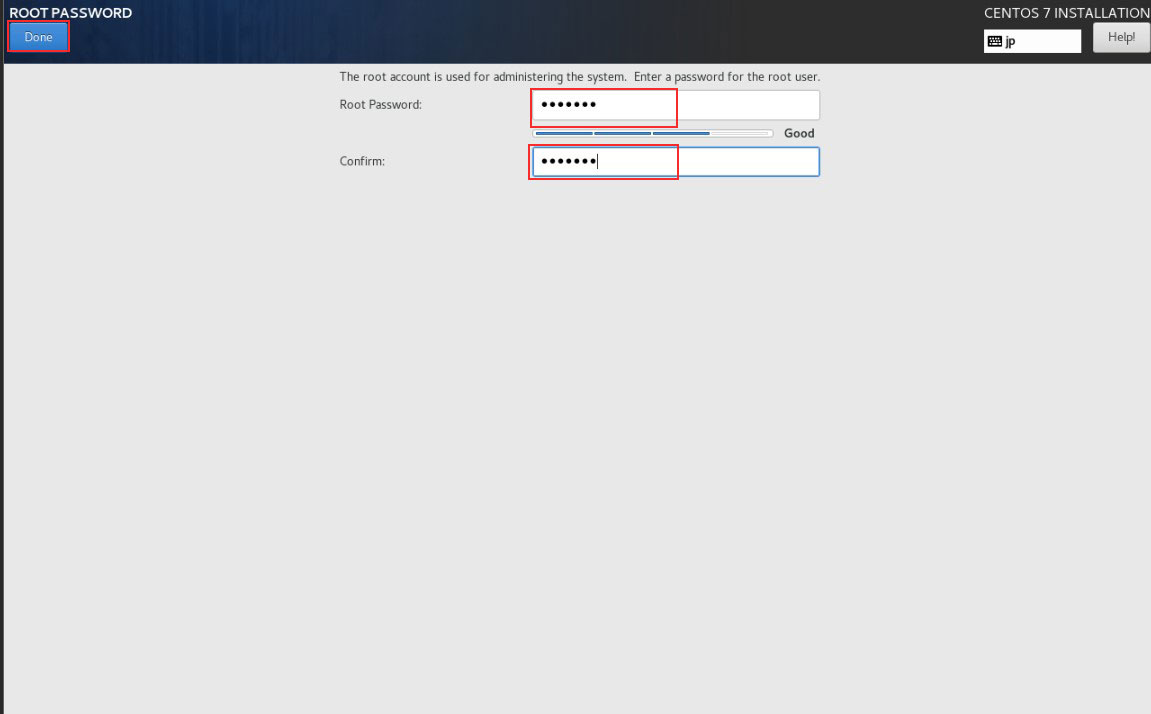
Enter the Root user password to be set twice and click "Done"
![](https://korodes.com/wp-content/uploads/2023/02/4a39de1da761cdd4f3b1c57bffb45691.jpg)
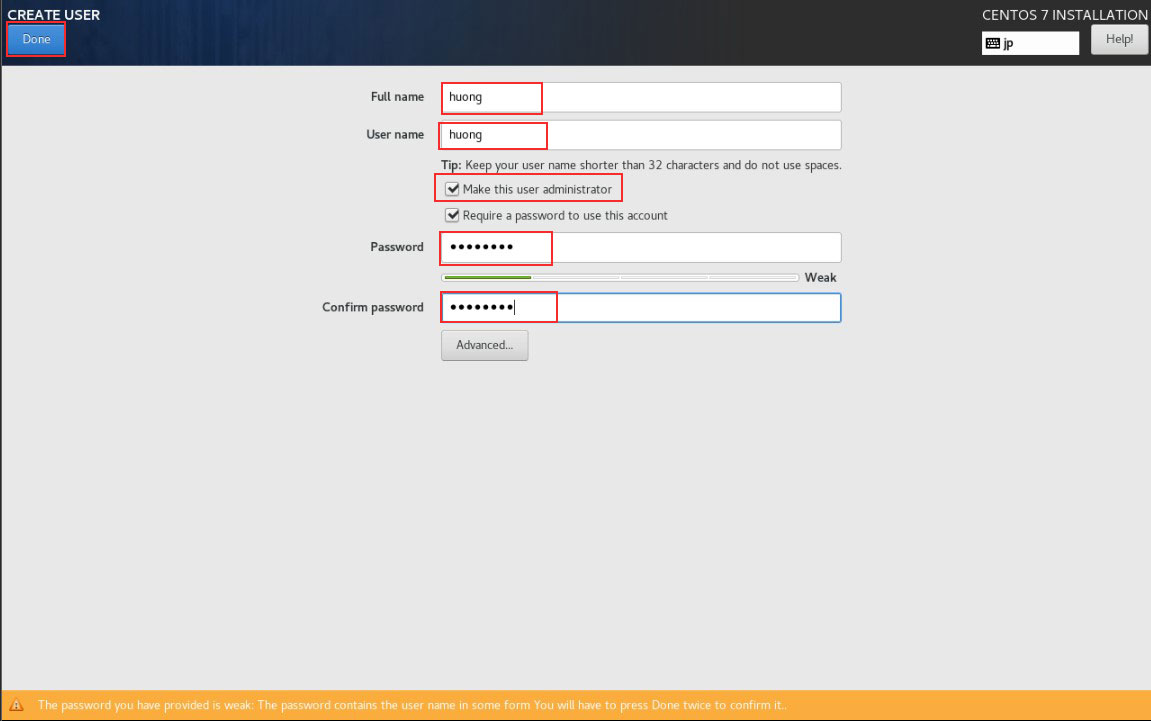
Creating a general user and setting a password
![](https://korodes.com/wp-content/uploads/2023/02/ace56c241017ca29f7382bad4a243215.jpg)
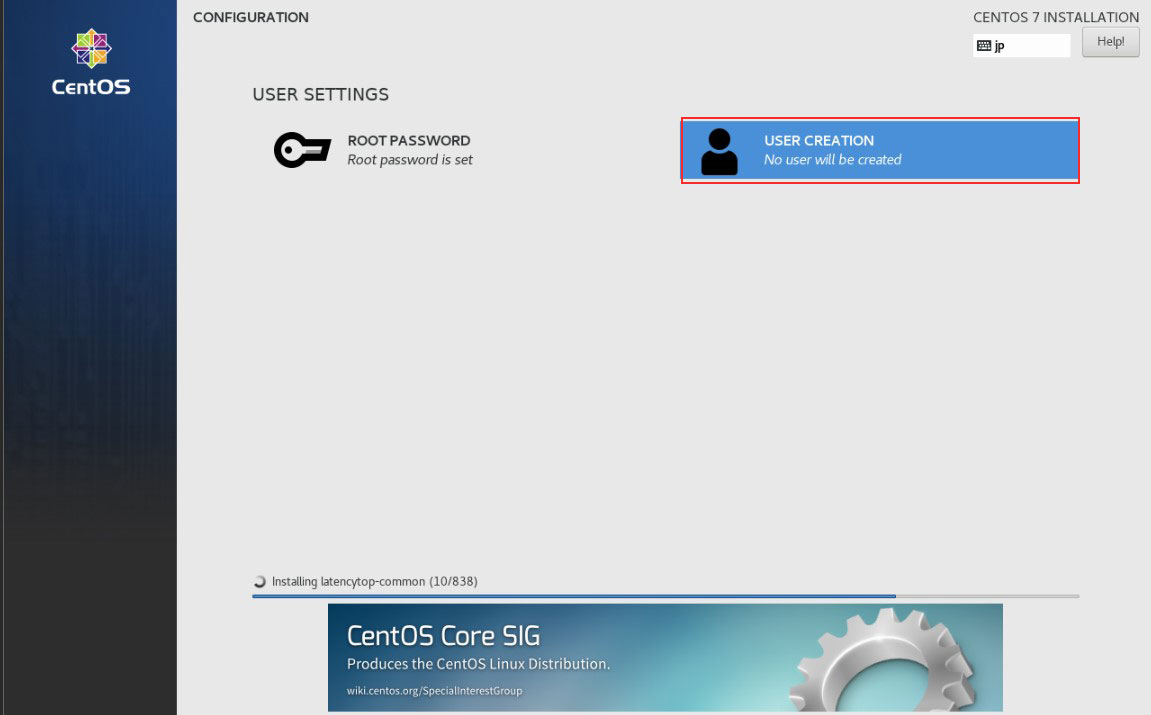
[Select [Full name][User name] as desired, check [Make this user administrator], and enter the password twice.
![](https://korodes.com/wp-content/uploads/2023/02/3b772e9b8738f0b6fe7475042e1fa6df.jpg)
Installation proceeds, click [Reboot] when complete
![](https://korodes.com/wp-content/uploads/2023/02/85ce7bd33b55a4e949c09a2c1d5e5708.jpg)
![](https://korodes.com/wp-content/uploads/2023/02/36dc41c44f799385e92ac345a139efb2.jpg)
2.9 login
After rebooting, a login prompt will appear, so log in as a regular user.
![](https://korodes.com/wp-content/uploads/2023/02/5a24771d43b4de49fb6e091321b35da6.jpg)