Contents
1.SSHによるリモート接続の設定
SSHはサーバーへリモートで接続するためのサービスで、基本的にはOSインストール直後に動作していますが、デフォルトの設定ではややセキュリティに難があります。
ここではデフォルトの設定を変更してssh接続のセキュリティを高める設定を行います。
1.1 SSHサービスの設定ファイル変更
SSHサービスの設定を変更するために設定ファイルを変更します。
SSHサービスの設定ファイルは"/etc/ssh/sshd_config"になります。設定ファイルをviエディターで開きます。(viエディタの使い方はネットに情報がたくさんありますので調べて下さい)
|
1 |
# vi /etc/ssh/sshd_config |
|
1 2 3 4 5 6 7 8 9 10 11 12 13 14 15 16 17 18 19 20 21 22 23 24 25 26 27 28 29 30 31 32 33 34 35 36 37 38 39 40 41 42 43 44 45 46 |
# $OpenBSD: sshd_config,v 1.104 2021/07/02 05:11:21 dtucker Exp $ # This is the sshd server system-wide configuration file. See # sshd_config(5) for more information. # This sshd was compiled with PATH=/usr/local/bin:/usr/bin:/usr/local/sbin:/ usr/sbin # The strategy used for options in the default sshd_config shipped with # OpenSSH is to specify options with their default value where # possible, but leave them commented. Uncommented options override the # default value. # To modify the system-wide sshd configuration, create a *.conf file under # /etc/ssh/sshd_config.d/ which will be automatically included below Include /etc/ssh/sshd_config.d/*.conf # If you want to change the port on a SELinux system, you have to tell # SELinux about this change. # semanage port -a -t ssh_port_t -p tcp #PORTNUMBER # #Port 22 Port 2244 #AddressFamily any ListenAddress 0.0.0.0 #ListenAddress :: #HostKey /etc/ssh/ssh_host_rsa_key #HostKey /etc/ssh/ssh_host_ecdsa_key #HostKey /etc/ssh/ssh_host_ed25519_key # Ciphers and keying #RekeyLimit default none # Logging #SyslogFacility AUTH #LogLevel INFO # Authentication: #LoginGraceTime 2m PermitRootLogin prohibit-password #StrictModes yes #MaxAuthTries 6 #MaxSessions 10 #PubkeyAuthentication yes |
②「#ListenAddress 0.0.0.0」を探し前の「#」を削除します
③「#PermitRootLogin prohibit-password」を探し行頭の「#」を削除する
rootユーザーはユーザー名が既に判明しているためパスワードが判明すると、管理者権限でサーバーへログイン出来るため、これを拒否する設定を行います。
SSH の再起動
|
1 |
# systemctl restart sshd.service |
2.ファイアウォール(firewalld)の設定方法
Fedoraではファイアウォールはfirewalldがデフォルトに設定されており、OSインストール時に有効になっています。
「firewalld」について簡単に説明すると、通信制御のポリシーを設定する場合、事前に定義されたゾーンに対して通信の許可・遮断ルールを適用し、そのゾーンを各NIC(ネットワークアダプタ)に割り当てていくという方式になっています。
2.1 「firewalld」を制御するための「firewall-cmd」コマンド使用方法
1)「fierwalld」の状態や設定内容を確認するためのコマンド
①firewalld稼働状況確認
|
1 |
# firewall-cmd --state |
または
|
1 2 3 4 5 6 7 8 9 10 11 12 13 14 |
# systemctl status firewalld ● firewalld.service - firewalld - dynamic firewall daemon Loaded: loaded (/usr/lib/systemd/system/firewalld.service; enabled; vendor> Active: active (running) since Sun 2022-10-16 21:37:27 JST; 14min ago Docs: man:firewalld(1) Main PID: 845 (firewalld) Tasks: 2 (limit: 2274) Memory: 37.8M CPU: 550ms CGroup: /system.slice/firewalld.service mq 845 /usr/bin/python3 -s /usr/sbin/firewalld --nofork --nopid Oct 16 21:37:25 Lepard systemd[1]: Starting firewalld.service - firewalld - dyn> Oct 16 21:37:27 Lepard systemd[1]: Started firewalld.service - firewalld - dyna> |
Active: inactive (dead)と表示され、firewallが停止していることが分かります
➁defaultゾーン設定を表示
|
1 2 3 4 5 6 7 8 9 10 11 12 13 14 15 |
# firewall-cmd --list-all FedoraServer (active) target: default icmp-block-inversion: no interfaces: ens160 sources: services: cockpit dhcpv6-client ntp ssh ports: protocols: forward: no masquerade: no forward-ports: source-ports: icmp-blocks: rich rules: |
上記の例ではサービス「 cockpit」「 dhcpv6-client」「 ntp」「 ssh」が許可されていること等がわかります
③「--permanent」オプションについて
サーバの再起動や「firewalld」サービスの再起動で設定が消えてしまわないようにするためには、
「--permanent」オプションを使用して設定を行う必要があります。その際、「--permanent」オプションを指定して設定を行った場合は、そのままでは「firewalld」に設定が反映されないため「fiewall-cmd --reload」で設定を反映させる必要があります
例としてHTTPサービスをシステムを再起動しても初期化されず恒久的に利用するためには
|
1 2 |
# firewall-cmd --add-service=http --permanent # firewall-cmd --reload |
④起動・停止方法
「firewalld」は「systemd」で制御されているので、起動と停止には「systemctl」コマンドを使用
|
1 2 3 4 |
firewalldの起動 # systemctl start firewalld firewalldの停止 # systemctl stop firewalld |
2.2 変更したSSHポート2244番を解放する
|
1 2 3 4 5 6 7 8 9 10 11 12 13 14 15 16 17 18 |
# firewall-cmd --add-port=2244/tcp --permanent # firewall-cmd --reload 確認する # firewall-cmd --list-all FedoraServer (active) target: default icmp-block-inversion: no interfaces: ens160 sources: services: cockpit dhcpv6-client http ntp ssh ports: 2244/tcp protocols: forward: no masquerade: no forward-ports: source-ports: icmp-blocks: rich rules: |
2244 port が追加されている
3.Windowsからリモート接続
Windowsでの設定
Windowsからリモート接続するための設定を始めます、ターミナルエミュレーターは「Tera Term」を使用します。
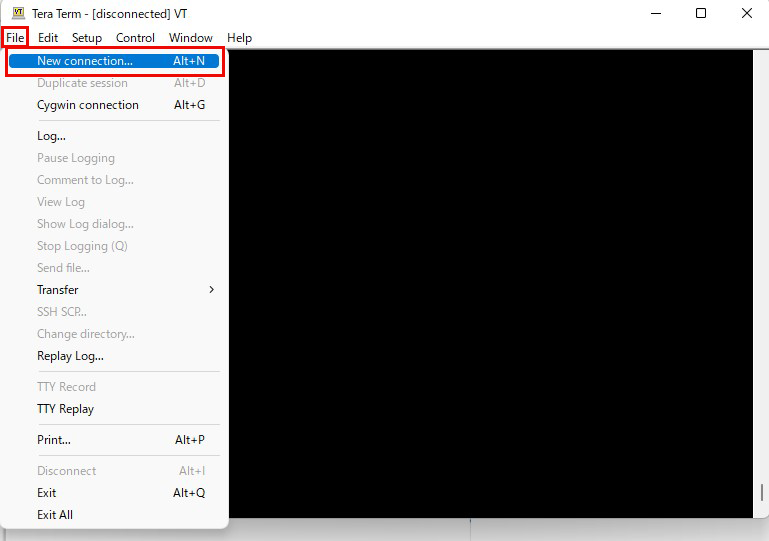
Tera Termを起動し、起動画面のキャンセルをした後、Tera Termメニューの「File」から「New Connection」を選択する。
「サーバーのIPアドレス」「TCPポート番号」の箇所は各自で設定したものを入力します。最後に「OK」をクリック
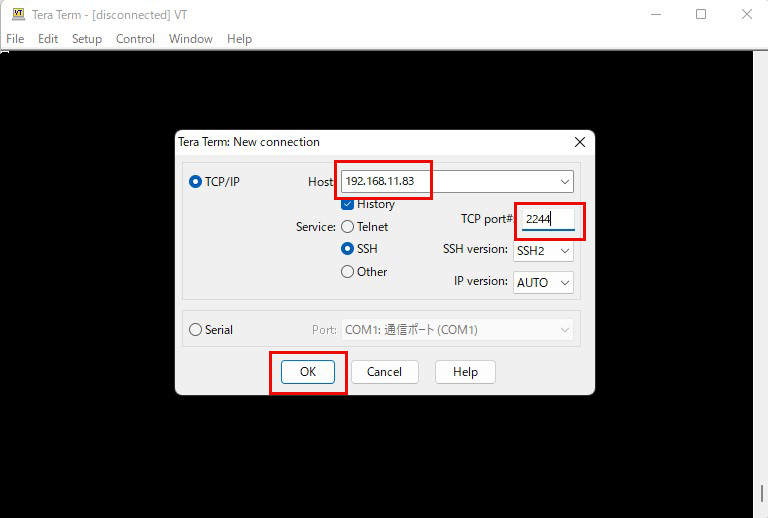
「OK」をクリックすると、セキュリティの確認の画面になるので「Continue」をクリック

次の画面になるので、「User name」Passphrasee」を入力し、「OK」をクリック
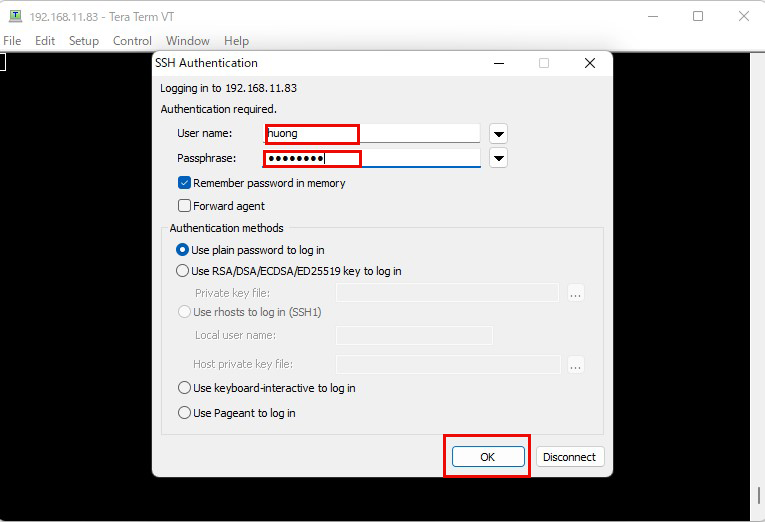
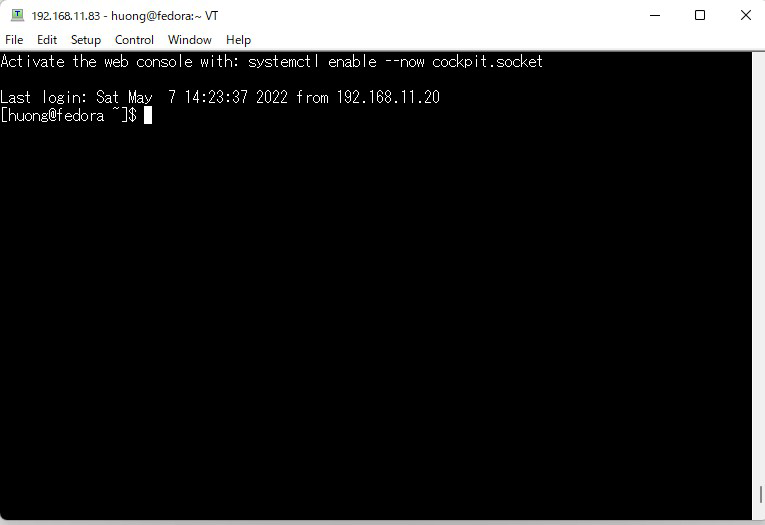
情報が正しければ下図のように正常にログインできるはずです。