1. MySQL 8インストール
1. 1 パッケージインデックスを更新
|
1 2 |
# apt update # apt upgrade |
必要パッケージをインストール
|
1 |
# apt install -y software-properties-common apt-transport-https wget ca-certificates gnupg2 |
1.2 MySQLリポジトリをインポート
|
1 2 |
# wget https://repo.mysql.com//mysql-apt-config_0.8.22-1_all.deb # dpkg -i mysql-apt-config_0.8.22-1_all.deb |
プロンプトが表示されたら、MySQL 8.0 リポジトリをデフォルトとして追加することを確認し、その後、タブで「OK」に移動し、キーを押してバージョンのインストールを確認します。

リポジトリが追加されたら、以下のコマンドを実行して、MySQL 8.0をインストールします。
1.3 MySQLインストール
|
1 2 |
# apt update # apt install mysql-server |
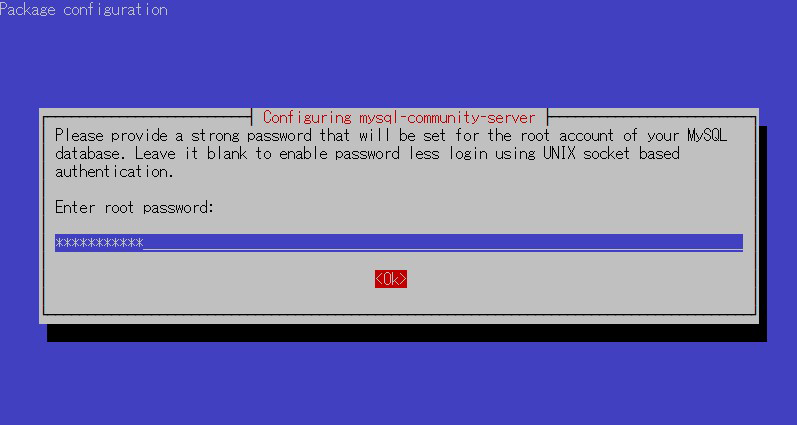
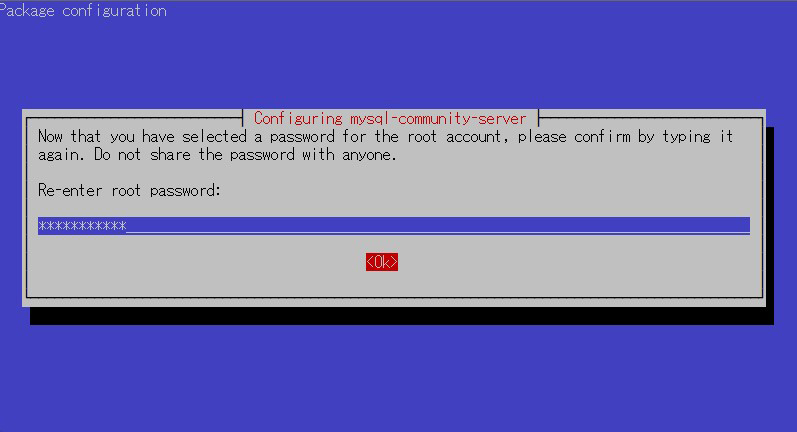
MySQLのルートパスワード入力を2回
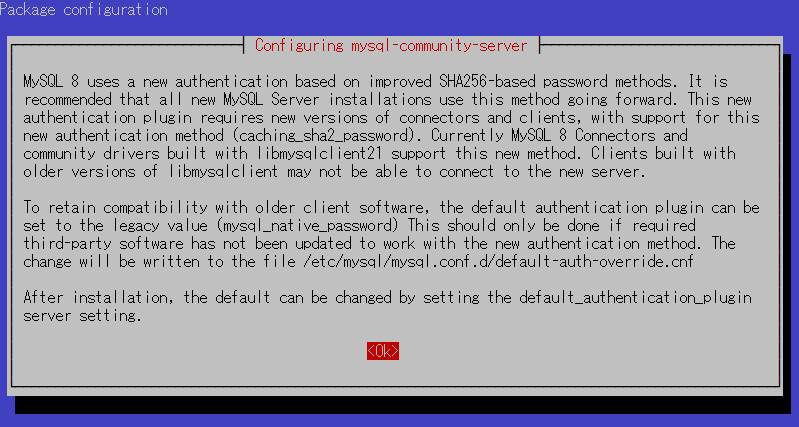
新しい認証システムについて表示
<OK>を選択
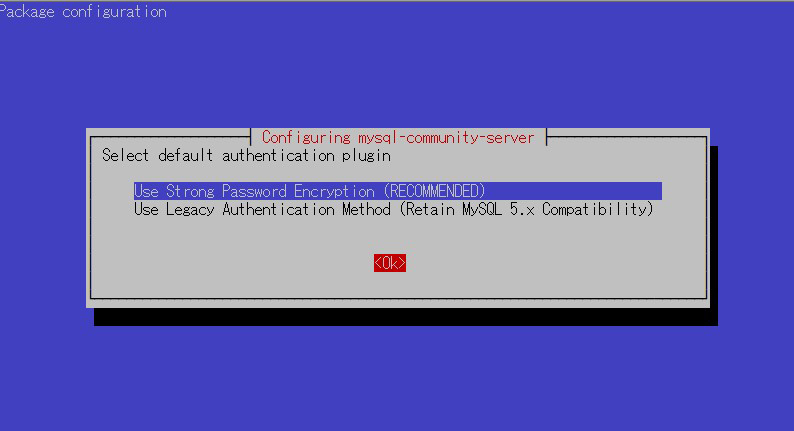
認証プラグインのデフォルトに合わせ、<OK>を選択
aptpolicyインストール
|
1 2 3 4 5 6 7 8 9 |
# apt policy mysql-server mysql-server: Installed: 8.0.32-1debian10 Candidate: 8.0.32-1debian10 Version table: *** 8.0.32-1debian10 500 500 http://repo.mysql.com/apt/debian buster/mysql-8.0 amd64 Packages 100 /var/lib/dpkg/status |
動作確認
|
1 2 3 4 5 6 7 8 9 10 11 12 13 14 15 16 17 |
# systemctl status mysql ● mysql.service - MySQL Community Server Loaded: loaded (/lib/systemd/system/mysql.service; enabled; vendor preset: enabled) Active: active (running) since Tue 2022-10-11 17:13:30 JST; 10min ago Docs: man:mysqld(8) http://dev.mysql.com/doc/refman/en/using-systemd.html Main PID: 6930 (mysqld) Status: "Server is operational" Tasks: 38 (limit: 2300) Memory: 365.0M CPU: 4.135s CGroup: /system.slice/mysql.service mq6930 /usr/sbin/mysqld Oct 11 17:13:29 Lepard systemd[1]: Starting MySQL Community Server... Oct 11 17:13:30 Lepard systemd[1]: Started MySQL Community Server. |
Mysqlバージョン確認
|
1 2 |
# mysql --version mysql Ver 8.0.32 for Linux on x86_64 (MySQL Community Server - GPL) |
1.4. MySQLサーバのセキュリティ設定
MySQLサーバのセキュリティ関連の設定を行うためにmysql_secure_installtionというツールを実行します。
実行すると、質問形式でいくつかのセキュリティ設定がはじまります。はじめに以下のようにパスワードバリデーション用のプラグインを使用するか確認されます。パスワードバリデーションというのは、MySQL用のユーザのパスワード強度をチェックし、十分セキュアなパスワードのみ受け付けるよう制限をかけることができます。例えば、最低何文字以上で必ず記号と数値を1文字以上含むなどです。この条件について次の質問で設定できます。
良ければyを入力してEnterを押します
|
1 2 |
# systemctl restart mysql.service # mysql_secure_installation |
インストール状況
Securing the MySQL server deployment.
Enter password for user root:
VALIDATE PASSWORD COMPONENT can be used to test passwords
and improve security. It checks the strength of password
and allows the users to set only those passwords which are
secure enough. Would you like to setup VALIDATE PASSWORD component?
Press y|Y for Yes, any other key for No: y
There are three levels of password validation policy:
LOW Length >= 8
MEDIUM Length >= 8, numeric, mixed case, and special characters
STRONG Length >= 8, numeric, mixed case, special characters and dictionary file
Please enter 0 = LOW, 1 = MEDIUM and 2 = STRONG: 0
Using existing password for root.
Estimated strength of the password: 100
Change the password for root ? ((Press y|Y for Yes, any other key for No) : y
New password:xxxxxxxxx
Re-enter new password:xxxxxxxxx
Estimated strength of the password: 100
Do you wish to continue with the password provided?(Press y|Y for Yes, any other key for No) : y
By default, a MySQL installation has an anonymous user,
allowing anyone to log into MySQL without having to have
a user account created for them. This is intended only for
testing, and to make the installation go a bit smoother.
You should remove them before moving into a production
environment.
Remove anonymous users? (Press y|Y for Yes, any other key for No) : y
Success.
Normally, root should only be allowed to connect from
'localhost'. This ensures that someone cannot guess at
the root password from the network.
Disallow root login remotely? (Press y|Y for Yes, any other key for No) : y
Success.
By default, MySQL comes with a database named 'test' that
anyone can access. This is also intended only for testing,
and should be removed before moving into a production
environment.
Remove test database and access to it? (Press y|Y for Yes, any other key for No) : y
-Dropping test database…
Success.
Removing privileges on test database…
Success.
Reloading the privilege tables will ensure that all changes
made so far will take effect immediately.
Reload privilege tables now? (Press y|Y for Yes, any other key for No) : y
Success.
All done!
最後にここまでで設定した内容が表示され、All done!と表示されればセキュリティ設定は完了です
以降 MySQLにアクセスするときは
|
1 2 |
# mysql -u root -p Enter password: (上記で設定した新しいパスワードを入力) |
2.WordPressインストール
2.1 データベース作成
Word Press 用のデータベースを作成します(例として今回はデータベース名を 「wp_db」、ユーザー名を「wp_user」、パスワードを「?Y123456y」)
アカウント作成時「Your password does not satisfy the current policy requirements」が表示される場合はパスワードを8文字以上、英数大文字小文字、記号等を含めてください
|
1 2 3 4 5 6 7 8 9 10 11 12 13 14 15 16 17 18 19 20 21 22 23 24 25 26 27 28 29 30 31 32 33 34 35 36 37 38 |
# mysql -u root -p Enter password: Welcome to the MySQL monitor. Commands end with ; or \g. Your MySQL connection id is 13 Server version: 8.0.29 MySQL Community Server - GPL Copyright (c) 2000, 2023, Oracle and/or its affiliates. Oracle is a registered trademark of Oracle Corporation and/or its affiliates. Other names may be trademarks of their respective owners. Type 'help;' or '\h' for help. Type '\c' to clear the current input statement. mysql> CREATE DATABASE wp_db DEFAULT CHARACTER SET utf8 COLLATE utf8_unicode_ci; Query OK, 1 row affected, 2 warnings (0.00 sec) mysql> show databases; +--------------------+ | Database | +--------------------+ | information_schema | | mysql | | performance_schema | | sys | | wp_db | +--------------------+ 5 rows in set (0.00 sec) mysql>CREATE USER 'wp_user'@'%' IDENTIFIED WITH mysql_native_password BY '?Y123456y'; Query OK, 0 rows affected (0.00 sec) mysql>GRANT ALL ON wp_db.* TO 'wp_user'@'%'; Query OK, 0 rows affected (0.00 sec) mysql> exit; Bye |
2.2 WordPressダウンロードとインストール
①ダウンロードと展開
|
1 2 3 |
# cd /var/www/html/[FQDN] # wget http://ja.wordpress.org/latest-ja.tar.gz # tar xvf latest-ja.tar.gz |
②Wordpress設定ファイルの編集
|
1 2 3 |
# cd wordpress/ # cp wp-config-sample.php wp-config.php # vi wp-config.php |
wp-config.phpの編集内容
|
1 2 3 4 5 6 7 8 9 10 11 12 13 |
// ** MySQL 設定 - この情報はホスティング先から入手してください。 ** // /** The name of the database for WordPress */ define('DB_NAME', 'wp_db'); ←「2.1 データベース作成」で作成したデータベース名 /** Database username */ define('DB_USER', 'wp_user'); ←「2.1 データベース作成」で作成したユーザー名 /** Database password */ define('DB_PASSWORD', '?Y123456y'); ←「2.1 データベース作成」で作成したユーザー用パスワード また、最終行に以下の分を追加します。 これをしないと、プラグインを追加するときにFTP接続情報なるものを聞かれます。 define('FS_METHOD', 'direct'); |
③ファイルの移動
|
1 2 |
# cd /var/www/html/[FQDN] # mv wordpress/* . |
移動されたことを確認後 wordpressディレクトリーとダウンロードしたlatest-ja.tar.gzを削除
|
1 2 3 |
# ls -l # rm -R -f wordpress # rm latest-ja.tar.gz |
④wordpressディレクトリの所有者をapacheにします
|
1 |
# chown -R www-data:www-data /var/www/html/[FQDN] |
⑤ブラウザからアクセスする
http://[FQDN]/wp-admin にアクセスします。
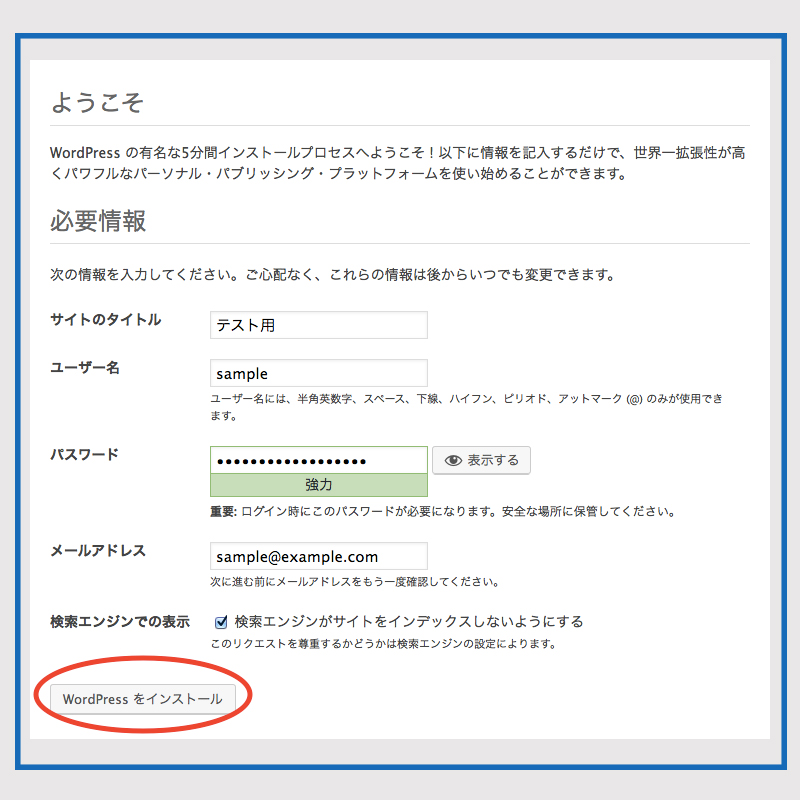
成功すると下記のWordpressインストール情報入力画面が出力されます。
Debianで「お使いのサーバーの PHP では WordPress に必要な MySQL 拡張を利用できないようです。」表示されたら
Debianサーバーでphpやmysqlがインストール済みなのにWordpressインストール時に「お使いのサーバーの PHP では WordPress に必要な MySQL 拡張を利用できないようです。」と表示される場合は、下記を確認しましょう。ライブラリ関連がインストールされているか確認、phpのライブラリ関連をインストールしていない場合はインストールします。
|
1 |
# apt -y install php7.3-gd php7.3-mbstring |
MYSQLモジュールのインストール
WordPressはPHPのMYSQLモジュールが必要です。PHPのMYSQLモジュールをインストールしていない場合はインストールします。
|
1 |
# apt -y install php7.3 php7.3-mysql libapache2-mod-php7.3 php7.3-mysql |
インストールが完了したらApacheを再起動をします。
|
1 |
# systemctl restart apache2 |
下記入力画面で
サイトのタイトル 任意の名称
ユーザー名 任意の名称
パスワード 任意のパスワード
メールアドレス 管理者用メールアドレス
を入力し、「Wordpressインストール」をクリックする。「ユーザー名」「パスワード」はwordpress管理画面にアクセスするときに必要なため忘れないようにする。