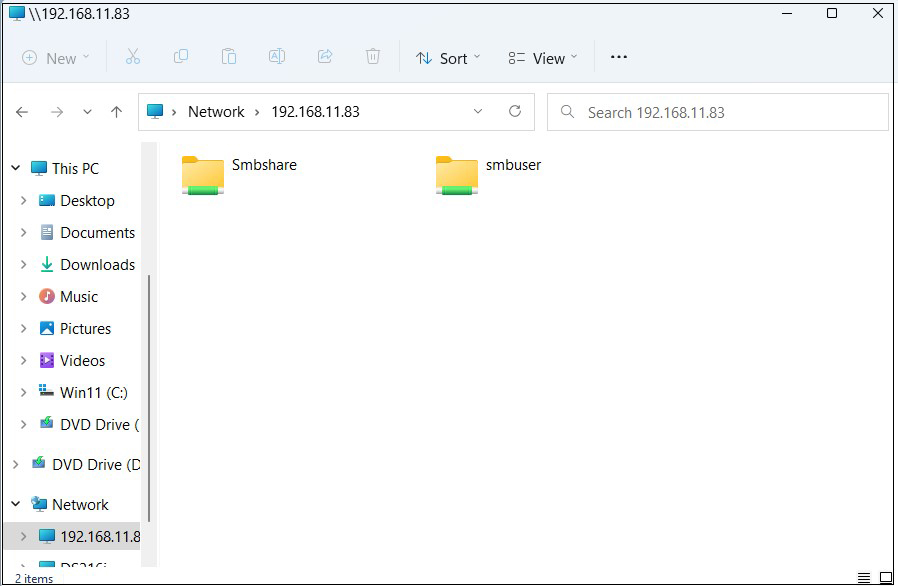
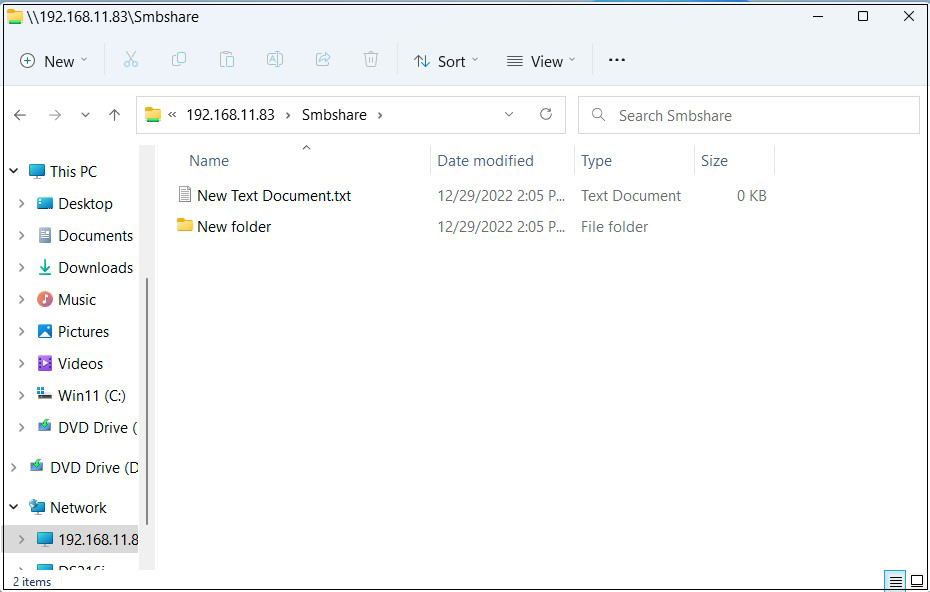
1.FTP Server
1. 1 vsftpd Install
# dnf -y install vsftpd
1.2 Vsftpd Configuration
Back up the vsftpd.conf file before editing
# cp /etc/vsftpd/vsftpd.conf /home/huong/vsftpd.conf.org
①Editing Configuration Files
# vi /etc/vsftpd/vsftpd.conf
●Lines 82 and 83: Uncomment (Allow ASCII mode transfer)
ascii_upload_enable=YES
ascii_download_enable=YES
●Lines 100, 101: Uncomment (chroot enabled)
chroot_local_user=YES
chroot_list_enable=YES
●Line 103: Uncomment (chroot list file specification)
chroot_list_file=/etc/vsftpd/chroot_list
●Line 109: Uncomment (Enable bulk transfer of entire directories)
ls_recurse_enable=YES
●Line 114 Change (Enable IPv4)
listen=YES
●Line 123 Change (Ignore IPv6)
listen_ipv6=NO
#Add to the last line
#Use local time
use_localtime=YES
②Add users to allow directory access to upper level
In my case, I wrote huong.
# echo "huong" >> /etc/vsftpd/chroot_list
③Specify IP addresses to allow connections in /etc/hosts.allow
192.168.11.0/24 is configured to allow all local IP addresses in my environment.
# echo "vsftpd:192.168.11.0/24" >> /etc/hosts.allow
Write vsftpd:ALL (deny all connections) in /etc/hosts.deny
# echo "vsftpd:ALL" >> /etc/hosts.deny
This setting overrides hosts.allow. That is, everything is denied, and IP addresses specified in hosts.allow are allowed.
④Enable vsftpd autostart and start it
# systemctl enable vsftpd
# systemctl start vsftpd
⑤From windows side, check if you can connect with FileZilla.
Open the ftp port with firewall before connecting
# firewall-cmd --permanent --add-service=ftp
# firewall-cmd --reload
Start FileZilla and select "Site Manager" from the "File" menu.
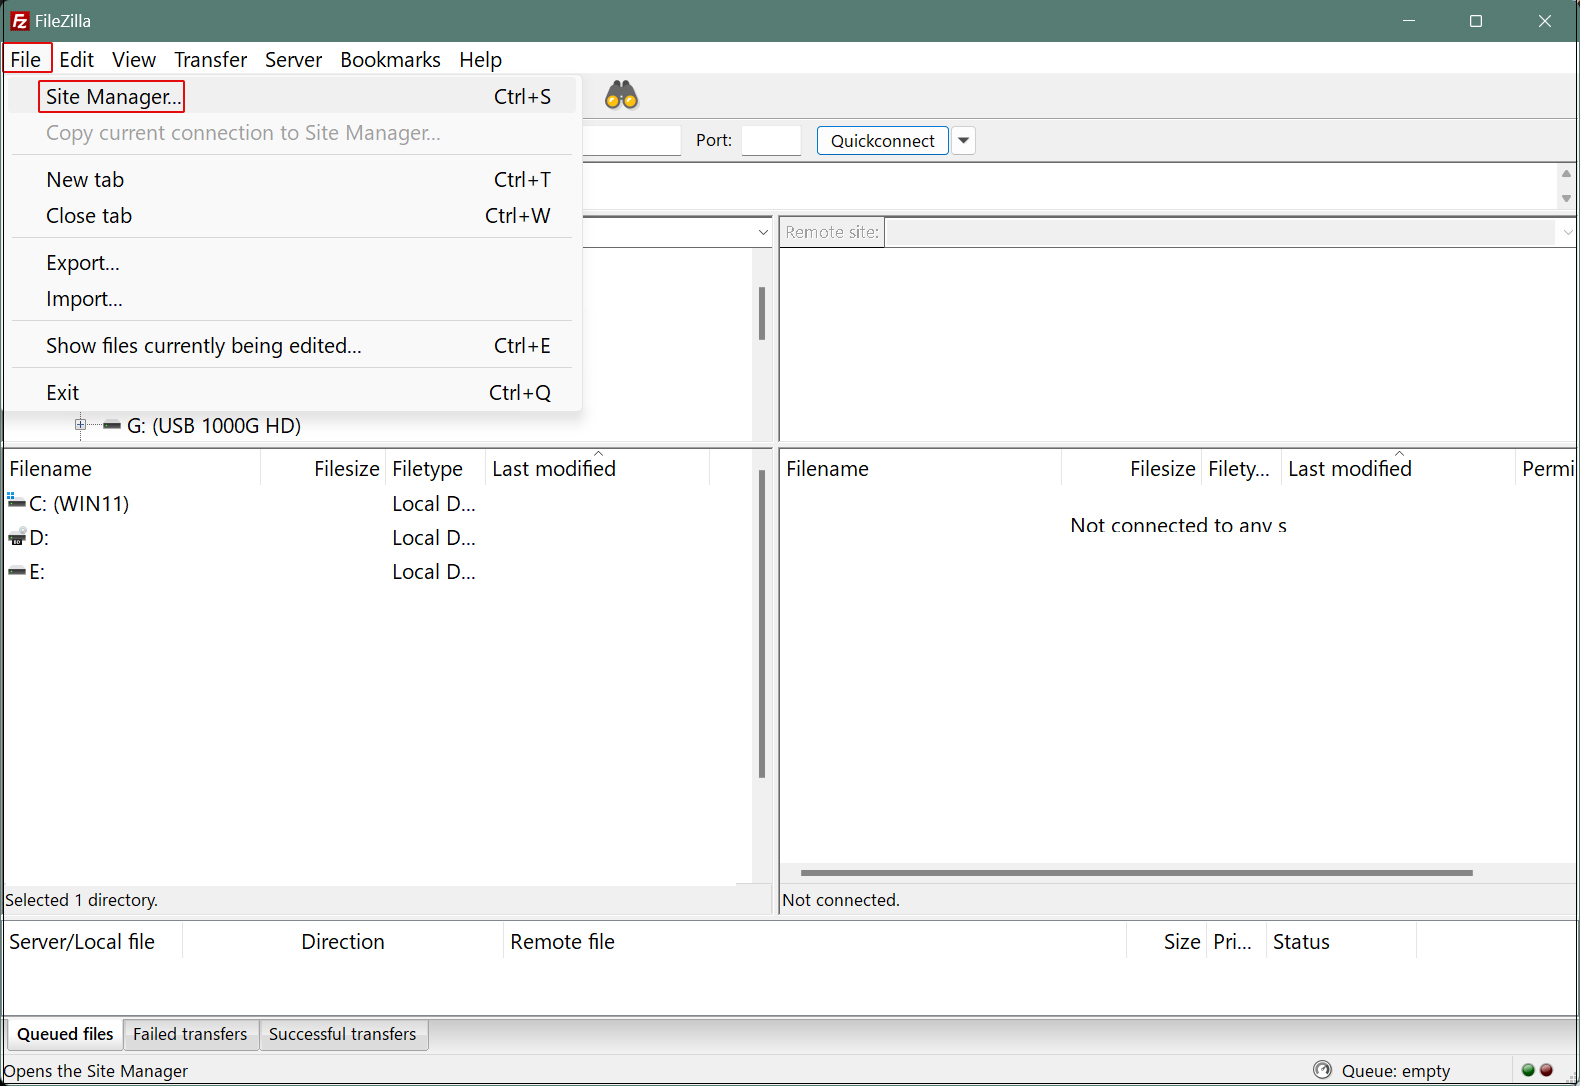
Click on "New site"
Enter the following settings for each item and click "Connect"
Protocol : FTP-File Transfer Protocol
Host : Server IP Address
Port : can be left blank
Encryption : Use expllict FTP ocver TLS if available
Logon Type : Ask for password
User : General user name (server login user)
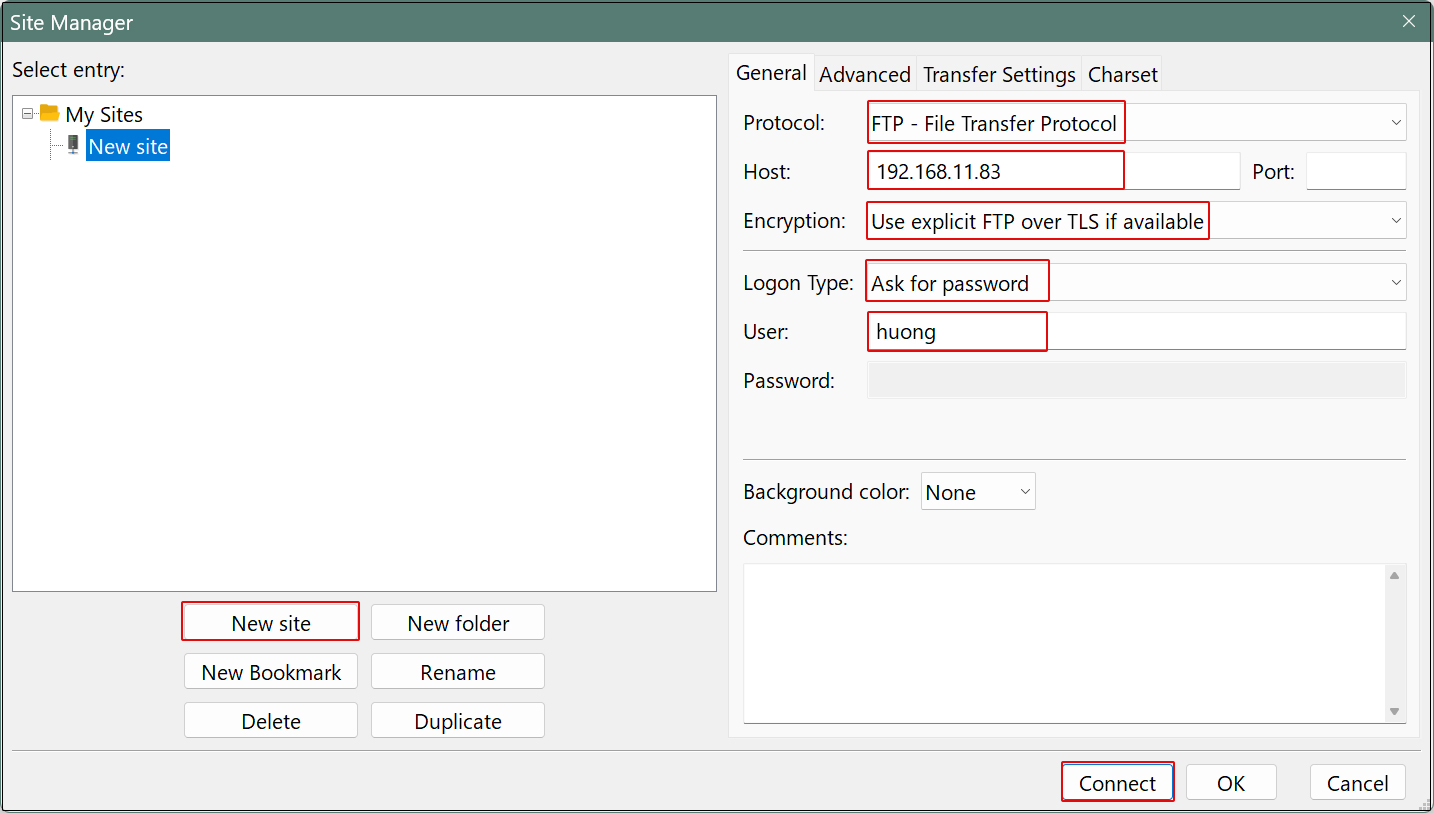
Set the password for the login user in "Password" and click "OK".
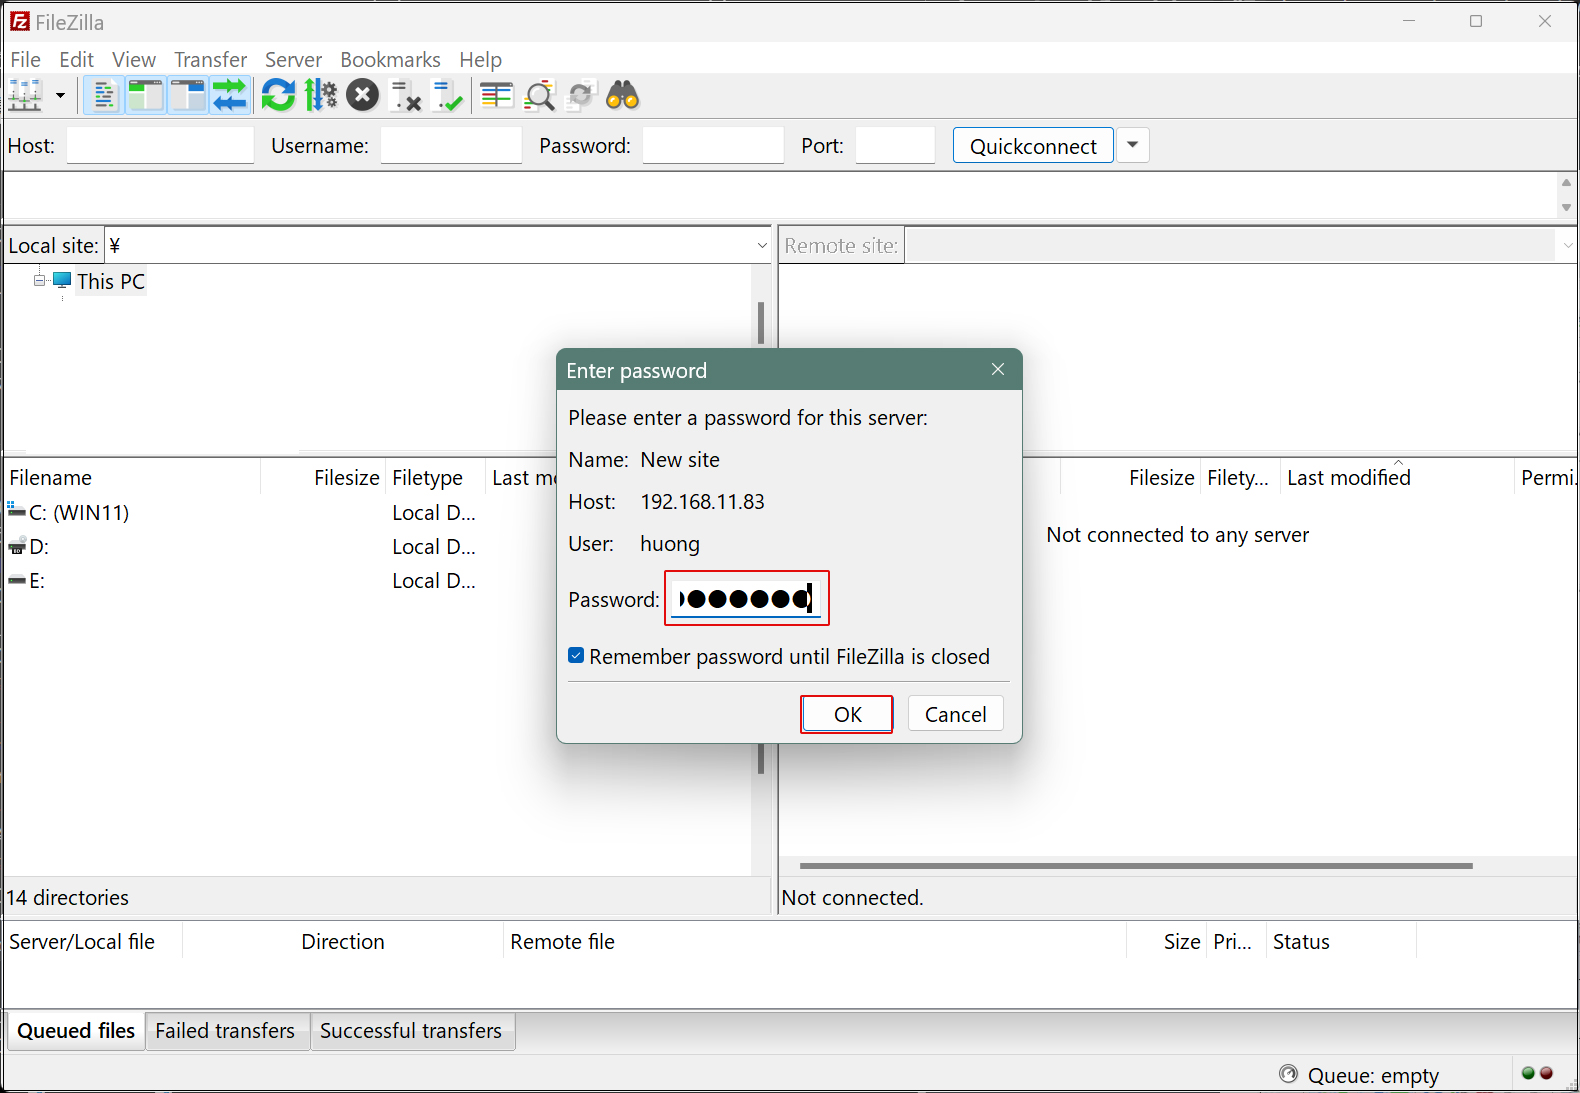
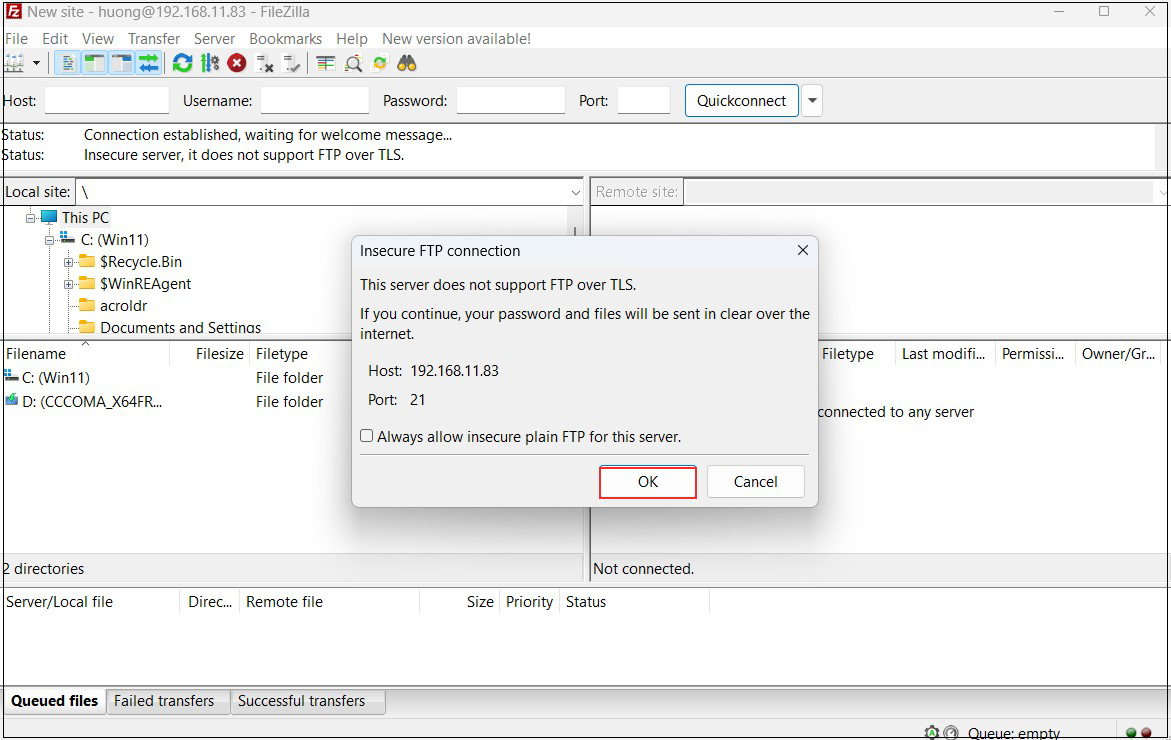
Click "OK" when the following screen appears
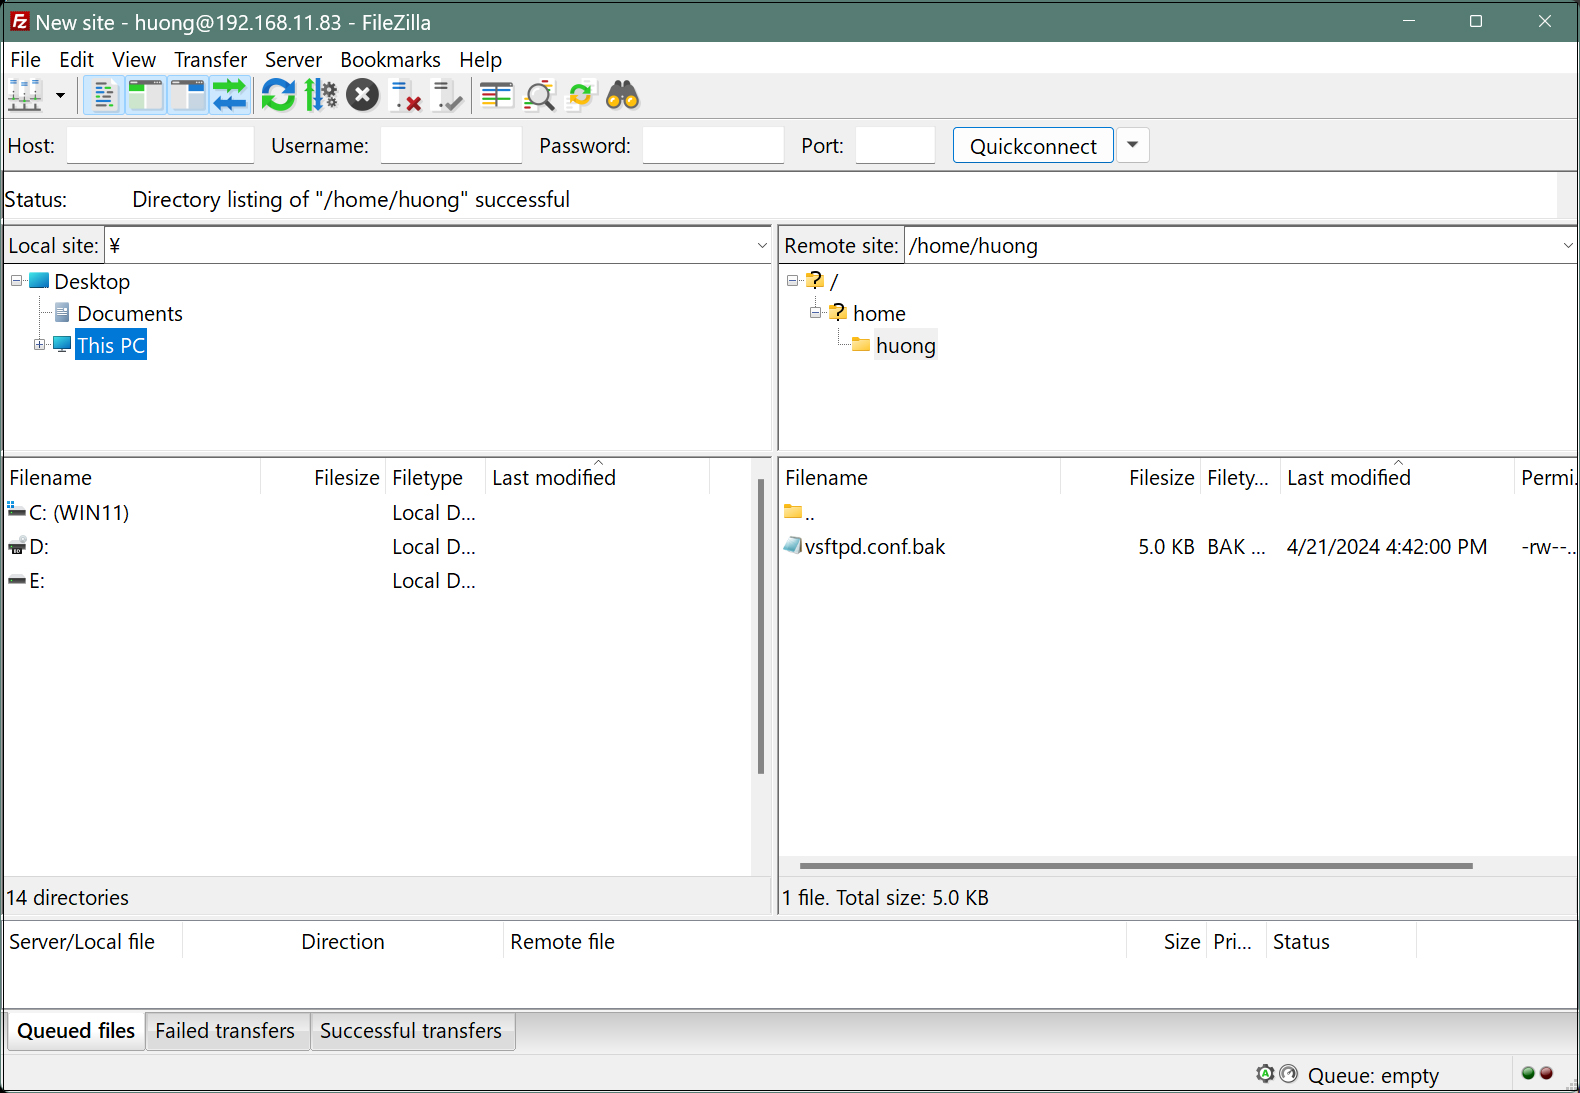
If the connection is successful, the server directory is displayed on the right and the Windows directory on the left.
2. Vsftpd SSL/TLS
Configure Vsftpd to use SSL/TLS
2.1 Create self-signed certificates
This work is not required if you are using a trusted, legitimate certificate such as Let's Encrypt.
# cd /etc/pki/tls/certs
# openssl req -x509 -nodes -newkey rsa:2048 -keyout /etc/pki/tls/certs/vsftpd.pem -out /etc/pki/tls/certs/vsftpd.pem
Generating a RSA private key
........................+++++
..................+++++
writing new private key to '/etc/pki/tls/certs/vsftpd.pem'
-----
You are about to be asked to enter information that will be incorporated
into your certificate request.
What you are about to enter is what is called a Distinguished Name or a DN.
There are quite a few fields but you can leave some blank
For some fields there will be a default value,
If you enter '.', the field will be left blank.
-----
Country Name (2 letter code) [XX]:JP # country code
State or Province Name (full name) []:Osaka # Region (Prefecture)
Locality Name (eg, city) [Default City]:Sakai # City
Organization Name (eg, company) [Default Company Ltd]:private # organization name
Organizational Unit Name (eg, section) []:Admin # department
Common Name (eg, your name or your server's hostname) [] Lepard # Server Host Name
Email Address []: # Administrator's email address
# chmod 600 vsftpd.pem
2.2 Vsftpd Configuration
# vi /etc/vsftpd/vsftpd.conf
●Add to the last line: Enable SSL/TLS
rsa_cert_file=/etc/pki/tls/certs/vsftpd.pem
ssl_enable=YES
force_local_data_ssl=YES
force_local_logins_ssl=YES
If Firewalld is enabled, allow passive ports.
●Add to the last line
# Set passive ports to any range of ports
pasv_enable=YES
pasv_min_port=60000
pasv_max_port=60100
# systemctl restart vsftpd
Allow passive ports in Firewalld
# firewall-cmd --add-port=60000-60100/tcp --permanent
success
# firewall-cmd --reload
success
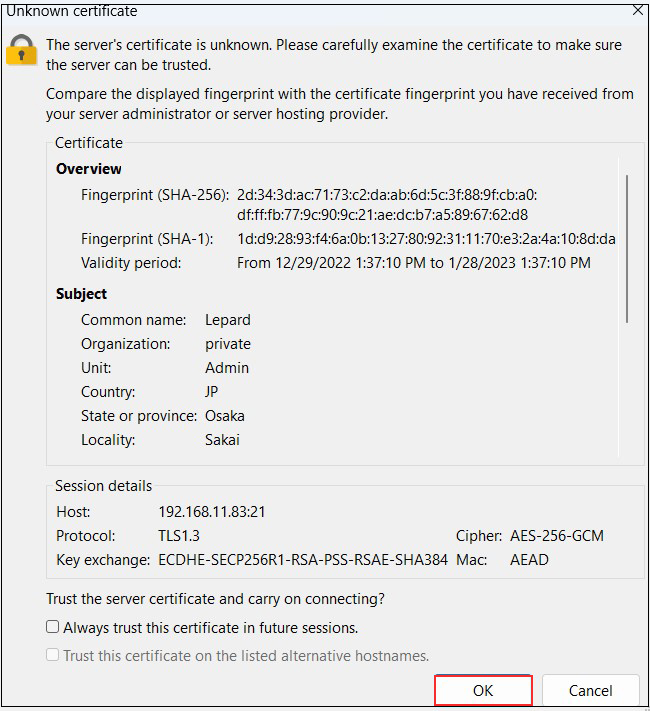
When connecting to FileZilla, the following screen appears, check the box and click "OK" to connect as described above.
3. File server installation with Samba
Build a file server with access rights that requires user authentication with Samba.
Installation Procedure
①Create shared folders with access rights that require user authentication
②Accessible group creation
③Creation of users belonging to accessible groups
④Configuration File Editing
3.1 samba Install
# dnf -y install samba samba-client samba-common
3.2 Create a shared folder (Example:smbshare)
# mkdir /home/smbshare
3.3 Accessible group (Example:smbgroup) creation
# groupadd smbgroup
# chgrp smbgroup /home/smbshare
# chmod 770 /home/smbshare
3.4 Configuration File Edit
# vi /etc/samba/smb.conf
Lines 11-12:
unix charset = UTF-8 # Addendum
dos charset = CP932 # Addendum
workgroup = SAMBA
security = user
# Addendum (Restrict access to internal users only)
hosts allow = 127. 192.168.11.
#Add to the last line
#Set any shared name
[Smbshare]
# Specify a shared folder
path = /home/smbshare
# Allow posting
writable = yes
# Do not allow guest users
guest ok = no
#[smbgroup] Allow access only to the group
valid users = @smbgroup
# Set the group for file creation to [smbgroup]
force group = smbgroup
# Set the permissions to [770] when creating the file.
force create mode = 770
# Set the permissions to [770] when creating folders.
force directory mode = 770
# Inherit permissions from the parent folder
inherit permissions = yes
3.5 Enabling and Starting SMB Automatic Startup
# systemctl enable smb
# systemctl start smb
3.6 User (Example:smbuser) registration, password setting, group registration
# useradd smbuser
# smbpasswd -a smbuser
New SMB password:     # Password Setup
Retype new SMB password:
Added user smbuser.

# usermod -aG smbgroup smbuser
3.7 Firewalld allows Samba services
# firewall-cmd --add-service=samba --permanent
success
# firewall-cmd --reload
success
3.8 Accessing shared directories from Windows 11
Connect from Windows Explorer
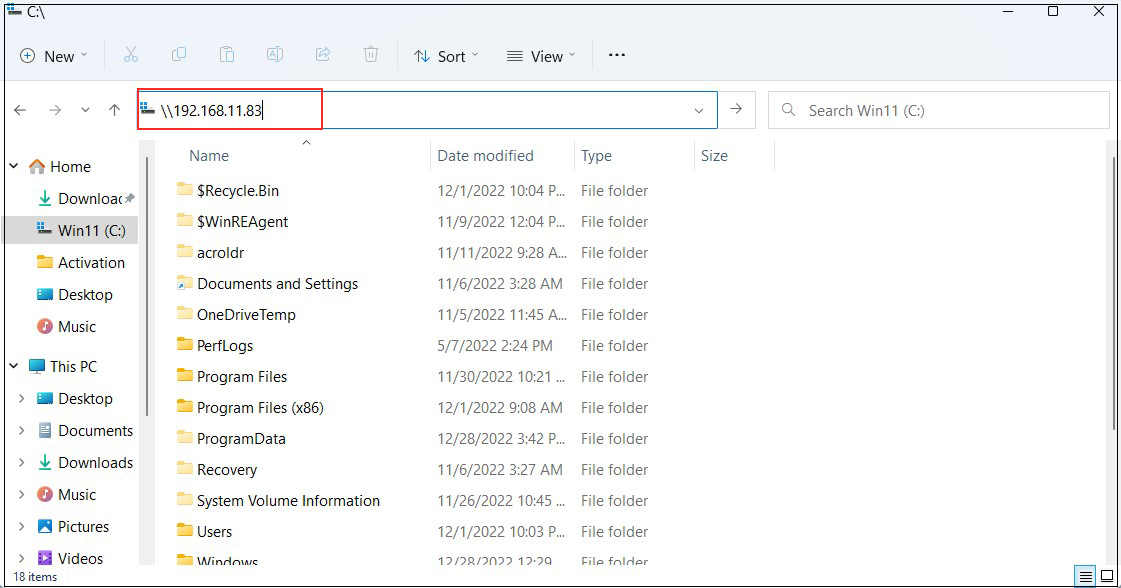
Open File Explorer and enter "\\[server IP]" (in this case 192.168.11.83) in the address field.
Access the server.
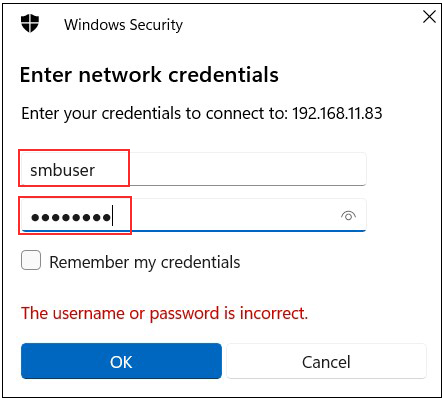
Enter authentication information
User name : User name created in "3.6 User (smbuser) Registration, Password Setting, Group Registration
Password : Password for the above user
Click "OK"
Shared directory information is displayed.