1.FTP Server
1.1 vsftpd Install
# dnf -y install vsftpd
1.2 Vsftpd configuration
Save vsftpd.conf with .bak
# cp /etc/vsftpd/vsftpd.conf /home/huong/vsftpd.conf.org
①Edit configuration file
# vi /etc/vsftpd/vsftpd.conf

Line 12: Anonymous login prohibited (confirmation)
anonymous_enable=NO

Line 39: Log transfer record (confirmation)
xferlog_enable=YES

Lines 82,83 Uncomment ( Allow transfer in ASCII mode )
ascii_upload_enable=YES
ascii_download_enable=YES

Lines 100,101: Uncomment ( chroot enabled )
chroot_local_user=YES
chroot_list_enable=YES

Line 103 Uncomment ( chroot list file specified )
chroot_list_file=/etc/vsftpd/chroot_list

Line 109 Uncomment ( Enable batch transfer by directory )
ls_recurse_enable=YES

Line 114 Change ( Enable IPv4 )
listen=YES

Line 123 Change (IPv6 is ignored)
listen_ipv6=NO

### Add to last line ###
# Use local time
use_localtime=YES
②Add users to allow directory access to upper level
In my case I wrote huong.
# echo "huong" >> /etc/vsftpd/chroot_list
③Specify IP addresses to allow connections in /etc/hosts.allow
192.168.11.0/24 is the setting that allows all local IP addresses in my environment.
# echo "vsftpd:192.168.11.0/24" >> /etc/hosts.allow
Write vsftpd:ALL (deny all connections) in /etc/hosts.deny
# echo "vsftpd:ALL" >> /etc/hosts.deny
This setting overrides hosts.allow. That is, everything is denied, and IP addresses specified in hosts.allow are allowed.
④Enable vsftpd autostart and start it
# systemctl enable vsftpd
# systemctl start vsftpd
⑤Now, from windows side, check if you can connect with FileZilla.
Open the ftp port with firewall before connecting
# firewall-cmd --permanent --add-service=ftp
# firewall-cmd --reload
Start FileZilla and select "Site Manager" from the "File" menu.
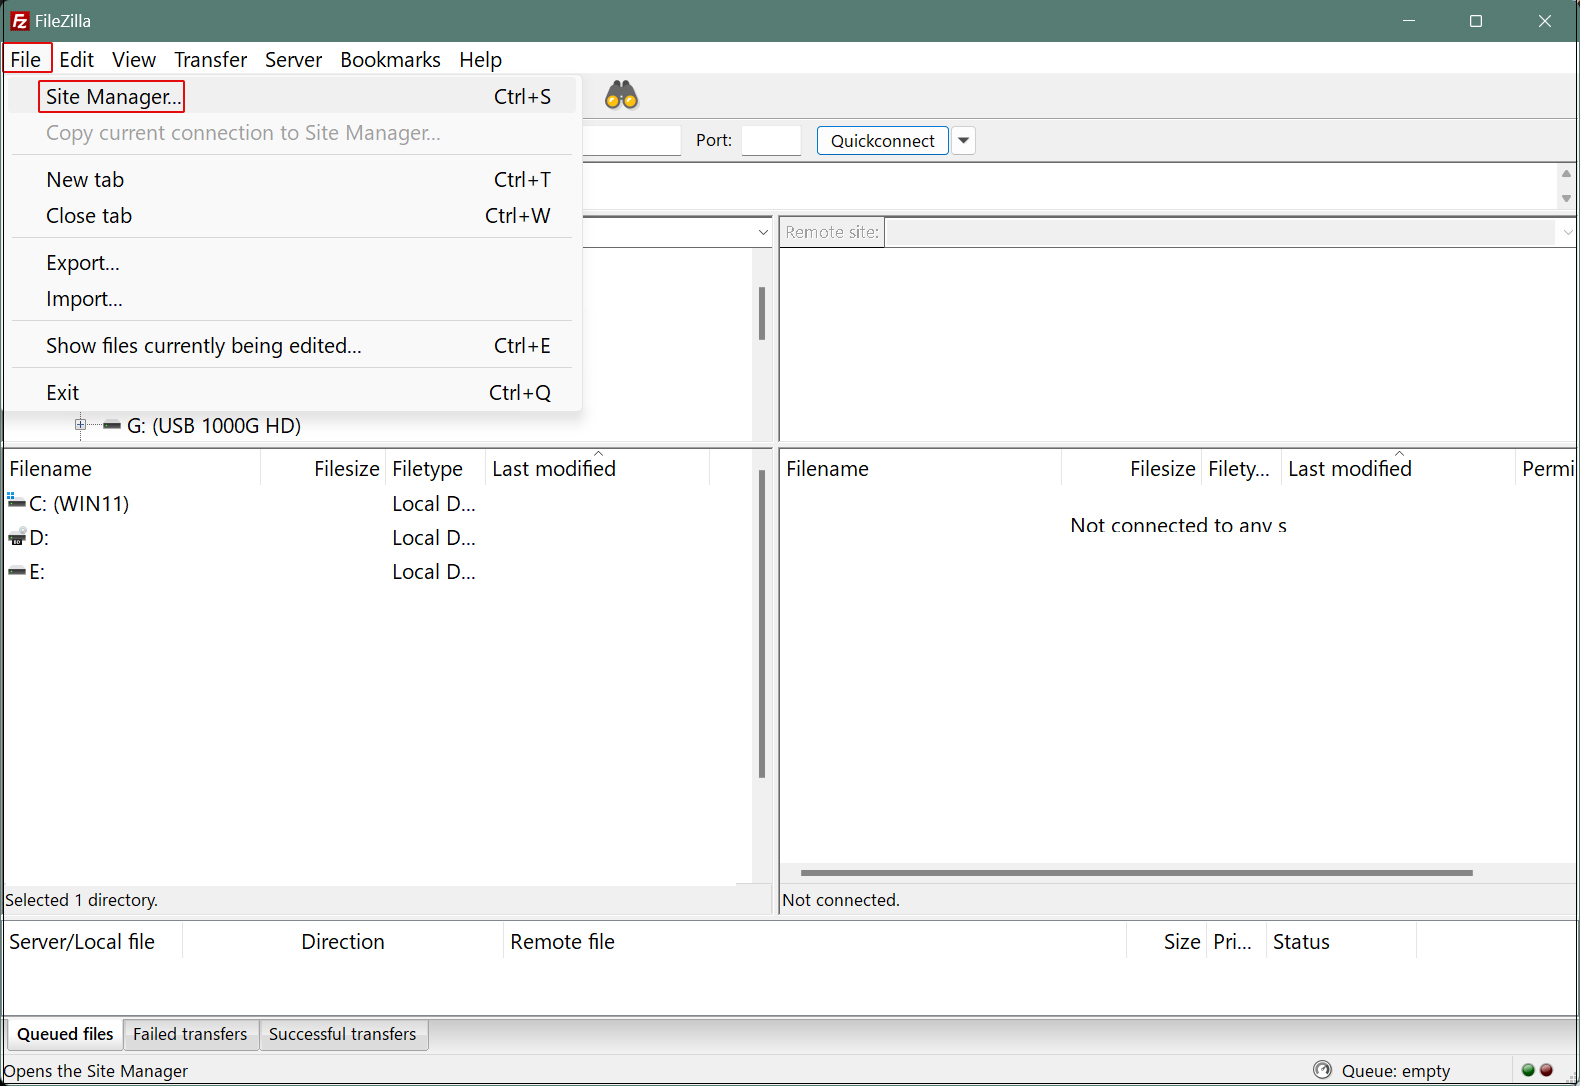
Click on "New site"
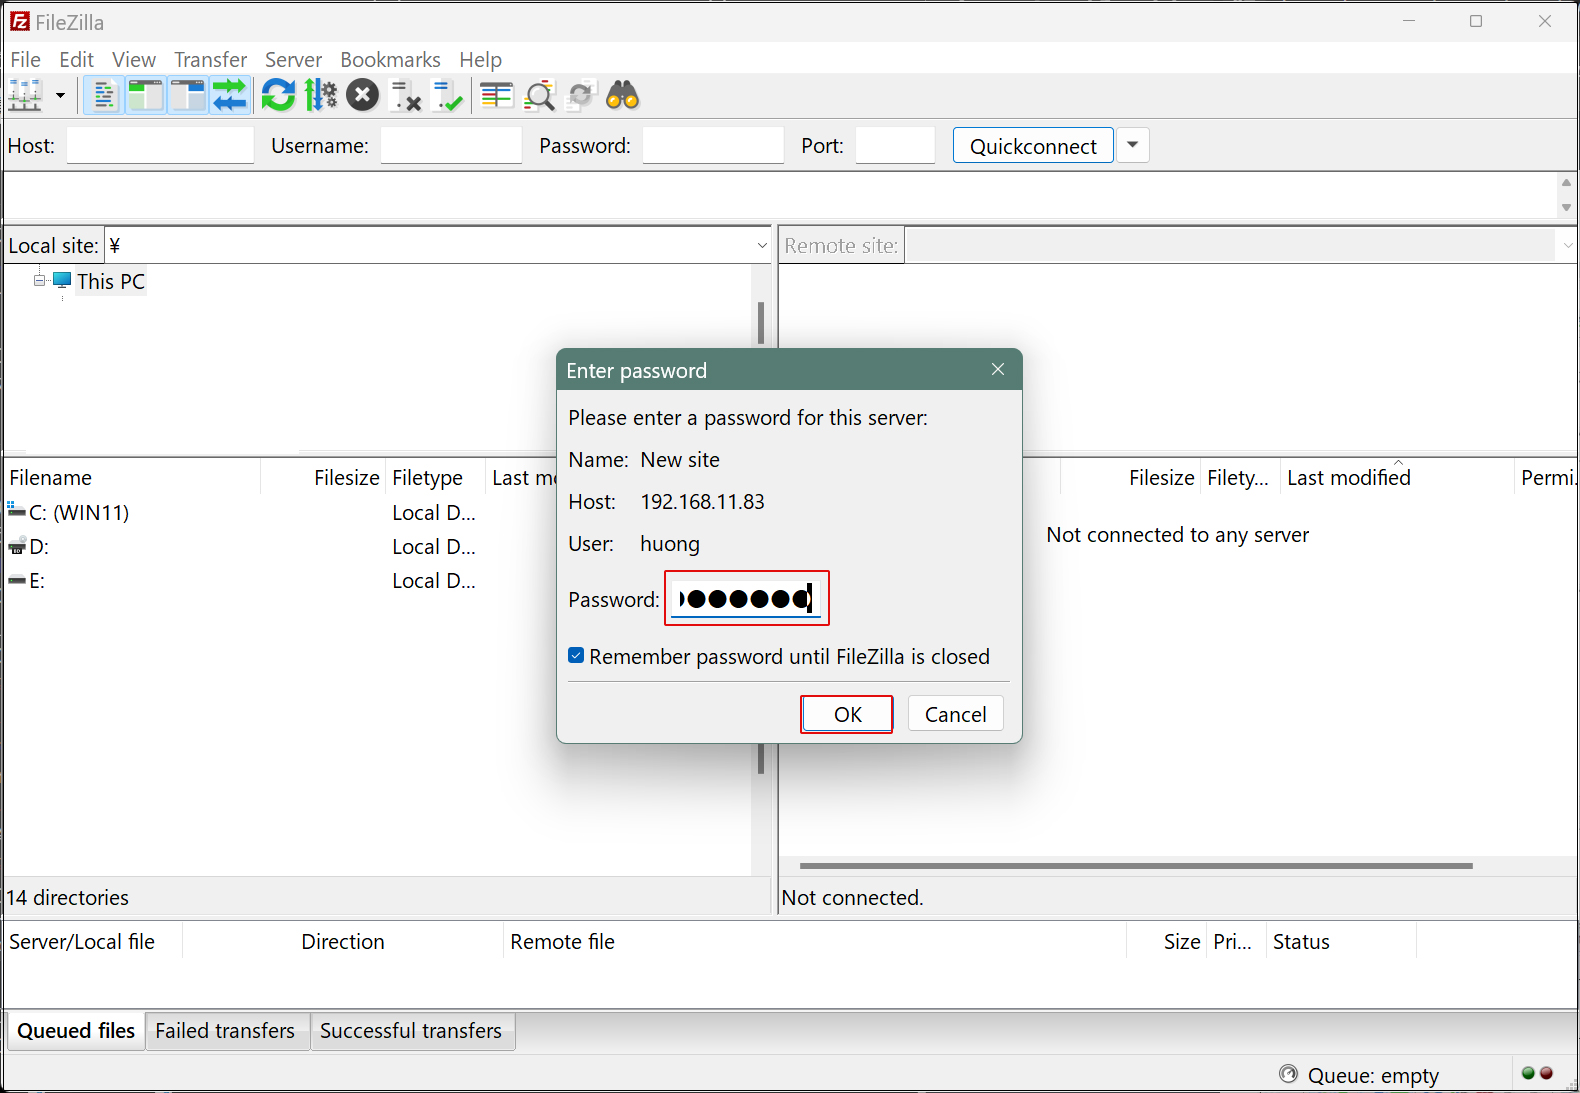
Enter the following settings for each item and click "Connect"
Protocol : FTP-File Transfer Protocol
Host : Server IP Address
Port : (blank.)
Logon Type : Ask for password
User : General user name (server login user)
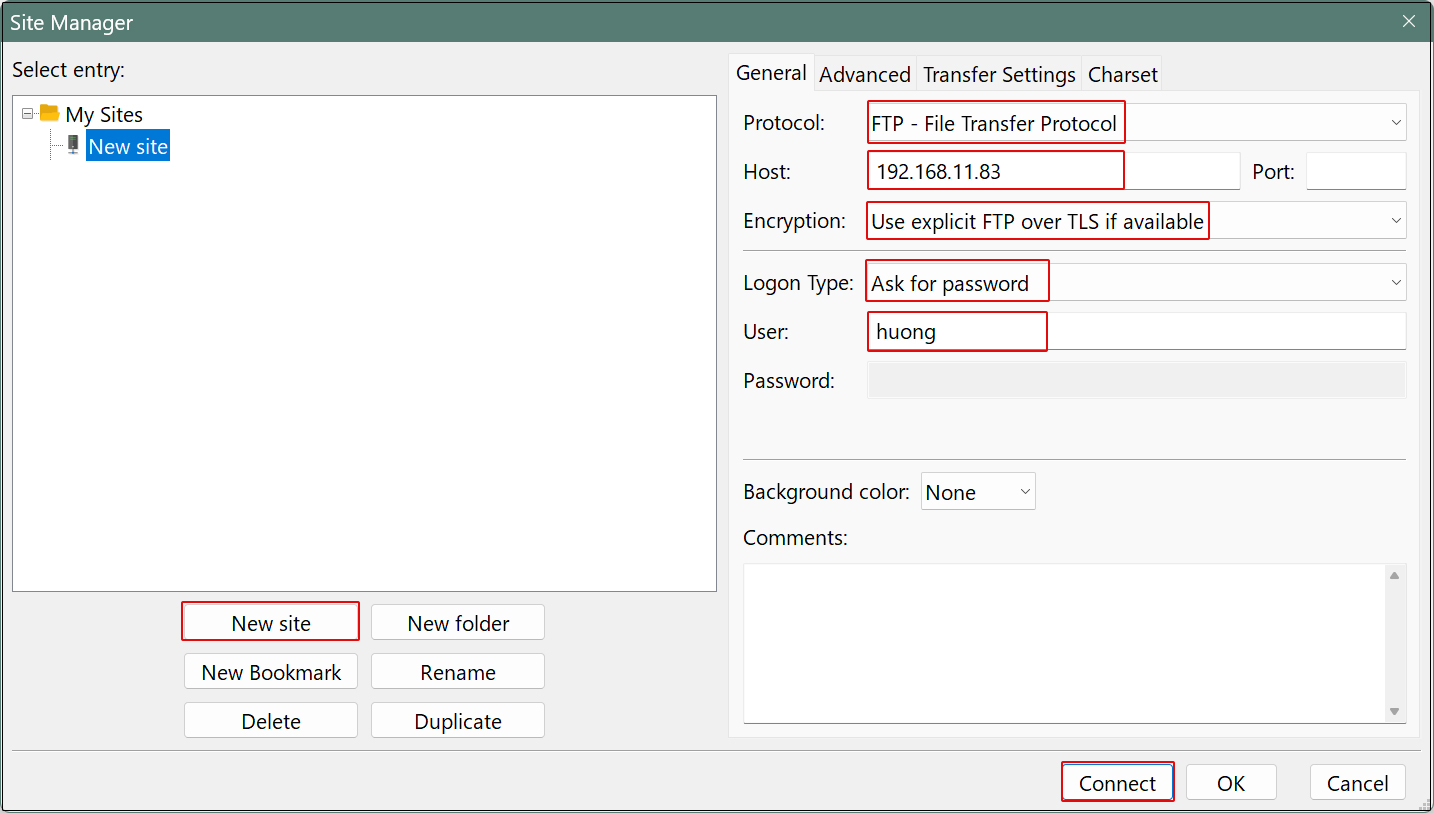
Password : General user (server login user) password
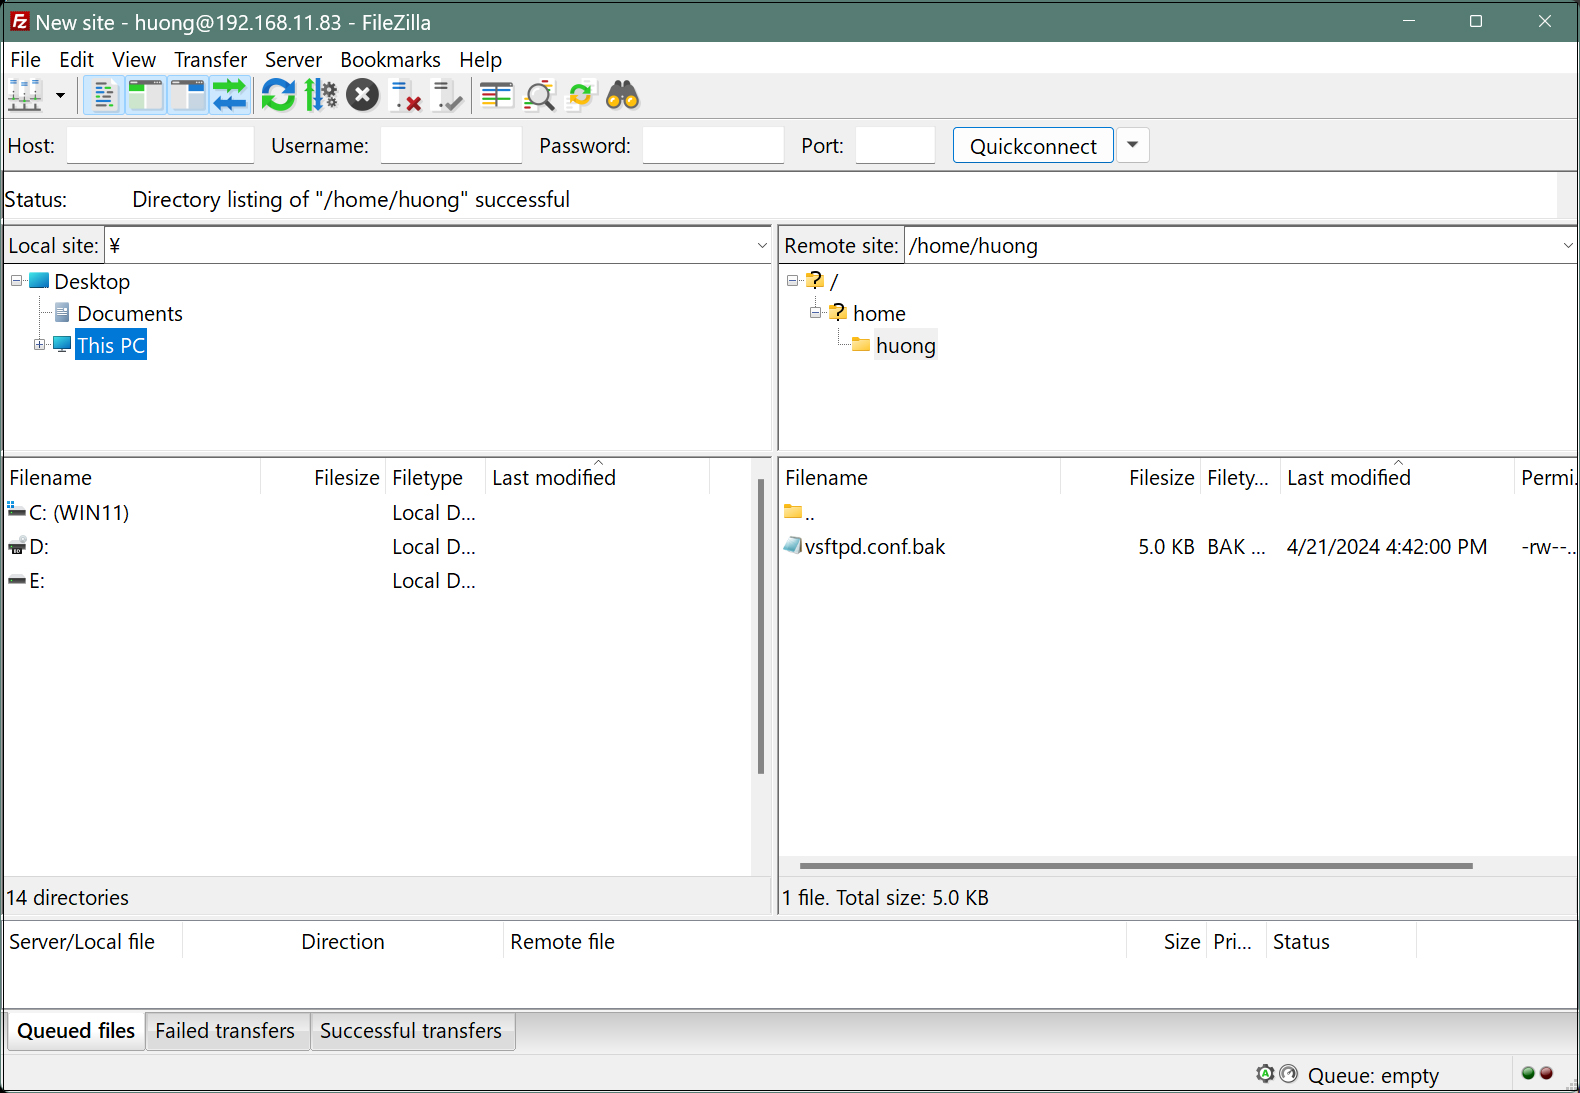
If the connection is successful, the server directory is displayed on the right and the Windows directory on the left.
2. vsftpd SSL/TLS
Configure Vsftpd to use SSL/TLS
2.1 Create self-signed certificates
This work is not required if you are using a trusted, legitimate certificate such as Let's Encrypt.
# cd /etc/pki/tls/certs
# openssl req -x509 -nodes -newkey rsa:2048 -keyout /etc/pki/tls/certs/vsftpd.pem -out /etc/pki/tls/certs/vsftpd.pem
Generating a RSA private key

-----------------------------------------------------------------------------------------------------
You are about to be asked to enter information that will be incorporated
into your certificate request.
What you are about to enter is what is called a Distinguished Name or a DN.
There are quite a few fields but you can leave some blank
For some fields there will be a default value,
If you enter '.', the field will be left blank.
-----
Country Name (2 letter code) [XX]:JP # country code
State or Province Name (full name) []:Osaka # Region (Prefecture)
Locality Name (eg, city) [Default City]:Sakai # City
Organization Name (eg, company) [Default Company Ltd]:private # organization name
Organizational Unit Name (eg, section) []:Admin # Name of organization's department
Common Name (eg, your name or your server's hostname) []: Lepard # Server Host Name
Email Address []: hoge@hoge.com    # Administrator's email address
# chmod 600 vsftpd.pem
2.2 Vsftpd Configuration
# vi /etc/vsftpd/vsftpd.conf

Add to the last line: SSL/TLS Enable
rsa_cert_file=/etc/pki/tls/certs/vsftpd.pem
ssl_enable=YES
force_local_data_ssl=YES
force_local_logins_ssl=YES

Passive ports allowed if Firewalld is enabled
Add to the last line: SSL/TLS Enable
Fixed passive ports in any range of ports
pasv_enable=YES
pasv_min_port=60000
pasv_max_port=60100
# systemctl restart vsftpd
Allow passive ports in Firewalld
# firewall-cmd --add-port=60000-60100/tcp --permanent
# firewall-cmd --reload
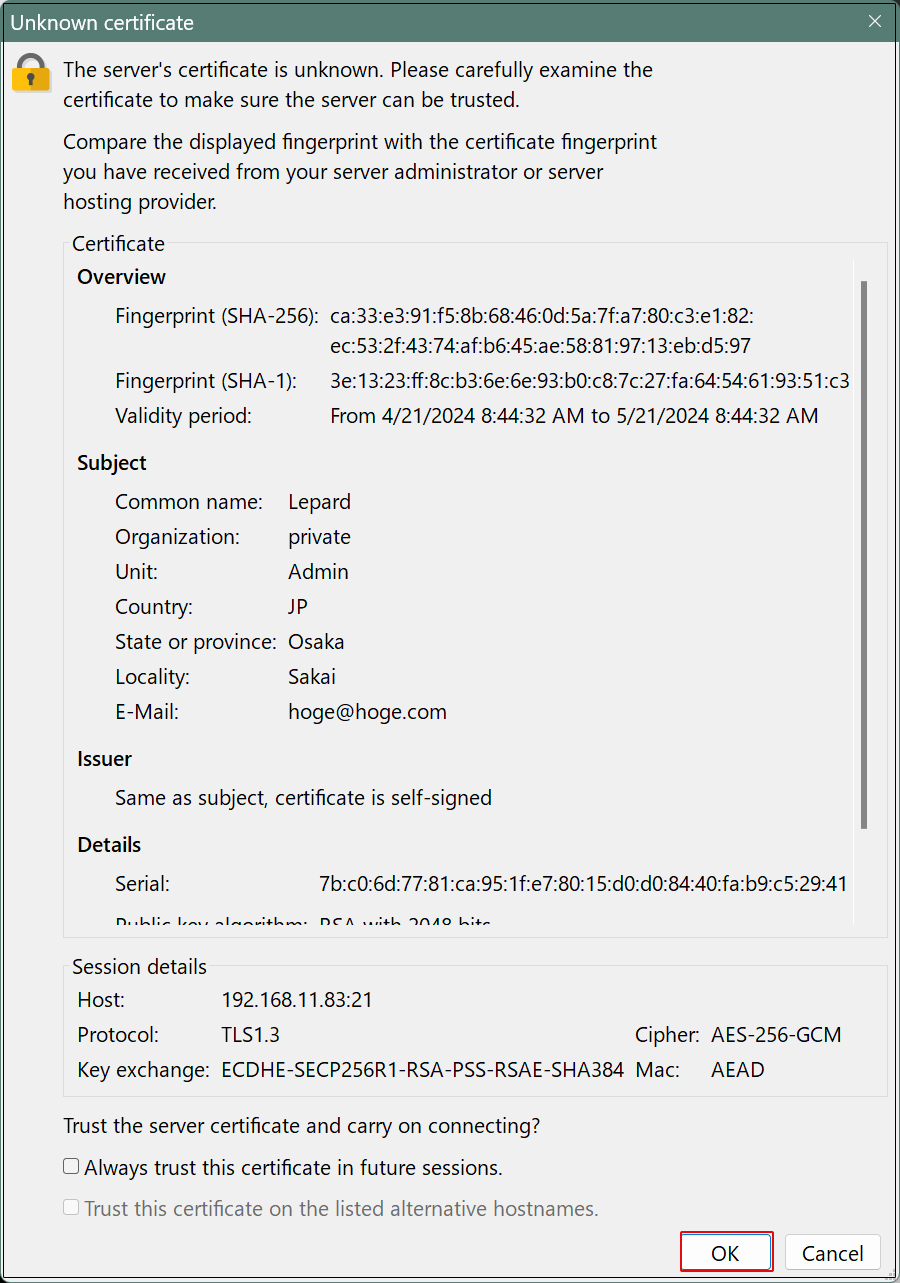
When connecting to FileZilla, the following screen appears, check the box and click "OK" to connect as described above.
3. File server installation with Samba
Build a file server with access rights that requires user authentication with Samba.
Installation Procedure
①Create shared folders with access rights that require user authentication
②Accessible group creation
③Creation of users belonging to accessible groups
④Configuration File Edit
3.1 samba Install
# dnf install samba samba-client samba-common -y
3.2 Create a shared folder (smbshare)
# mkdir /home/smbshare
3.3 Accessible group (smbgroup) creation
# groupadd smbgroup
# chgrp smbgroup /home/smbshare
# chmod 770 /home/smbshare
3.4 Configuration File Edit
# vi /etc/samba/smb.conf

Lines 11-12. :
        unix charset = UTF-8  # Add
        dos charset = CP932   # Add
        workgroup = SAMBA
        security = user
        # Add (Allow access only from the inside)
        hosts allow = 127. 192.168.11.
Add to the last line
Set an arbitrary share name
[Smbshare]
        # Specify a shared folder
        path = /home/smbshare
        # Allow Write
        writable = yes
        # Do not allow guest users
        guest ok = no
        # [smbgroup] Grant access only to groups
        valid users = @smbgroup
        # Set [smbgroup] as the group for file creation
        force group = smbgroup
        # Set file creation permissions to [770].
        force create mode = 770
        # Set permissions to [770] when creating folders
        force directory mode = 770
        # Inherit permissions of upper folders
        inherit permissions = yes
3.5 SMB enable, start
# systemctl enable smb
Created symlink /etc/systemd/system/multi-user.target.wants/smb.service → /usr/lib/systemd/system/smb.service.

# systemctl start smb
3.6 User (smbuser) registration, password setting, group registration
# useradd smbuser
# smbpasswd -a smbuser
New SMB password:     # Password Setting
Retype new SMB password:
Added user smbuser.

# usermod -aG smbgroup smbuser
3.7 Firewalld allows Samba services
# firewall-cmd --add-service=samba --permanent
# firewall-cmd --reload
3.8 Accessing shared directories from Windows 11
Connect from Windows Explorer
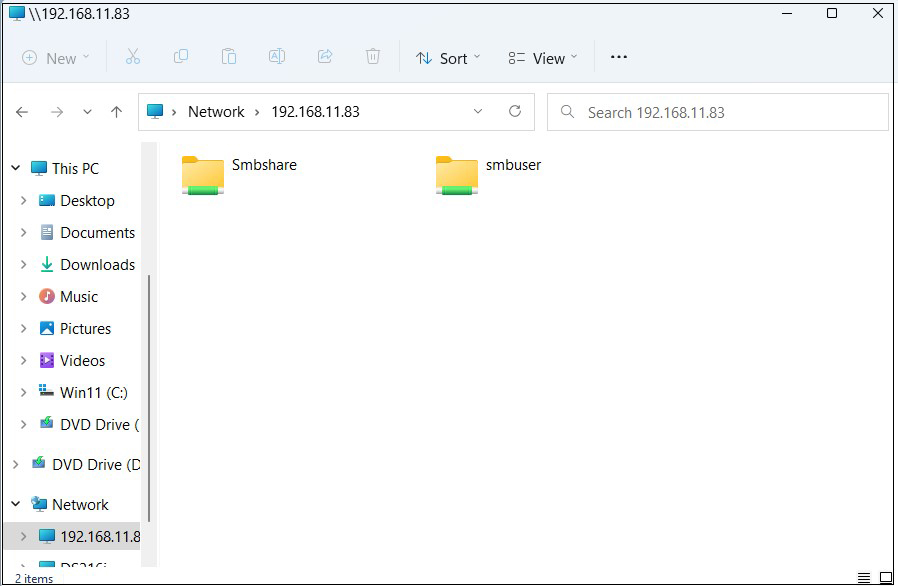
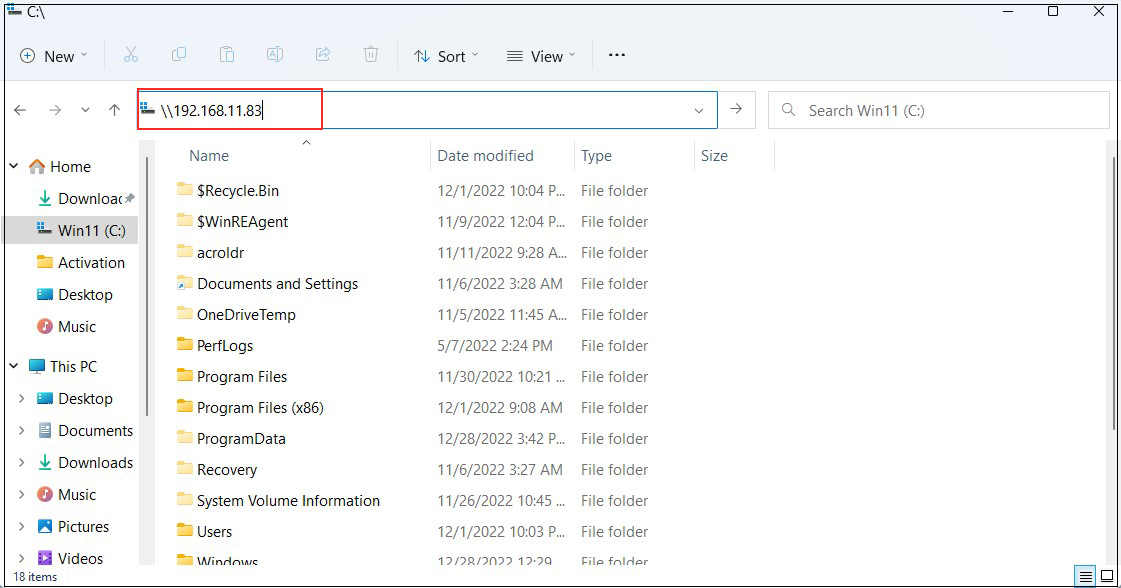
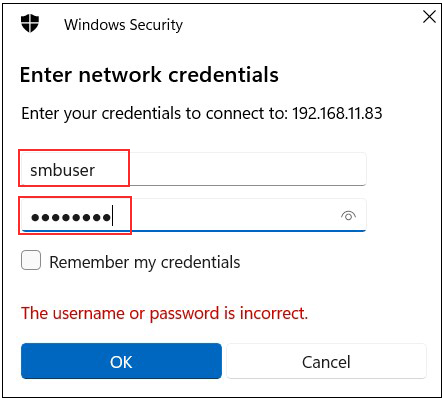
Open File Explorer and enter "\\<server IP address>" (in this case 192.168.11.83) in the address field.
Access the server.
Enter authentication information
User name : User name created in "3.6 User (smbuser) Registration, Password Setting, Group Registration
Password : Password for the above user
Click "OK"
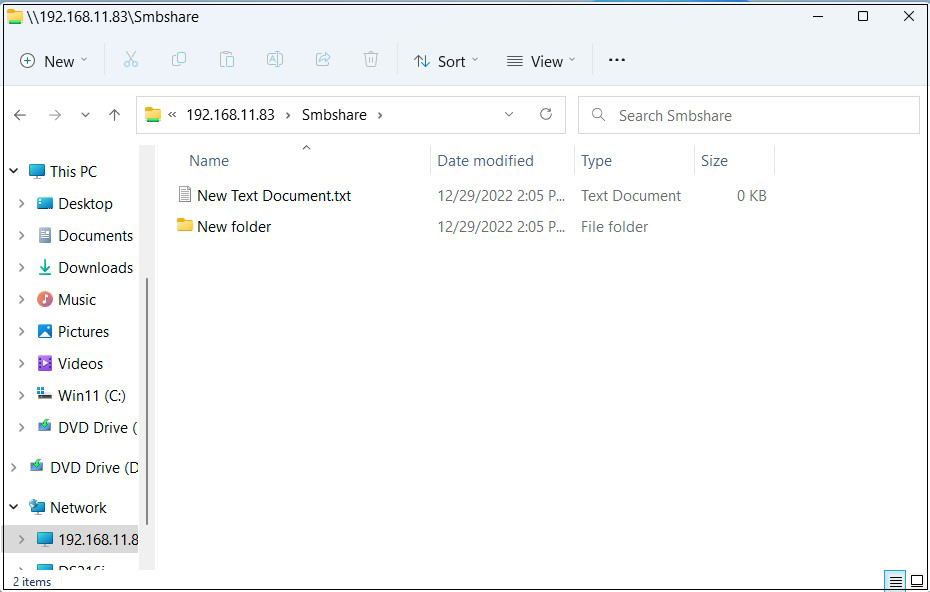
Shared directory information is displayed.