

Prerequisites
1.Suricata
SURICATA IDS/IPS is an open source IDS that monitors communications on the network and detects suspicious traffic.
The basic mechanism is signature-based, so it can detect predefined unauthorized communications. Suricata is also characterized by its ability to provide protection as well as detection.
2.Elastic Stack,Kibana,Filebeat
Install and configure the Elastic Stack so you can visualize and search SURICATA logs using Kibana and Filebeat
In this session, we will install Suricata IDS and ElasticStack on the following server:
・First Server Suricata IDS & Filebeat : openSUSE Tumbleweed (192.168.11.83)
・Second server Elasticsearch & kibana : openSUSE Tumbleweed (192.168.11.85)
First Server : Suricata Install
1.Suricata Installation and Configuration
①Suricata Install
# zypper addrepo https://download.opensuse.org/repositories/server:monitoring/openSUSE_Tumbleweed/server:monitoring.repo
# zypper refresh
# zypper -n install suricata

Version Check
# suricata -V
his is Suricata version 8.0.6 RELEASE
②Determine interface and IP address where Suricata will inspect network packets
# ip --brief add
lo               UNKNOWN        127.0.0.1/8 ::1/128
ens33            UP             192.168.11.83/24 fe80::20c:29ff:fe2e:4273/64
③Edit the configuration file
# vi /etc/suricata/suricata.yaml

Line 18 : Comment it out and add it below it(In the vars section, define the network.)
#HOME_NET: "[192.168.0.0/16,10.0.0.0/8,172.16.0.0/12]"
HOME_NET: "[192.168.11.0/24]"

Per Line 158 : Change
community-id: false → community-id: true

Per Line 661 : Set the interface name for the af-packet section
af-packet:
    - interface: ens33
# vi /etc/sysconfig/suricata

# Line 8: Specify the interface
 SURICATA_OPTIONS="-c /etc/suricata/suricata.yaml -i ens33"
④Suricata rules update
# suricata-update
⑤Activate Suricata
# systemctl start suricata
# systemctl enable --now suricata
Created symlink '/etc/systemd/system/multi-user.target.wants/suricata.service' → '/usr/lib/systemd/system/suricata.service'.
⑥Confirm Suricata startup
# systemctl status suricata

● suricata.service - Suricata Intrusion Detection and Prevention Tool
     Loaded: loaded (/usr/lib/systemd/system/suricata.service; enabled; preset: disabled)
     Active: active (running) since Wed 2026-08-05 10:34:29 JST; 25s ago
 Invocation: b08dd76b73b0443f9bd6d51f63fc4e0a
       Docs: man:suricata(1)
   Main PID: 3914 (Suricata-Main)
      Tasks: 8 (limit: 6074)
        CPU: 310ms
     CGroup: /system.slice/suricata.service
             mq3914 /usr/bin/suricata -c /etc/suricata/suricata.yaml -i ens33

Aug 05 10:34:29 Lepard systemd[1]: Started Suricata Intrusion Detection and Prevention Tool.
Aug 05 10:34:29 Lepard suricata[3914]: i: suricata: This is Suricata version 8.0.6 RELEASE running in SYSTEM mode
Aug 05 10:34:30 Lepard suricata[3914]: W: detect: No rule files match the pattern /var/lib/suricata/rules/suricata.rules
Aug 05 10:34:30 Lepard suricata[3914]: W: detect: 1 rule files specified, but no rules were loaded!
Aug 05 10:34:30 Lepard suricata[3914]: W: mpm-hs: Failed to create Hyperscan cache folder, make sure the  parent folder is writeable or adju>
Aug 05 10:34:30 Lepard suricata[3914]: i: threads: Threads created -> W: 2 FM: 1 FR: 1   Engine started.
Check Log
# tail /var/log/suricata/suricata.log

[7140 - Suricata-Main] 2026-08-05 13:53:28 Info: logopenfile: stats output device (regular) initialized: stats.log
[7140 - Suricata-Main] 2026-08-05 13:53:28 Warning: detect: No rule files match the pattern /var/lib/suricata/rules/suricata.rules
[7140 - Suricata-Main] 2026-08-05 13:53:28 Warning: detect: 1 rule files specified, but no rules were loaded!
[7140 - Suricata-Main] 2026-08-05 13:53:28 Info: threshold-config: Threshold config parsed: 0 rule(s) found
[7140 - Suricata-Main] 2026-08-05 13:53:28 Info: detect: 0 signatures processed. 0 are IP-only rules, 0 are inspecting packet payload, 0 inspect application layer, 0 are decoder event only
[7140 - Suricata-Main] 2026-08-05 13:53:28 Warning: mpm-hs: Failed to create Hyperscan cache folder, make sure the  parent folder is writeable or adjust sgh-mpm-caching-path setting (/var/lib/suricata/cache/sgh)
[7140 - Suricata-Main] 2026-08-05 13:53:28 Info: unix-manager: unix socket '/var/run/suricata/suricata-command.socket'
[7140 - Suricata-Main] 2026-08-05 13:53:28 Info: runmodes: ens33: creating 2 threads
[7145 - W#01-ens33] 2026-08-05 13:53:28 Info: ioctl: ens33: MTU 1500
[7140 - Suricata-Main] 2026-08-05 13:53:28 Notice: threads: Threads created -> W: 2 FM: 1 FR: 1   Engine started.
Check the stats.log file for statistics (updated every 8 seconds by default)
# tail -f /var/log/suricata/stats.log
A more advanced output, EVE JSON, can be generated with the following command
# tail -f /var/log/suricata/eve.json
2.Suricata Testing
①Run ping test with curl utility
# curl http://testmynids.org/uid/index.html
uid=0(root) gid=0(root) groups=0(root)
② Check the log file using the specified rule number
Suricata comes with the following two log files, which are enabled by default.
/var/log/suricata/fast.log
/var/log/suricata/eve.log
To check the log entries corresponding to curl requests, use the grep command to examine the /var/log/suricata/fast.log file. Search for log entries using rule identifier 2100498. (For IPv4)
# grep 2100498 /var/log/suricata/fast.log

08/05/2026-14:04:21.310533  [**] [1:2100498:7] GPL ATTACK_RESPONSE id check returned root [**] [Classification: Potentially Bad Traffic] [Priority: 2] {TCP} 13.227.50.36:80 -> 192.168.11.83:53146
③ Check the events in /var/log/suricata/eve.log
Install jq
# zypper -n install jq
Search for signature 2100498 to filter events in the EVE log
Display alert objects with a signature_id key that matches the value of 2100498
# jq 'select(.alert .signature_id==2100498)' /var/log/suricata/eve.json

{
  "timestamp": "2026-08-05T14:04:21.310533+0900",
  "flow_id": 1546017292858723,
  "in_iface": "ens33",
  "event_type": "alert",
  "src_ip": "13.227.50.36",
  "src_port": 80,
  "dest_ip": "192.168.11.83",
  "dest_port": 53146,
  "proto": "TCP",
  "ip_v": 4,
  "pkt_src": "wire/pcap",
  "community_id": "1:0Zq5OGShZnb5IwZpKEzG9b8VRXk=",
  "alert": {
    "action": "allowed",
    "gid": 1,
    "signature_id": 2100498,
    "rev": 7,
    "signature": "GPL ATTACK_RESPONSE id check returned root",
    "category": "Potentially Bad Traffic",
    "severity": 2,
    "metadata": {
      "confidence": [
        "Medium"
      ],
      "created_at": [
        "2010_09_23"
      ],
      "signature_severity": [
        "Informational"
      ],
      "updated_at": [
        "2019_07_26"
      ]
    }
  },
  "app_proto": "http",
  "direction": "to_client",
  "flow": {
    "pkts_toserver": 6,
    "pkts_toclient": 5,
    "bytes_toserver": 496,
    "bytes_toclient": 874,
    "start": "2026-08-05T14:04:21.294424+0900",
    "src_ip": "192.168.11.83",
    "dest_ip": "13.227.50.36",
    "src_port": 53146,
    "dest_port": 80
  }
}
3.Setting Suricata Rules
①Display of rule sets packaged in Suricata
# ls -al /var/lib/suricata/rules/
total 44024
drwxr-x--- 1 suricata suricata       70 Aug  5 13:53 .
drwxr-x--- 1 suricata suricata       32 Aug  5 13:51 ..
-rw-r--r-- 1 suricata suricata     3228 Aug  5 13:53 classification.config
-rw-r--r-- 1 suricata suricata 45073778 Aug  5 13:53 suricata.rules
②Index list of sources providing rule sets
# suricata-update list-sources

Name: et/open
  Vendor: Proofpoint
  Summary: Emerging Threats Open Ruleset
  License: MIT
Name: et/pro
  Vendor: Proofpoint
  Summary: Emerging Threats Pro Ruleset
  License: Commercial
  Replaces: et/open
  Parameters: secret-code
  Subscription: https://www.proofpoint.com/us/threat-insight/et-pro-ruleset
Name: oisf/trafficid
  Vendor: OISF
  Summary: Suricata Traffic ID ruleset
  License: MIT
Name: scwx/enhanced
  Vendor: Secureworks
  Summary: Secureworks suricata-enhanced ruleset
  License: Commercial
  Parameters: secret-code
  Subscription: https://www.secureworks.com/contact/ (Please reference CTU Countermeasures)
Name: scwx/malware
  Vendor: Secureworks
  Summary: Secureworks suricata-malware ruleset
  License: Commercial
  Parameters: secret-code
  Subscription: https://www.secureworks.com/contact/ (Please reference CTU Countermeasures)
Name: scwx/security
  Vendor: Secureworks
  Summary: Secureworks suricata-security ruleset
  License: Commercial
  Parameters: secret-code
  Subscription: https://www.secureworks.com/contact/ (Please reference CTU Countermeasures)
Name: abuse.ch/sslbl-blacklist
  Vendor: Abuse.ch
  Summary: Abuse.ch SSL Blacklist
  License: CC0-1.0
  Replaces: sslbl/ssl-fp-blacklist
Name: abuse.ch/sslbl-ja3
  Vendor: Abuse.ch
  Summary: Abuse.ch Suricata JA3 Fingerprint Ruleset
  License: CC0-1.0
  Replaces: sslbl/ja3-fingerprints
Name: abuse.ch/feodotracker
  Vendor: Abuse.ch
  Summary: Abuse.ch Feodo Tracker Botnet C2 IP ruleset
  License: CC0-1.0
Name: abuse.ch/urlhaus
  Vendor: abuse.ch
  Summary: Abuse.ch URLhaus Suricata Rules
  License: CC0-1.0
Name: etnetera/aggressive
  Vendor: Etnetera a.s.
  Summary: Etnetera aggressive IP blacklist
  License: MIT
Name: tgreen/hunting
  Vendor: tgreen
  Summary: Threat hunting rules
  License: GPLv3
Name: stamus/lateral
  Vendor: Stamus Networks
  Summary: Lateral movement rules
  License: GPL-3.0-only
Name: stamus/nrd-30-open
  Vendor: Stamus Networks
  Summary: Newly Registered Domains Open only - 30 day list, complete
  License: Commercial
  Parameters: secret-code
  Subscription: https://www.stamus-networks.com/stamus-labs/subscribe-to-threat-intel-feed
Name: stamus/nrd-14-open
  Vendor: Stamus Networks
  Summary: Newly Registered Domains Open only - 14 day list, complete
  License: Commercial
  Parameters: secret-code
  Subscription: https://www.stamus-networks.com/stamus-labs/subscribe-to-threat-intel-feed
Name: stamus/nrd-entropy-30-open
  Vendor: Stamus Networks
  Summary: Newly Registered Domains Open only - 30 day list, high entropy
  License: Commercial
  Parameters: secret-code
  Subscription: https://www.stamus-networks.com/stamus-labs/subscribe-to-threat-intel-feed
Name: stamus/nrd-entropy-14-open
  Vendor: Stamus Networks
  Summary: Newly Registered Domains Open only - 14 day list, high entropy
  License: Commercial
  Parameters: secret-code
  Subscription: https://www.stamus-networks.com/stamus-labs/subscribe-to-threat-intel-feed
Name: stamus/nrd-phishing-30-open
  Vendor: Stamus Networks
  Summary: Newly Registered Domains Open only - 30 day list, phishing
  License: Commercial
  Parameters: secret-code
  Subscription: https://www.stamus-networks.com/stamus-labs/subscribe-to-threat-intel-feed
Name: stamus/nrd-phishing-14-open
  Vendor: Stamus Networks
  Summary: Newly Registered Domains Open only - 14 day list, phishing
  License: Commercial
  Parameters: secret-code
  Subscription: https://www.stamus-networks.com/stamus-labs/subscribe-to-threat-intel-feed
Name: pawpatrules
  Vendor: pawpatrules
  Summary: PAW Patrules is a collection of rules for IDPS / NSM Suricata engine
  License: CC-BY-SA-4.0
Name: ptrules/open
  Vendor: Positive Technologies
  Summary: Positive Technologies Open Ruleset
  License: Custom
Name: aleksibovellan/nmap
  Vendor: aleksibovellan
  Summary: Suricata IDS/IPS Detection Rules Against NMAP Scans
  License: MIT
Name: ipfire/dbl
  Vendor: IPFire
  Summary: IPFire DBL
  License: CC-BY-SA-4.0
Name: julioliraup/antiphishing
  Vendor: julioliraup
  Summary: Antiphishing for protection against phishing attacks
  License: GPL-3.0
Name: the-hunters-ledger/open
  Vendor: The Hunters Ledger
  Summary: The Hunters Ledger threat-intelligence detection feed
  License: CC-BY-4.0
③Enable source (if tgreen/hunting is enabled)
# suricata-update enable-source tgreen/hunting

5/8/2026 -- 14:25:12 - <Info> -- Using data-directory /var/lib/suricata.
5/8/2026 -- 14:25:12 - <Info> -- Using Suricata configuration /etc/suricata/suricata.yaml
5/8/2026 -- 14:25:12 - <Info> -- Using /usr/share/suricata/rules for Suricata provided rules.
5/8/2026 -- 14:25:12 - <Info> -- Found Suricata version 8.0.4 at /usr/sbin/suricata.
5/8/2026 -- 14:25:12 - <Warning> -- Source index does not exist, will use bundled one.
5/8/2026 -- 14:25:12 - <Warning> -- Please run suricata-update update-sources.
5/8/2026 -- 14:25:12 - <Info> -- Creating directory /var/lib/suricata/update/sources
5/8/2026 -- 14:25:12 - <Info> -- Enabling default source et/open
5/8/2026 -- 14:25:12 - <Info> -- Source tgreen/hunting enabled
Perform update
# suricata-update update-sources
Restart Suricata service
# systemctl restart suricata
4. Creating Suricata Custom Rules
①Create files containing customer rules
# vi /var/lib/suricata/rules/local.rules
Please include the following information
alert icmp any any -> any any (msg:"ICMP Ping"; sid:100000; rev:1;)
②Edit configuration file (define new rule paths)
# vi /etc/suricata/suricata.yaml

# Add around line 2332
default-rule-path: /var/lib/suricata/rules

rule-files:
  - suricata.rules
  - local.rules
③Testing the configuration file
# suricata -T -c /etc/suricata/suricata.yaml -v

Notice: suricata: This is Suricata version 8.0.6 RELEASE running in SYSTEM mode
Info: cpu: CPUs/cores online: 2
Info: suricata: Running suricata under test mode
Info: suricata: Setting engine mode to IDS mode by default
Info: exception-policy: master exception-policy set to: auto
Info: logopenfile: fast output device (regular) initialized: fast.log
Info: logopenfile: eve-log output device (regular) initialized: eve.json
Info: logopenfile: stats output device (regular) initialized: stats.log
Info: detect: 2 rule files processed. 52201 rules successfully loaded, 0 rules failed, 0 rules skipped
Info: threshold-config: Threshold config parsed: 0 rule(s) found
Info: detect: 52206 signatures processed. 1309 are IP-only rules, 4510 are inspecting packet payload, 46151 inspect application layer, 110 are decoder event only
Notice: suricata: Configuration provided was successfully loaded. Exiting.
Restart Suricat service
# systemctl restart suricata
④Testing the application of Custom Rules
Ping another device on the same local network to see if it was logged
# cat /var/log/suricata/fast.log

08/05/2026-14:31:48.670855  [**] [1:100000:1] ICMP Ping [**] [Classification: (null)] [Priority: 3] {ICMP} 192.168.11.14:8 -> 192.168.11.83:0
08/05/2026-14:31:48.670904  [**] [1:100000:1] ICMP Ping [**] [Classification: (null)] [Priority: 3] {ICMP} 192.168.11.83:0 -> 192.168.11.14:0
Execute the following command to ping another device on the same local network
# tail -f /var/log/suricata/eve.json | jq 'select(.event_type=="alert")'
When you run `ping`, the following is displayed on the console:
{
  "timestamp": "2026-05-01T10:03:19.914396+0900",
  "flow_id": 2238258836857160,
  "in_iface": "ens160",
  "event_type": "alert",
  "src_ip": "192.168.11.83",
  "dest_ip": "192.168.11.6",
  "proto": "ICMP",
  "ip_v": 4,
  "icmp_type": 0,
  "icmp_code": 0,
  "pkt_src": "wire/pcap",
  "alert": {
    "action": "allowed",
    "gid": 1,
    "signature_id": 100000,
    "rev": 1,
    "signature": "ICMP Ping",
    "category": "",
    "severity": 3
  },
  "direction": "to_client",
  "flow": {
    "pkts_toserver": 2,
    "pkts_toclient": 1,
    "bytes_toserver": 148,
    "bytes_toclient": 74,
    "start": "2026-05-01T10:03:19.914351+0900",
    "src_ip": "192.168.11.6",
    "dest_ip": "192.168.11.83"
  }
}
5. Configuring Suricata as an IPS
Configure Suricata to start in IPS mode to drop malicious network traffic.
①Edit the SURICATA configuration file located at /etc/sysconfig/suricata
# vi /etc/sysconfig/suricata

Line 9 : Add this as a comment, and add the following below it (to instruct SURICATA to run in IPS mode)
#SURICATA_OPTIONS="-c /etc/suricata/suricata.yaml -i ens33"
SURICATA_OPTIONS="-c /etc/suricata/suricata.yaml -q 0 -vvv "
➁Restart Suricata
# systemctl daemon-reload
# systemctl restart suricata.service
Check Status
# systemctl status suricata.service

● suricata.service - Suricata Intrusion Detection and Prevention Tool
     Loaded: loaded (/usr/lib/systemd/system/suricata.service; enabled; preset: disabled)
     Active: active (running) since Wed 2026-08-05 14:46:04 JST; 19s ago
 Invocation: 71ea87865bb24f79b28694899590903d
       Docs: man:suricata(1)
   Main PID: 8203 (Suricata-Main)
      Tasks: 10 (limit: 4537)
        CPU: 17.322s
     CGroup: /system.slice/suricata.service
             mq8203 /usr/bin/suricata -c /etc/suricata/suricata.yaml -q 0 -vvv

Aug 05 14:46:21 Lepard suricata[8203]: [8203] Perf: mpm-hs-cache: rule group caching - loaded: 117 newly cached: 0 total cacheable: 117
Aug 05 14:46:21 Lepard suricata[8203]: [8203] Info: unix-manager: unix socket '/var/run/suricata/suricata-command.socket'
Aug 05 14:46:21 Lepard suricata[8203]: [8203] Config: tmqh-flow: AutoFP mode using "Hash" flow load balancer
Aug 05 14:46:21 Lepard suricata[8203]: [8212] Info: nfq: binding this thread 0 to queue '0'
Aug 05 14:46:21 Lepard suricata[8203]: [8212] Info: nfq: setting queue length to 4096
Aug 05 14:46:21 Lepard suricata[8203]: [8212] Info: nfq: setting nfnl bufsize to 6144000
Aug 05 14:46:21 Lepard suricata[8203]: [8203] Config: flow-manager: using 1 flow manager threads
Aug 05 14:46:21 Lepard suricata[8203]: [8203] Config: flow-manager: using 1 flow recycler threads
Aug 05 14:46:21 Lepard suricata[8203]: [8203] Config: log-flush: log flusher thread not used with heartbeat.output-flush-interval of 0
Aug 05 14:46:21 Lepard suricata[8203]: [8203] Notice: threads: Threads created -> RX: 1 W: 2 TX: 1 FM: 1 FR: 1   Engine started.
➂Direct incoming network traffic to Suricata's NFQUEUE
Firewalld is installed and enabled, so add the necessary rules for Suricata to Firewalld.
# firewall-cmd --permanent --direct --add-rule ipv4 filter INPUT 0 -p tcp --dport 22 -j NFQUEUE --queue-bypass
# firewall-cmd --permanent --direct --add-rule ipv4 filter OUTPUT 0 -p tcp --sport 22 -j NFQUEUE --queue-bypass

# firewall-cmd --permanent --direct --add-rule ipv4 filter FORWARD 0 -j NFQUEUE
# firewall-cmd --permanent --direct --add-rule ipv6 filter FORWARD 0 -j NFQUEUE

# firewall-cmd --permanent --direct --add-rule ipv4 filter INPUT 1 -j NFQUEUE
# firewall-cmd --permanent --direct --add-rule ipv4 filter OUTPUT 1 -j NFQUEUE

# firewall-cmd --permanent --direct --add-rule ipv6 filter INPUT 1 -j NFQUEUE
# firewall-cmd --permanent --direct --add-rule ipv6 filter OUTPUT 1 -j NFQUEUE

# firewall-cmd --reload
※On openSUSE, configuring NFQUEUE using firewall-cmd --direct may not take effect. This is because the firewalld backend is set to nftables, so the traditional iptables-based direct rules are not hooked correctly. Therefore, we will change the backend to iptables.
# vi /etc/firewalld/firewalld.conf
Line 65 : Change
FirewallBackend=iptables

Restart firewalld
# systemctl restart firewalld
④Verify that SURICATA is correctly dropping traffic.
If there is a rule matching sid:2100498 in /var/lib/suricata/rules/suricata.rules, comment it out and add the rule to /var/lib/suricata/rules/local.rules.
# vi /var/lib/suricata/rules/suricata.rules

#alert ip any any -> any any (msg:"GPL ATTACK_RESPONSE id check returned root"; content:"uid=0|28|root|29|"; classtype:bad-unknown; sid:2100498; rev:7; metadata:created_at 2010_09_23, confidence Medium, signature_severity Informational, updated_at 2019_07_26;)
Create a new rule with the sid:2100498 in /var/lib/suricata/rules/local.rules
# vi /var/lib/suricata/rules/local.rules

drop ip any any -> any any (msg:"GPL ATTACK_RESPONSE id check returned root"; content:"uid=0|28|root|29|"; classtype:bad-unknown; sid:2100498; rev:7; metadata:created_at 2010_09_23, confidence Medium, signature_severity Informational, updated_at 2019_07_26;)
⑤Restart Suricata service
#systemctl restart suricata
⑥Test this rule using curl
# curl --max-time 5 http://testmynids.org/uid/index.html
curl: (28) Operation timed out after 5001 milliseconds with 0 out of 39 bytes received
Using jq to examine the eve.log file
# jq 'select(.alert .signature_id==2100498)' /var/log/suricata/eve.json

{
  "timestamp": "2026-08-08T13:18:09.751953+0900",
  "flow_id": 335419483908991,
  "event_type": "alert",
  "src_ip": "13.227.50.49",
  "src_port": 80,
  "dest_ip": "192.168.11.83",
  "dest_port": 56696,
  "proto": "TCP",
  "ip_v": 4,
  "pkt_src": "wire/pcap",
  "community_id": "1:Y83N6F8UUWwUwSrNfvbORgyPjlg=",
  "alert": {
    "action": "blocked",
    "gid": 1,
    "signature_id": 2100498,
    "rev": 7,
    "signature": "GPL ATTACK_RESPONSE id check returned root",
    "category": "Potentially Bad Traffic",
    "severity": 2,
    "metadata": {
      "confidence": [
        "Medium"
      ],
      "created_at": [
        "2010_09_23"
      ],
      "signature_severity": [
        "Informational"
      ],
      "updated_at": [
        "2019_07_26"
      ]
    }
  },
  "app_proto": "http",
  "direction": "to_client",
  "flow": {
    "pkts_toserver": 3,
    "pkts_toclient": 4,
    "bytes_toserver": 256,
    "bytes_toclient": 752,
    "start": "2026-08-08T13:18:09.733455+0900",
    "src_ip": "192.168.11.83",
    "dest_ip": "13.227.50.49",
    "src_port": 56696,
    "dest_port": 80
  }
}
"action": "blocked", is set
Integration of the ELK Stack and Suricata
Install and configure the Elastic Stack to visualize and search SURICATA logs more efficiently
This section will generally be performed on a second openSUSE Tumbleweed server.
1. Elasticsearch Install
1.1 Install the Elastic Stack 9.x repository signing key
# rpm --import https://artifacts.elastic.co/GPG-KEY-elasticsearch
1.2 Create a repository definition in the /etc/zypp/repos.d/ directory
#  vi /etc/zypp/repos.d/elasticsearch.repo

Describe the following content
[elasticsearch-9.x]
name=Elasticsearch repository for 9.x packages
baseurl=https://artifacts.elastic.co/packages/9.x/yum
gpgcheck=1
gpgkey=https://artifacts.elastic.co/GPG-KEY-elasticsearch
enabled=1
autorefresh=1
type=rpm-md
1.3 Elasticsearch Install
# zypper refresh
# zypper -n install  elasticsearch
2. Elasticsearch Configuration
Elasticsearch is configured by default to accept only local connections.
Additionally, tools such as Filebeat cannot send logs because authentication is not enabled.
This time, we will configure Elasticsearch's network settings and enable the xpack security module built into Elasticsearch.
2.1 Elasticsearch Network Configuration
Since the Elasticsearch and SURICATA servers are separate, Elasticsearch must be configured to listen for connections on the private network interface.
# vi /etc/elasticsearch/elasticsearch.yml

Line 57 : Add the local address of the Elasticsearch server
#network.host: 192.168.0.1
network.host: 192.168.11.85

Line 62 : Uncomments
http.port: 9200
2.2 Start Elasticsearch
# systemctl daemon-reload
# systemctl enable elasticsearch.service
# systemctl start elasticsearch.service
2.3 Create passwords for elastic and kibana_system
Be sure to copy the passwords for the elastic user and kibana_system user, as they will be needed later.
The kibana_system user is used for configuring Kibana.
The elastic user is used for configuring Filebeat and Auditbeat, and for logging into Kibana.
If you forget your password, you can use the command again to reset it.
[elastic] User password creation
# cd /usr/share/elasticsearch/bin

# ./elasticsearch-reset-password -u elastic
This tool will reset the password of the [elastic] user to an autogenerated value.
The password will be printed in the console.
Please confirm that you would like to continue [y/N]y


Password for the [elastic] user successfully reset.
New value: CGT+sB6jpdpNjfFpNuUf
※Resetting Elasticsearch Passwords
The automatically generated Elastic user password is too complex, so you can reset it using the /usr/share/elasticsearch/bin/elasticsearch-reset-password command.
To reset your password, execute the command.
# /usr/share/elasticsearch/bin/elasticsearch-reset-password -u elastic -i

This tool will reset the password of the [elastic] user.
You will be prompted to enter the password.
Please confirm that you would like to continue [y/N]y


Enter password for [elastic]:
Re-enter password for [elastic]:
Password for the [elastic] user successfully reset.
[kibana_system] User Password Creation
# cd /usr/share/elasticsearch/bin

# ./elasticsearch-reset-password -u kibana_system
This tool will reset the password of the [kibana_system] user to an autogenerated value.
The password will be printed in the console.
Please confirm that you would like to continue [y/N]y


Password for the [kibana_system] user successfully reset.
New value: rYOlzftkuBArFjZeMt0k
3. Installing and Configuring Kibana
This section is primarily performed on the second opebSUSE Tumbleweed(IP:192.168.11.85)
3.1 Kibana Installation
# zypper -n install kibana
3.2 xpack Security Module Configuration
Enable Kibana's xpack security features to generate several encryption keys that Kibana uses to store data in Elasticsearch.
Encryption keys are created using the kibana-encryption-keys utility located in the /usr/share/kibana/bin directory.
Store the three keys you created in a secure location.
# cd /usr/share/kibana/bin/
# ./kibana-encryption-keys generate -q --force
xpack.encryptedSavedObjects.encryptionKey: d2ba6f76cbea5263209f232b23330696e1d519f6039e6f7e65650b88de0505c3
xpack.reporting.encryptionKey: 2301eb8be7a46ab19d95aa079b2e7a4e98e49cf0dbae28538c9dc121bf64303a
xpack.security.encryptionKey: 3d44285fc034d3096c2cb9b0bd1860eedb1a66b78f3634759ce8152080a07839
Add these keys to Kibana's /etc/kibana/kibana.yml configuration file.
# vi /etc/kibana/kibana.yml

Write it on the last line
xpack.encryptedSavedObjects.encryptionKey: d2ba6f76cbea5263209f232b23330696e1d519f6039e6f7e65650b88de0505c3
xpack.reporting.encryptionKey: 2301eb8be7a46ab19d95aa079b2e7a4e98e49cf0dbae28538c9dc121bf64303a
xpack.security.encryptionKey: 3d44285fc034d3096c2cb9b0bd1860eedb1a66b78f3634759ce8152080a07839
3.3 Kibana Network Configuration
# vi /etc/kibana/kibana.yml

Line 6 : Uncomments
server.port: 5601

Line 12 : Add the server's private IP address (192.168.11.85)
#server.host: "localhost"
server.host: "192.168.11.85"
3.4 Generating a Kibana-Elasticsearch Enrollment Token
To configure a Kibana instance to communicate with an existing Elasticsearch cluster with security enabled, an enrollment token is required. An enrollment token for Kibana can be generated using the following command:
# /usr/share/elasticsearch/bin/elasticsearch-create-enrollment-token -s kibana
eyJ2ZXIiOiI4LjE0LjAiLCJhZHIiOlsiMTkyLjE2OC4xMS44NTo5MjAwIl0sImZnciI6IjM4Yzc0NDBjOWY3MmZkMjc2ZDM3NGI3OThhYzNjMjk4MDE2ZWNjNmI3NWJhNTI5ODhmYmViYTA4NTk2OWIzNDciLCJrZXkiOiJqNzc1MzU4QmhuY0tlSUN4c004UDpmbC1tc0RLZVBWOW42bTUyNUNiRGJ3In0=
3.5 Starting Kibana
Launch Kibana 9 and configure it to run at system startup.
# systemctl enable --now kibana
# systemctl start kibana
Check Status
# systemctl status kibana

● kibana.service - Kibana
     Loaded: loaded (/usr/lib/systemd/system/kibana.service; enabled; preset: disabled)
     Active: active (running) since Sat 2026-08-08 15:05:30 JST; 37s ago
 Invocation: b0bf09f4073b4cb4bd13f1387d7f9046
       Docs: https://www.elastic.co
   Main PID: 4712 (MainThread)
      Tasks: 11 (limit: 3409)
        CPU: 15.368s
     CGroup: /system.slice/kibana.service
             └─4712 /usr/share/kibana/bin/../node/default/bin/node /usr/share/kibana/bin/../src/cli/kibana/dist

Aug 08 15:05:33 Lion kibana[4712]: Native global console methods have been overridden in production environment.
Aug 08 15:05:35 Lion kibana[4712]: [2026-08-08T15:05:35.635+09:00][INFO ][root] Kibana is starting
Aug 08 15:05:35 Lion kibana[4712]: [2026-08-08T15:05:35.711+09:00][INFO ][node] Kibana process configured with roles: [background_tasks, ui]
Aug 08 15:05:46 Lion kibana[4712]: [2026-08-08T15:05:46.283+09:00][INFO ][plugins-service] The following plugins are disabled: "cloudChat,cloudExperim>
Aug 08 15:05:46 Lion kibana[4712]: [2026-08-08T15:05:46.360+09:00][INFO ][http.server.Preboot] http server running at http://192.168.11.85:5601
Aug 08 15:05:46 Lion kibana[4712]: [2026-08-08T15:05:46.646+09:00][INFO ][plugins-system.preboot] Setting up [1] plugins: [interactiveSetup]
Aug 08 15:05:46 Lion kibana[4712]: [2026-08-08T15:05:46.698+09:00][INFO ][preboot] "interactiveSetup" plugin is holding setup: Validating Elasticsearc>
Aug 08 15:05:46 Lion kibana[4712]: [2026-08-08T15:05:46.738+09:00][INFO ][root] Holding setup until preboot stage is completed.
Aug 08 15:05:54 Lion kibana[4712]: i Kibana has not been configured.
Aug 08 15:05:54 Lion kibana[4712]: Go to http://192.168.11.85:5601/?code=781502 to get started.
The following appears toward the end of the output:
Go to http://192.168.11.85:5601/?code=781502 to get started.
Copy the provided Kibana URL (including the code) and use it in your browser to access Kibana and complete the setup.
4. Accessing the Kibana 9 Dashboard
If the firewall is running, open the Kibana port.
# firewall-cmd --add-port=5601/tcp --permanent
# firewall-cmd --reload
Accsess http://192.168.11.85:5601/?code=781502
(Copy each person's appropriate address)
When you access Kibana 9, the welcome page prompts you to configure Elastic.
First, enter the generated registration token.
Copy the Kibana token generated using the command /usr/share/elasticsearch/bin/elasticsearch-create-enrollment-token -s kibana and paste it into the box
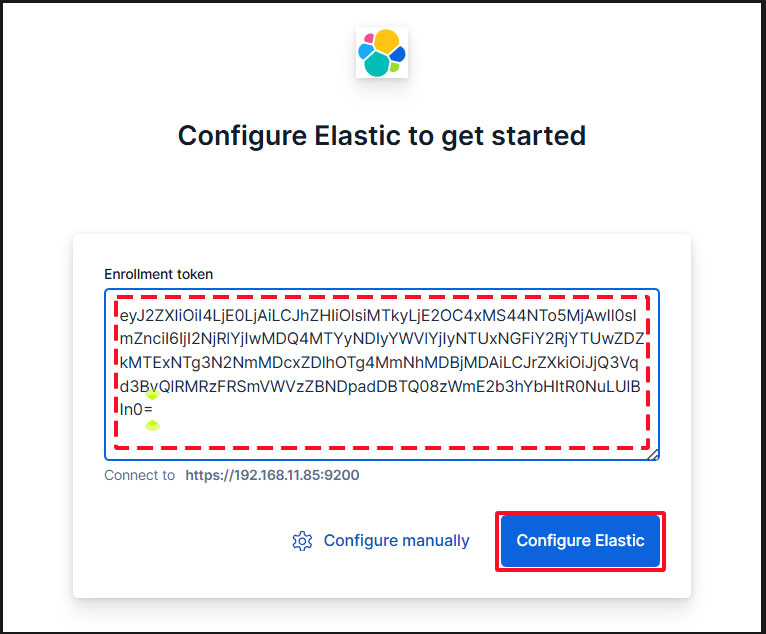
Paste the token, and Kibana will automatically connect to Elasticsearch.
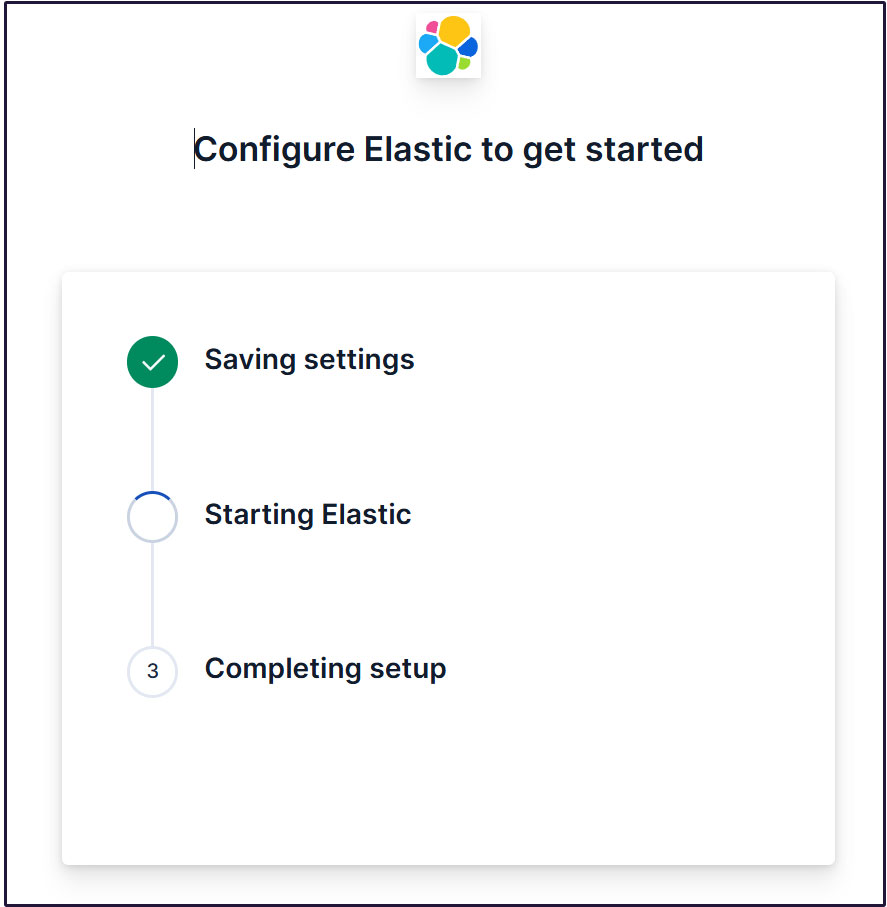
Click Configure Elastic. The settings will be saved, and Elasticsearch will be configured and restarted.
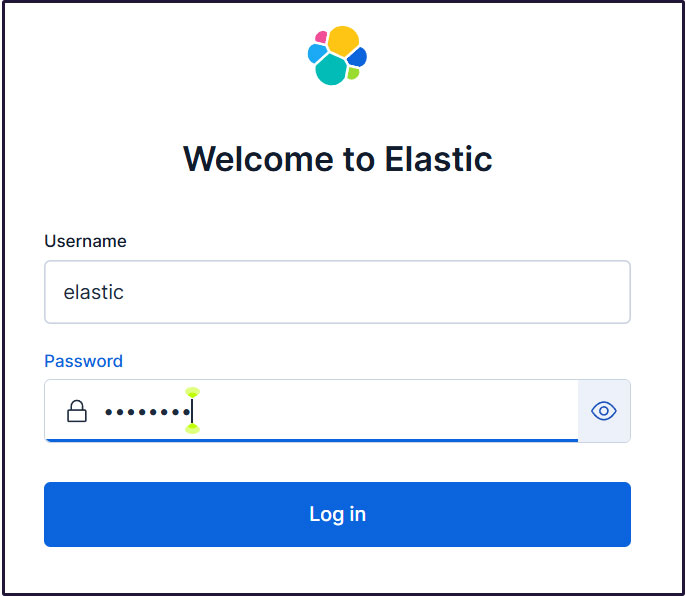
Proceed to the login page. Log in using the generated Elastic user credentials.
Username : elastic
Password : Password regenerated for clarity
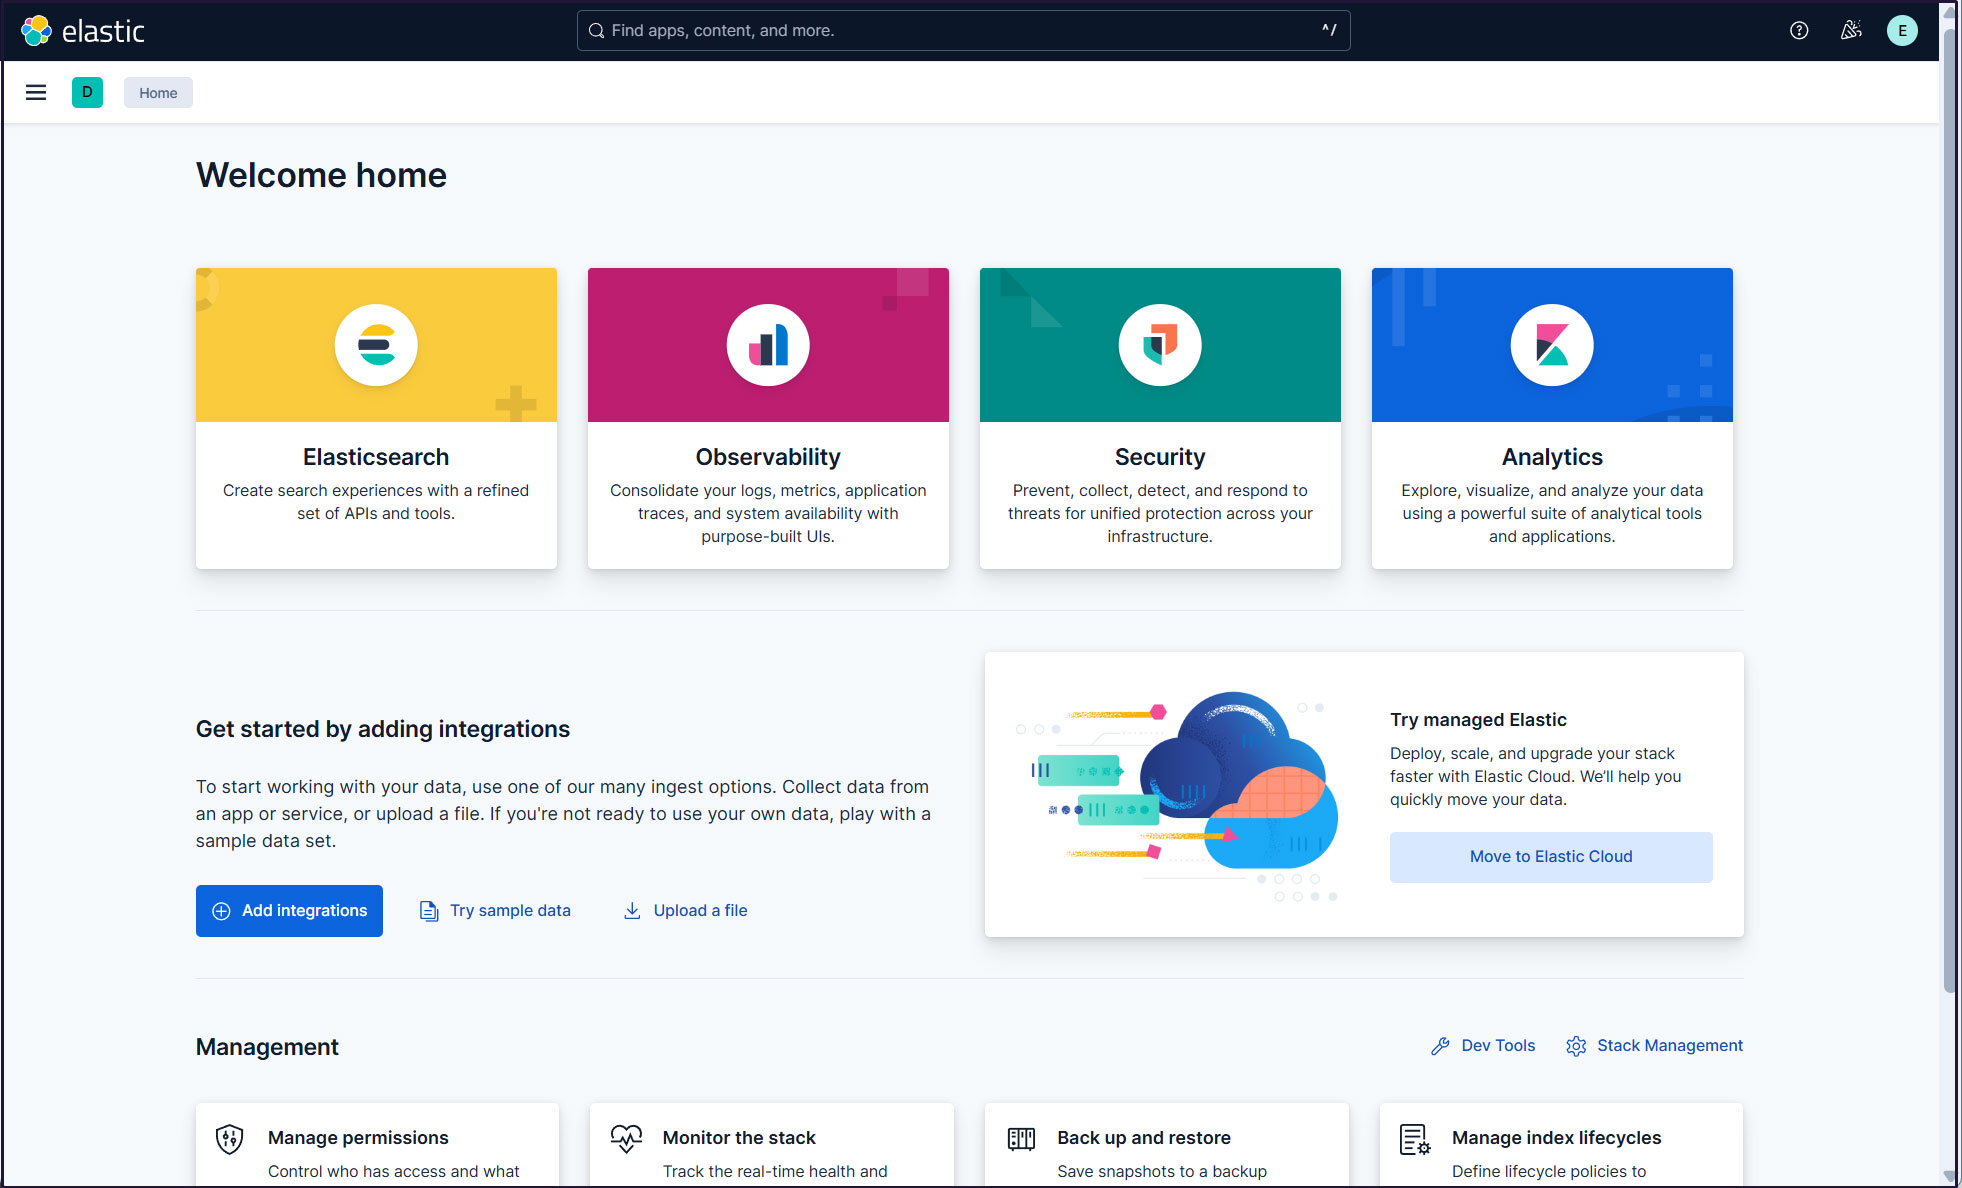
On the welcome page, click "Explore on my own" to proceed to the Kibana 9.x dashboard.

Create a new user account so that you do not need to use the elastic superuser account.
Open the main menu, then navigate to Stack Management > Security > Users
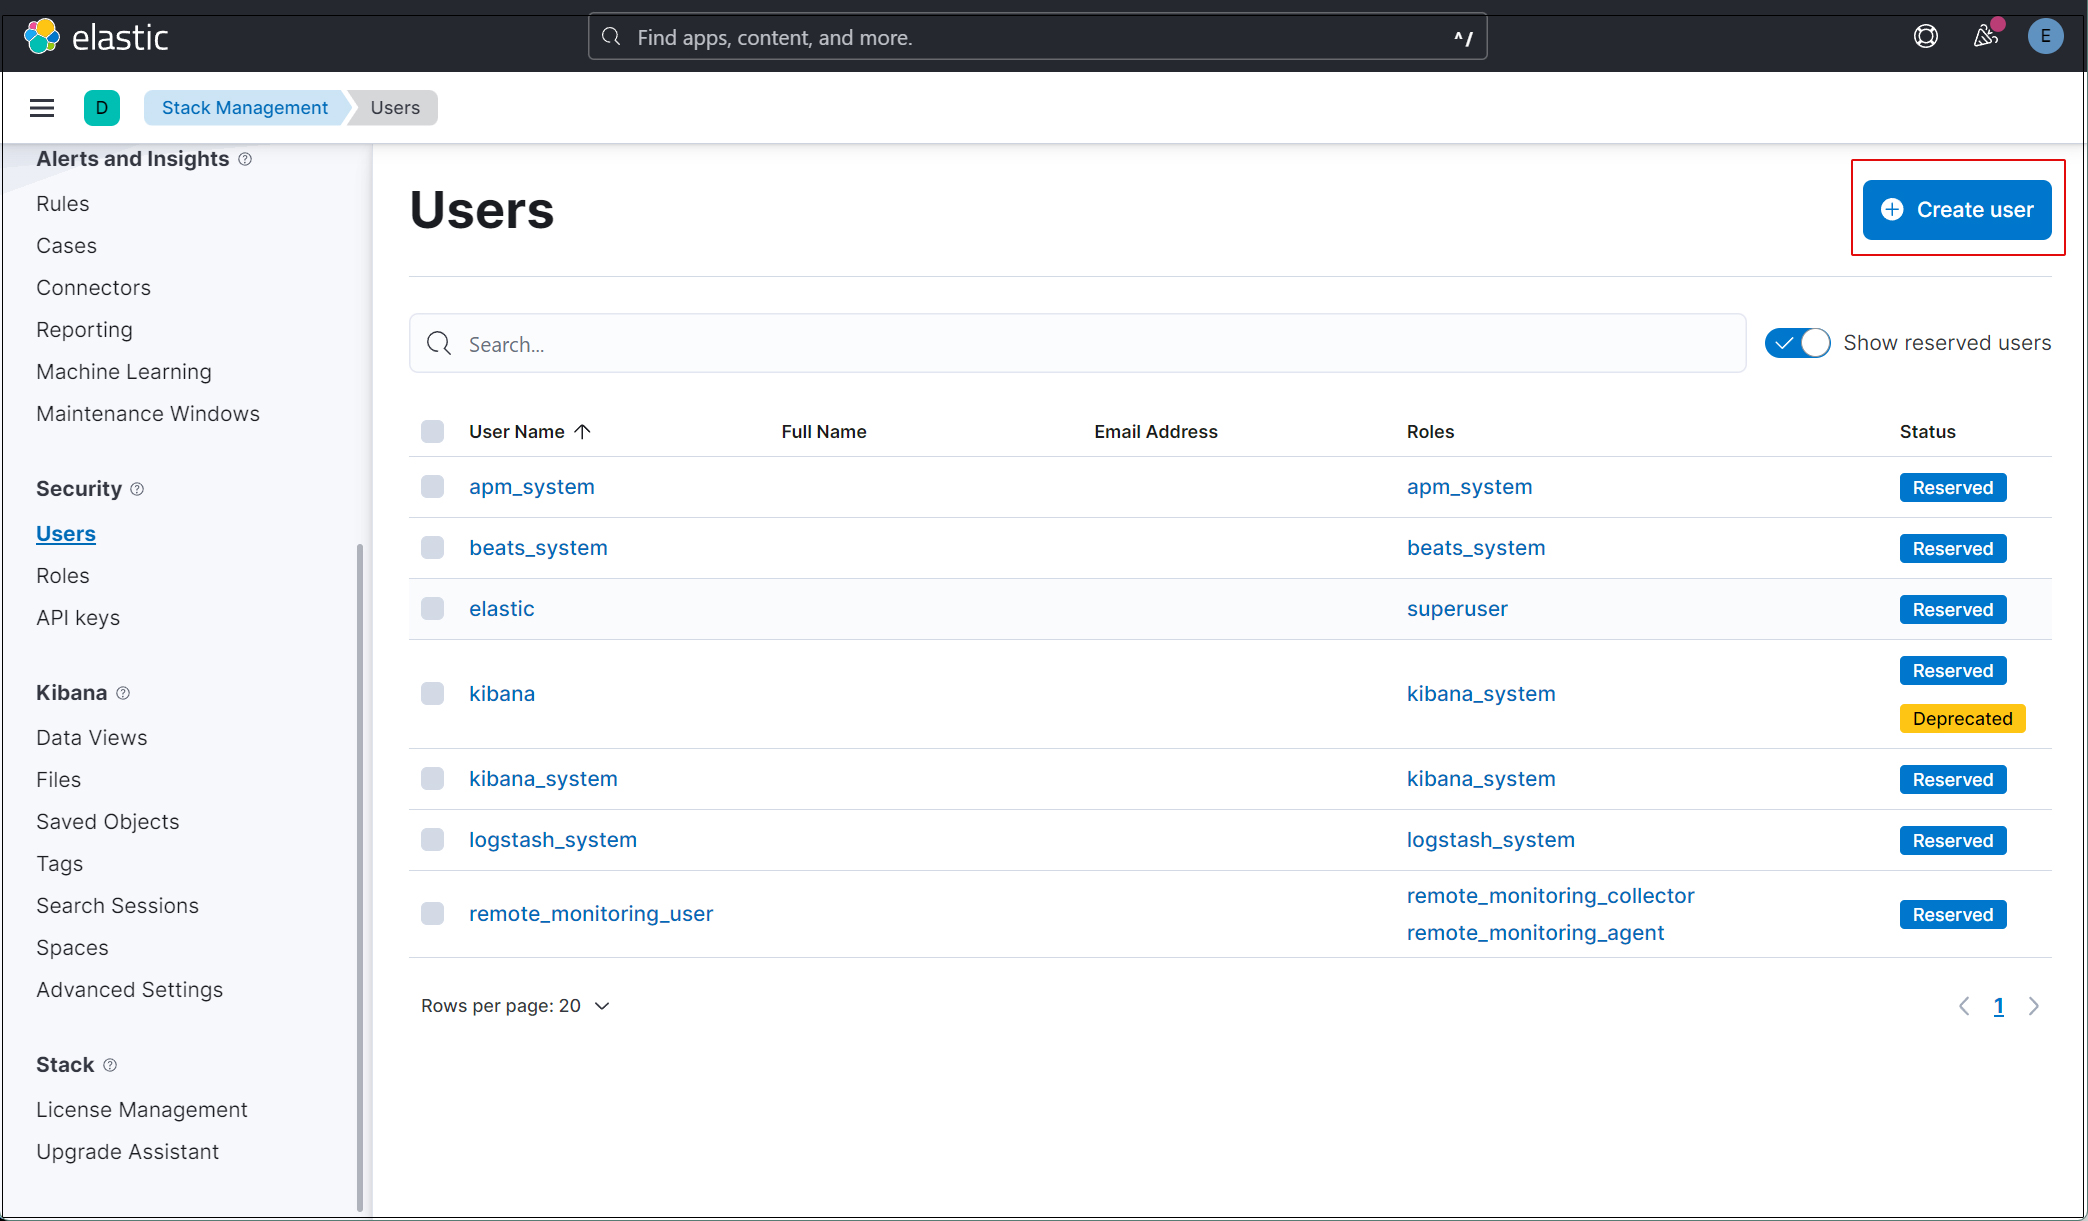
Click the "Create user" button in the upper right corner.
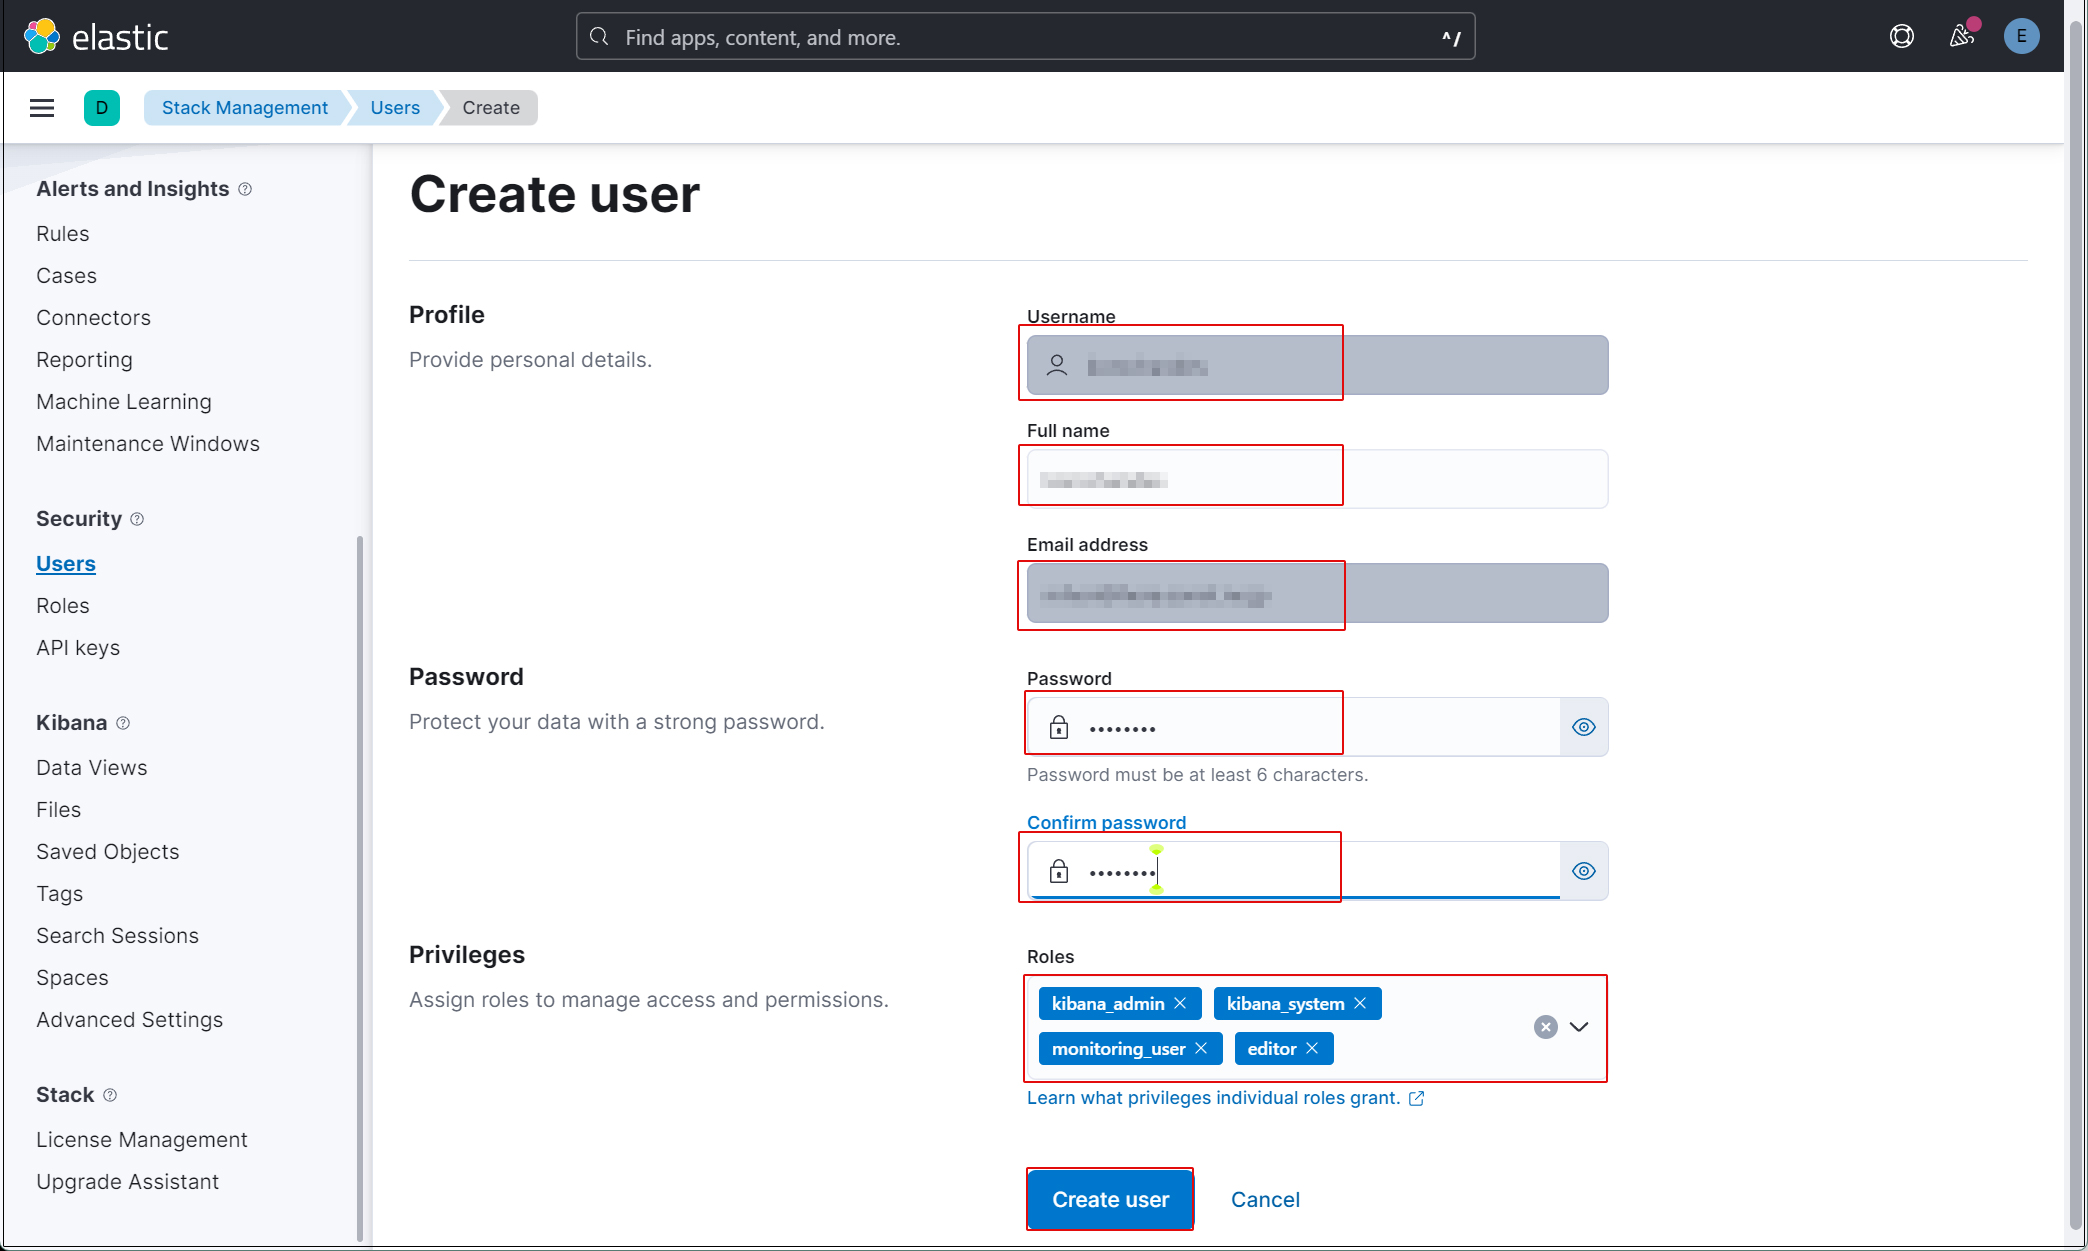
Enter new user information and assign the kibana_admin, kibana_system, monitoring_user, and editor roles under Privileges.
Finally, click [Create user].
Log out of the current profile and verify that you can log in with the newly created user account.
Currently, there is no data available to display in Kibana because Filebeat and Auditbeat are not configured on the SURICATA host.
Install Filebeat on the SURICATA server
This task will be performed on the first openSUSE Tumbleweed Server(IP:192.168.11.83) where Suricata has been installed.
1. Filebeat Install
1.1 Download Elastic GPG Key
# rpm --import https://artifacts.elastic.co/GPG-KEY-elasticsearch
1.2 Create a repository definition in the /etc/zypp/repos.d/ directory
#  vi /etc/zypp/repos.d/elasticsearch.repo

Describe the following content
[elasticsearch-9.x]
name=Elasticsearch repository for 9.x packages
baseurl=https://artifacts.elastic.co/packages/9.x/yum
gpgcheck=1
gpgkey=https://artifacts.elastic.co/GPG-KEY-elasticsearch
enabled=1
autorefresh=1
type=rpm-md
1.3 Install Filebeat
# zypper refresh
# zypper -n install  filebeat
1.4 Creating an Elasticsearch CA Certificate
Download the Elasticsearch CA certificate and save it to any directory (in this case, save it as /etc/filebeat/elastic-ca.crt).
※Keep port 9200 open on the second server (Elasticsearch installed).
# openssl s_client -connect 192.168.11.85:9200 \
-showcerts </dev/null 2>/dev/null | \
openssl x509 -outform PEM > /etc/filebeat/elastic-ca.crt
1.5 Configure Filebeat to connect to Elasticsearch and Kibana
# vi /etc/filebeat/filebeat.yml

Line 137 : Add a line specifying the private IP address and port of the Kibana instance
#host: "localhost:5601"
host: "192.168.11.85:5601"

Line 164 : comment out
#hosts: ["localhost:9200"]

Line 165 : Enter the Elastic Stack IP address and Elasticsearch port number.
hosts: ["https://192.168.11.85:9200"]

Line 171 : Uncomments
protocol: "https"

Line 172 : Elasticsearch CA Certificate Specification
ssl.certificate_authorities: ["/etc/filebeat/elastic-ca.crt"]

Line 175,176 : Uncomment the line, leave [username] as the default, and enter the password for the [elastic] user in [password].
username: "elastic"
password: “xxxxxxxxx"
1.6 Configuration File Test
# filebeat test config
Config OK
1.7 Enable the built-in Suricata module in Filebeats
# filebeat modules enable suricata
The above command will change /etc/filebeat/modules.d/suricata.yml.disabled to /etc/filebeat/modules.d/suricata.yml, but the contents remain unchanged. Therefore, edit it as follows:
# vi /etc/filebeat/modules.d/suricata.yml

Line 6-7 : Changes as follows
  eve:
    enabled: true
    var.paths: ["/var/log/suricata/eve.json"]
1.8 Set up the initial environment
Load the pipeline into the Suricata service
Load the SIEM dashboard into Elasticsearch
# filebeat setup -e

-----------------------------------------------------------------------------------------------------------------------------------------
{"log.level":"info","@timestamp":"2026-08-08T15:45:06.485+0900","log.logger":"modules","log.origin":{"function":"github.com/elastic/beats/v7/filebeat/fileset.LoadPipeline","file.name":"fileset/pipelines.go","file.line":134},"message":"Elasticsearch pipeline loaded.","service.name":"filebeat","pipeline":"filebeat-9.5.0-suricata-eve-pipeline","ecs.version":"1.6.0"}
{"log.level":"info","@timestamp":"2026-08-08T15:45:06.553+0900","log.logger":"modules","log.origin":{"function":"github.com/elastic/beats/v7/filebeat/fileset.LoadPipeline","file.name":"fileset/pipelines.go","file.line":134},"message":"Elasticsearch pipeline loaded.","service.name":"filebeat","pipeline":"filebeat-9.5.0-suricata-eve-dns","ecs.version":"1.6.0"}
{"log.level":"info","@timestamp":"2026-08-08T15:45:06.680+0900","log.logger":"modules","log.origin":{"function":"github.com/elastic/beats/v7/filebeat/fileset.LoadPipeline","file.name":"fileset/pipelines.go","file.line":134},"message":"Elasticsearch pipeline loaded.","service.name":"filebeat","pipeline":"filebeat-9.5.0-suricata-eve-dns-answer-v1","ecs.version":"1.6.0"}
{"log.level":"info","@timestamp":"2026-08-08T15:45:06.813+0900","log.logger":"modules","log.origin":{"function":"github.com/elastic/beats/v7/filebeat/fileset.LoadPipeline","file.name":"fileset/pipelines.go","file.line":134},"message":"Elasticsearch pipeline loaded.","service.name":"filebeat","pipeline":"filebeat-9.5.0-suricata-eve-dns-answer-v2","ecs.version":"1.6.0"}
{"log.level":"info","@timestamp":"2026-08-08T15:45:06.915+0900","log.logger":"modules","log.origin":{"function":"github.com/elastic/beats/v7/filebeat/fileset.LoadPipeline","file.name":"fileset/pipelines.go","file.line":134},"message":"Elasticsearch pipeline loaded.","service.name":"filebeat","pipeline":"filebeat-9.5.0-suricata-eve-tls","ecs.version":"1.6.0"}
{"log.level":"info","@timestamp":"2026-08-08T15:45:06.971+0900","log.logger":"modules","log.origin":{"function":"github.com/elastic/beats/v7/filebeat/fileset.LoadPipeline","file.name":"fileset/pipelines.go","file.line":134},"message":"Elasticsearch pipeline loaded.","service.name":"filebeat","pipeline":"filebeat-9.5.0-suricata-eve-http","ecs.version":"1.6.0"}
-----------------------------------------------------------------------------------------------------------------------------------------
1.9 Start the Filebeat service
# systemctl start filebeat.service
2. Check in Kibana
Log back into Kibana using the user you created. Accsses http://192.168.11.85:5601
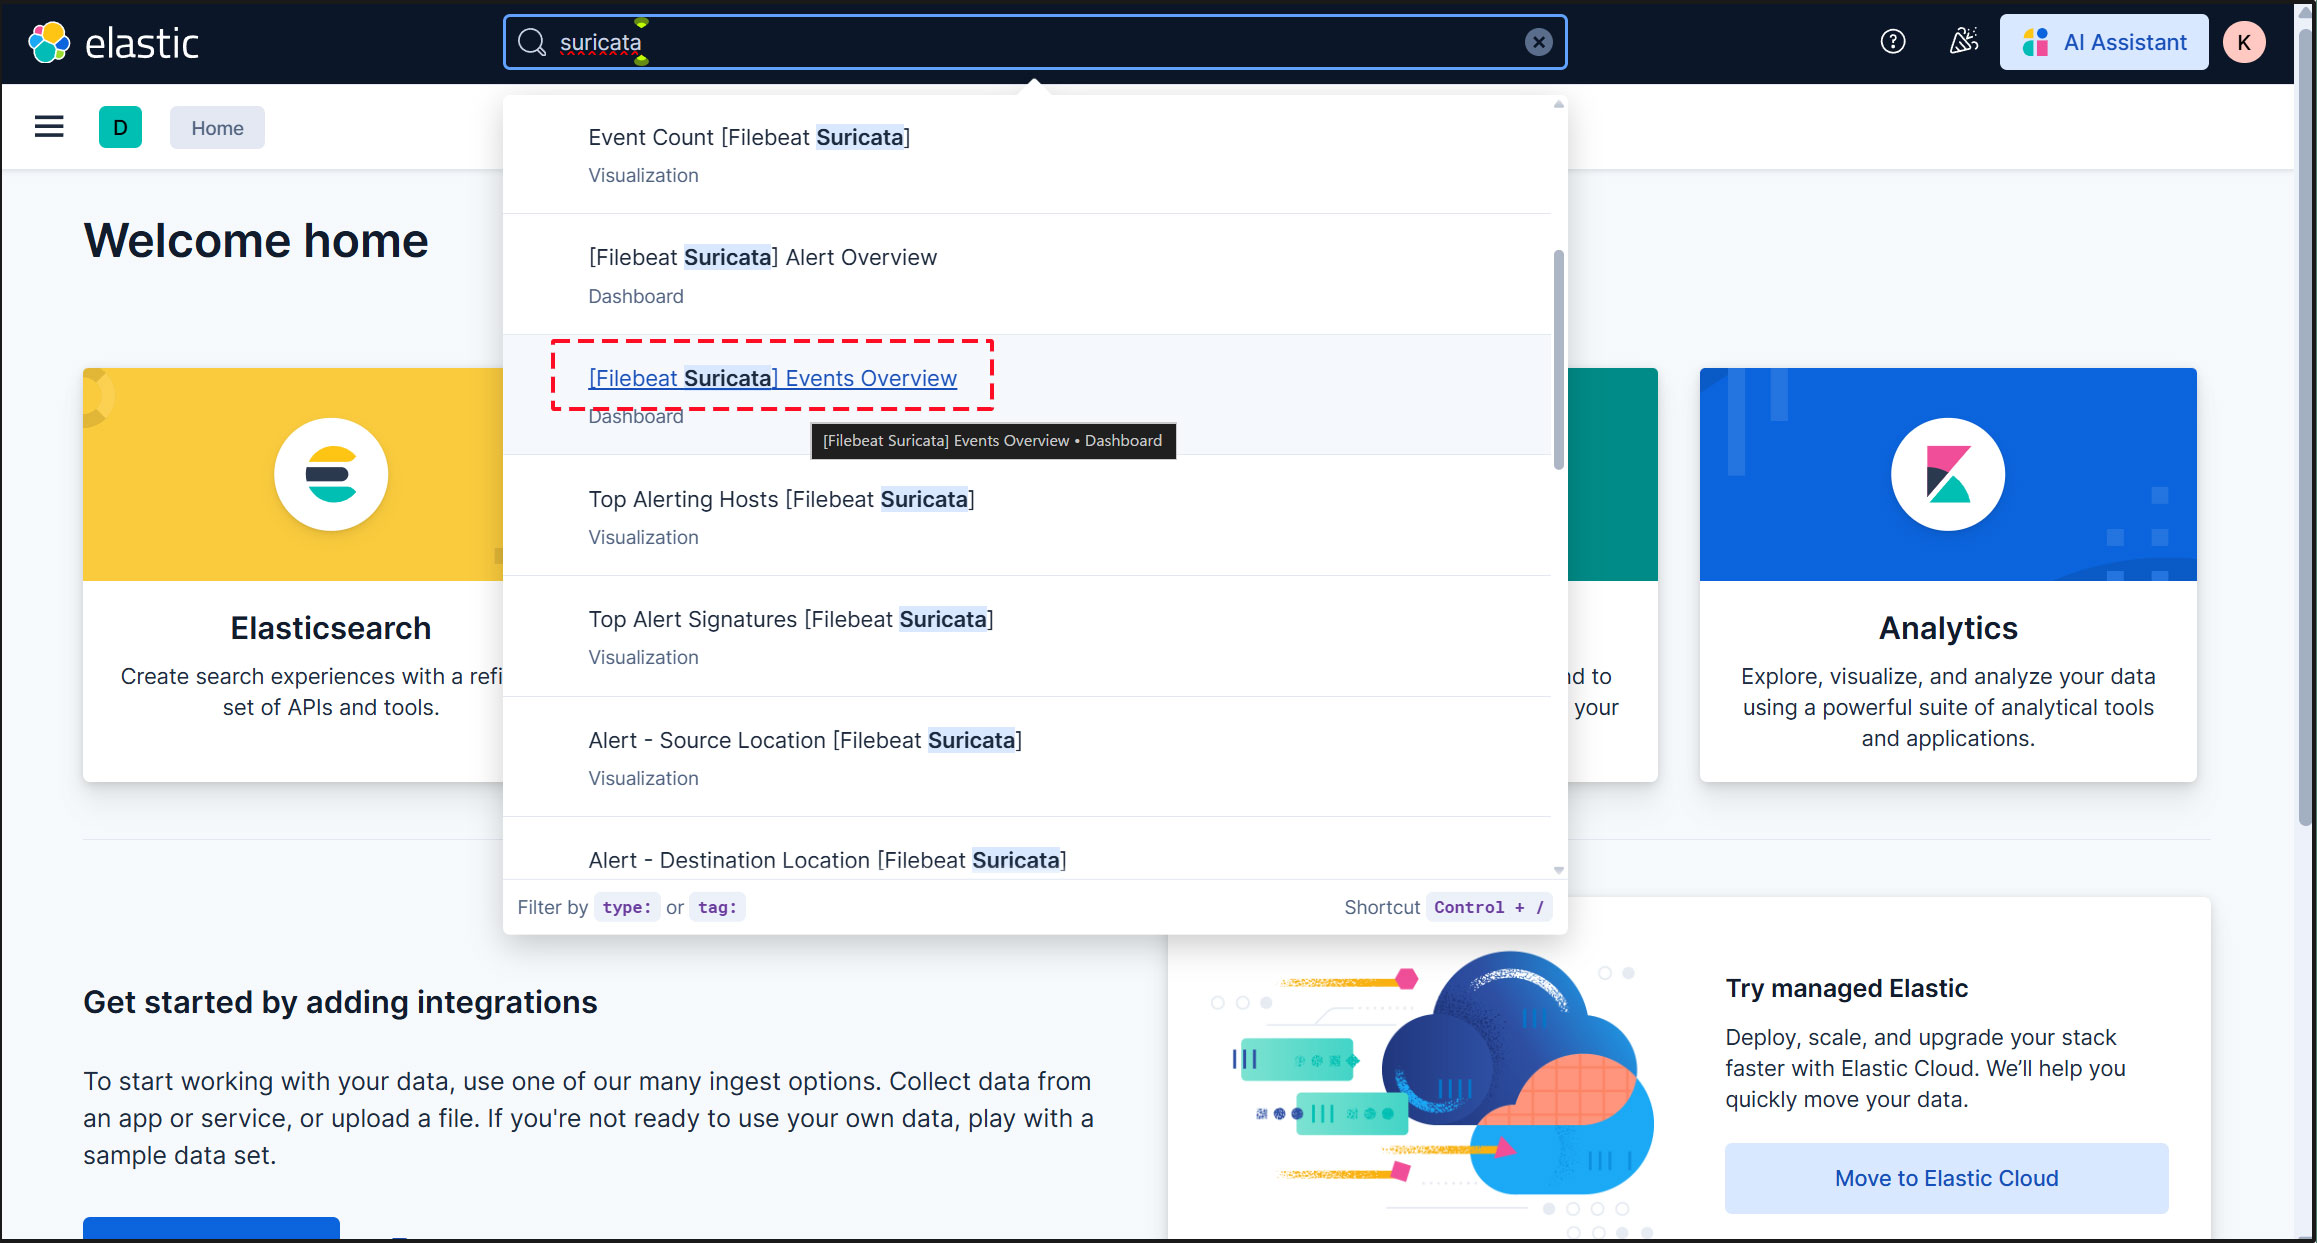
Type "Suricata Events Overview" into the top search field, then click [Filebeat Suricata] Events Overview
All Suricata events from the past 15 minutes are displayed.
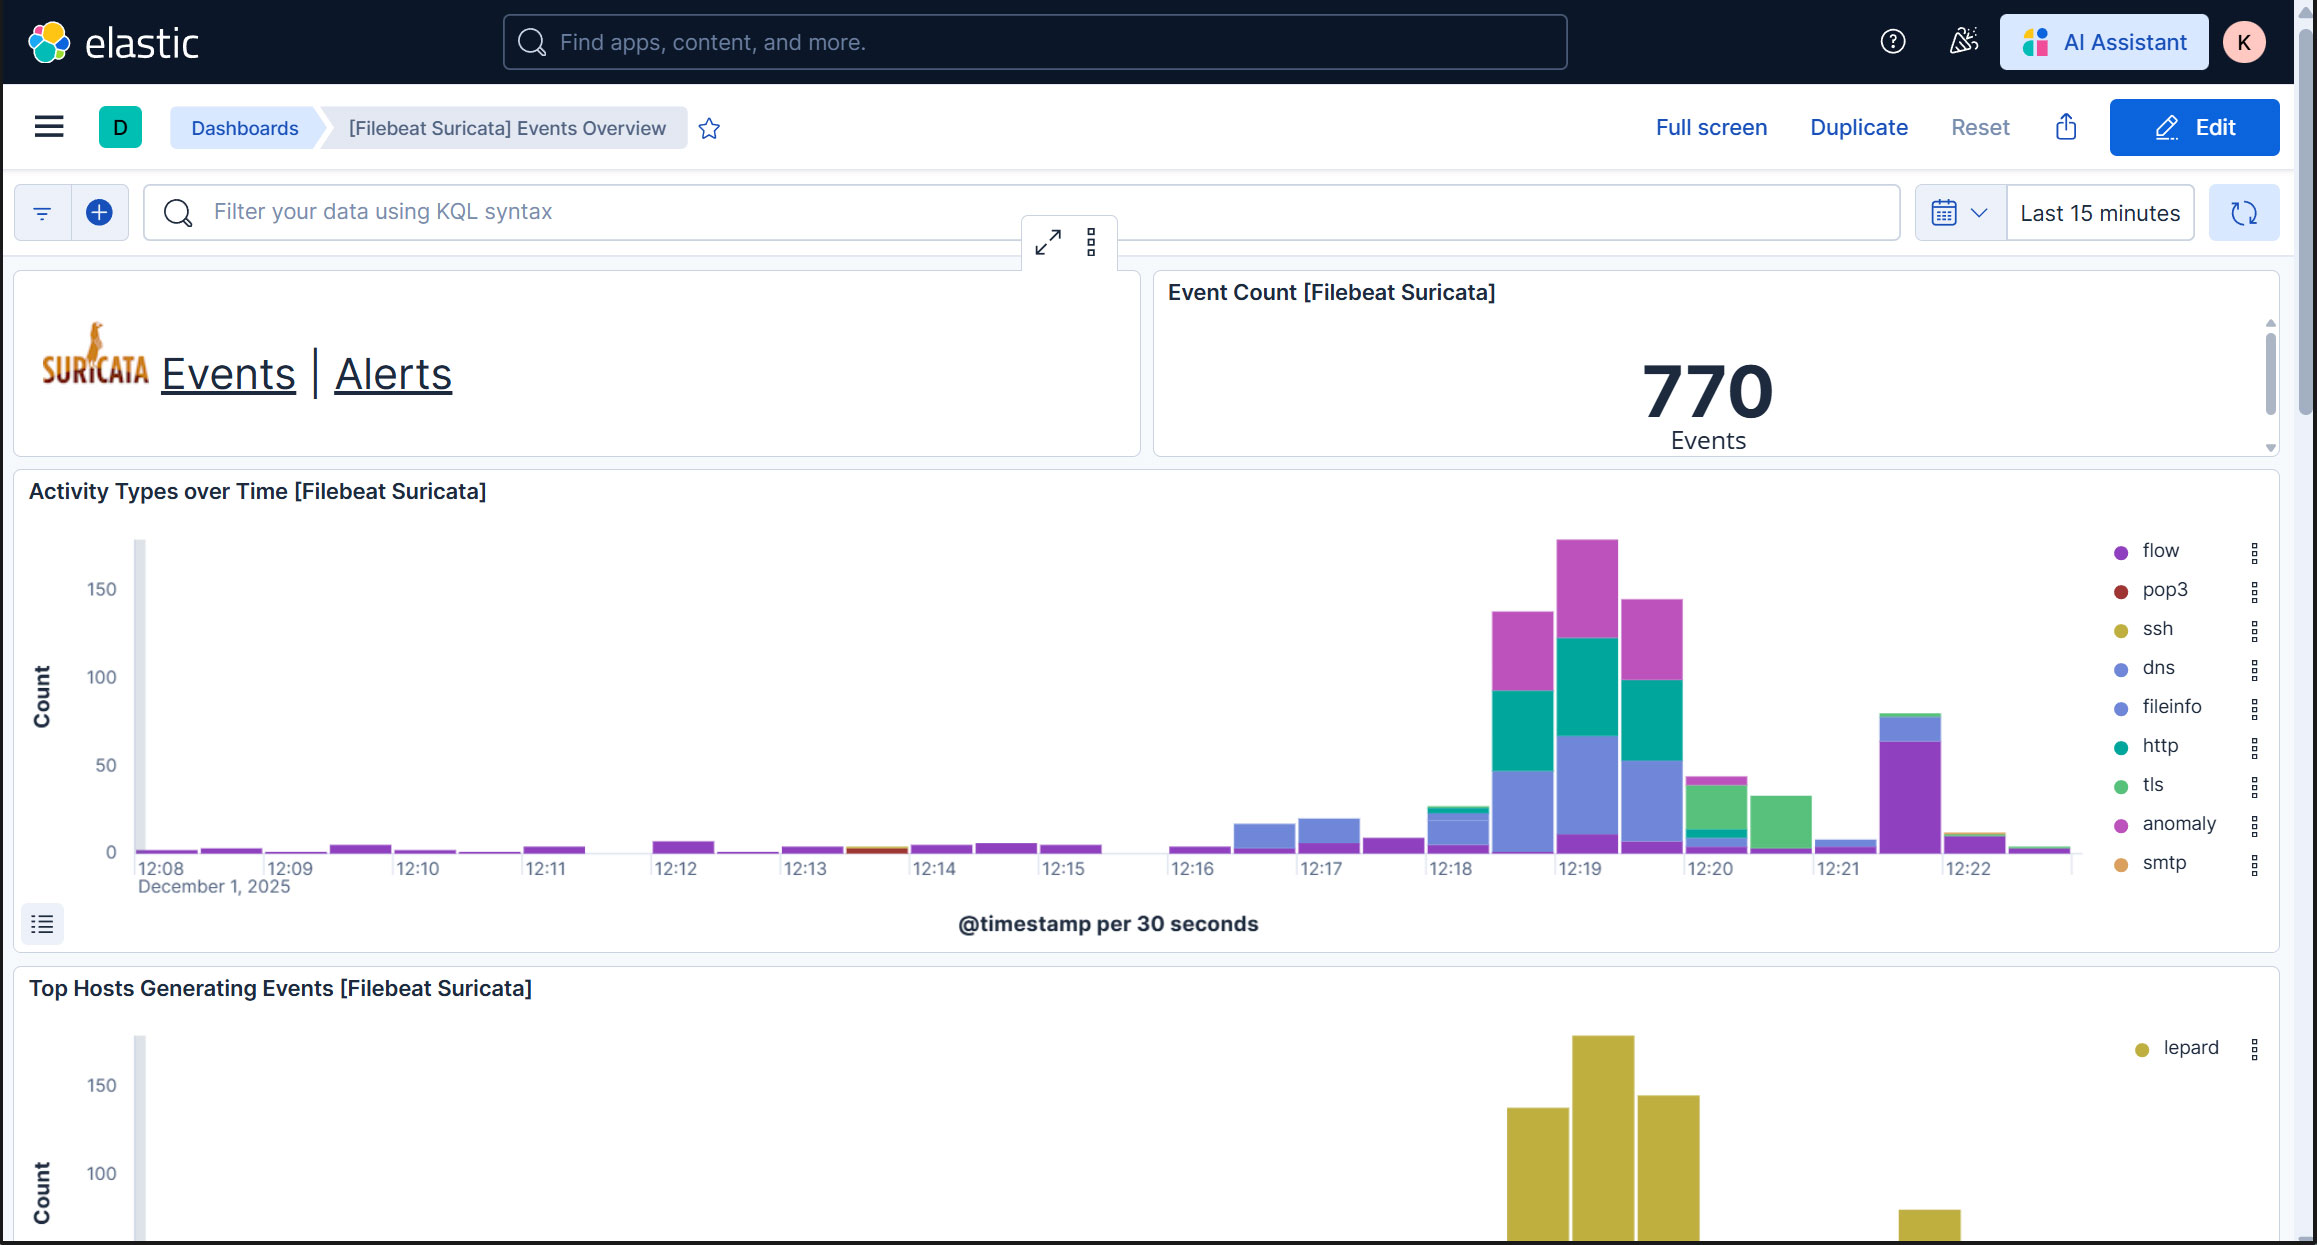
To display alerts for malicious traffic, click the "Alerts" text next to the Suricata logo.
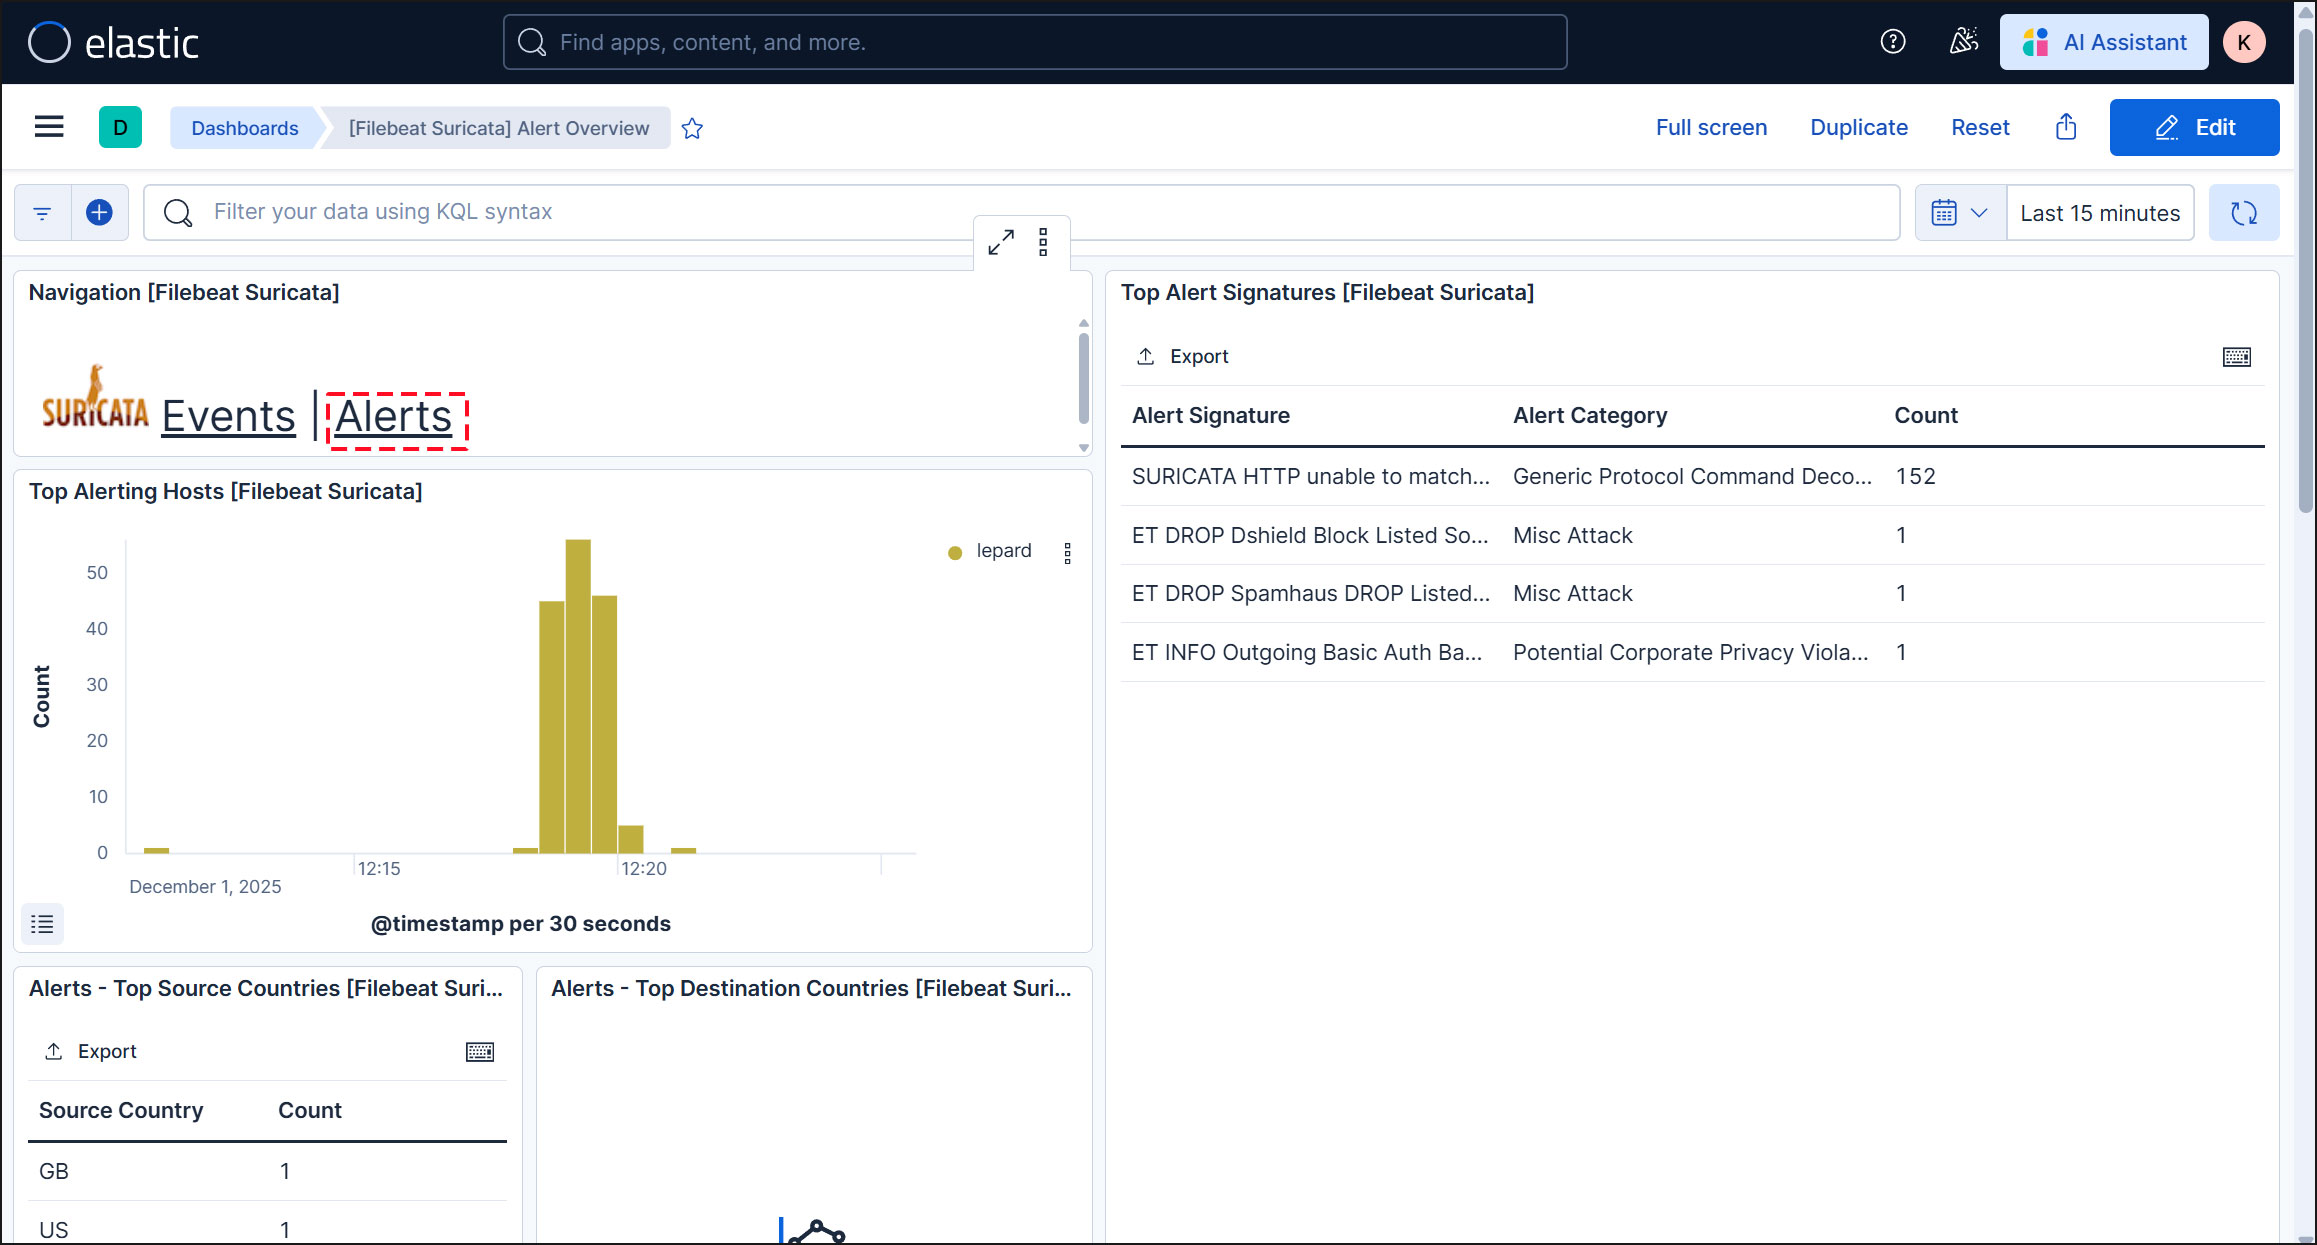
Kibana offers a variety of features and tools for visualizing logs, so feel free to experiment with them.