

AlmaLinux 10.2
AlmaLinux OS is a project launched by CloudLinux in the US as an alternative to CentOS.
Currently, the AlmaLinux OS Foundation is the development parent organization.
General availability of Red Hat Enterprise Linux 10.2 was followed by the release of AlmaLinux 10.2 on May 26, 2026.
AlmaLinux 10.2 Download
To download the AlmaLinux 10.2 installation image, go to the following site and download “AlmaLinux-10.2-x86_64-dvd.iso”.
https://ftp.riken.jp/Linux/almalinux/10.2/isos/x86_64/
AlmaLinux 10.2 Install
Install USB media Change BIOS settings to boot from USB media.
The installation procedure is the same as for AlmaLinux 10.0, so it will be omitted here. Please refer to the page below.

Initial Setup
Disabling SELinux
First, disable selinux. selinux is a feature that improves auditing and security in Linux, but when enabled, it places considerable restrictions on the behavior of services and on what can be configured. Therefore, it is basically disabled in many cases.
SELinux operating modes
Enforcing : SELinux functionality is enabled and access control is enabled
Permissive : SElinux will warn, but no access restrictions will be placed
disabled : Both SElinux function and access control are disabled
①Current SELinux status
# getenforce
Enforcing
②Switching to [permissive] mode
# setenforce 0
# getenforce
Permissive
③Switching to [enforcing] mode
# setenforce 1
# getenforce
Enforcing
④To completely disable SELinux, a reboot is required by adding selinux=0 to the kernel command line as follows
# grubby --update-kernel ALL --args selinux=0
# reboot
※ To return SELinux to active, do the following (reboot after changes)
# grubby --update-kernel ALL --remove-args selinux
# reboot
System Modernization
Update packages as soon as possible after OS installation.
A kernel update may require rebooting the system or stopping services, or worse, a kernel panic may occur and the system may not boot. It is wiser to exclude the kernel from the update.
The kernel can be excluded from updates by running dnf -y update with "--exclude=kernel*" after it.
# dnf -y update --exclude=kernel*
Services to be stopped due to security measures
# systemctl stop atd.service
# systemctl disable atd.service
# systemctl stop kdump.service
# systemctl disable kdump.service
# systemctl stop lvm2-monitor.service
# systemctl disable lvm2-monitor.service
# systemctl stop mdmonitor.service
# systemctl disable mdmonitor.service
# systemctl stop smartd.service
# systemctl disable smartd.service
# systemctl stop dm-event.socket
# systemctl disable dm-event.socket
Adding Repositories
1. Add EPEL repository
# dnf config-manager --set-enabled crb
# dnf -y install epel-release
# vi /etc/yum.repos.d/epel.repo
[epel]
name=Extra Packages for Enterprise Linux $releasever - $basearch
# It is much more secure to use the metalink, but if you wish to use a local mirror
# place its address here.
#baseurl=https://download.example/pub/epel/$releasever${releasever_minor:+z}/Everything/$basearch/
metalink=https://mirrors.fedoraproject.org/metalink?repo=epel${releasever_minor:+-z}-$releasever&arch=$basearch
gpgkey=file:///etc/pki/rpm-gpg/RPM-GPG-KEY-EPEL-$releasever_major
gpgcheck=1
repo_gpgcheck=0
metadata_expire=24h
countme=1
enabled=1
priority=10   ←[Add] Specify priority in the range of 1~99
[epel-debuginfo]
name=Extra Packages for Enterprise Linux $releasever - $basearch - Debug
------------------------------------------------------------
------------------------------------------------------------
2. Added Remi's RPM repository
# dnf -y install https://rpms.remirepo.net/enterprise/remi-release-10.rpm
# dnf -y config-manager --set-enabled remi
# vi /etc/yum.repos.d/remi-safe.repo
# This repository is safe to use with RHEL/CentOS base repository
# it only provides additional packages for the PHP stack
# all dependencies are in base repository or in EPEL

[remi-safe]
name=Safe Remi's RPM repository for Enterprise Linux $releasever_major - $basearch
#baseurl=http://rpms.remirepo.net/enterprise/$releasever_major/safe/$basearch/
#mirrorlist=https://rpms.remirepo.net/enterprise/$releasever_major/safe/$basearch/httpsmirror
mirrorlist=http://cdn.remirepo.net/enterprise/$releasever_major/safe/$basearch/mirror
enabled=1
priority=10   ← [Add] Specify priority in the range of 1~99
gpgcheck=1
# can be enabled if not behind a proxy because of possible cache issue
repo_gpgcheck=0
gpgkey=file:///etc/pki/rpm-gpg/RPM-GPG-KEY-remi.el$releasever_major

[remi-safe-debuginfo]
name=Remi's RPM repository for Enterprise Linux $releasever_major - $basearch - debuginfo
baseurl=http://rpms.remirepo.net/enterprise/$releasever_major/debug-remi/$basearch/
enabled=0
gpgcheck=1
repo_gpgcheck=0
gpgkey=file:///etc/pki/rpm-gpg/RPM-GPG-KEY-remi.el$releasever_major
Network Settings
1. Check network device name
# nmcli dev s
DEVICE  TYPE      STATE                   CONNECTION
ens160  ethernet  connected               ens160
lo      loopback  connected (externally)  lo
The network device name can be found as "ens160"
2. Host Name Change
Change the host name to Lepard to try it out
# hostnamectl set-hostname Lepard

Log in again
[huong@Lepard:~]$
3. Static IPv4 address configuration
The name of the network interface is "ens160".
Change by "nmcli" command
Change the static IPv4 address to "192.168.11.83".
①Change by "nmcli" command
Fixed IPv4 address setting
# nmcli connection modify ens160 ipv4.addresses 192.168.11.83/24

Gateway Configuration
# nmcli connection modify ens160 ipv4.gateway 192.168.11.1

Referenced DNS settings
# nmcli connection modify ens160 ipv4.dns 192.168.11.1

DNS search base settings (own domain name)
# nmcli connection modify ens160 ipv4.dns-search [domin]

Set to fixed IP address assignment
# nmcli connection modify ens160 ipv4.method manual

Reboot interface to reflect settings
# nmcli connection down ens160; nmcli connection up ens160
➁Change in GUI
# nmtui
Change the fixed IPv4 address to "192.168.11.83" as above.
nmcli connection down ens160; nmcli connection up ens160
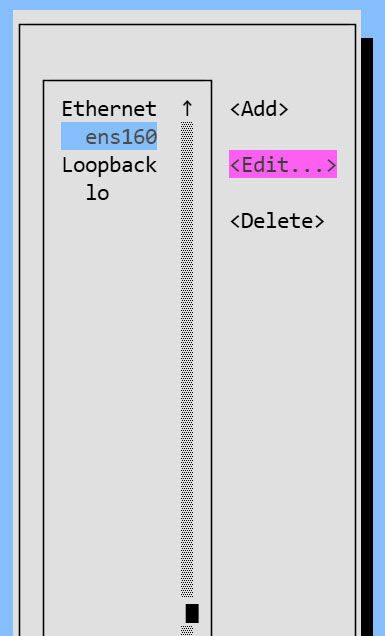
Change the address of the IPv4 configuration
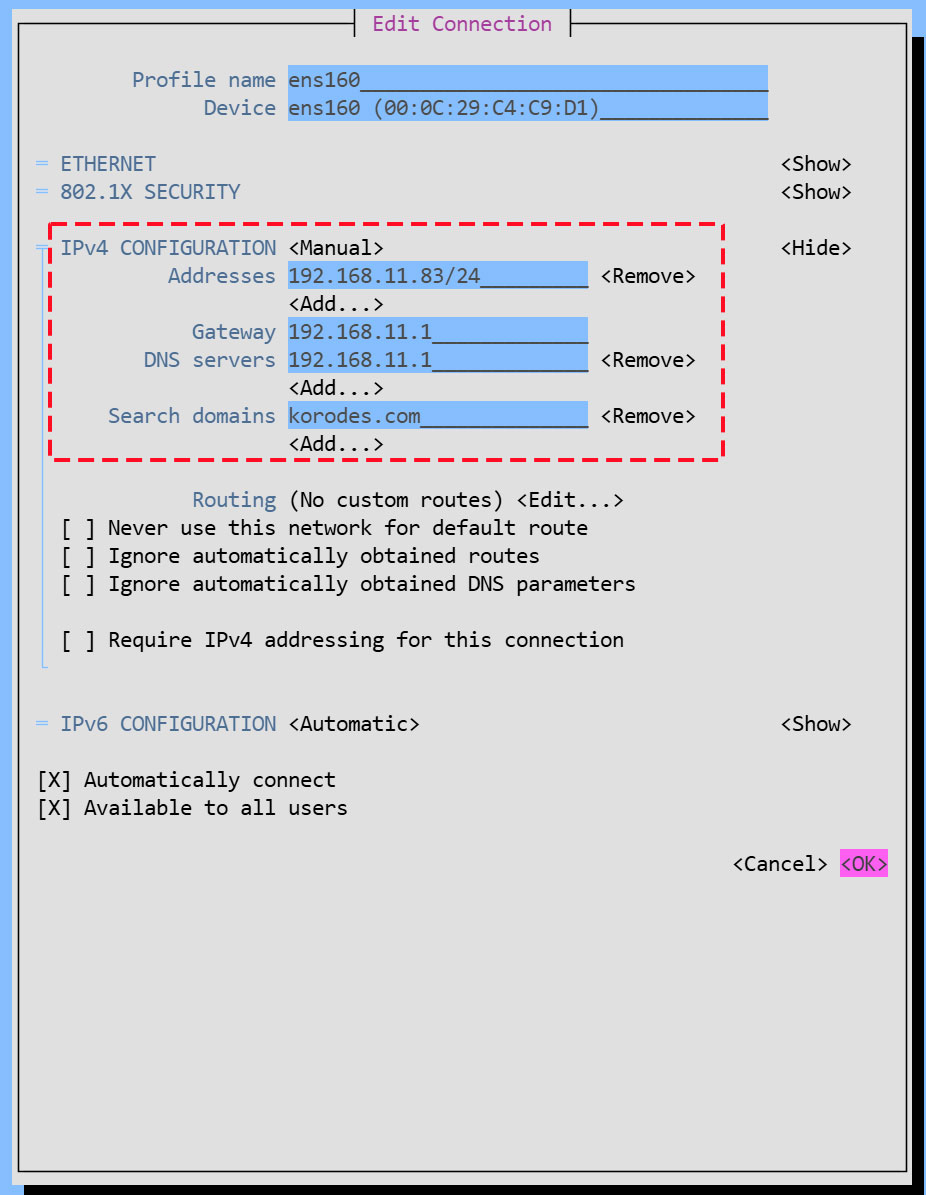
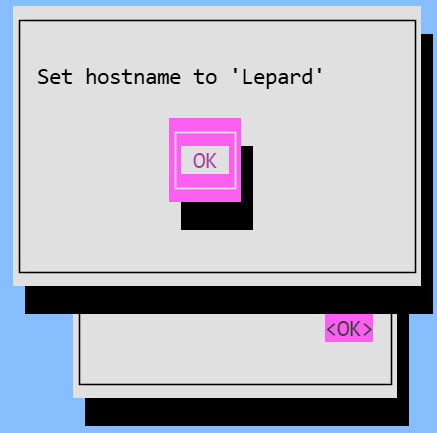
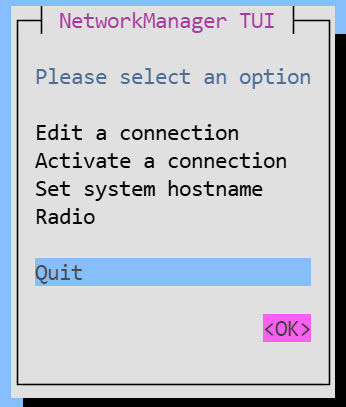
4. Host Name Change
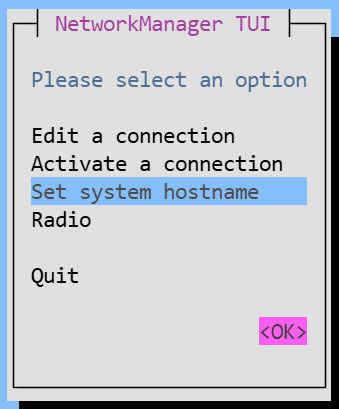
Change the hostname to Lepard
Return to the first screen of [NetworkManager TUI], select [Set system hostname], and click <OK>.
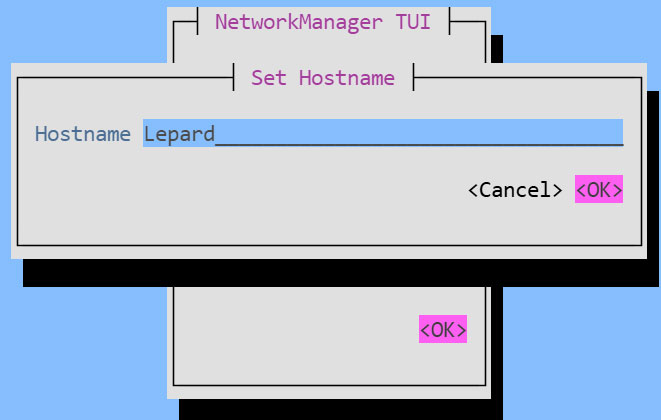
Enter [Hostname] and click
Vim Configuration
①Vim Install
# dnf -y install vim-enhanced
②Apply and reflect Vim
# vi ~/.bashrc
# Alias appended to the last line
alias vi='vim'
# source ~/.bashrc
③Configure Vim as a user-specific environment
# vi ~/.vimrc
" Use vim's own extensions (not compatible with vi)
set nocompatible
" Specify character code
set encoding=utf-8
" Specify file encoding (read from the beginning until success)
set fileencodings=utf-8,iso-2022-jp,sjis,euc-jp
" Specify the line feed code to be recognized automatically
set fileformats=unix,dos
" Get Backup
set backup
" Specify the directory from which to obtain backups
set backupdir=~/backup
" Number of generations to keep search history
set history=50
" Do not distinguish between upper and lower case letters when searching
set ignorecase
" Mixing capital letters in search terms makes the search case sensitive
set smartcase
" Highlight words matching your search term
set hlsearch
" Use incremental search
set incsearch
" Display line number
set number
" Visualize line breaks ( $ ) and tabs ( ^I )
set list
" Highlight corresponding parentheses when entering parentheses
set showmatch
" No newlines at the end of files
set binary noeol
" Enable automatic indentation
set autoindent
" Color-coded display by syntax
syntax on
" Change color of comment text in case of syntax on
highlight Comment ctermfg=LightCyan
" Wrap lines by window width
set wrap