

SSH connection with authentication using public key cryptography
Creation of public and private key pairs
Create a public/private key pair for a user connecting to the Linux server using OpenSSH.
Use ssh-keygen to create key pairs.
Creation of public/private key pairs is performed with remote login user privileges。
If you do not specify the destination and file name, id_ed25519 and id_ed25519.pub will be created in /home/(user name)/.ssh/. On the way, enter the password for the key.
# su - huong
[huong@Lepard~]$ ssh-keygen -t ed25519
Generating public/private ed25519 key pair.
Enter file in which to save the key (/home/huong/.ssh/id_ed25519):
Created directory '/home/huong/.ssh'.
Enter passphrase for "/home/huong/.ssh/id_ed25519" (empty for no passphrase):
Enter same passphrase again:
Your identification has been saved in /home/huong/.ssh/id_ed25519
Your public key has been saved in /home/huong/.ssh/id_ed25519.pub
The key fingerprint is:
SHA256:OvKH+r2OkMT84qp+zZuoxblgVGJZGceXpC+WBnpiktY huong@Lepard
The key's randomart image is:
+--[ED25519 256]--+
|   o+....        |
|  o....o         |
| + o ..          |
|..=o. o          |
|o* E+= .S        |
|= +.+o..         |
| o +B +.         |
|. oooBo+.        |
|o+++o==o+.       |
+----[SHA256]-----+
$ cat ~/.ssh/id_ed25519.pub >> ~/.ssh/authorized_keys
$ chmod 600 ~/.ssh/authorized_keys
$ chmod 700 ~/.ssh/
Save the generated private key id_ed25519 to the Windows directory c:\USERS\user\.ssh\ using winSCP
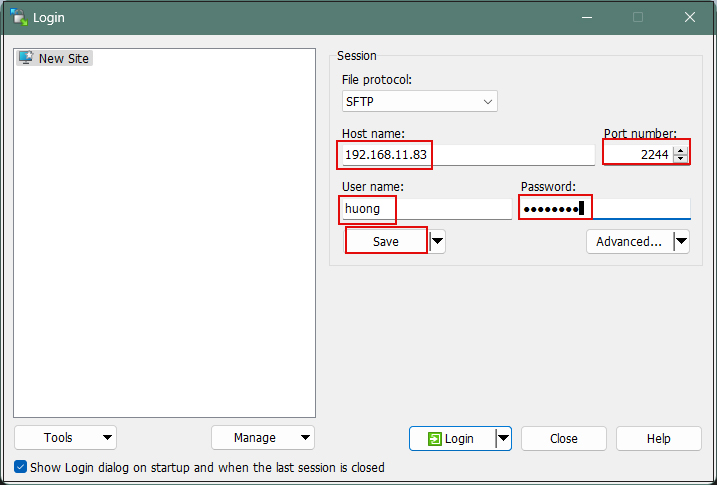
Start Winscp
Host name : Server IP Address
Port number : SSH Port
User name : Server Login User
Password : Password for the same user
and then "Save".
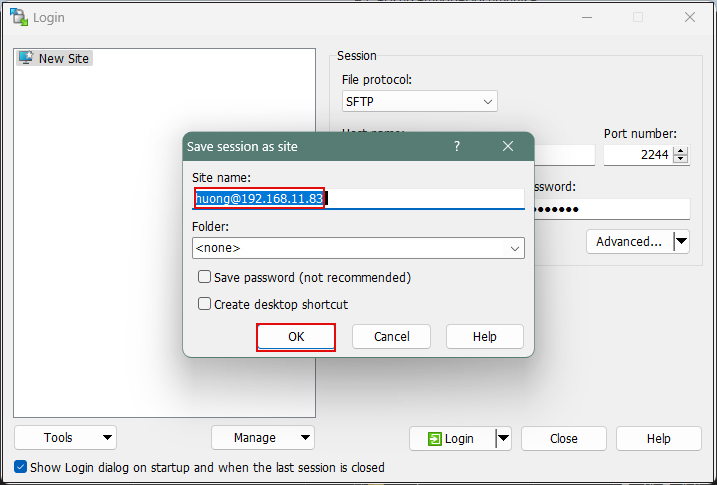
Site name : Any name
Click "OK"
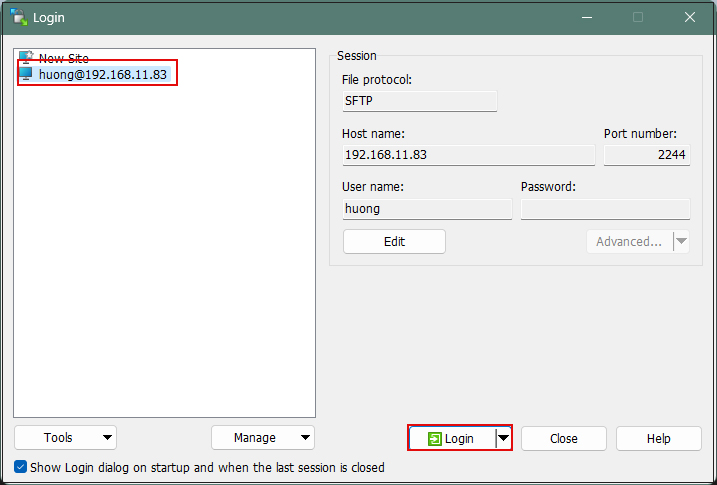
After confirming the server, click "Login".
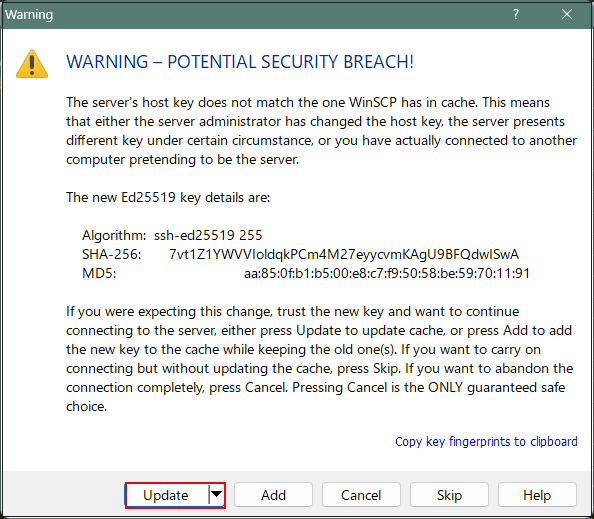
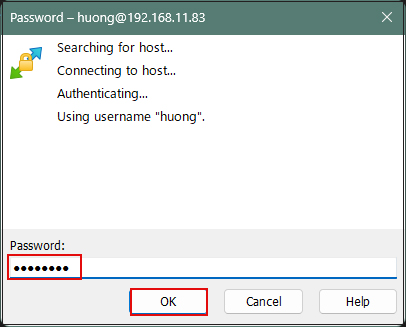
Click "Update" when the following screen appears
Password of the logged-in user in the Password field
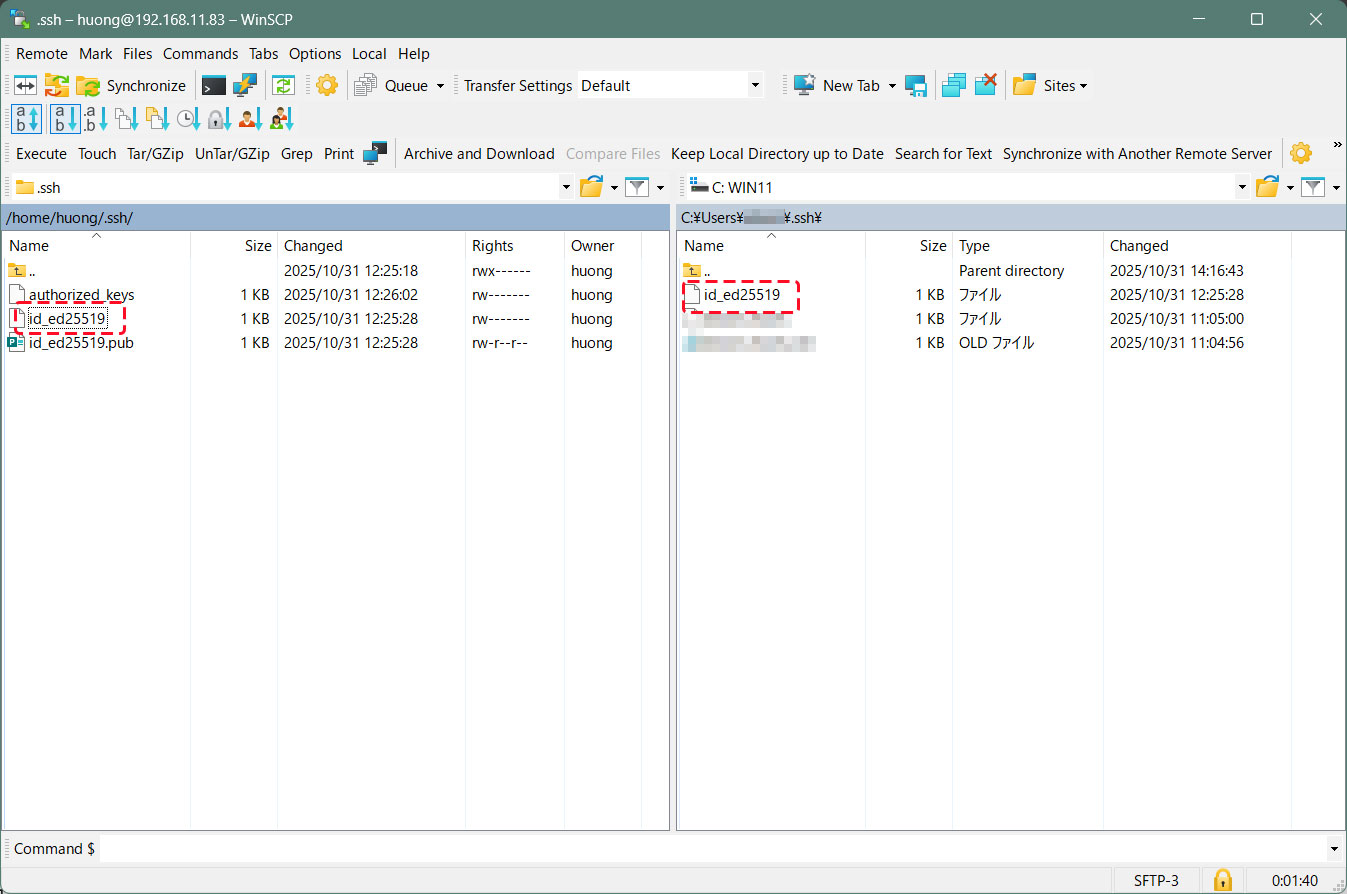
Once connected, the left pane shows the server side, and the right pane shows the PC (Windows) side.
Copy the "id_ed25519" file located in the .ssh directory to the Windows directory[c:\USERS\user\.ssh] on the right side.
Editing SSH Configuration File
Edit the SSH configuration file to disable password authentication.
This time, instead of being an ordinary user, su - to become root.
$ su -
Password:
# vi /etc/ssh/sshd_config
# Line 65 : Changed to no password authentication
PasswordAuthentication no

# systemctl restart sshd
How to connect using Tabby Terminal
Specify the key using the option [-i c:\USERS\xxxxx\.ssh\id_ed25519]
C:\Users\xxxxx>ssh huong@192.168.11.83 -p 2244 -i c:\USERS\xxxxx\.ssh\id_ed25519
Enter passphrase for key 'c:\USERS\xxxxx\.ssh\id_ed25519': [The password created when generating the public key]
Activate the web console with: systemctl enable --now cockpit.socket
Last login: Wed Jul 1 10:01:28 2026
huong@Lepard:~$
Creating a private key using PuTTYgen
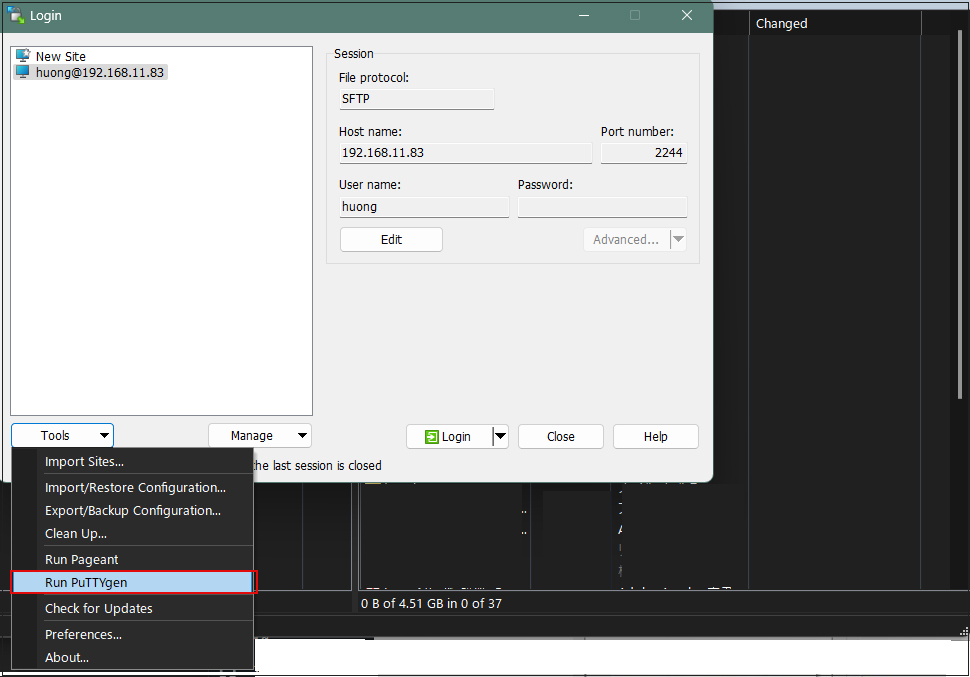
Start Winscp and launch [Run Puttygen] from [Tools].
Select the appropriate server
Click Load
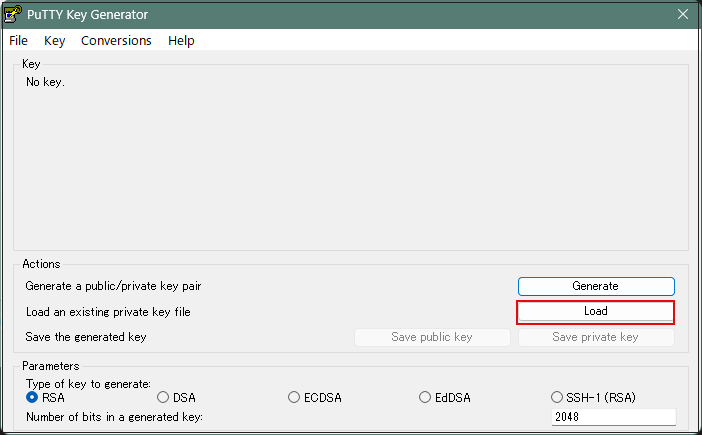
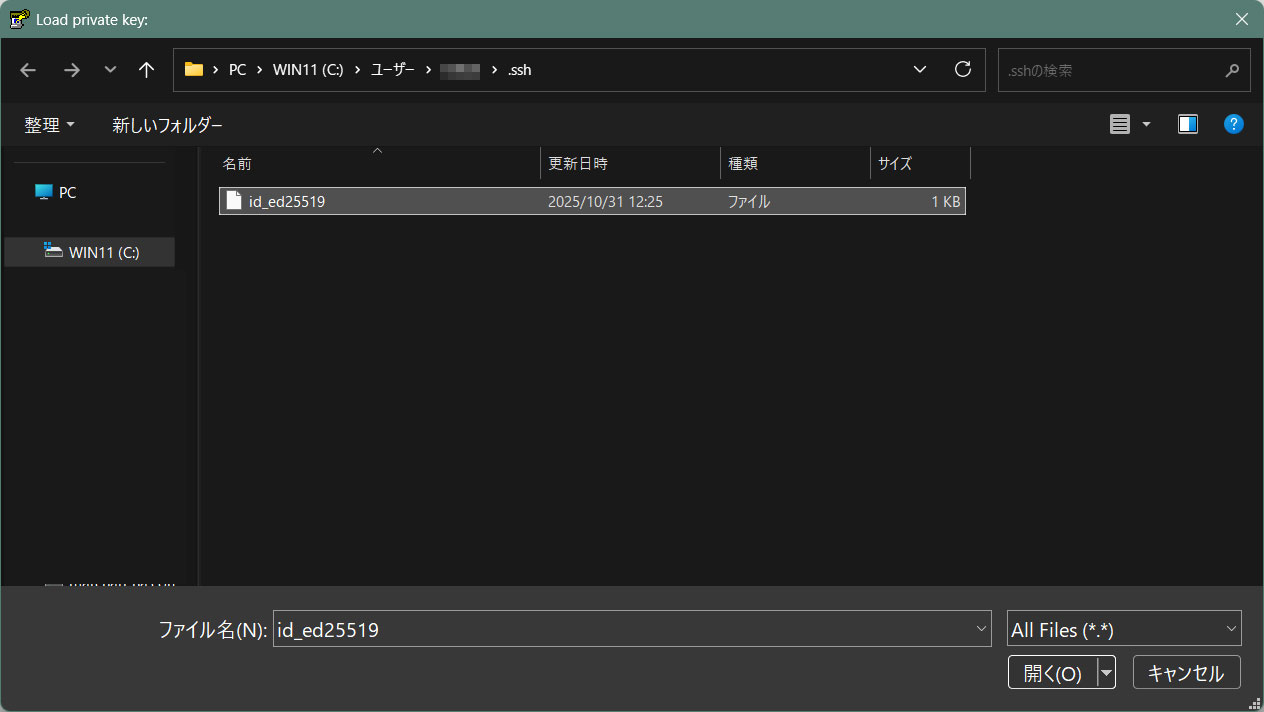
The [ Open File Dialog ] will open, change the file type to [ All Files (. Change the file type to [ All Files (. *) ] and load the private key id_ed25519 that was transferred from the Linux server.
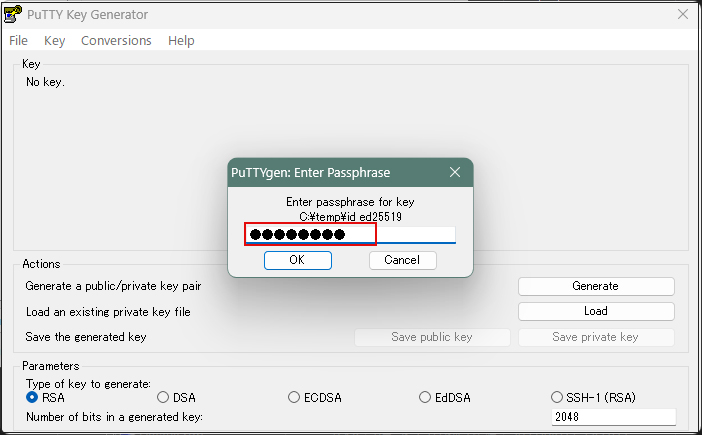
The password is the password set in "Creating a public and private key pair" above
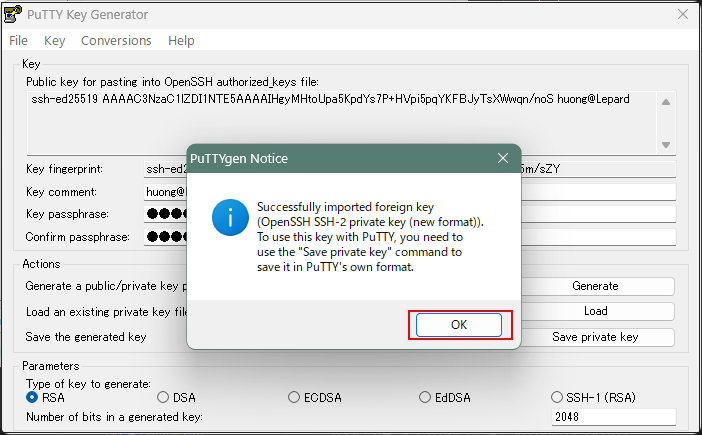
Click on "Save private key"
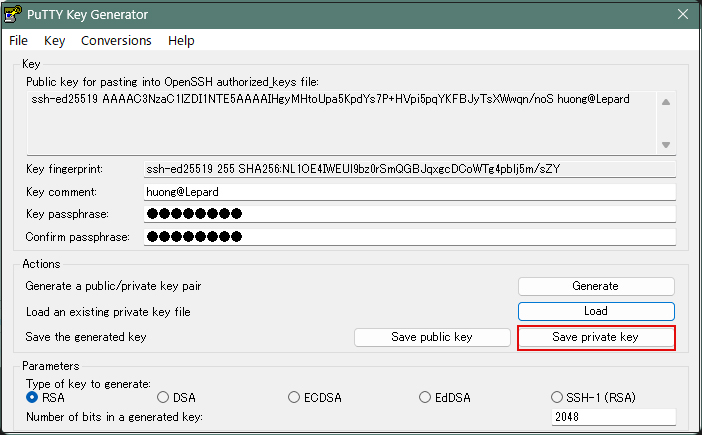
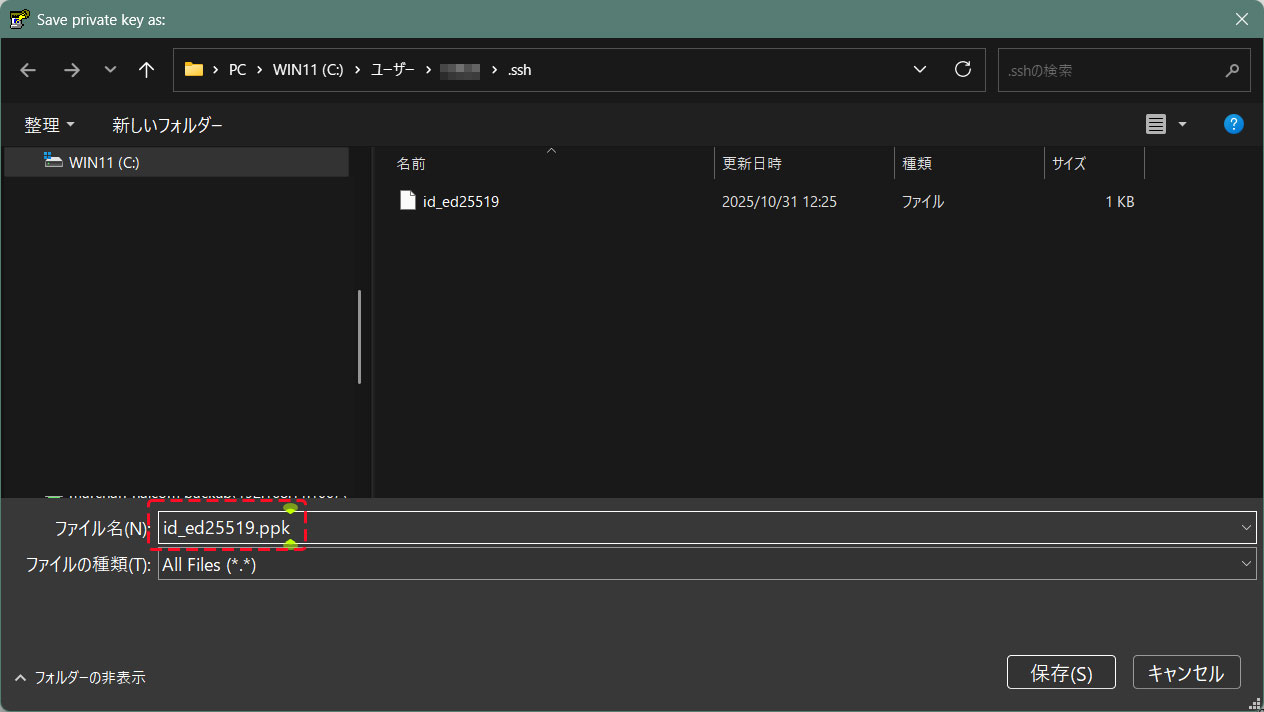
Save the file with the extension ".ppk" in the same place as "id_ed25519" saved earlier on the Windows side under the name "id_ed25519.ppk".
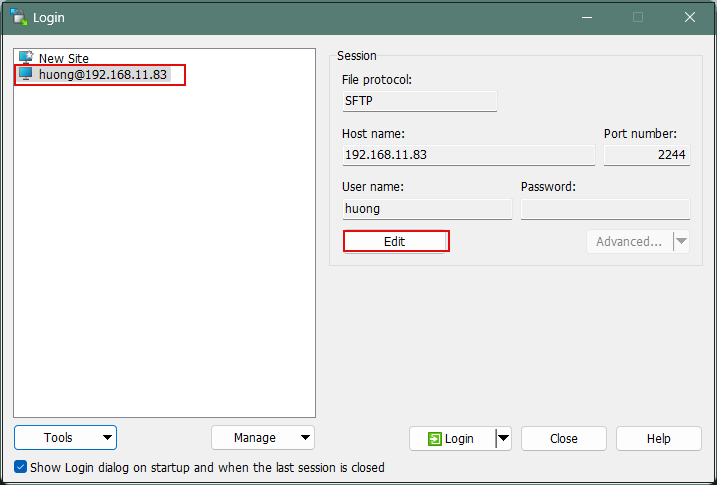
Select the target server and click "Edit".
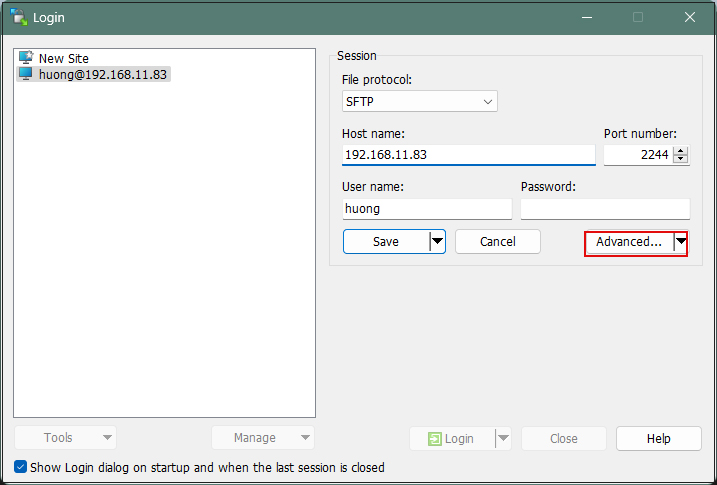
Click on "Advanced"
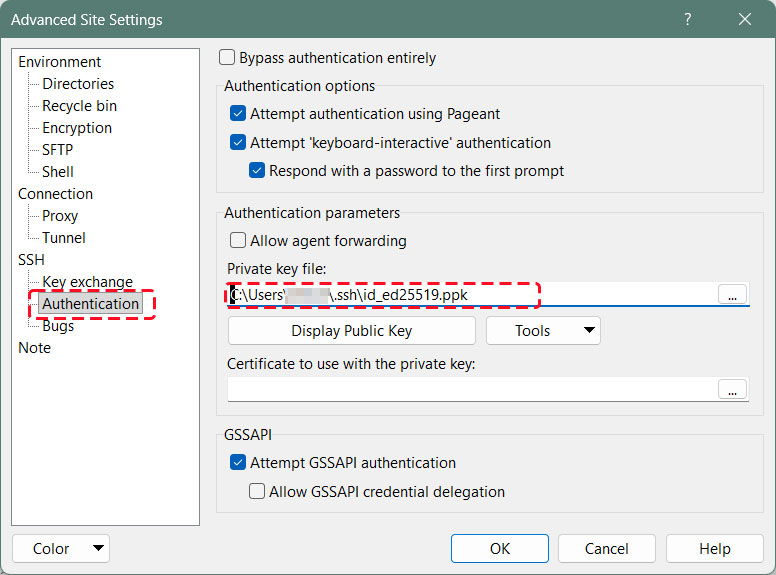
Open the "Authentication" menu and specify "id_ed25519.ppk" saved in Windows for "Private key file
Click "Save"
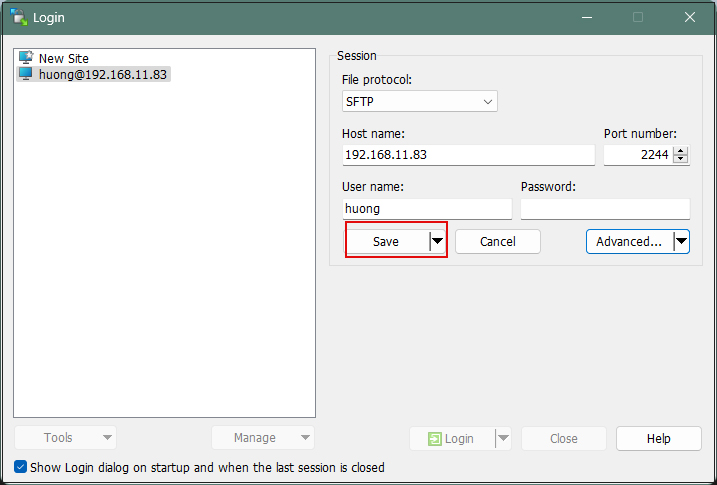
Click on "Login"
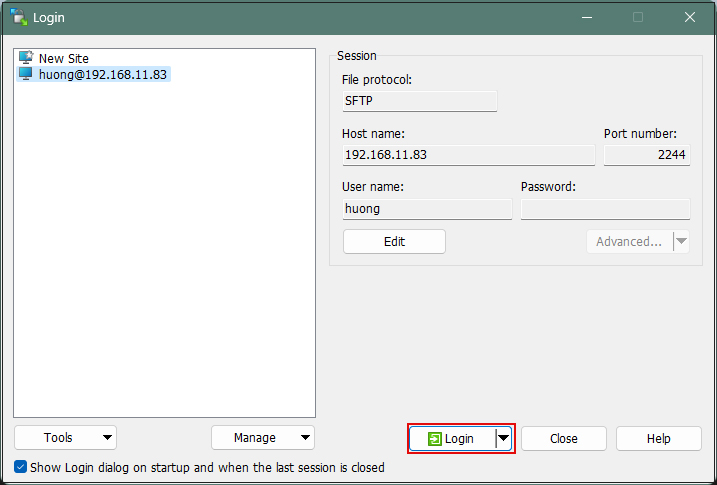
The password is the password set in "Creating a public and private key pair" above
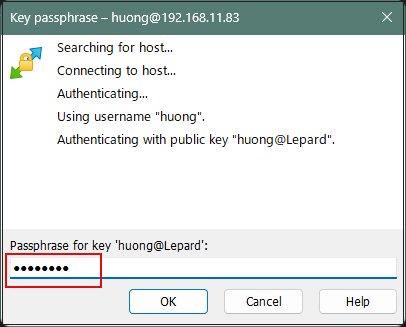
When connecting via Tabby Terminal, do the following:
C:\Users\xxxxx>ssh huong@192.168.11.83 -p 2244 -i c:\USERS\xxxxx\.ssh\id_ed25519.ppk
Enter passphrase for key 'c:\USERS\xxxxx\.ssh\id_ed25519.ppk': ←The password specified when creating the public key
Activate the web console with: systemctl enable --now cockpit.socket
If you encounter an error like the one below, convert your private key to OpenSSH format.
C:\Users\xxxxx>ssh huong@192.168.11.83 -p 2244 -i c:\USERS\xxxxx\.ssh\id_ed25519.ppk
Load key "c:\USERS\xxxxx\.ssh\id_ed25519.ppk": invalid format
huong@192.168.11.83: Permission denied (publickey,gssapi-keyex,gssapi-with-mic).
Launch [WinSCP] > [Run PuTTygen], then import the private key under [Import key] in the [Conversions] tab.
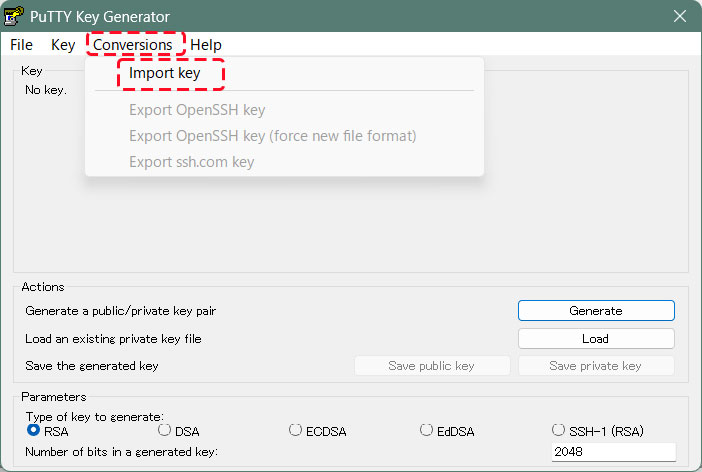
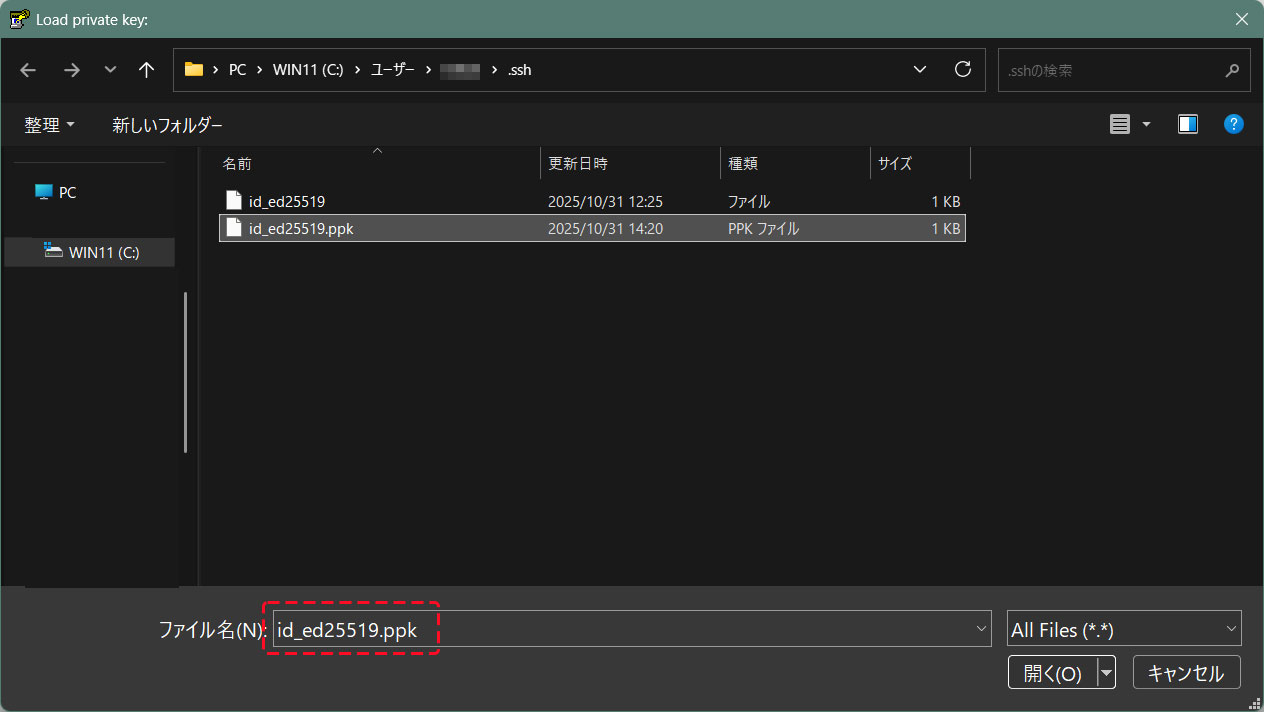
Convert the imported private key to OpenSSH format and save it under a different name
The password specified when creating the public key
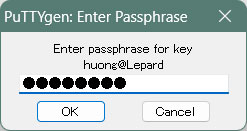
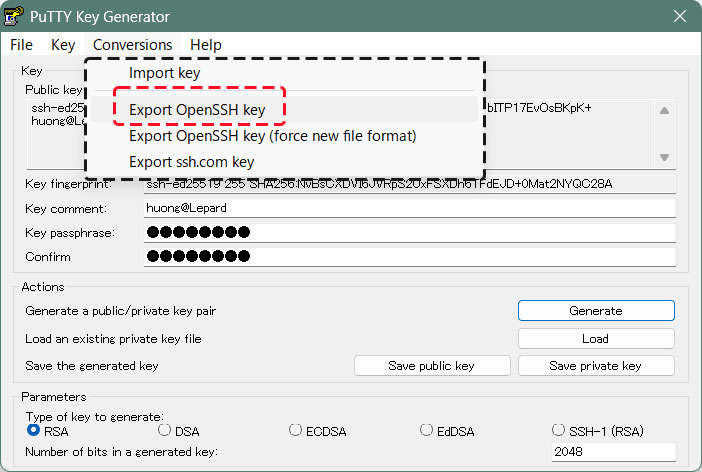
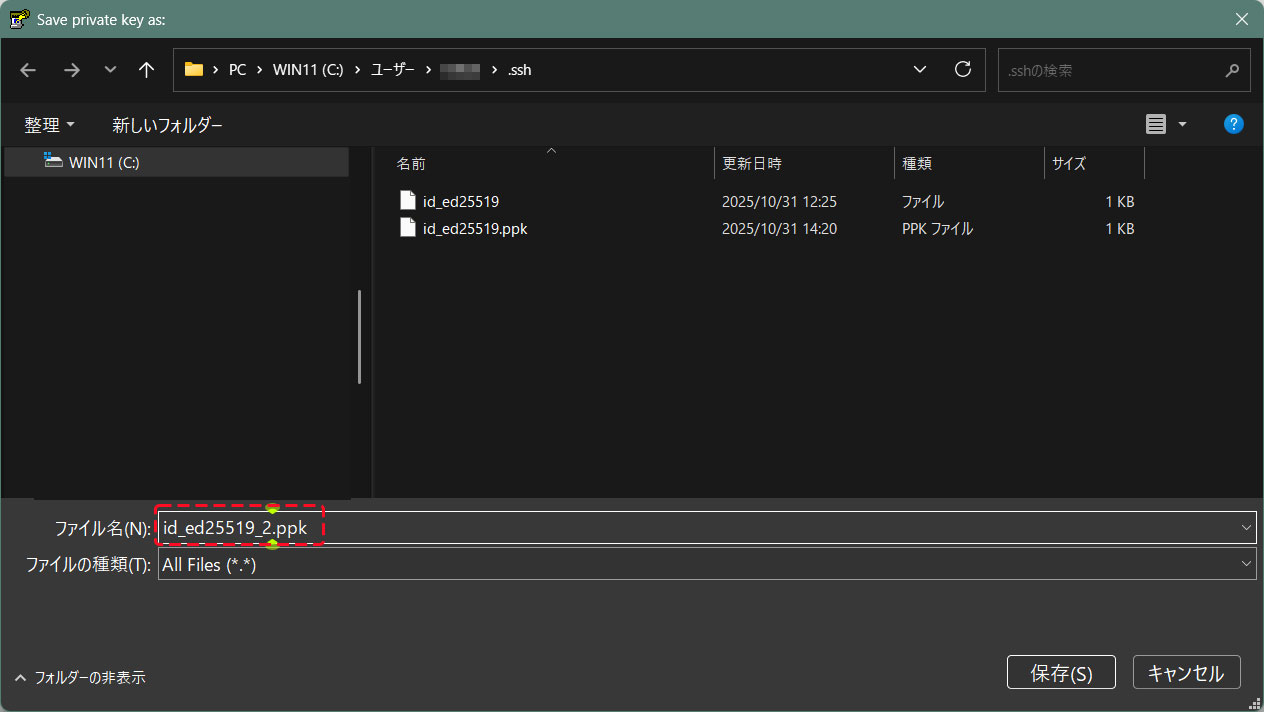
Using the [id_ed25519_2.ppk] file converted to OpenSSH format, you can connect as follows:
C:\Users\xxxxx>ssh huong@192.168.11.83 -p 2244 -i c:\USERS\xxxxx\.ssh\id_ed25519_2.ppk
Enter passphrase for key 'c:\USERS\xxxxx\.ssh\id_ed25519_2.ppk': ←The password specified when creating the public key
Activate the web console with: systemctl enable --now cockpit.socket
Last login: Wed Jul 1 10:06:20 2026 from 192.168.11.14