1. Install NTP server
# apt -y install chrony
# vi /etc/chrony/chrony.conf
Line 5.:Comment the default settings and add the NTP server for your time zone.
#pool 2.debian.pool.ntp.org iburst
pool ntp.nict.jp iburst
Add to the last line (Range for which time synchronization is allowed)
allow 192.168.11.0/24
Setting Reflection
# systemctl restart chrony
Operation check
# chronyc sources
MS Name/IP address         Stratum Poll Reach LastRx Last sample
===============================================================================
^- ntp-b3.nict.go.jp             1   6    17    26   +440us[ +440us] +/- 7169us
^* ntp-k1.nict.jp                1   6    17    26    +74us[ -848us] +/- 4972us
^- ntp-a2.nict.go.jp             1   6    17    26  +1158us[+1158us] +/- 6015us
^+ ntp-b2.nict.go.jp             1   6    17    26   +557us[ -365us] +/- 7032us
2. Install FTP Server
2.1 Install Vsftpd
# apt install -y vsftpd
FTP Port21 allowed
# ufw allow ftp
# ufw reload
2.2 Edit Vsftpd configuration file
# vi /etc/vsftpd.conf

Line 14. : change
listen=YES
Line 22 : change
listen_ipv6=NO
Line 31 : Uncomment(Allow use of FTP commands to make changes to files)
write_enable=YES
Line 35 : Uncomment(Set permission values to be applied to new files)
local_umask=022
Line 99-100 : Uncomment(Allow uploads/downloading  by ASCII)
ascii_upload_enable=YES
ascii_download_enable=YES
Line 122 : Uncomment
Change the user's login directory to the user's root directory
chroot_local_user=YES
Line 123 : Uncomment
Users will not be able to access outside the login directory
chroot_list_enable=YES
Line 125 : Uncomment
Users listed in vsftpd.chroot_list are exempt from the above restrictions
chroot_list_file=/etc/vsftpd.chroot_list
Line 131:Uncomment( Enable batch transfer by directory )
ls_recurse_enable=YES
Next, create a new vsftpd.chroot_list under etc.
Add your Debian username (e.g. huong) to this file.
# vi /etc/vsftpd.chroot_list
huong
Enable vsftpd and restart
# systemctl restart vsftpd
2.3 Check FTP connection
Check with FTP client
In this case, we will use FileZilla.
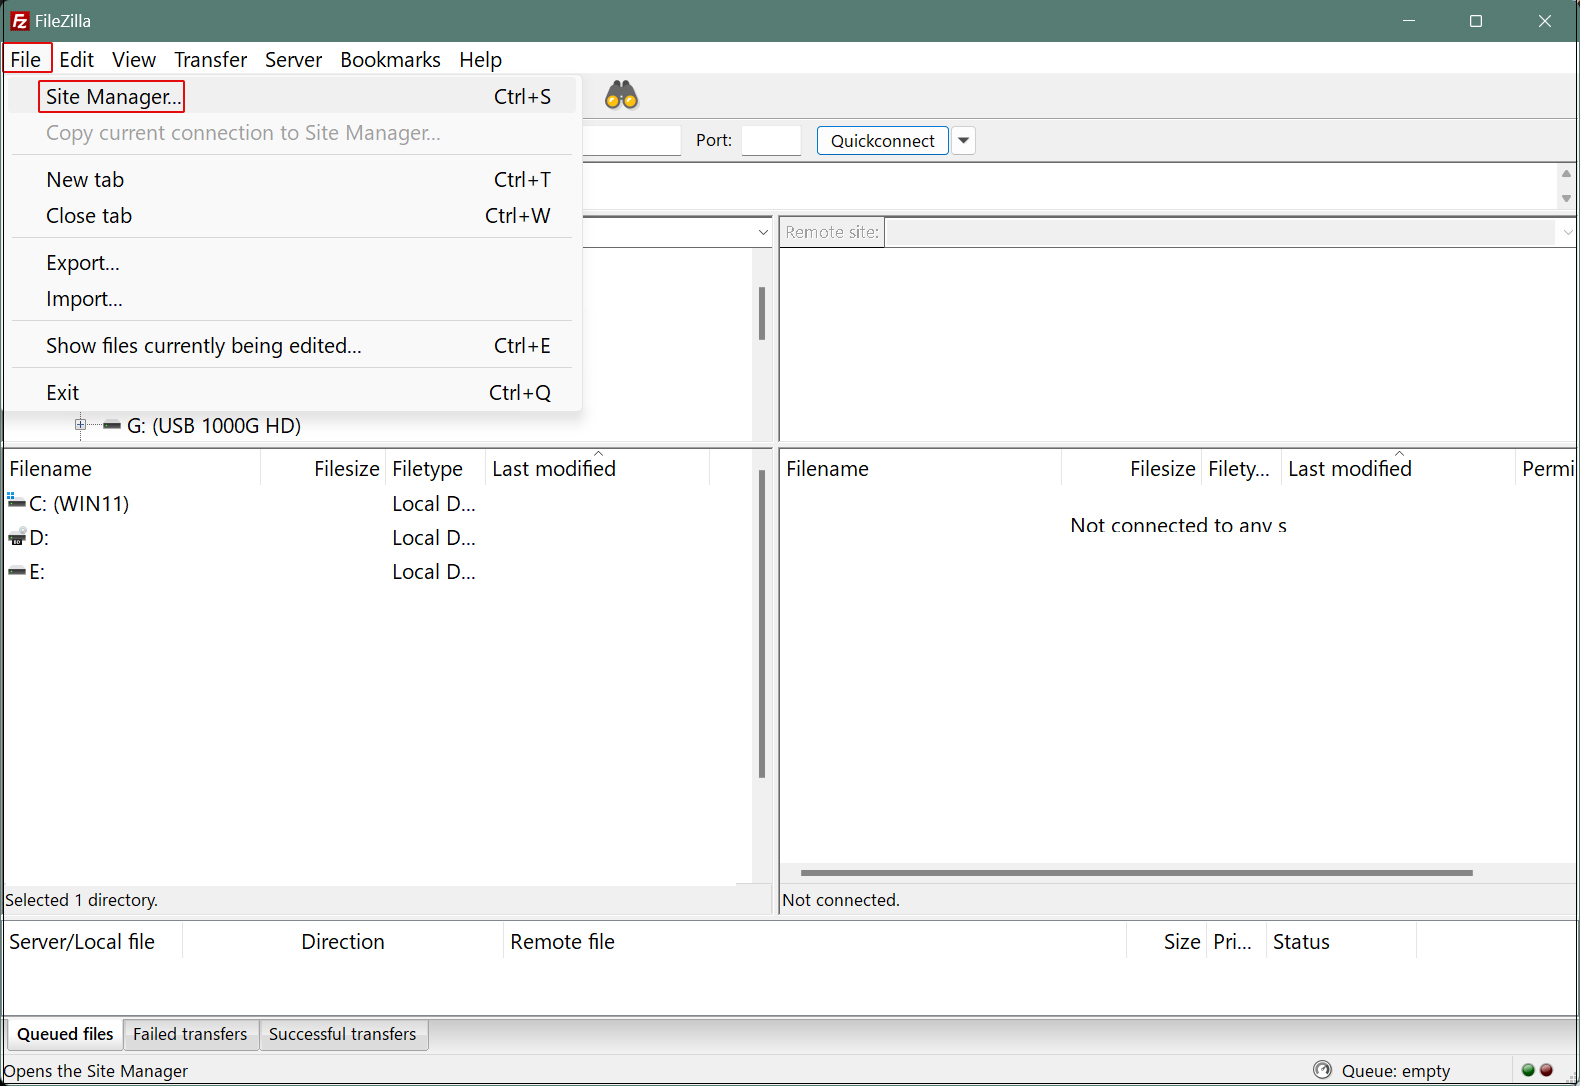
Select "Site Manager" from the "File" menu
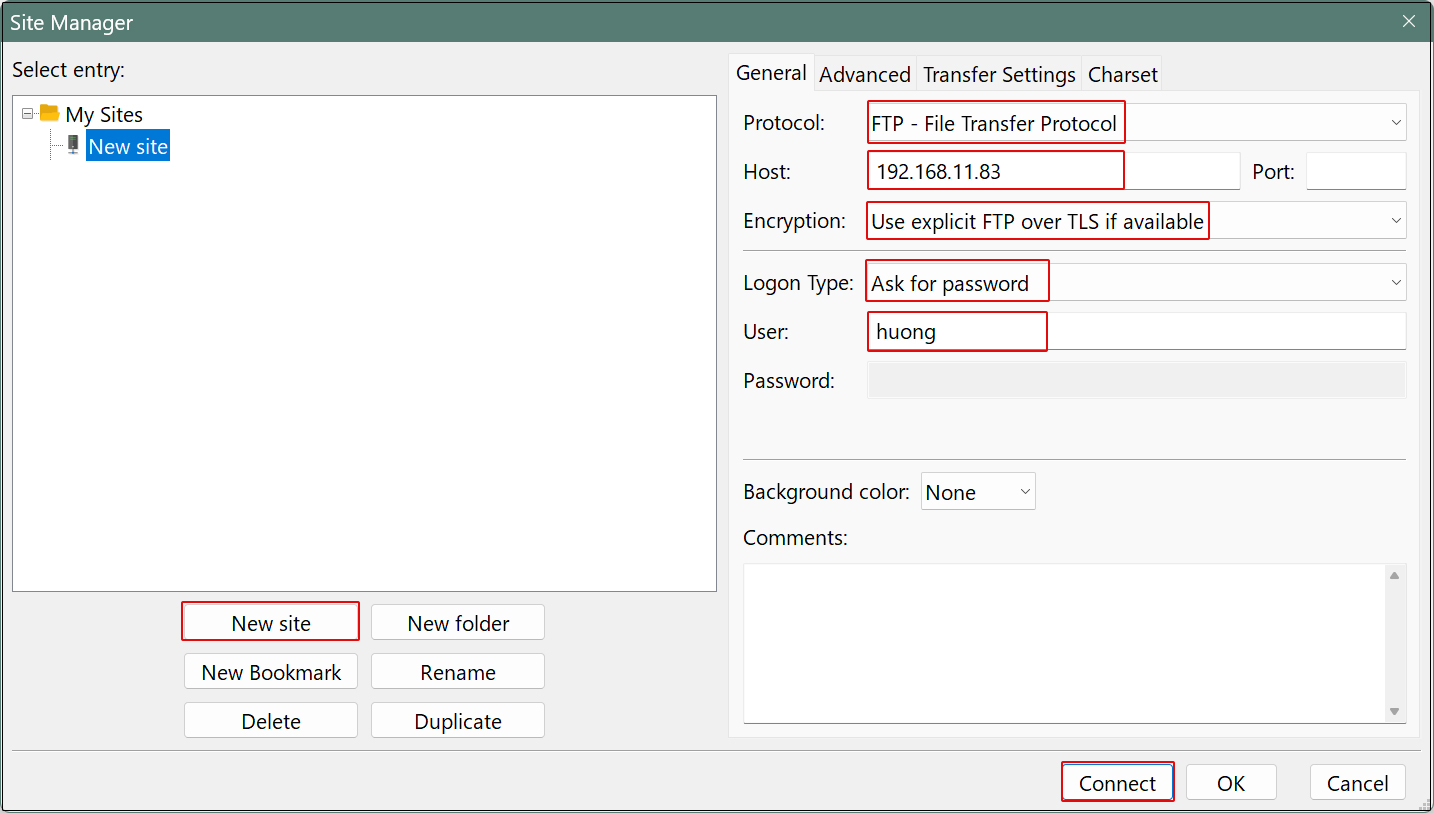
Click on "New site" and then
Protocol : FTP-File Transfer Protocol
Host : Server IP Address
Port : (can be blank)
Encryption : Use expllict FTP ocver TLS if available
Logon Type : Ask for password
User : Login User Name
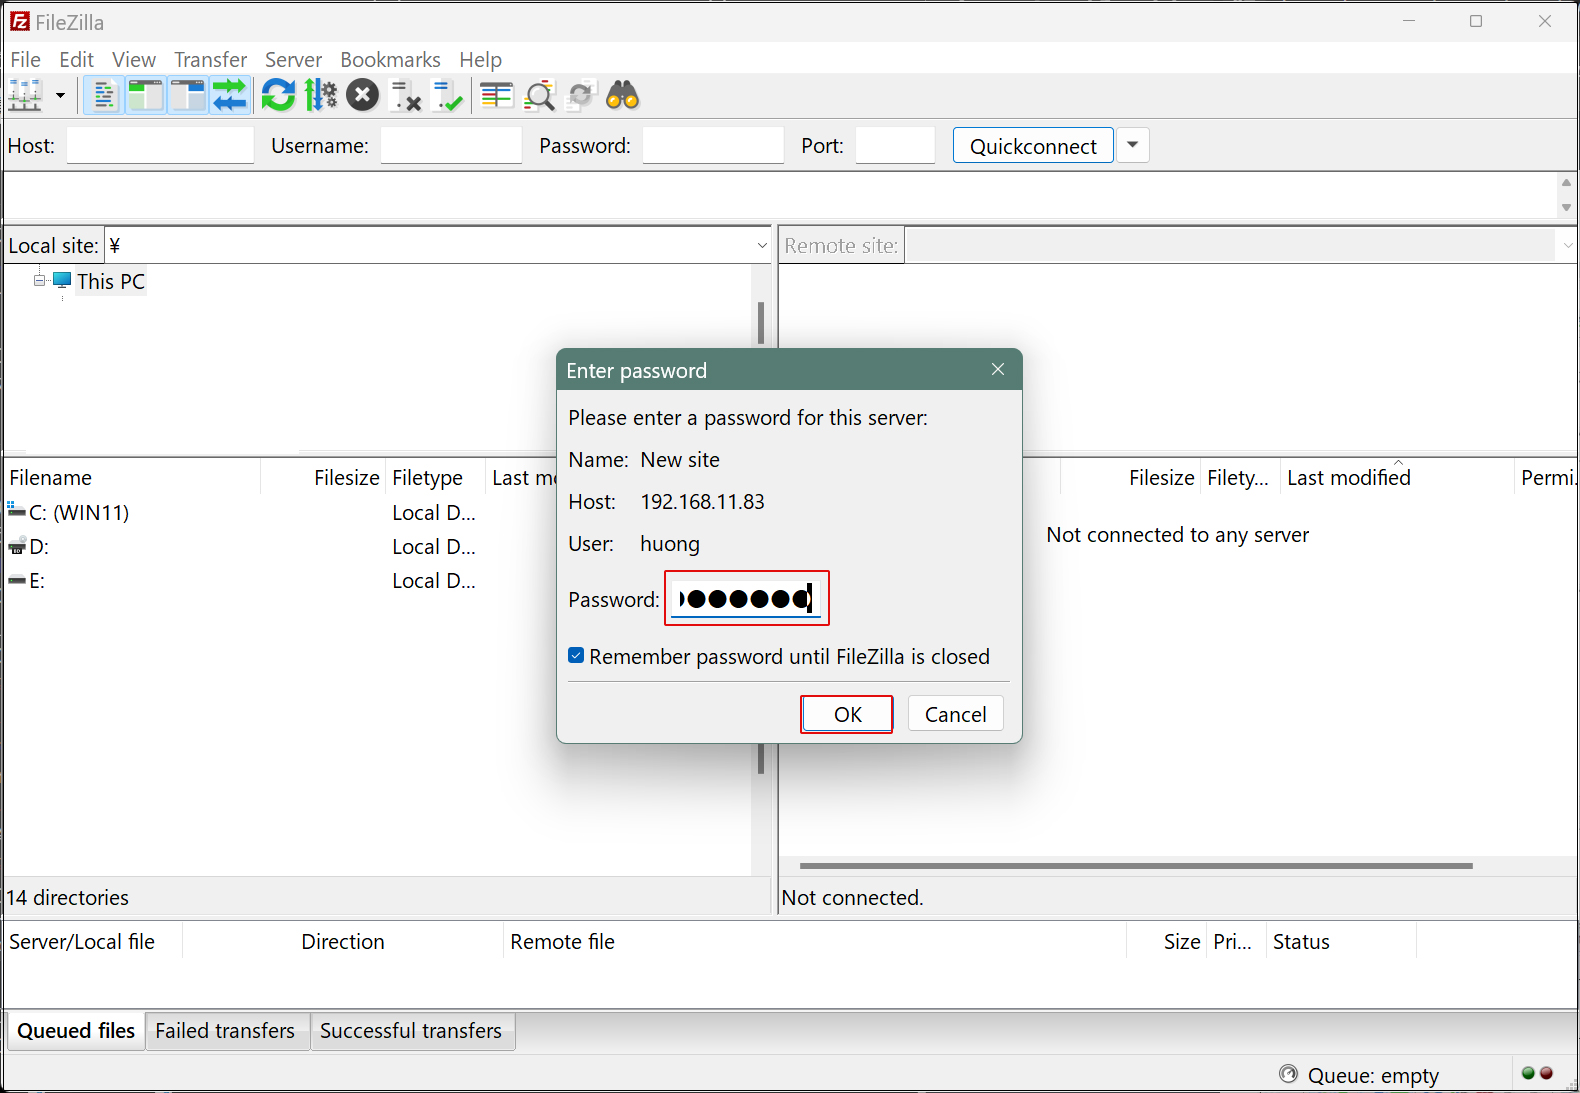
Password : Password for logged-in user
If you see the Windows directory on the left and the Debian directory on the right, the connection was successful.
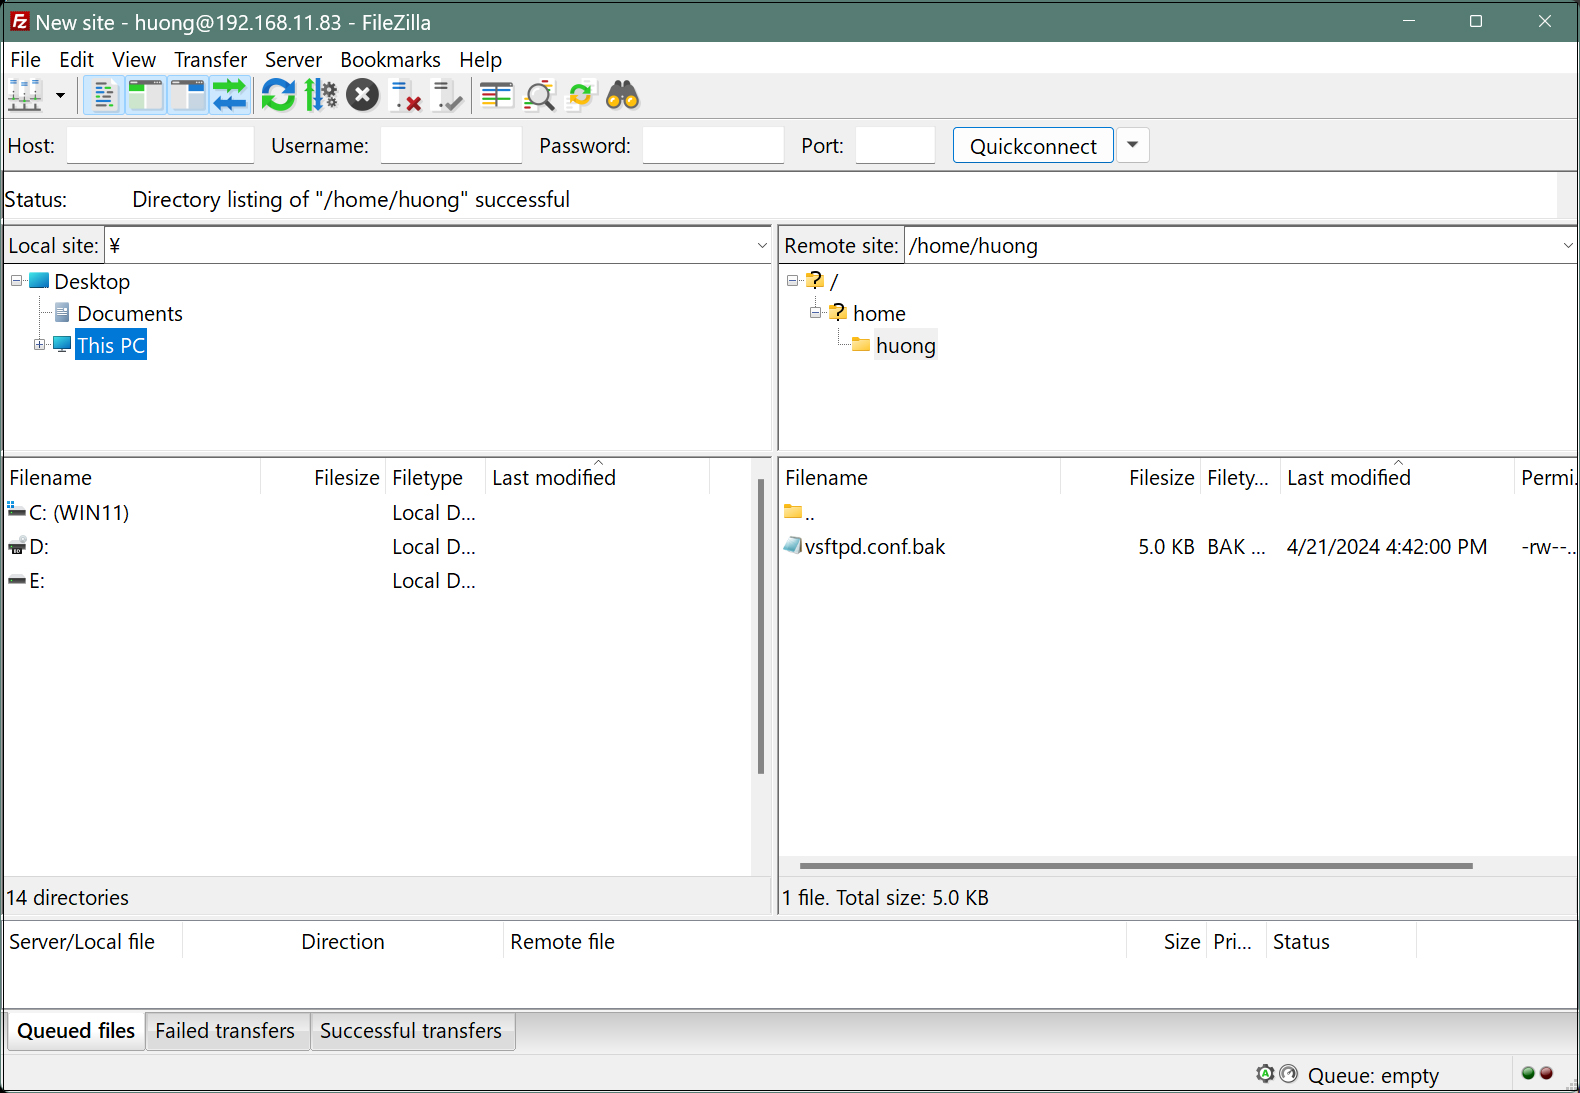
If you can't connect, try setting "Transfer mode" to "Active" in "Transfer Settings".
3. Vsftpd SSL/TLS
Configure Vsftpd to use SSL/TLS
3.1 Create self-signed certificates
This work is not required if you are using a trusted, legitimate certificate such as Let's Encrypt.
# cd /etc/ssl/private
# openssl req -x509 -nodes -newkey rsa:2048 -keyout vsftpd.pem -out vsftpd.pem -days 3650
Generating a RSA private key
........................+++++
..................+++++
writing new private key to '/etc/pki/tls/certs/vsftpd.pem'
-----
You are about to be asked to enter information that will be incorporated
into your certificate request.
What you are about to enter is what is called a Distinguished Name or a DN.
There are quite a few fields but you can leave some blank
For some fields there will be a default value,
If you enter '.', the field will be left blank.
-----
Country Name (2 letter code) [XX]:JP # country code
State or Province Name (full name) []:Osaka # Region (Prefecture)
Locality Name (eg, city) [Default City]:Sakai # City
Organization Name (eg, company) [Default Company Ltd]:private # organization name
Organizational Unit Name (eg, section) []:Admin # Name of organization's department
Common Name (eg, your name or your server's hostname) [] Lepard # Server Host Name
Email Address []: # Administrator's email address
# chmod 600 vsftpd.pem
3.2 Vsftpd Configuration
# vi /etc/vsftpd.conf

Lines 149-151 : Make a comment and add the following below
#rsa_cert_file=/etc/ssl/certs/ssl-cert-snakeoil.pem
#rsa_private_key_file=/etc/ssl/private/ssl-cert-snakeoil.key
#ssl_enable=NO
rsa_cert_file=/etc/ssl/private/vsftpd.pem
rsa_private_key_file=/etc/ssl/private/vsftpd.pem
ssl_enable=YES
ssl_ciphers=HIGH
force_local_data_ssl=YES
force_local_logins_ssl=YES
# systemctl restart vsftpd
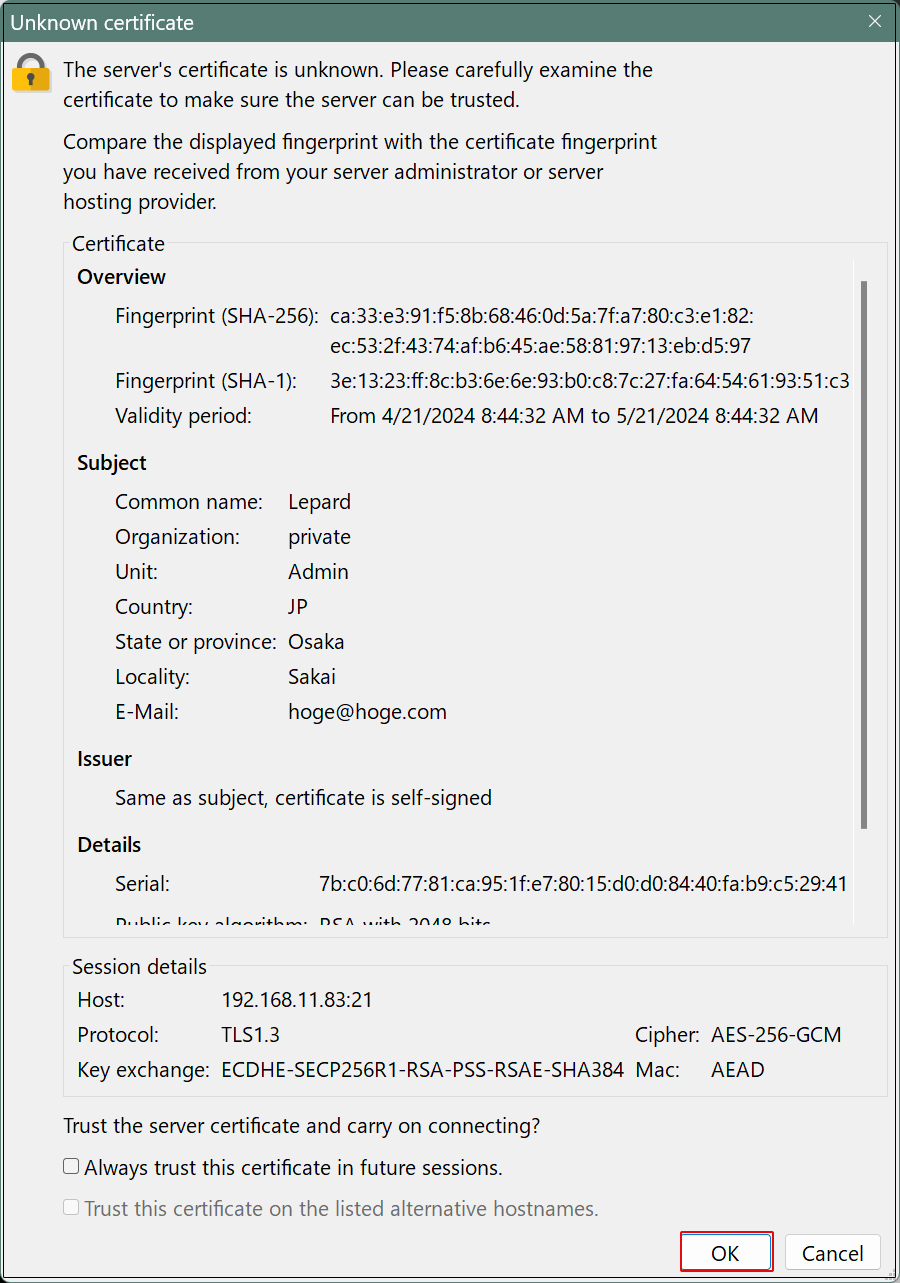
When connecting to FileZilla, the following screen appears, check the box and click "OK" to connect as described above.