1. MariaDB Install
Update the server package
# zypper ref
# zypper up -y
1.1 MariaDB
①Install
# zypper -n install mariadb
②initialization
# vi /etc/my.cnf

Line 12 : add
[mysqld]
character-set-server=utf8
③Check installed
# rpm -qi mariadb

Name        : mariadb
Version     : 12.3.2
Release     : 1.3
Architecture: x86_64
Install Date: Wed 05 Aug 2026 01:42:41 PM JST
Group       : Productivity/Databases/Servers
Size        : 144479744
License     : SUSE-GPL-2.0-with-FLOSS-exception
Signature   : RSA/SHA512, Mon 27 Jul 2026 10:01:40 AM JST, Key ID 35a2f86e29b700a4
Source RPM  : mariadb-12.3.2-1.3.src.rpm
Build Date  : Thu 11 Jun 2026 02:26:23 AM JST
Build Host  : reproducible
Packager    : https://bugs.opensuse.org
Vendor      : openSUSE
URL         : https://www.mariadb.org
Summary     : Server part of MariaDB
Description :
MariaDB is an open-source, multi-threaded, relational database management
system. It's a backward compatible, drop-in replacement branch of the
MySQL Community Server.

This package only contains the server-side programs.
Distribution: openSUSE Tumbleweed
④Start and enable MariaDB service
# systemctl start mariadb
# systemctl enable mariadb
Created symlink '/etc/systemd/system/mysql.service' → '/usr/lib/systemd/system/mariadb.service'.
Created symlink '/etc/systemd/system/multi-user.target.wants/mariadb.service' → '/usr/lib/systemd/system/mariadb.service'.
Ensure services are started upon reboot
# systemctl status mariadb

● mariadb.service - MariaDB database server
     Loaded: loaded (/usr/lib/systemd/system/mariadb.service; enabled; preset: disabled)
     Active: active (running) since Wed 2026-08-05 13:44:31 JST; 14s ago
 Invocation: 4de3258d908449b6b67908968947b32a
       Docs: man:mysqld(8)
             https://mariadb.com/kb/en/library/systemd/
   Main PID: 5440 (mysqld)
     Status: "Taking your SQL requests now..."
      Tasks: 12 (limit: 4537)
        CPU: 1.747s
     CGroup: /system.slice/mariadb.service
             mq5440 /usr/sbin/mysqld --defaults-file=/etc/my.cnf --user=mysql --socket=/run/mysql/mysql.sock

Aug 05 13:44:30 Lepard mysql-systemd-helper[5388]: you need to be the system 'mysql' user to connect.
Aug 05 13:44:30 Lepard mysql-systemd-helper[5388]: After connecting you can set the password, if you would need to be
Aug 05 13:44:30 Lepard mysql-systemd-helper[5388]: able to connect as any of these users with a password and without sudo
Aug 05 13:44:30 Lepard mysql-systemd-helper[5388]: See the MariaDB Knowledgebase at https://mariadb.com/kb
Aug 05 13:44:30 Lepard mysql-systemd-helper[5388]: Please report any problems at https://mariadb.org/jira
Aug 05 13:44:30 Lepard mysql-systemd-helper[5388]: The latest information about MariaDB is available at https://mariadb.org/.
Aug 05 13:44:30 Lepard mysql-systemd-helper[5388]: Consider joining MariaDB's strong and vibrant community:
Aug 05 13:44:30 Lepard mysql-systemd-helper[5388]: https://mariadb.org/get-involved/
Aug 05 13:44:30 Lepard mysql-systemd-helper[5440]: /usr/sbin/mysqld: Deprecated program name. It will be removed in a future release, >
Aug 05 13:44:31 Lepard systemd[1]: Started MariaDB database server.
⑤Security of MariaDB installation
Change the password for the root user of the MariaDB server.
# mysql_secure_installation

/usr/bin/mysql_secure_installation: Deprecated program name. It will be removed in a future release, use 'mariadb-secure-installation' instead

NOTE: MariaDB is secure by default. Running this script is mostly
      unecessary and it will likely be removed in a future release,
      but it is for now preserved for backwards compatibility.

Enter root user password or leave blank:

Enter current password for root (enter for none):
OK, successfully used password, moving on...

Setting the root password or using the unix_socket ensures that nobody
can log into the MariaDB root user without the proper authorisation.

You already have your root account protected, so you can safely answer 'n'.

Switch to unix_socket authentication [Y/n] y
Enabled successfully (or at least no errors was emitted)!
Reloading privilege tables..
 ... Success!


You already have your root account protected, so you can safely answer 'n'.

Change the root password? [Y/n] y
New password:
Re-enter new password:
Password updated successfully!
Reloading privilege tables..
 ... Success!


By default, a MariaDB installation has an anonymous user, allowing anyone
to log into MariaDB without having to have a user account created for
them.  This is intended only for testing, and to make the installation
go a bit smoother.  You should remove them before moving into a
production environment.

Remove anonymous users? [Y/n] y
Query OK, 2 rows affected
SQL executed without errors!

Normally, root should only be allowed to connect from 'localhost'.  This
ensures that someone cannot guess at the root password from the network.

Disallow root login remotely? [Y/n] y
Query OK, 0 rows affected
SQL executed without errors!

By default, MariaDB comes with a database named 'test' that anyone can
access.  This is also intended only for testing, and should be removed
before moving into a production environment.

Remove test database and access to it? [Y/n] y
 - Dropping test database...
Query OK, 0 rows affected
SQL executed without errors!
 - Removing privileges on test database...
Query OK, 2 rows affected
SQL executed without errors!

Reloading the privilege tables will ensure that all changes made so far
will take effect immediately.

Reload privilege tables now? [Y/n] y
 ... Success!

Cleaning up...

All done!  If you've completed all of the above steps, your MariaDB
installation should now be secure.

Thanks for using MariaDB!
⑥Check the version of MariaDB
# mariadb -V
mariadb from 12.3.2-MariaDB, client 15.2 for Linux (x86_64) using  EditLine wrapper
⑦Firewalld is enabled and the service is allowed to use MariaDB remotely.
# firewall-cmd --add-service=mysql --permanent
success
# firewall-cmd --reload
success
1.2 phpMyAdmin Install
Installed phpMyAdmin and configured it to operate MariaDB via web browser
①Install
# zypper -n install phpMyAdmin

# systemctl restart apache2
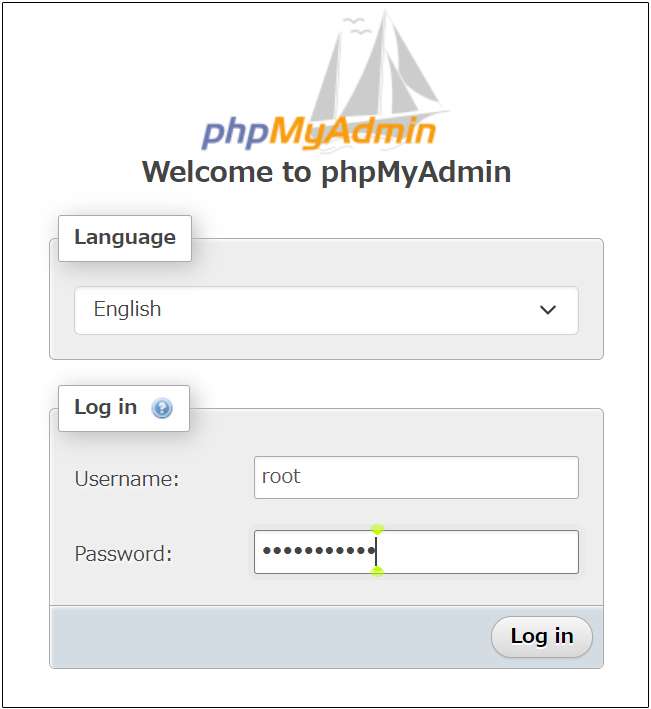
②Access http://[IP address]/phpMyAdmin in your browser
The following login screen will appear
Username : root
Password: Password for the root user set in the MariaDB security installation
Go click
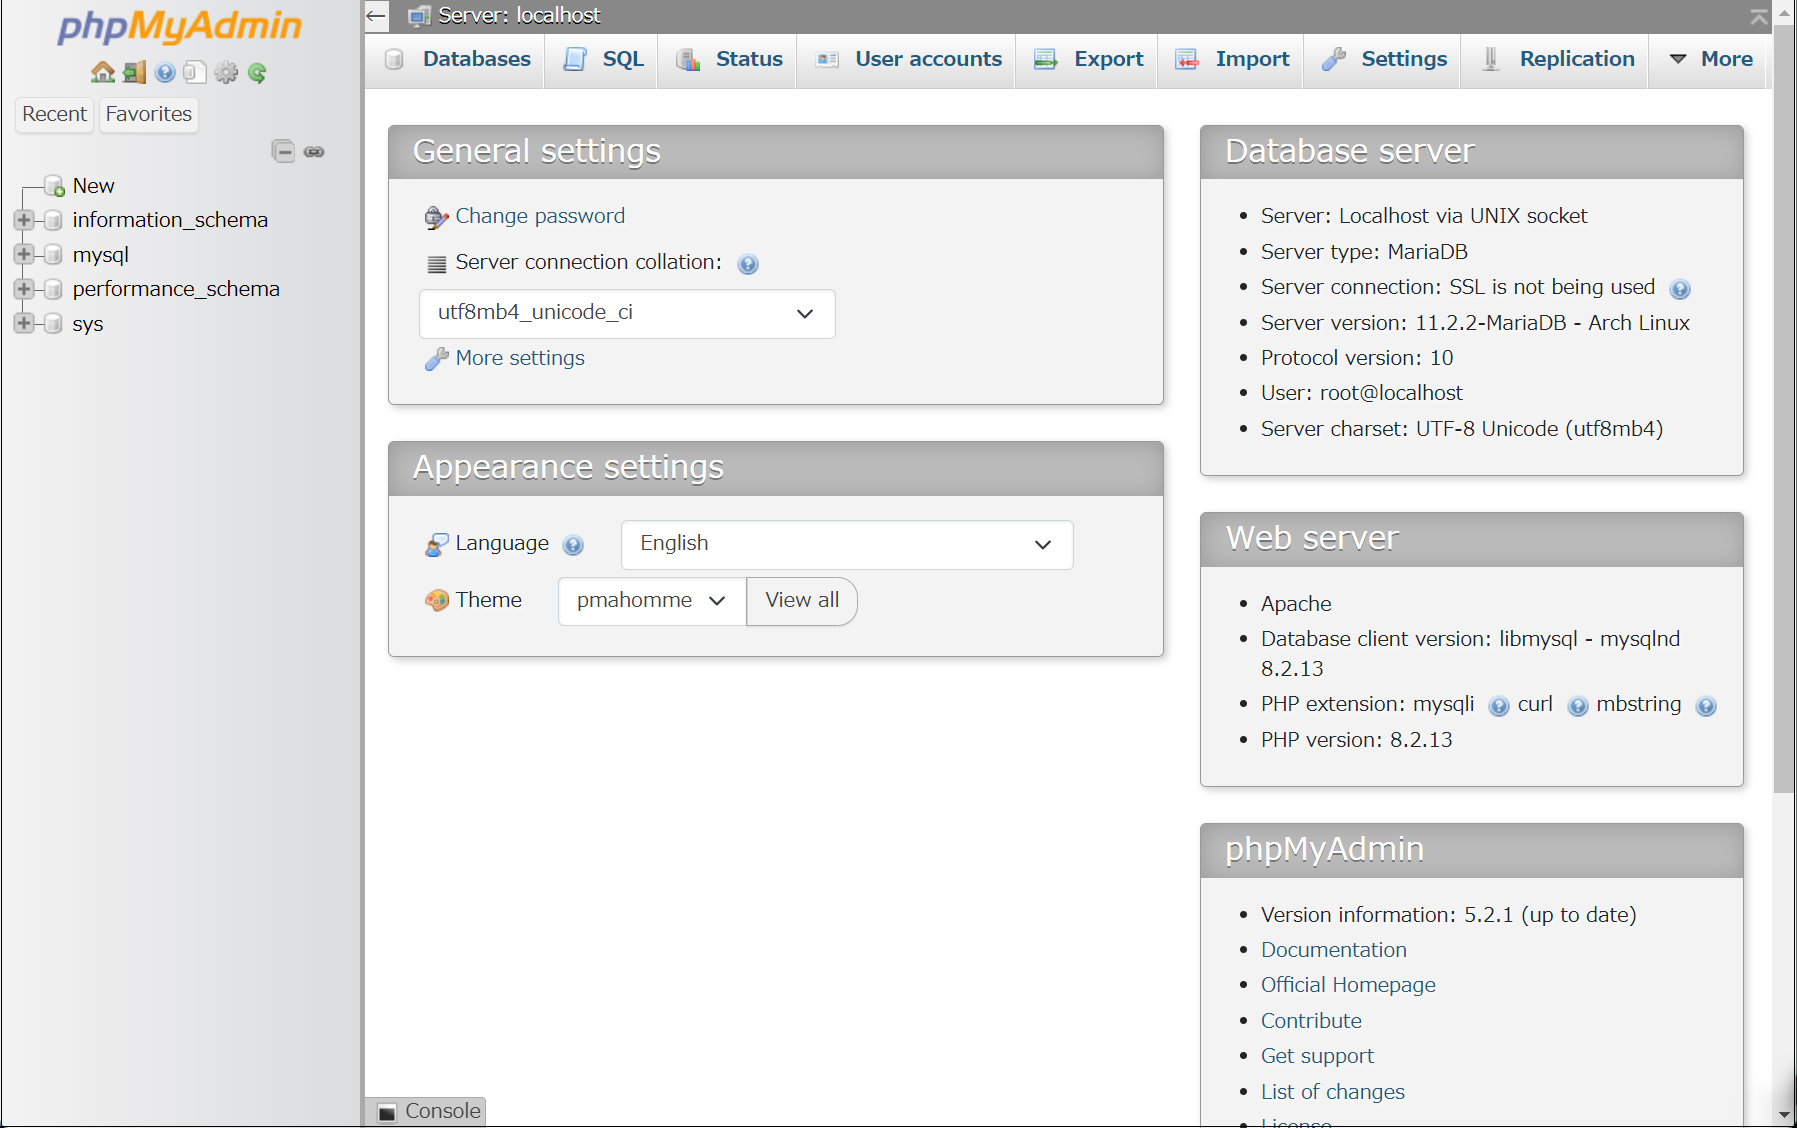
The following phpMyAdmin settings screen appears
1.3 MariaDB Example of database and user creation
I'll create a user, password, and database for wordpress to install next.
database : wp_db
user : wp_user
password : ?WHxx333Yo
# mariadb -u root -p
Enter password:
Welcome to the MariaDB monitor.  Commands end with ; or \g.
Your MariaDB connection id is 37
Server version: 12.3.2-MariaDB MariaDB package

Copyright (c) 2000, 2018, Oracle, MariaDB Corporation Ab and others.

Type 'help;' or '\h' for help. Type '\c' to clear the current input statement.

MariaDB [(none)]> create database wp_db;
Query OK, 1 row affected (0.001 sec)

MariaDB [(none)]> create user 'wp_user'@'localhost' identified by '?WHxx333Yo';
Query OK, 0 rows affected (0.002 sec)

MariaDB [(none)]> grant all on wp_db.* to 'wp_user'@'localhost';
Query OK, 0 rows affected (0.001 sec)

MariaDB [(none)]> flush privileges;
Query OK, 0 rows affected (0.000 sec)

MariaDB [(none)]> exit;
Bye
2. WordPress Install
2.1 Required library installation
# zypper install -n php8-gd php8-pdo php8-mysql php8-mbstring php8-curl apache2-mod_php8
2.2 WordPress Download and Installation
# cd /srv/www/htdocs/[FQDN]
# wget http://wordpress.org/latest.tar.gz
# tar zxvf latest.tar.gz
2.3 Editing Configuration Files
# cd /srv/www/htdocs/[FQDN]/wordpress/
# cp wp-config-sample.php wp-config.php
# vi wp-config.php

Line 23 :
define( 'DB_NAME', 'wp_db' ); [Database Name]

Line 26 :
define( 'DB_USER', 'wp_user' ); [Username]

Line 29 :
define( 'DB_PASSWORD', '?WHxx333Yo' ); [Password]

/** Database hostname */

/** Add the following to the last line. */
/** If you do not do this, you will be asked for FTP connection information when you add the plugin. */
define('FS_METHOD', 'direct');
Move the expanded contents under /srv/www/htdocs/[web public directory]
# cd /srv/www/htdocs/[FQDN]
# mv wordpress/* .
After confirming that the files have been moved, delete the wordpress directory and the downloaded latest.tar.gz
# cd /srv/www/htdocs/[FQDN]
# rm -Rf wordpress
# rm -f latest.tar.gz
Make apache the owner of the wordpress directory.
If you don't do this, you will be told that you cannot create directories when installing plug-ins, etc.
# chown -R wwwrun:wwwrun /srv/www/htdocs/[FQDN]
# chmod 775 -R /srv/www/htdocs/[FQDN]
Restart Apache
# systemctl restart apache2
2.4 Startup Confirmation
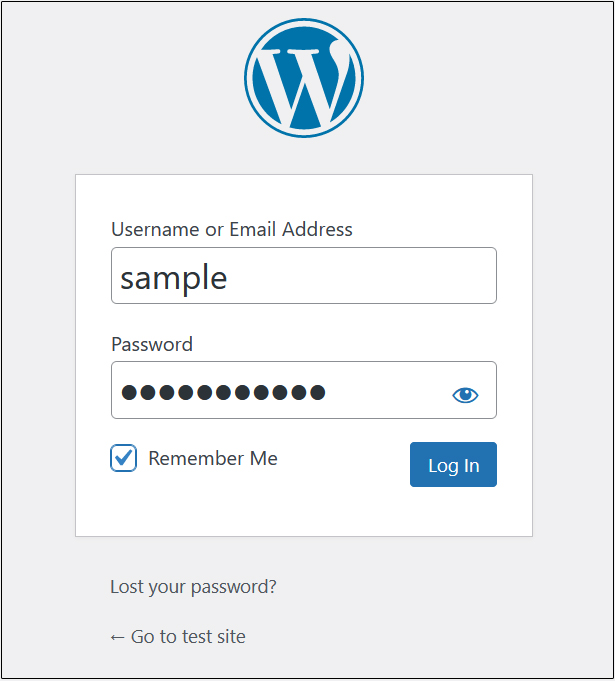
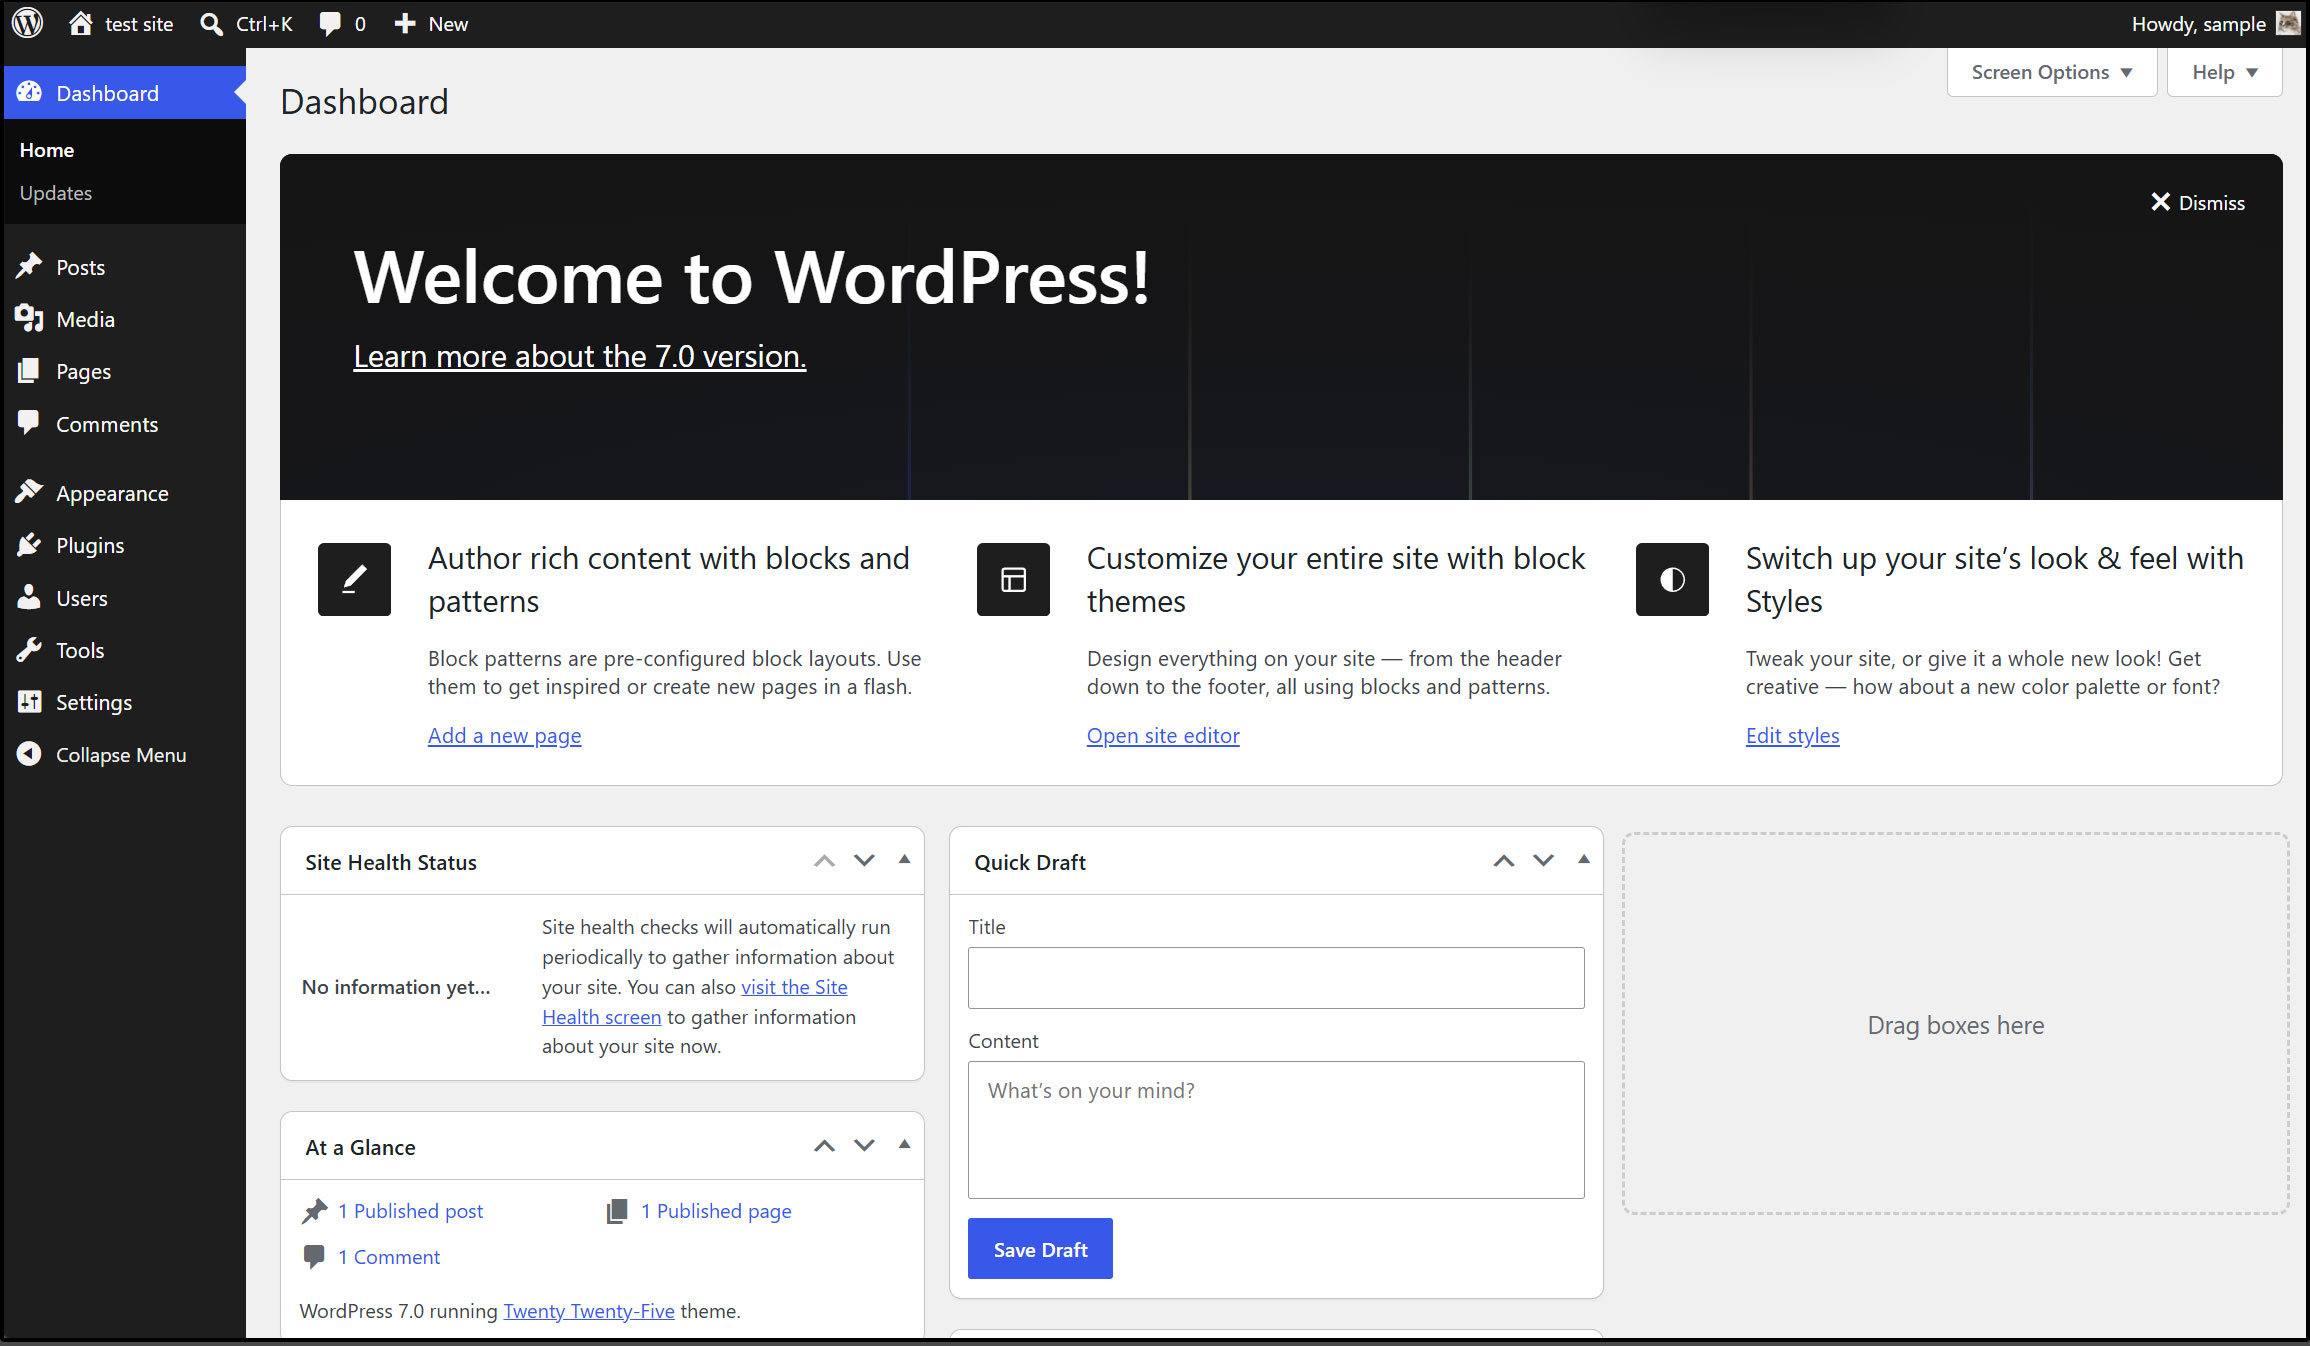
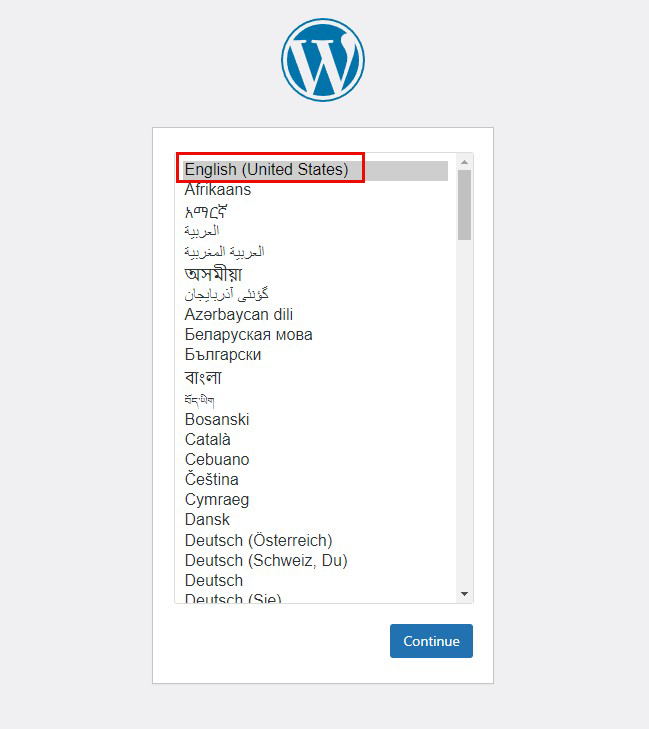
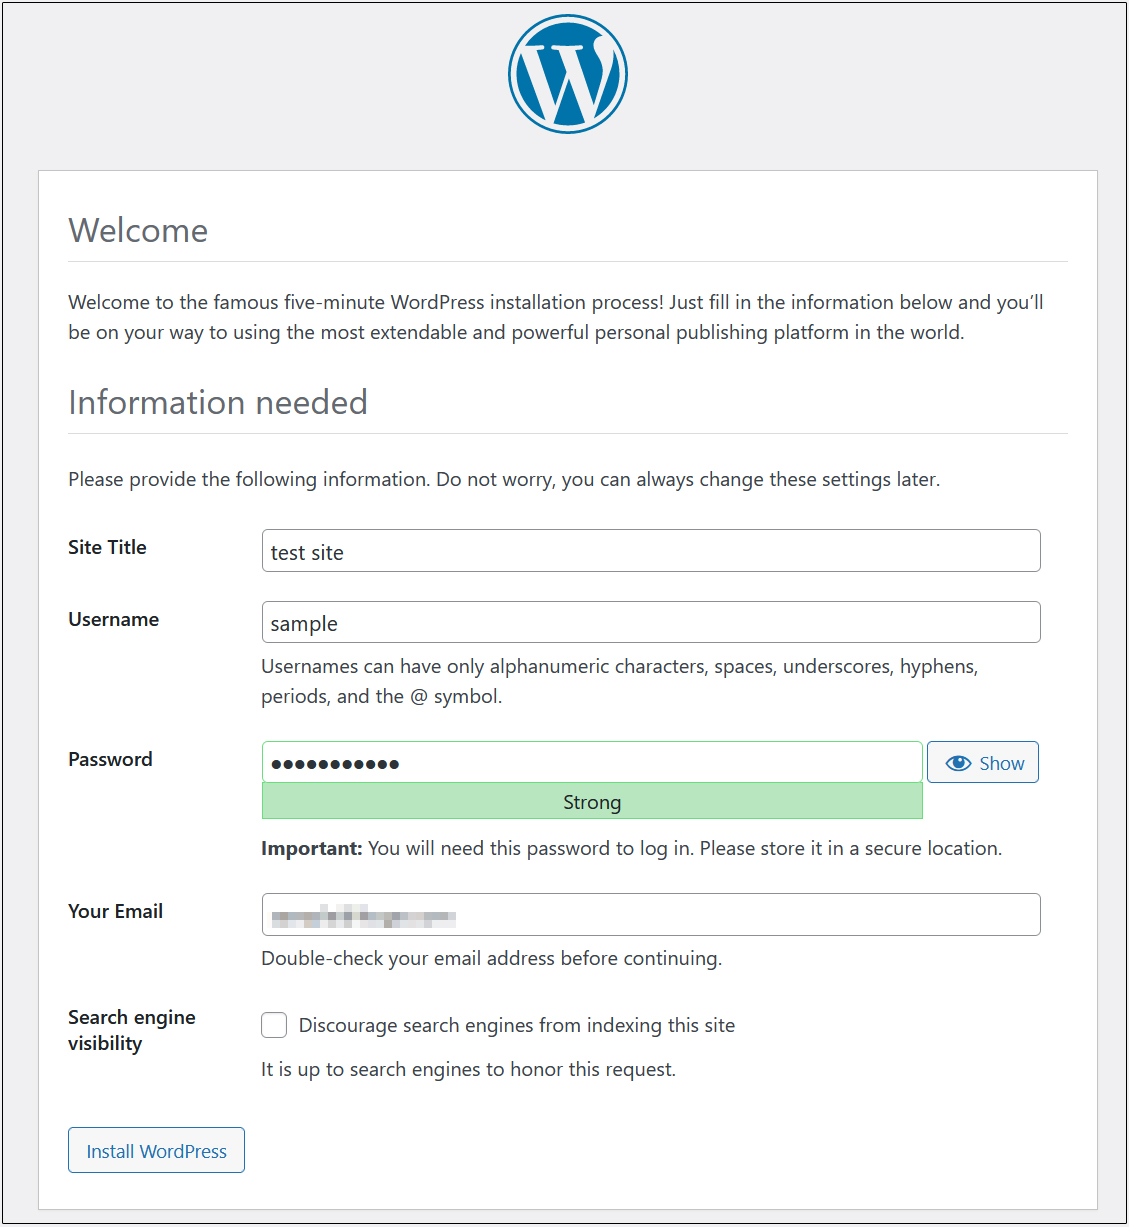
Connect to http://<FQDN>/wp-admin/install.php with your browser, enter your username, password, and other necessary information to start the installation
Access the WordPress administration screen in the figure below, and you will see the initial settings installation screen including "User Name" and "Password".
Site Title : Any title
Username : Any user name
Password : Any password
Your Email : Administrator's email address
Click "Install WordPress"
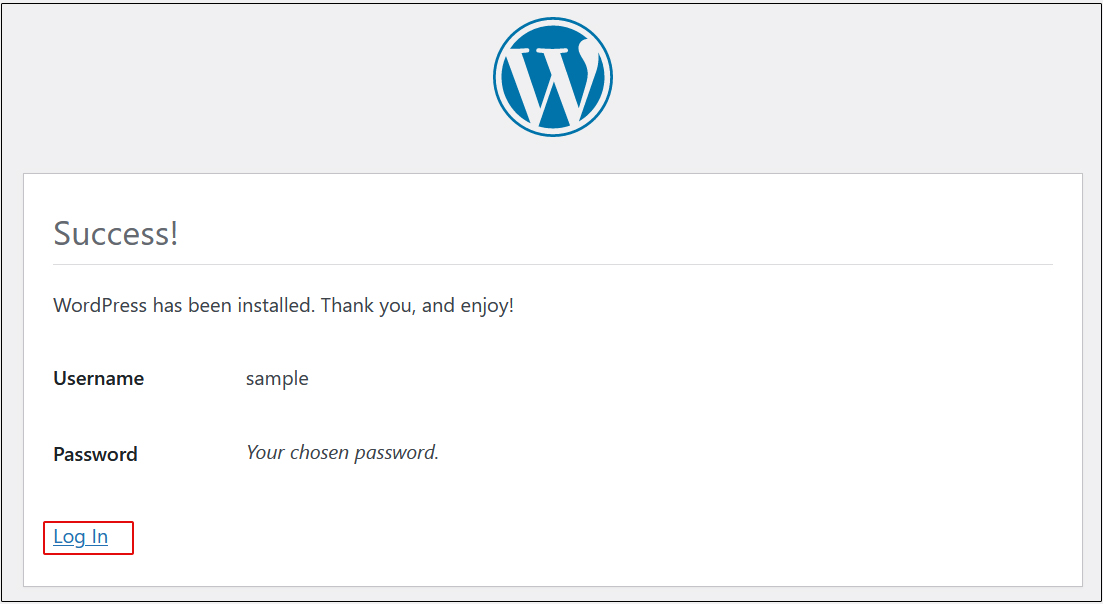
User Name : The user name you have just set
Password : User's password you have just set
and click "Login".