1. vsftpd( FTP Server )
1.1 vsftpd Install
# zypper -n install vsftpd
1.2 Edit vsftpd configuration file
Back up the vsftpd.conf file before editing it.
# cp /etc/vsftpd.conf /home/huong/vsftpd.conf.org
# vi /etc/vsftpd.conf

Line 19: Change
write_enable=YES

Line 36: Uncomment ( Enable batch transfer by directory )
ls_recurse_enable=YES

Line 57: Uncomment
local_umask=022

Lines 62,63: Uncomment ( chroot enabled )
chroot_local_user=YES
chroot_list_enable=YES

Line 65: Uncomment ( chroot list file specified )
chroot_list_file=/etc/vsftpd.chroot_list

Line 80: Change Anonymous login prohibited
anonymous_enable=NO

Line 150: Comment out and add under it
#connect_from_port_20=YES
listen_port=21

Per line 173: Uncomment ( Allow transfer in ASCII mode )
ascii_download_enable=YES

Per line 185: Change as needed (if listening for IPv4 only)
listen=YES

Per line 190: Change as needed (if listening for IPv4 only)
# If YES, both IPv4 and IPv6 listen
listen_ipv6=NO

Around line 218: Uncomment (turn off seccomp filter)
seccomp_sandbox=NO

Add to last line.
# Use local time
use_localtime=YES
Add users to allow directory access to upper level
# echo "huong" >> /etc/vsftpd.chroot_list
In my case I wrote huong
Enable vsftpd autostart and start it
# systemctl enable vsftpd
# systemctl start vsftpd
1.3 firewall settings
FTP port open (FTP uses 21)
# firewall-cmd --add-service=ftp --permanent
# firewall-cmd --reload
From windows, check if you can connect with FileZilla
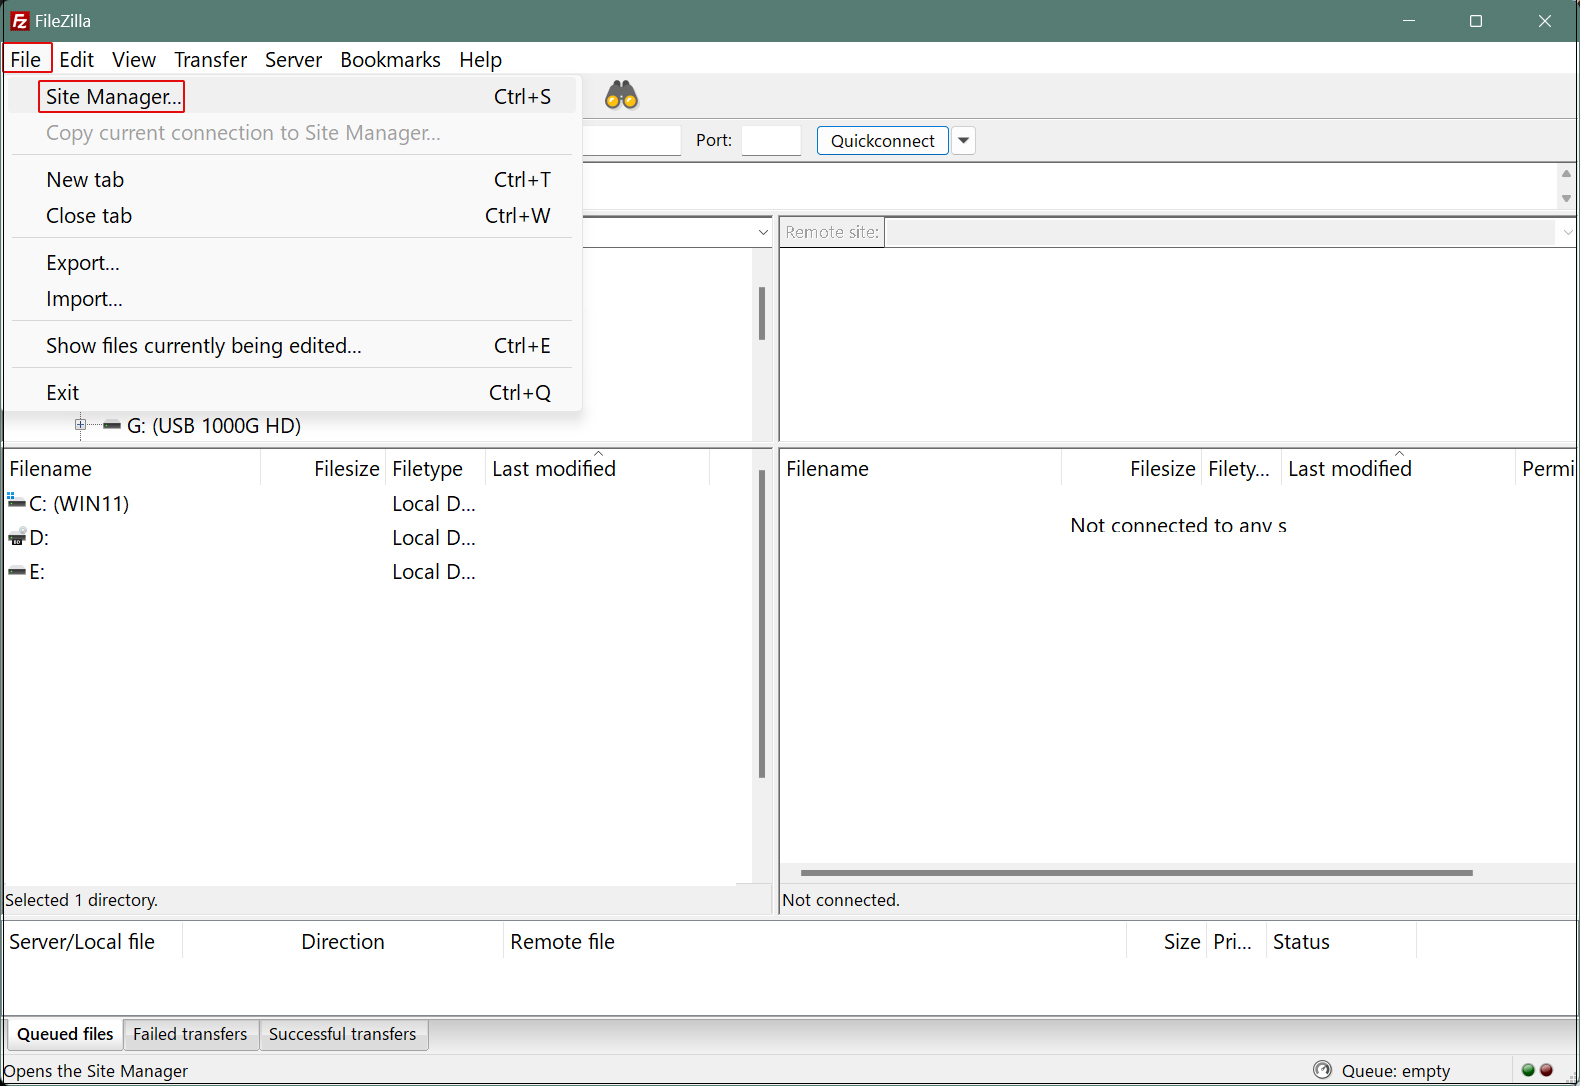
Start FileZilla and select "Site Manager" from the "File" menu.
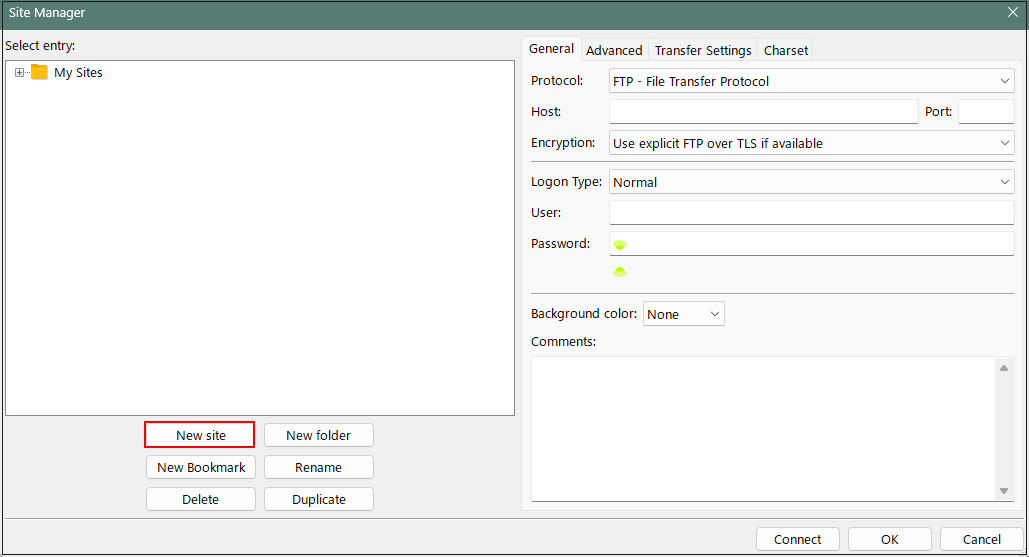
"New site" click
Enter the following settings for each item and click "Connect"
Protocol : FTP - File Transfer Protocol
Host: server IP address
Port: (blank)
Encryption : Use explicit FTP over TLS if available
Logon Type: Ask for password
User : login user
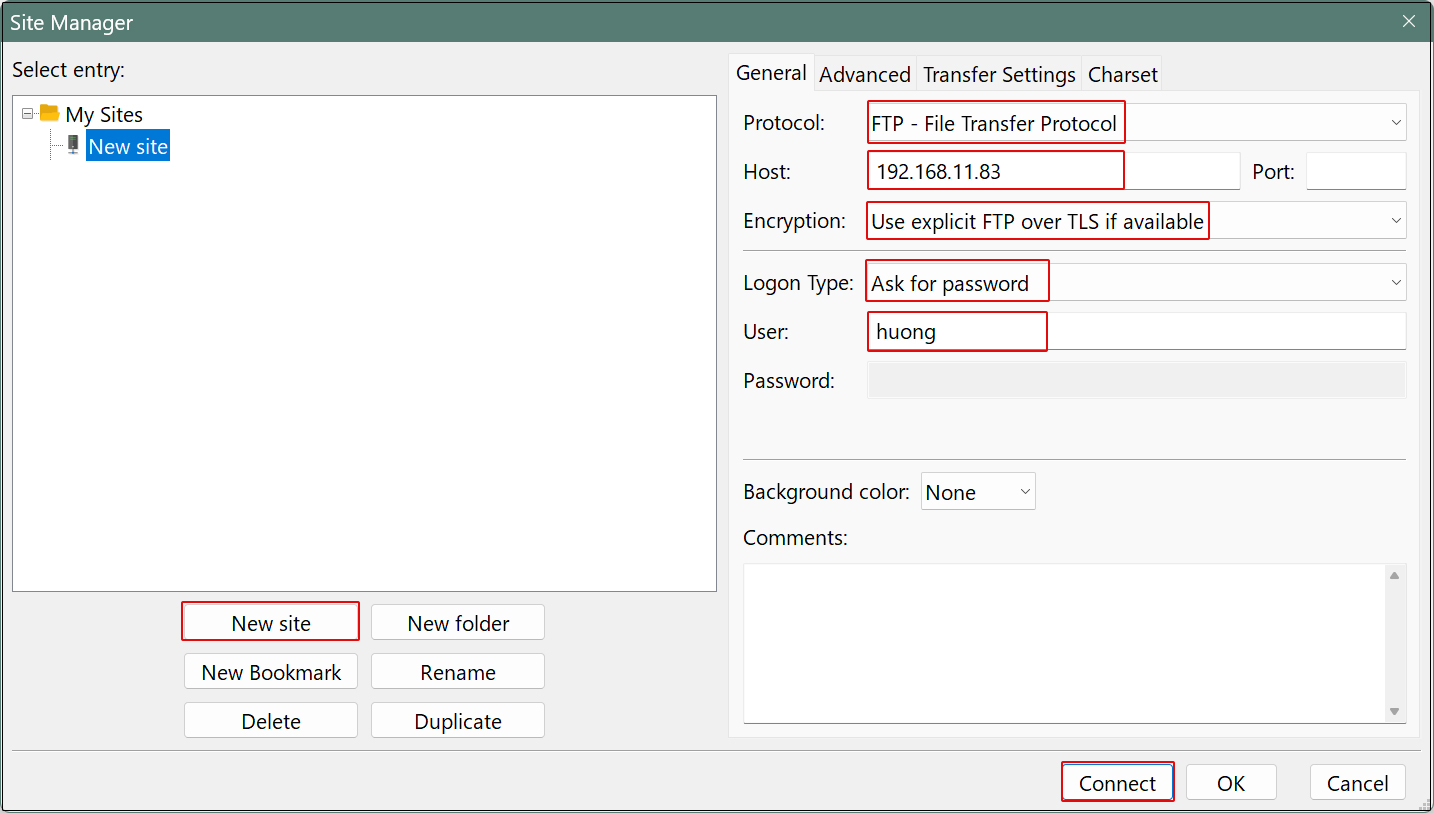
Password : login user password
Click "OK"
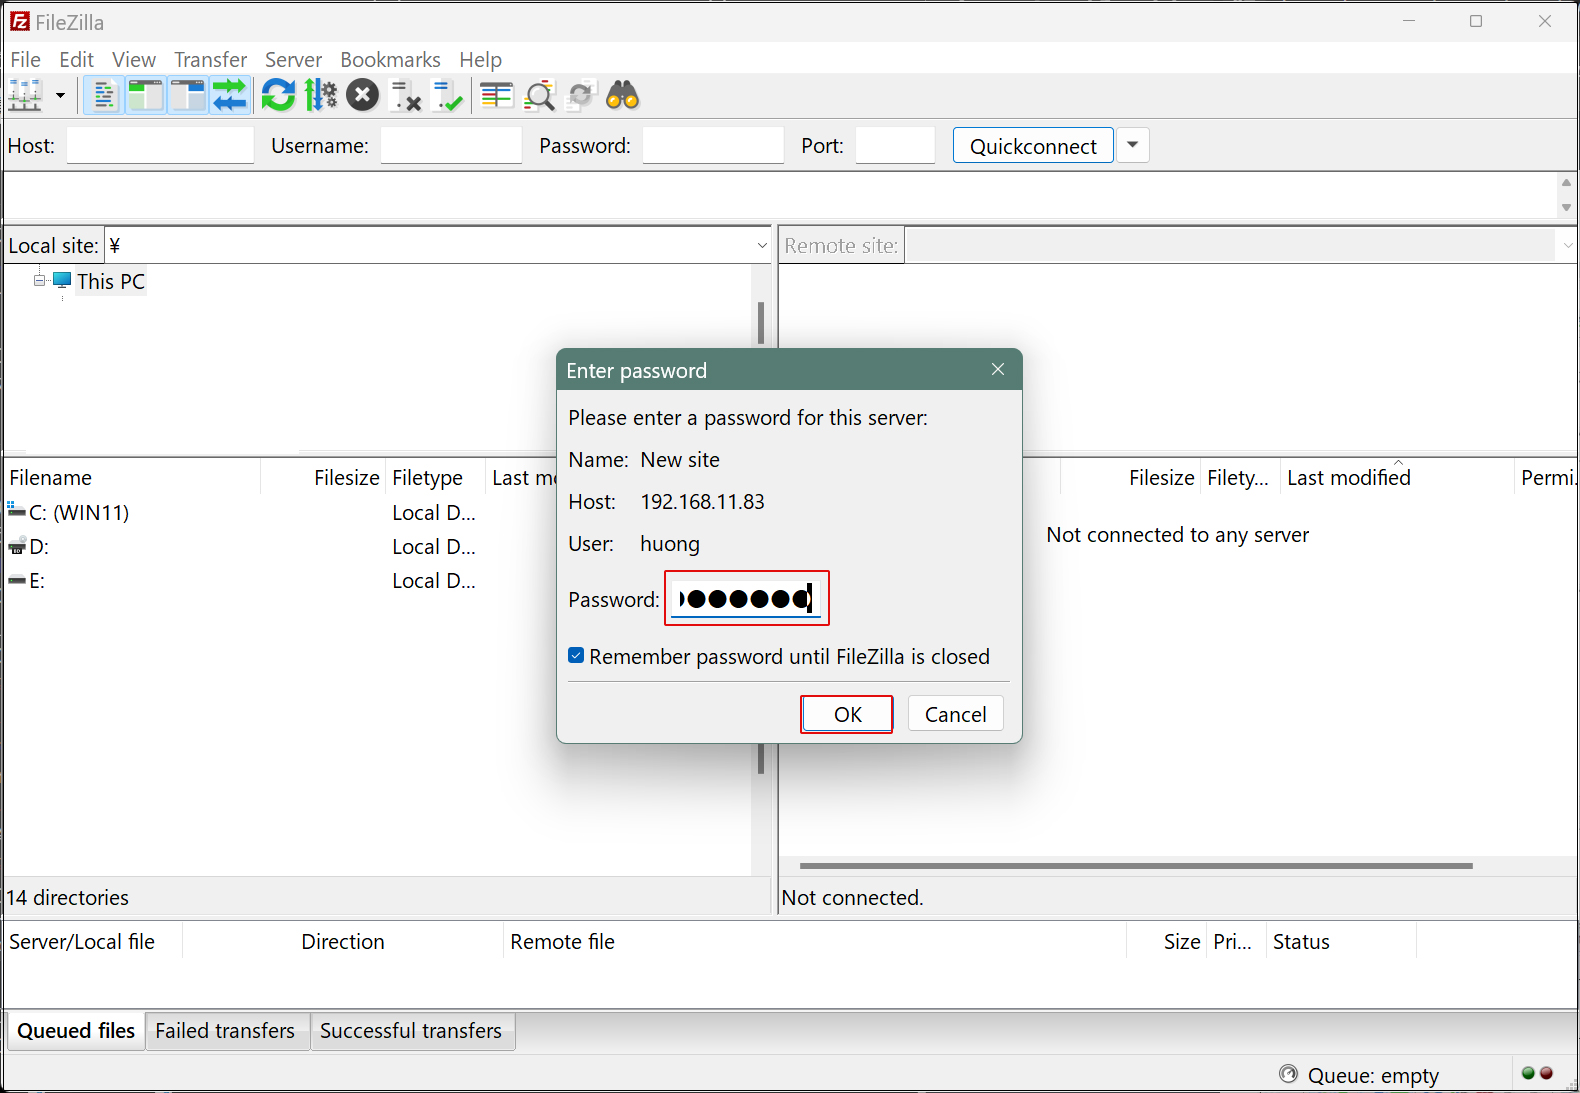
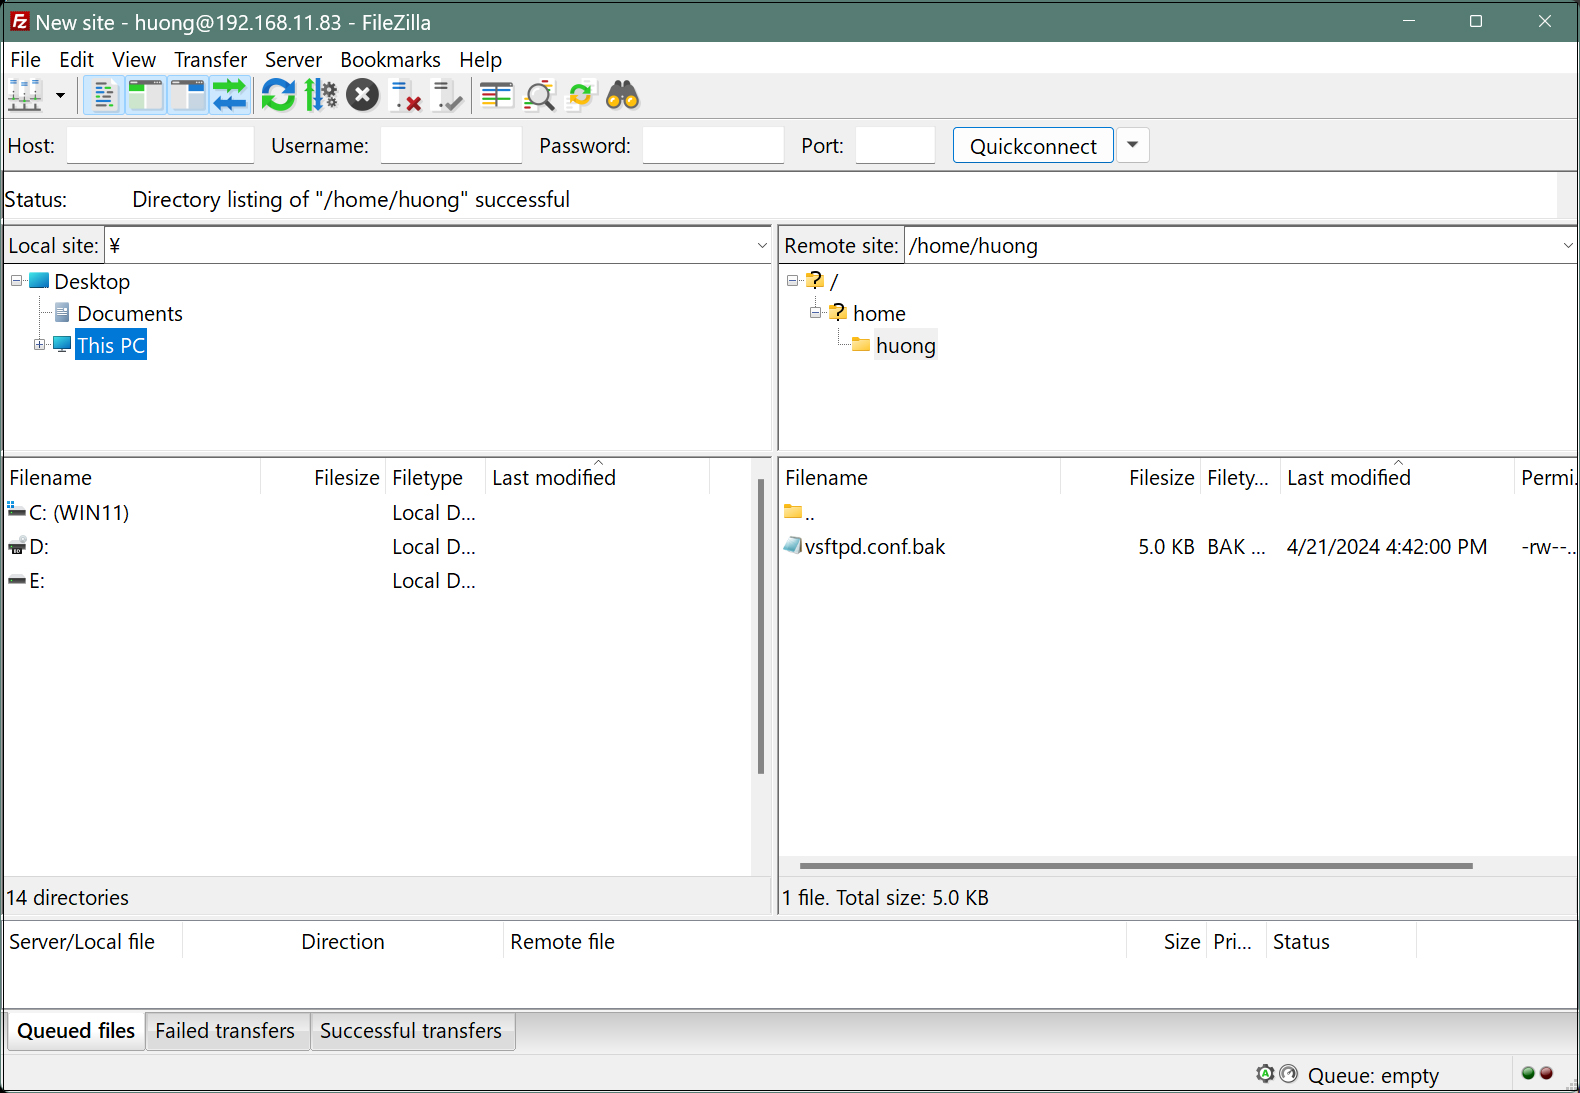
If the connection is successful, you will see the server directory on the right and the Windows directory on the left.
2. vsftpd SSL/TLS
Configure Vsftpd to use SSL/TLS
2.1 Create self-signed certificates
This work is not required if you are using a trusted, legitimate certificate such as Let's Encrypt.
# zypper -n install openssl
# cd /etc/ssl/private
# openssl req -x509 -nodes -newkey rsa:2048 -keyout vsftpd.pem -out vsftpd.pem -days 365

-----
You are about to be asked to enter information that will be incorporated
into your certificate request.
What you are about to enter is what is called a Distinguished Name or a DN.
There are quite a few fields but you can leave some blank
For some fields there will be a default value,
If you enter '.', the field will be left blank.
-----
Country Name (2 letter code) [AU]:JP   <country code>
State or Province Name (full name) [Some-State]:Osaka   <Region (Prefecture)>
Locality Name (eg, city) []:Sakai   <City>
Organization Name (eg, company) [Internet Widgits Pty Ltd]:private  <Organization Name>
Organizational Unit Name (eg, section) []:Admin  <Organization Name>
Common Name (e.g. server FQDN or YOUR name) []:Lepard  <Host
# chmod 600 vsftpd.pem
2.2 Edit vsftpd configuration file
# vi /etc/vsftpd.conf

Line 195: Change
ssl_enable=YES

Add to the last line
rsa_cert_file=/etc/ssl/private/vsftpd.pem
rsa_private_key_file=/etc/ssl/private/vsftpd.pem
ssl_ciphers=HIGH
force_local_data_ssl=YES
force_local_logins_ssl=YES

When using passive ports
Line 177
pasv_enable=YES
# systemctl restart vsftpd
2.3 Firewalld
Passive port open
# firewall-cmd --add-port=30000-30100/tcp --permanent
success
# firewall-cmd --reload
success
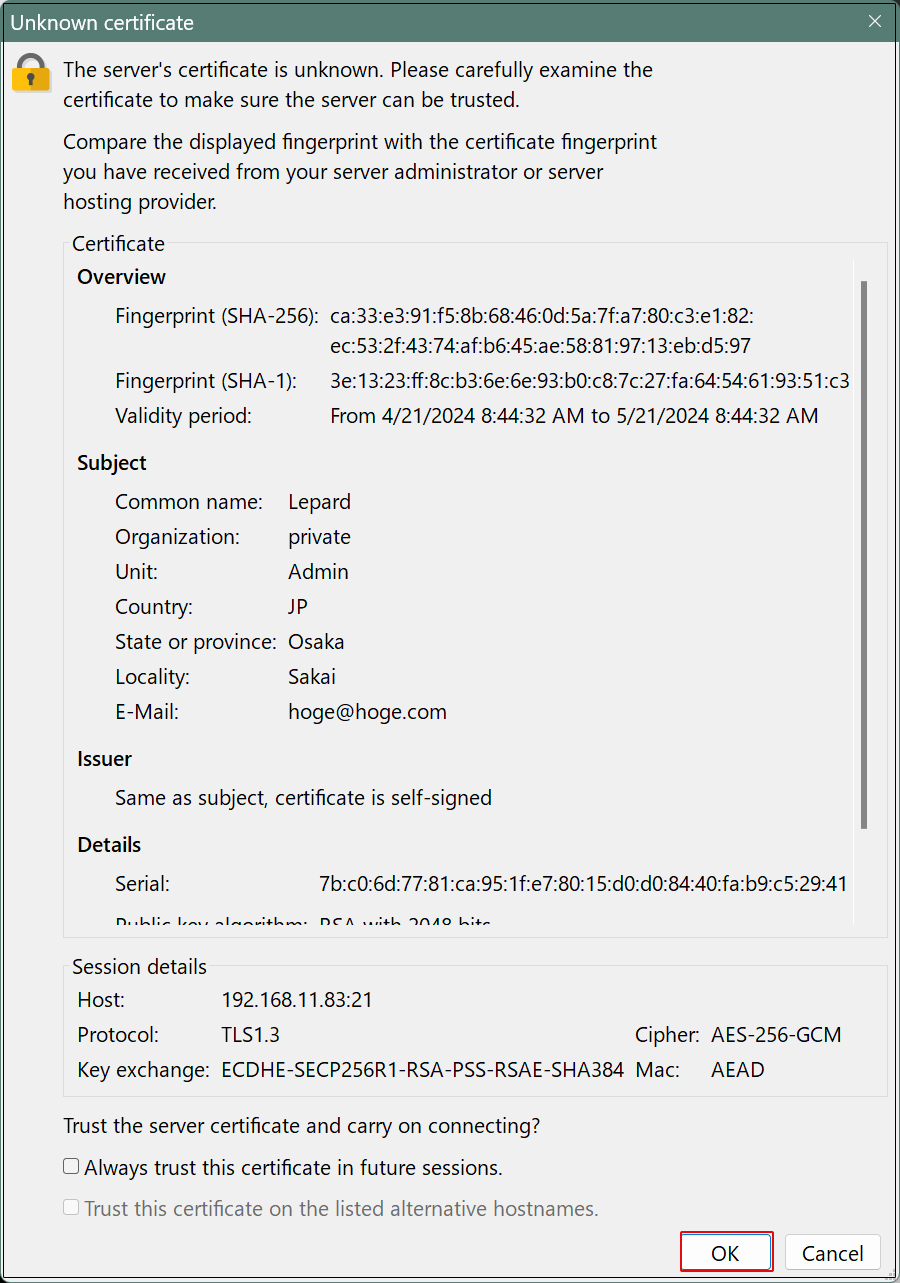
When you connect to FileZilla as described above, the following screen appears, check the box and click "OK".