

WEBサーバー(Apache)
Apacheのインストール
①システムアップデート
 # slackpkg update
 # slackpkg upgrade slackpkg
 # slackpkg new-config
➁httpdインストール
# slackpkg upgrade httpd
➂Apacheのバージョン確認
# httpd -v
Server version: Apache/2.4.68 (Unix)
Server built:   Jun 10 2026 19:43:33
④Apacheの有効化と起動
# chmod +x /etc/rc.d/rc.httpd
# /etc/rc.d/rc.httpd  start
⑤Webサーバー利用のポート開放
firewall設定ファイルに追記する(http,httpsポートの開放)
# vi /etc/rc.d/rc.firewall

# httpd
iptables -A INPUT -p tcp --dport 80  -j ACCEPT
iptables -A INPUT -p tcp --sport 80  -j ACCEPT
iptables -A INPUT -p tcp --dport 443 -j ACCEPT
iptables -A INPUT -p tcp --sport 443 -j ACCEPT
firewall設定反映
# /etc/rc.d/rc.firewall restart
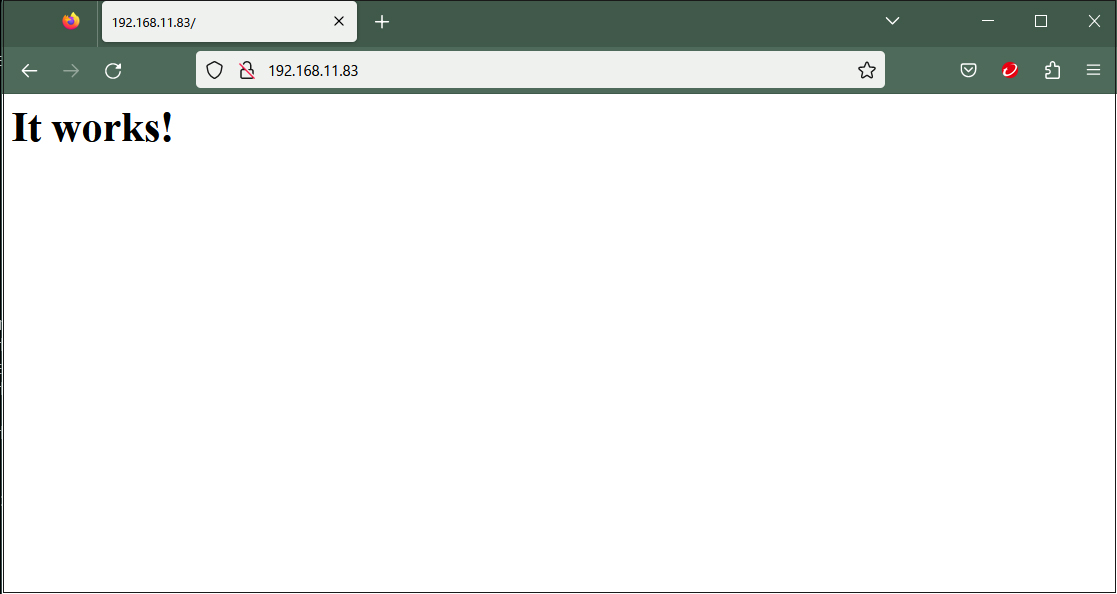
任意のブラウザでhttp://[サーバーIP]/に接続すると下記のようになればOK
Apache 基本設定
①設定ファイルは/etc/httpd/httpd.conf このファイルを編集する
# vi /etc/httpd/httpd.conf

216行目管理者メールアドレスに変更
ServerAdmin [管理者メールアドレス]

225行目コメント解除し自ドメイン名[FQDN]に変更
ServerName [ドメイン名:80]

263行目Indexes削除
Options FollowSymLinks

270行目変更
AllowOverride ALL

283行目ディレクトリー名だけでアクセスできるファイルの追加
 <IfModule dir_module>
      DirectoryIndex index.html index.htm index.pl index.php index.cgi
  </IfModule>

430行目コメント解除
AddHandler cgi-script .cgi

517行目コメント解除
# Various default settings
Include /etc/httpd/extra/httpd-default.conf

最終行に追記
ServerTokens Prod
➁Apache再起動
# /etc/rc.d/rc.httpd restart
CGIスクリプトの利用確認
①CGIの利用可確認
# grep -n "^ *ScriptAlias" /etc/httpd/httpd.conf
366:    ScriptAlias /cgi-bin/ "/srv/httpd/cgi-bin/"
上記が表示され、「/srv/httpd/cgi-bin/」配下で利用可能
➁httpd.conf編集
# vi /etc/httpd/httpd.conf

169,172行目コメント解除
LoadModule cgid_module lib64/httpd/modules/mod_cgid.so
LoadModule cgi_module lib64/httpd/modules/mod_cgi.so
➂テストスクリプトを作成し、作動確認
# vi /srv/httpd/cgi-bin/index.cgi

下記を記述
#!/usr/bin/python3
print("Content-type: text/html\n")
print("CGI Script Test Page")
# chmod 755 /srv/httpd/cgi-bin/index.cgi
# /etc/rc.d/rc.httpd restart
# curl localhost/cgi-bin/index.cgi
CGI Script Test Page
PHP 設定
①バージョンチェック
# php -v
PHP 8.4.22 (cli) (built: Jun  7 2026 00:28:09) (ZTS)
Copyright (c) The PHP Group
Zend Engine v4.4.22, Copyright (c) Zend Technologies
    with Zend OPcache v8.4.22, Copyright (c), by Zend Technologies
➁httpd.confの編集
# vi /etc/httpd/httpd.conf

539行目コメント解除
Include /etc/httpd/mod_php.conf
➂/etc/php.iniファイルの編集
wordpressのインストールを考慮し、アップロードできるファイルサイズを変更しておく
# vi /etc/php.ini

699行目変更
post_max_size = 300M

851行目変更
upload_max_filesize = 200M

1007行目コメント解除しタイムゾーンを追加
date.timezone = Asia/Tokyo
④Apache再起動
# /etc/rc.d/rc.httpd restart
⑤PHP起動確認のため下記ファイル作成
# vi /srv/httpd/htdocs/info.php

下記を記述
<?php
phpinfo();
?>
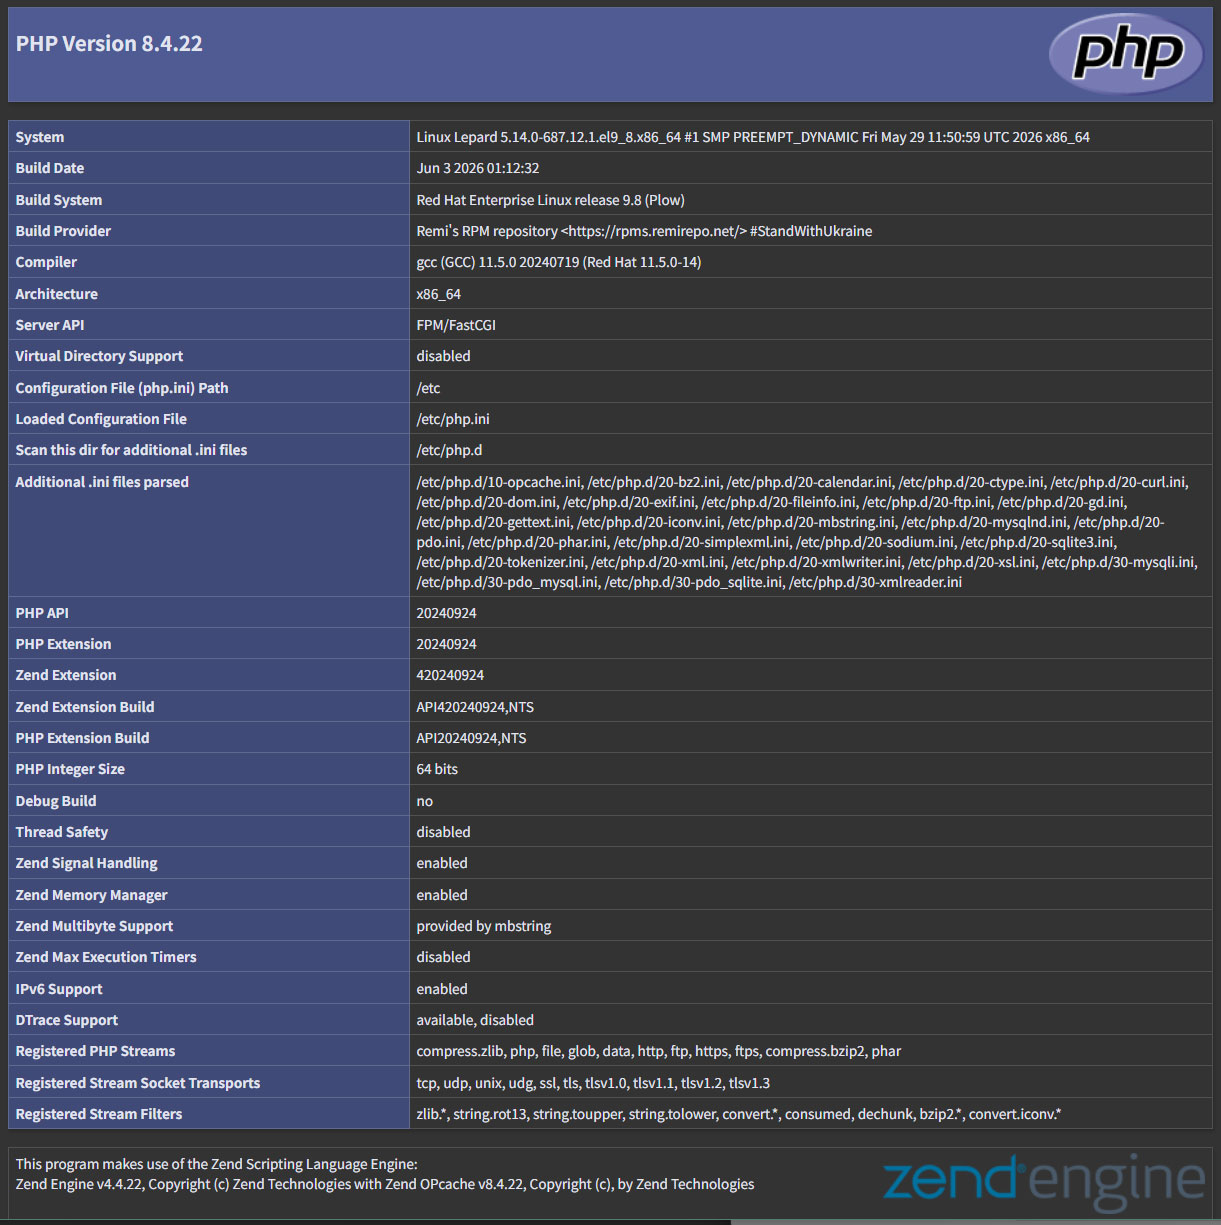
任意のブラウザでhttp://[サーバーIP]/info.php にアクセスすると下記理画面になればPHPは正常です
バーチャルホストの設定
バーチャルホストで運用するドメイン名 [FQDN] を、ドキュメントルート[/srv/httpd/htdocs/FQDN] ディレクトリに割り当てて設定します
slack-vhosts.confを新規作成
# cd /etc/httpd/extra/

# vi slack-vhosts.conf
下記を記述
<VirtualHost *:80>
    ServerAdmin [管理者メールアドレス]
    DocumentRoot "/srv/httpd/htdocs/[FQDN]"
    ServerName [FQDN]
    ErrorLog "/var/log/httpd/[FQDN].error_log"
    CustomLog "/var/log/httpd/[FQDN].access_log" common

  <Directory "/srv/httpd/htdocs/[FQDN]/">
   Options FollowSymLinks
   AllowOverride All
  </Directory>
</VirtualHost>
httpd.confファイルの編集
# vi /etc/httpd/httpd.conf

509行目あたりに追加
Include /etc/httpd/extra/slack-vhosts.conf
ドキュメントルートディレクトリー作成
# mkdir /srv/httpd/htdocs/[FQDN]
Apache再起動
# /etc/rc.d/rc.httpd restart
WEBサーバーSSL化
Let's Encrypt のSSL証明書を取得し、WEBサーバーをSSL化します。
今回はpythonの仮想環境を作成して、letsencryptの証明書を取得します
pythonの仮想環境ではプロジェクトごとに独立した環境になり、依存関係の管理や互換性やセキュリティの面でメリットがあります。
SSL証明書取得
1. python仮想環境作成
# python3 -m venv /opt/certbot
2. 仮想環境内のpipを最新版にアップグレード
# /opt/certbot/bin/pip install --upgrade pip
Requirement already satisfied: pip in /opt/certbot/lib64/python3.12/site-packages (25.0.1)
Collecting pip
  Downloading pip-26.1.2-py3-none-any.whl.metadata (4.6 kB)
Downloading pip-26.1.2-py3-none-any.whl (1.8 MB)
   ━━━━━━━━━━━━━━━━━━━━━━━━━━━━━━━━━━━━━━━━ 1.8/1.8 MB 37.7 MB/s eta 0:00:00
Installing collected packages: pip
  Attempting uninstall: pip
    Found existing installation: pip 25.0.1
    Uninstalling pip-25.0.1:
      Successfully uninstalled pip-25.0.1
Successfully installed pip-26.1.2
3.仮想環境内にCertbotをインストール
# /opt/certbot/bin/pip install certbot
4.リンク作成
実行する際に絶対パスを記述しなくてよくなる
# ln -s /opt/certbot/bin/certbot /usr/bin/certbot
5.apacheを停止する
# /etc/rc.d/rc.httpd stop
6.証明書取得--対象ドメインを[FQDN]とする
# certbot certonly --standalone -d [FQDN]
Saving debug log to /var/log/letsencrypt/letsencrypt.log
Requesting a certificate for [FQDN]

Successfully received certificate.
Certificate is saved at: /etc/letsencrypt/live/[FQDN]/fullchain.pem
Key is saved at:         /etc/letsencrypt/live/[FQDN]/privkey.pem
This certificate expires on 2026-09-20.
These files will be updated when the certificate renews.

NEXT STEPS:
- The certificate will need to be renewed before it expires. Certbot can automatically renew the certificate in the background, but you may need to take steps to enable that functionality. See https://certbot.org/renewal-setup for instructions.

- - - - - - - - - - - - - - - - - - - - - - - - - - - - - - - - - - - - - - - -
If you like Certbot, please consider supporting our work by:
 * Donating to ISRG / Let's Encrypt:   https://letsencrypt.org/donate
 * Donating to EFF:                    https://eff.org/donate-le
- - - - - - - - - - - - - - - - - - - - - - - - - - - - - - - - - - - - - - - -
apache設定ファイルの編集
デフォルトのhttpd-ssl.conf をコピーして名称をslack-ssl.confにし、編集する
# cd /etc/httpd/extra/
# cp httpd-ssl.conf slack-ssl.conf

# vi slack-ssl.conf

124-128行目当たり : 下記のとおり変更
DocumentRoot "/srv/httpd/htdocs/[FQDN]"
ServerName [FQDN]:443
ServerAdmin [mail address]
ErrorLog "/var/log/httpd/[FQDN].error_log"
TransferLog "/var/log/httpd/[FQDN].access_log"

#144行目 : コメントにしてその下に追記
#SSLCertificateFile "/etc/httpd/server.crt"
SSLCertificateFile "/etc/letsencrypt/live/[FQDN]/cert.pem"

#155行目 : コメントにしてその下に追記
#SSLCertificateKeyFile "/etc/httpd/server.key"
SSLCertificateKeyFile "/etc/letsencrypt/live/[FQDN]/privkey.pem"

#168行目 : 追記
#SSLCertificateChainFile "/etc/httpd/server-ca.crt"
SSLCertificateChainFile "/etc/letsencrypt/live/[FQDN]/chain.pem"
apacheのメイン設定ファイルhttpd.confの編集
# cd /etc/httpd/
# vi httpd.conf
# 92行目 : コメント解除
LoadModule socache_shmcb_module lib64/httpd/modules/mod_socache_shmcb.so

# 151行目 : コメント解除
LoadModule ssl_module lib64/httpd/modules/mod_ssl.so

# 526行目当たり : 追記
Include /etc/httpd/extra/slack-ssl.conf
apache再起動
# /etc/rc.d/rc.httpd restart
httpからhttpsリダイレクト
バーチャルホスト設定ファイルの編集
# cd /etc/httpd/extra
# vi slack-vhosts.conf
下記を<VirtualHost *:80>~</VirtualHost>の中に追記する
 RewriteEngine On
 RewriteCond %{HTTPS} off
 RewriteRule ^(.*)$ https://%{HTTP_HOST}%{REQUEST_URI} [R=301,L]
apacheのメイン設定ファイルhttpd.confの編集
# cd /etc/httpd/
# vi httpd.conf
#183行目当たり : コメント解除
LoadModule rewrite_module lib64/httpd/modules/mod_rewrite.so
apache再起動
# /etc/rc.d/rc.httpd restart