

Tripwire
クラッカーによるLinuxサーバーのファイルの改竄を検知するシステムを導入する。
今回は、ファイル改竄検知システムにホスト型IDS(IDS=Intrusion Detection System)のTripwireを導入する。
Tripwireは、導入時のファイル状態をデータベース化し、そのデータベースとファイルの現状を比較することにより、ファイルの追加/変更/削除を検知する。
1 インストール
# apt -y install tripwire
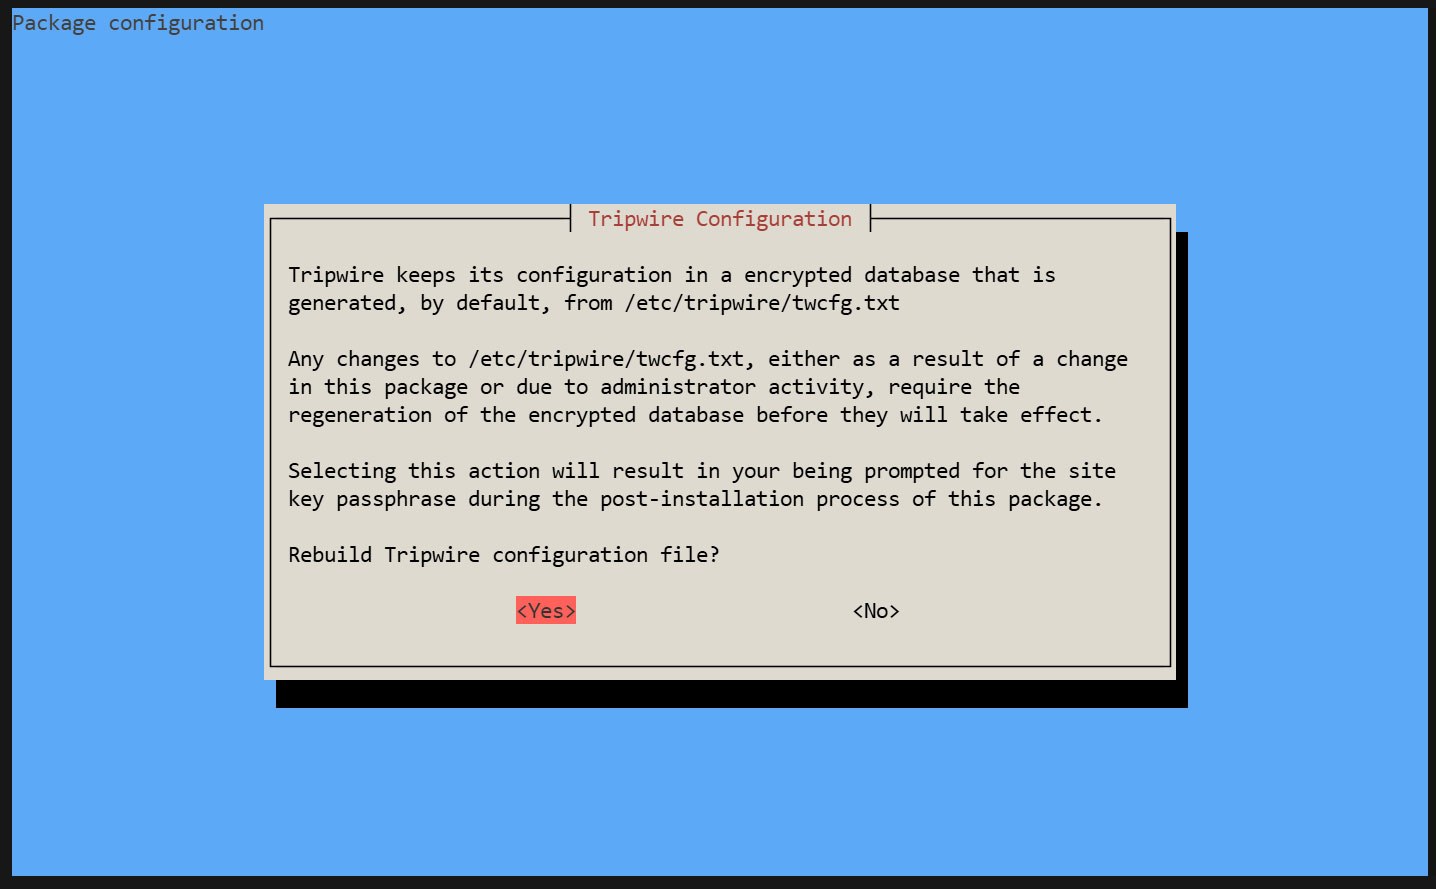
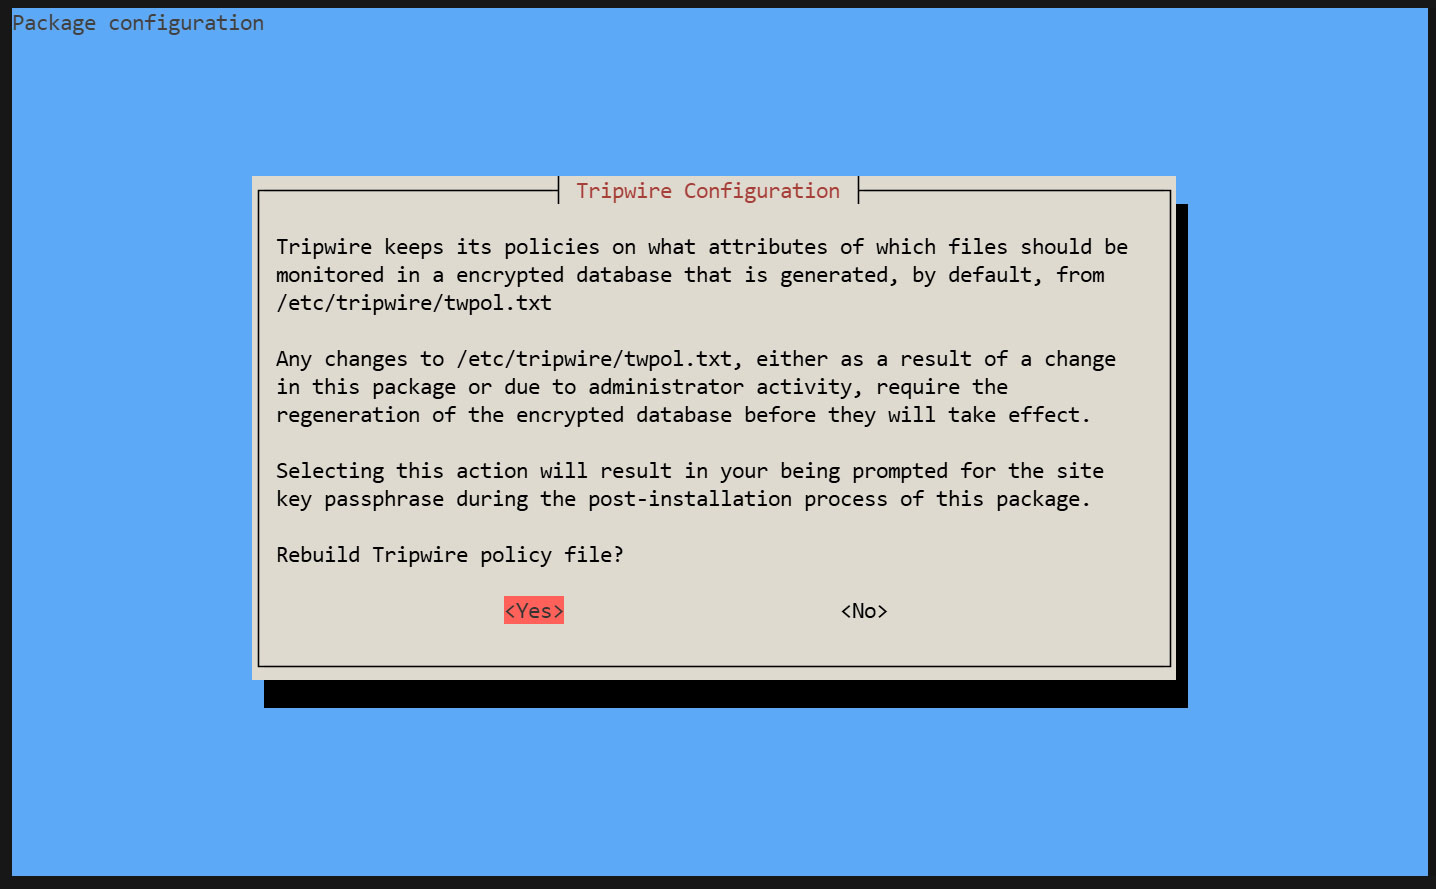
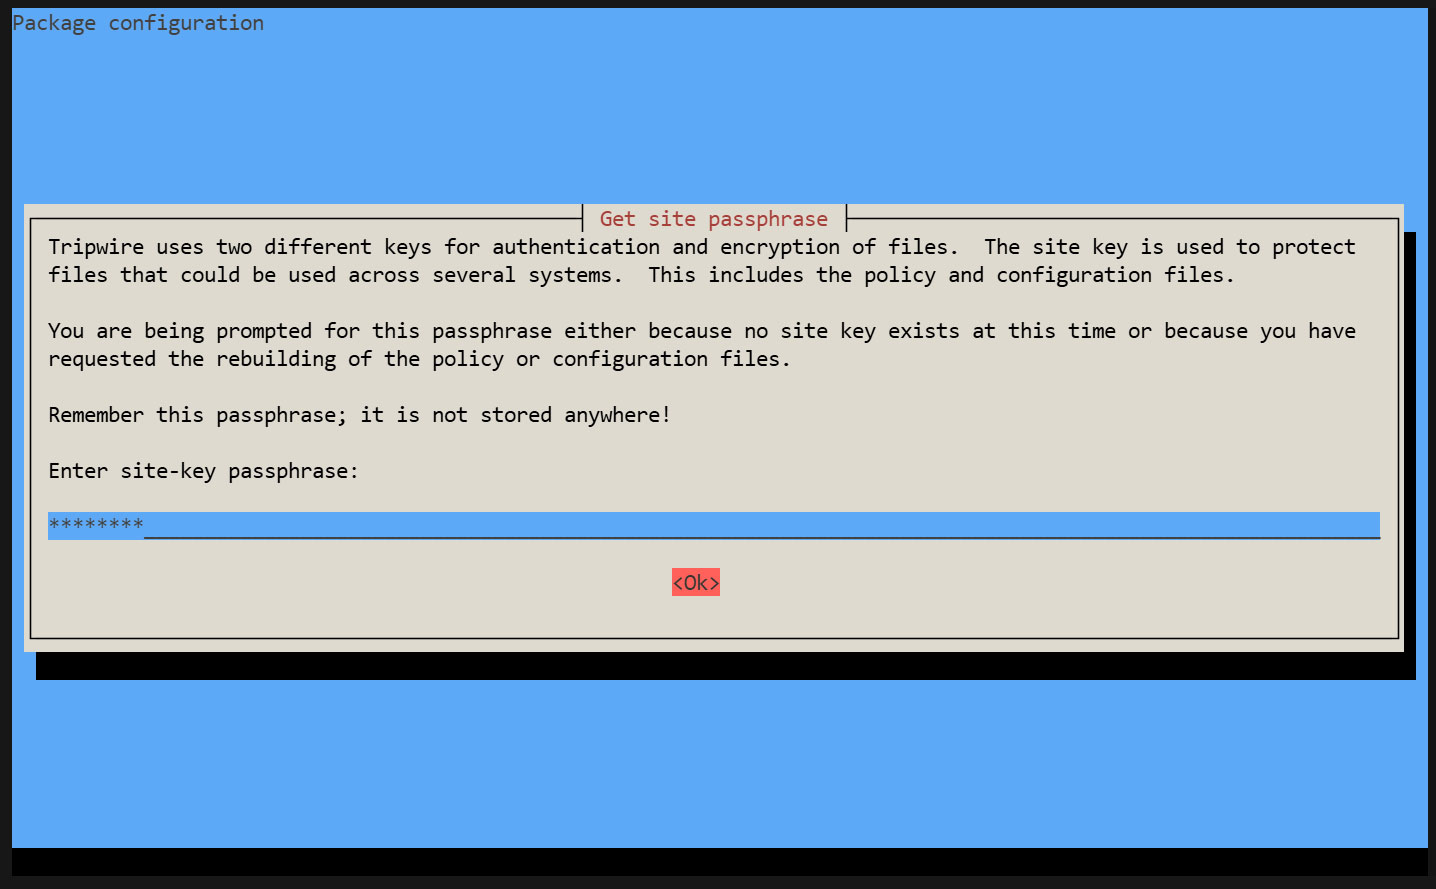
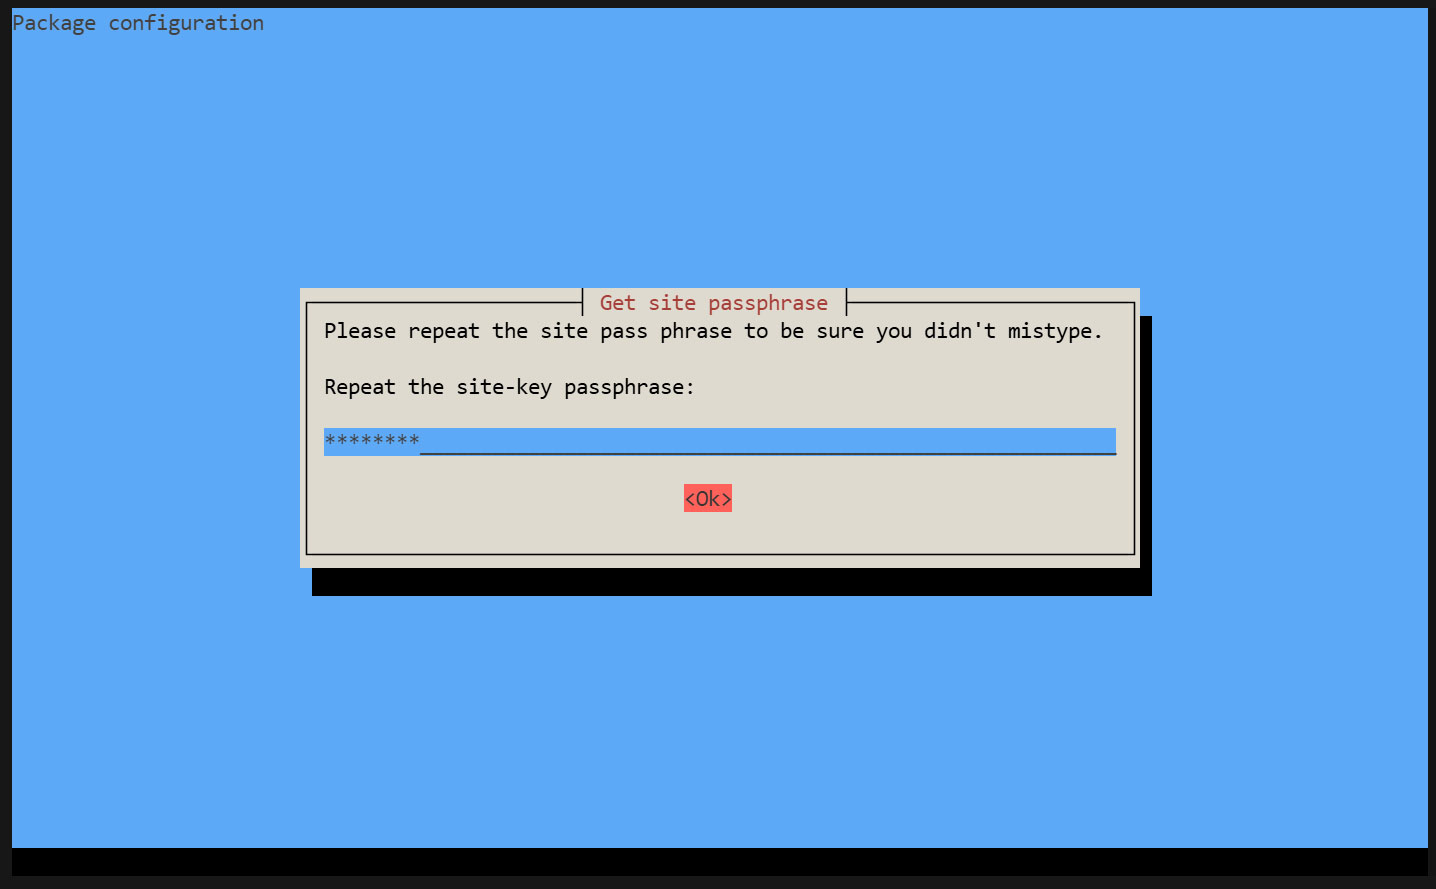
Tripwire は、「tw.cfg」tripwire構成ファイルと 「tw.pol」tripwireポリシーファイルをセキュリティで保護するためにサイトパスフレーズを必要とします。指定されたパスフレーズを使用して両方のファイルを暗号化します。 サイトパスフレーズは、単一インスタンスのtripwireに対しても必要です。
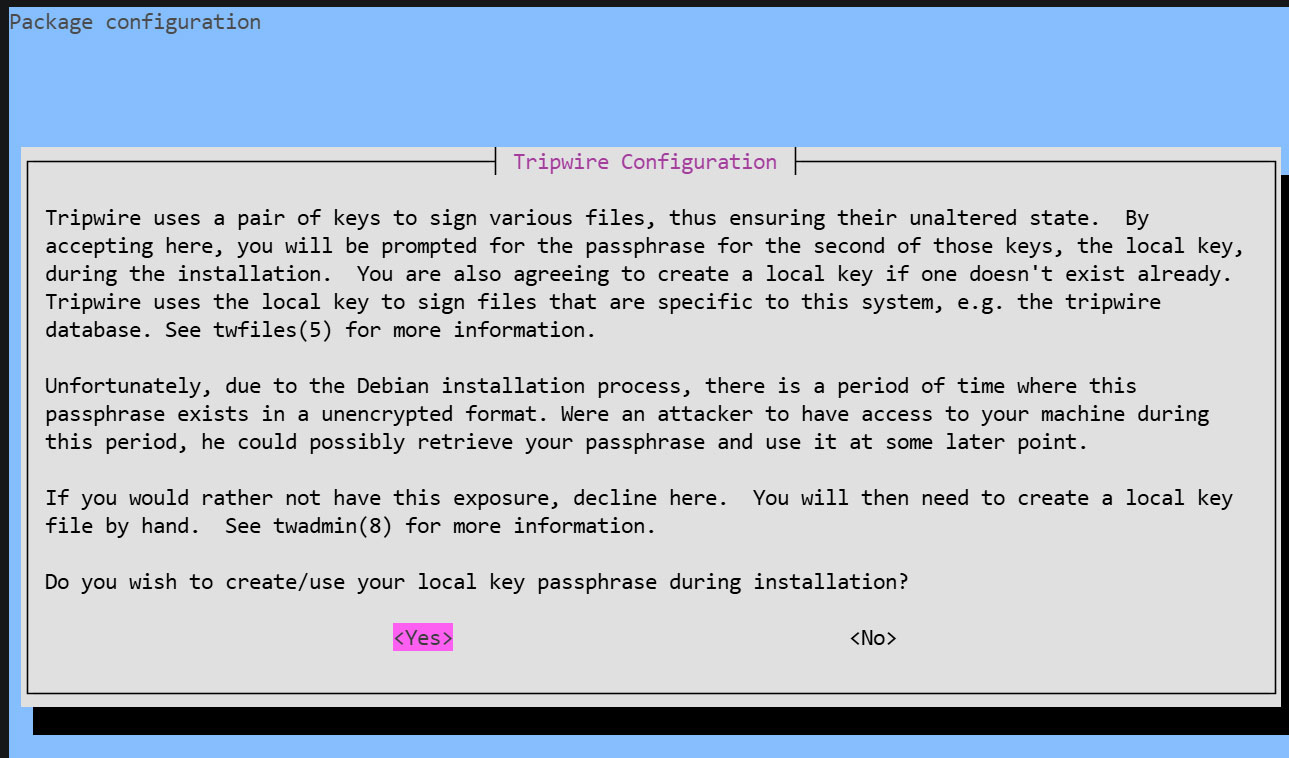
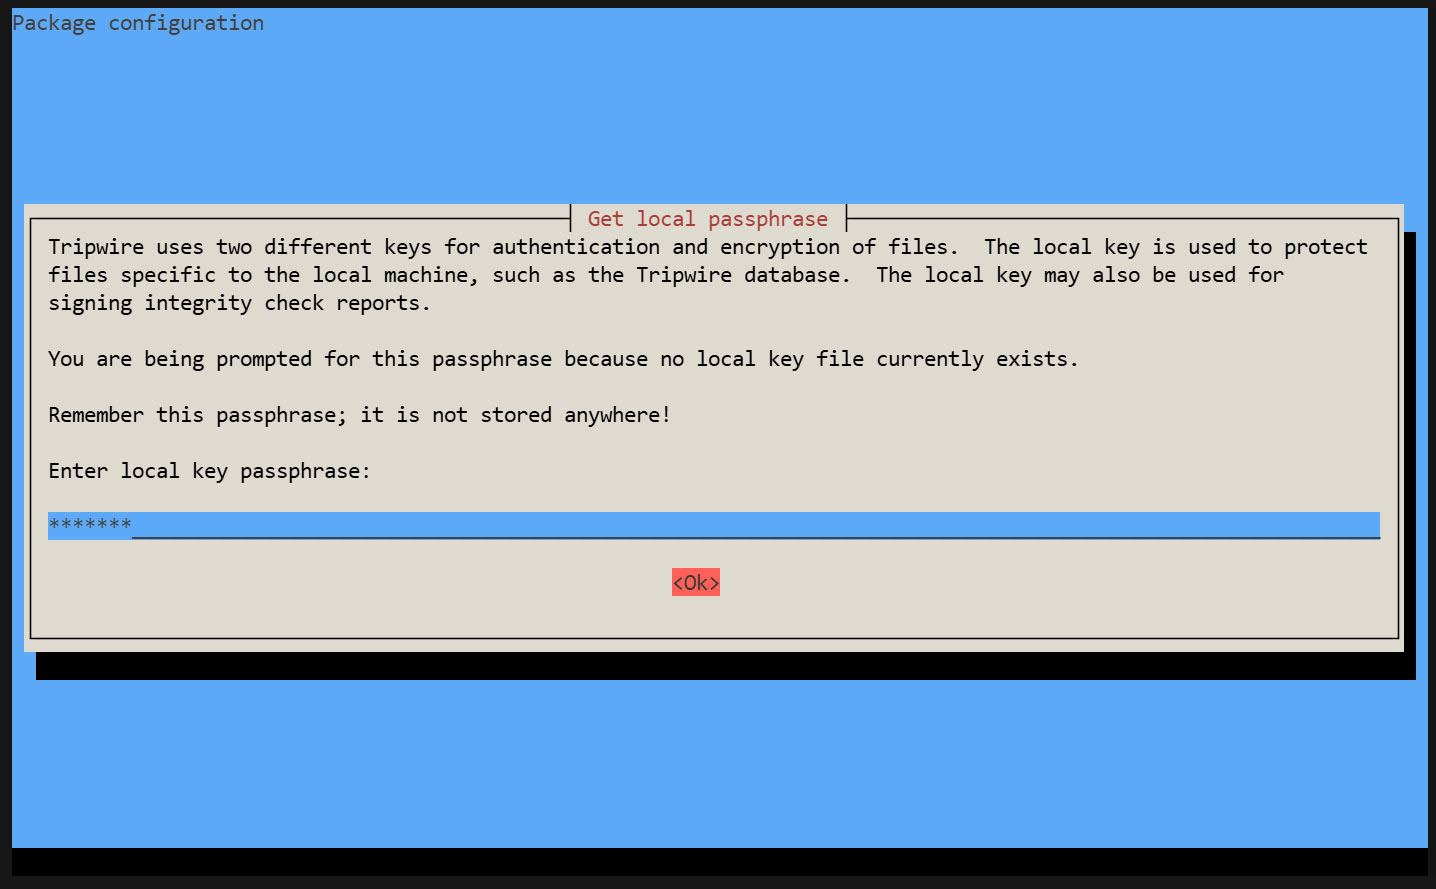
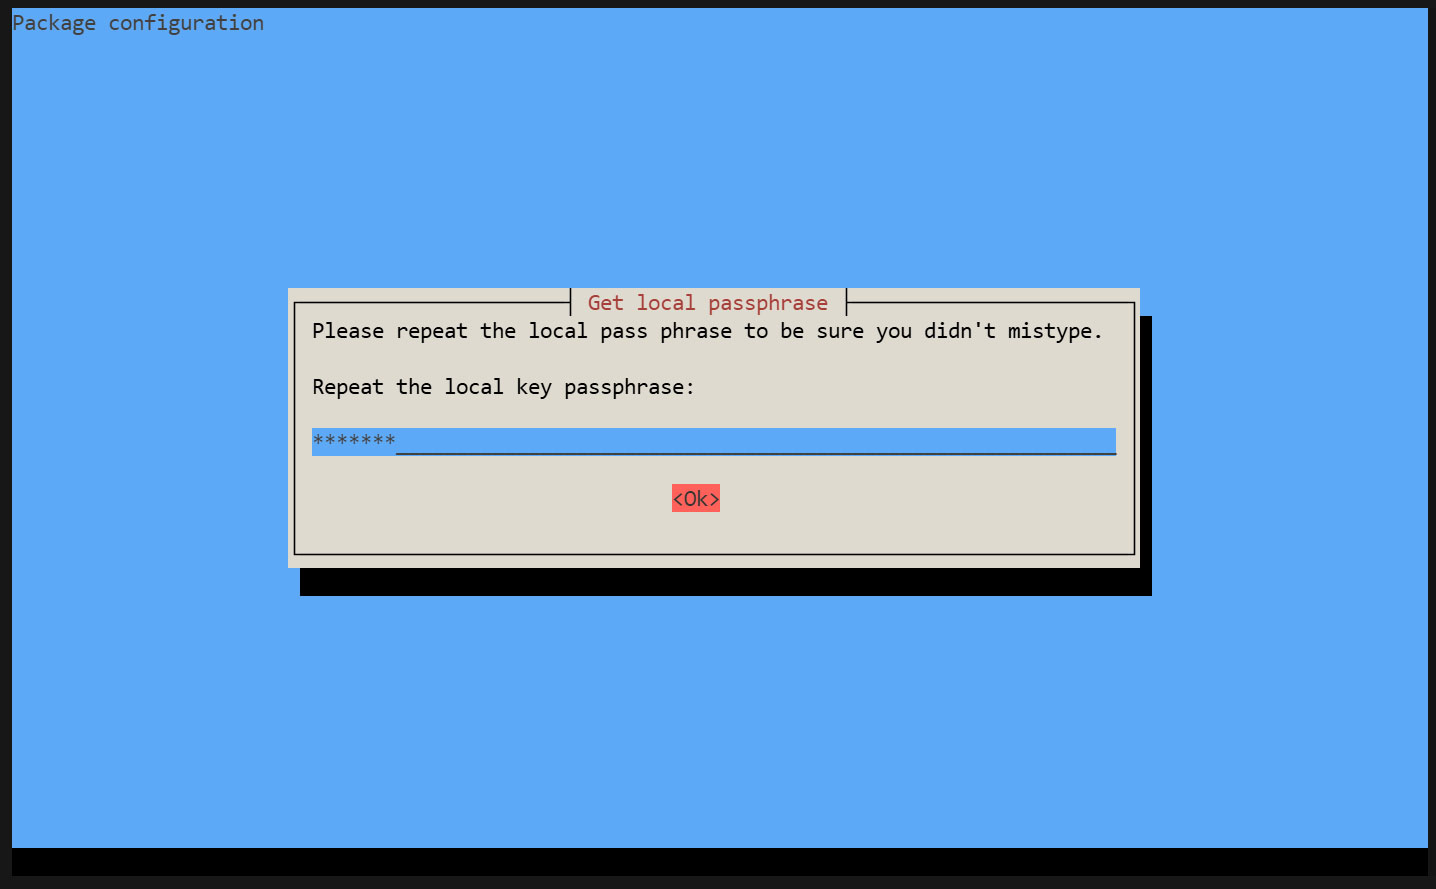
インストール過程で"site key passphrase"及び"local key passphrase"の入力を求められます。
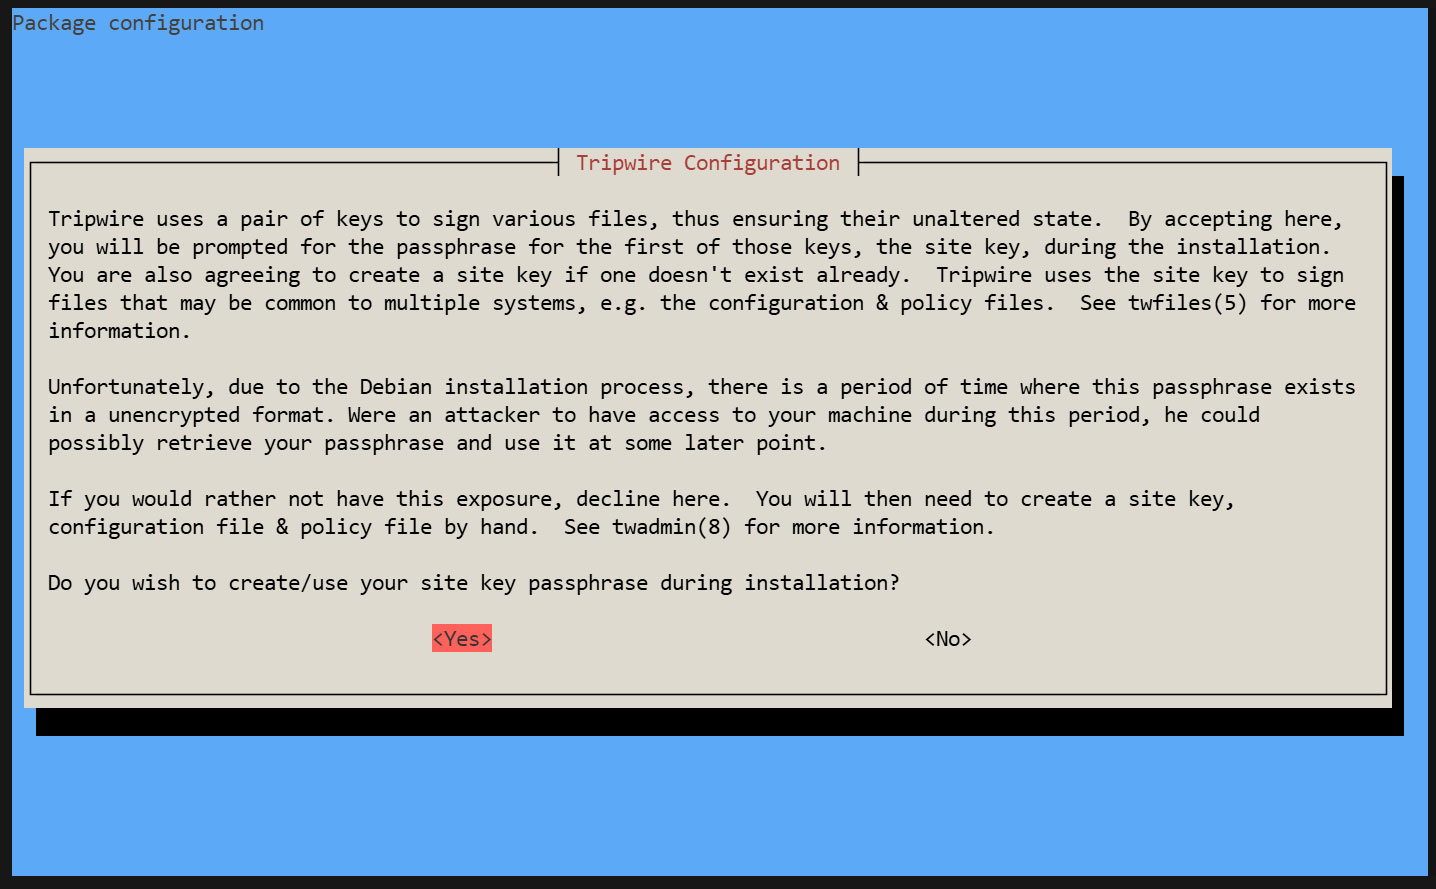
サイトキーパスフレーズの作成
ローカルキーパスフレーズの作成
tripwireデータベースとレポートファイルの保護にはローカルパスフレーズが必要です。tripwireベースラインデータベースの不正な変更を避けるためにtripwireが使用するローカルキー。
インストールが進み完了します
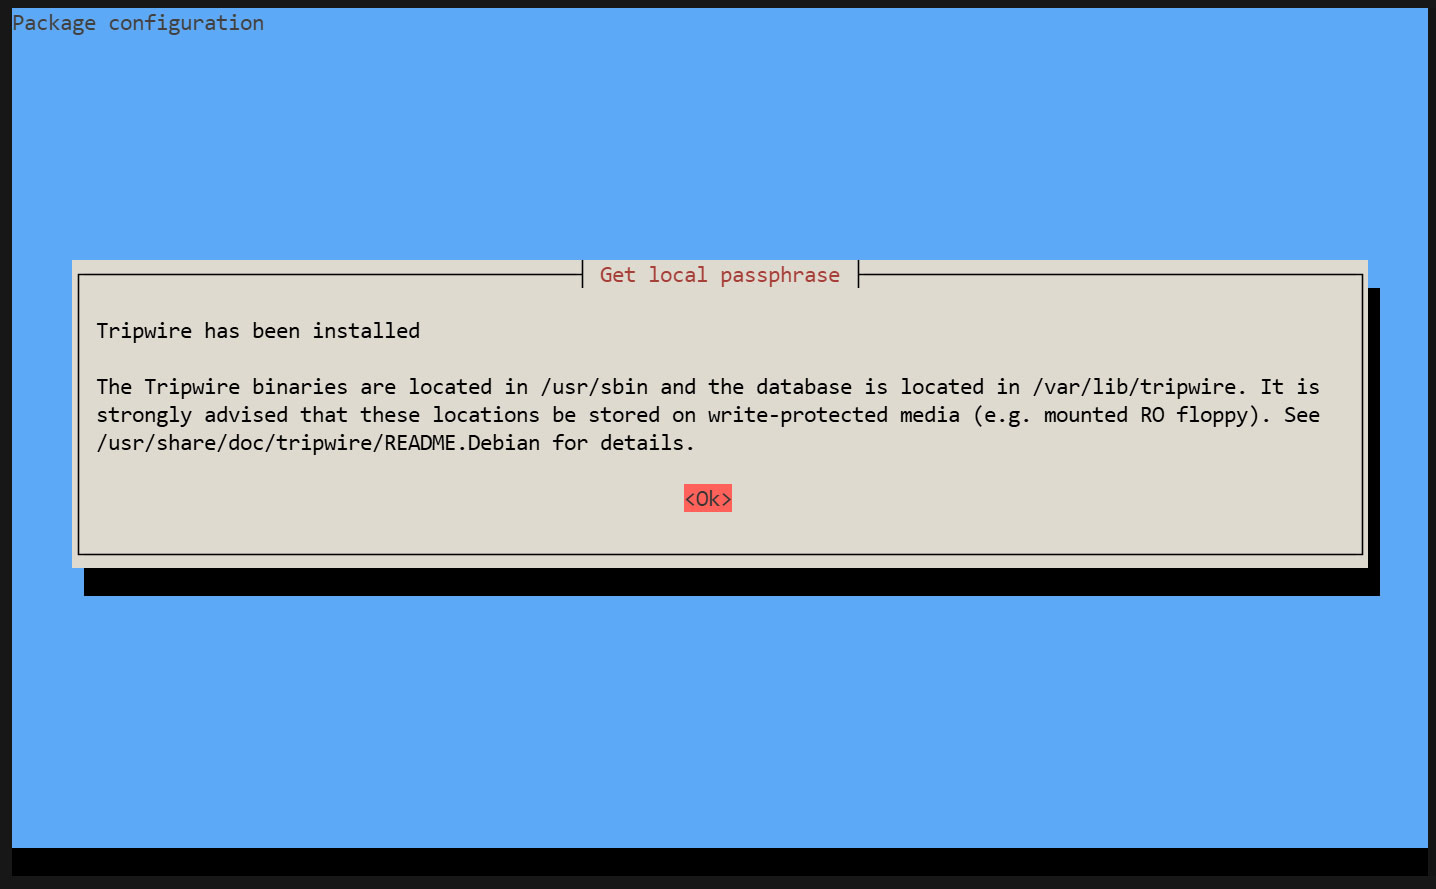
2. Tripwire の設定
①twcfg.txt編集
# cd /etc/tripwire
# vi twcfg.txt
9 行目 : 変更
LOOSEDIRECTORYCHECKING =true
12行目:必要に応じて変更 (レポートレベル : 4 が最大)
REPORTLEVEL =4
② 設定ファイル(暗号署名版)を作成
# twadmin -m F -c tw.cfg -S site.key twcfg.txt
Please enter your site passphrase: <site pass>
Wrote configuration file: /etc/tripwire/tw.cfg
③ ポリシーを最適化
次のポリシー最適化スクリプトを利用し、ポリシーを最適化する
# vi twpolmake.pl
ポリシー最適化スクリプト内容
#!/usr/bin/perl

$POLFILE=$ARGV[0];
open(POL,"$POLFILE") or die "open error: $POLFILE" ;
my($myhost,$thost) ;
my($sharp,$tpath,$cond) ;
my($INRULE) = 0 ;
while (<POL>) {
chomp;
if (($thost) = /^HOSTNAME\s*=\s*(.*)\s*;/) {
$myhost = `hostname` ; chomp($myhost) ;
if ($thost ne $myhost) {
$_="HOSTNAME=\"$myhost\";" ;
}
}
elsif ( /^{/ ) {
$INRULE=1 ;
}
elsif ( /^}/ ) {
$INRULE=0 ;
}
elsif ($INRULE == 1 and ($sharp,$tpath,$cond) = /^(\s*\#?\s*)(\/\S+)\b(\s+->\s+.+)$/) {
$ret = ($sharp =~ s/\#//g) ;
if ($tpath eq '/sbin/e2fsadm' ) {
$cond =~ s/;\s+(tune2fs.*)$/; \#$1/ ;
}
if (! -s $tpath) {
$_ = "$sharp#$tpath$cond" if ($ret == 0) ;
}
else {
$_ = "$sharp$tpath$cond" ;
}
}
print "$_\n" ;
}
close(POL) ;
ポリシーファイル最適化
# perl twpolmake.pl twpol.txt > twpol.txt.new
最適化済ポリシーファイルを元に、ポリシーファイル(暗号署名版)作成
# twadmin -m P -c tw.cfg -p tw.pol -S site.key twpol.txt.new
Please enter your site passphrase: <site pass>
Wrote policy file: /etc/tripwire/tw.pol
Tripwireデータベース自体をチェック対象外にする
# echo ! "/var/lib/tripwire/`hostname`.twd ;" >> /etc/tripwire/twpol.txt.new
④データベース作成
# tripwire -m i -s -c tw.cfg
Please enter your local passphrase: <local pass>
3. 動作確認
①テスト用ファイルを作成
# echo test > /root/test.txt
②Tripwire の動作確認
# tripwire -m c -s -c /etc/tripwire/tw.cfg
成功すると次ような表示が出る
Open Source Tripwire(R) 2.4.3.7 Integrity Check Report

Report generated by:          root
Report created on:            Fri 22 May 2026 04:43:36 PM JST
Database last updated on:     Never

===============================================================================
Report Summary:
===============================================================================

Host name:                    Lepard
Host IP address:              Unknown IP
Host ID:                      None
Policy file used:             /etc/tripwire/tw.pol
Configuration file used:      /etc/tripwire/tw.cfg
Database file used:           /var/lib/tripwire/Lepard.twd
Command line used:            tripwire -m c -s -c /etc/tripwire/tw.cfg

===============================================================================
Rule Summary:
===============================================================================

-------------------------------------------------------------------------------
  Section: Unix File System
-------------------------------------------------------------------------------

  Rule Name                       Severity Level    Added    Removed  Modified
  ---------                       --------------    -----    -------  --------
  Other binaries                  66                0        0        0
  Tripwire Binaries               100               0        0        0
  Other libraries                 66                0        0        0
  Root file-system executables    100               0        0        0
* Tripwire Data Files             100               1        0        0
  System boot changes             100               0        0        0
  Root file-system libraries      100               0        0        0
  (/lib)
  Critical system boot files      100               0        0        0
  Other configuration files       66                0        0        0
  (/etc)
  Boot Scripts                    100               0        0        0
  Security Control                66                0        0        0
* Root config files               100               1        0        0
  Devices & Kernel information    100               0        0        0
  (/dev)
  Invariant Directories           66                0        0        0

Total objects scanned:  36244
Total violations found:  2

===============================================================================
Object Summary:
===============================================================================

-------------------------------------------------------------------------------
# Section: Unix File System
-------------------------------------------------------------------------------

-------------------------------------------------------------------------------
Rule Name: Tripwire Data Files (/var/lib/tripwire/Lepard.twd)
Severity Level: 100
-------------------------------------------------------------------------------

Added:
"/var/lib/tripwire/Lepard.twd"

-------------------------------------------------------------------------------
Rule Name: Root config files (/root)
Severity Level: 100
-------------------------------------------------------------------------------

Added:
"/root/test.txt"

===============================================================================
Error Report:
===============================================================================

No Errors

-------------------------------------------------------------------------------
*** End of report ***

Open Source Tripwire 2.4 Portions copyright 2000-2018 Tripwire, Inc.  Tripwire is a registered
trademark of Tripwire, Inc. This software comes with ABSOLUTELY NO WARRANTY;
for details use --version. This is free software which may be redistributed
or modified only under certain conditions; see COPYING for details.
All rights reserved.
テストファイルを削除しておく
# rm -f /root/test.txt
4. Tripwire 自動実行
①メールで結果報告用スクリプト(tripwire.sh)を作成し、自動実行させる
# cd /opt/script
# vi tripwire.sh
#!/bin/bash

PATH=/usr/sbin:/usr/bin:/bin:/usr/local/tripwire/sbin

# パスフレーズ設定
LOCALPASS=xxxxx # ローカルキーパスフレーズ
SITEPASS=xxxxx # サイトキーパスフレーズ

#通知先メールアドレス指定
MAIL="<your mailaddress> "

cd /etc/tripwire

# Tripwireチェック実行
tripwire -m c -s -c tw.cfg|mail -s "Tripwire(R) Integrity Check Report in `hostname`" $MAIL

# ポリシーファイル最新化
twadmin -m p -c tw.cfg -p tw.pol -S site.key > twpol.txt
perl twpolmake.pl twpol.txt > twpol.txt.new
twadmin -m P -c tw.cfg -p tw.pol -S site.key -Q $SITEPASS twpol.txt.new > /dev/null
rm -f twpol.txt* *.bak

# データベース最新化
rm -f /usr/local/tripwire/lib/tripwire/*.twd*
tripwire -m i -s -c tw.cfg -P $LOCALPASS
②実行権限を与え、Cronで定期実行する
# chmod 700 tripwire.sh
# crontab -e
0 5 * * * /opt/script/tripwire.sh
下記を実行し、指定メールアドレスに結果が届くか確認する
# /opt/script/tripwire.sh
Logwatch
Logwatch は、いろいろなログをまとめて集計し、レポートとして毎日定期的にメールで届けてくれる。不正アクセスや不具合の発見とサーバの監視に便利なツール。
①インストール
# apt -y install logwatch
②デフォルトの設定ファイルをコピー
# cp /usr/share/logwatch/default.conf/logwatch.conf /etc/logwatch/conf/
➂メールの送信先等を変更
# vi /etc/logwatch/conf/logwatch.conf

76 行目 : 通知を受け取りたいメールアドレスを追加
#MailTo = root
MailTo = [メールアドレス]

115行目 : ログ通知の詳細度を設定
#Detail = Low
Detail = High
④ディレクトリの作成
# mkdir /var/cache/logwatch
⑤動作確認
logwatch をインストールするとデフォルトで cron 登録されるので、毎日レポートメールが届く
設定したアドレスにレポートが届くかテストを行います。
# /etc/cron.daily/00logwatch
ディスク使用率チェックスクリプト
1. スクリプト作成
# cd /opt/script/
# vi disk_capacity_check.sh
disk_capacity_check.shの内容
#!/bin/bash

#通知先メールアドレス指定
MAIL="<your mailaddress>"

DVAL=`/bin/df / | /usr/bin/tail -1 | /bin/sed 's/^.* \([0-9]*\)%.*$/\1/'`

if [ $DVAL -gt 80 ]; then
echo "Disk usage alert: $DVAL %" | mail -s "Disk Space Alert in `hostname`" $MAIL
fi
# chmod 700 disk_capacity_check.sh
2. 実行確認
①現在の使用率を確認
# df -h
次のように表示される
Filesystem      Size  Used Avail Use% Mounted on
udev            1.9G     0  1.9G   0% /dev
tmpfs           389M  1.2M  388M   1% /run
/dev/sda1        38G  3.5G   32G  10% /
tmpfs           1.9G     0  1.9G   0% /dev/shm
tmpfs           1.0M     0  1.0M   0% /run/credentials/systemd-journald.service
tmpfs           5.0M     0  5.0M   0% /run/lock
/dev/loop1      106M  106M     0 100% /snap/core/17292
/dev/loop3       50M   50M     0 100% /snap/snapd/26865
/dev/loop0       67M   67M     0 100% /snap/core24/1643
/dev/loop2       74M   74M     0 100% /snap/certbot/5603
tmpfs           1.9G   64K  1.9G   1% /tmp
tmpfs           1.0M     0  1.0M   0% /run/credentials/getty@tty1.service
tmpfs           389M   12K  389M   1% /run/user/1000
②使用率80%以上になるようダミーファイルを作成(例ではdummyfile という名前で30G程度)
# dd if=/dev/zero of=dummyfile bs=1M count=30000
③再度確認
# df -h
を実行して80%以上になっていることを確認
④ディスク容量チェックスクリプトを実行
# /opt/script/disk_capacity_check.sh
設定したメールアドレスに本文の内容として「Disk usage alert : 94%」のように記載のメールが届きます
⑤作成した「dummyfile」を削除
# rm dummyfile
⑥定期実行設定
# crontab -e
30 2 * * * /opt/script/disk_capacity_check.sh
DNS更新
ネットが切断されたり、ルーターが切断再起動したときにおこるグローバルIPの変更の度に、ダイナミックDNSにアクセスしグローバルIPが変更されたことを知らせなくてはいけません。
専用のpythonファイルを作成しCronで定期実行します
今回はValudomainでのDNS設定です
# cd /opt/script
# vi ddnsset.py
ddnsset.pyの内容
#setddns.py
import requests
import ipaddress
from datetime import datetime
from pathlib import Path

# SETTING DATA
MY_DOMAIN = "example.jp"  ←自ドメイン
MY_PASS = "xxxxxxxxxx" ←パスワード
MY_HOSTNAME = "xxxx" ←ホスト名
OUT_FILE = Path("/tmp/ipadress") ←IPアドレス記録ファイル

def time_msg():
    now = datetime.now()
    return now.strftime("%Y/%m/%d %H:%M:%S")

def is_valid_ip(ip_str):
    try:
        ipaddress.ip_address(ip_str)
        return True
    except ValueError:
        return False

def main():
    # Check Global IP Address
    url_get_ip = "https://dyn.value-domain.com/cgi-bin/dyn.fcg?ip"
    try:
        response = requests.get(url_get_ip, timeout=10)
        response.raise_for_status()
        current_ip = response.text.strip()
    except requests.RequestException as e:
        print(f"{time_msg()} Failed to get IP: {e}")
        return

    # IP check
    mssg = time_msg()
    if not current_ip:
        print(f"{mssg} invalid IP NULL")
        return

    if not is_valid_ip(current_ip):
        print(f"{mssg} invalid IP={current_ip}")
        return

    # Read previous IP
    previous_ip = ""
    if OUT_FILE.exists():
        with open(OUT_FILE, "r") as f:
            previous_ip = f.read().strip()

    if current_ip == previous_ip:
        print(f"{time_msg()} no change IP={current_ip}")
        return
    else:
        print(f"change IP from {previous_ip} to {current_ip}")

    # Update DDNS
    mssg = time_msg()
    print(f"{mssg} access to value-domain")

    url_set_ddns = (
        f"https://dyn.value-domain.com/cgi-bin/dyn.fcg?"
        f"d={MY_DOMAIN}&p={MY_PASS}&h={MY_HOSTNAME}"
    )

    try:
        response = requests.get(url_set_ddns, timeout=10)
        response.raise_for_status()
        # 改行をスペースに変換し、連続するスペースを1つにまとめる
        result = ' '.join(response.text.strip().split())
    except requests.RequestException as e:
        print(f"{time_msg()} Failed to update DDNS: {e}")
        return

    mssg = time_msg()
    print(f"{mssg} {MY_HOSTNAME}.{MY_DOMAIN} {result} IP={current_ip}")

    # DDNS更新が成功した場合のみIPを保存
    if "status=0" in result:
        with open(OUT_FILE, "w") as f:
            f.write(current_ip)
        print(f"{mssg} Successfully saved new IP: {current_ip}")
    else:
        print(f"{mssg} DDNS update failed, IP not saved")

if __name__ == "__main__":
    main()
IPアドレス記録ファイル作成
# touch /tmp/ipadress
定期的に実行
# crontab -e

* 00 * * * /usr/bin/python3 /opt/script/ddnsset.py >> /var/log/ddns_updater.log 2>&1