MySQL8 インストール
# dnf -y install mysql-server
charset.cnf 下記の内容で新規作成
# vi /etc/my.cnf.d/charset.cnf

# デフォルトの文字コードを設定  絵文字等 4 バイト長の文字を扱う場合はutf8mb4

[mysqld]
character-set-server = utf8mb4

[client]
default-character-set = utf8mb4
# systemctl enable --now mysqld
Created symlink /etc/systemd/system/multi-user.target.wants/mysqld.service → /usr/lib/systemd/system/mysqld.service.
完了したら、 「mysql_secure_installation」 コマンドを使用してrootユーザーのパスワードを設定し、いくつかの基本的なポリシーを設定します
# mysql_secure_installation
Securing the MySQL server deployment.
Connecting to MySQL using a blank password.
VALIDATE PASSWORD COMPONENT can be used to test passwords
and improve security. It checks the strength of password
and allows the users to set only those passwords which are
secure enough. Would you like to setup VALIDATE PASSWORD component?
Press y|Y for Yes, any other key for No: Y
There are three levels of password validation policy:
LOW Length >= 8
MEDIUM Length >= 8, numeric, mixed case, and special characters
STRONG Length >= 8, numeric, mixed case, special characters and dictionary file
Please enter 0 = LOW, 1 = MEDIUM and 2 = STRONG: 0 ←任意
Please set the password for root here.
New password: [Password]
Re-enter new password: [Password]
Estimated strength of the password: 100
Do you wish to continue with the password provided?(Press y|Y for Yes, any other key for No) : Y
By default, a MySQL installation has an anonymous user,
allowing anyone to log into MySQL without having to have
a user account created for them. This is intended only for
testing, and to make the installation go a bit smoother.
You should remove them before moving into a production
environment.
Remove anonymous users? (Press y|Y for Yes, any other key for No) : Y
Success.
Normally, root should only be allowed to connect from
'localhost'. This ensures that someone cannot guess at
the root password from the network.
Disallow root login remotely? (Press y|Y for Yes, any other key for No) : Y
Success.
By default, MySQL comes with a database named 'test' that
anyone can access. This is also intended only for testing,
and should be removed before moving into a production
environment.
Remove test database and access to it? (Press y|Y for Yes, any other key for No) : Y
- Dropping test database…
Success. - Removing privileges on test database…
Success.
Reloading the privilege tables will ensure that all changes
made so far will take effect immediately.
Reload privilege tables now? (Press y|Y for Yes, any other key for No) : Y
Success.
All done!
WordPressインストール
1. Word Press 用のデータベースを作成
例としてデータベース[wp_db] データベースユーザー[wp_user] パスワード[?Ww123456]とします
# mysql -u root -p

Enter password: ←MySQL 用root パスワード入力
Welcome to the MySQL monitor.  Commands end with ; or \g.
Your MySQL connection id is 10
Server version: 8.0.46 Source distribution

Copyright (c) 2000, 2026, Oracle and/or its affiliates.

Oracle is a registered trademark of Oracle Corporation and/or its
affiliates. Other names may be trademarks of their respective
owners.

Type 'help;' or '\h' for help. Type '\c' to clear the current input statement.

#WordPressが制御する専用のデータベースを作成
mysql> CREATE DATABASE wp_db DEFAULT CHARACTER SET utf8 COLLATE utf8_unicode_ci;
Query OK, 0 rows affected (0.00 sec)

#アカウントを作成し、パスワードを設定
mysql>CREATE USER 'wp_user'@'localhost' IDENTIFIED WITH mysql_native_password BY '?Ww123456';
Query OK, 0 rows affected (0.04 sec)

#ユーザーがセットアップ済データベースにフルアクセスできる
mysql> GRANT ALL ON wp_db.* TO 'wp_user'@'localhost';
Query OK, 0 rows affected (0.04 sec)

#権限をリロード
mysql> flush privileges;

#mysqlを終了する
mysql> exit;
Bye
2.Wordpressインストール
# cd /var/www/html/[FQDN]
# wget http://ja.wordpress.org/latest-ja.tar.gz
# tar xvf latest-ja.tar.gz
3.Wordpress設定ファイルの編集
# cd wordpress/
# cp wp-config-sample.php wp-config.php
# vi wp-config.php
<?php
/**
-----省略-----
// ** Database settings - You can get this info from your web host ** //
/** The name of the database for WordPress */
define( 'DB_NAME', 'wp_db' );
/** Database username */
define( 'DB_USER', 'wp_user' );
/** Database password */
define( 'DB_PASSWORD', '?Ww123456' );
/** Database hostname */
define( 'DB_HOST', 'localhost' );
/** Database charset to use in creating database tables. */
define( 'DB_CHARSET', 'utf8' );
--------------------省略-------------------------
/** Sets up WordPress vars and included files. */
require_once ABSPATH . 'wp-settings.php';
define('FS_METHOD', 'direct');
また、最終行に以下の分を追加します。 これをしないと、プラグインを追加するときにFTP接続情報なるものを聞かれます。
define('FS_METHOD', 'direct');
4.ファイルの移動
①/var/www/html/[wordpress用ドメイン名]の下に展開した中身を移動
# cd /var/www/html/[FQDN]
# mv wordpress/* .
移動されたことを確認後 wordpressディレクトリーとダウンロードしたlatest-ja.tar.gzを削除
# cd /var/www/html/[FQDN]
# rm -R -f wordpress
# rm -f latest-ja.tar.gz
wordpressディレクトリの所有者をapacheにします。
# chown -R apache:apache /var/www/html/[FQDN]
5.wordpress インストールの開始
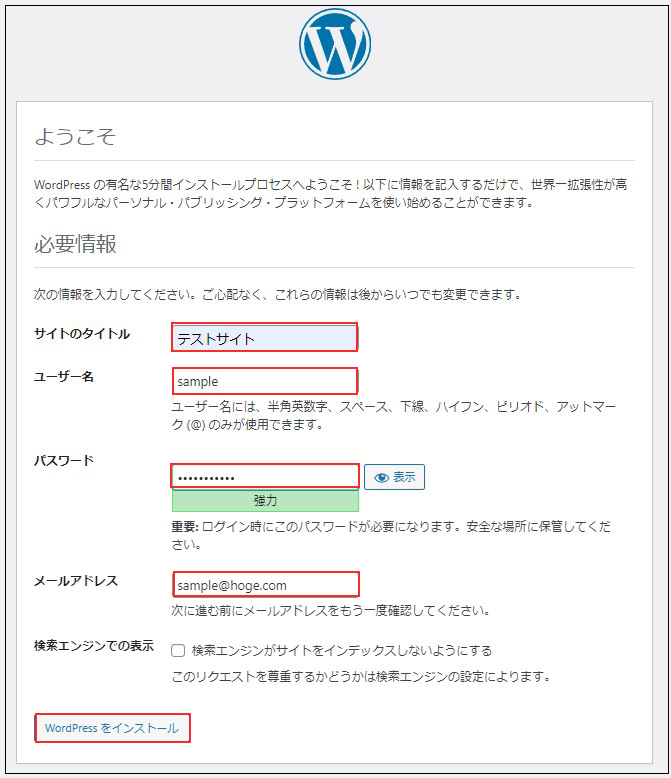
ブラウザでhttp://[FQDN]/wp-admin/install.phpにアクセスし、ユーザー名、パスワード等必要事項を入力し、インストールを開始してください
「お使いのサーバーの PHP では WordPress に必要な MySQL 拡張を利用できないようです。」表示されたら 次をインストールしてapacheとmysqlを再起動する
# dnf -y install php-mysqlnd
# systemctl restart mysqld
# systemctl restart httpd
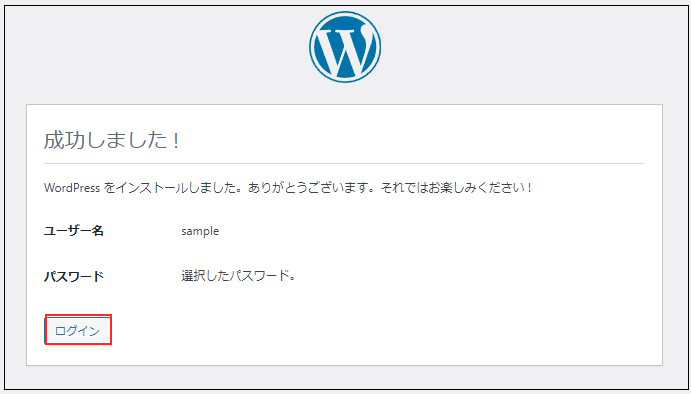
[ログイン]をクリック
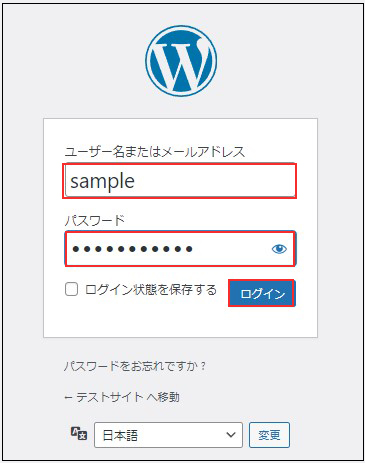
ユーザー名 : 先ほど設定したユーザー名
パスワード : 先ほど設定したユーザーのパスワード
を入力し、[ログイン]をクリック
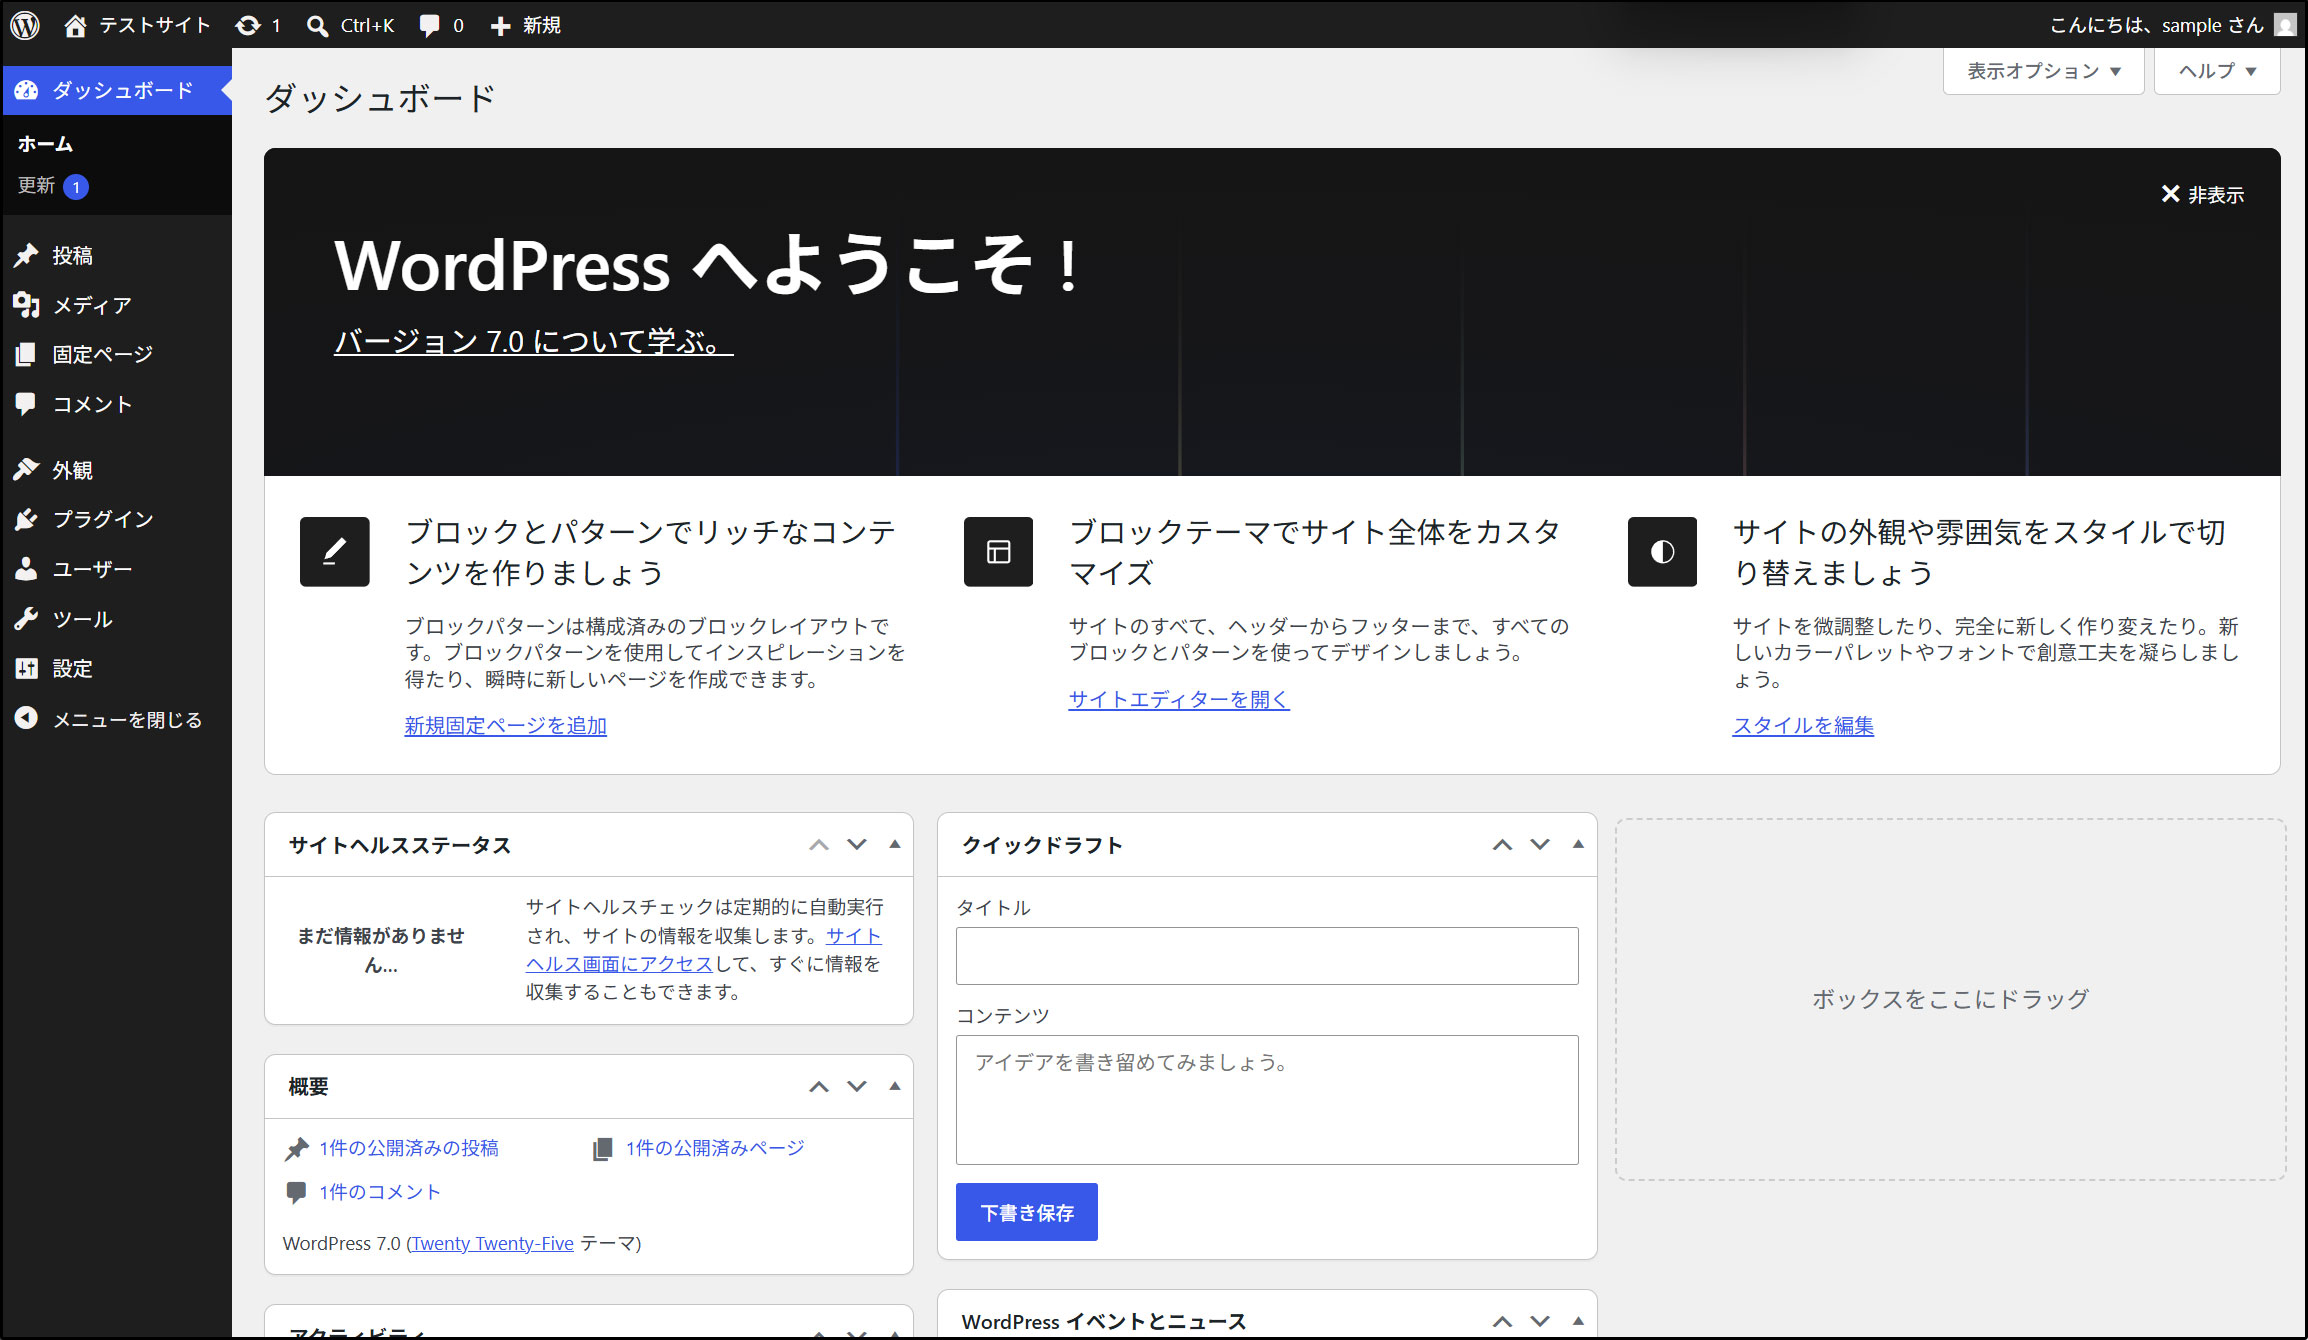
ログインに成功すると下記WordPressの管理画面にアクセスできます