Icinga(アイシンガ)は「Nagios」から派生して開発され、CPU、メモリ、ディスク使用量や、Ping、HTTP、DNSなどのネットワークサービスを監視するためのオープンソースのITインフラストラクチャ監視ツールです
1.前提条件
Icinga2 をインストールするための要件として、LAMP がインストールされている必要があります。またPHP 7.3 以降のバージョンが必要です。
今回は下記が構築されていることを前提とします
mariadb from 11.8.6-MariaDB
PHP 8.4.24
Apache2 2.4.68
必要なトランスポートパッケージをインストール
# apt update
# apt -y install apt-transport-https wget gnupg
2. Icinga2 をインストール
2.1 Icingaアーカイブキーリングをインストール
# wget -O /tmp/icinga-archive-keyring.deb "https://packages.icinga.com/icinga-archive-keyring_latest+ubuntu26.04.deb"

# apt install -y /tmp/icinga-archive-keyring.deb
2.2 icinga2やコンポーネントをインストールするリポジトリを追加
# . /etc/os-release
DIST=$(lsb_release -c | awk '{print $2}')

# echo "deb [signed-by=/usr/share/keyrings/icinga-archive-keyring.gpg] https://packages.icinga.com/debian icinga-${DIST} main" > /etc/apt/sources.list.d/${DIST}-icinga.list
# echo "deb-src [signed-by=/usr/share/keyrings/icinga-archive-keyring.gpg] https://packages.icinga.com/debian icinga-${DIST} main" >> /etc/apt/sources.list.d/${DIST}-icinga.list
2.3 Icinga2と監視プラグインをインストール
# apt update
# apt -y install icinga2 monitoring-plugins
2.4 Icinga2サービスを有効にして起動
# systemctl enable --now icinga2
Synchronizing state of icinga2.service with SysV service script with /usr/lib/systemd/systemd-sysv-install.
Executing: /usr/lib/systemd/systemd-sysv-install enable icinga2
2.5 インストール済みのバージョンを確認
# icinga2 --version
icinga2 - The Icinga 2 network monitoring daemon (version: r2.16.5-1)

Copyright (c) 2012-2026 Icinga GmbH (https://icinga.com/)
License GPLv3+: GNU GPL version 3 or later <https://gnu.org/licenses/gpl-3.0.html>
This is free software: you are free to change and redistribute it.
There is NO WARRANTY, to the extent permitted by law.

System information:
  Platform: Debian GNU/Linux
  Platform version: 13 (trixie)
  Kernel: Linux
  Kernel version: 6.12.107+deb13-amd64
  Architecture: x86_64

Build information:
  Compiler: GNU 14.2.0
  Build host: runner-5jugdrtyg-project-575-concurrent-2
  OpenSSL version: OpenSSL 3.5.7 9 Jun 2026

Application information:

General paths:
  Config directory: /etc/icinga2
  Data directory: /var/lib/icinga2
  Log directory: /var/log/icinga2
  Cache directory: /var/cache/icinga2
  Spool directory: /var/spool/icinga2
  Run directory: /run/icinga2

Old paths (deprecated):
  Installation root: /usr
  Sysconf directory: /etc
  Run directory (base): /run
  Local state directory: /var

Internal paths:
  Package data directory: /usr/share/icinga2
  State path: /var/lib/icinga2/icinga2.state
  Modified attributes path: /var/lib/icinga2/modified-attributes.conf
  Objects path: /var/cache/icinga2/icinga2.debug
  Vars path: /var/cache/icinga2/icinga2.vars
  PID path: /run/icinga2/icinga2.pid
Icinga2はデータバックエンドとしてIcingaDBを使用しており、IcingaDBにはMySQLまたはMariaDBが必要です。
今回はMariaDB として進めます。
次の2つのデータベースとユーザーを作成する
3. MySQL/MariaDB の設定
IcingaDBデータベースとユーザー:
データベース名 : icingadb
ユーザ名 : icingauser
パスワード : ?Ww123456
Icingaweb2データベースとユーザー:
データベース名 : icingaweb2db
ユーザ名 : icingaweb2user
パスワード : ?Yy123456
# mysql -u root -p

> CREATE DATABASE icingadb;
> CREATE USER 'icingauser'@'localhost' IDENTIFIED BY '?Ww123456';
> GRANT ALL ON icingadb.* TO 'icingauser'@'localhost';

> CREATE DATABASE icingaweb2db;
> CREATE USER 'icingaweb2user'@'localhost' IDENTIFIED BY '?Yy123456';
> GRANT ALL ON icingaweb2db.* TO 'icingaweb2user'@'localhost';

> FLUSH PRIVILEGES;
> exit;
4. IcingaDBとRedisをインストール
IcingaDBは、従来のIDOデータベースモジュールに代わる最新のソリューションです。Icinga2とデータベースバックエンド間の高性能トランスポート層としてRedisを使用しています。
IcingaDBとそのRedisコンポーネントをインストールし、データベーススキーマをインポートします。
# apt -y install icingadb icingadb-redis
IcingaDB 用の Redis を有効にして起動
# systemctl enable --now icingadb-redis
# systemctl start icingadb-redis
先ほど作成したデータベースに、IcingaDBデータベーススキーマをインポートする
# mysql -u root -p icingadb < /usr/share/icingadb/schema/mysql/schema.sql
IcingaDBの設定を編集して、データベースの認証情報を設定する
# vi /etc/icingadb/config.yml

6行目以降database:項目の内容を次のようにする
database:
  type: mysql
  host: localhost
  port: 3306
  database: icingadb
  user: icingauser
  password: ?Ww123456
Icinga2でIcingaDB機能を有効にし、APIを設定する
# icinga2 feature enable icingadb
# icinga2 api setup

information/cli: Generating new CA.
information/base: Writing private key to '/var/lib/icinga2/ca//ca.key'.
information/base: Writing X509 certificate to '/var/lib/icinga2/ca//ca.crt'.
information/cli: Generating new CSR in '/var/lib/icinga2/certs//lepard.csr'.
information/base: Writing private key to '/var/lib/icinga2/certs//lepard.key'.
information/base: Writing certificate signing request to '/var/lib/icinga2/certs//lepard.csr'.
information/cli: Signing CSR with CA and writing certificate to '/var/lib/icinga2/certs//lepard.crt'.
information/pki: Writing certificate to file '/var/lib/icinga2/certs//lepard.crt'.
information/cli: Copying CA certificate to '/var/lib/icinga2/certs//ca.crt'.
information/cli: Adding new ApiUser 'root' in '/etc/icinga2/conf.d/api-users.conf'.
information/cli: Reading '/etc/icinga2/icinga2.conf'.
information/cli: Enabling the 'api' feature.
Enabling feature api. Make sure to restart Icinga 2 for these changes to take effect.
information/cli: Updating 'NodeName' constant in '/etc/icinga2/constants.conf'.
information/cli: Created backup file '/etc/icinga2/constants.conf.orig'.
information/cli: Updating 'ZoneName' constant in '/etc/icinga2/constants.conf'.
information/cli: Backup file '/etc/icinga2/constants.conf.orig' already exists. Skipping backup.
Done.

Now restart your Icinga 2 daemon to finish the installation!
変更を適用する
# systemctl enable --now icingadb
# systemctl restart icinga2
5. Icinga Web 2をインストール
Icinga Webは、監視データの表示、設定の管理、アラートの処理を行うためのWebベースのフロントエンドです。IcingaDB WebモジュールとApacheと一緒にインストールしてください。
# apt -y install icingaweb2 icingadb-web libapache2-mod-php icingacli
6.Apache Webサーバーの設定
Icinga Web 2パッケージは、Apache設定ファイルを自動的にインストールします。必要なApacheモジュールを有効にして、サービスを再起動してください。
# a2enmod rewrite
# a2enmod php8.4
# systemctl restart apache2
7. Icinga Web 2セットアップウィザードを実行
7.1 ウェブセットアップウィザード用の認証トークンを生成する
# icingacli setup token create
The newly generated setup token is: 85363bea2b91f61c
7.2 ブラウザを開き、以下のセットアップウィザードにアクセスする
http://[server IP]/icingaweb2/setup
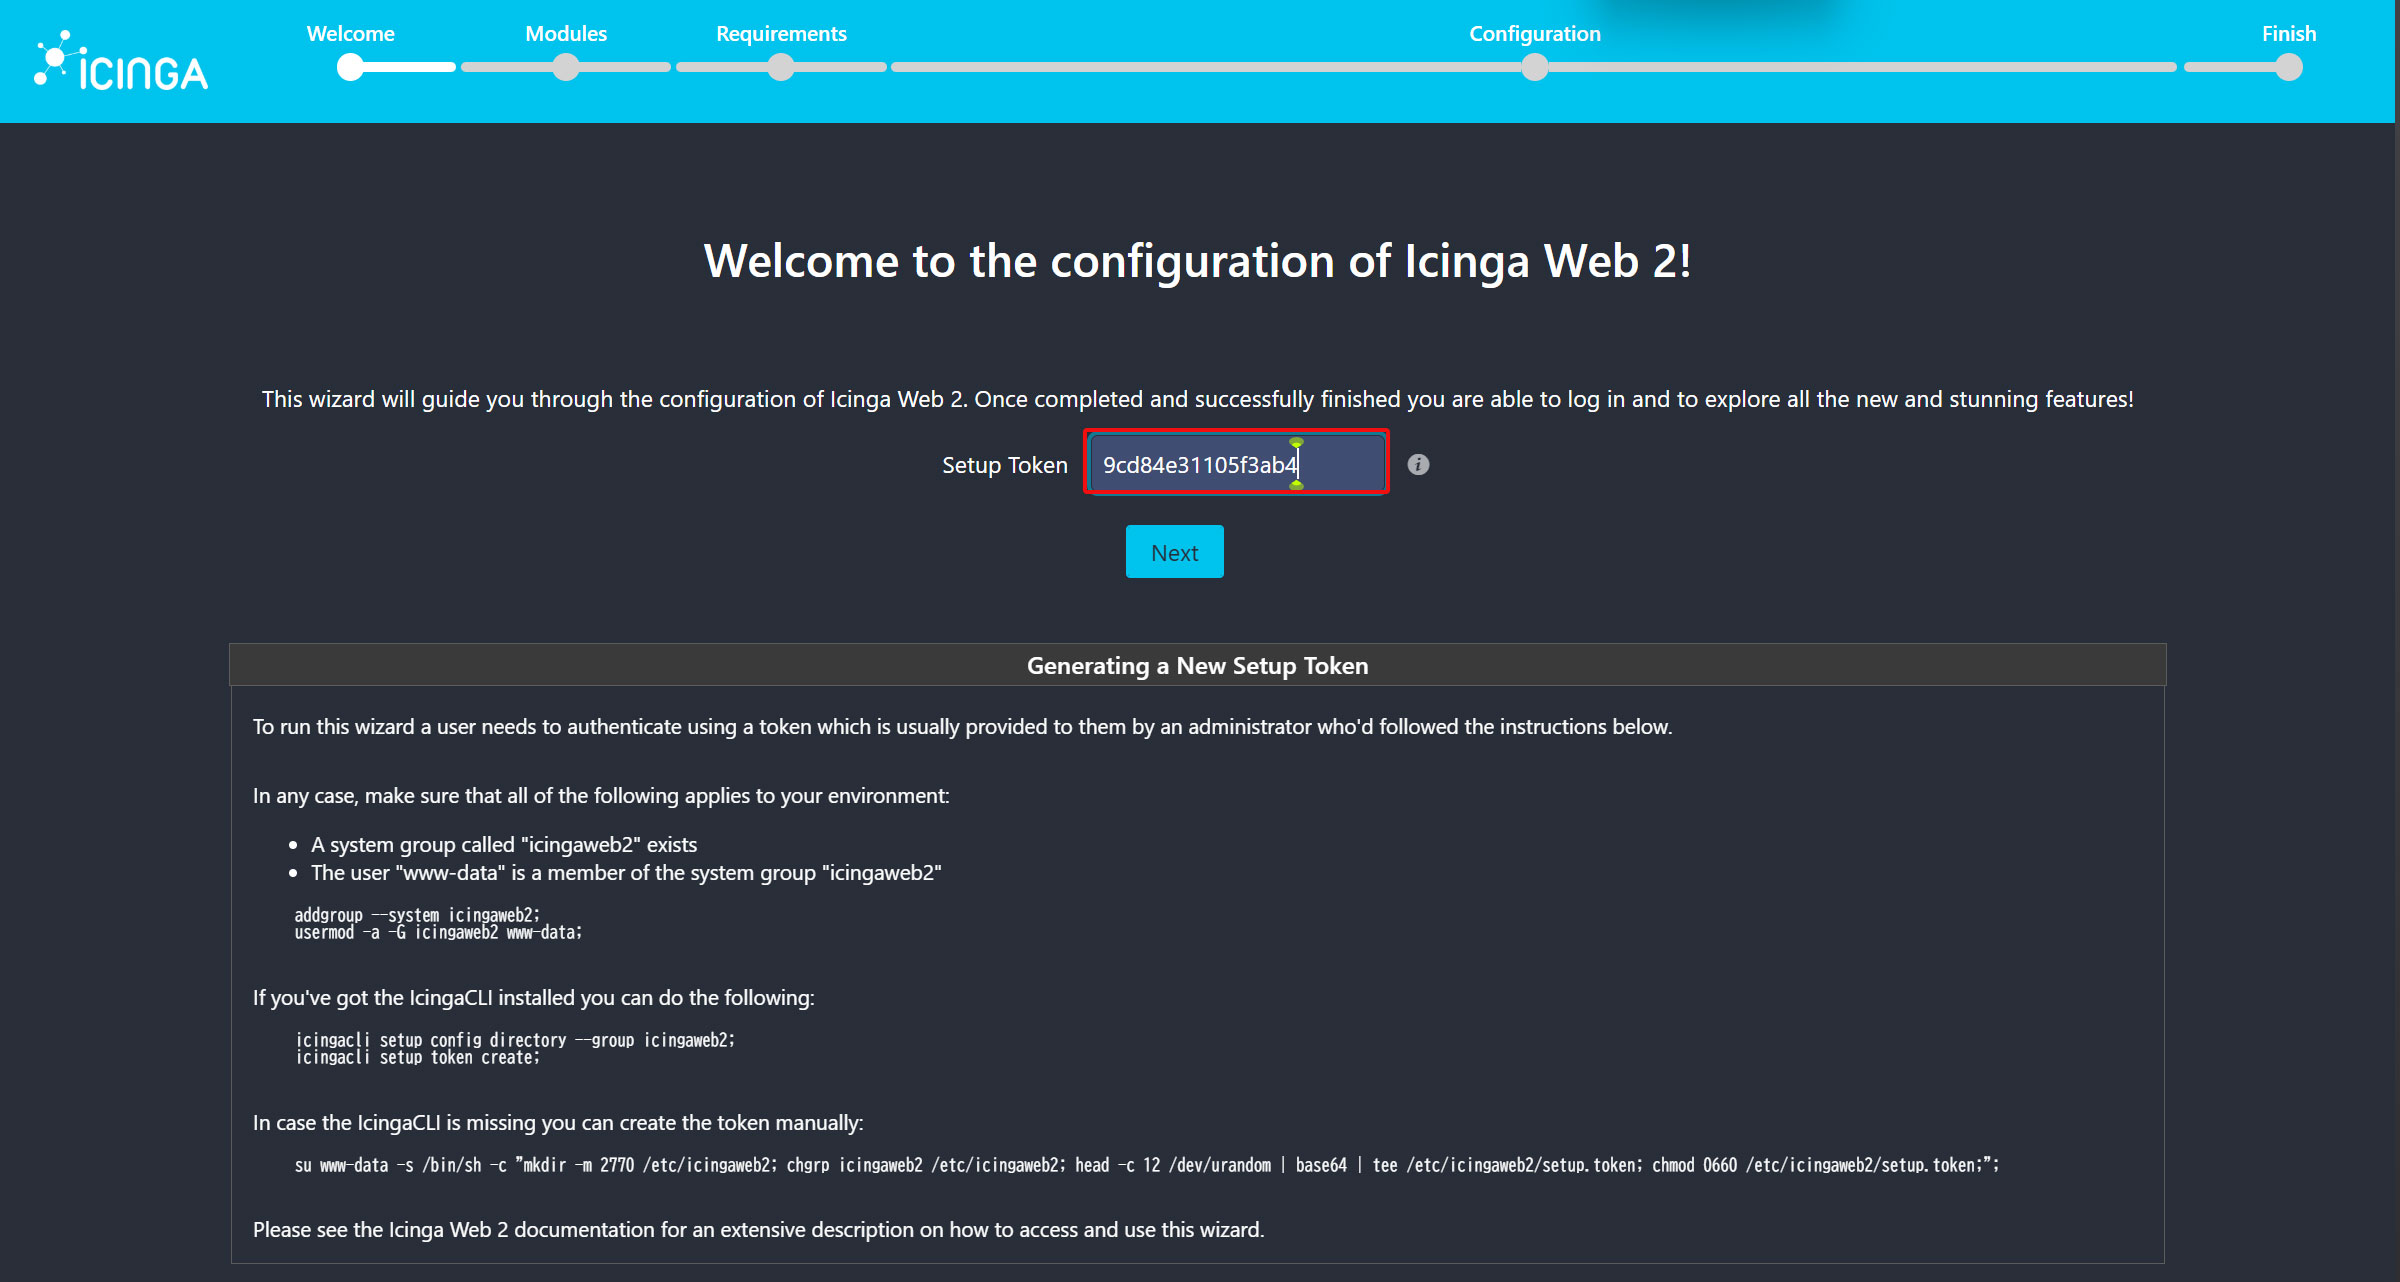
①作成したトークンを入力して「Next」をクリック
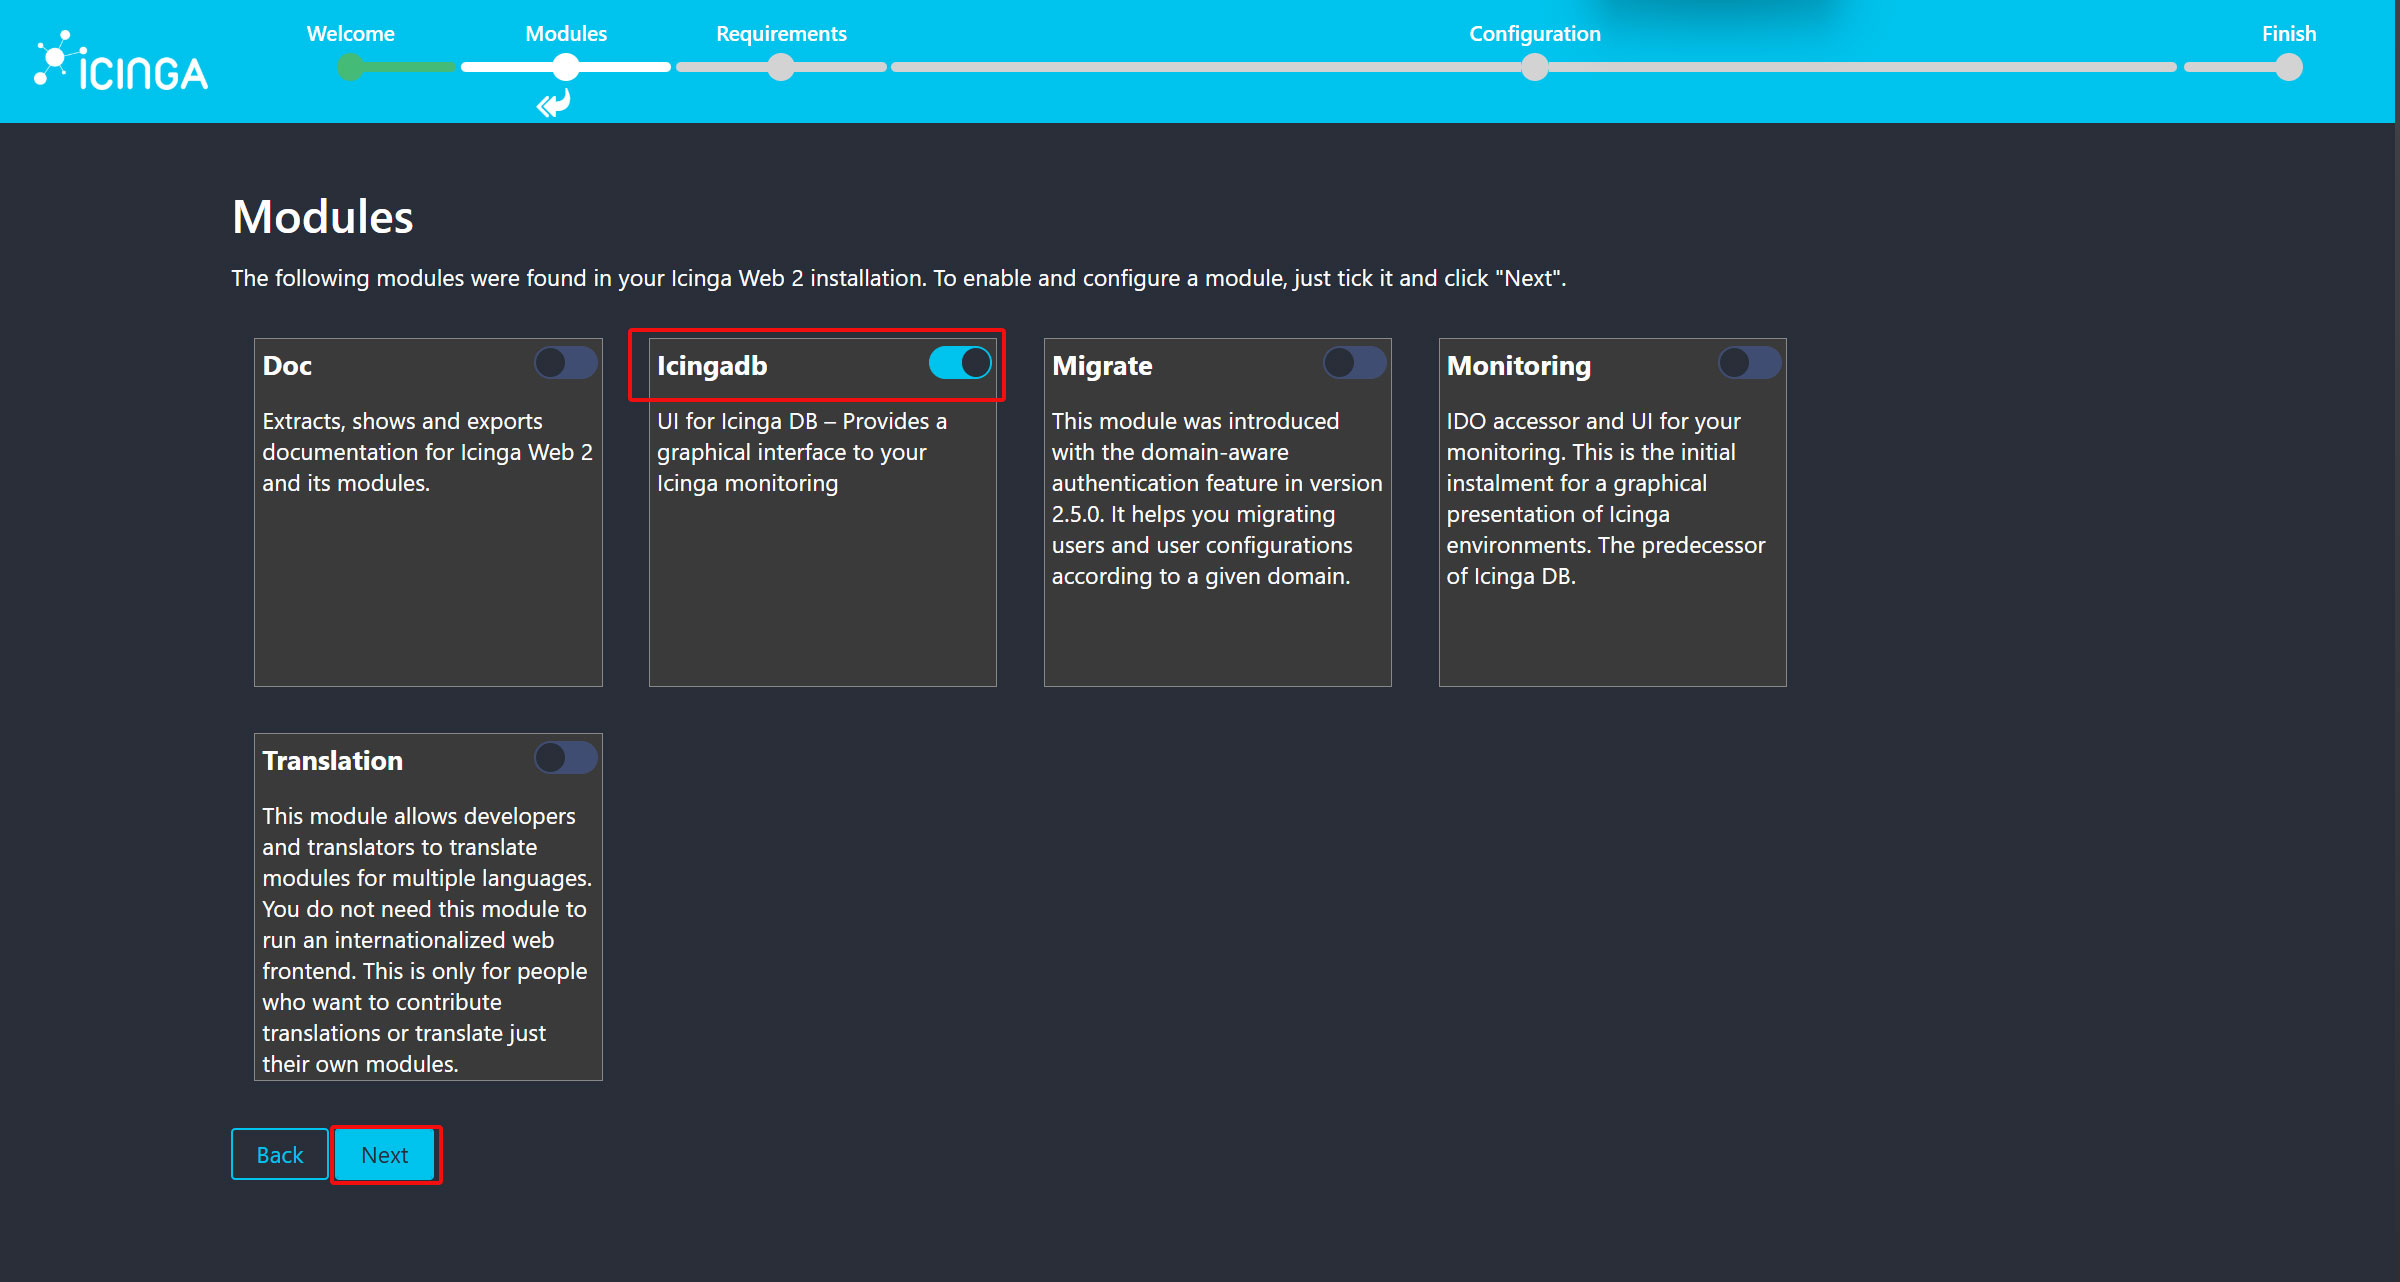
➁IcingadbがONになっていることを確認し、「Next」をクリック
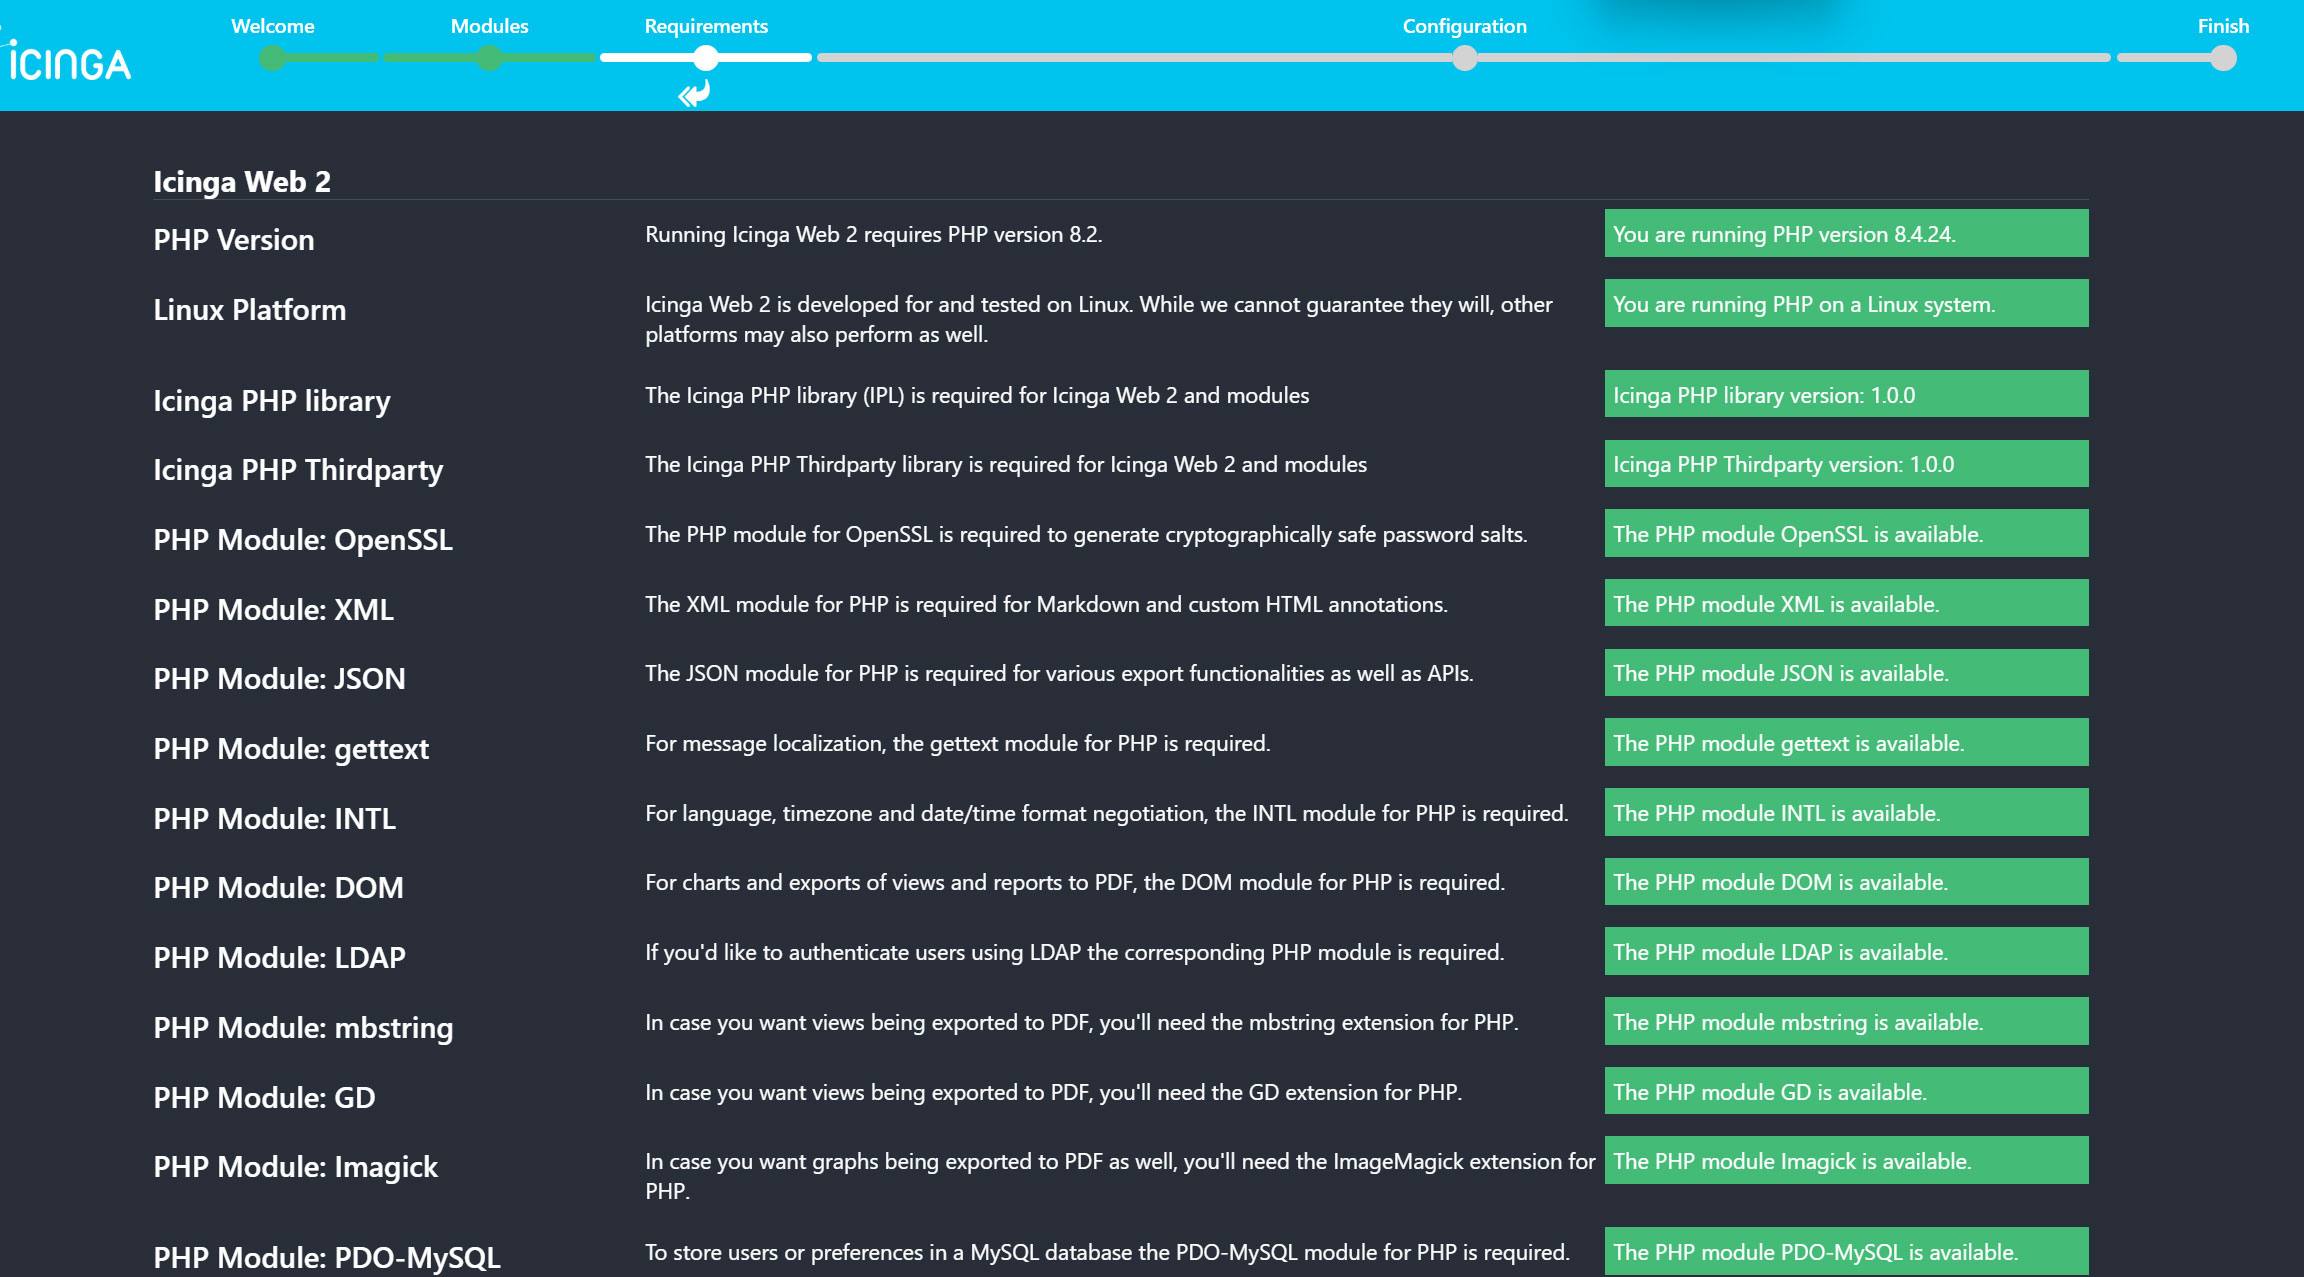
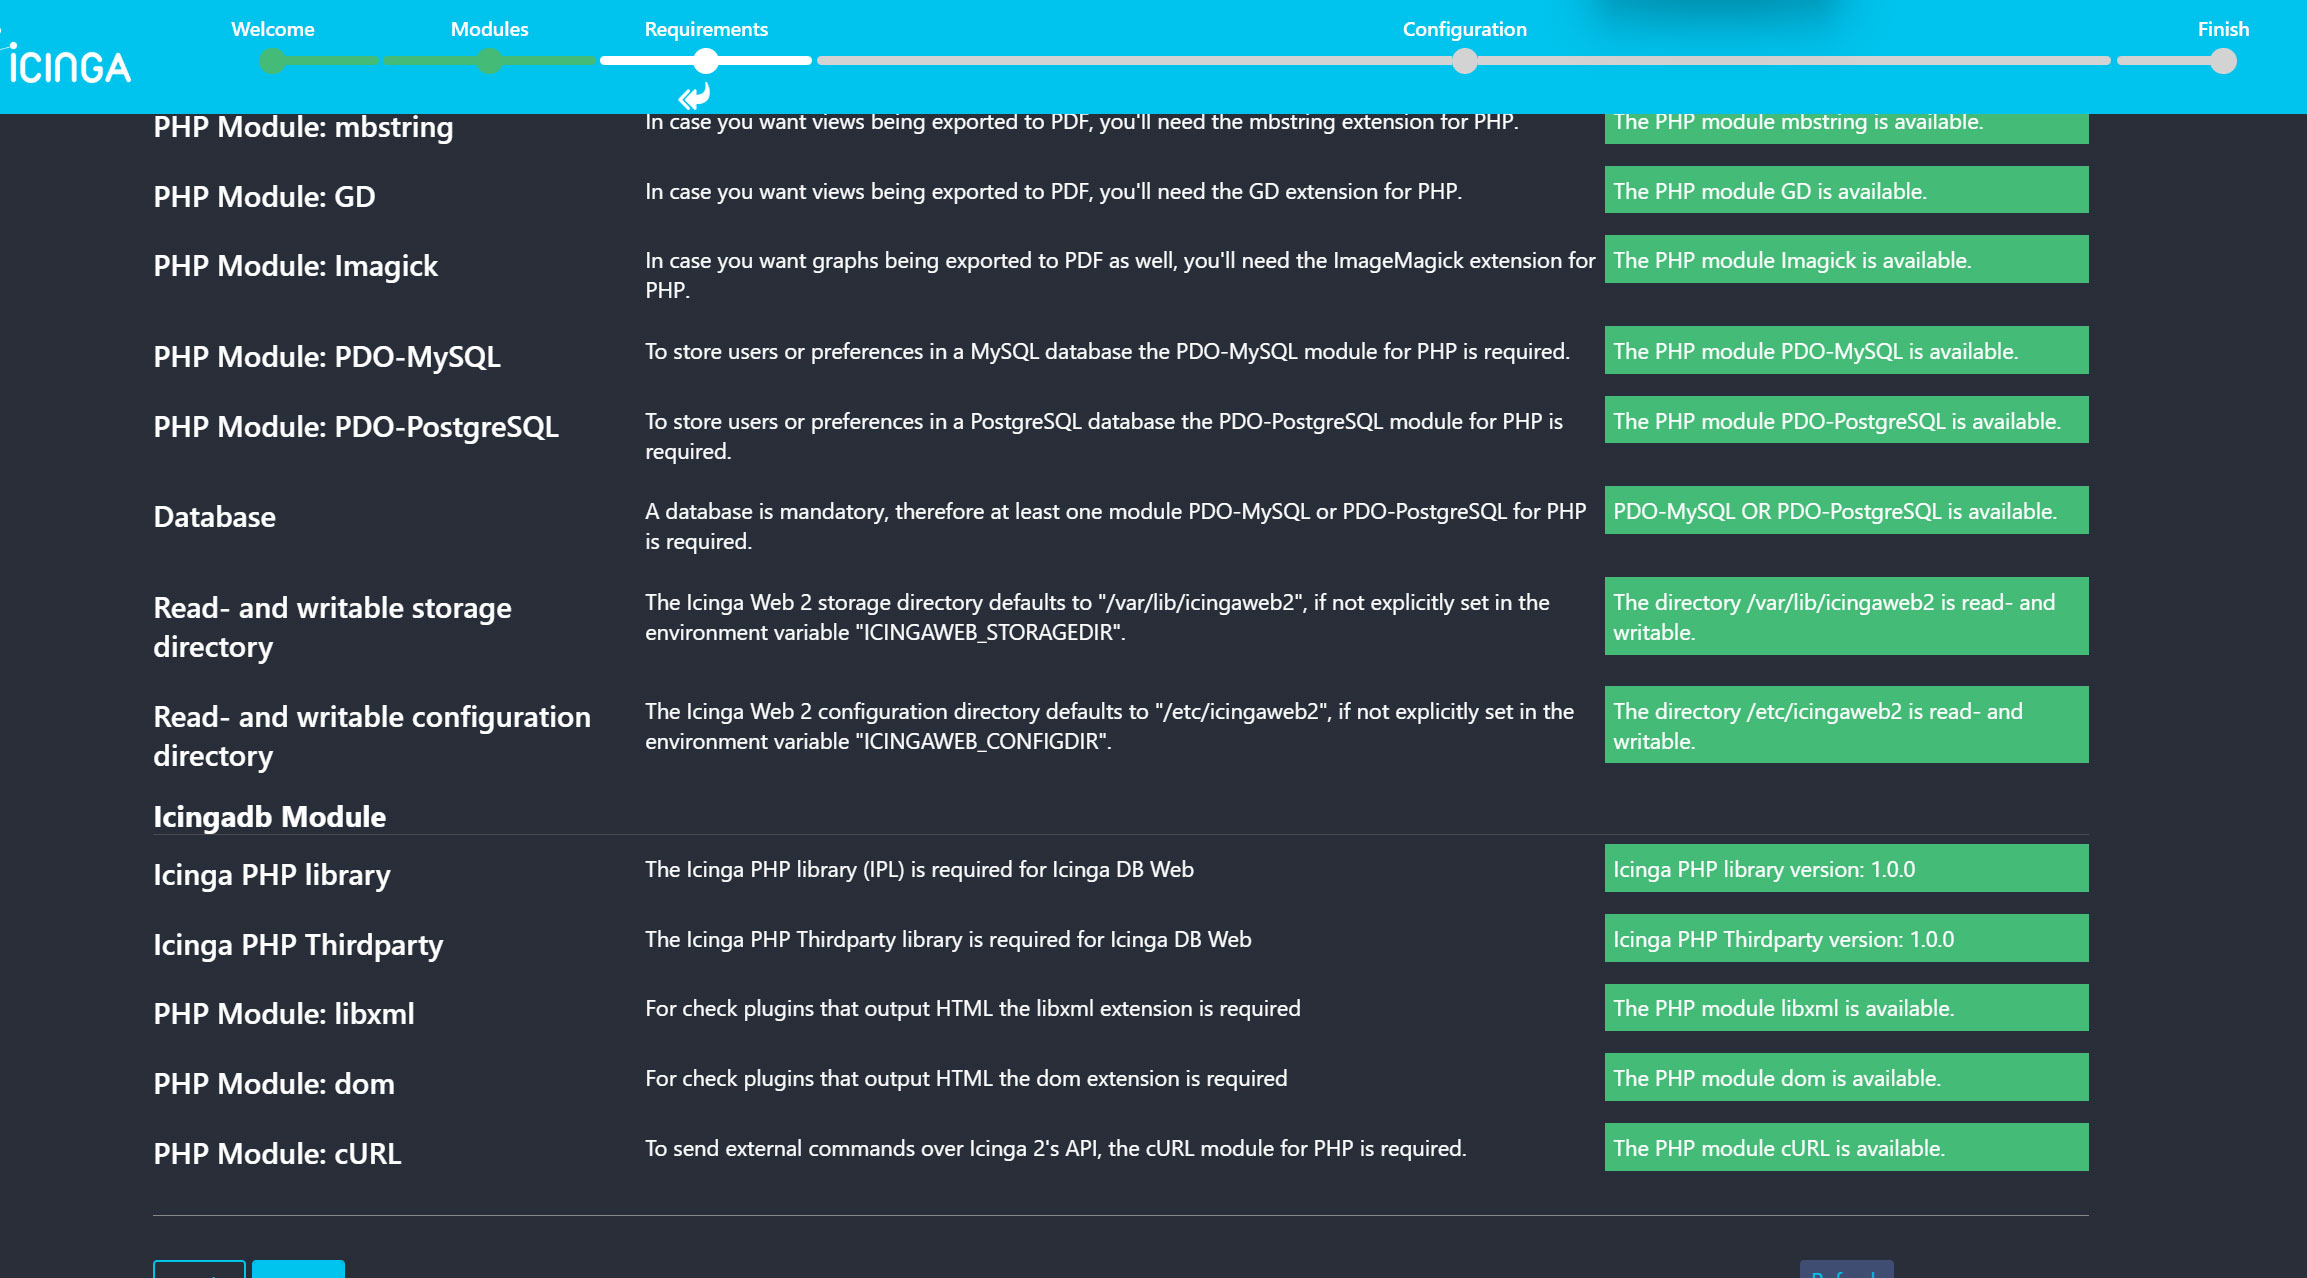
➂PHP構成要件画面が表示される
下図のようにThe PHP module Imagick is missing.が表示される場合は下記をインストールしてApacheを再起動する
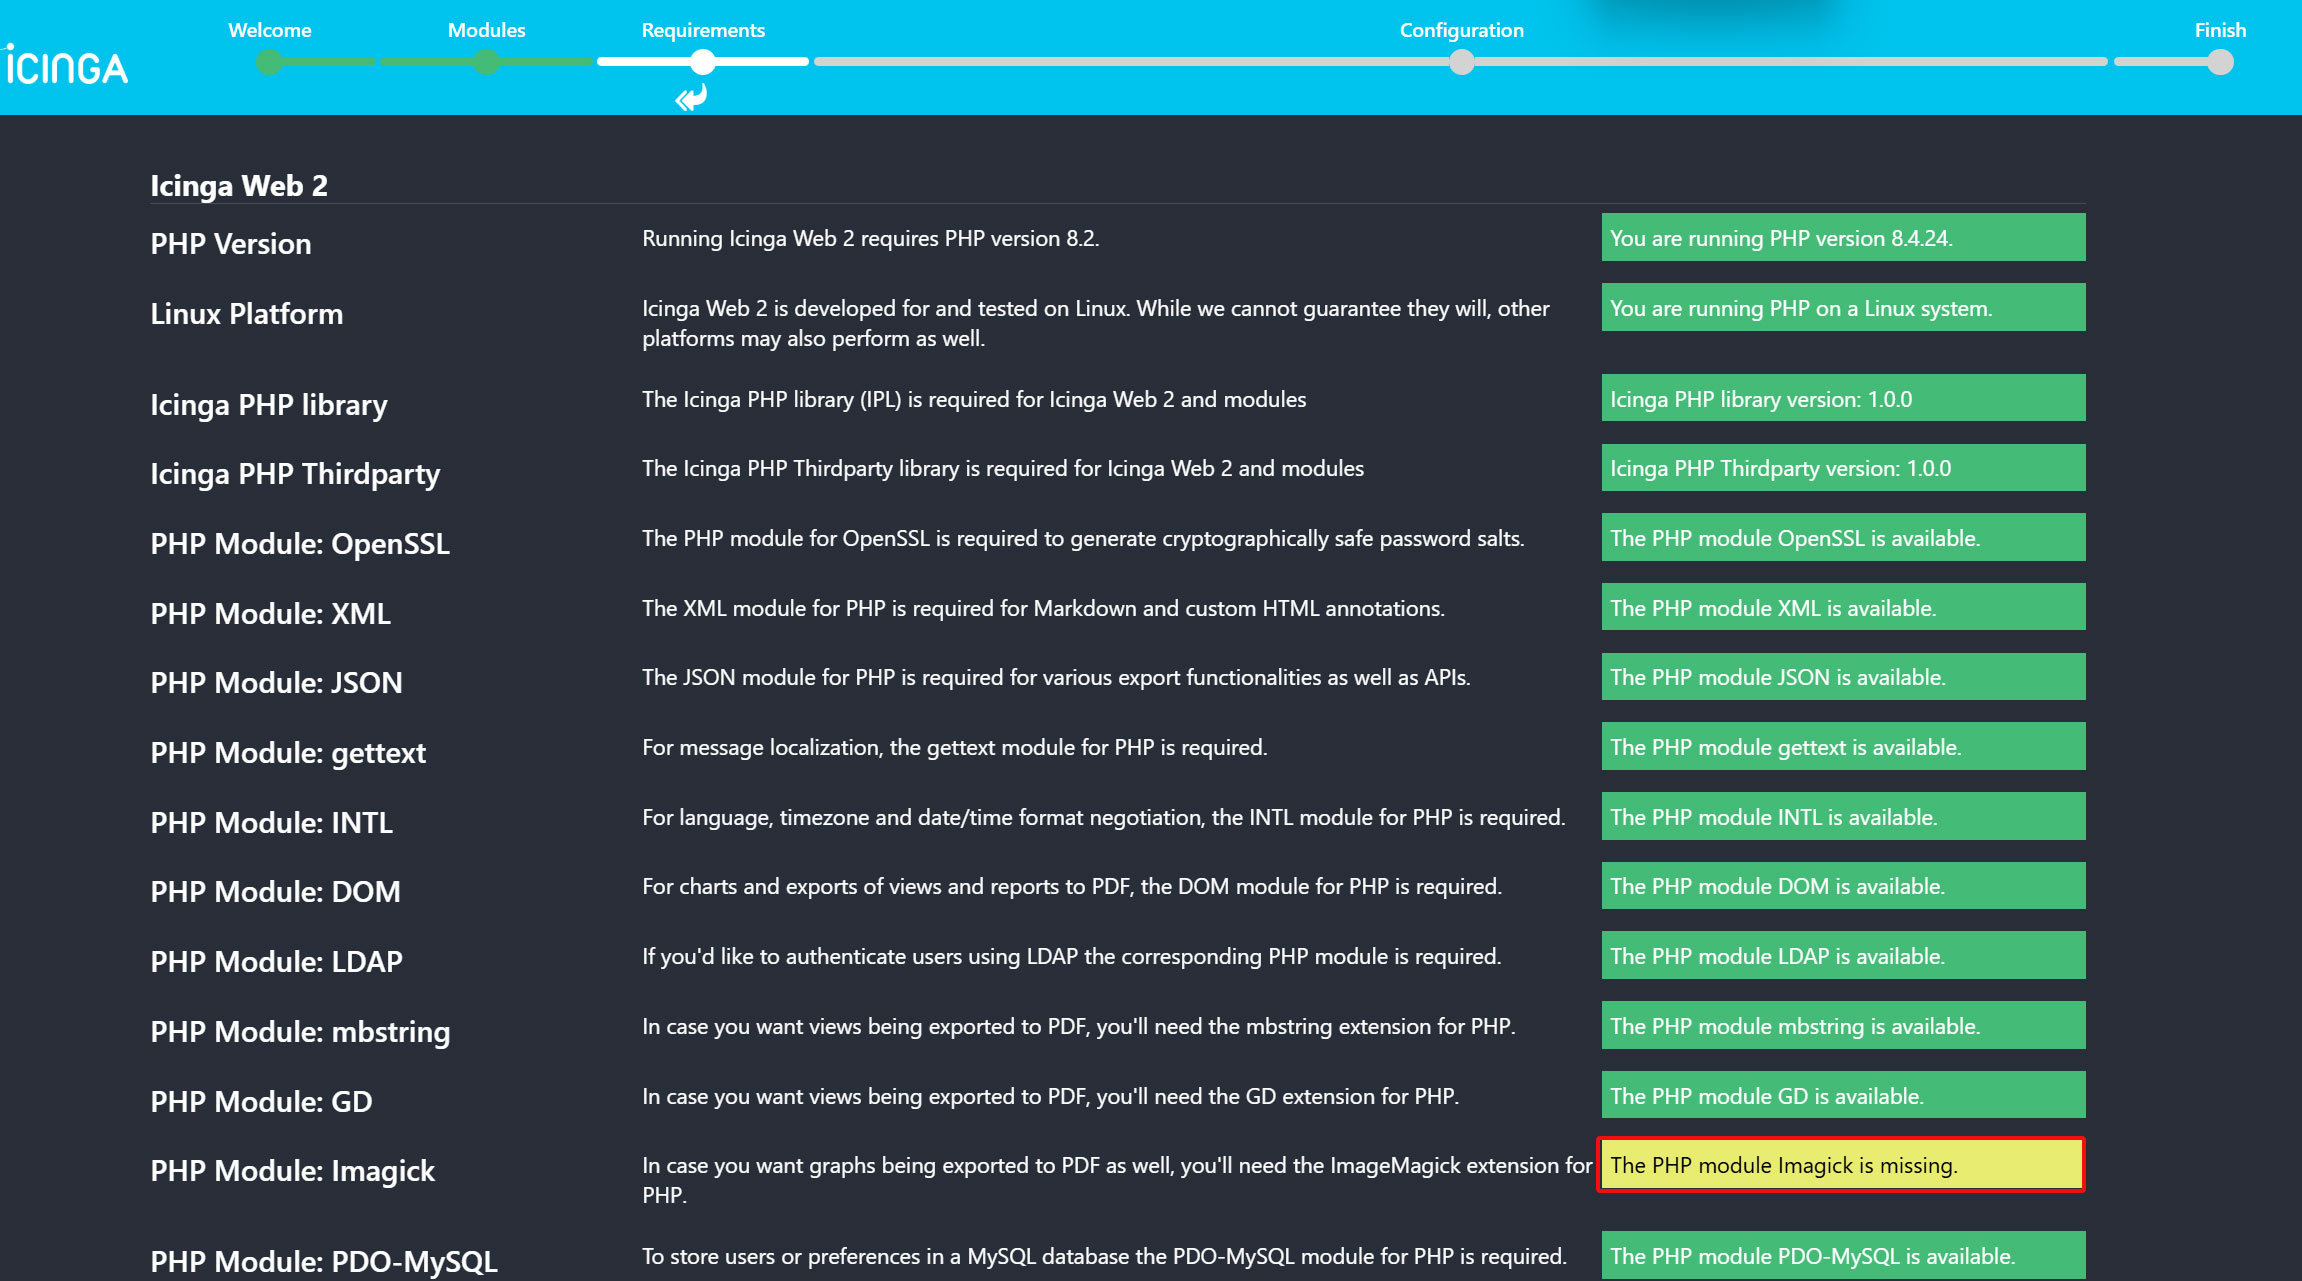
# apt install php8.4-imagick -y
# systemctl restart apache2.service
PHP モジュール、ライブラリ、ディレクトリなどの PHP 前提条件がすべて満たされていることを確認します。すべて問題がなければ、下にスクロールして [Next] をクリック
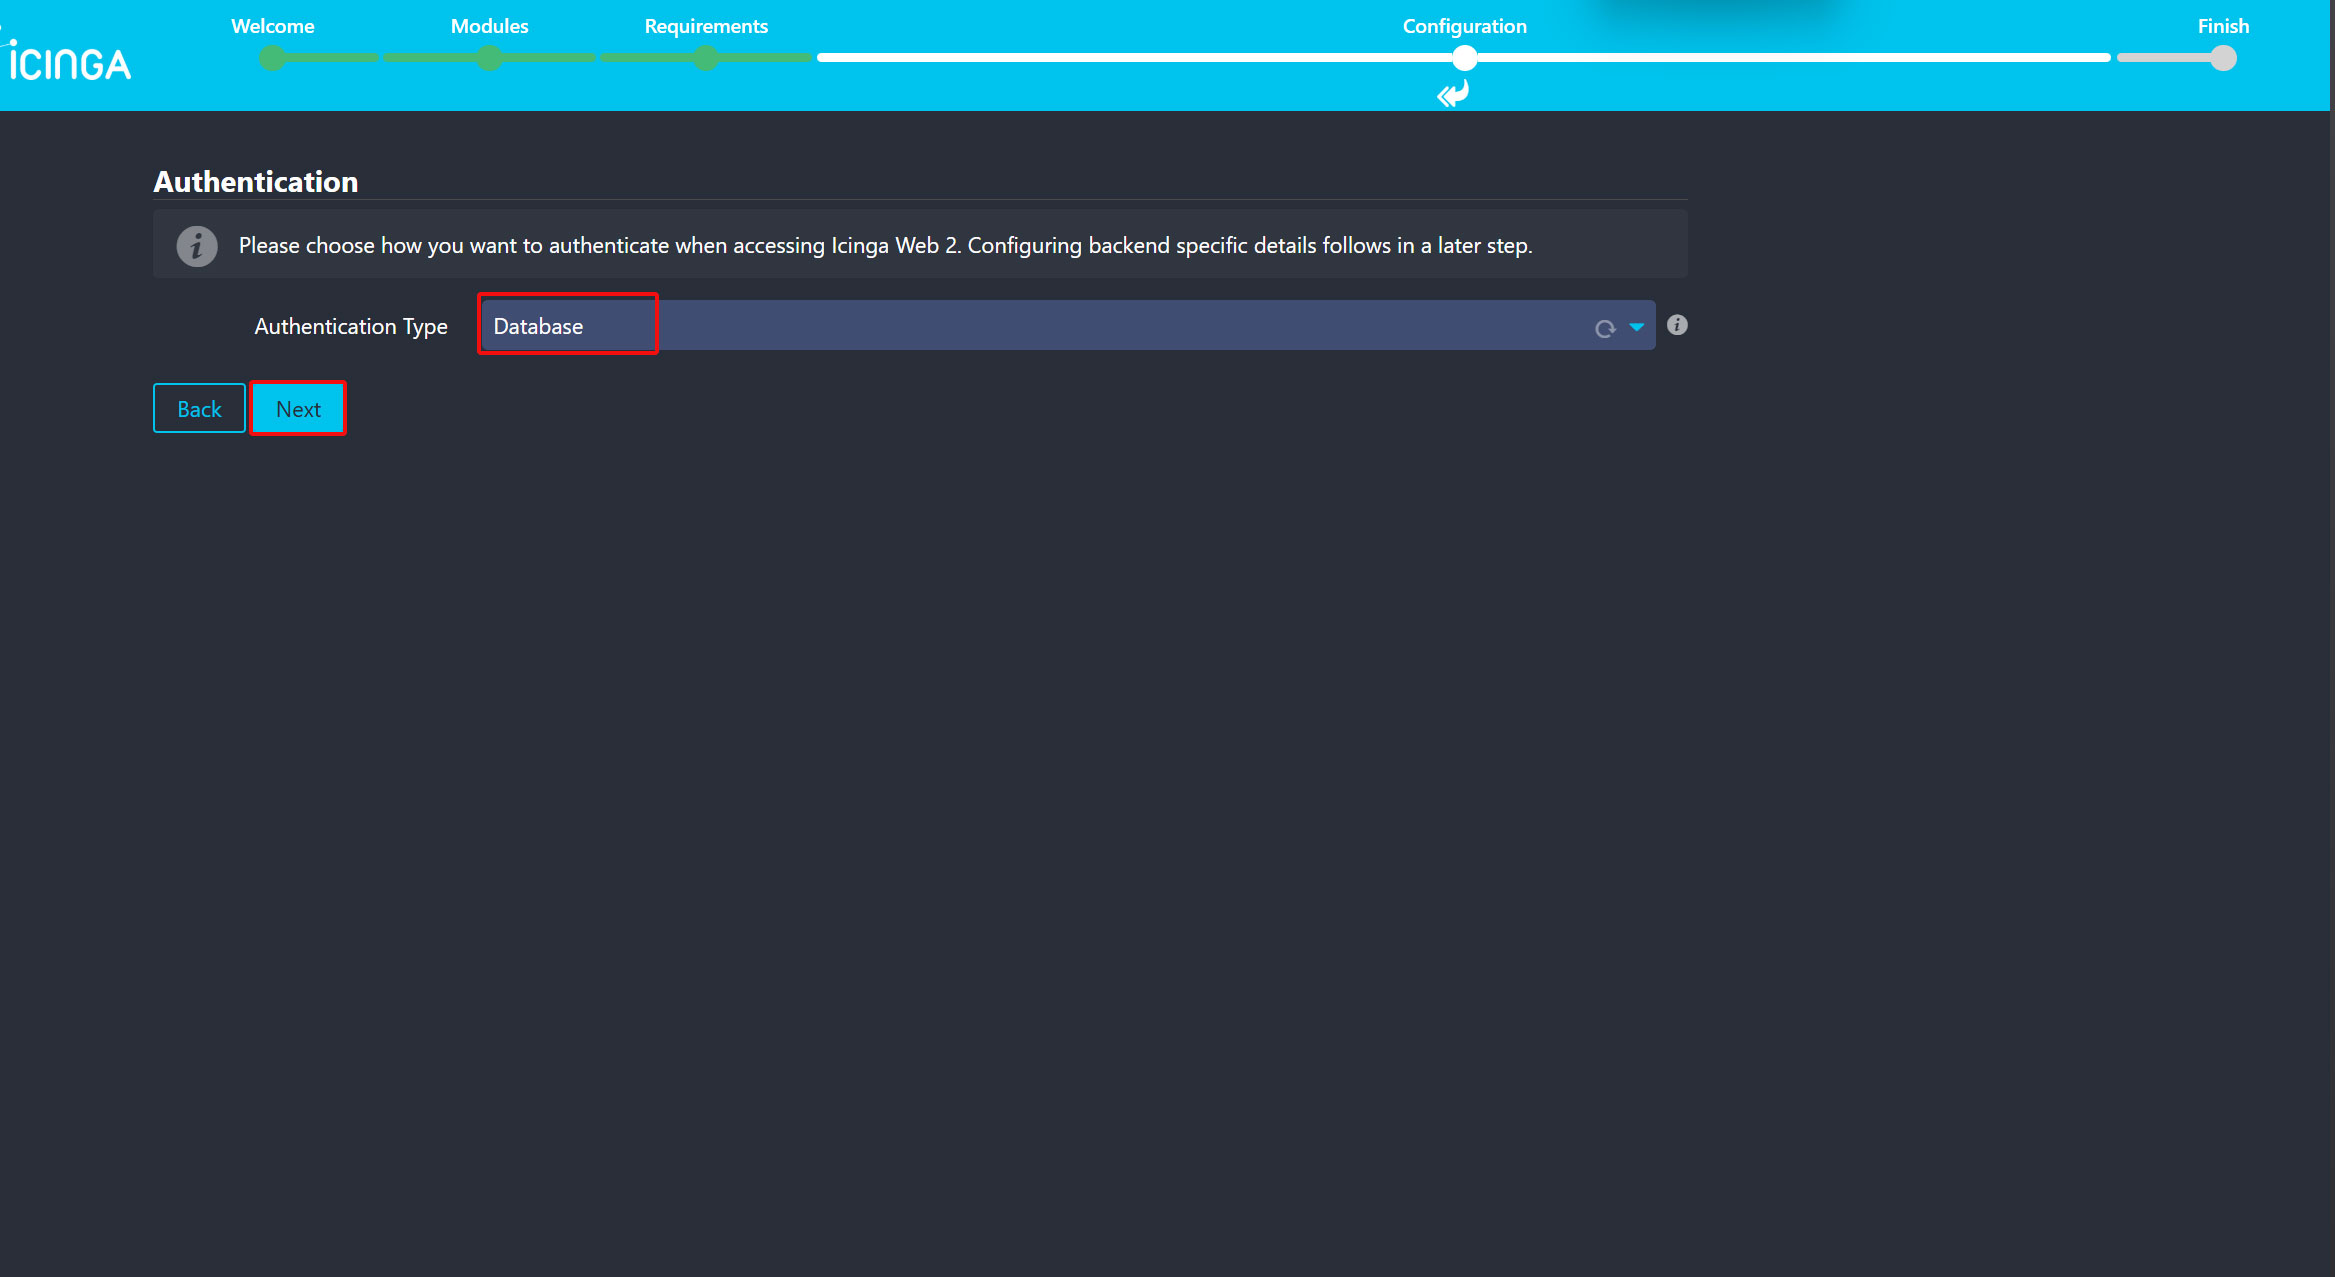
④認証タイプを「Database」にして「Next」をクリック
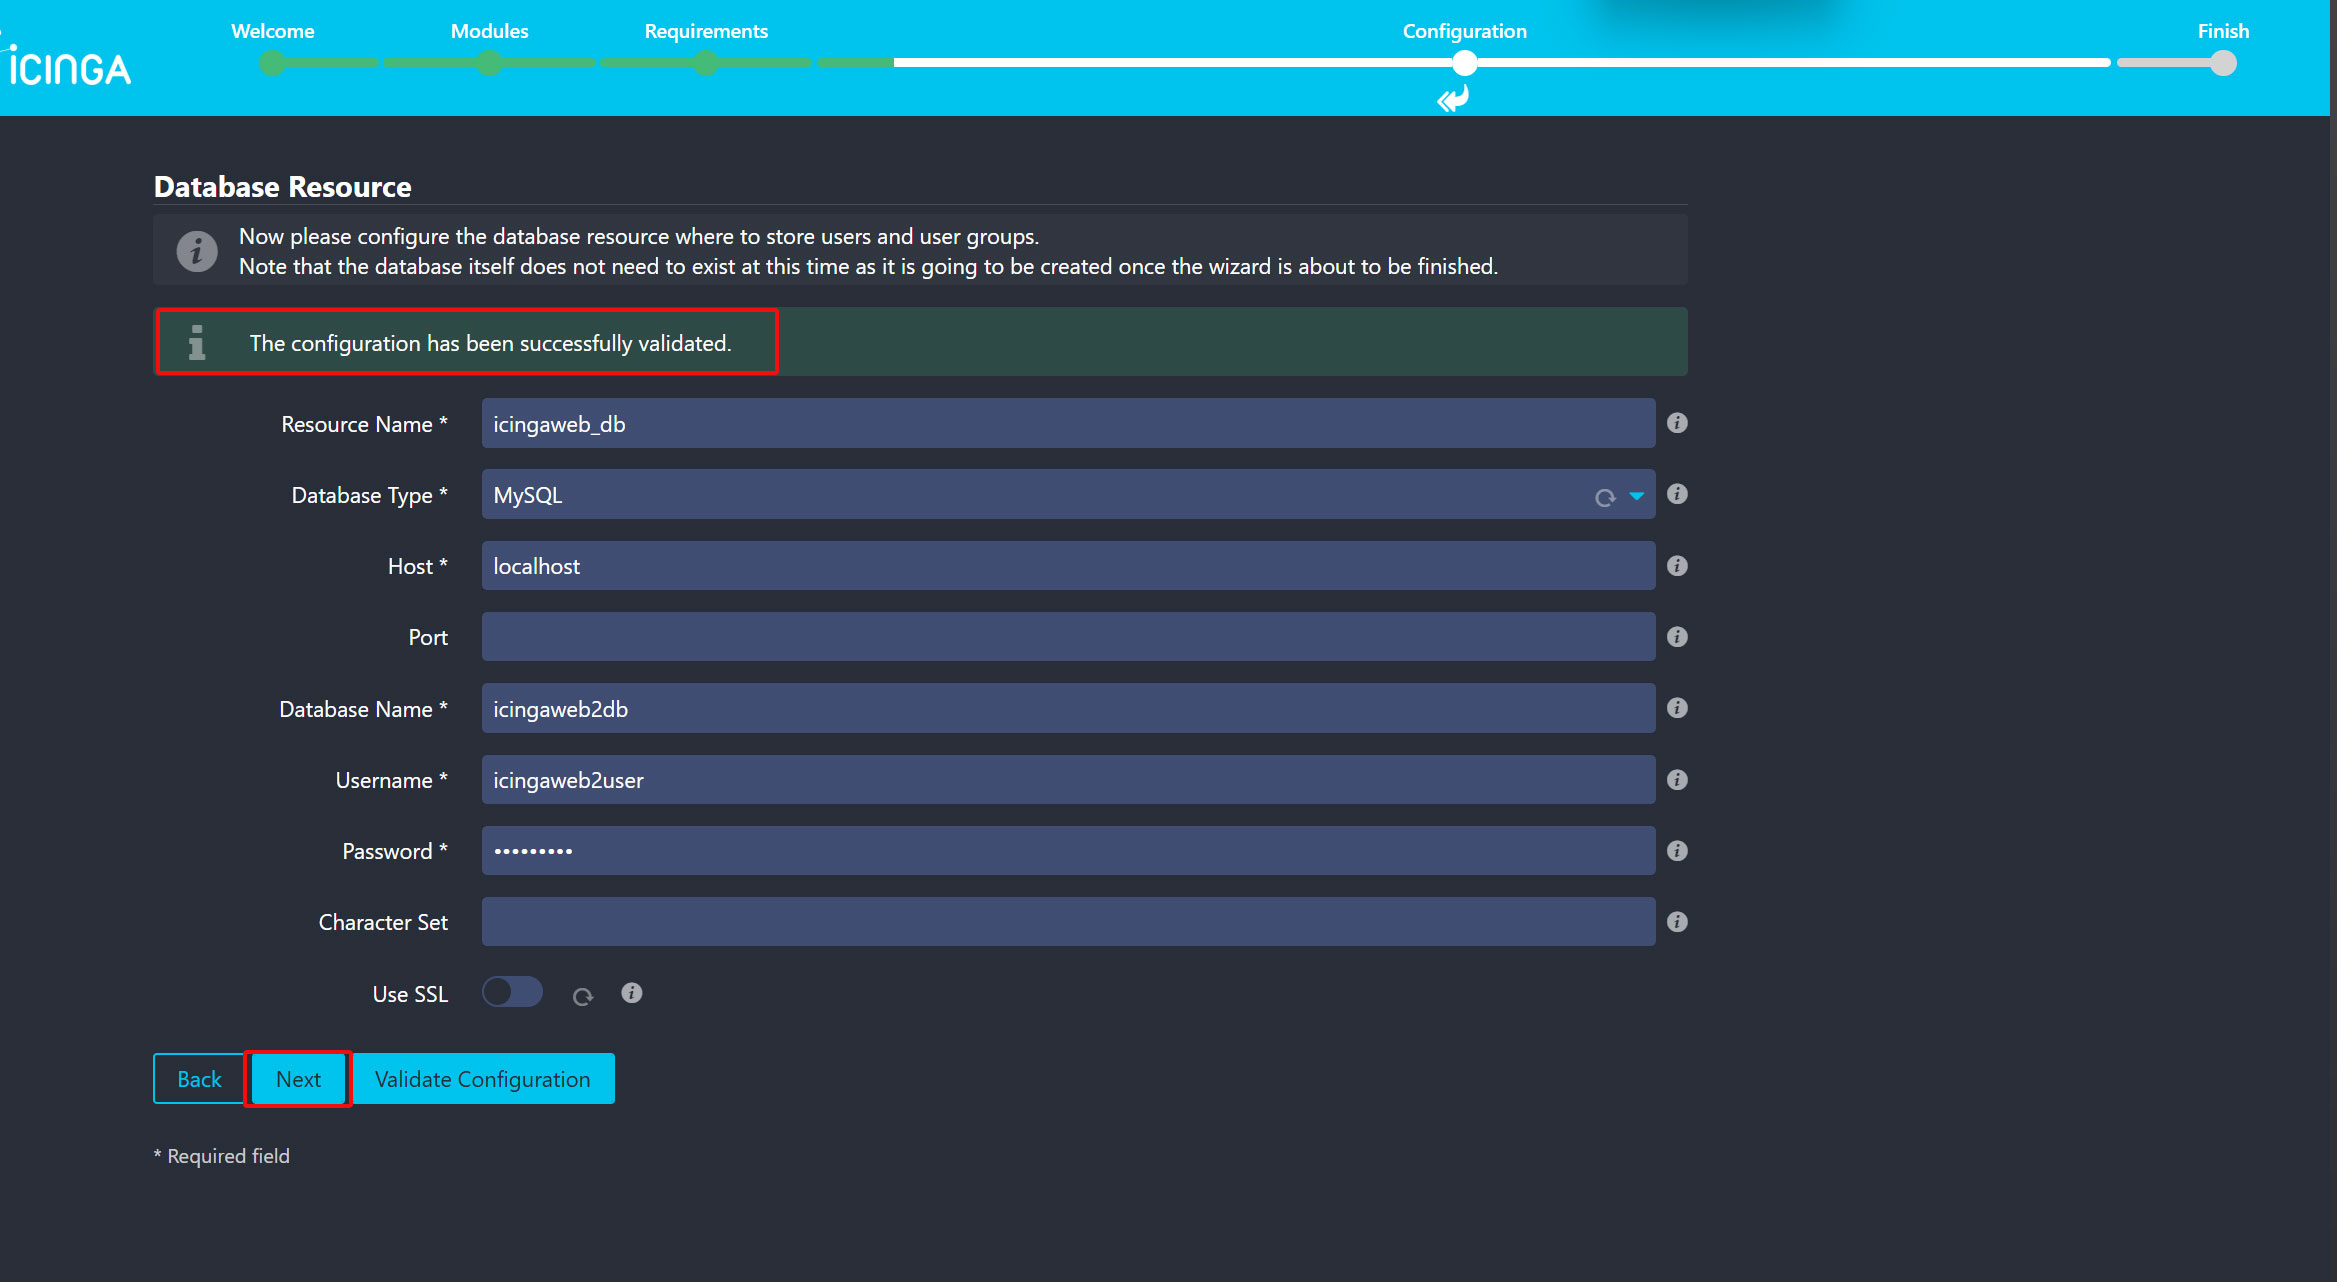
⑤データベースリソース
以下の画面が表示されるので、icingaweb2 用のデータベース名、ユーザ名、パスワードを入力する。
確認のため、"Validate Configuration"をクリック
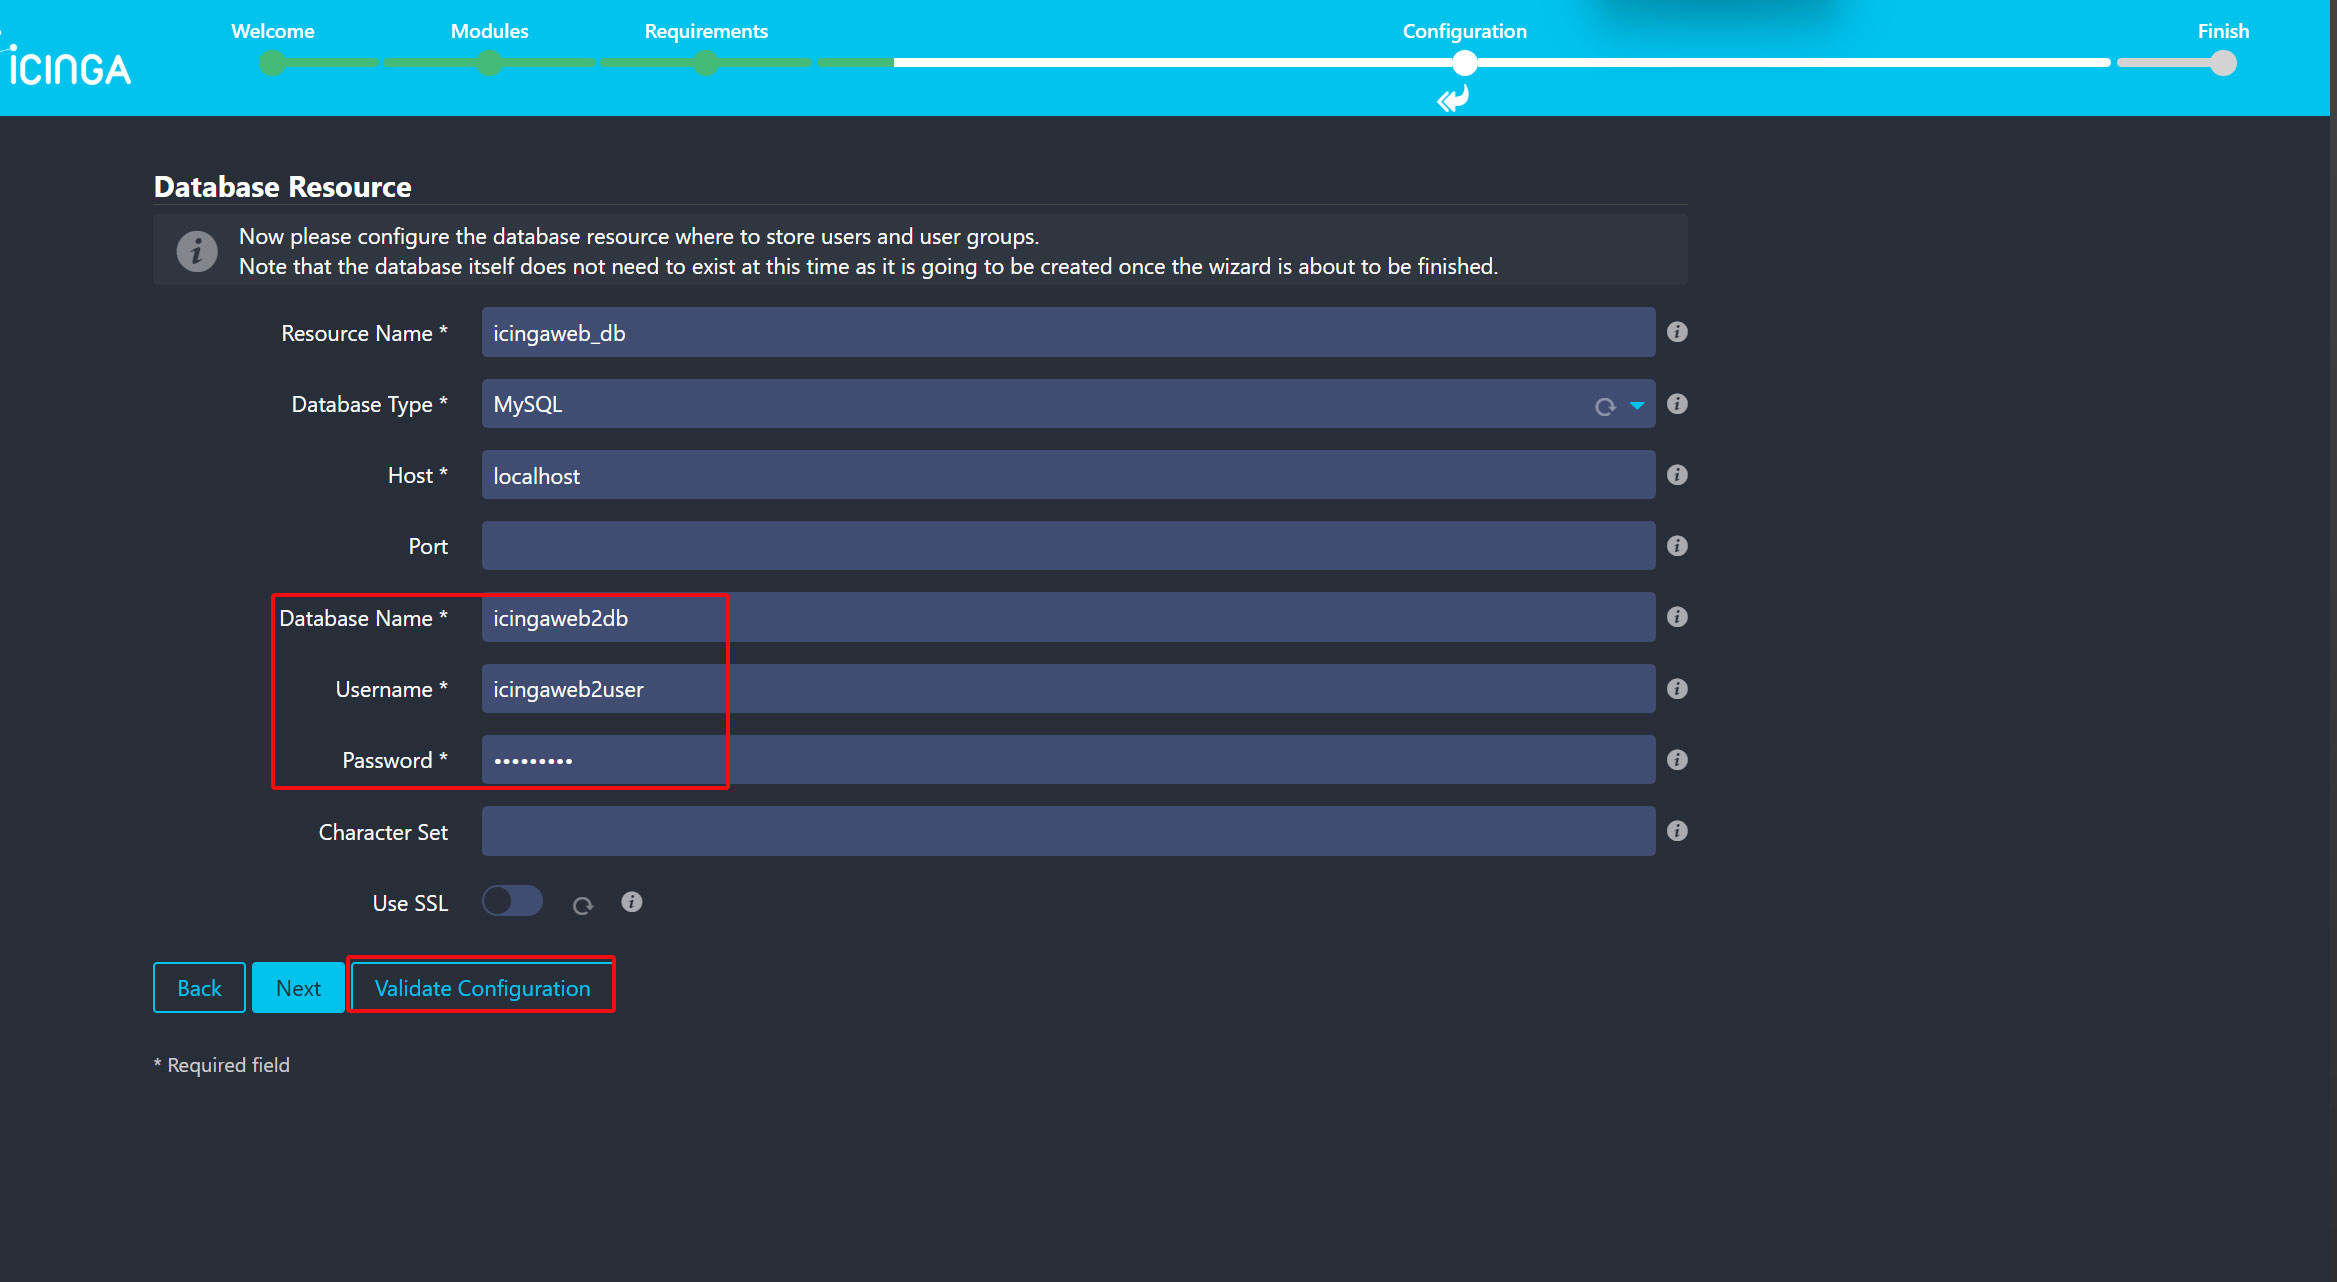
間違いがなければ下図のように"The configuration has been successfuly validated."と表示されのでNextをクリック
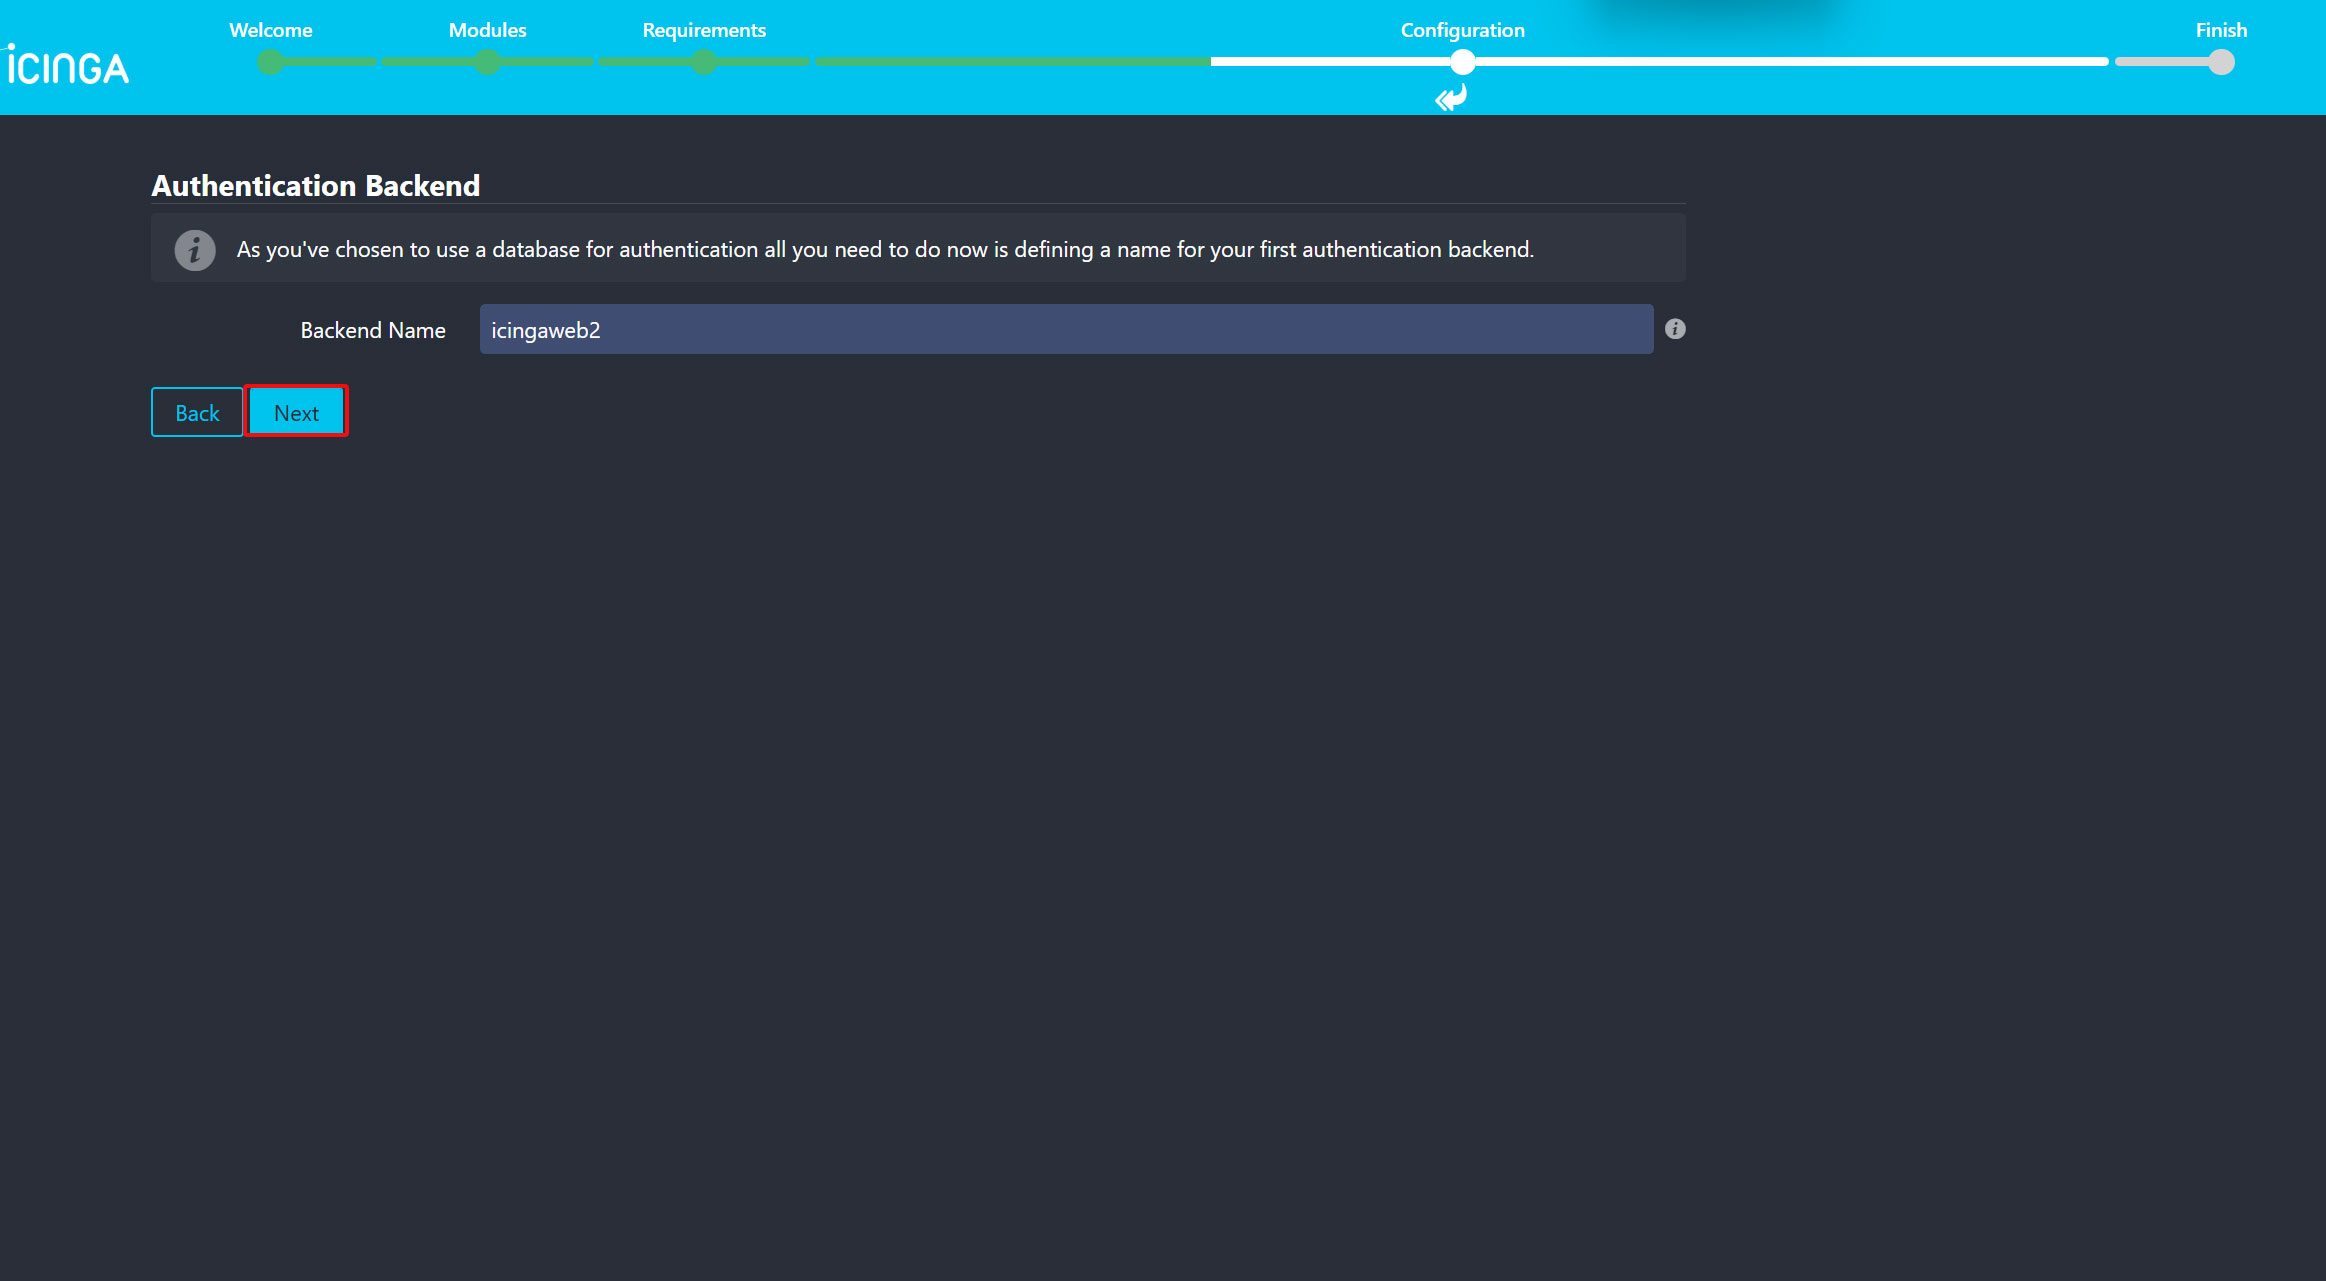
⑥バックエンド
Nextをクリック
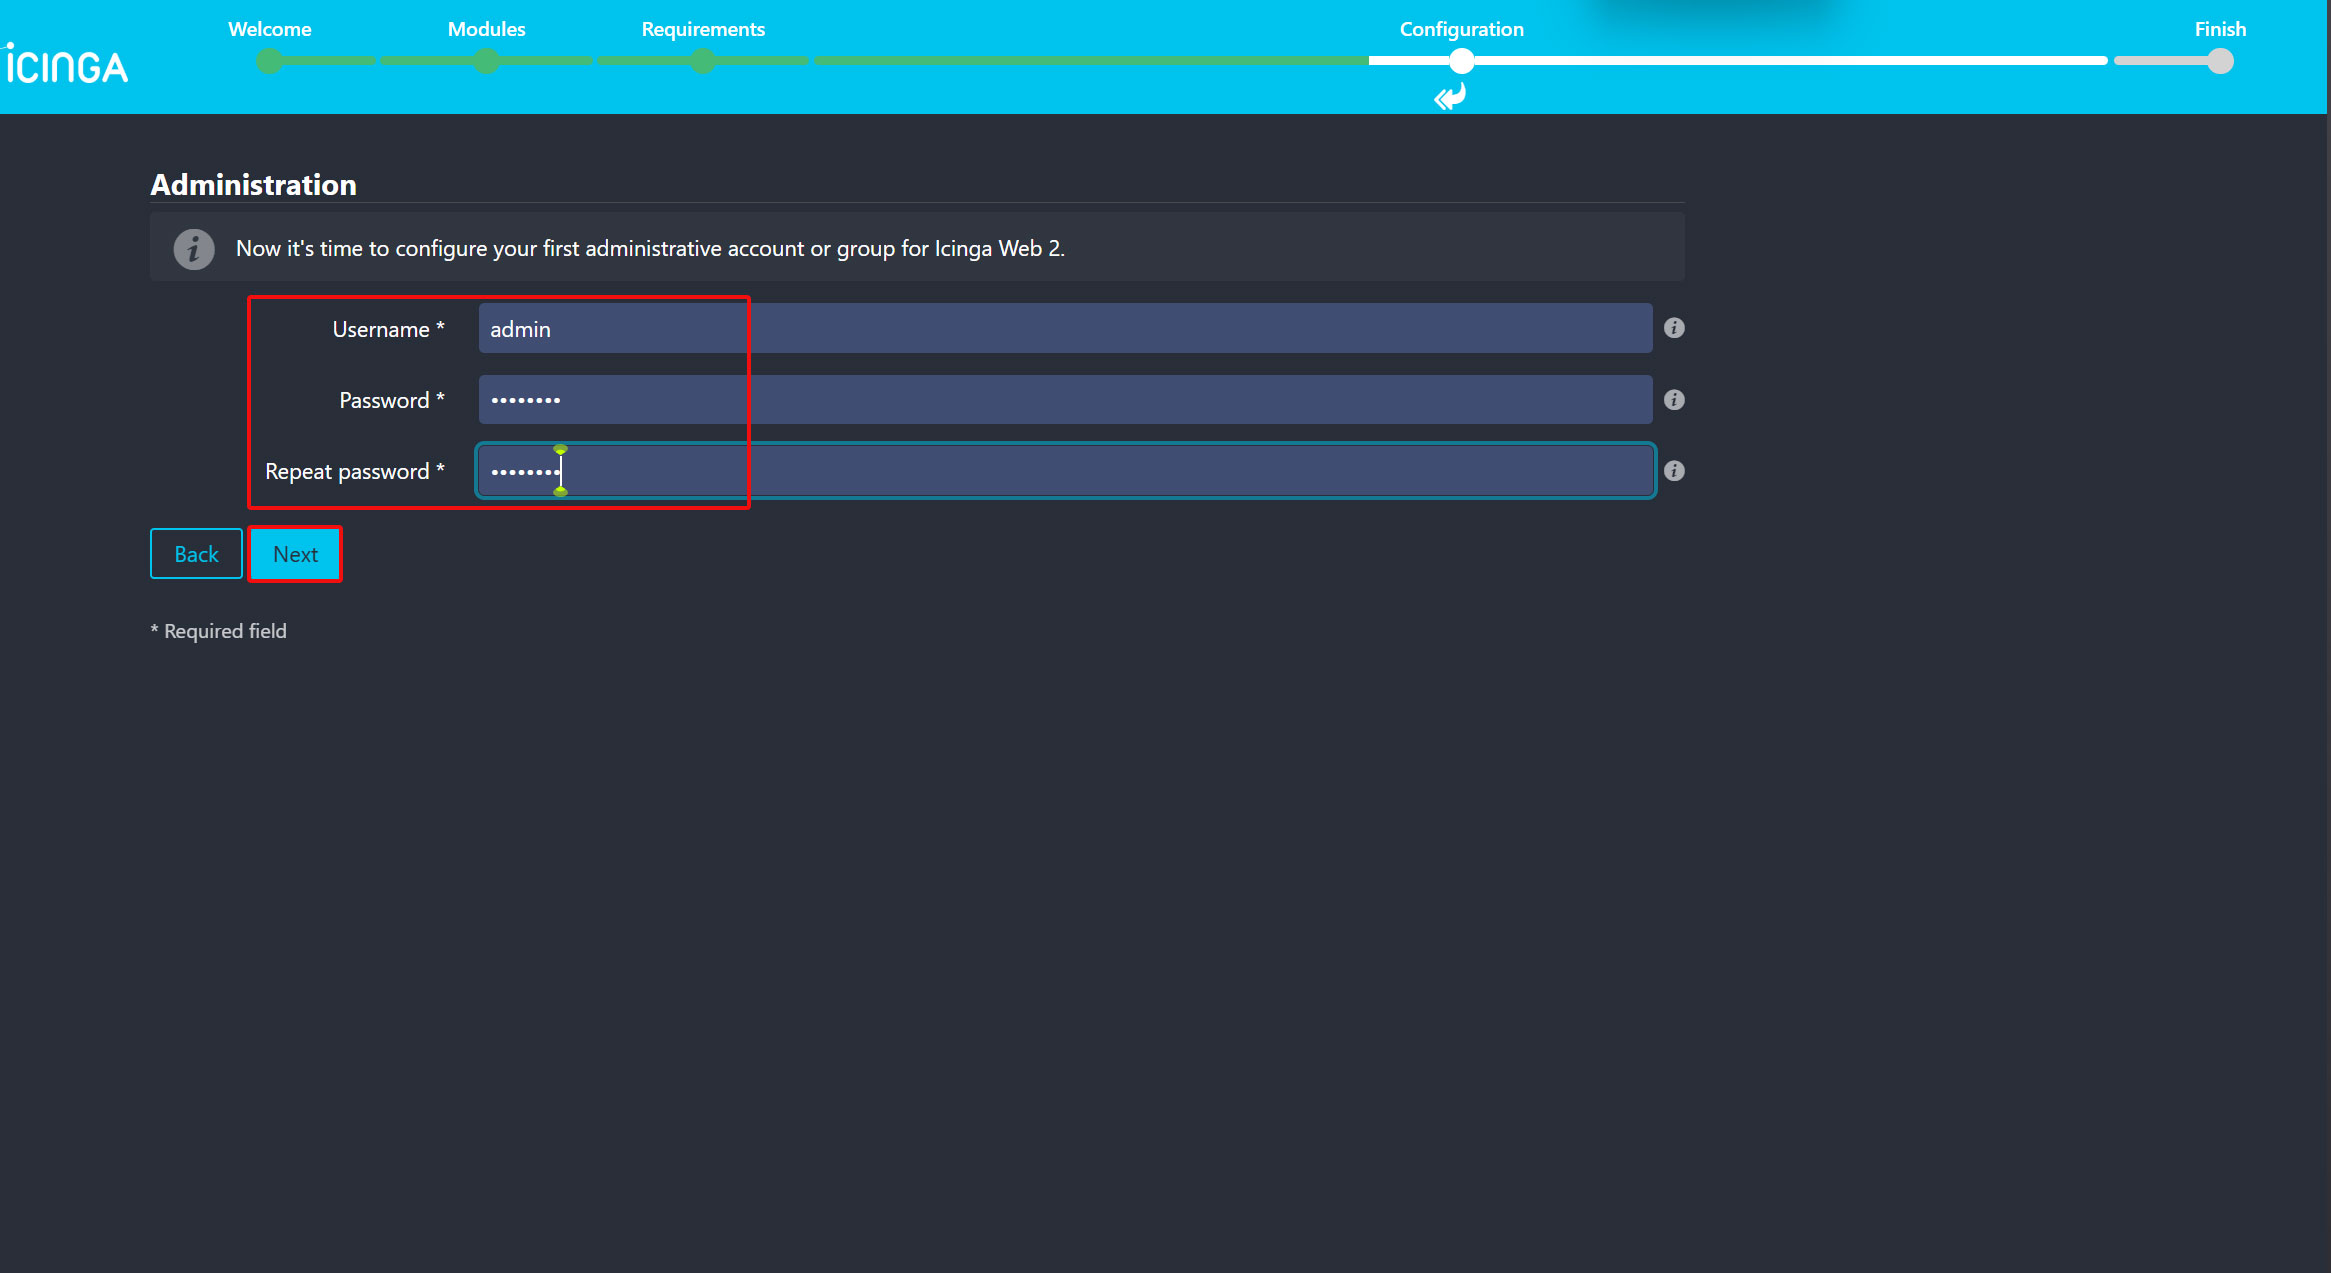
⑦Icinga Web2用の管理者アカウントの作成
Icinga Web2にアクセスするためのユーザおよびパスワードを設定し「Next」をクリック
今回はユーザー名をadminとしている
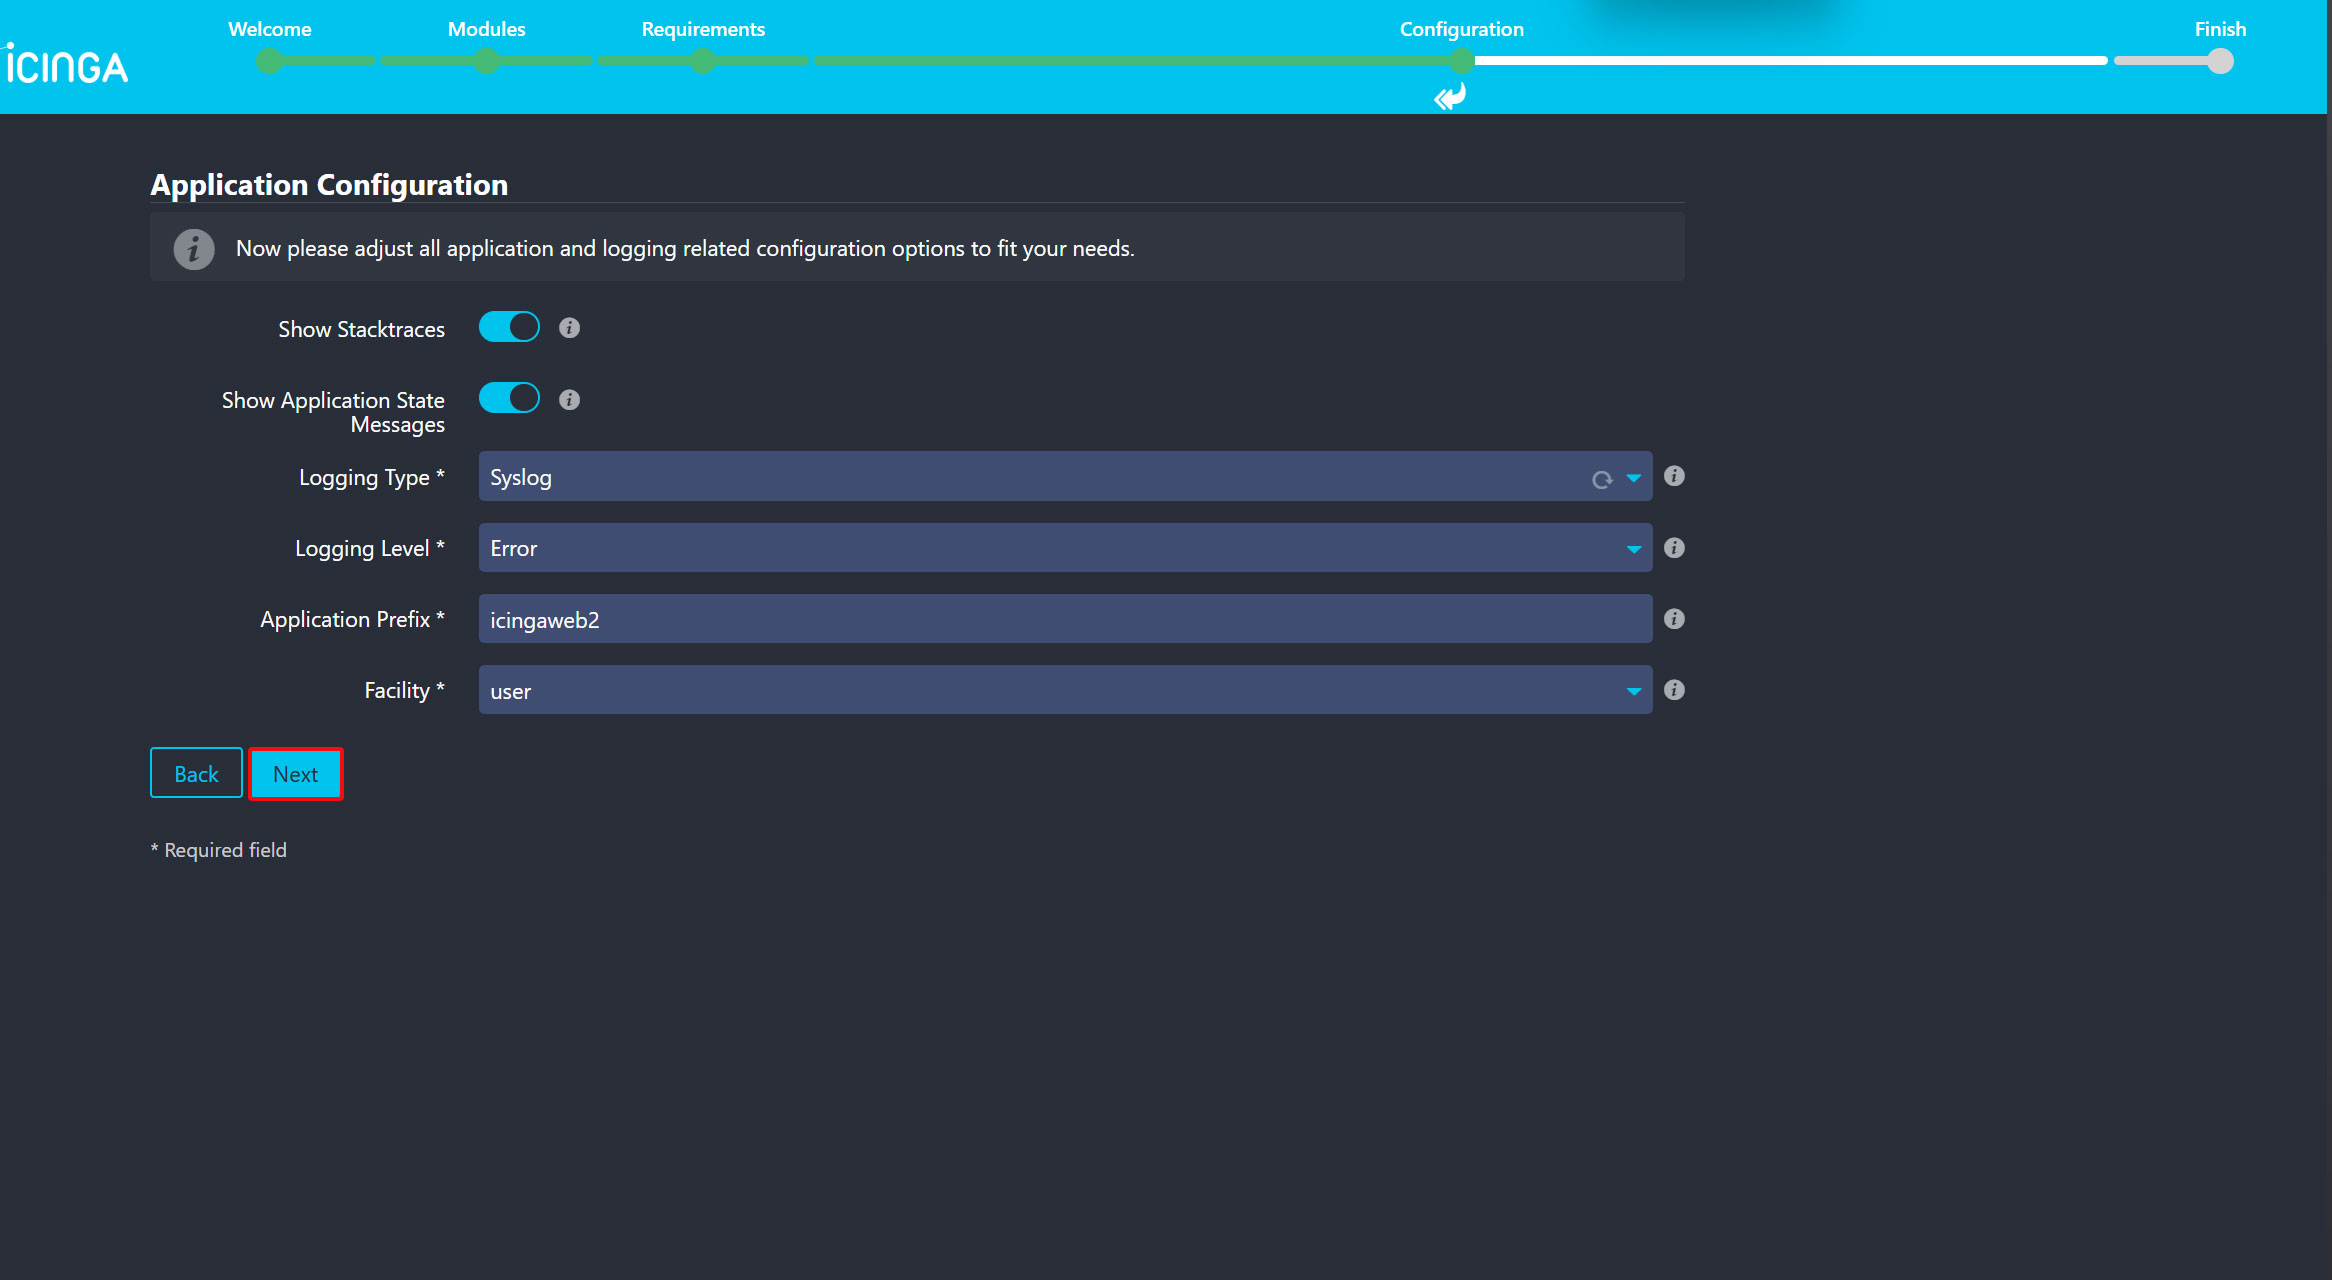
⑧アプリケーション設定
以下の画面が表示される。変更がなければ「Next」をクリック
⑨設定完了画面
以下の画面が表示される。設定が正しければ「Next」をクリック
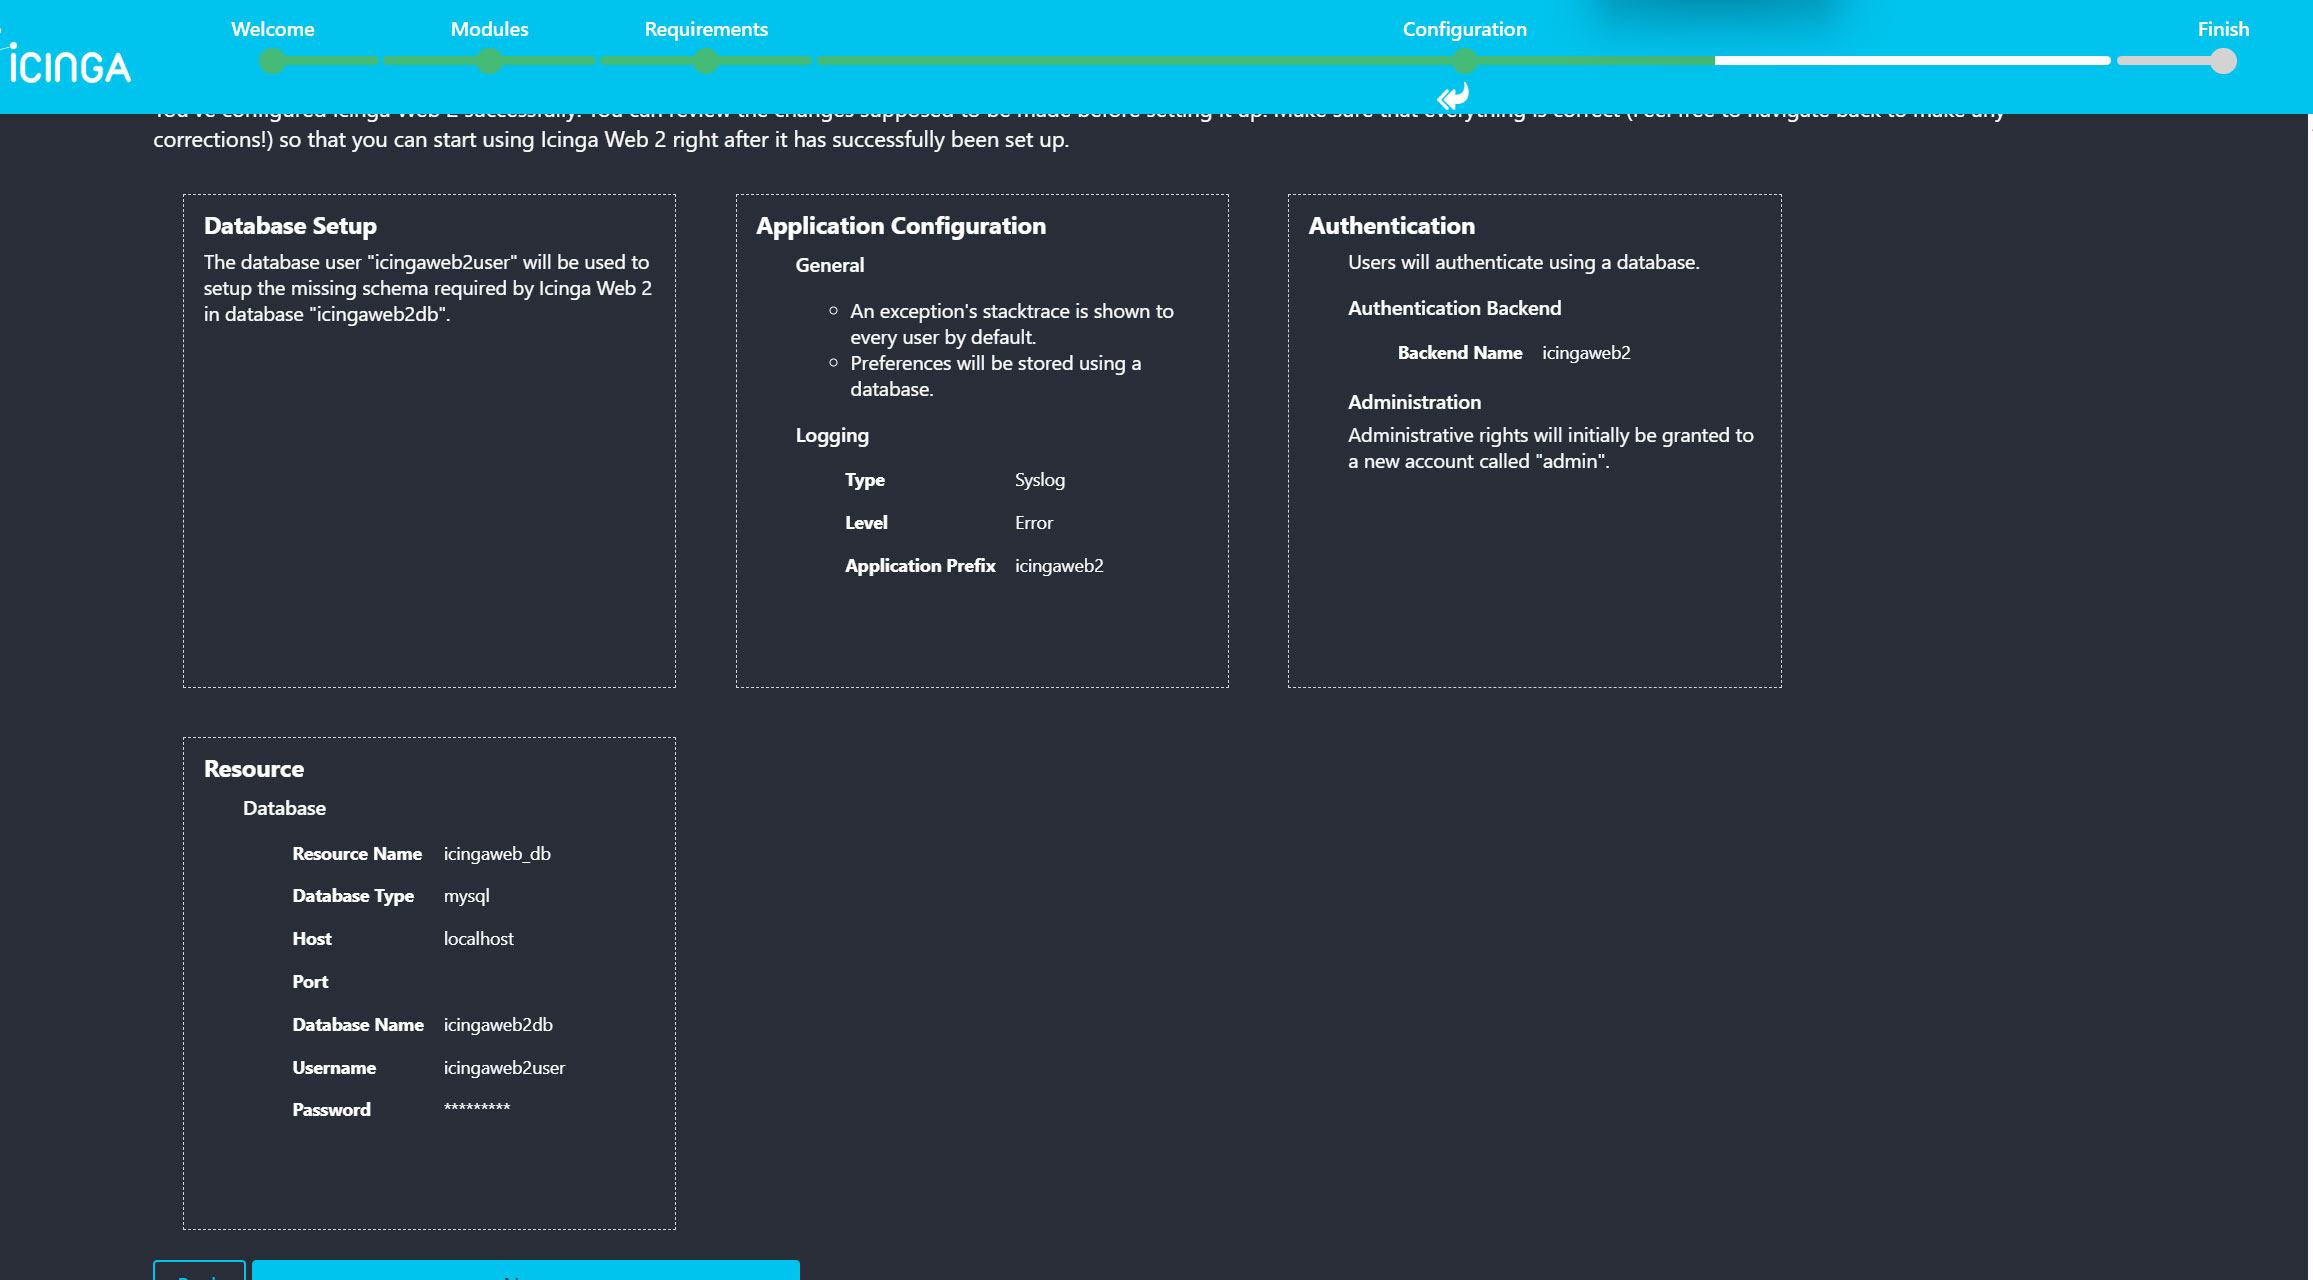
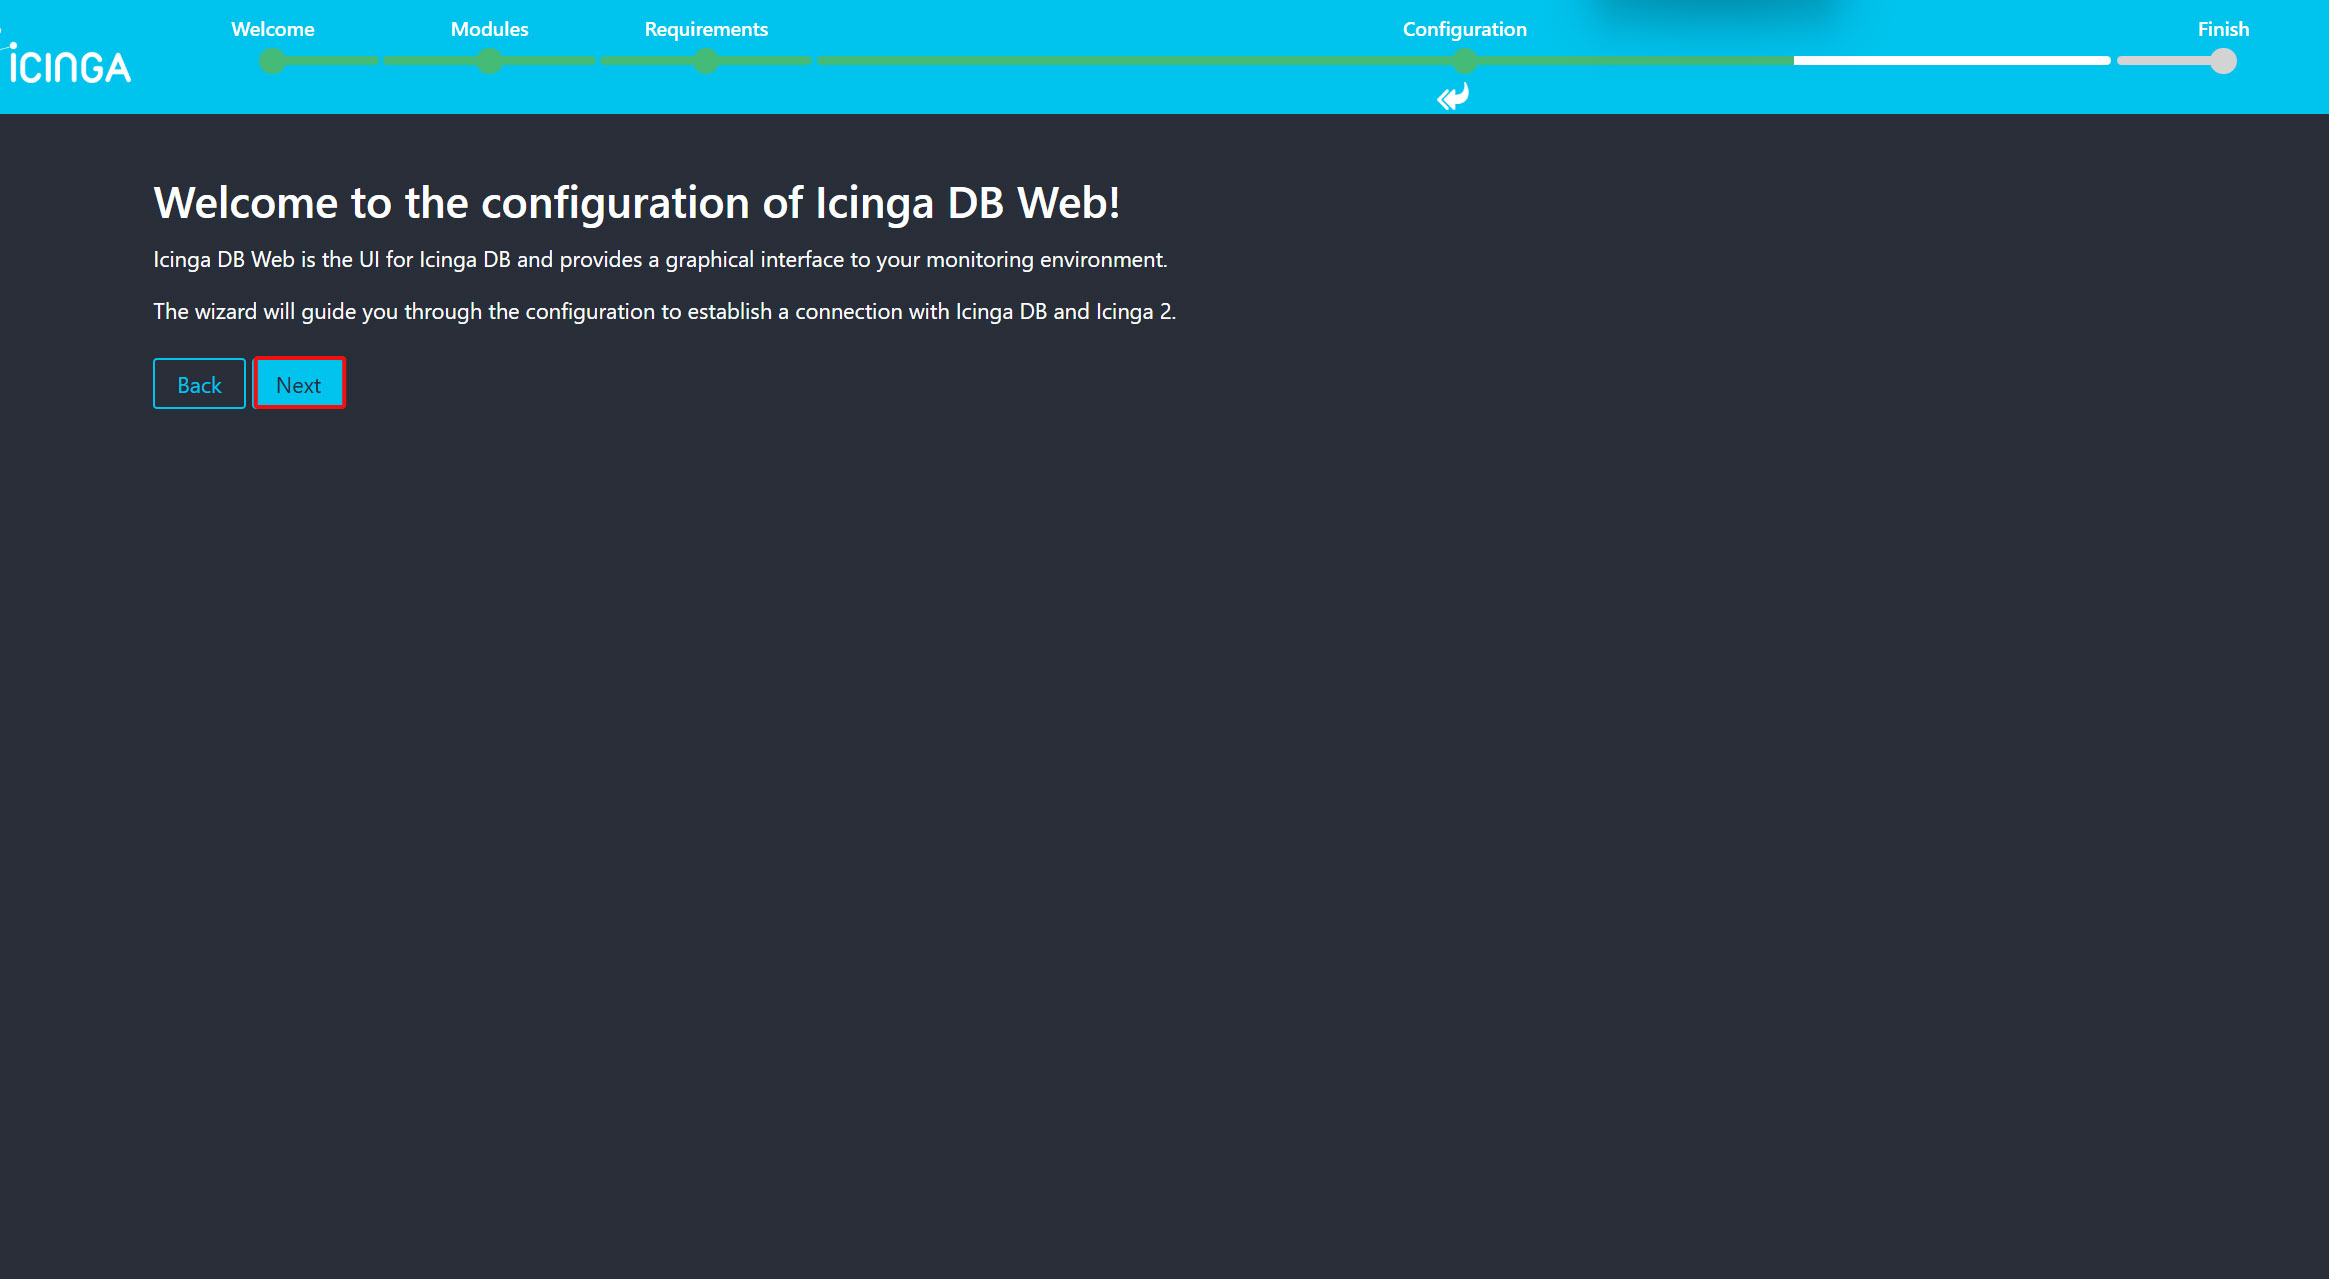
⑩Icinga DB Webの設定
「Next」をクリック
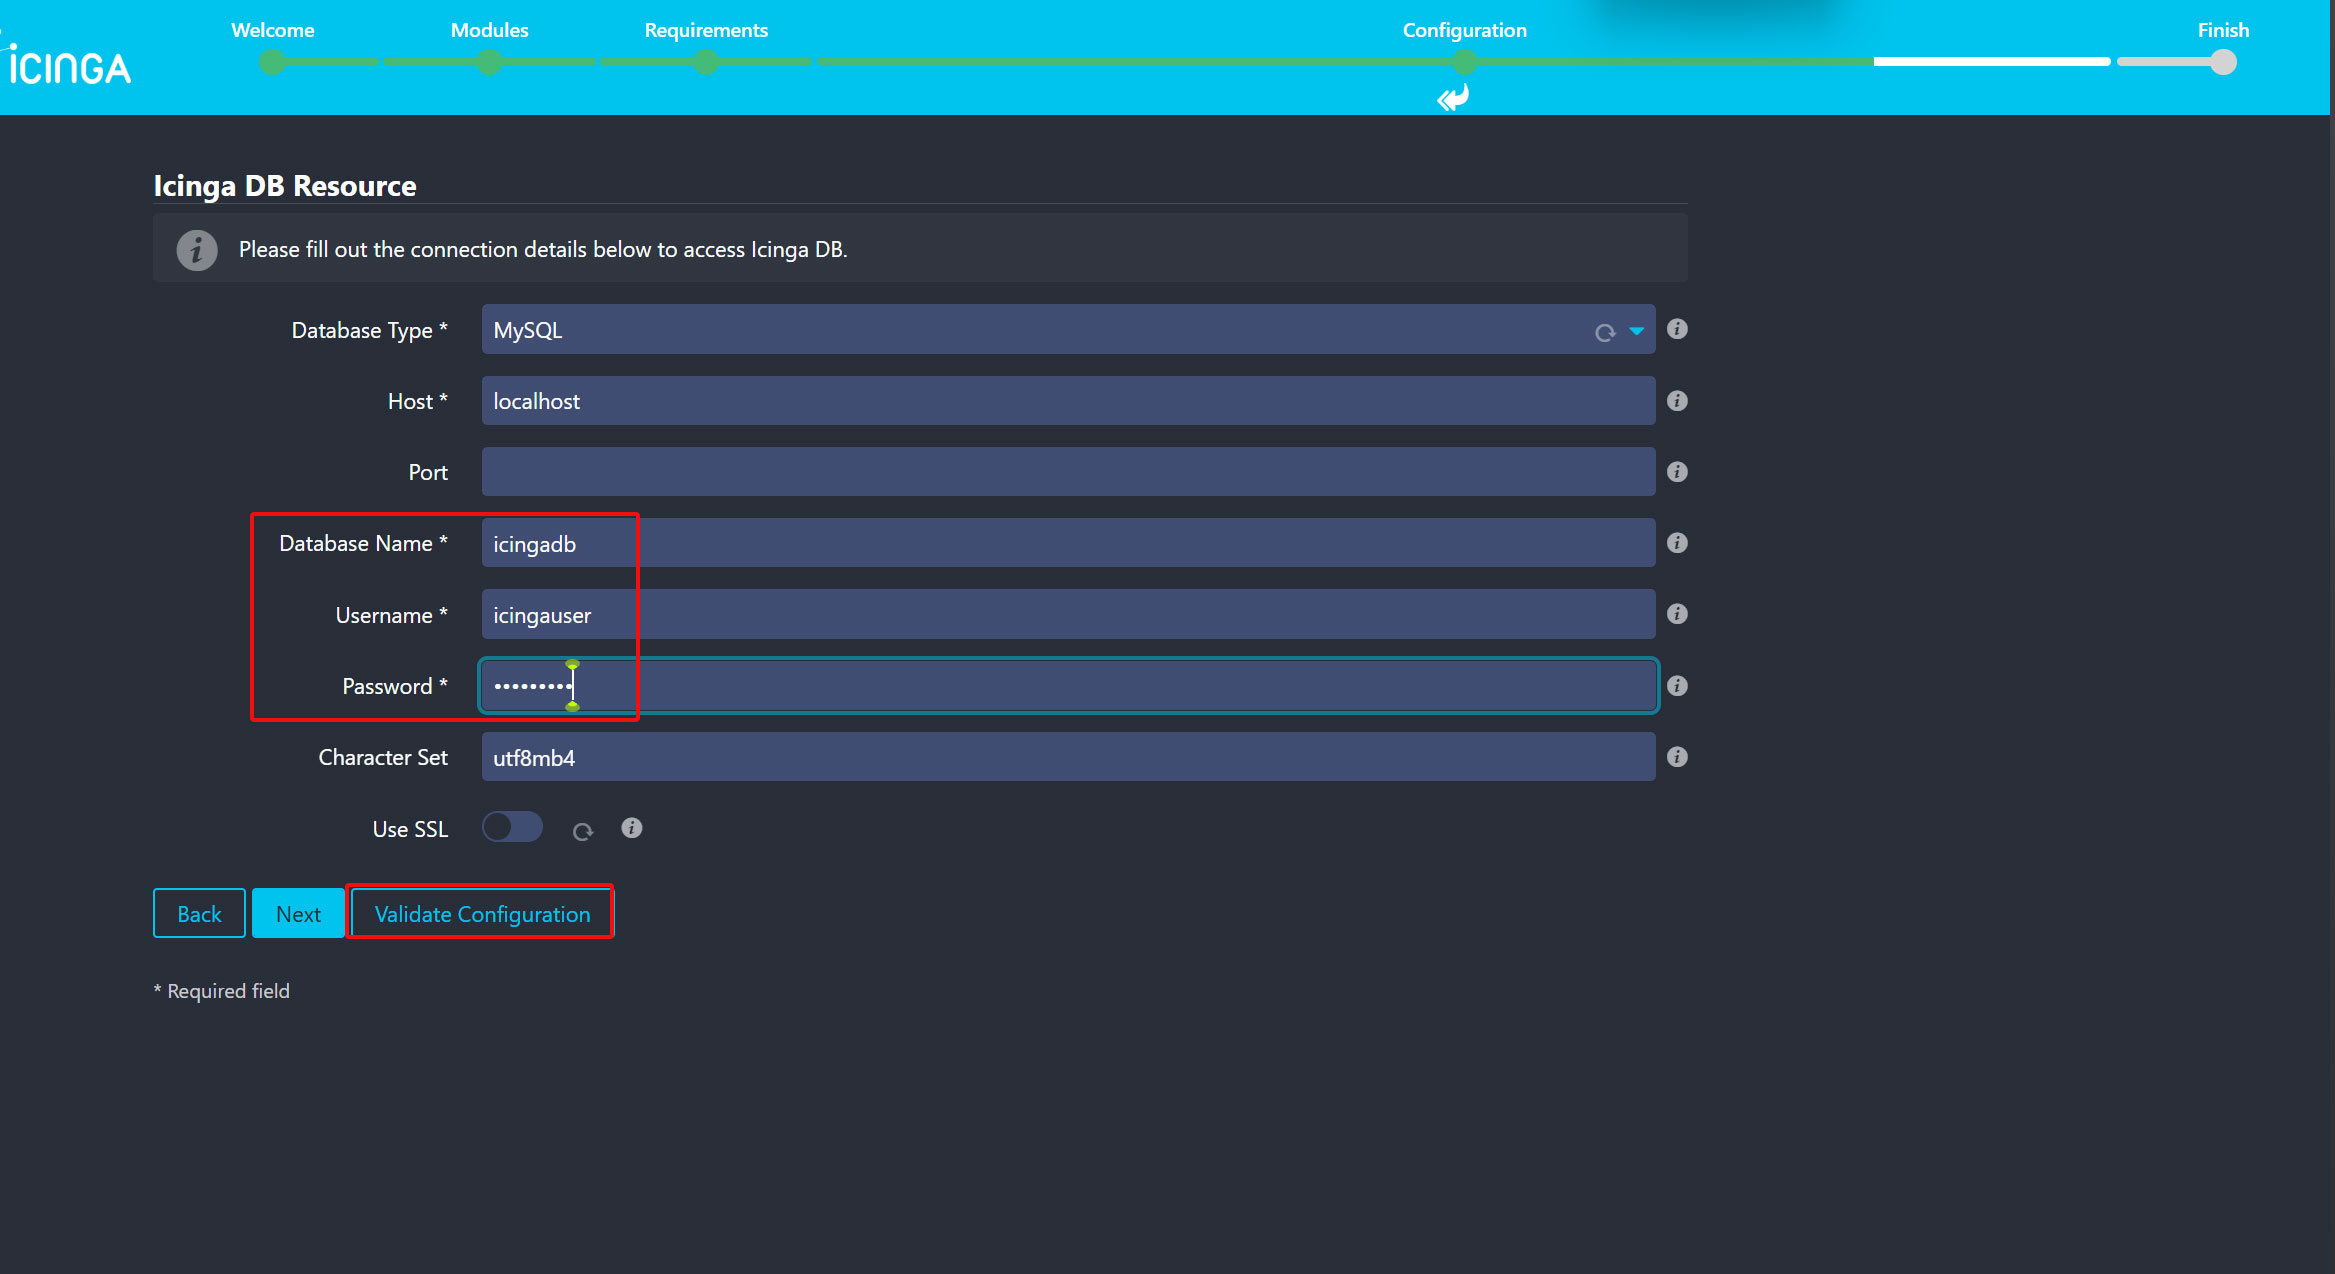
icinga 用のデータベース名・ユーザ名・パスワードを入力する。入力が終わったら"Validate Configuration"をクリックして検証する。
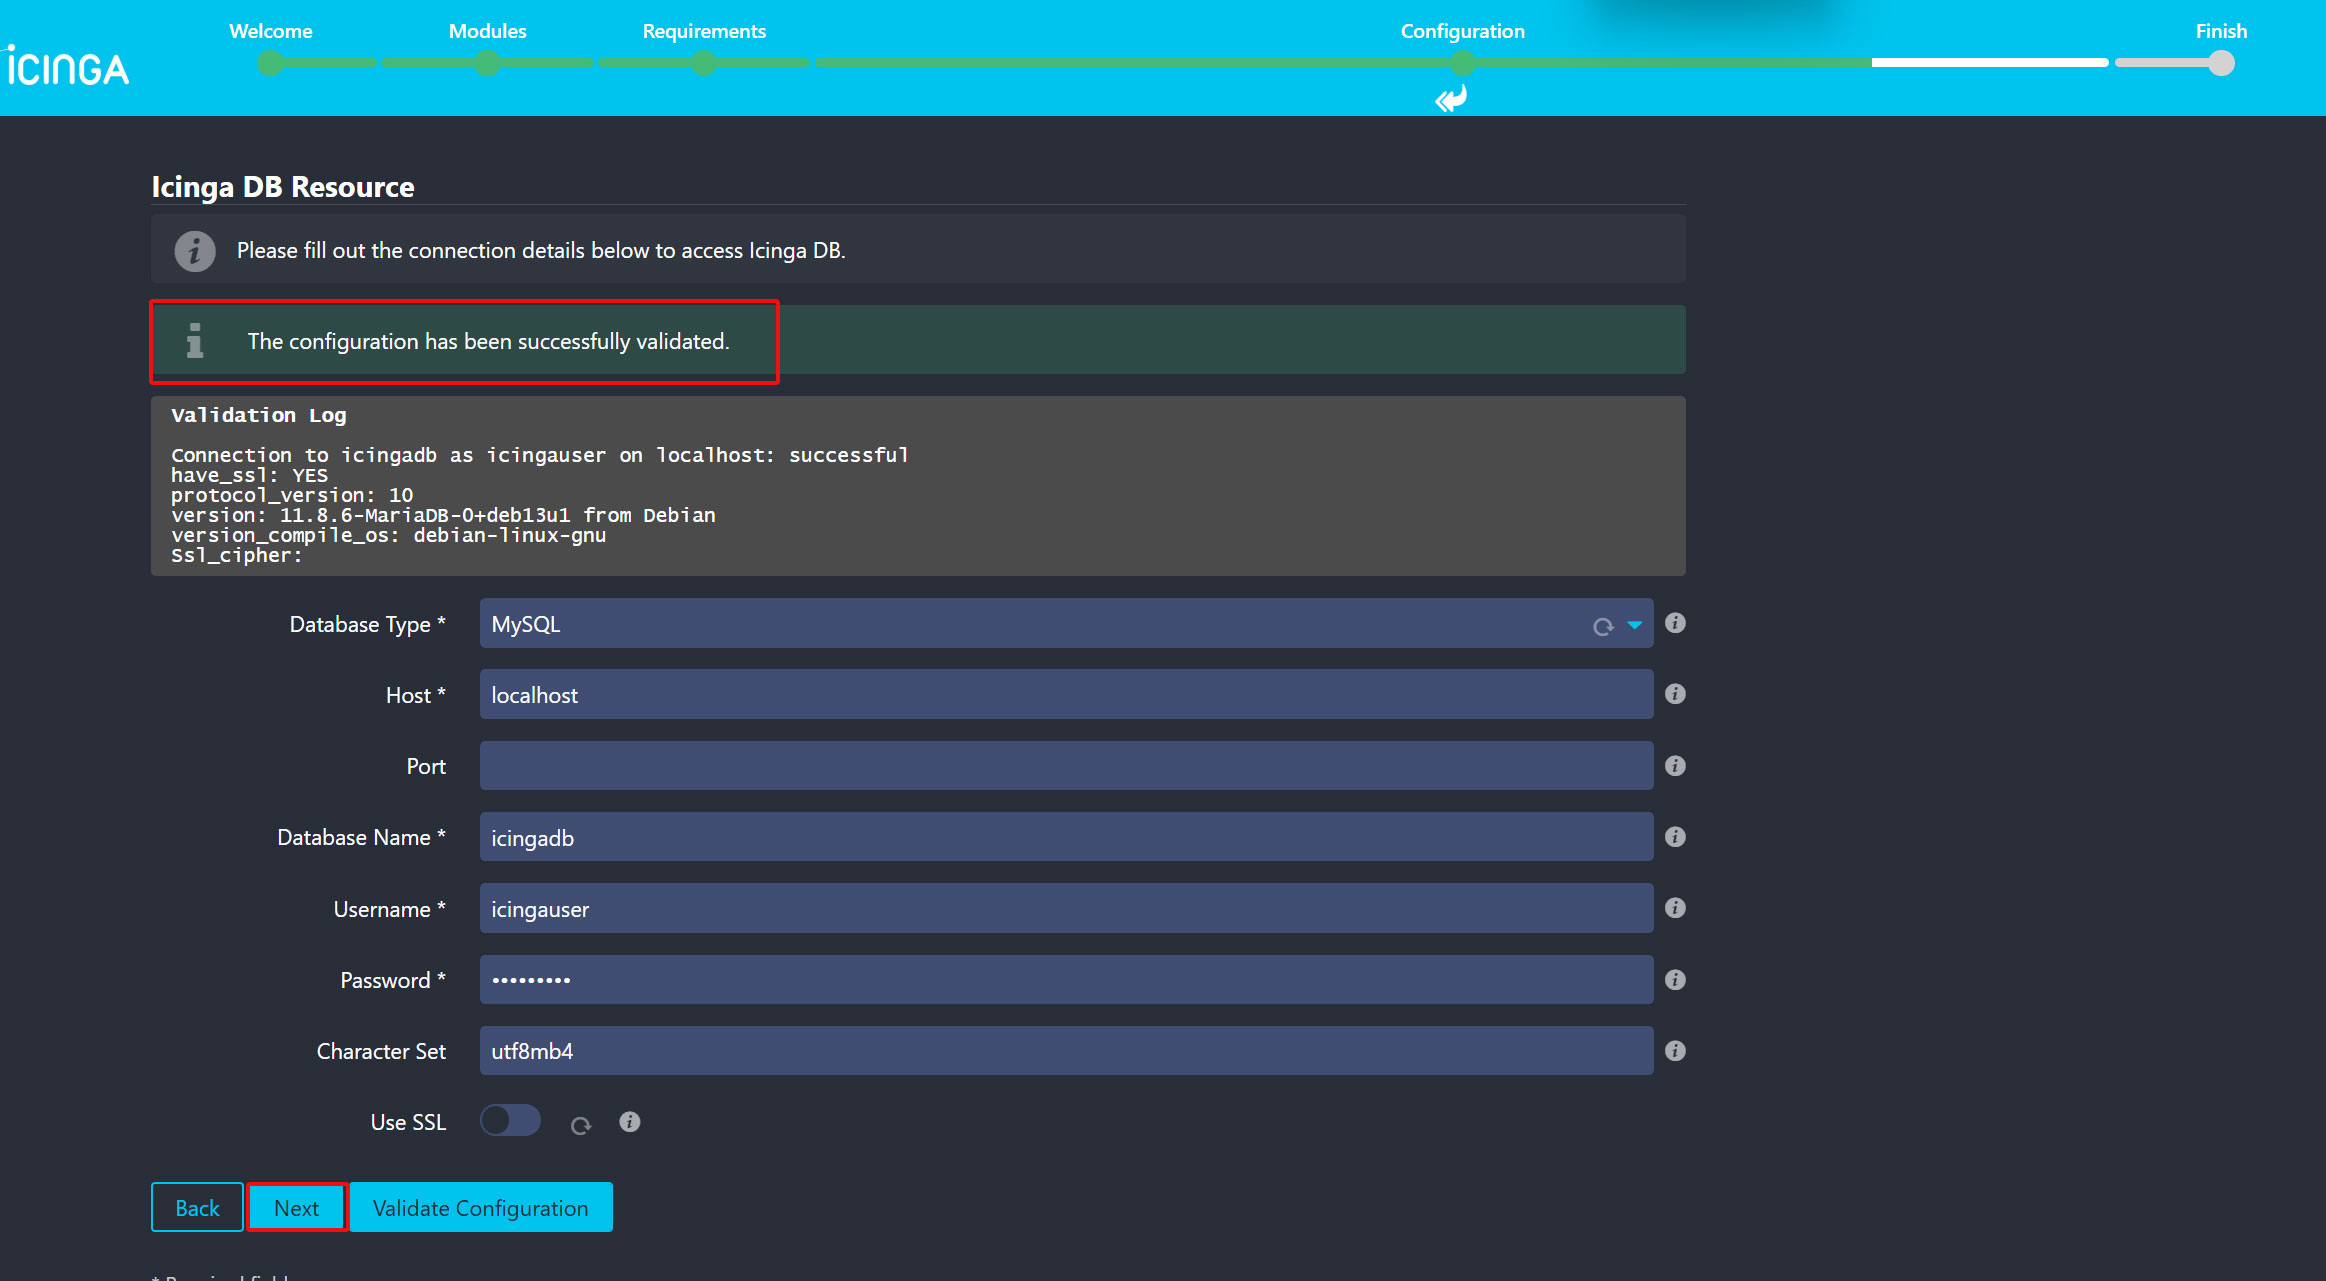
間違いがなければ下図のように"The configuration has been successfuly validated."と表示されのでNextをクリック
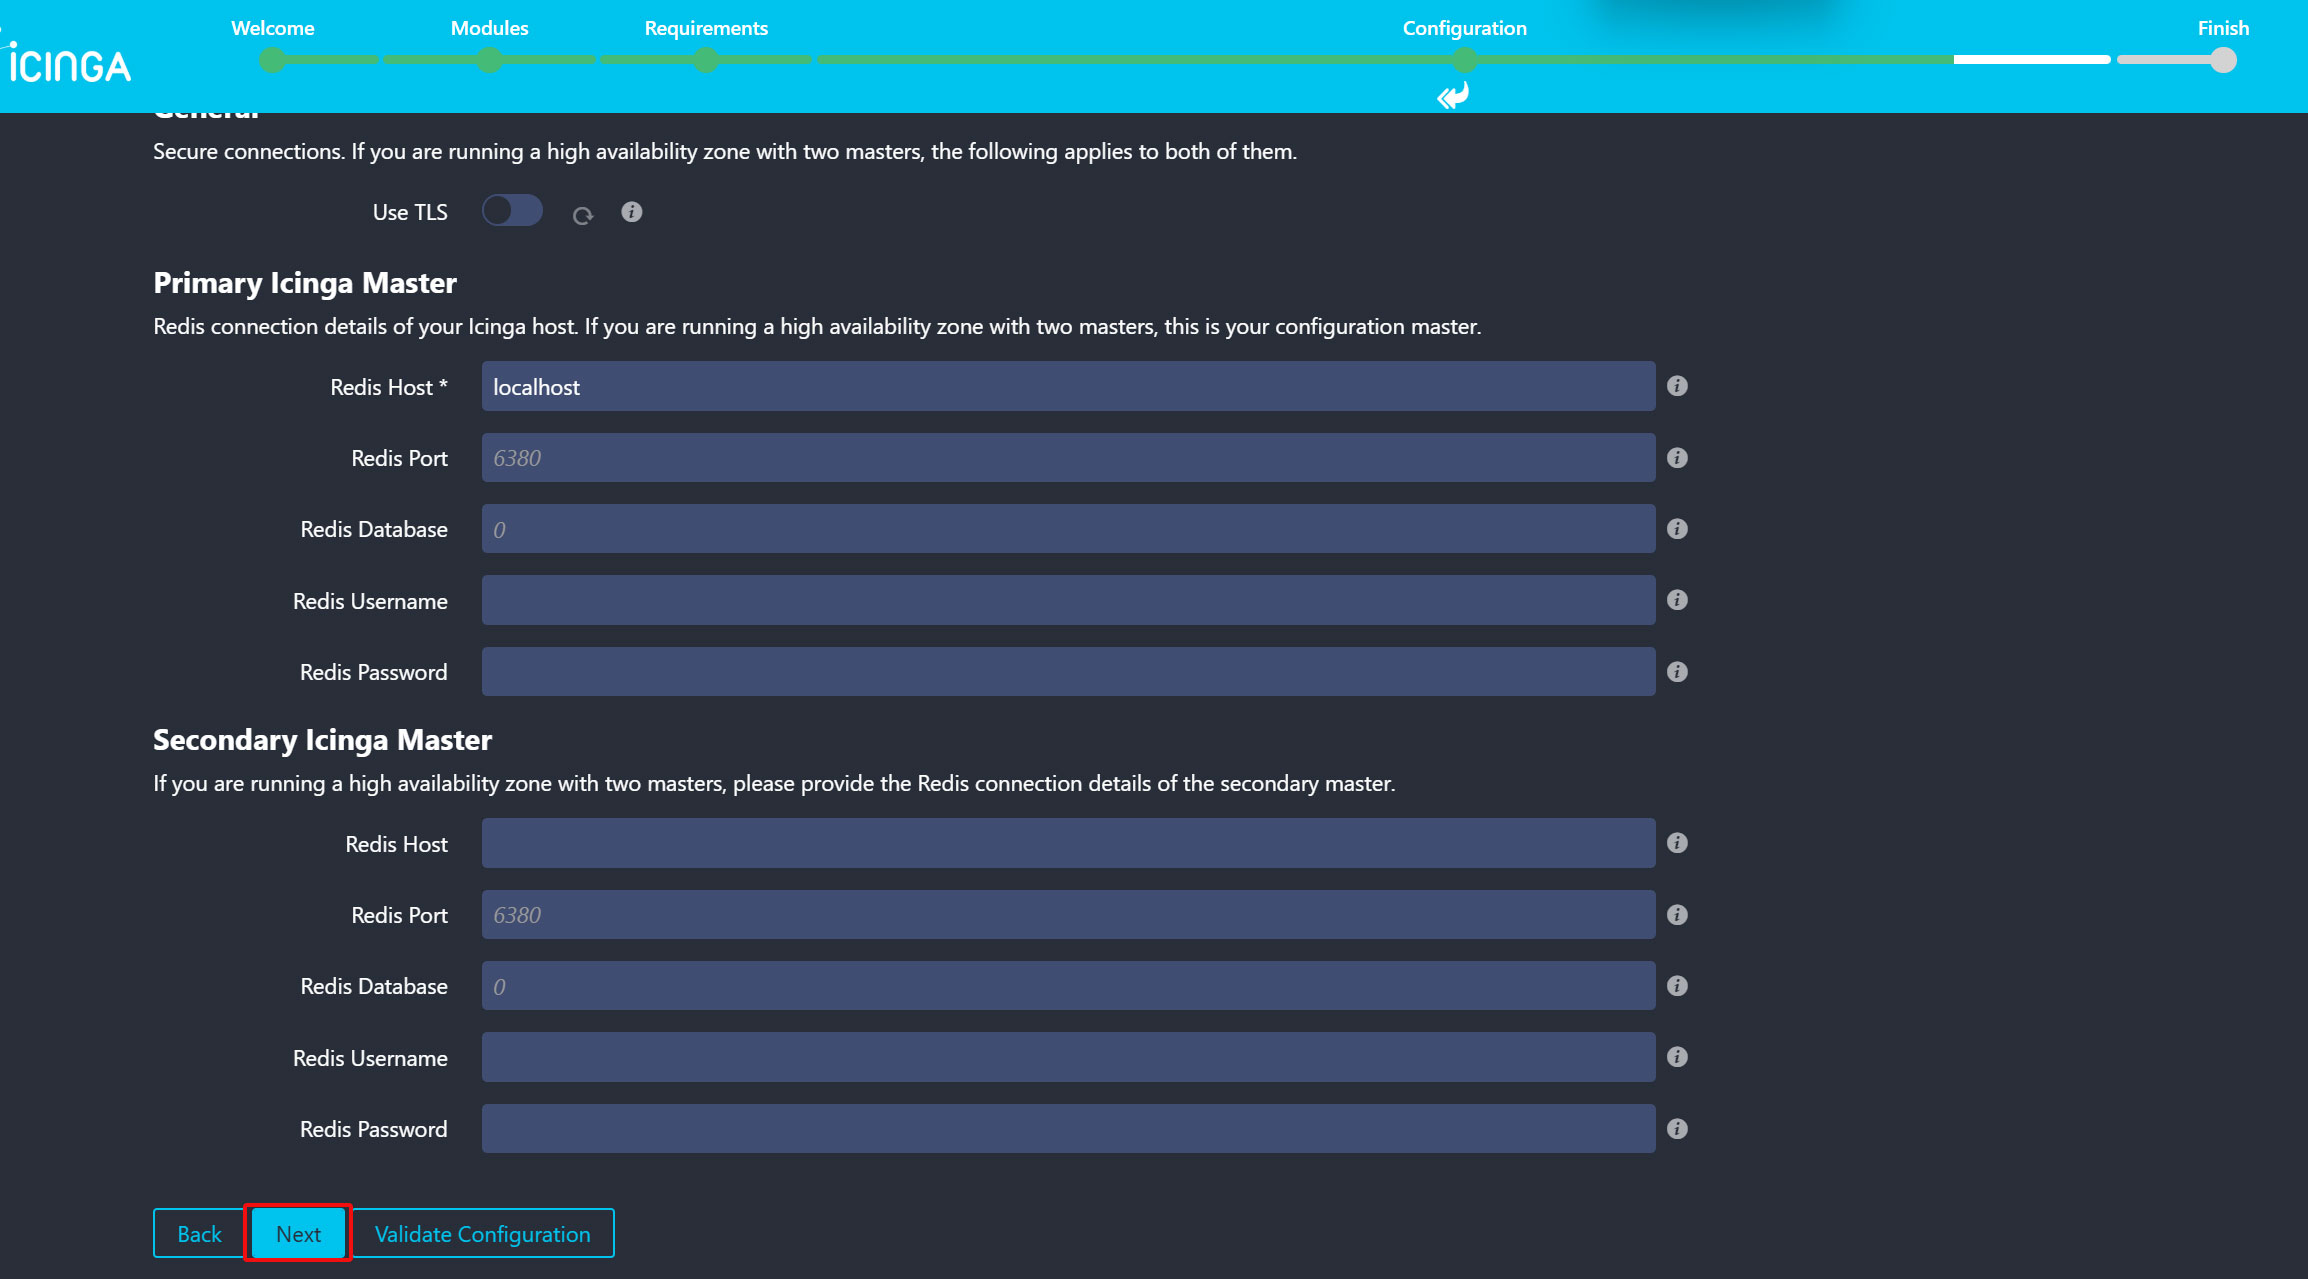
⑪IcingaDB-Redisの設定
icingadb-redisのセットアップページが表示されます。Redis Hostはlocalhostにして、 Nextをクリック
⑫Icinga2 APi の設定
Host => localhost
Port => 5665
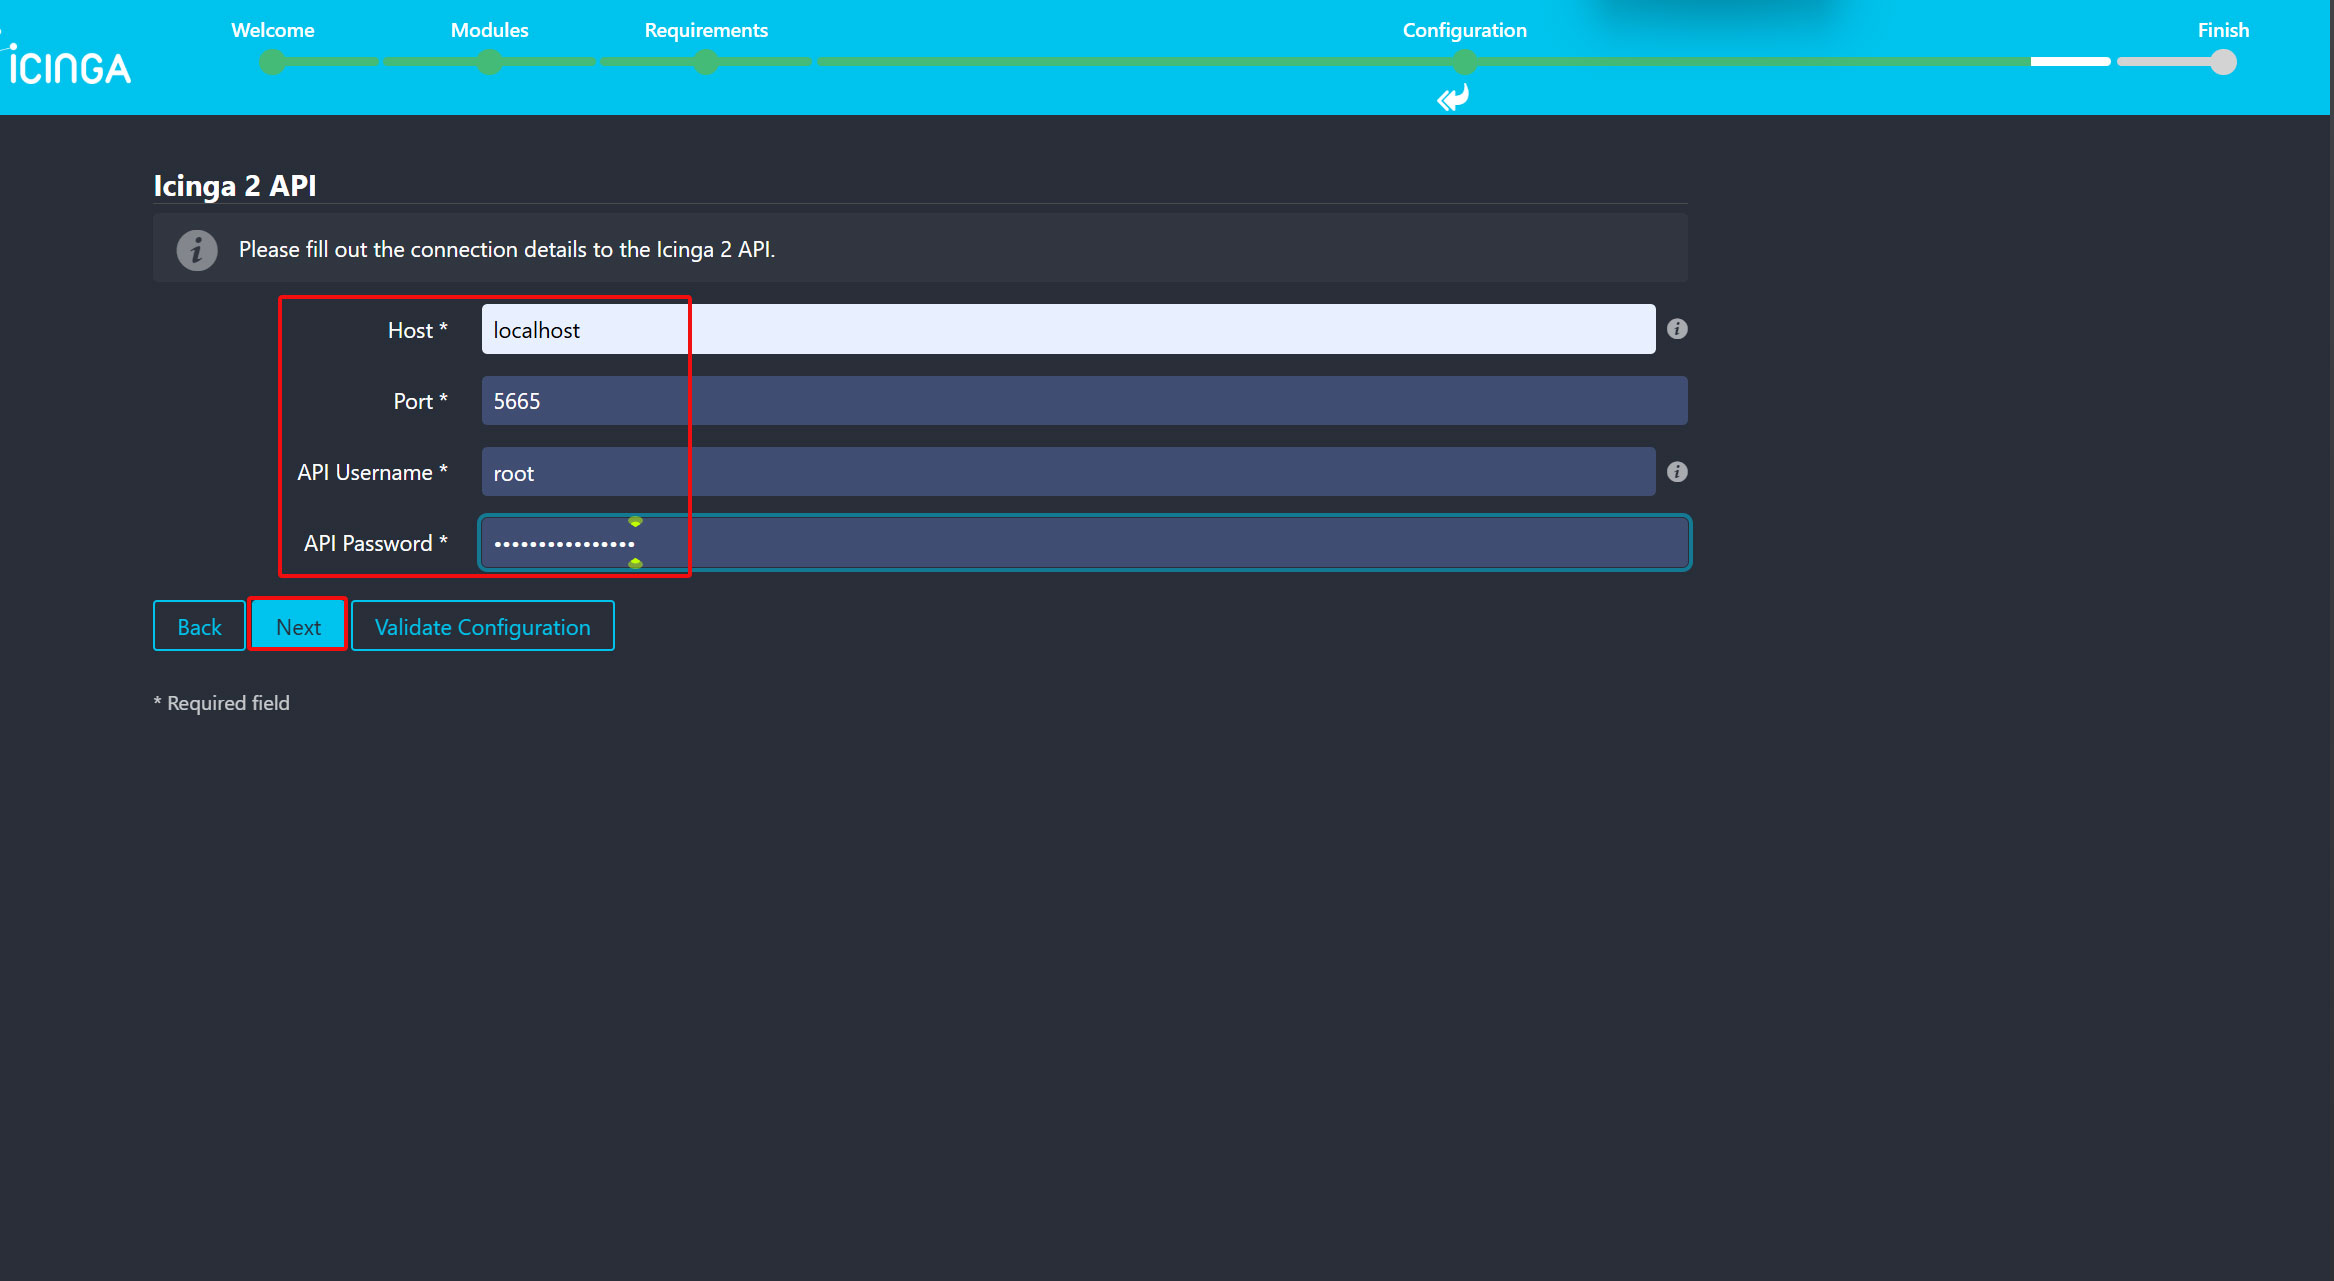
Api Username 及び Api Passwordは下記ファイル中を確認する
# vi /etc/icinga2/conf.d/api-users.conf

object ApiUser "root" {
    password = "575d37e9eee7cc2a"
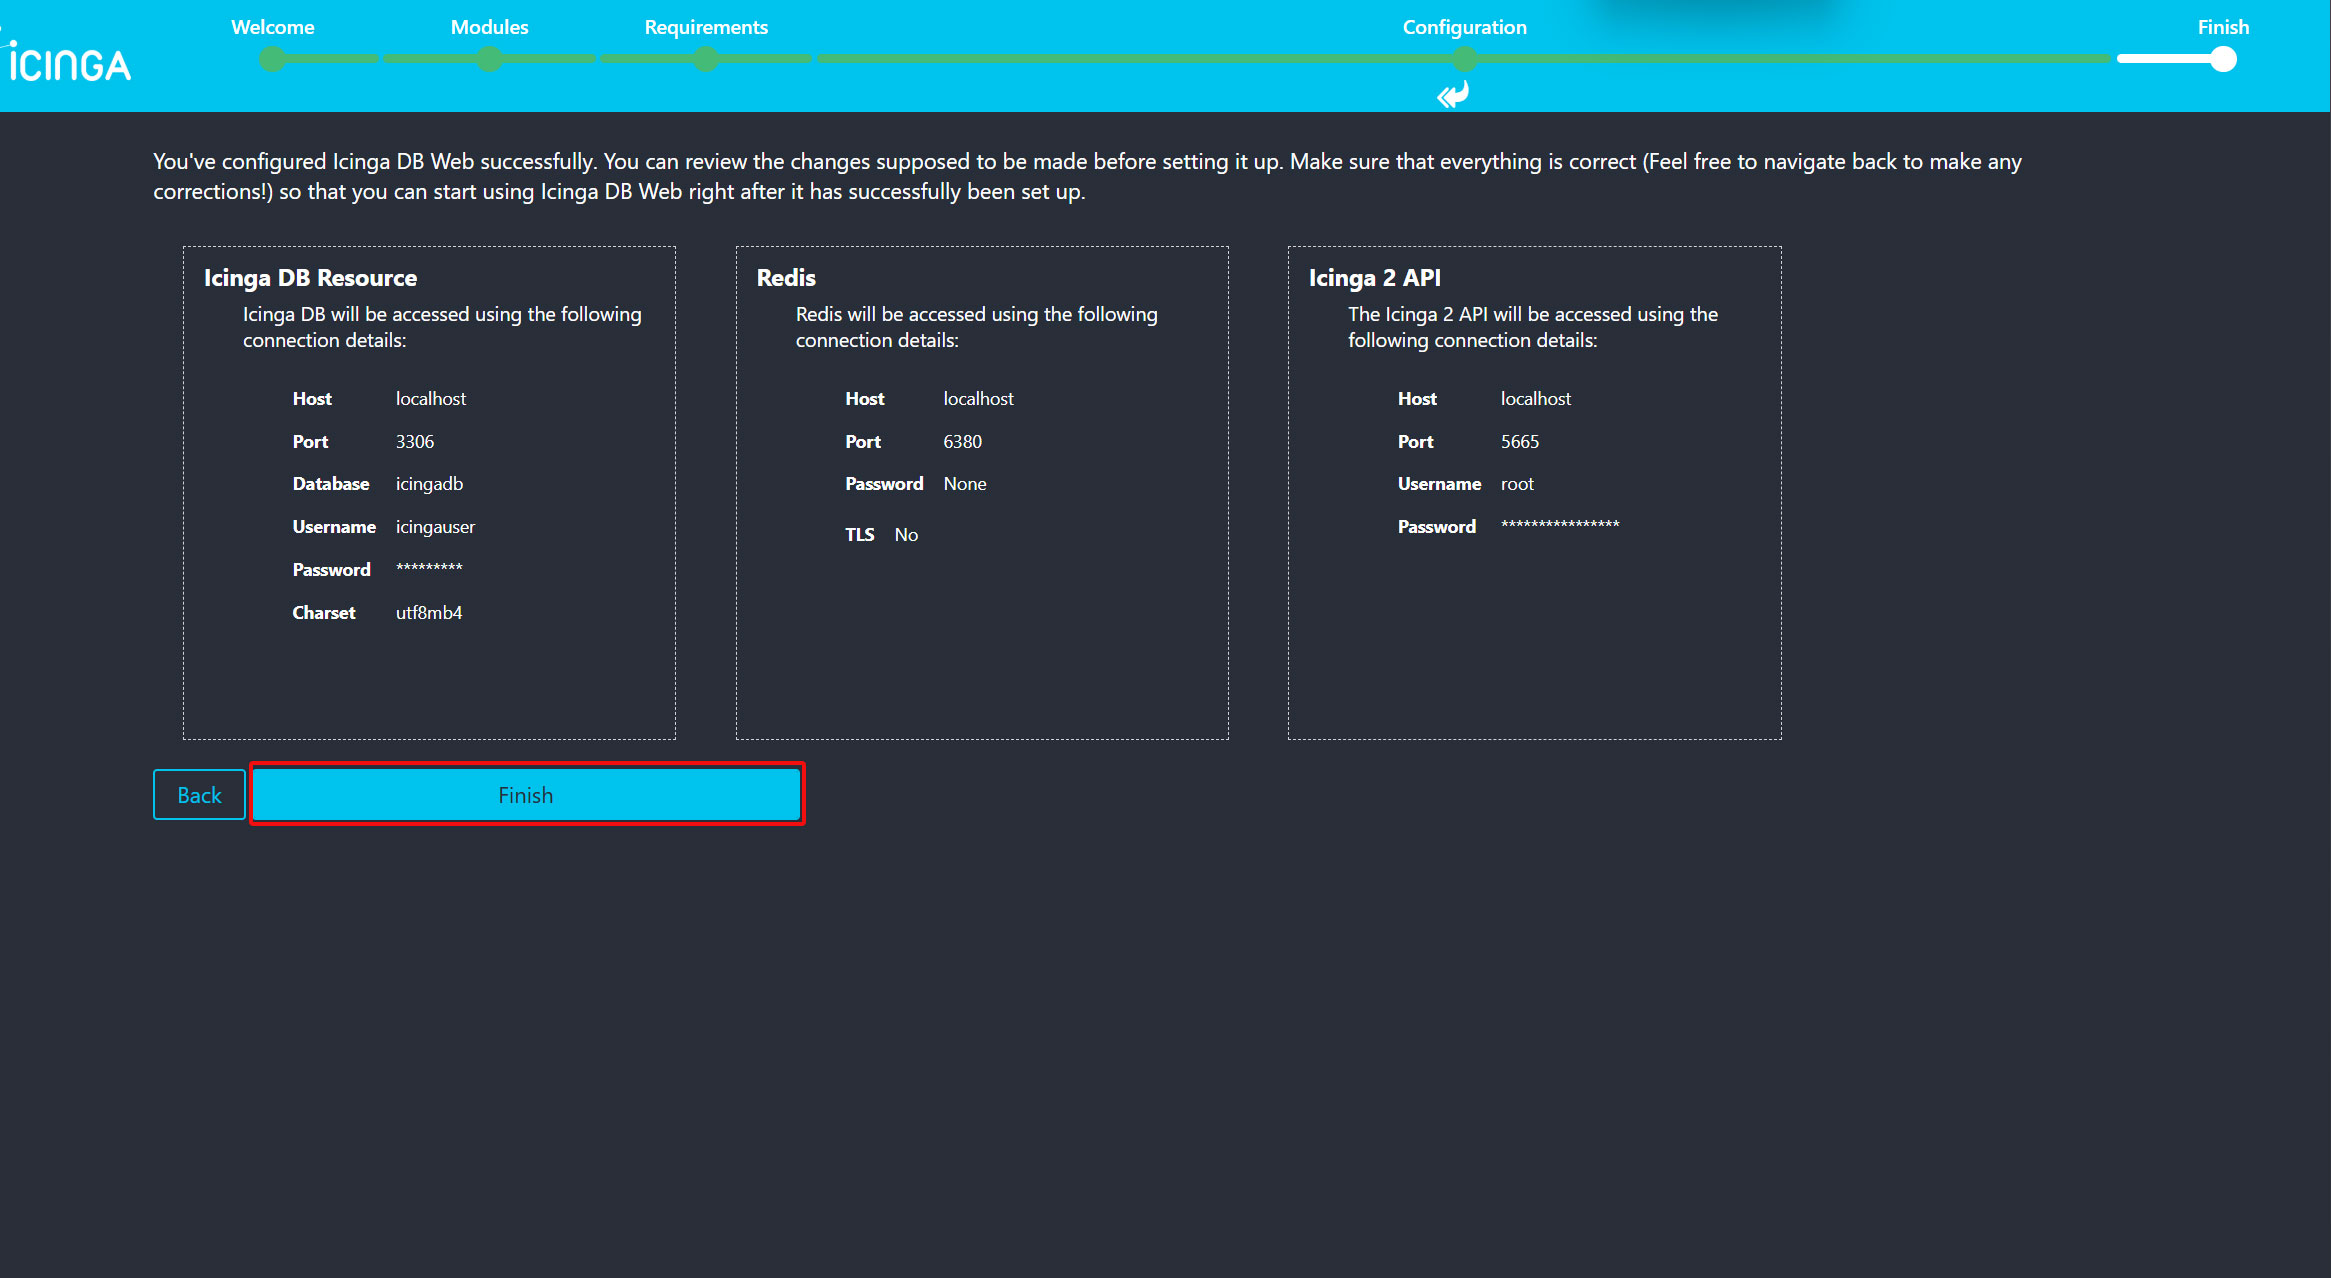
入力後Nextをクリックすると概要ページに入りますので、Finishをクリック
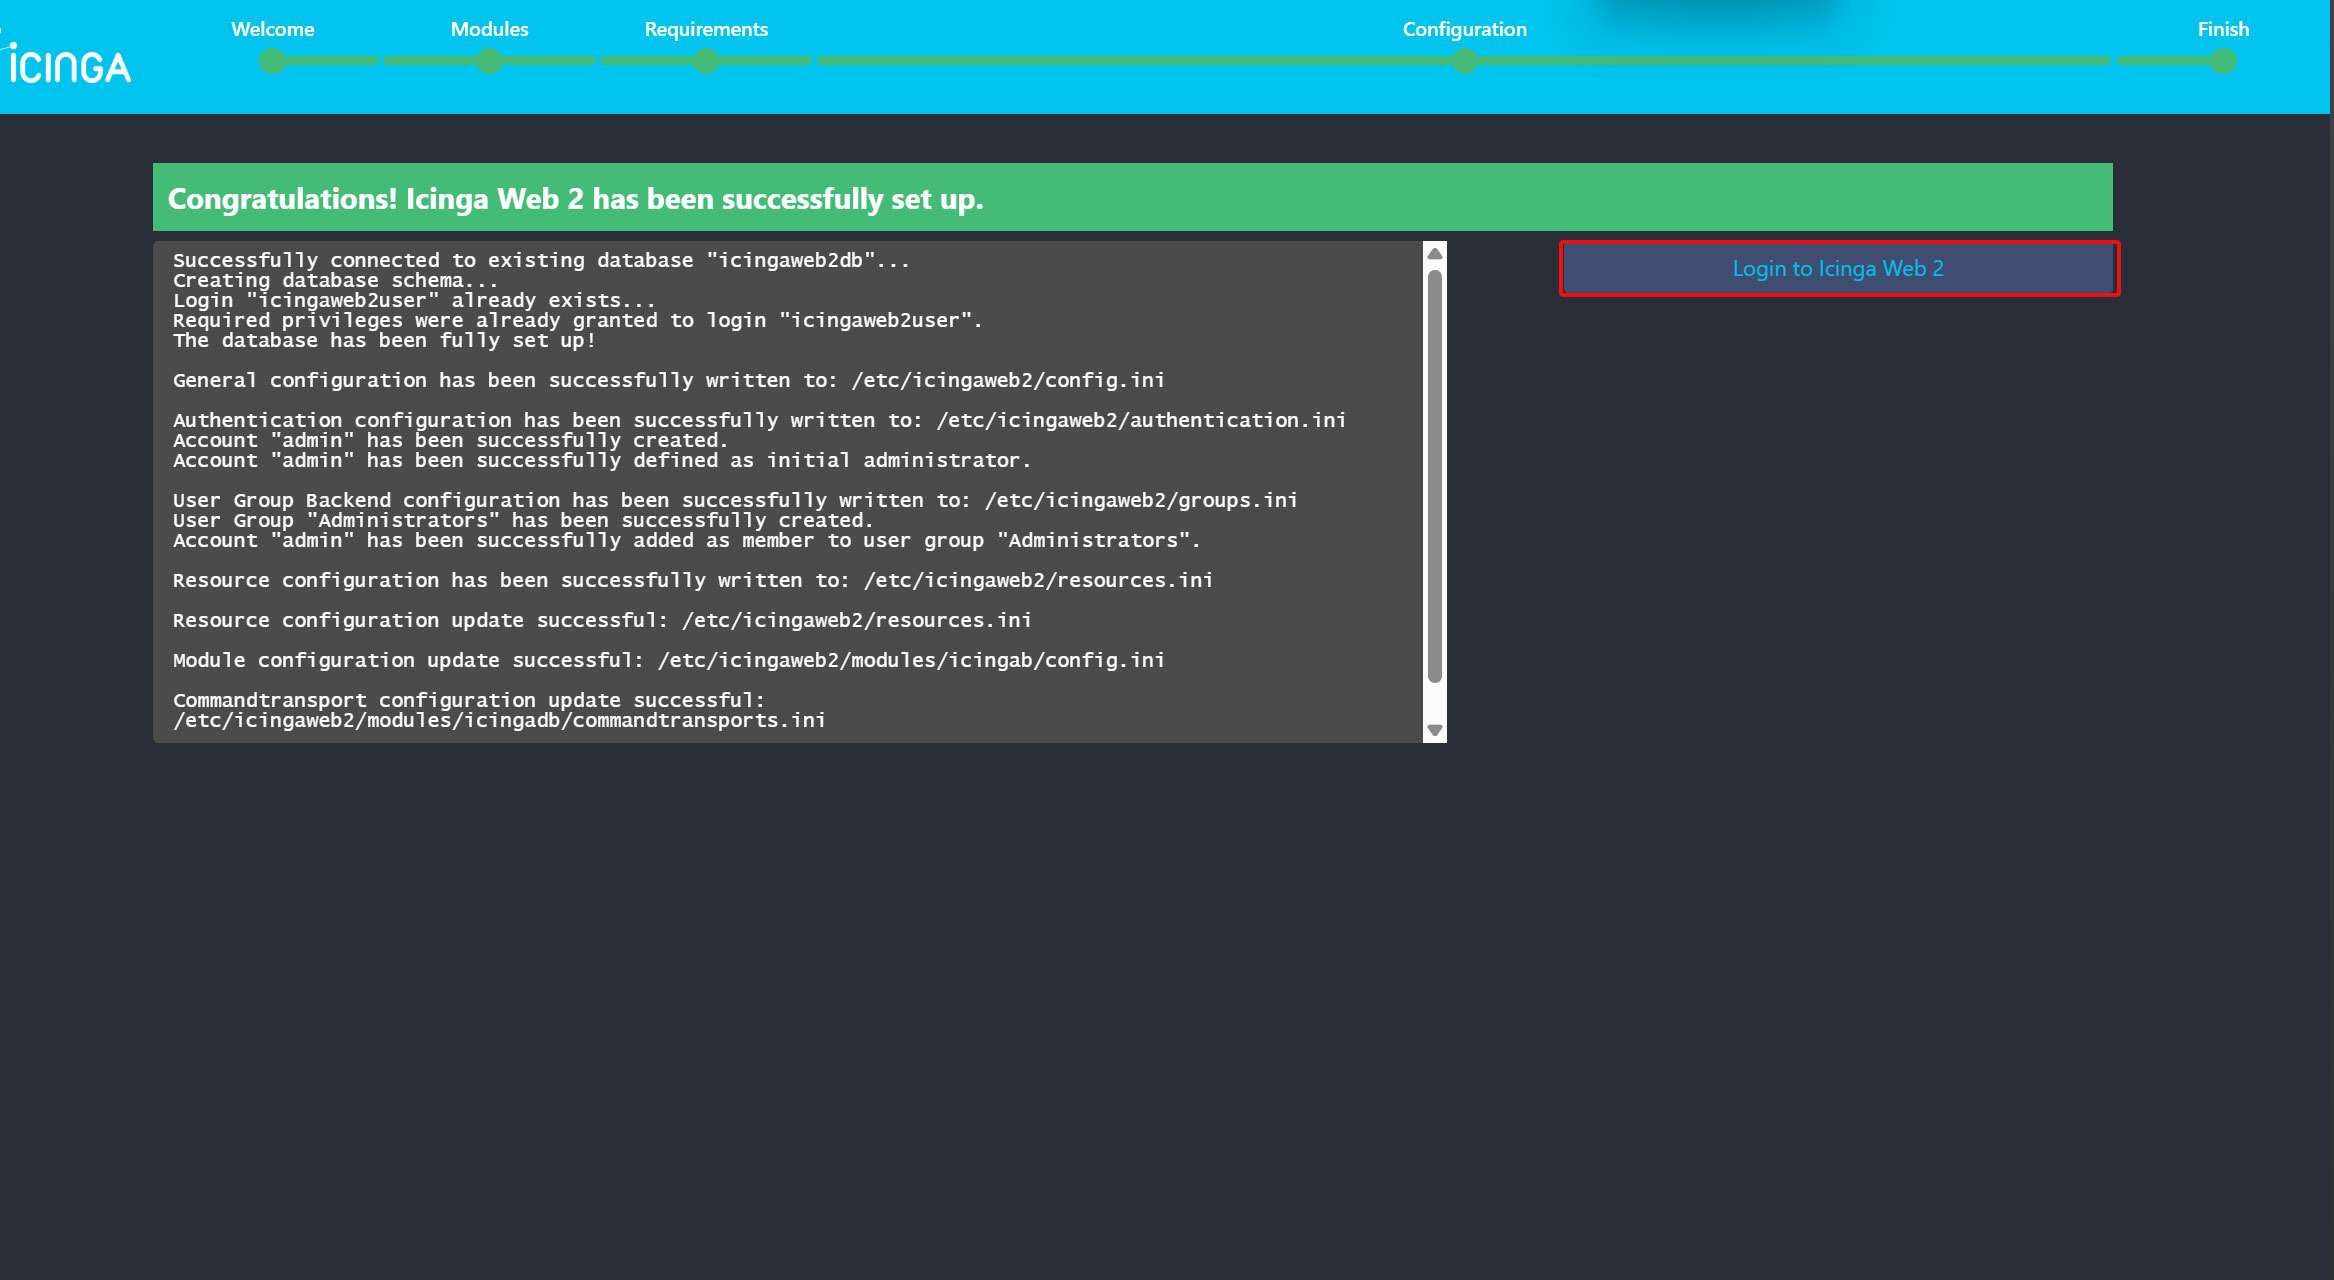
設定がすべて正常に完了しましたので"Login to Icinga Web 2"をクリック
icingadbを再起動
# systemctl restart icingadb
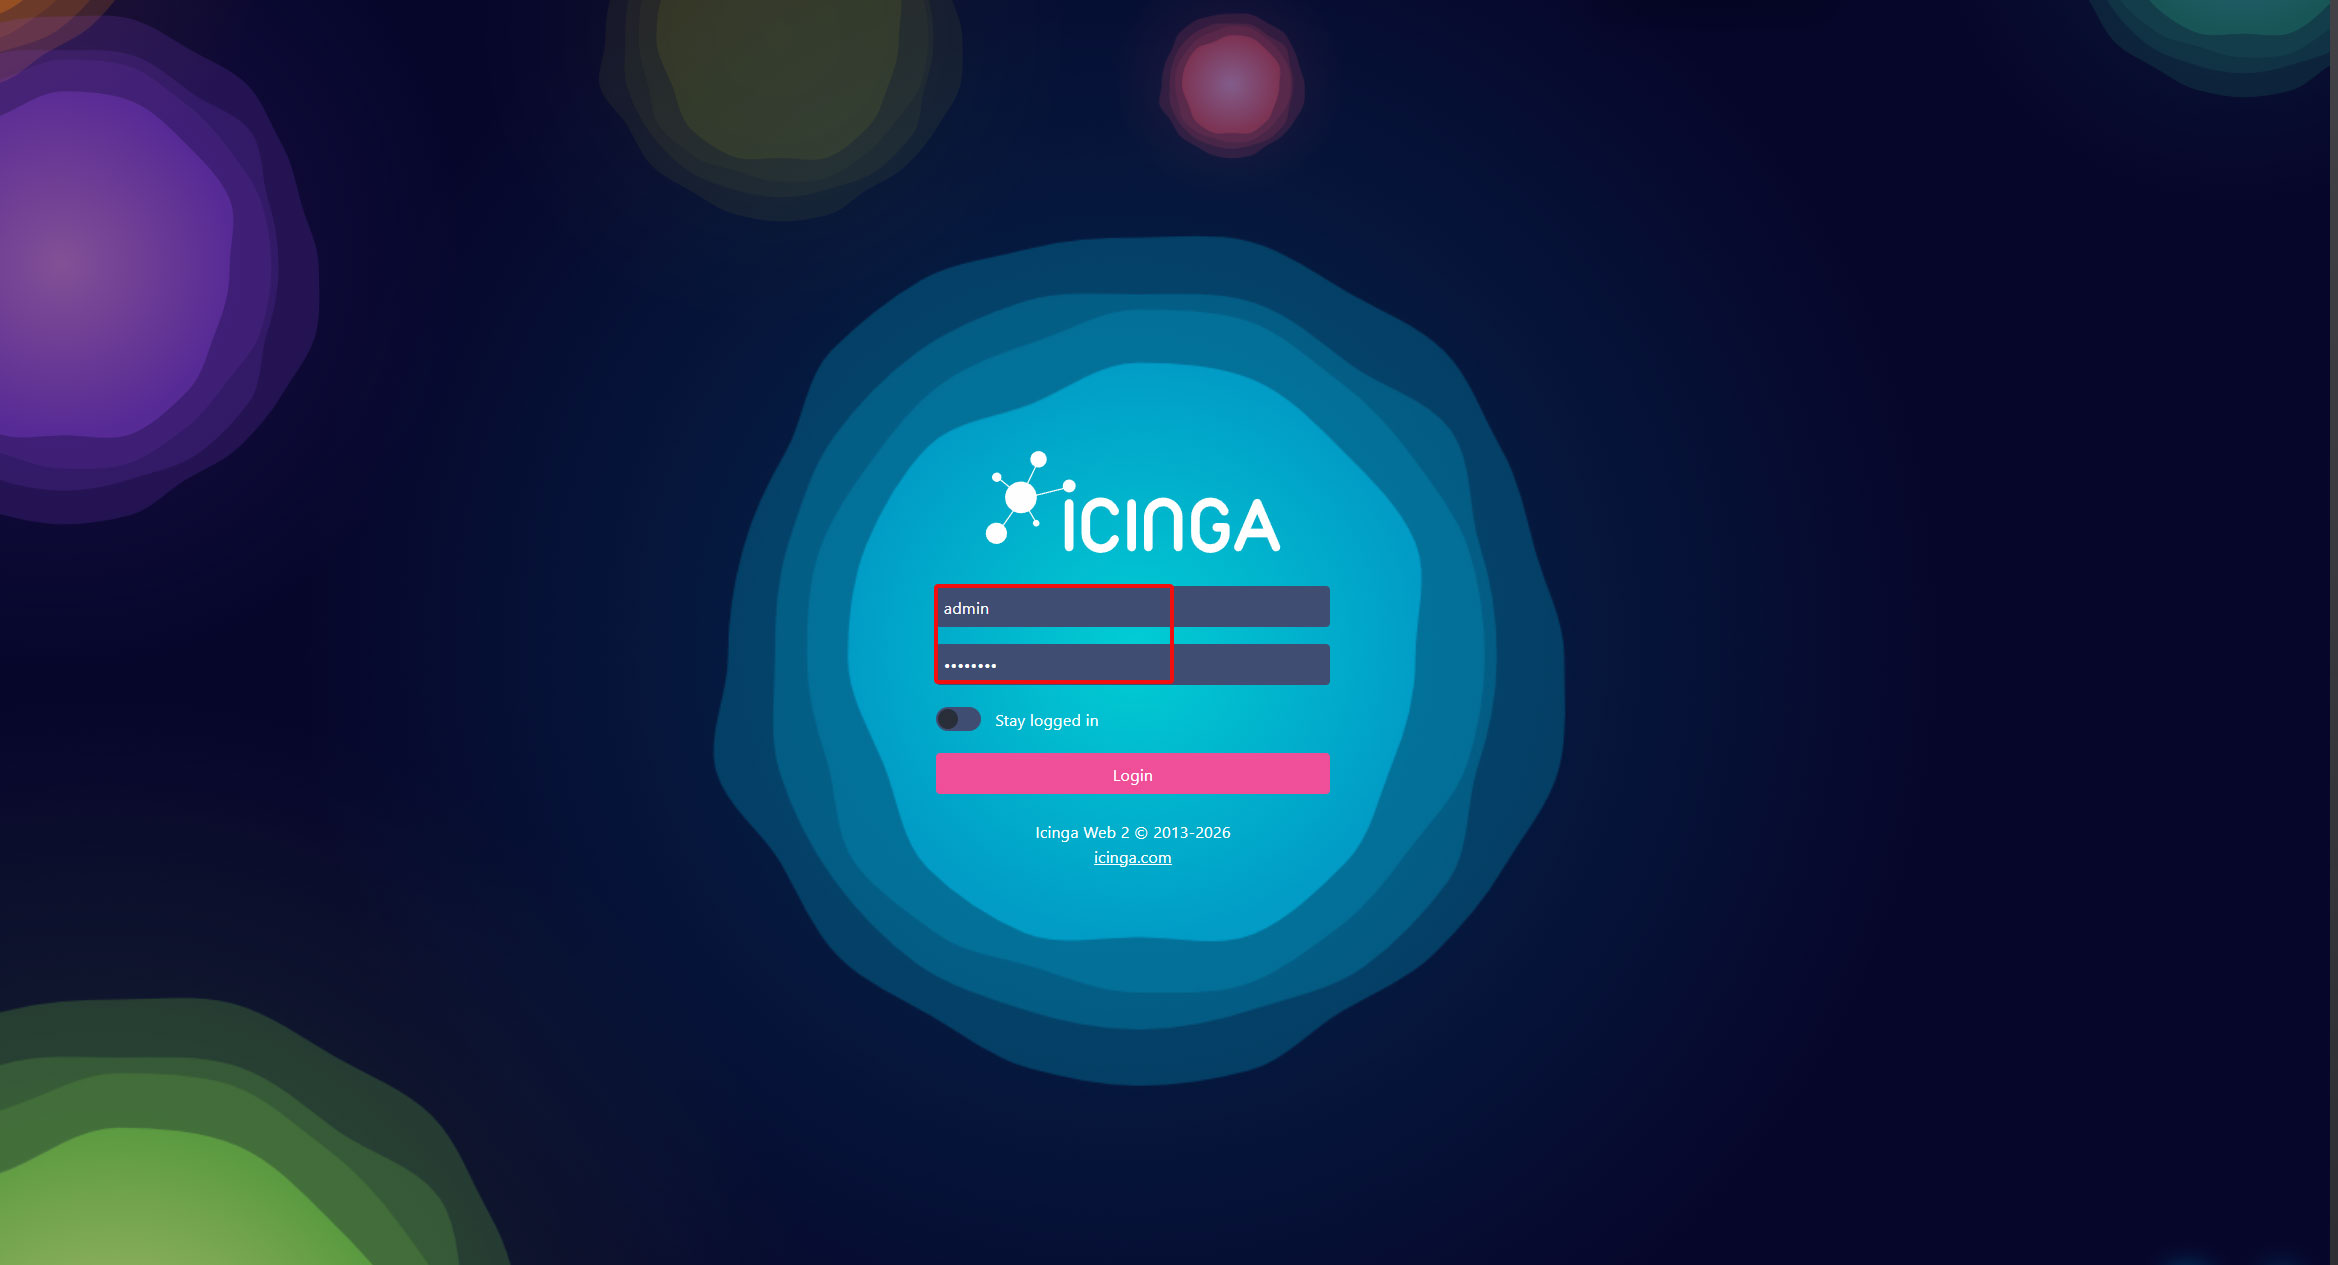
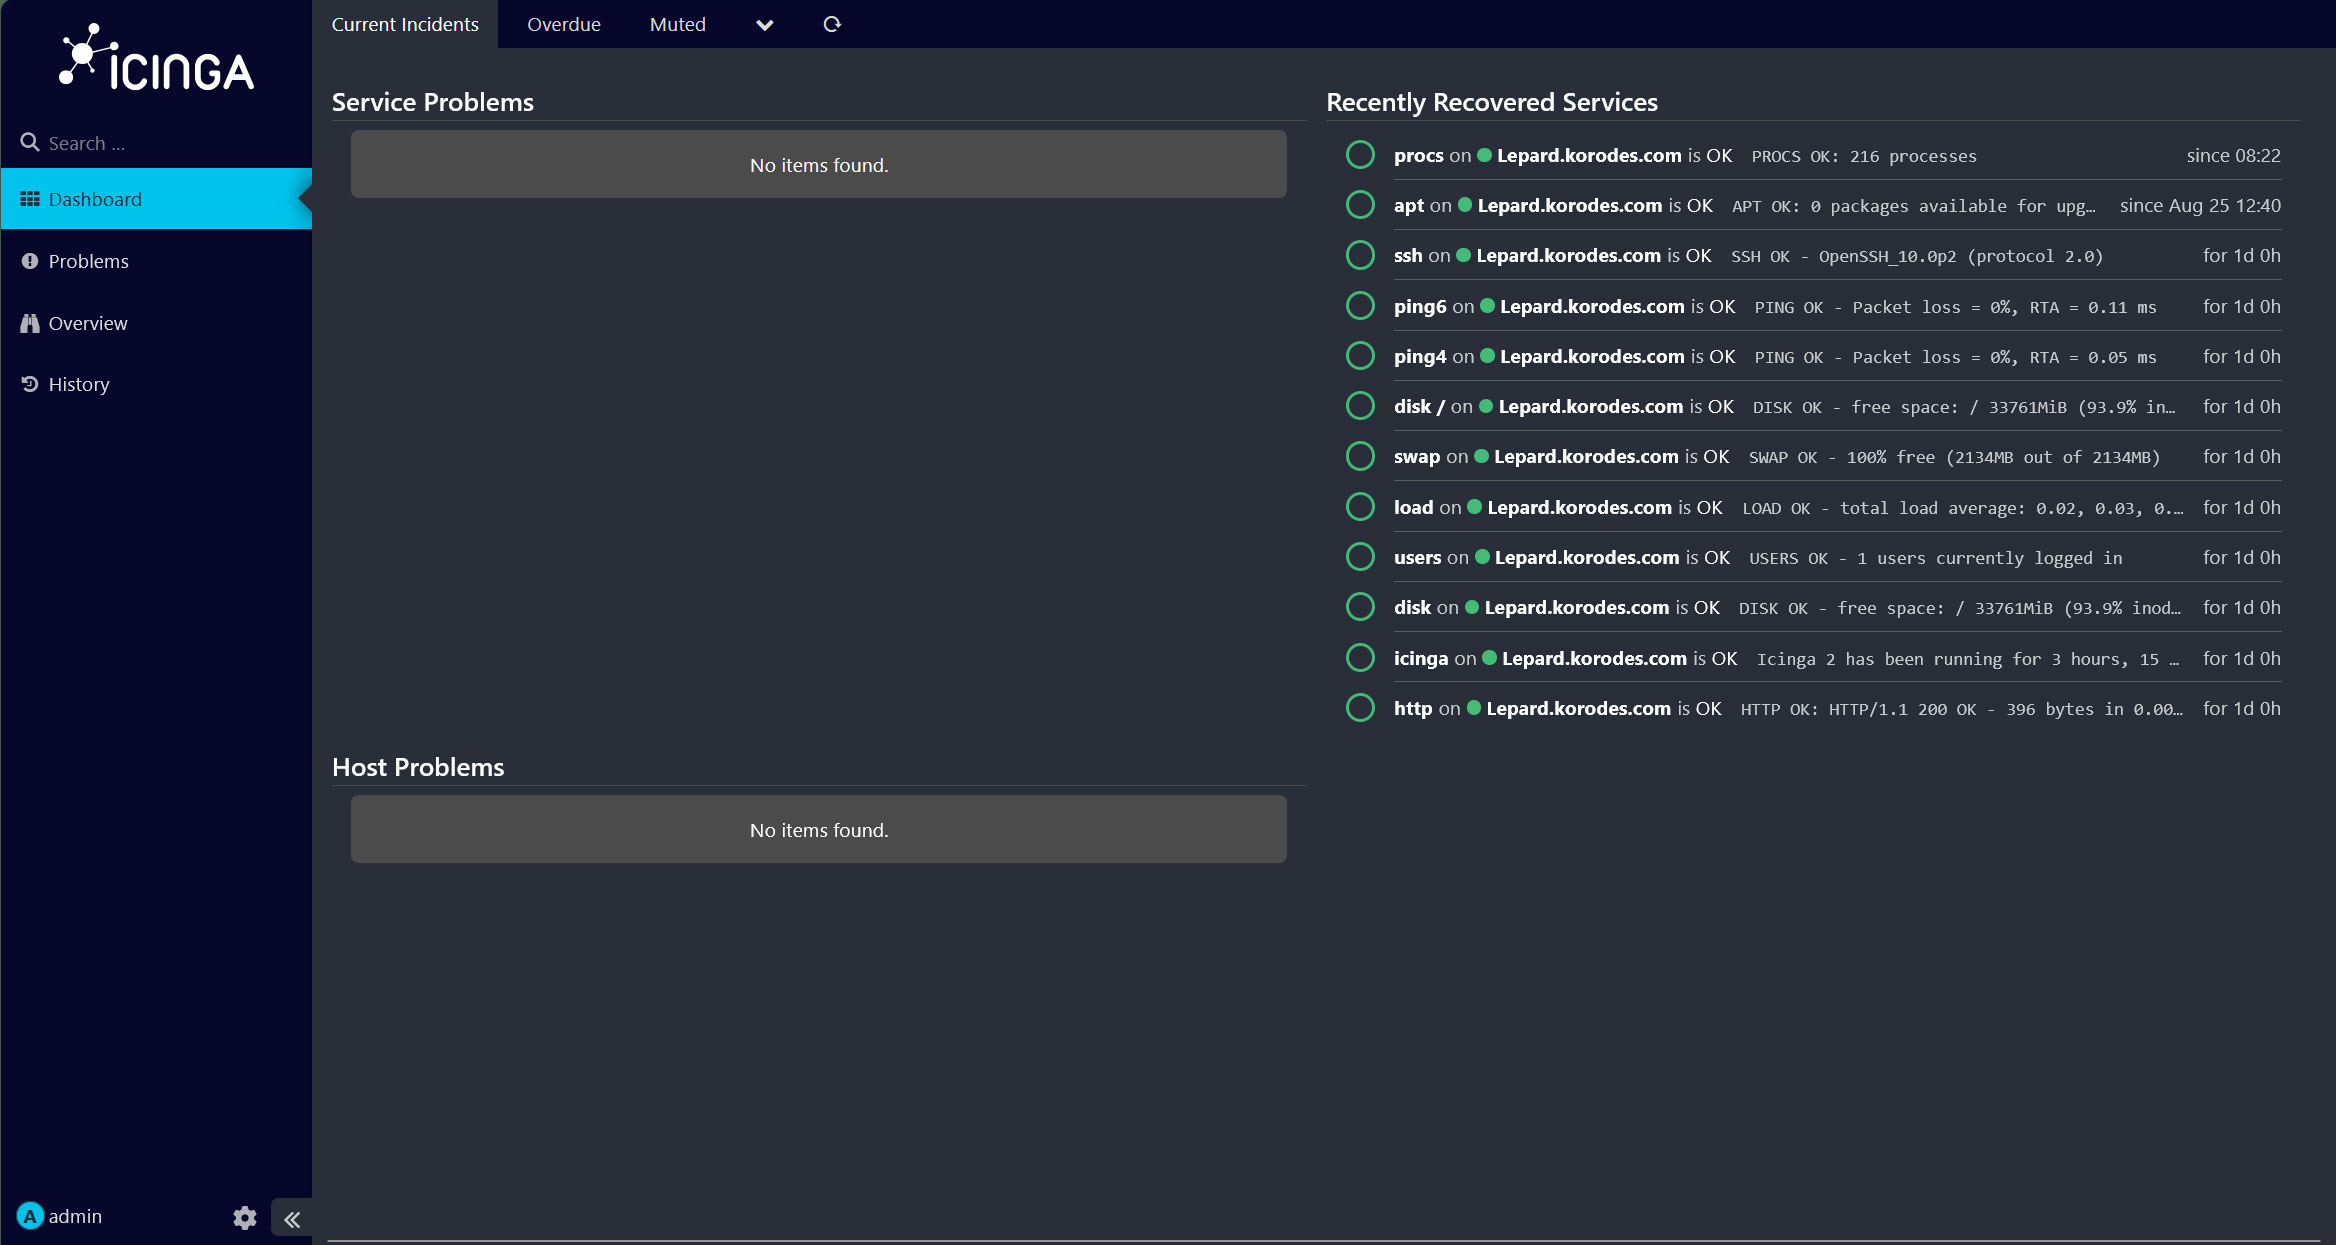
⑬IcingaDB-Web ログイン画面
先ほど作成したIcinga Web にログインするためアカウント情報を入力し、ログインする
8. Icinga Directorをインストール
Icinga Directorは、Webベースの設定モジュールであり、設定ファイルを手動で編集する代わりに、Icinga Webインターフェースを通じてホスト、サービス、テンプレートを管理できます
8.1 Directorパッケージをインストール
# apt -y install icinga-director
8.2 Director専用のデータベースを作成
Directorデータベース : directordb
Directorユーザー : directoruser
パスワード : ?Xx123456
# mysql -u root -p

> CREATE DATABASE directordb ;
> CREATE USER 'directoruser'@'localhost' IDENTIFIED BY '?Xx123456';
> GRANT ALL ON directordb.* TO 'directoruser'@'localhost';
> FLUSH PRIVILEGES;
> EXIT;
データベースに、Icingadirectorデータベーススキーマをインポートする
# mysql -u root -p icingadb < /usr/share/icingaweb2/modules/director/schema/mysql.sql
icinga-director.service を有効化
# systemctl enable icinga-director
8.3 Icinga Web 2画面で設定
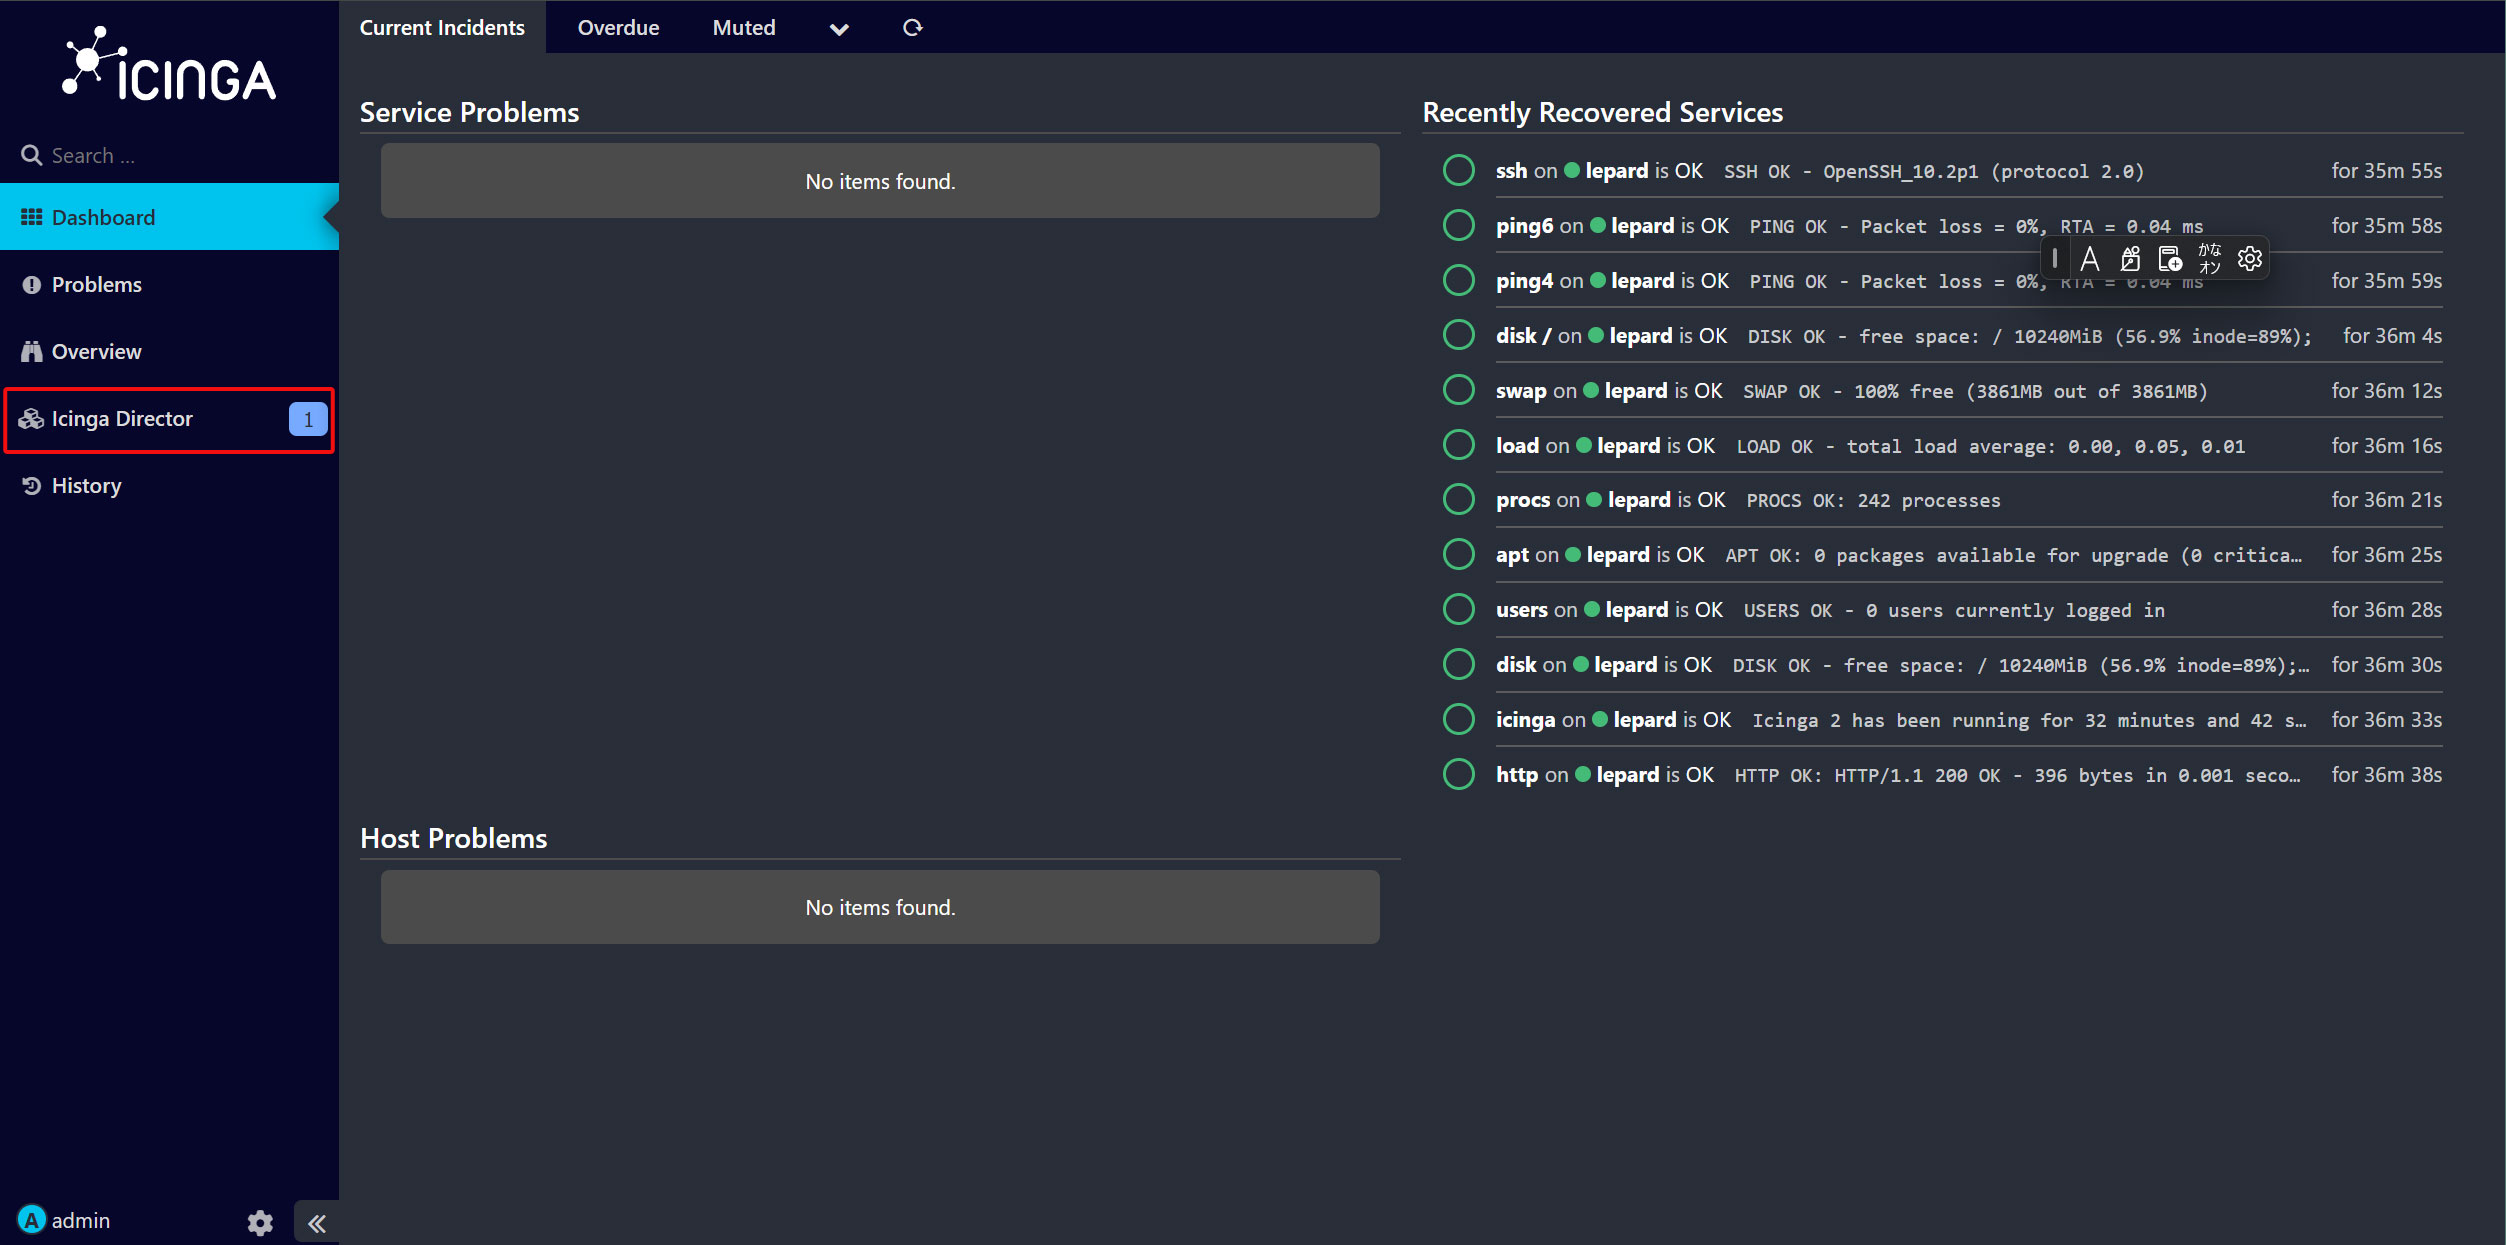
Icinga Web 2 にログインする。すると以下のように画面左に「Icinga director」が追加されている。
リソースの登録
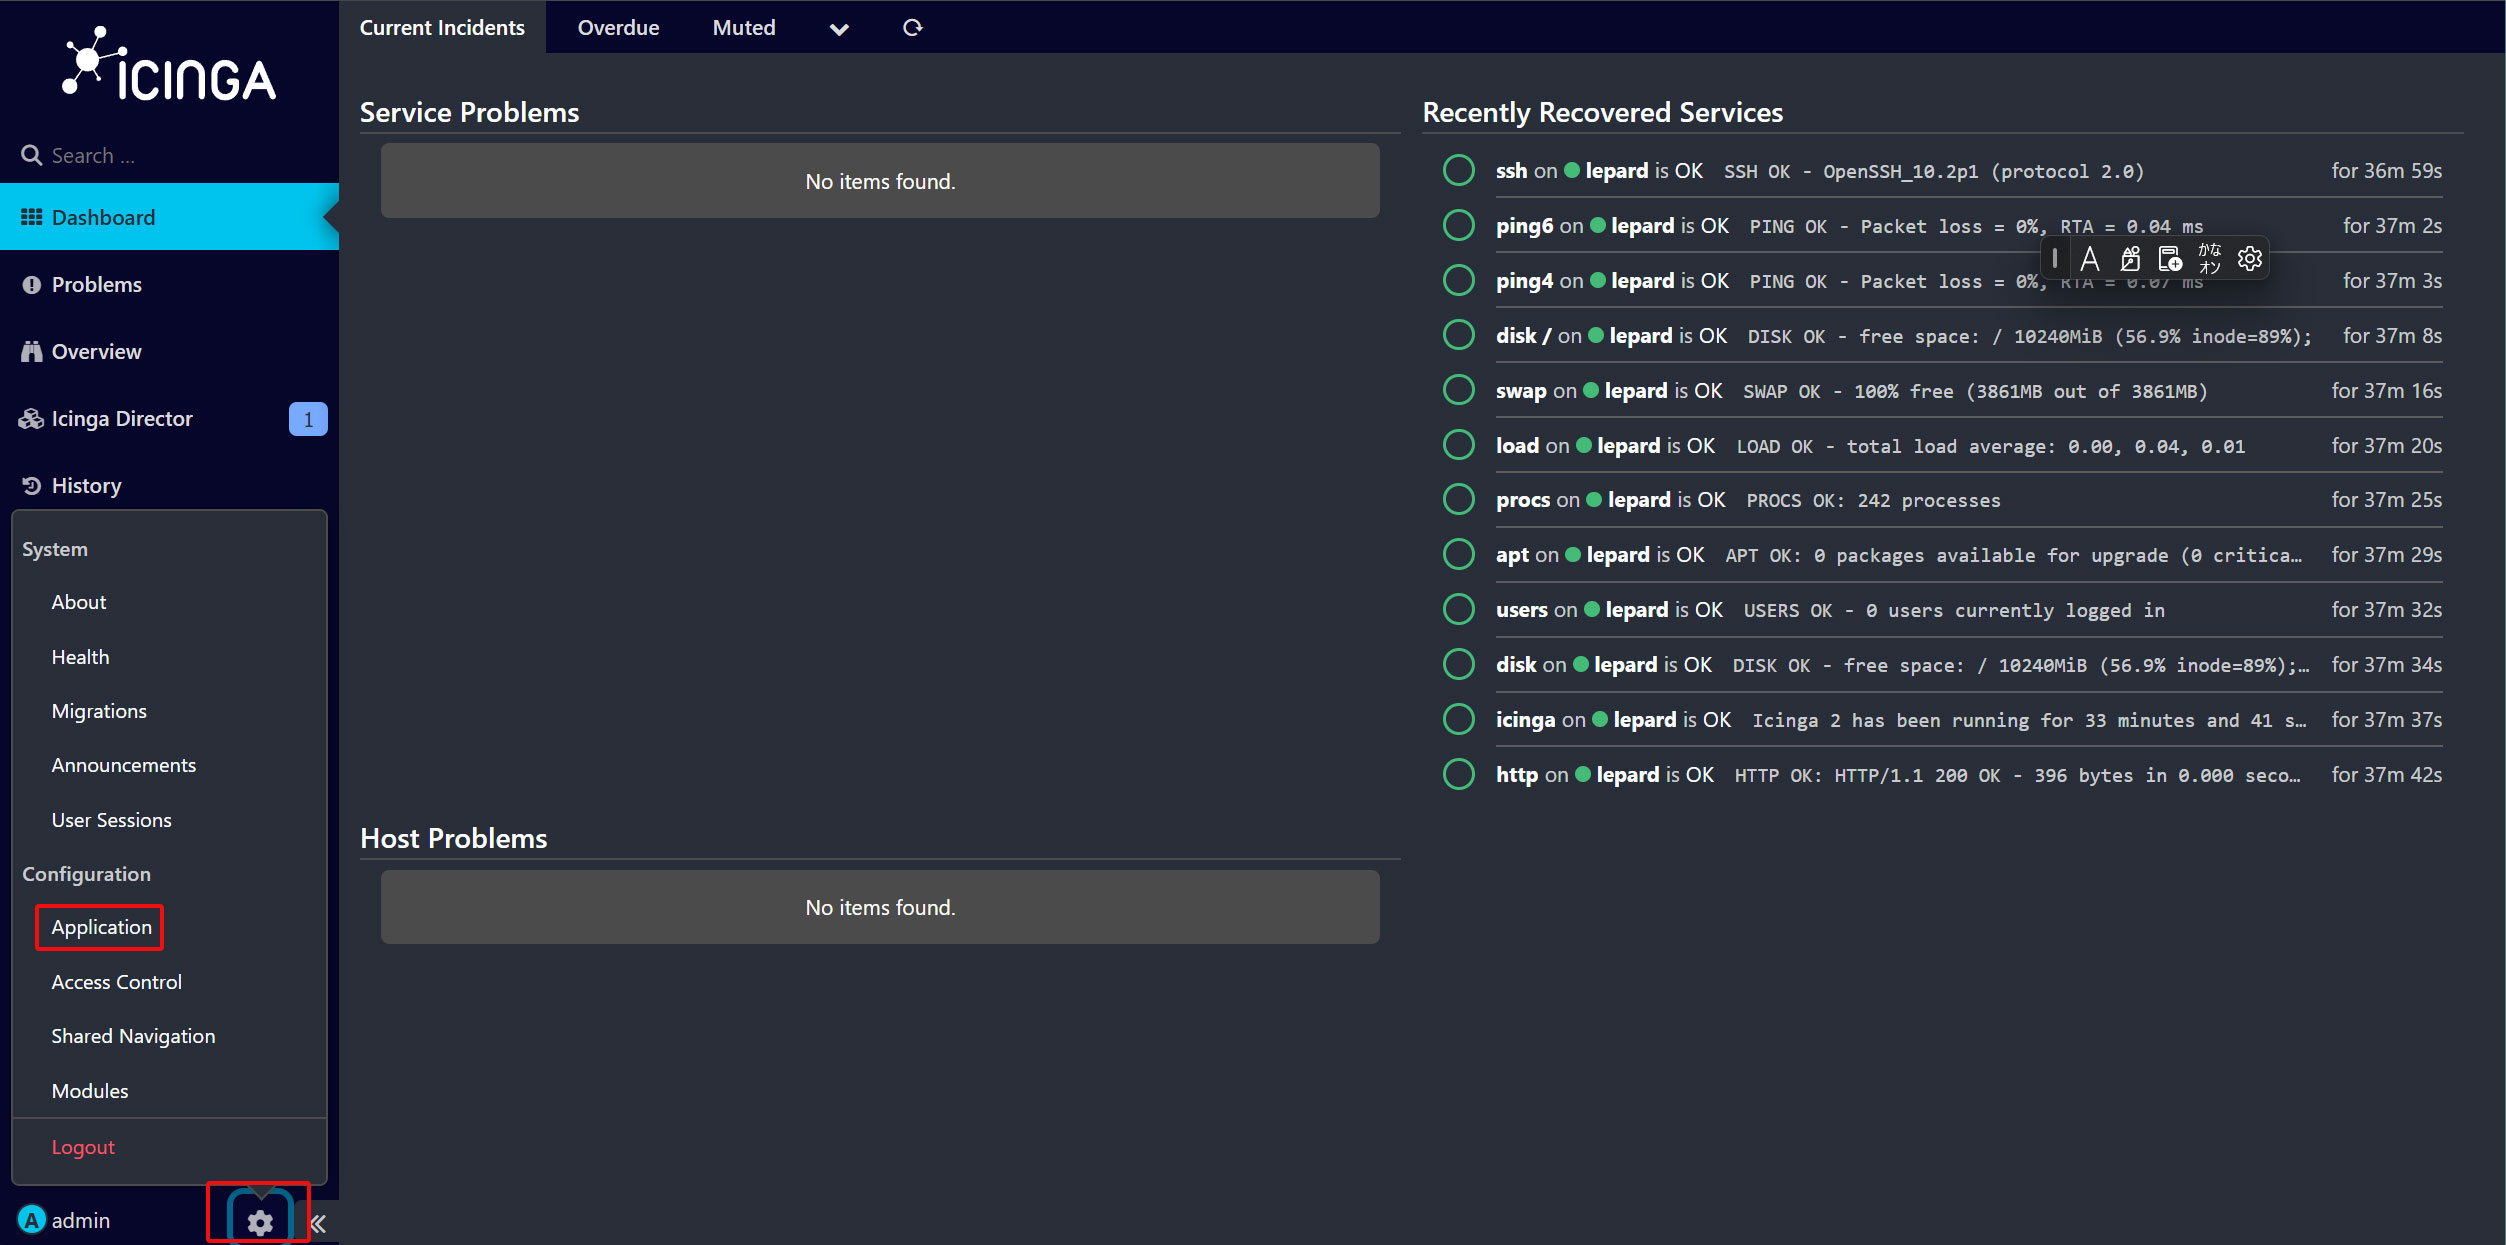
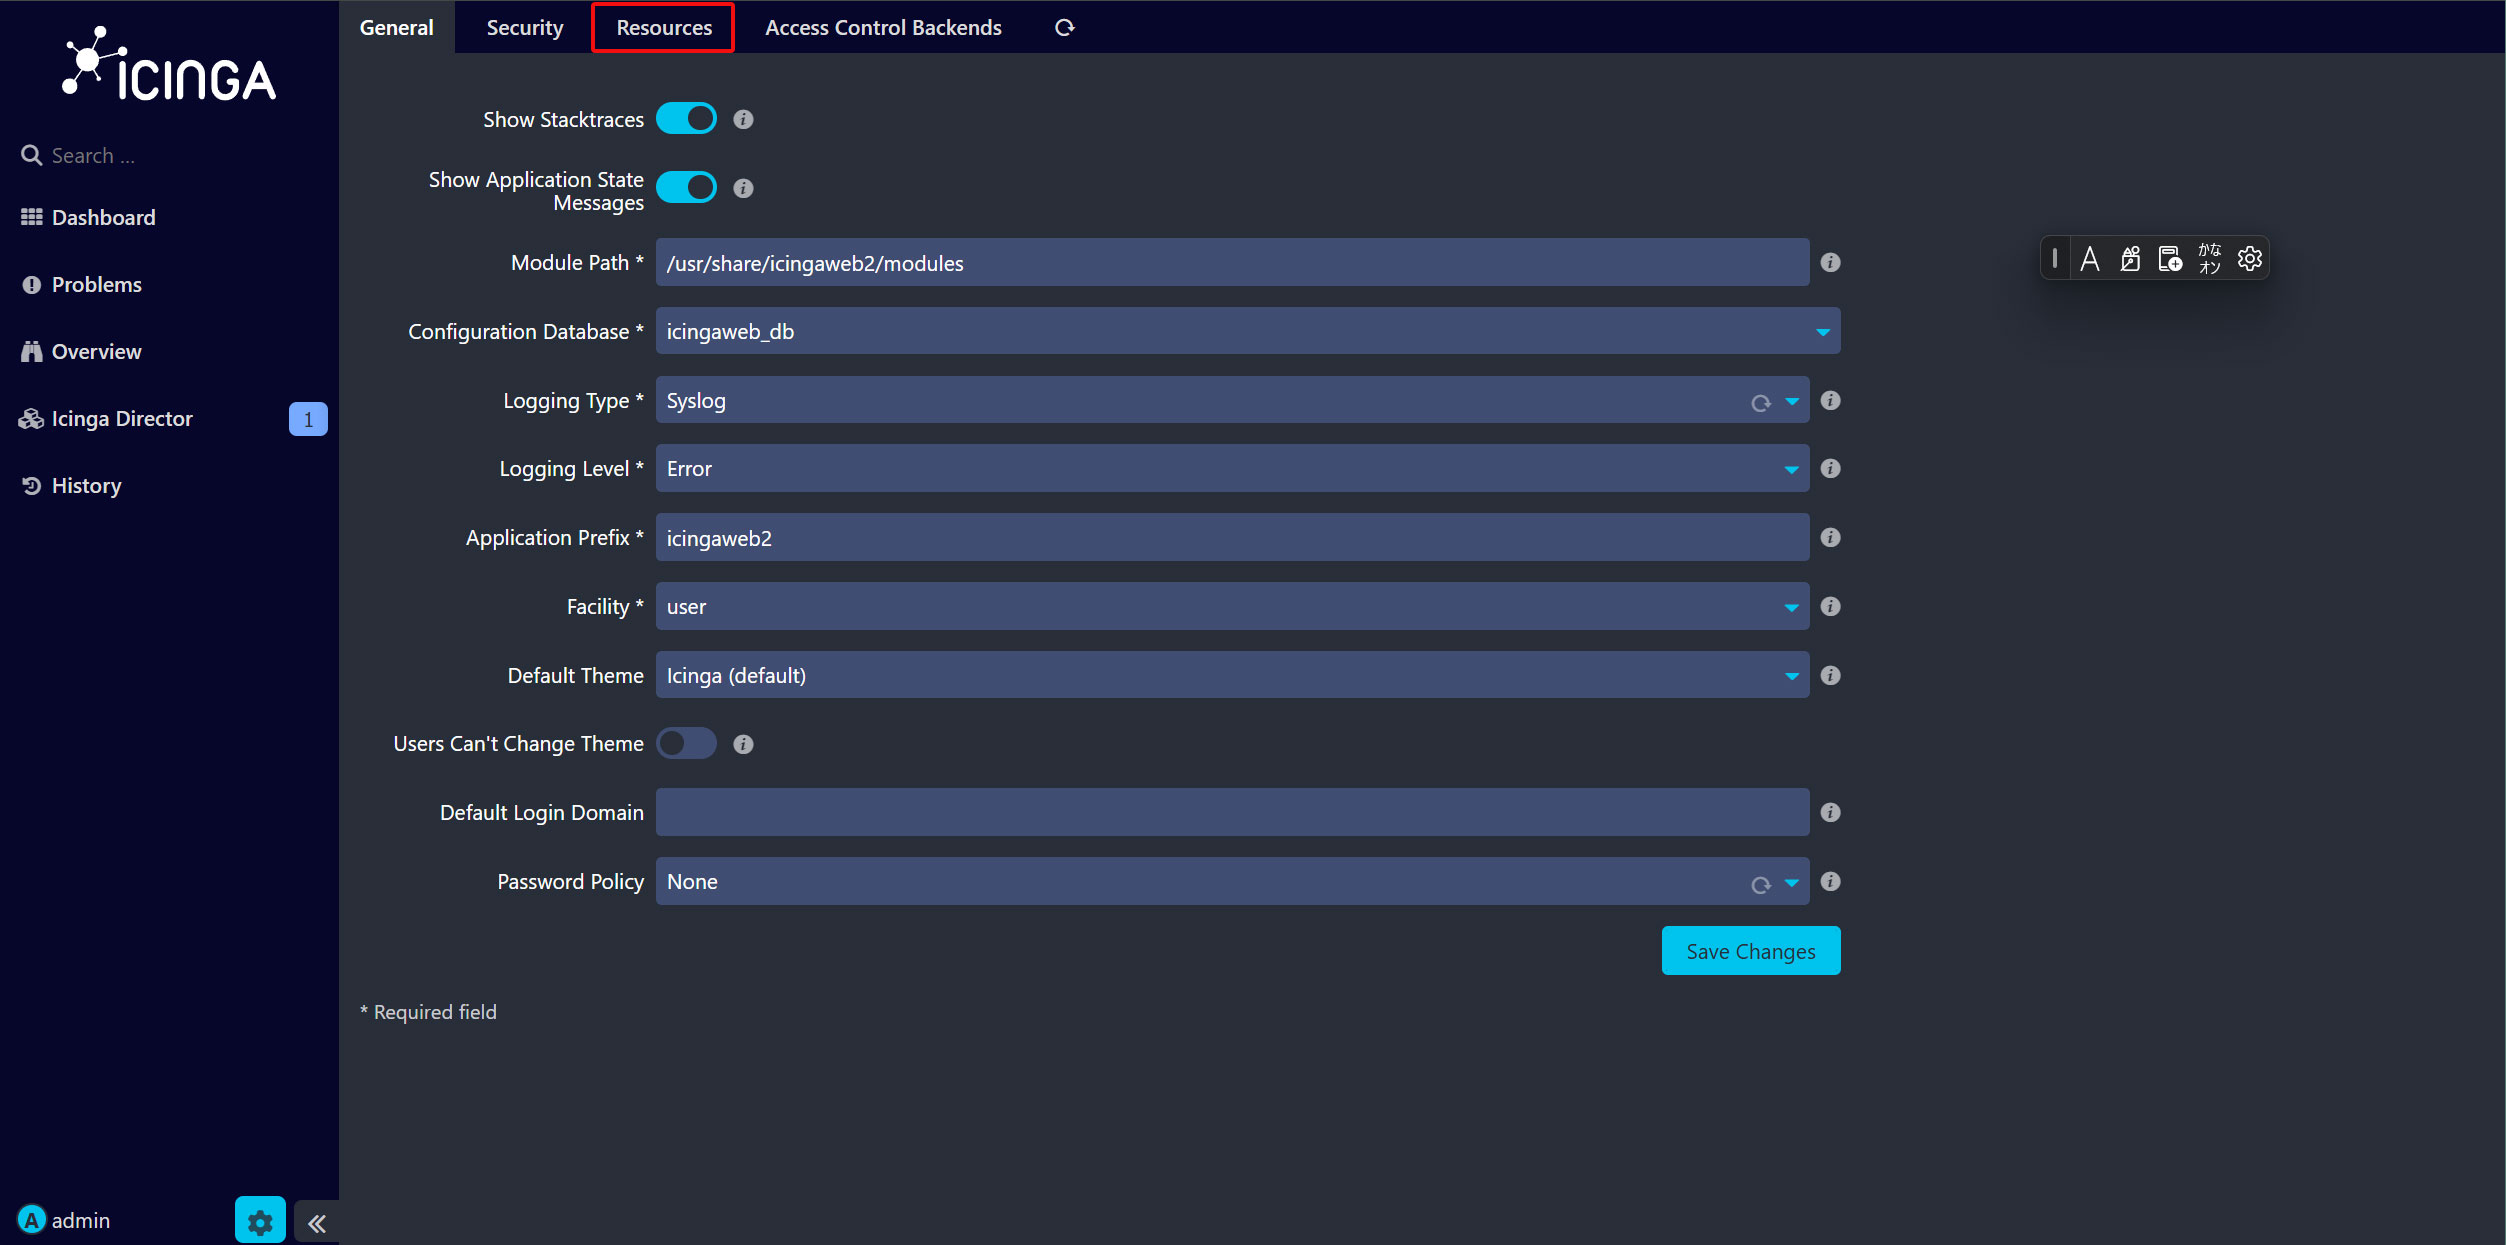
画面左ペインの右下の鍵マークをクリックし、「Configration」の「Application」を選択する。
ここで、「Resources」タブをクリックする。
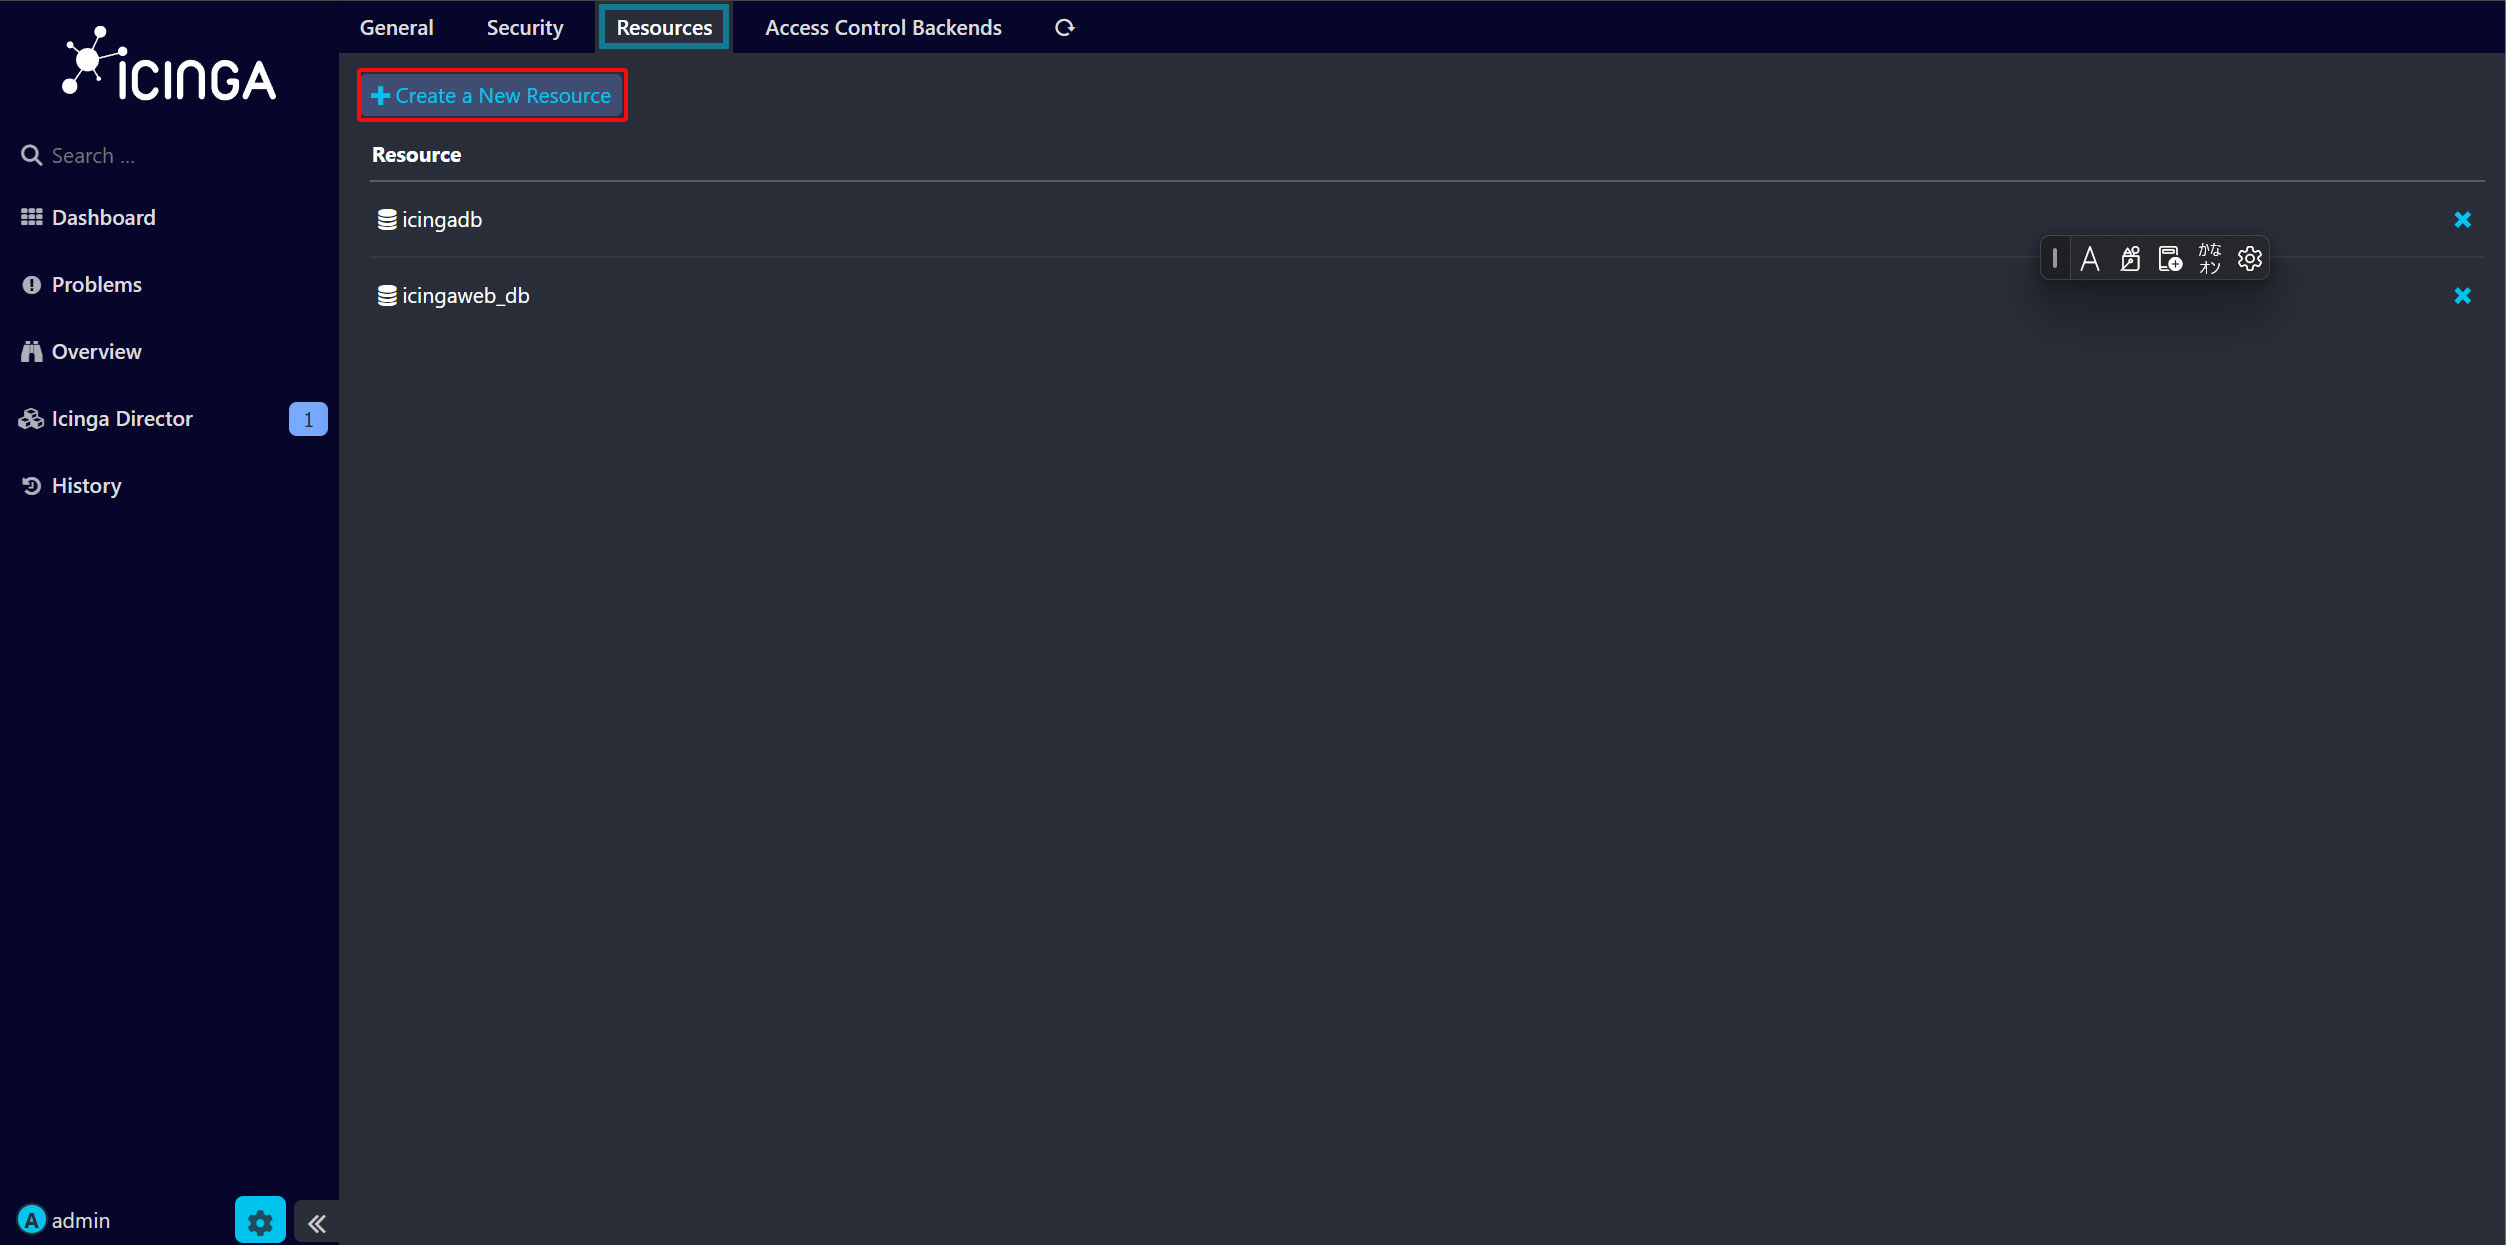
この画面の「Create a New Resource 」をクリックする。
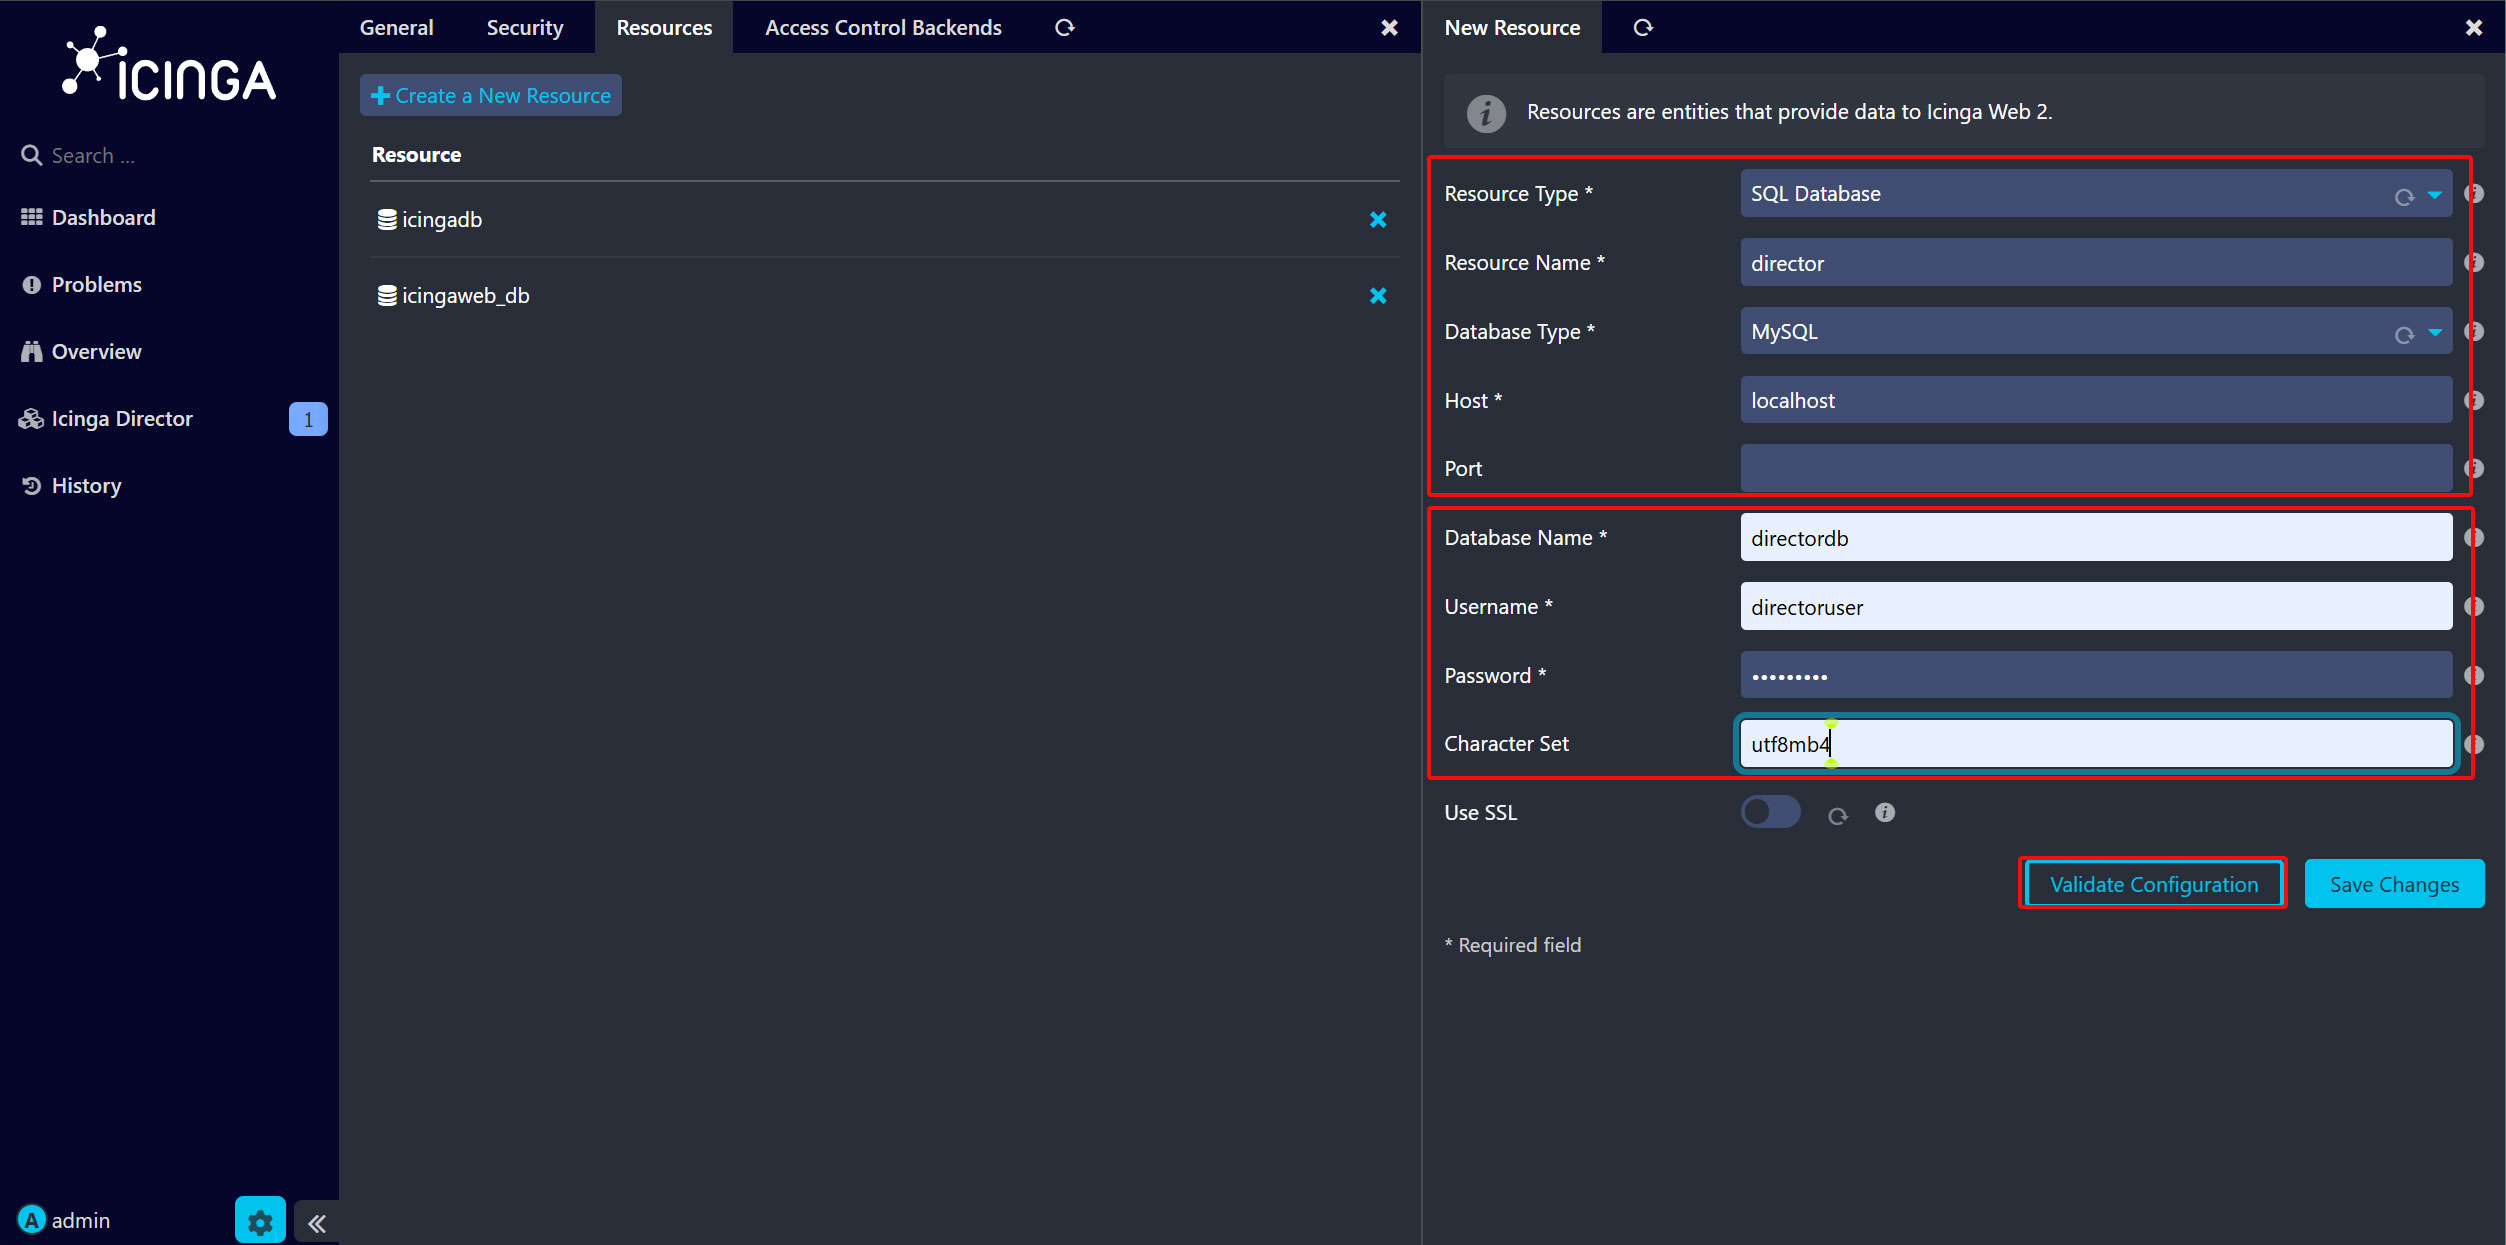
「リソースの種類」で “SQL Database” を選択、「Resource Nmae」に “director”、「Database Type」に “MySQL” を指定、「Database Name」、「Username」、「Password」に先ほど director 用に作成したデータベースのものを入力、「文字コード」には “utf8” を指定する。
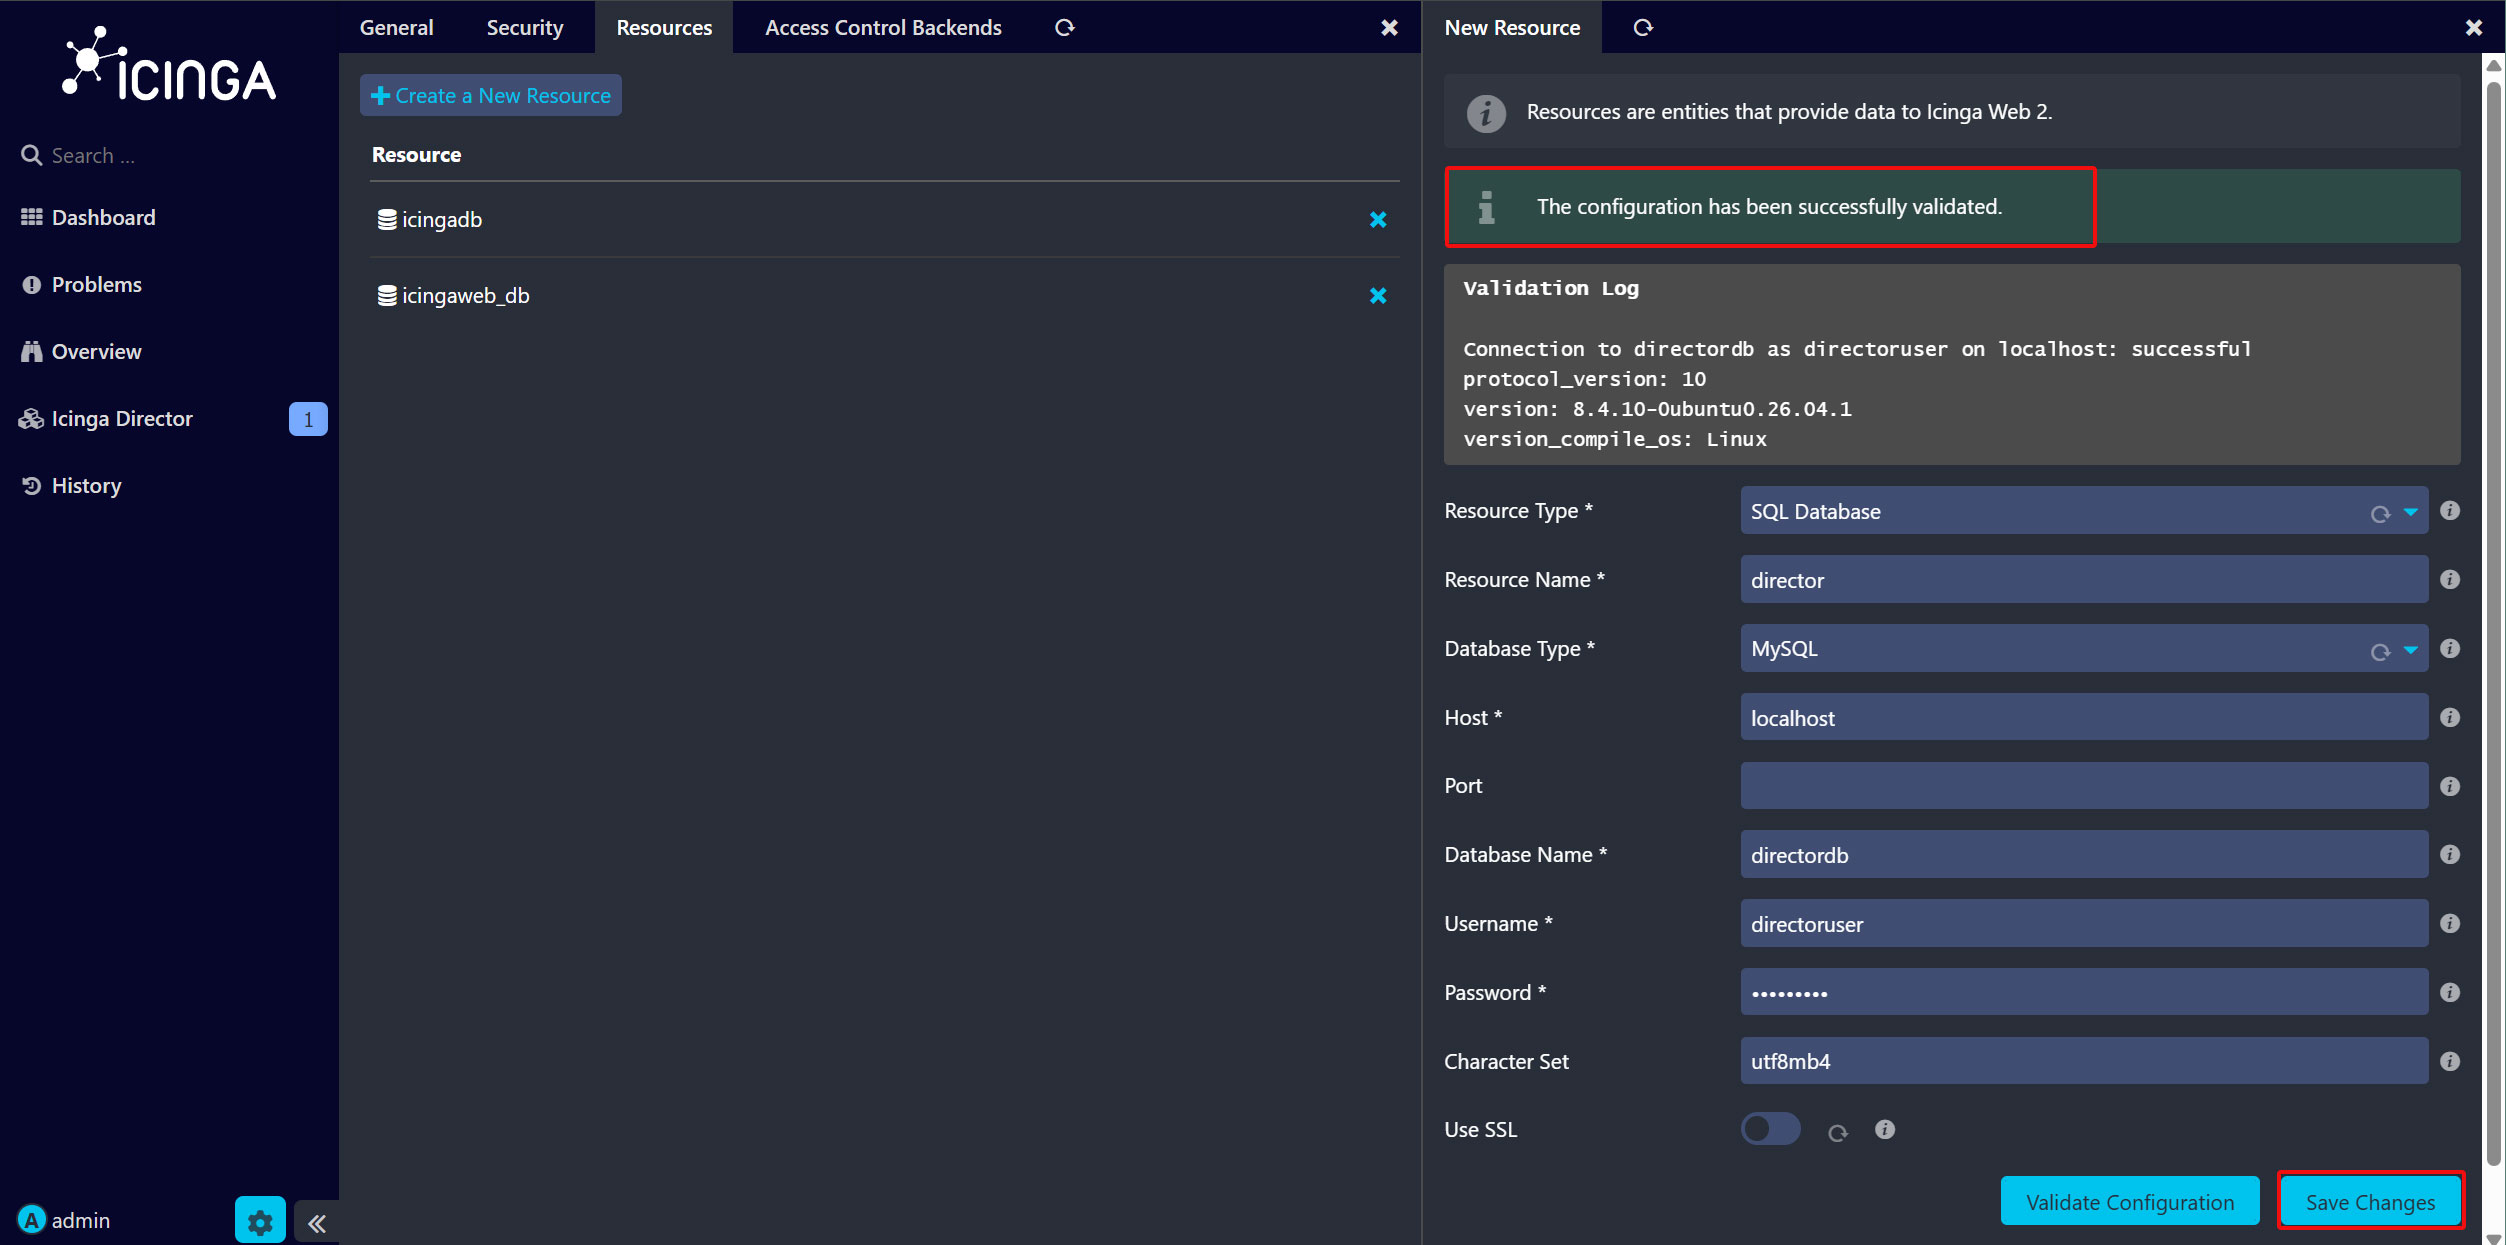
「Validate Configuration」をクリックして問題なければ「Save Changes」をクリックする。
「データベースバックエンド」の設定
画面左ペインの「Icinga Director」をクリック
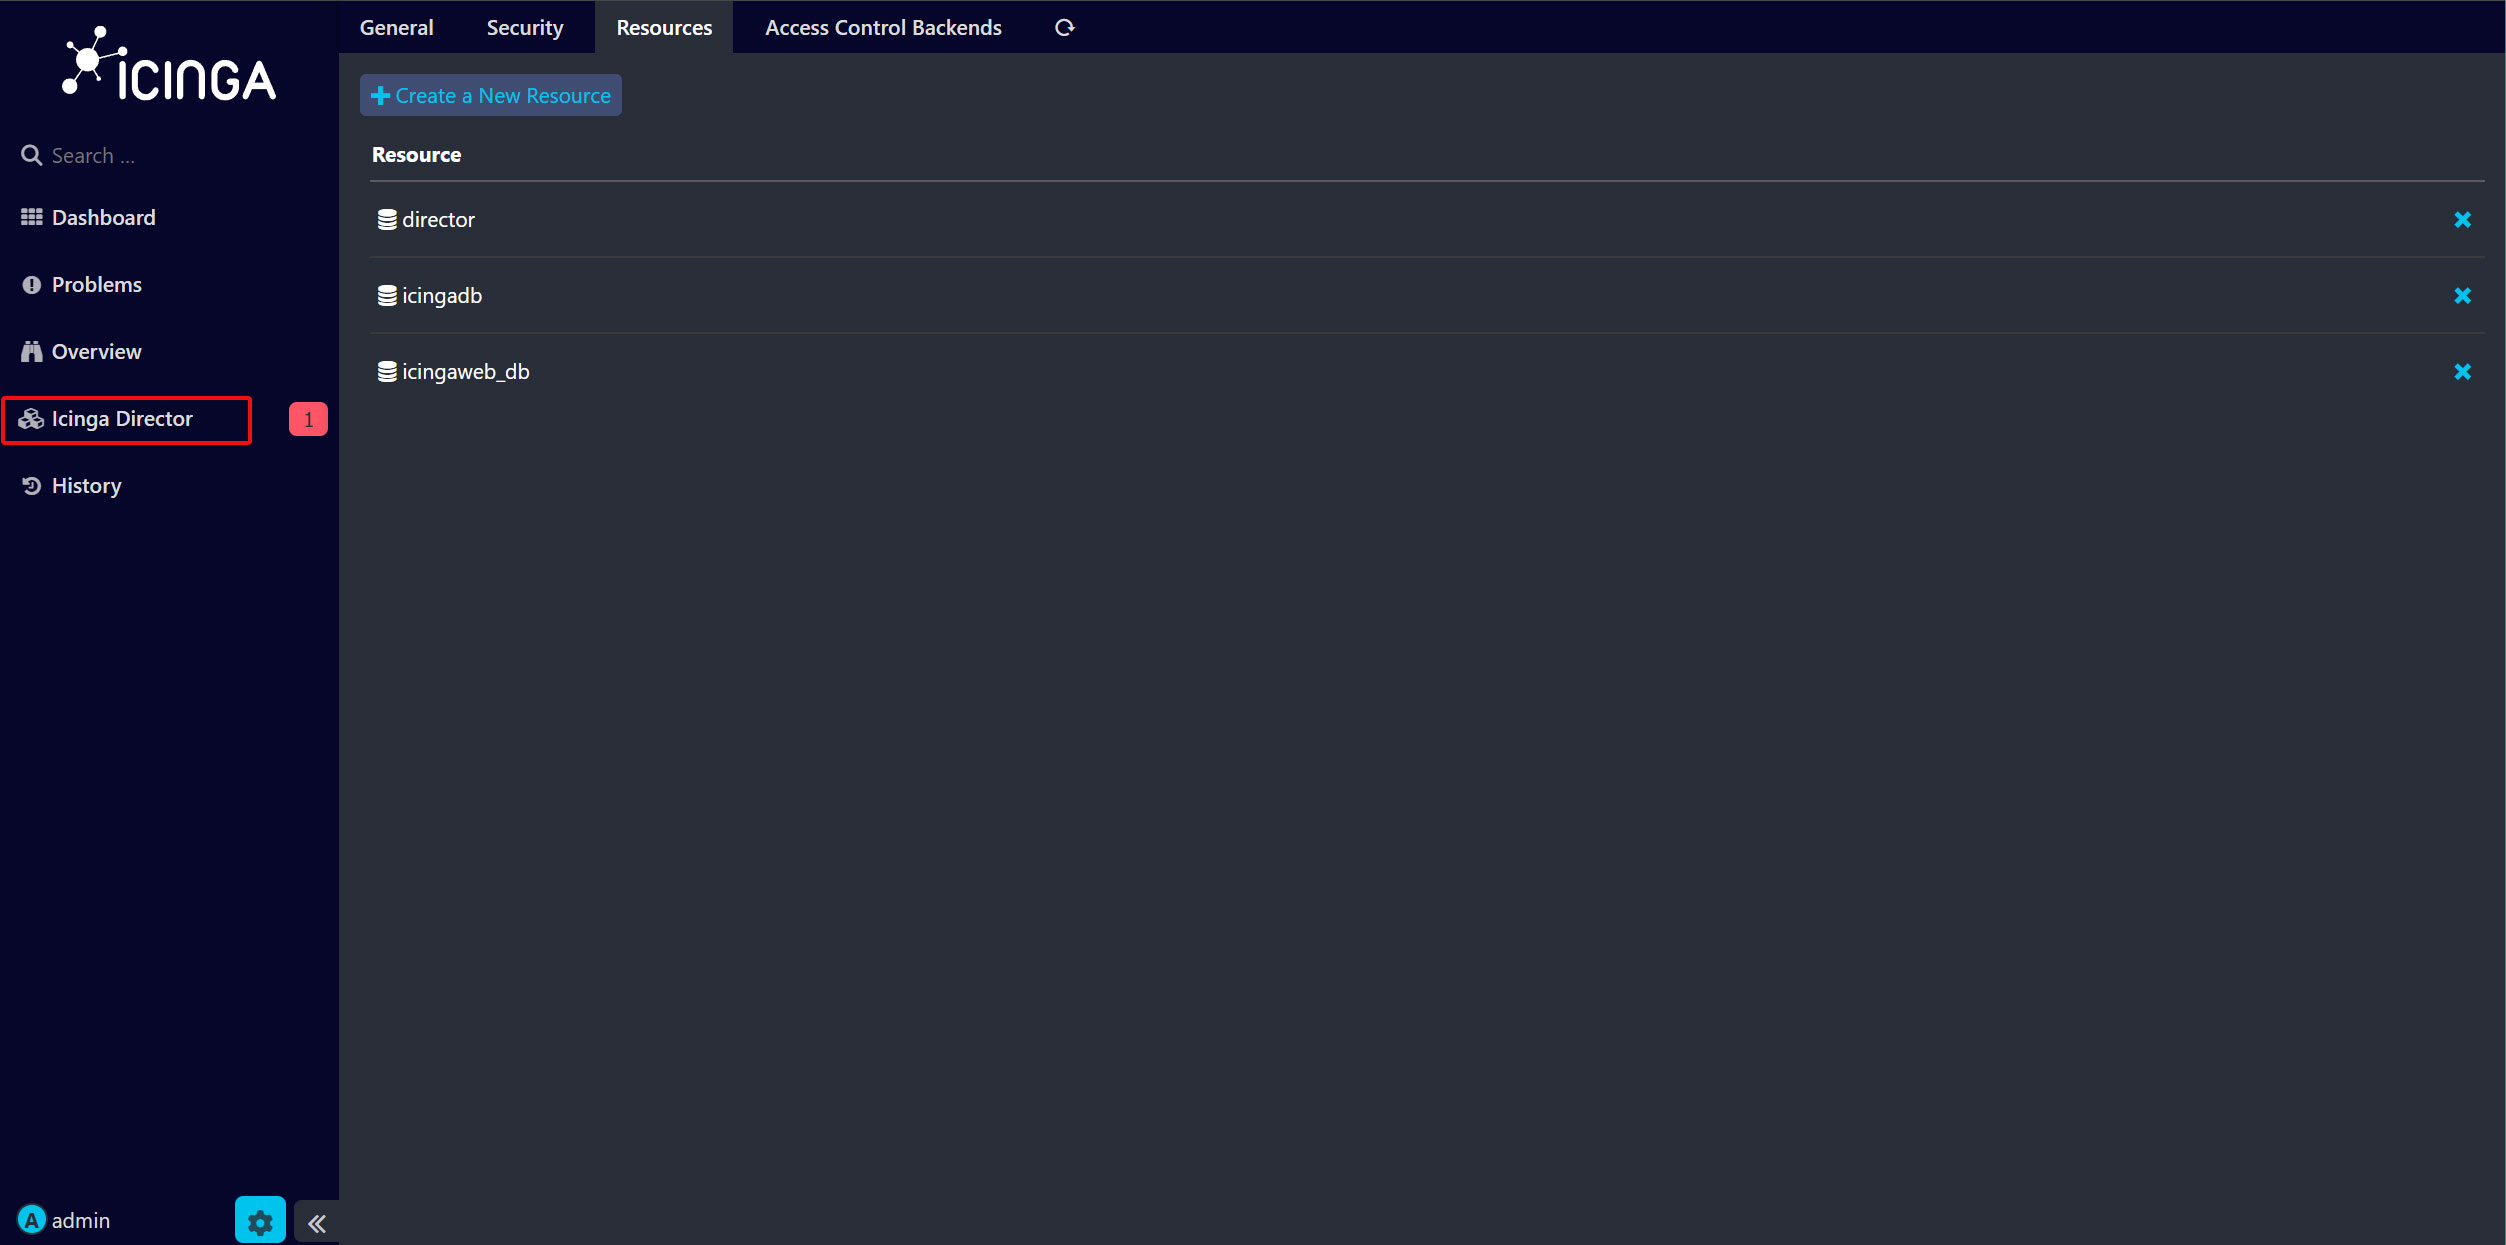
「DB Resource」で “director” を選択
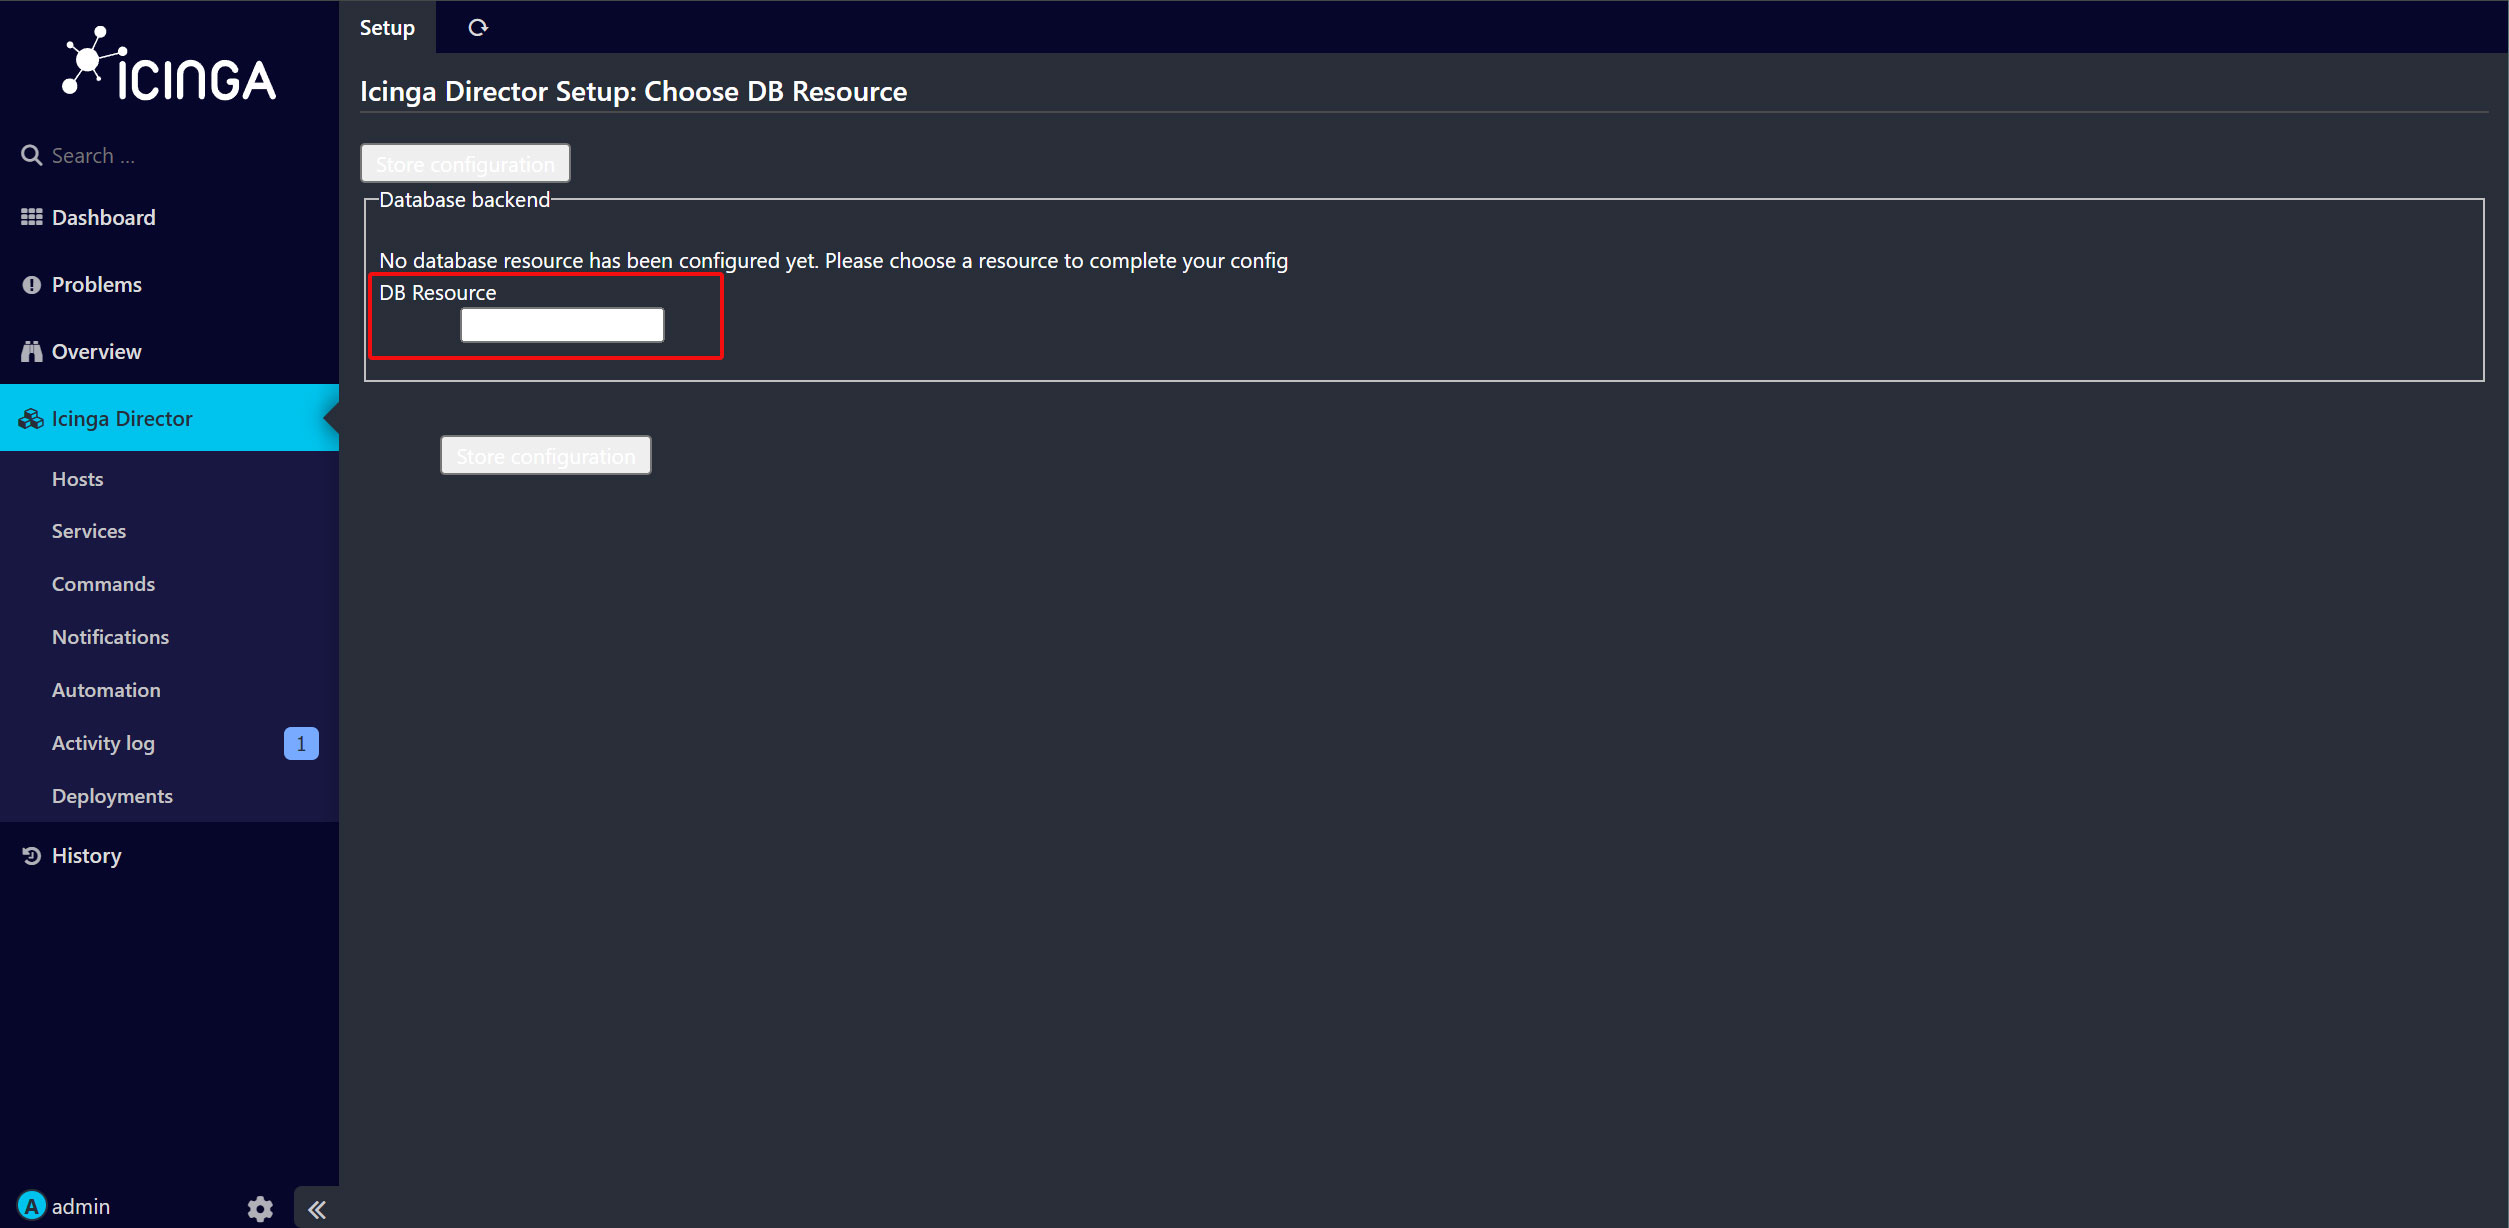
すると次の画面に自動的に切り替わる。
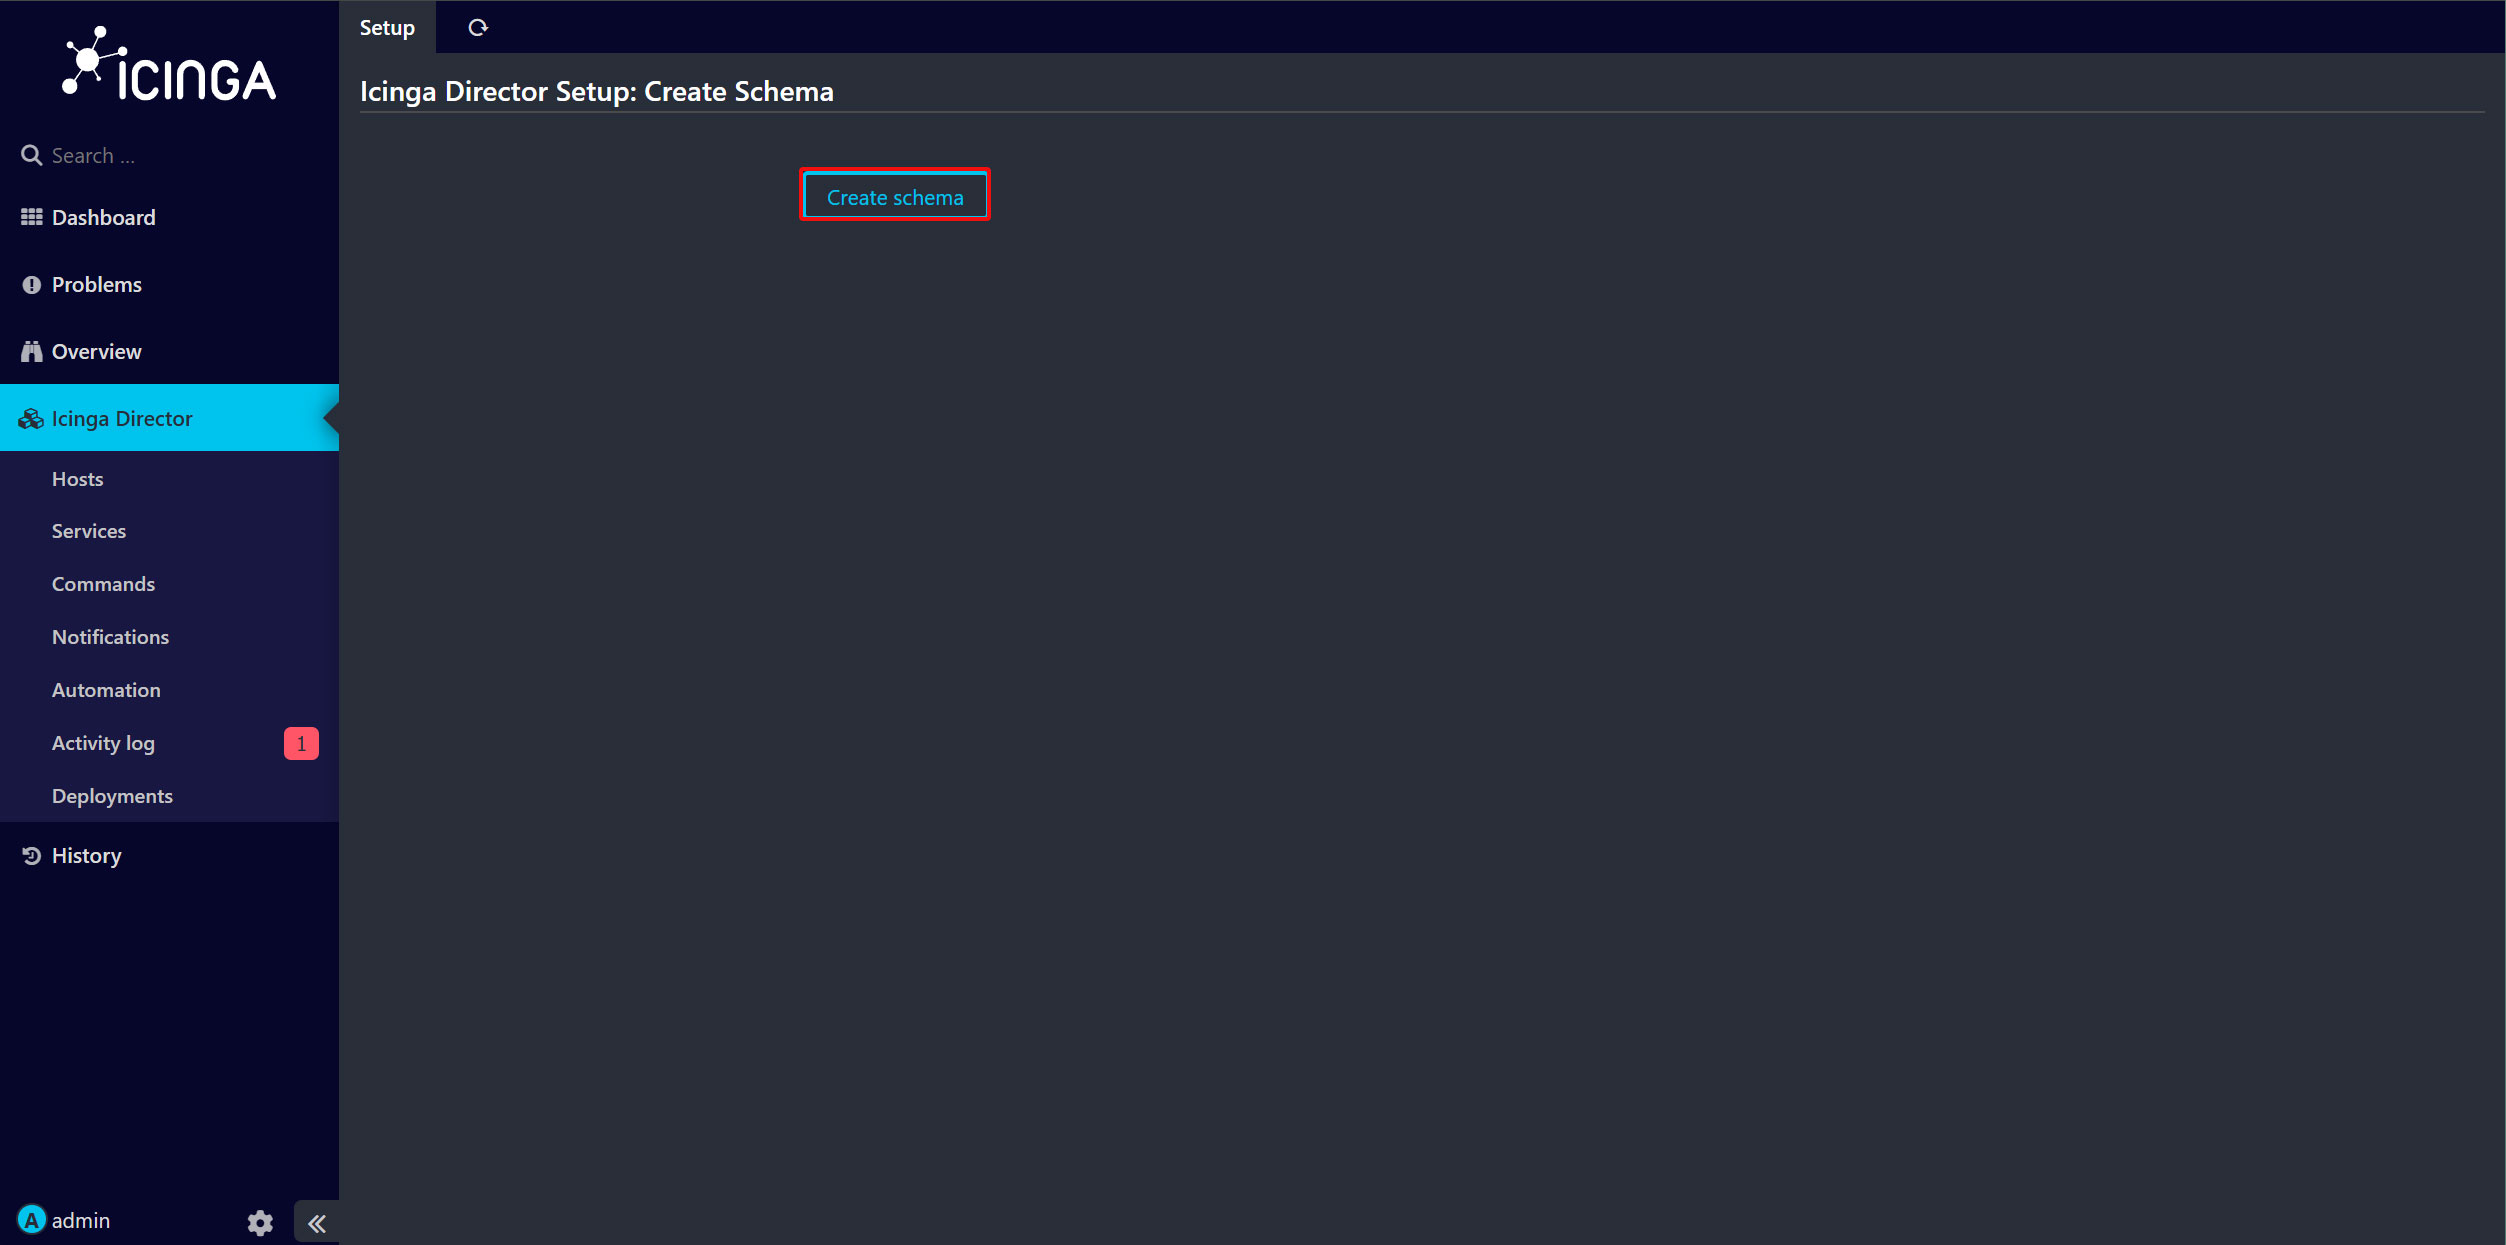
上記画面で「Create Schema」をクリックするとしばらく時間が経過したのち以下の「キックスタートウィザード」画面になる。
キックスタートウィザード画面
Endpoint Name: # hostname -f で確認
Icinga Host : サーバの IP アドレス
API user , Passwrd : icinga api ユーザのユーザ名とパスワード
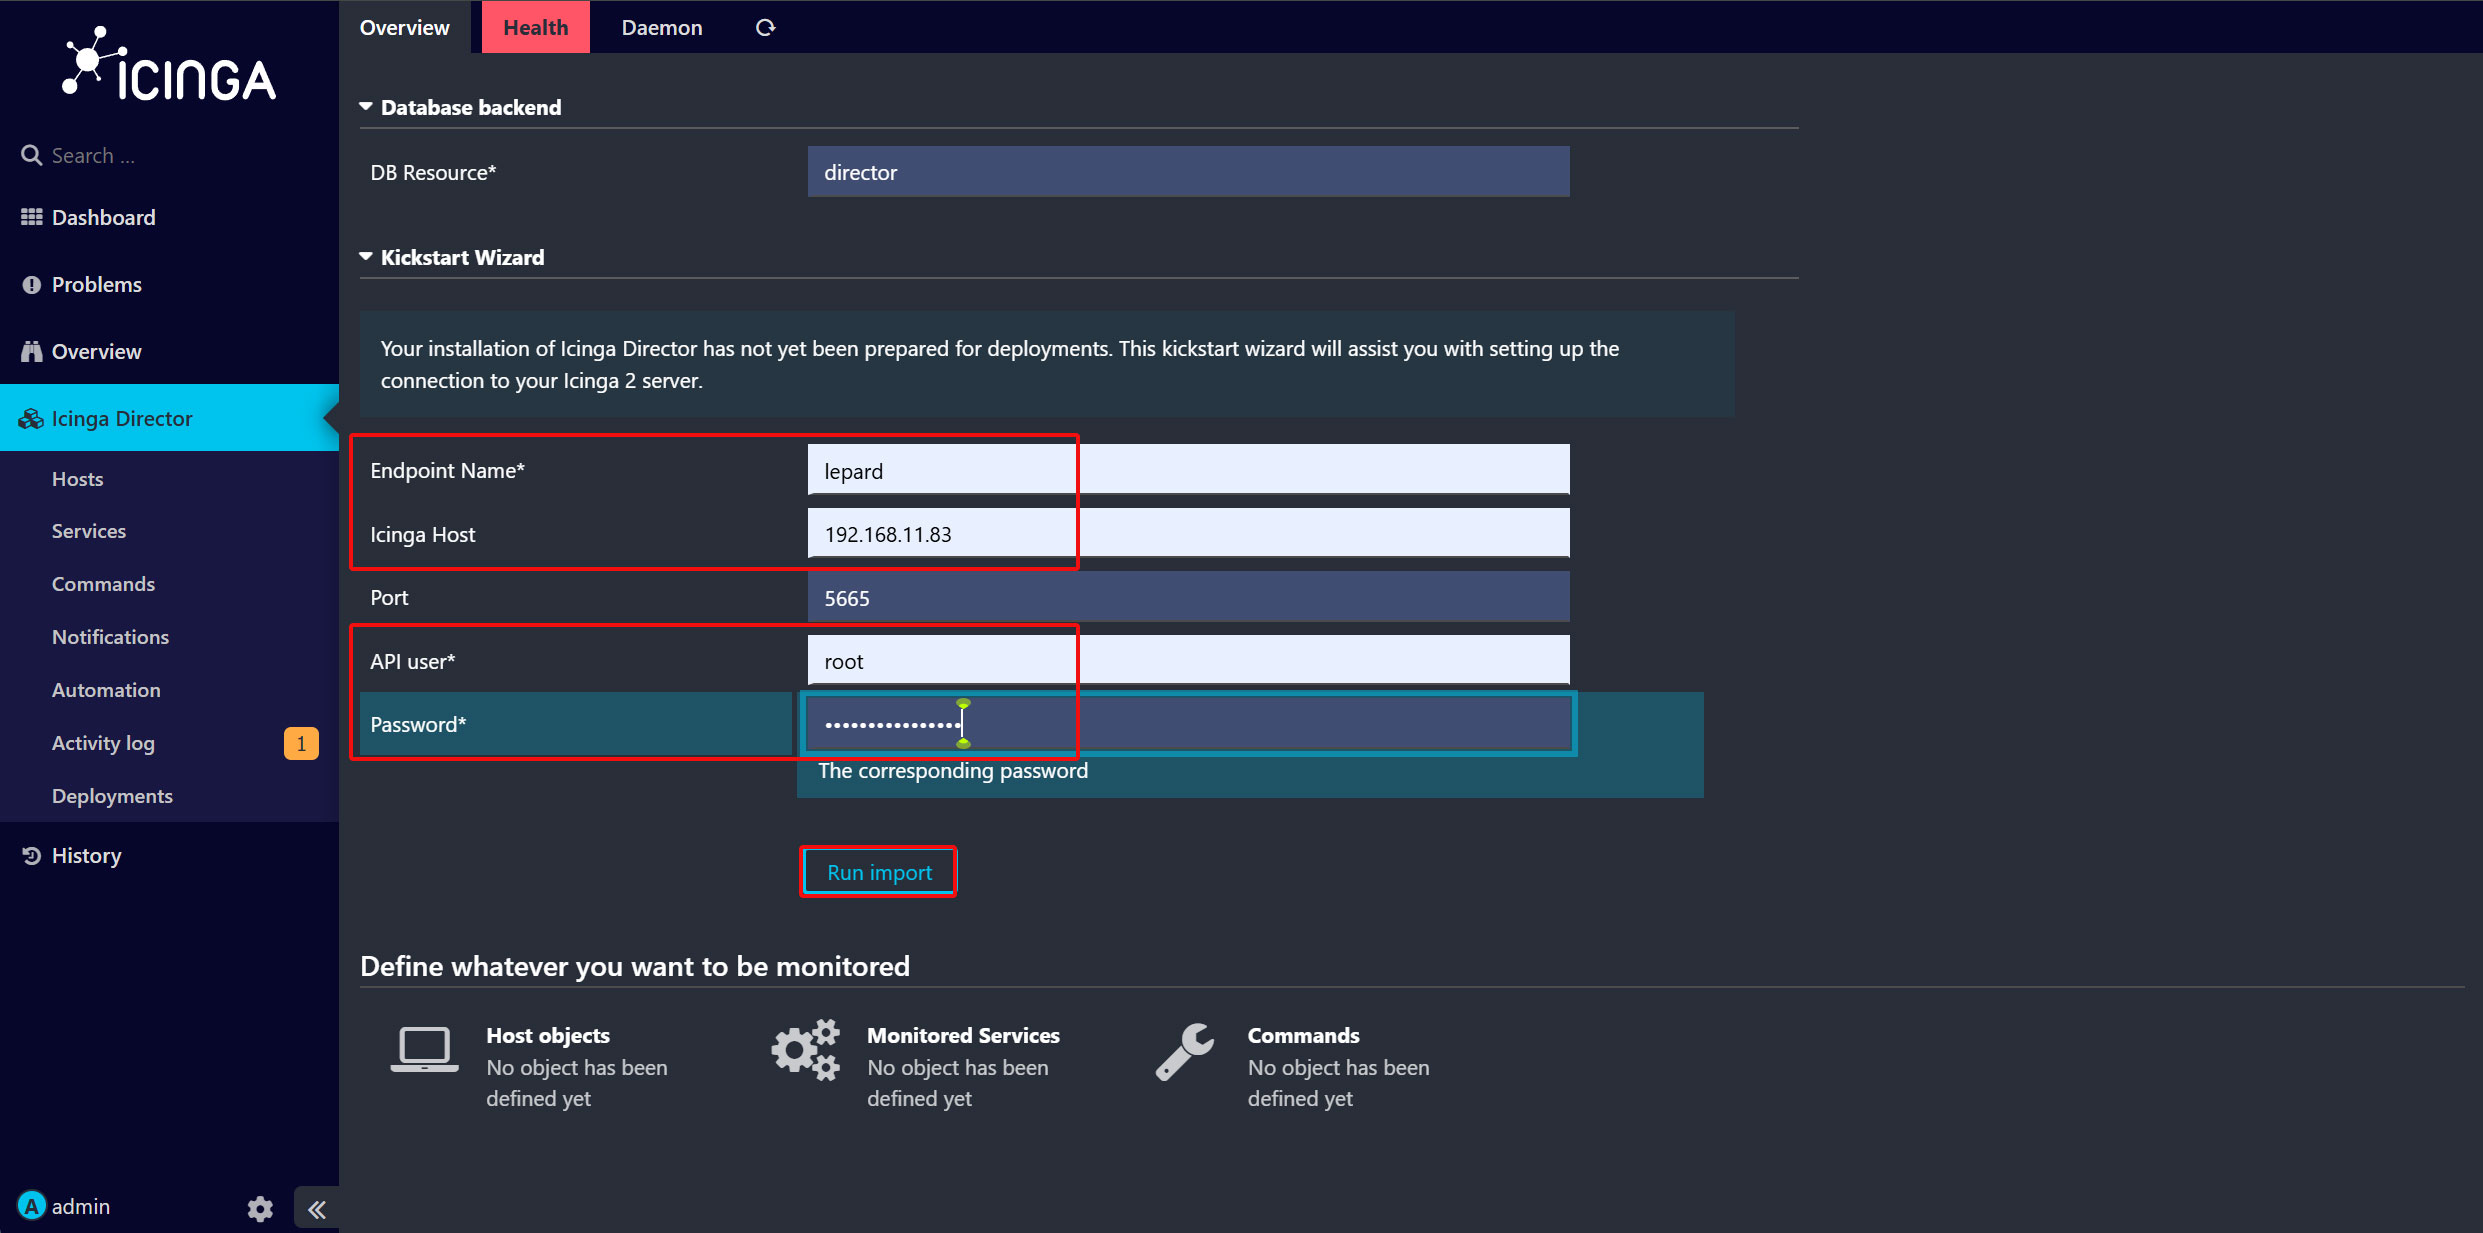
入力が終わったら「Run import」をクリックする。
9. Icinga Directorで監視サービスの追加
9.1 Service Templateの作成
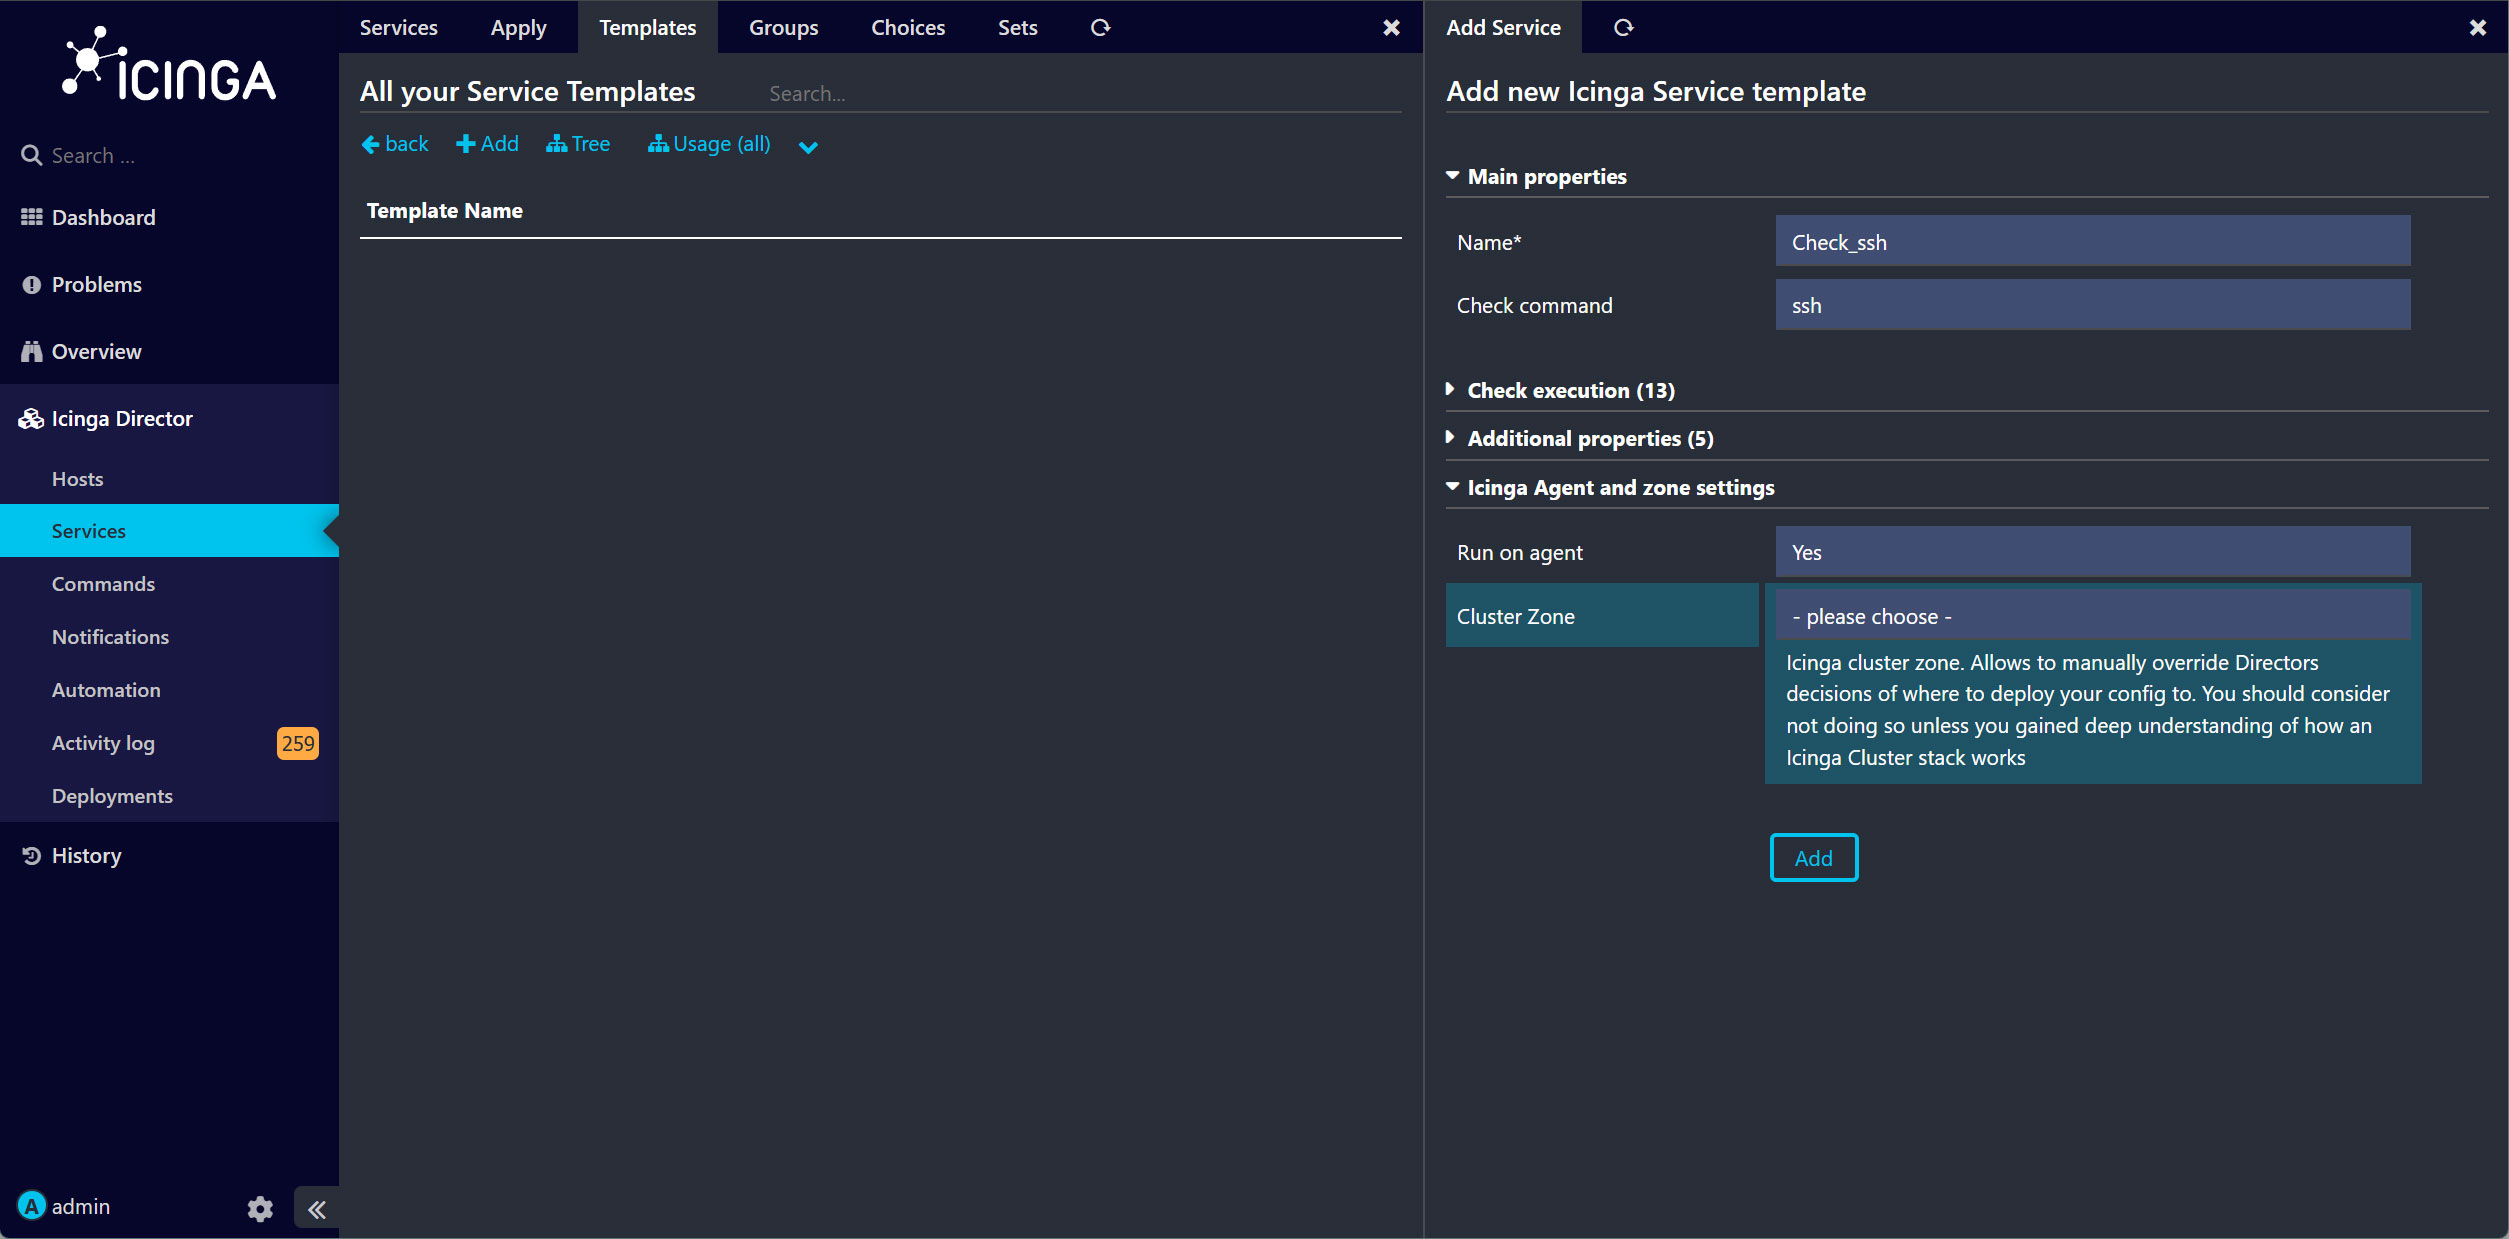
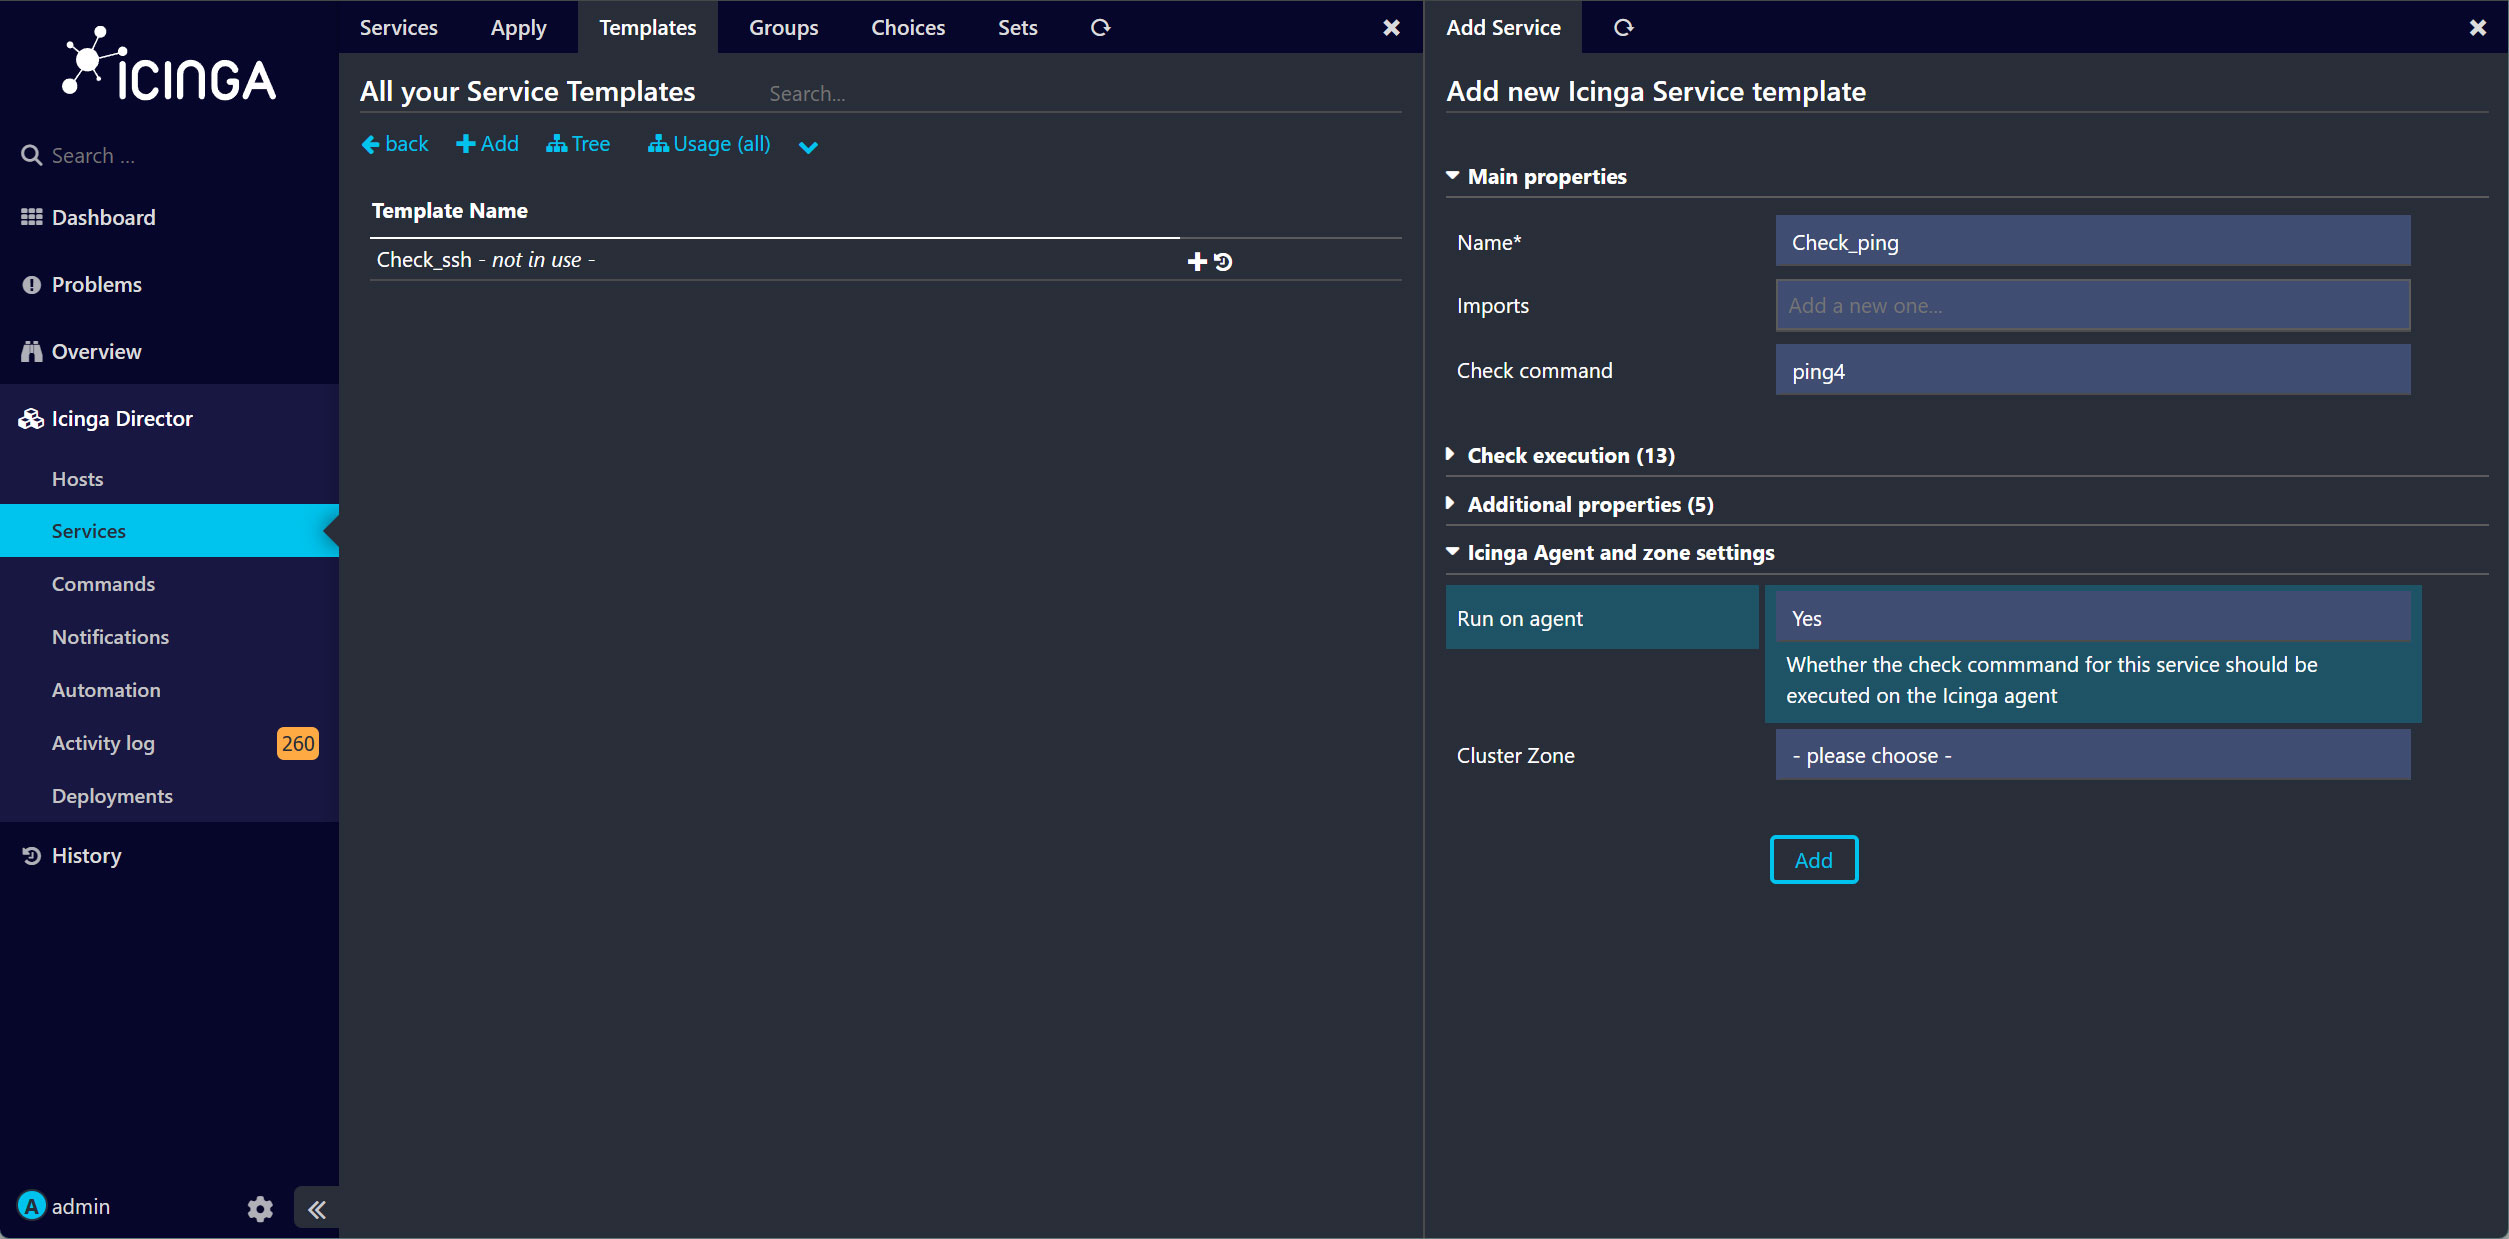
Icinga Director を使用して、今回はSSH、HTTP、PINGを監視するためのテンプレートを作成します。
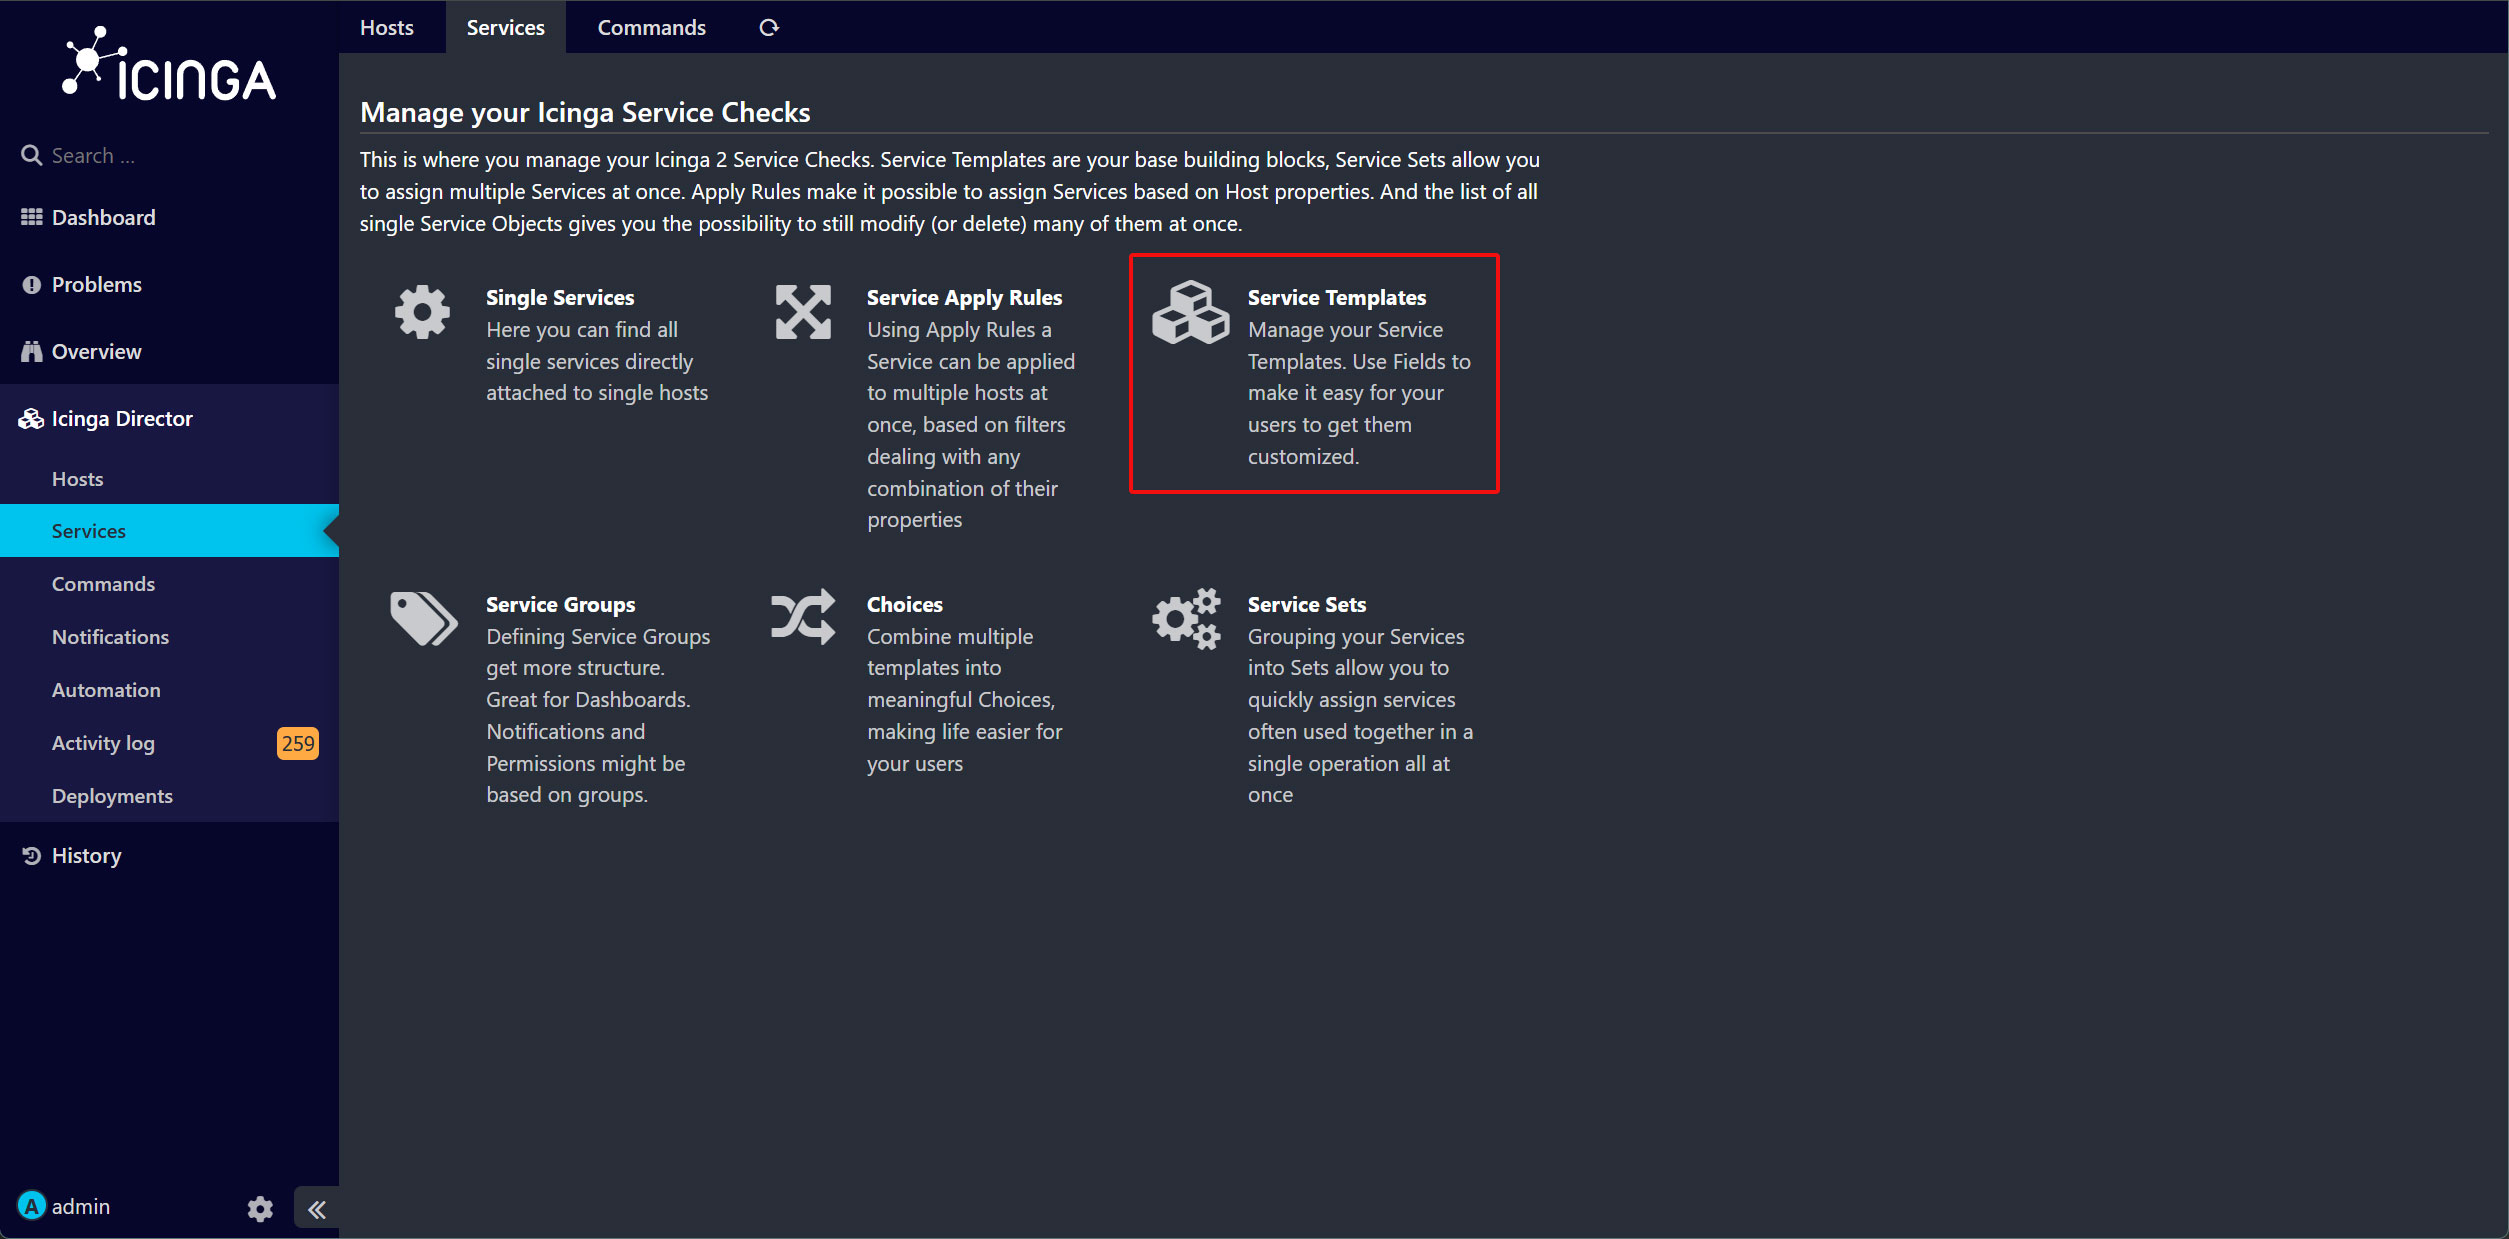
「Services」をクリックし、ページ上の「Service Templates」をクリック。
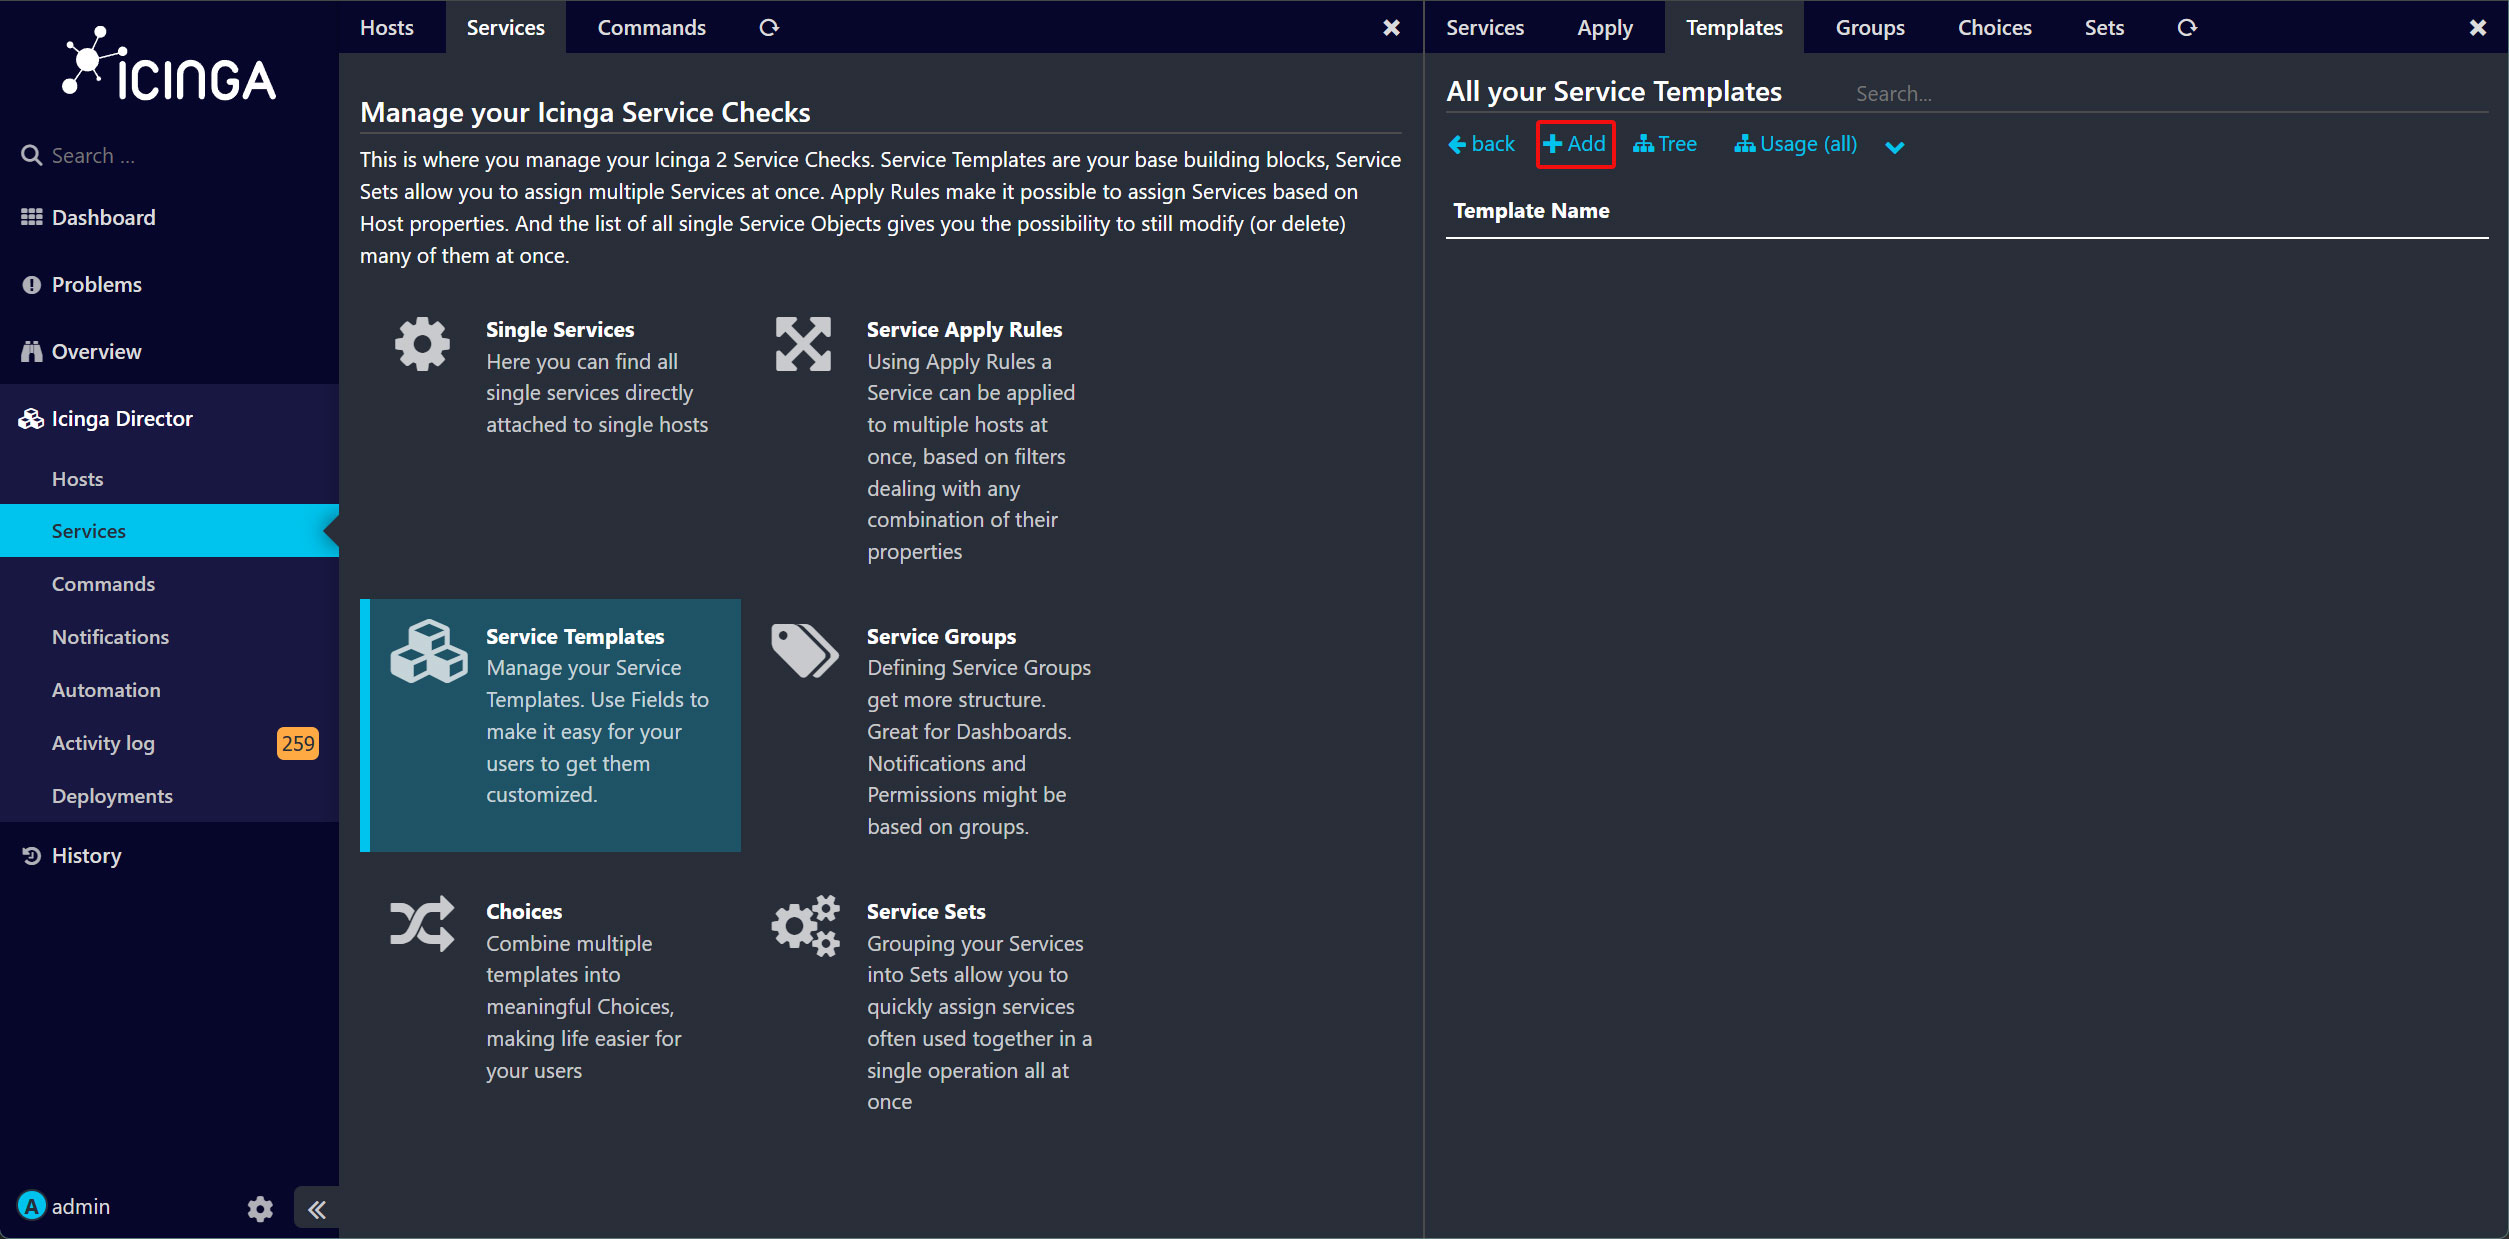
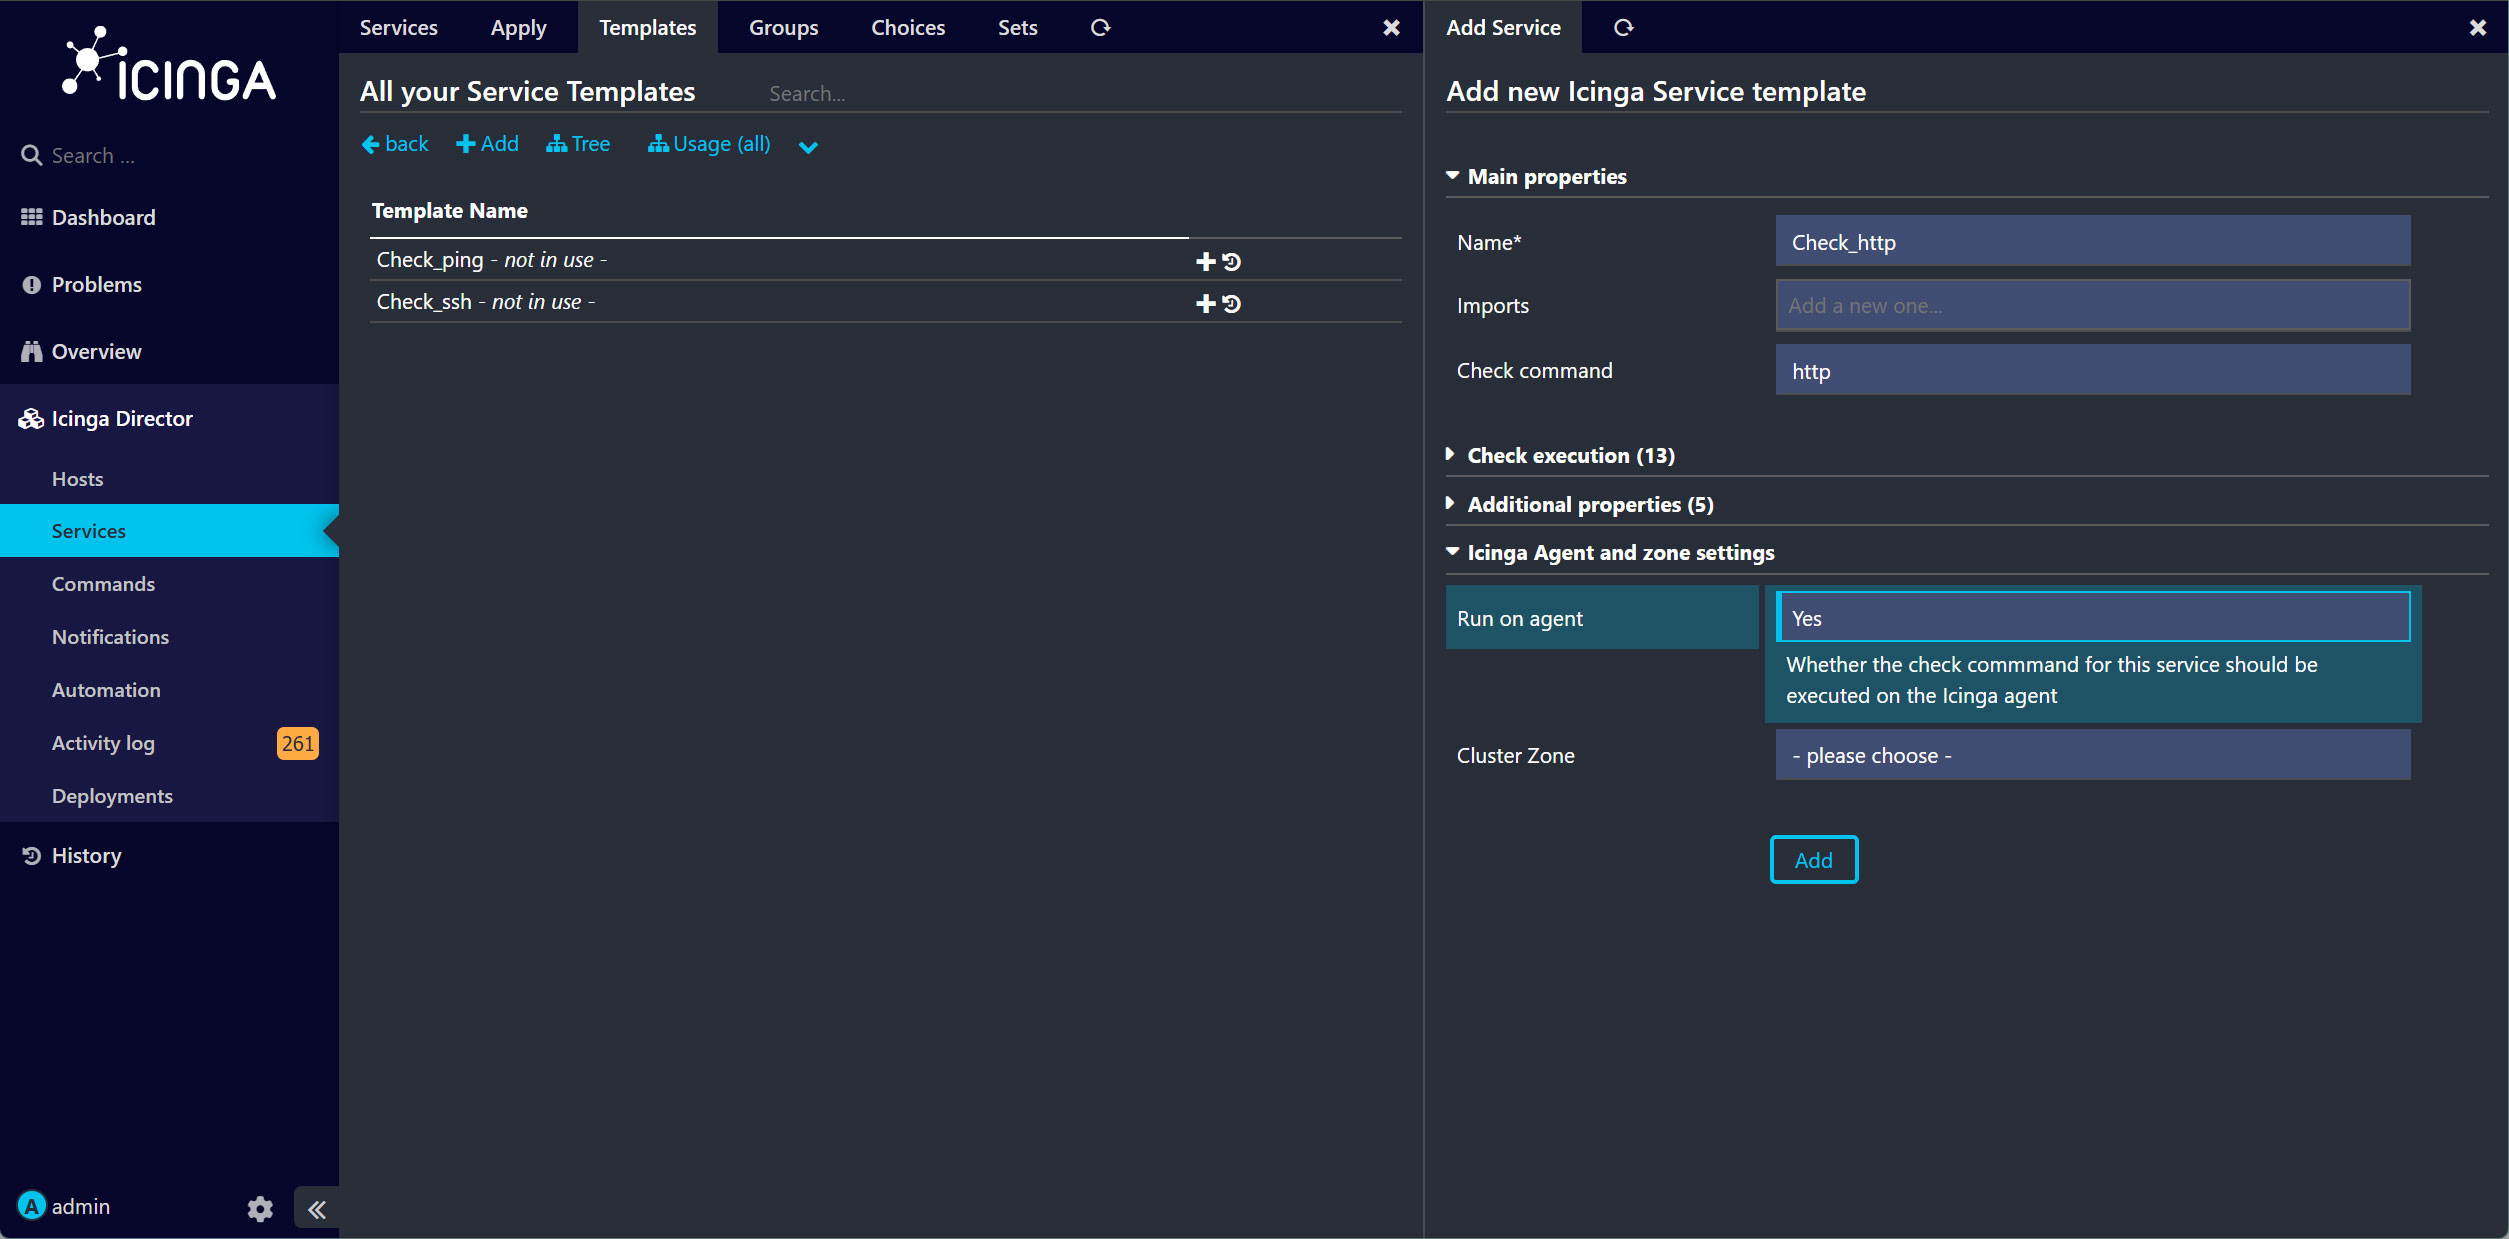
新しいService Templateを作成するには、「Add」ボタンをクリックします。
SSH サービスの監視に関する詳細を入力
同様にPING,HTTPサービスの監視に関する詳細を入力
9.2 サービスセットを作成し、Service Templateを追加する
作成したService Templateをを1つのServiceSetにまとめます。
「Services」ページで、「Service Sets」をクリック
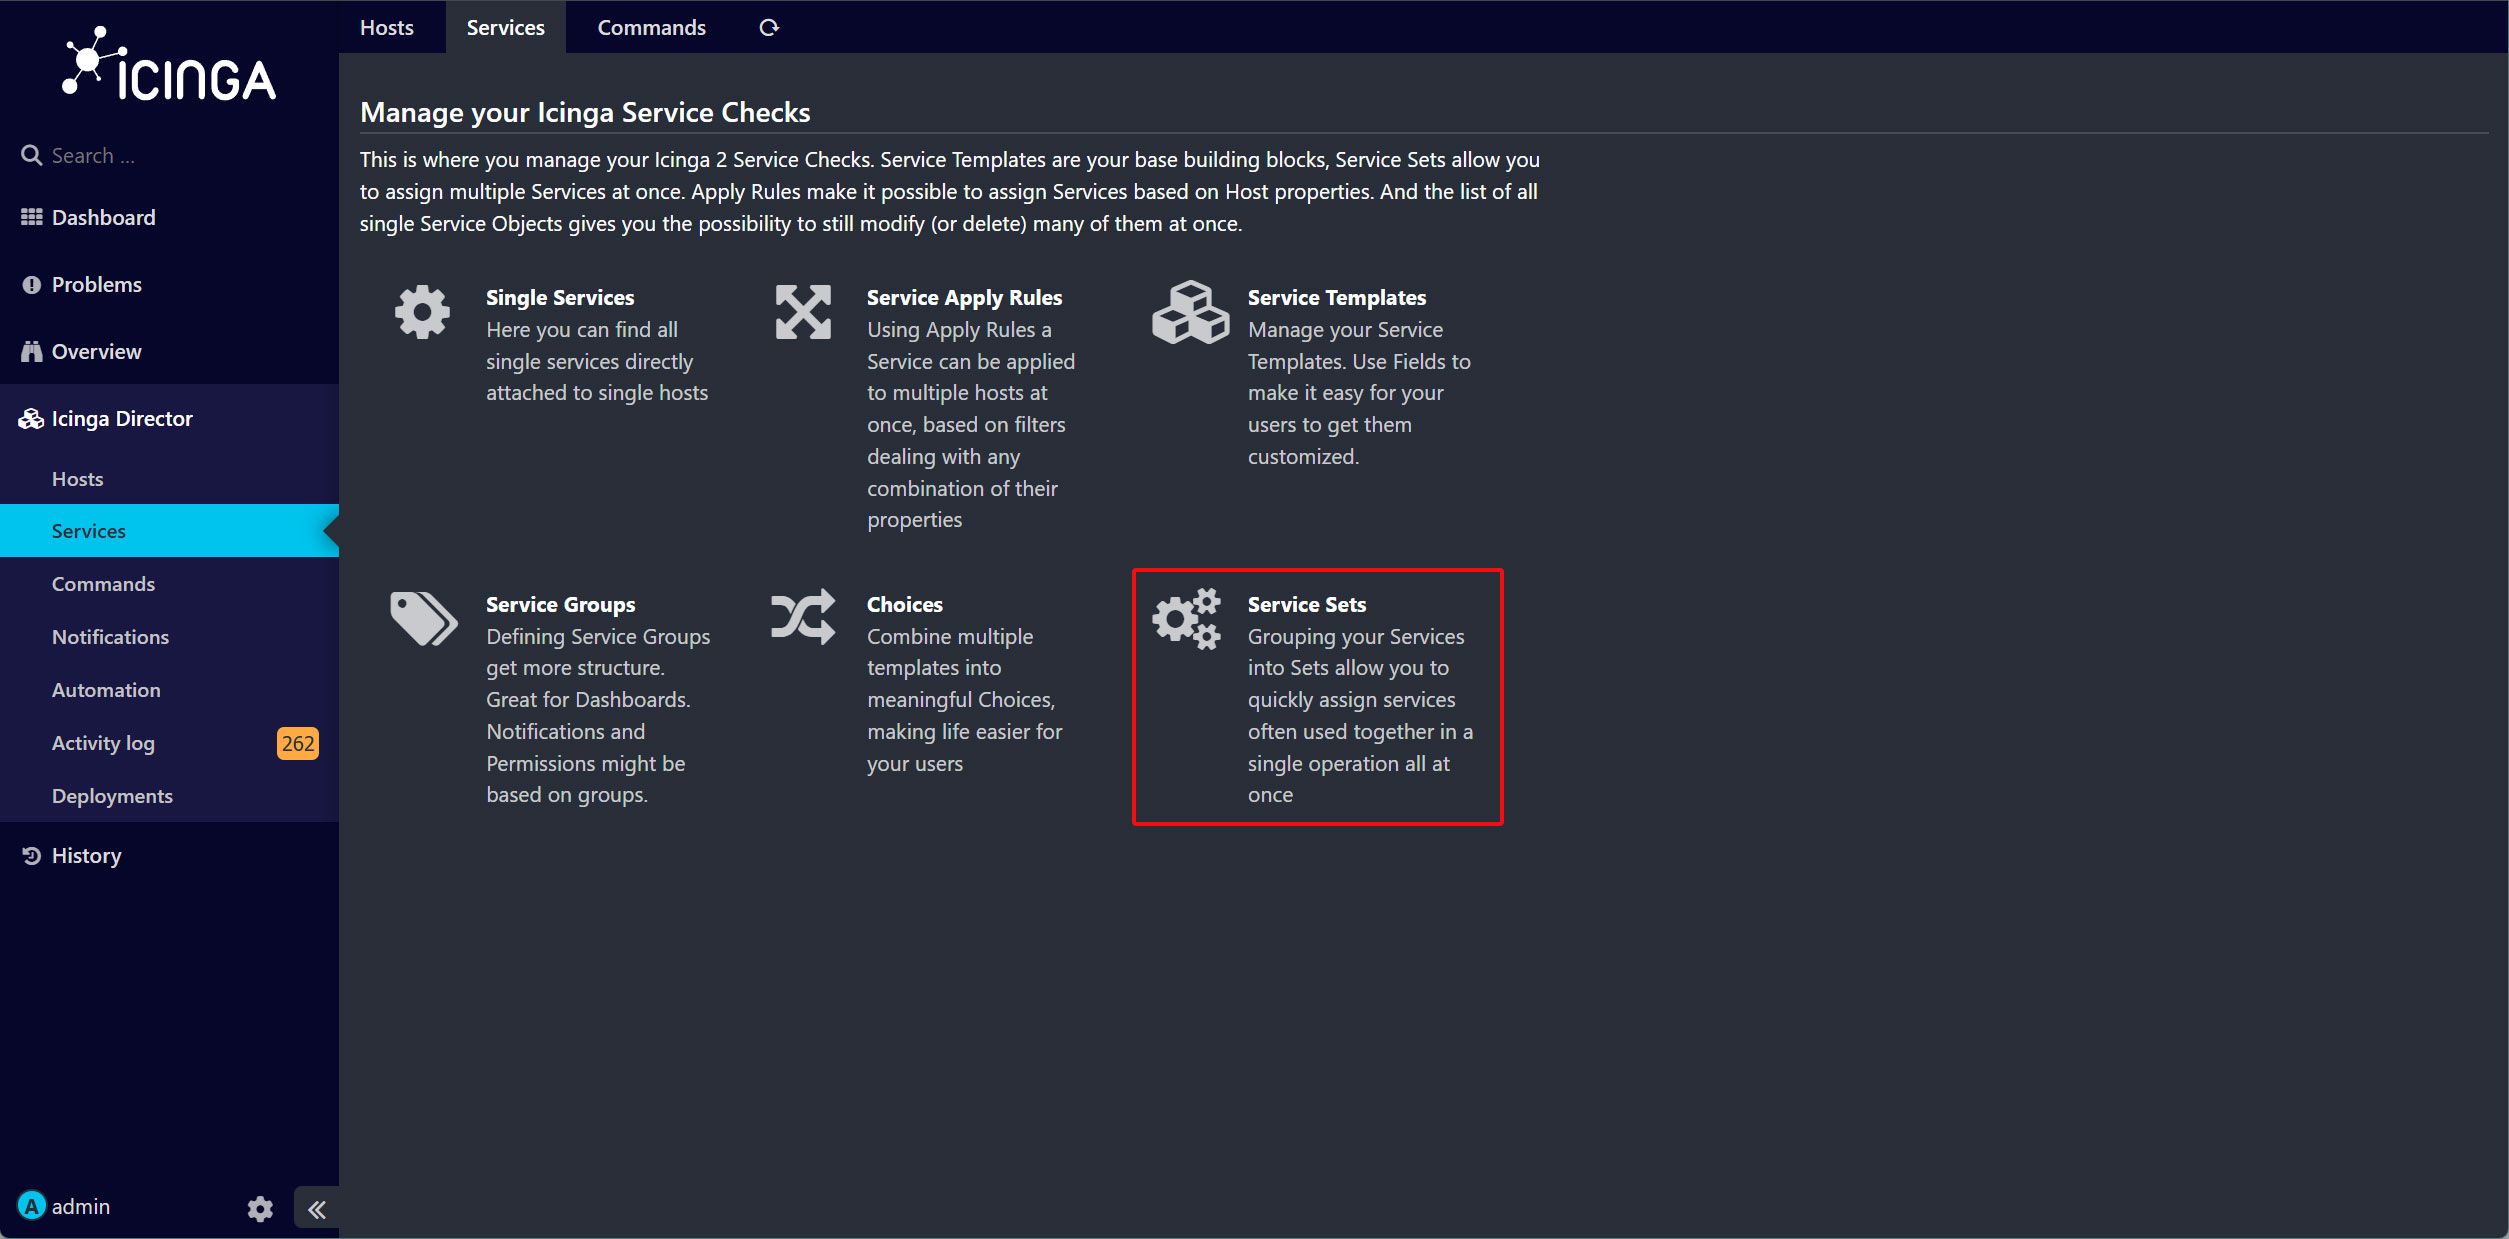
「Add」ボタンをクリック
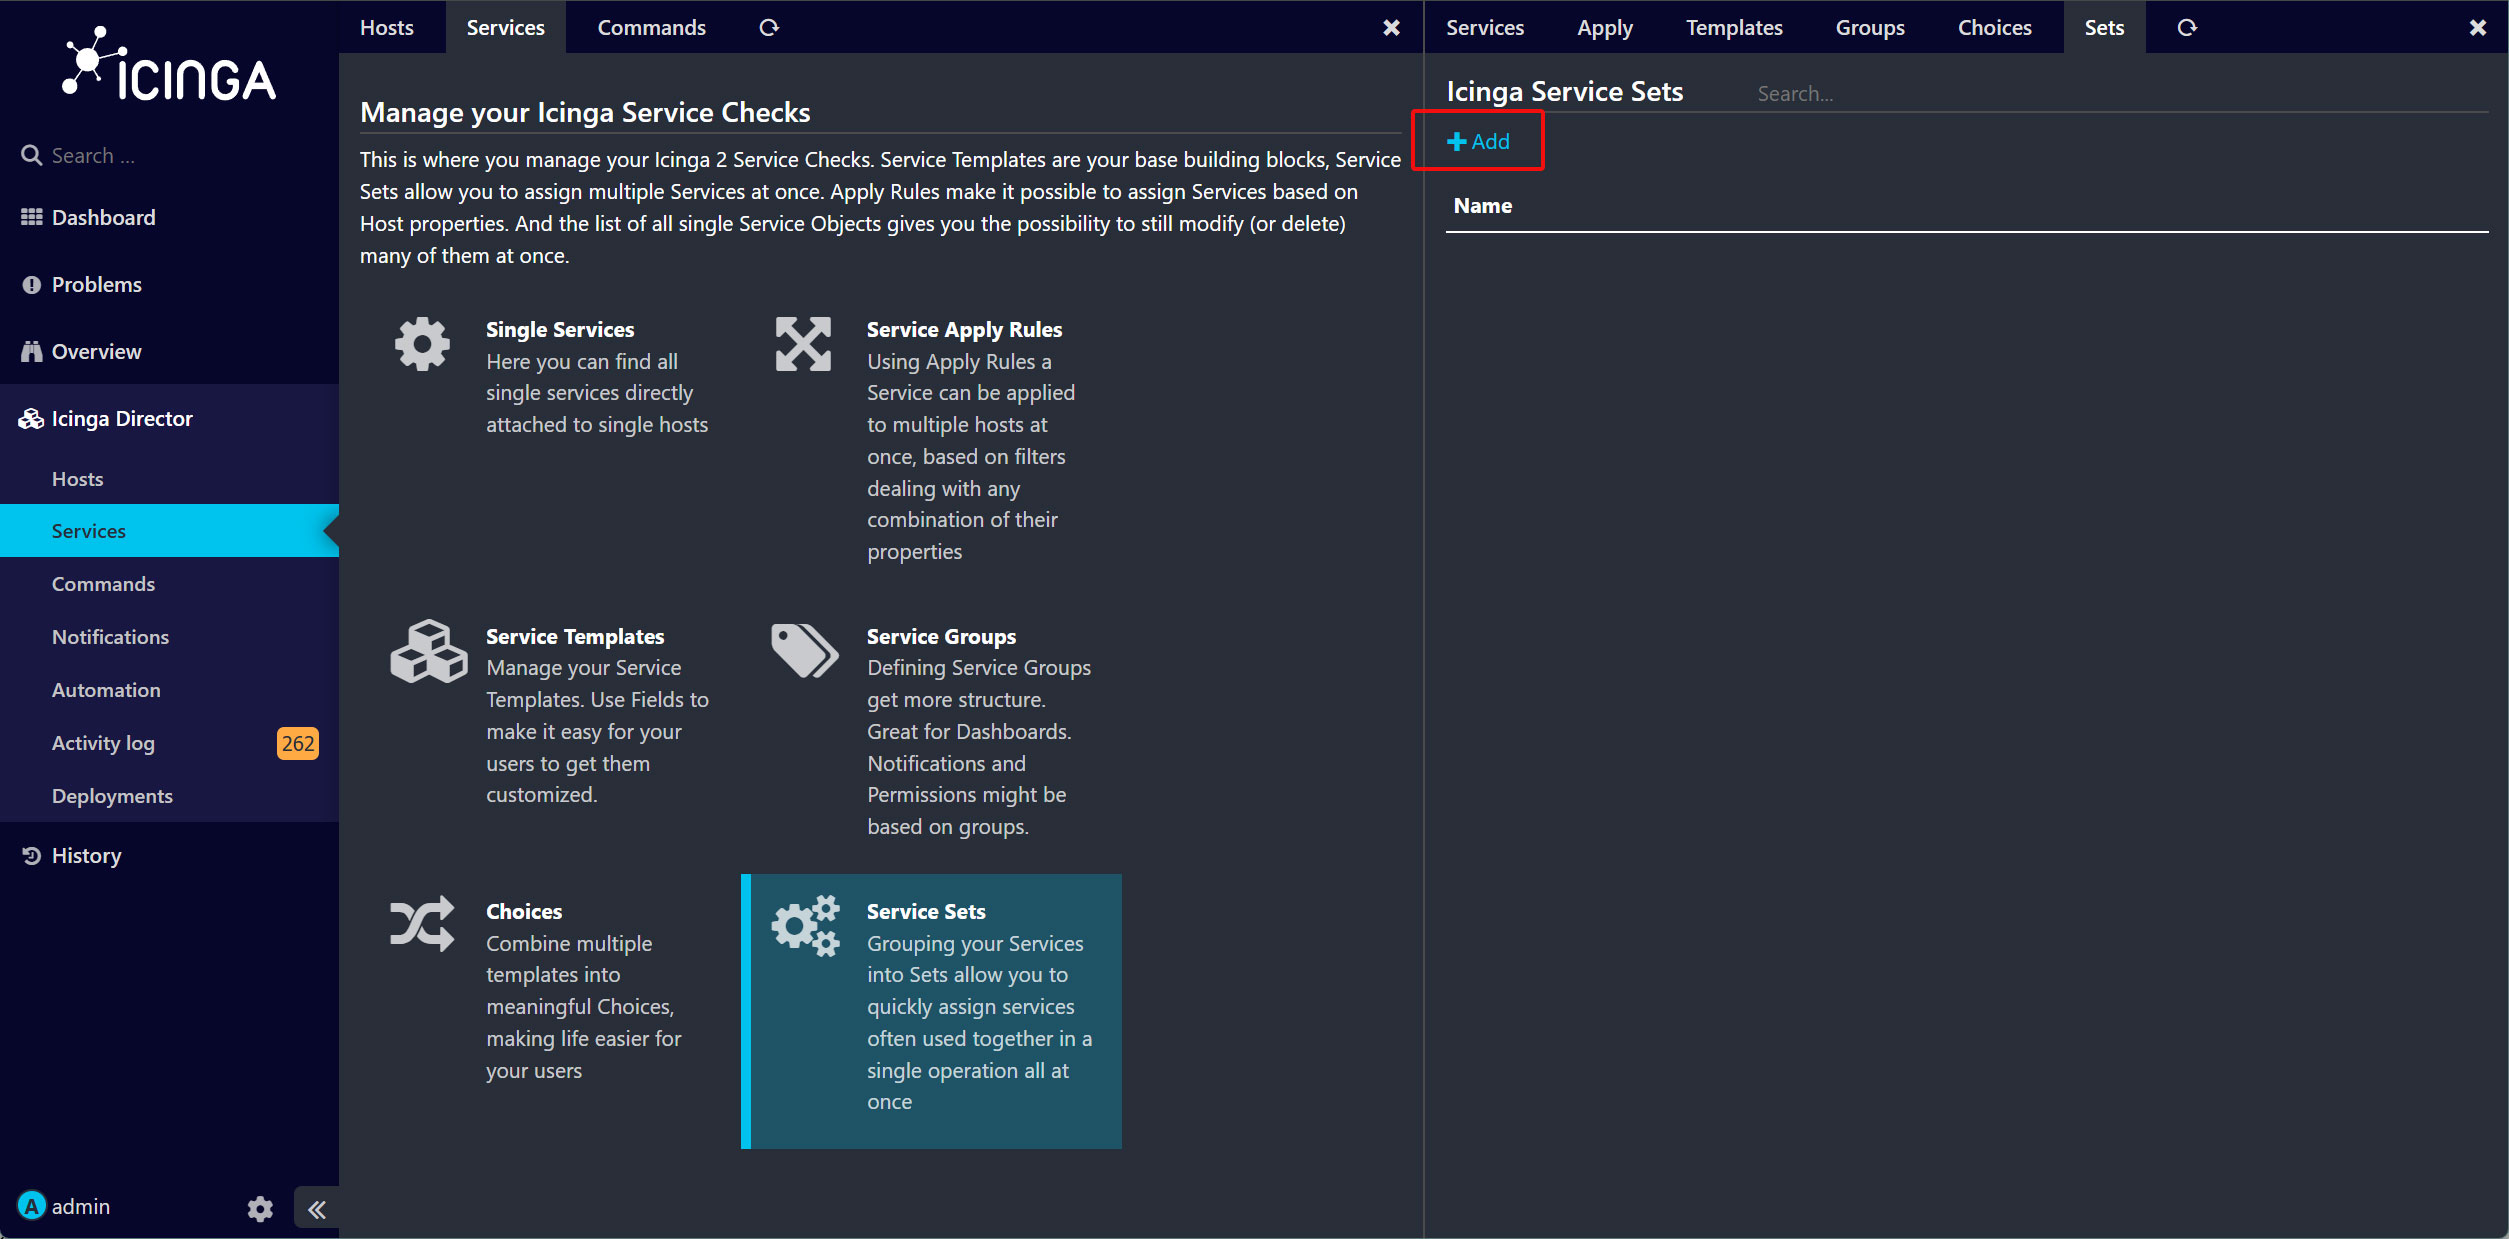
「Service set name」と「Description」に独自の名前と内容を入力し、「Add」ボタンをクリック
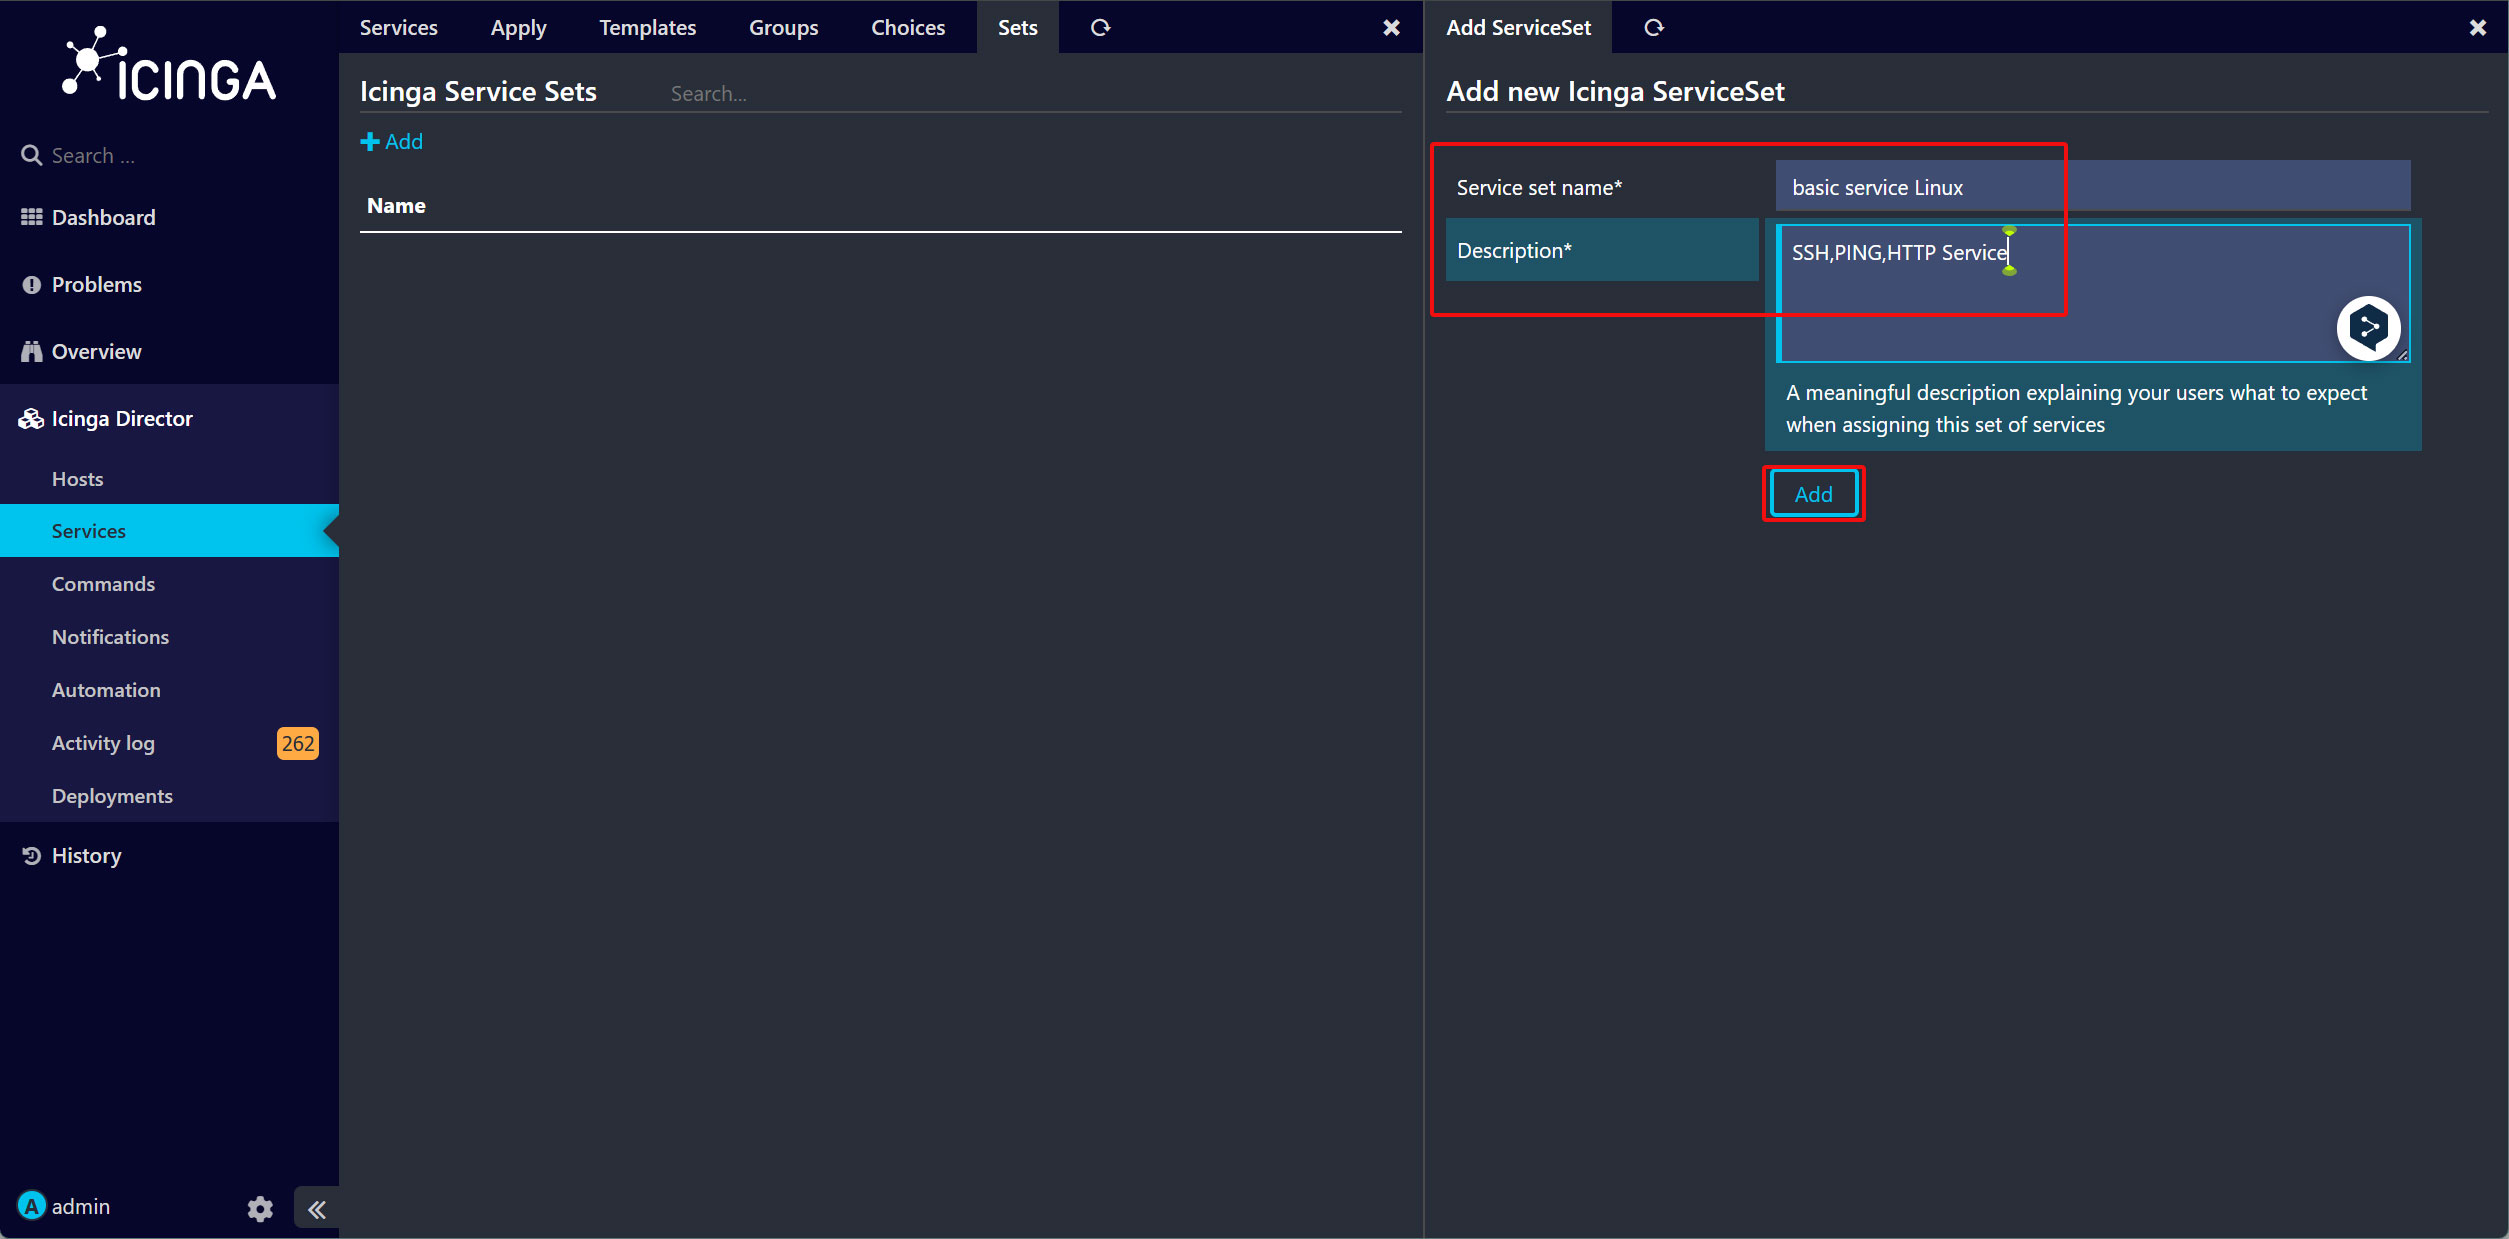
「basic service Linux」という名前のServiceSetが作成されました。
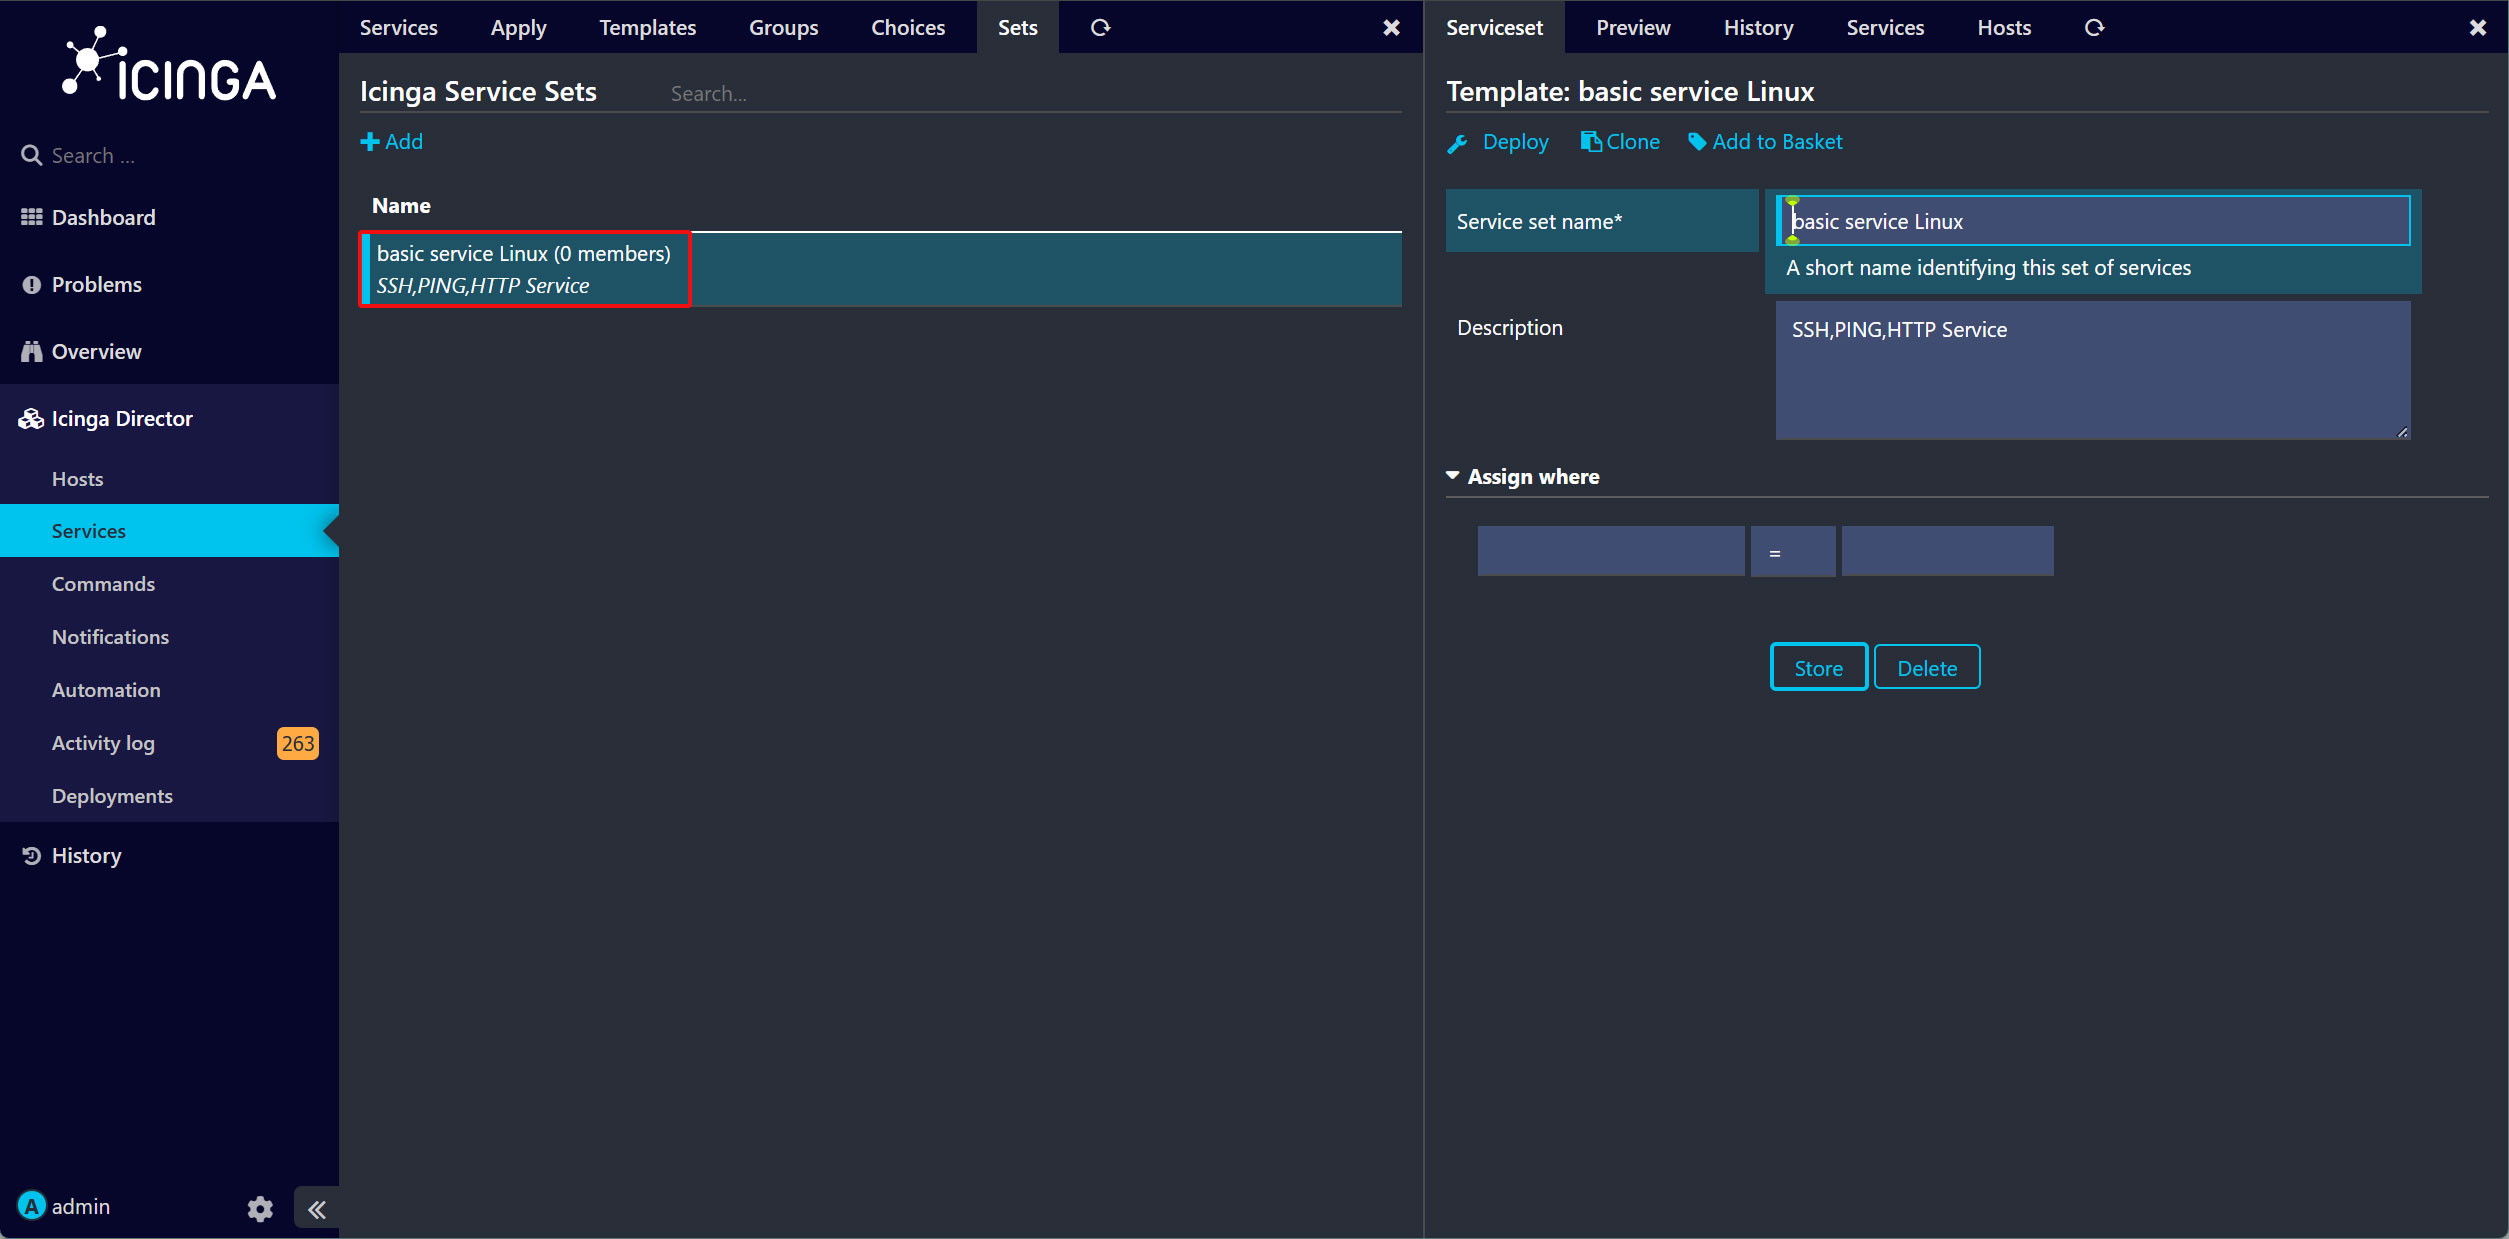
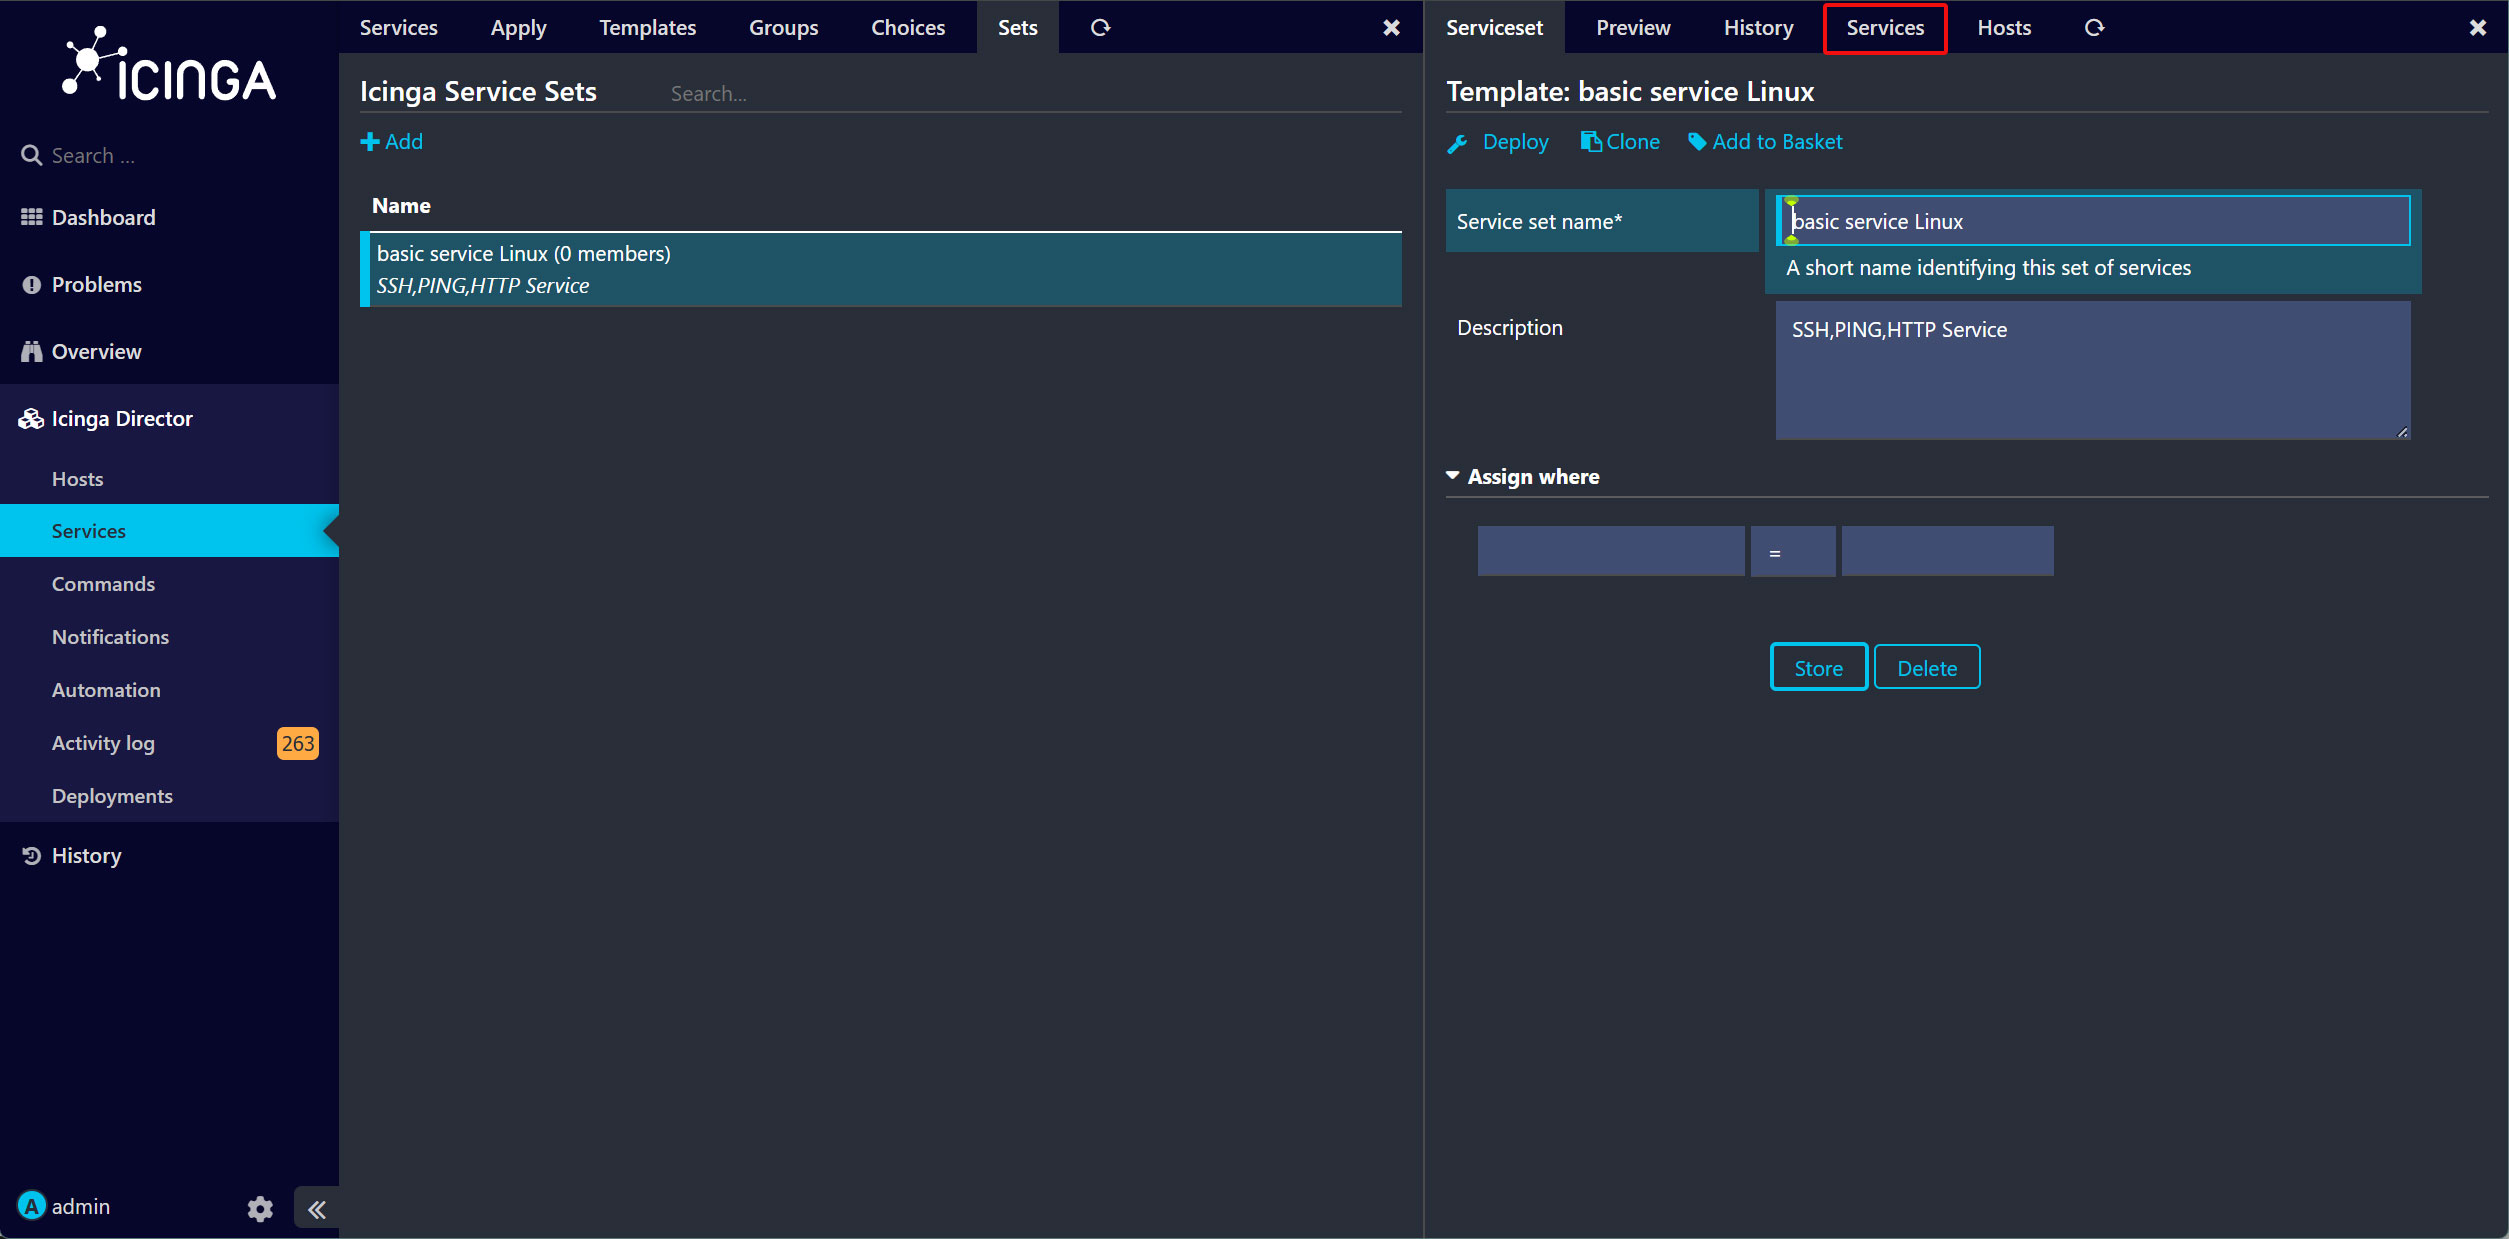
次に、Service Templateを「basic service Linux」ServiceSetに追加します。ServiceSetの名前をクリックし、右側の画面にある「Services」タブをクリック
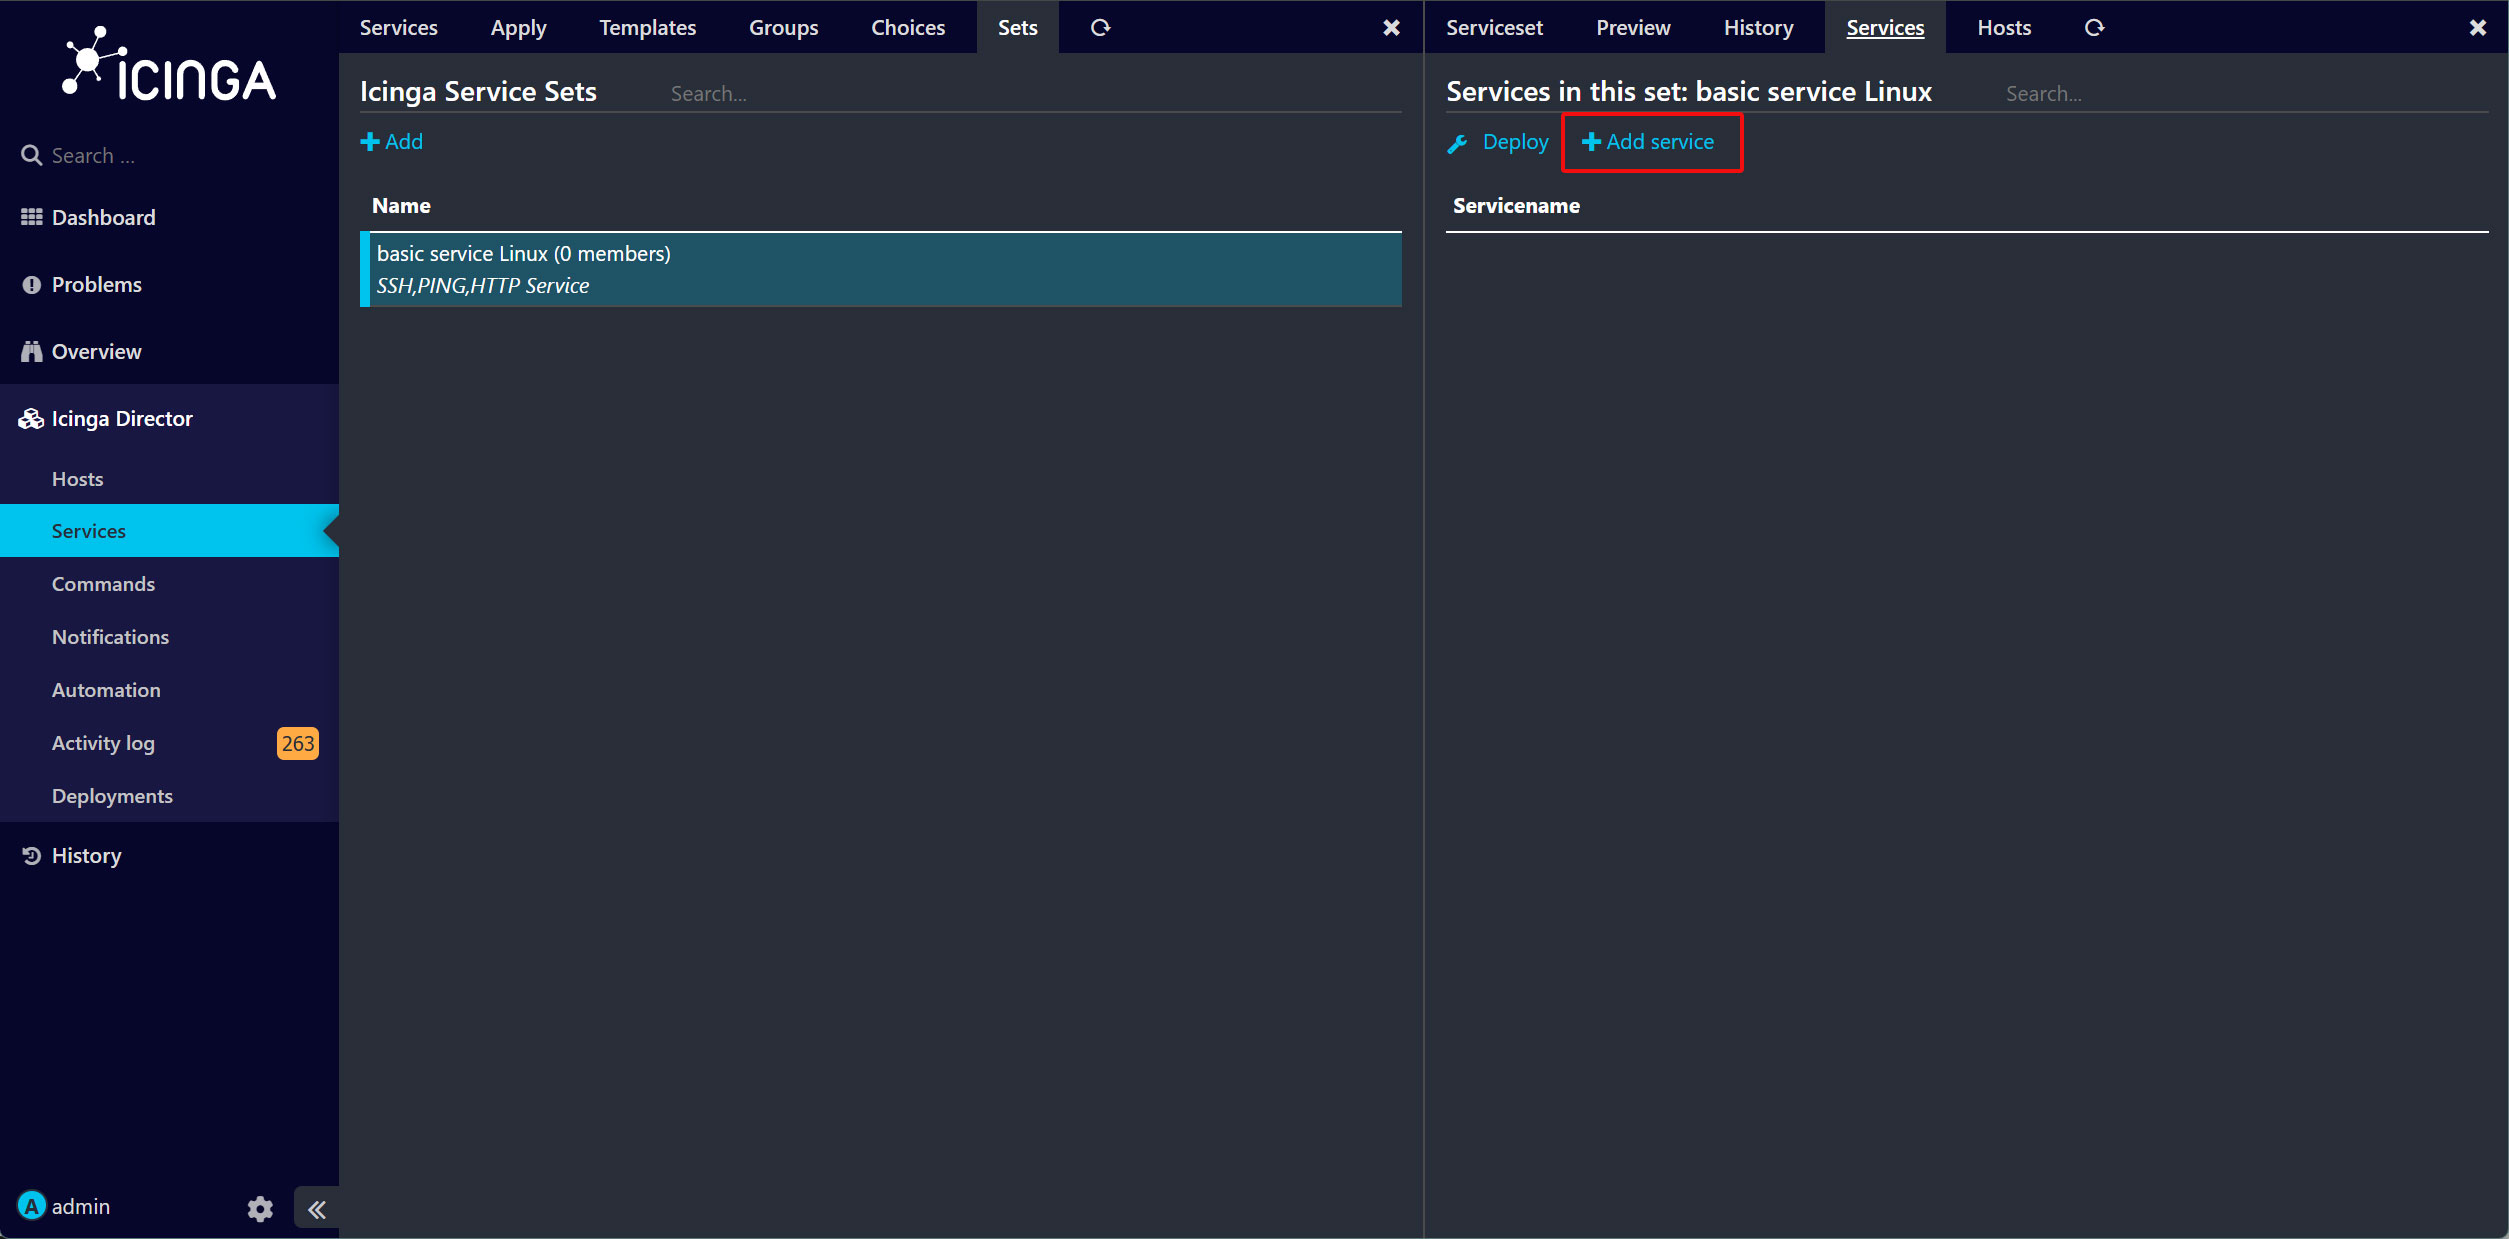
「Add service」ボタンをクリック
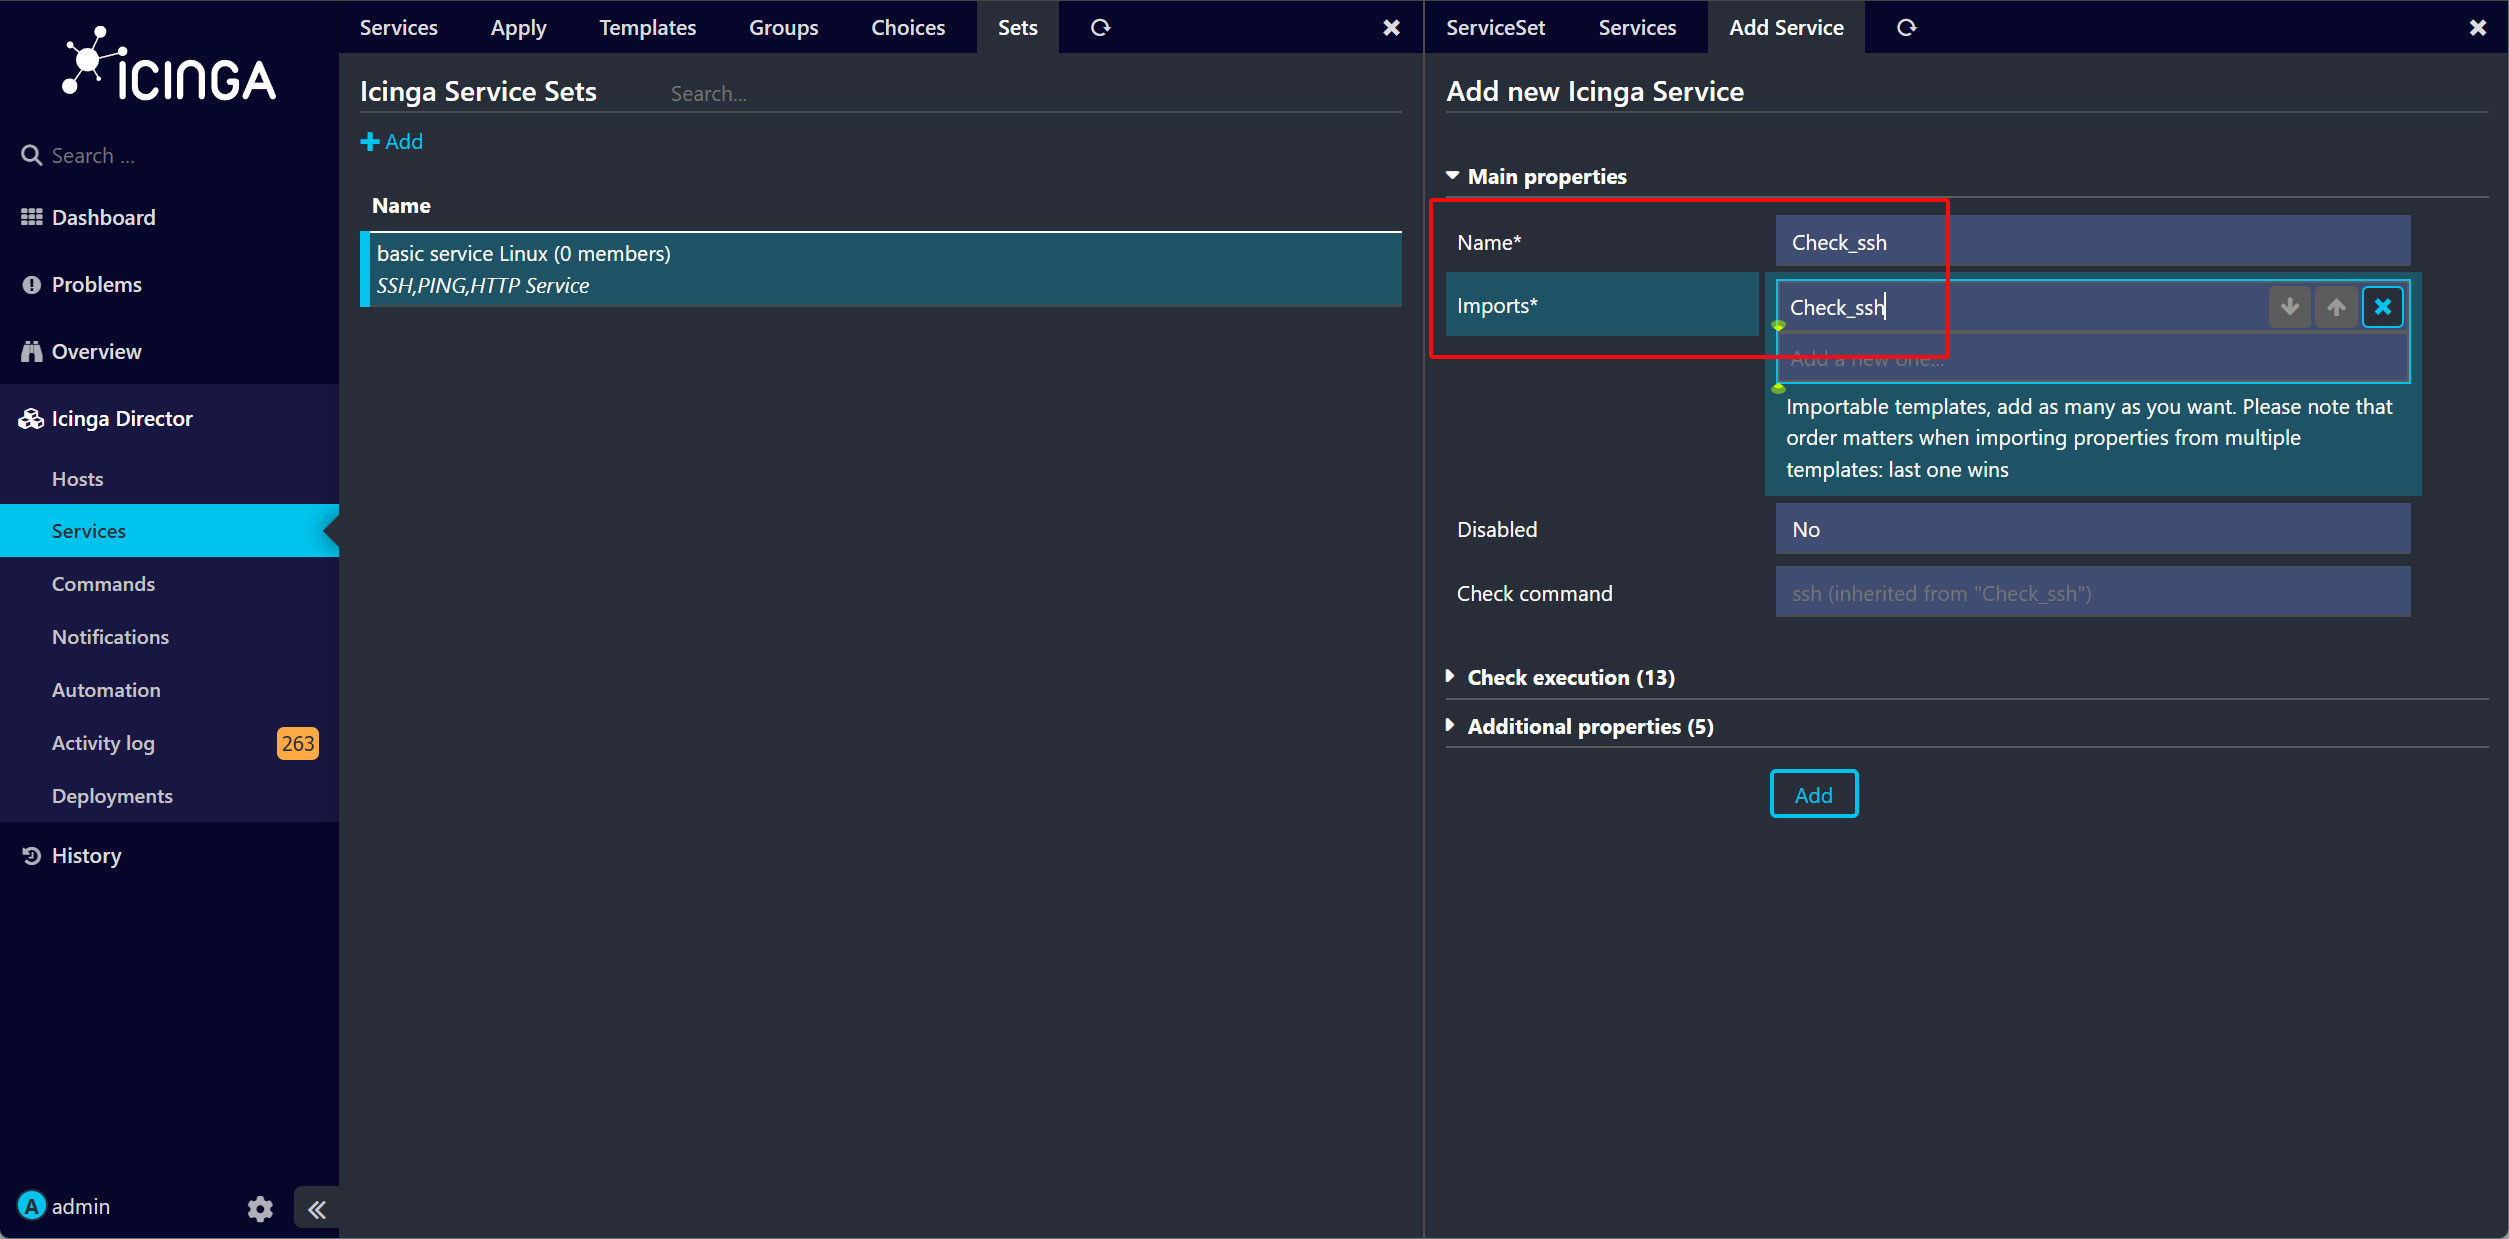
[Check_ssh]を追加する
「Add」ボタンをクリック
同様に[Check_ping][Check_http]を追加する
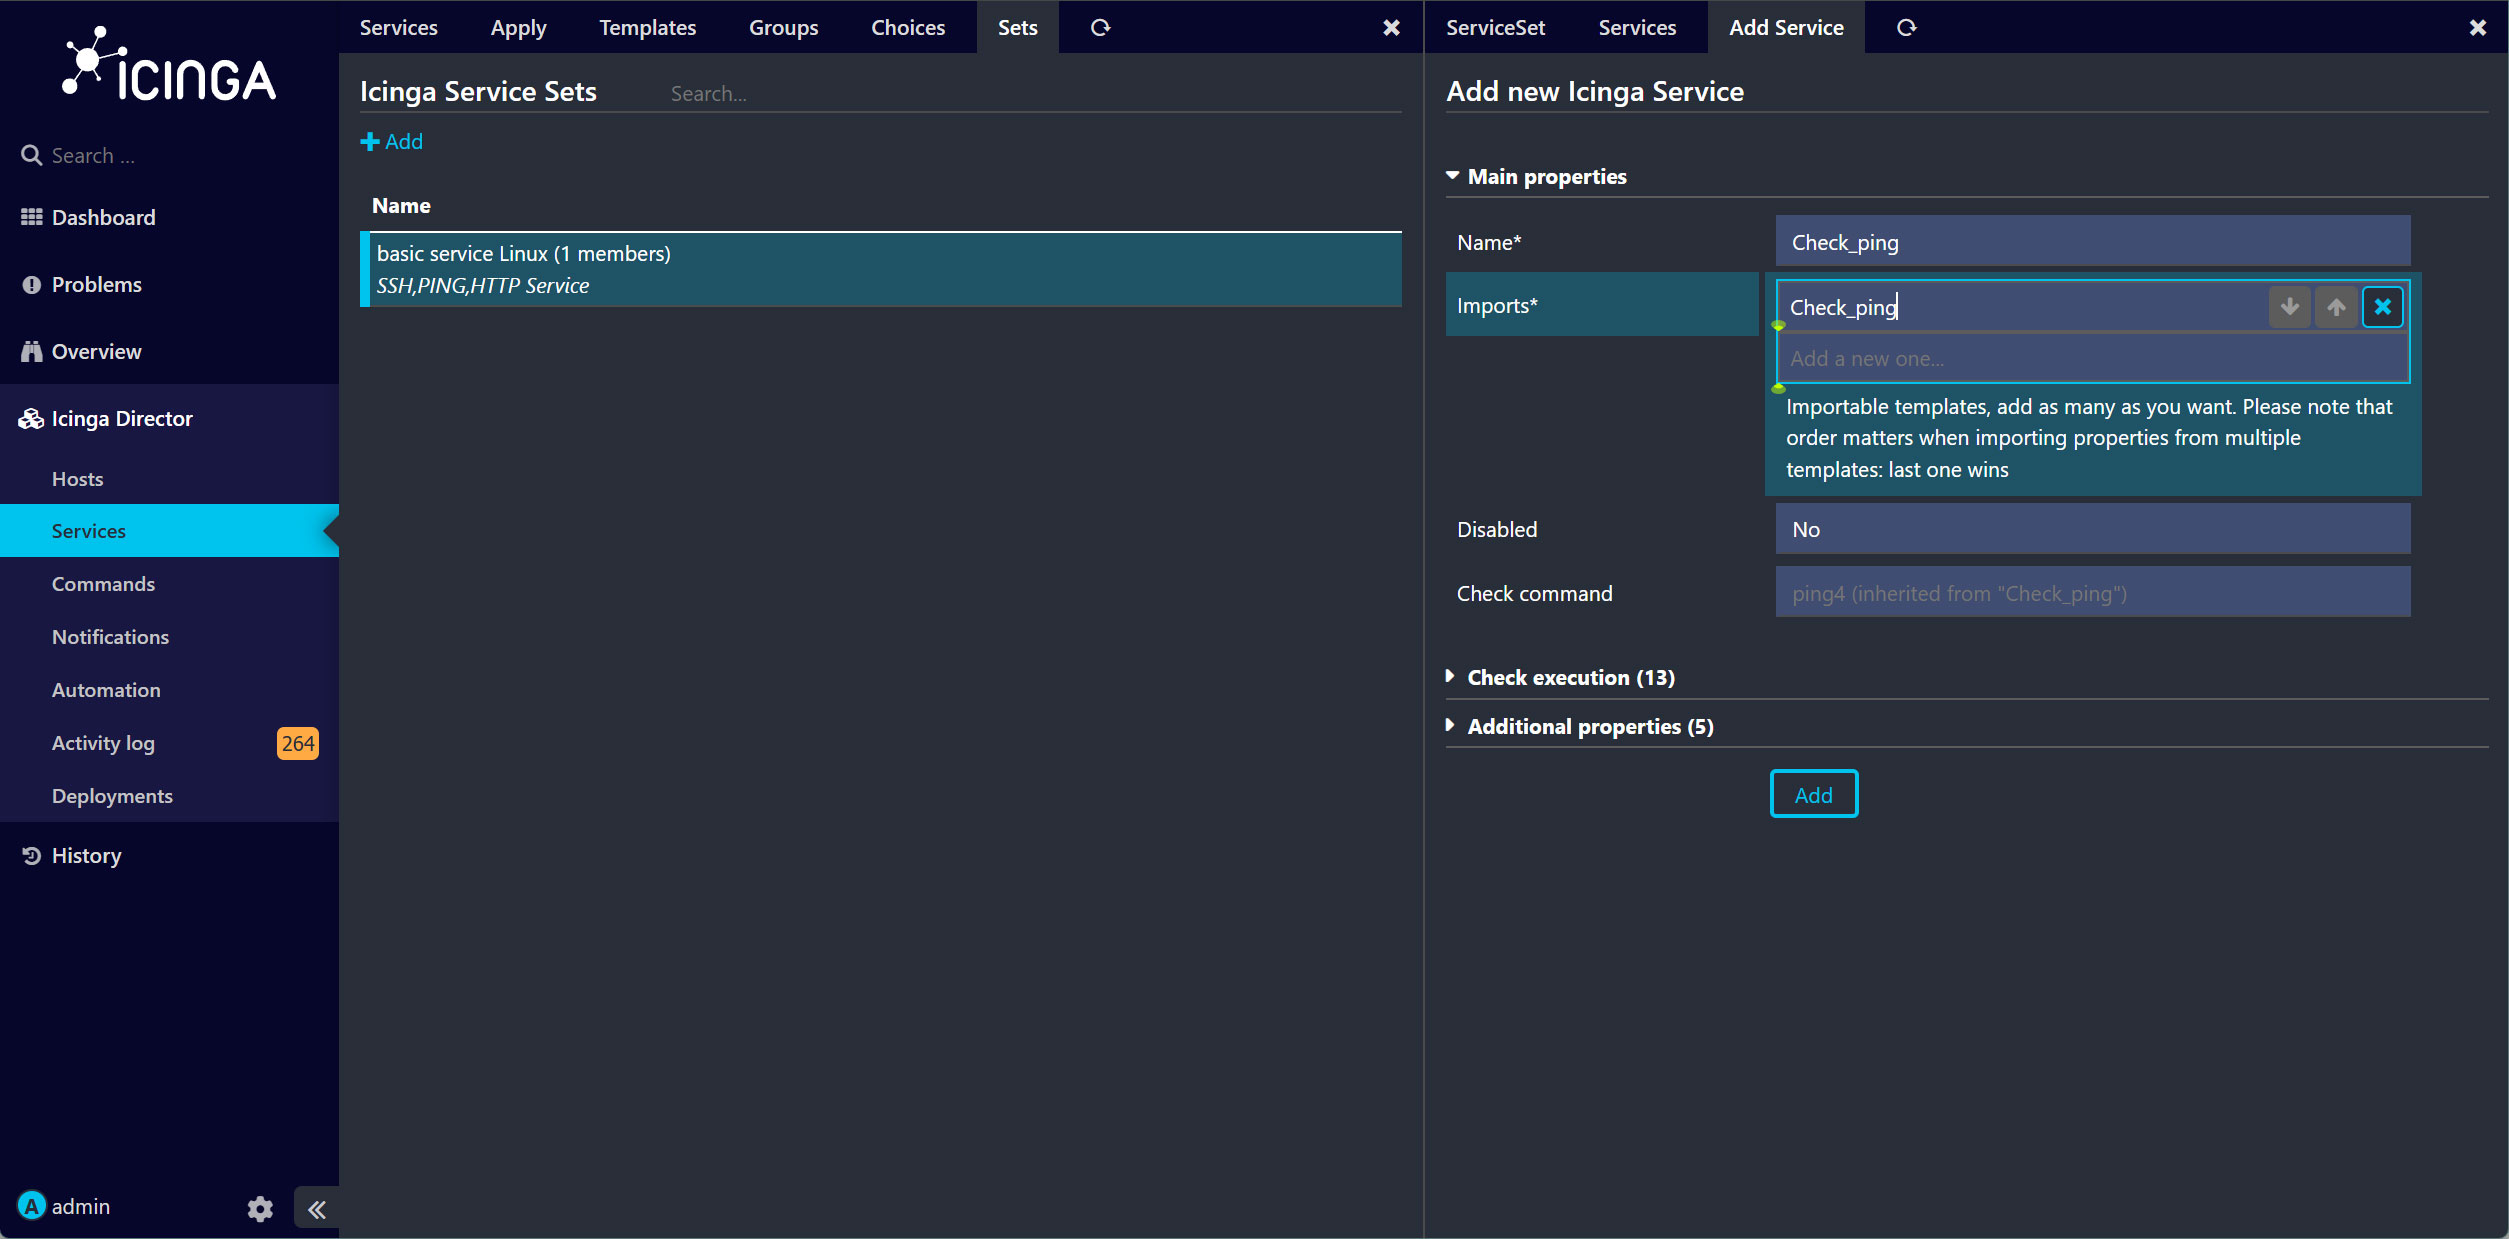
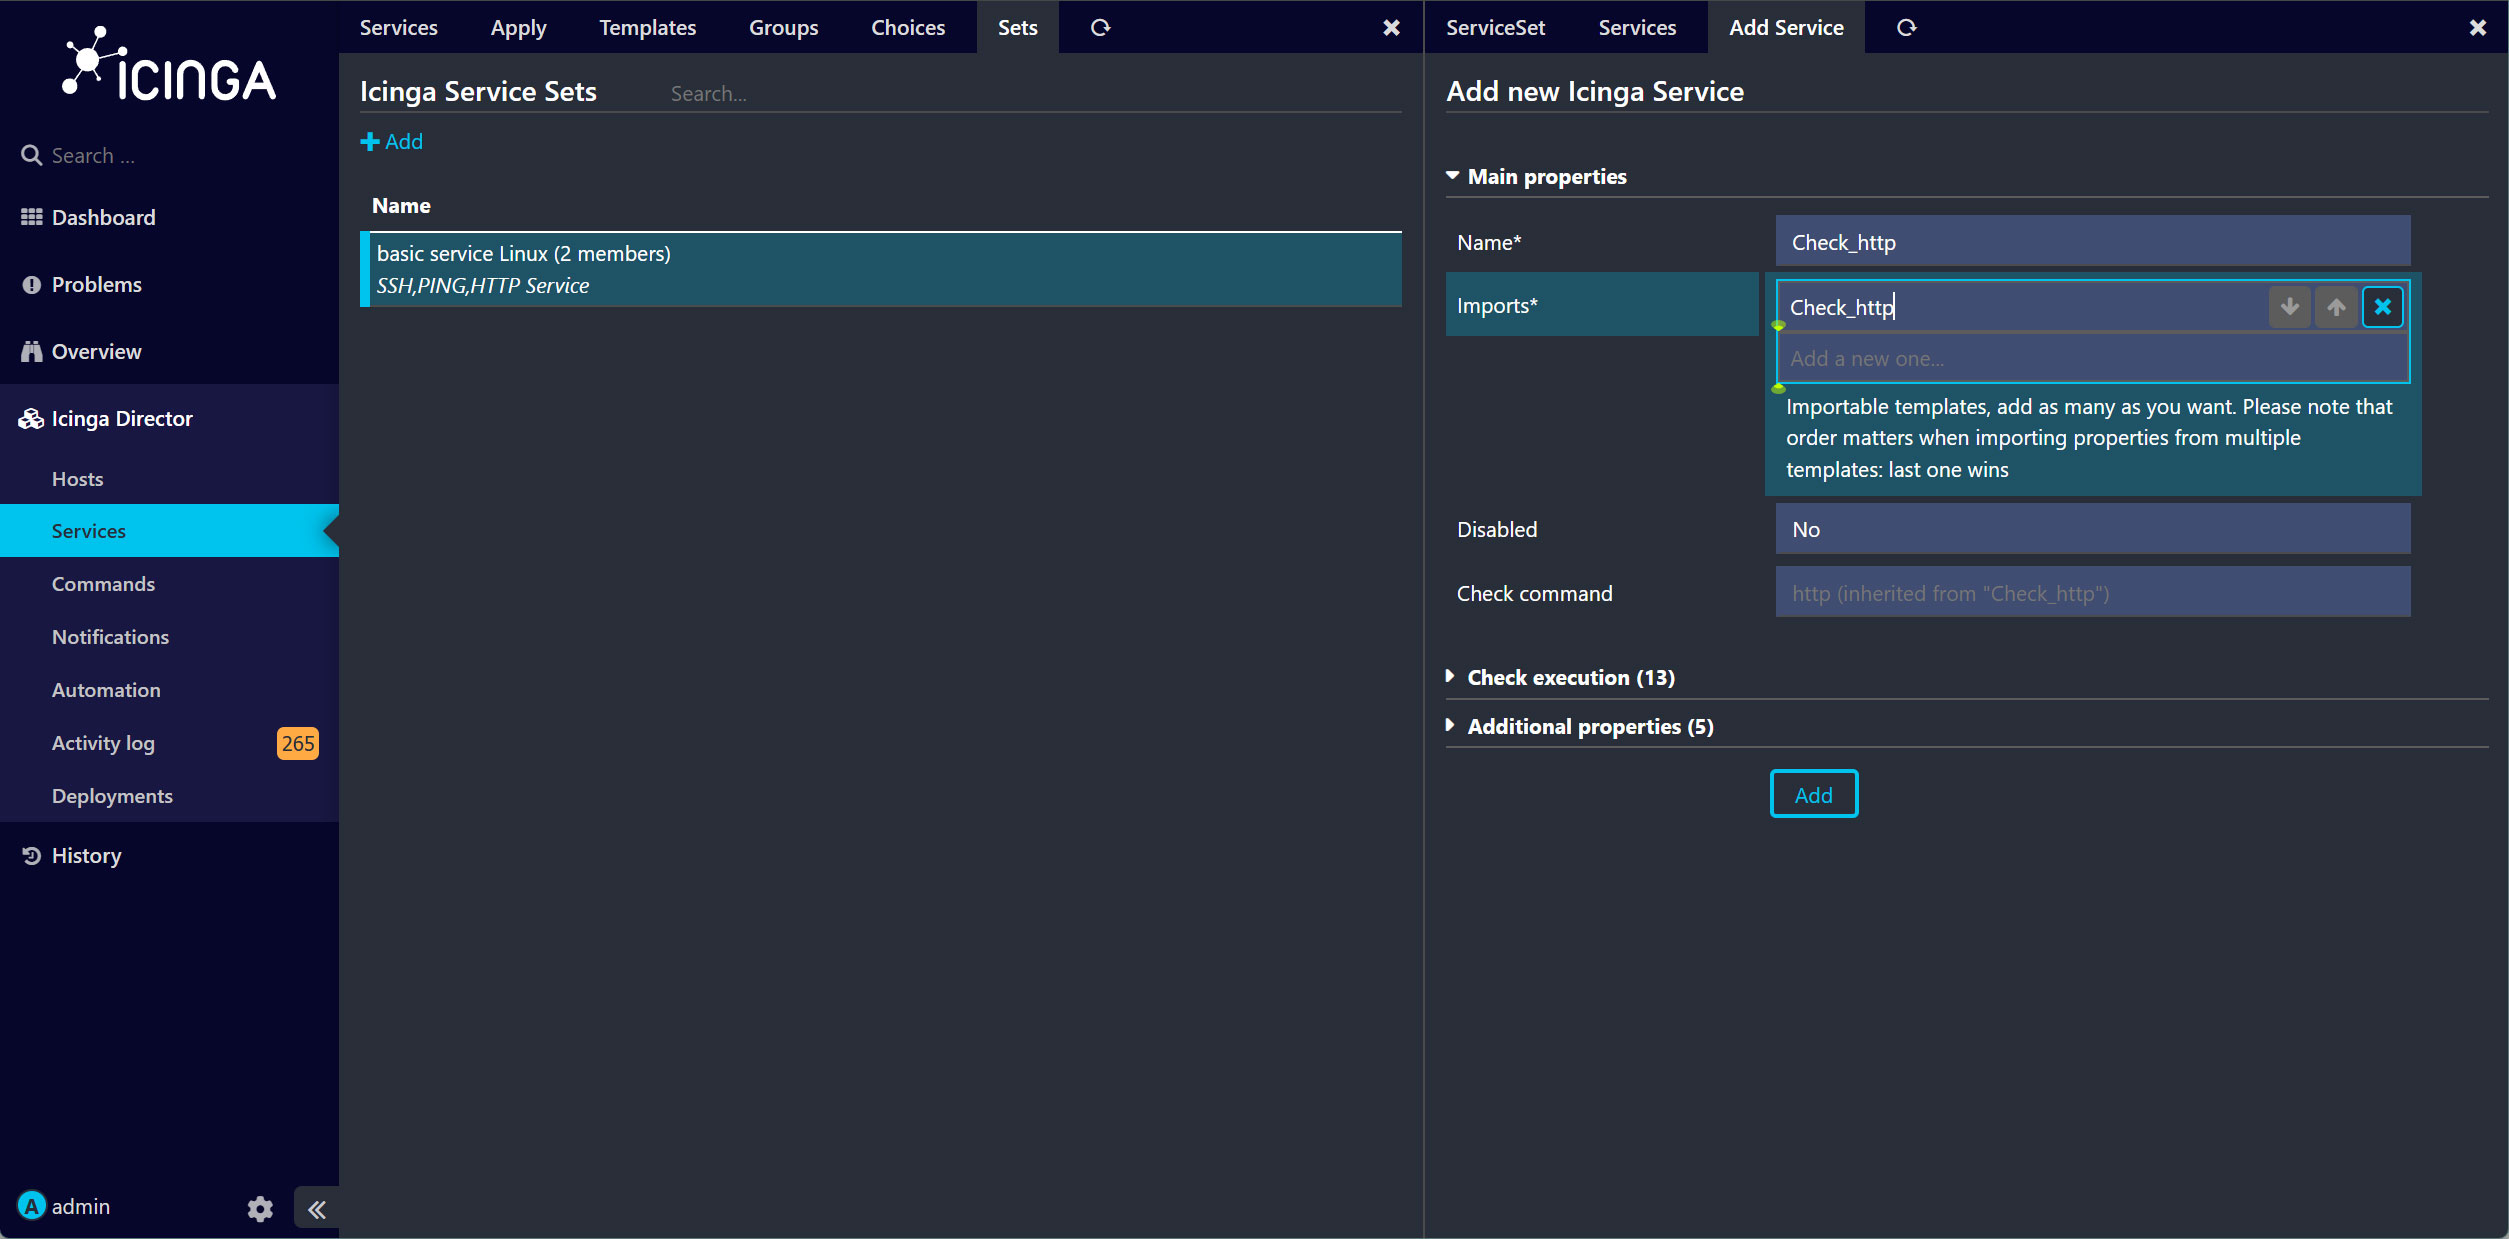
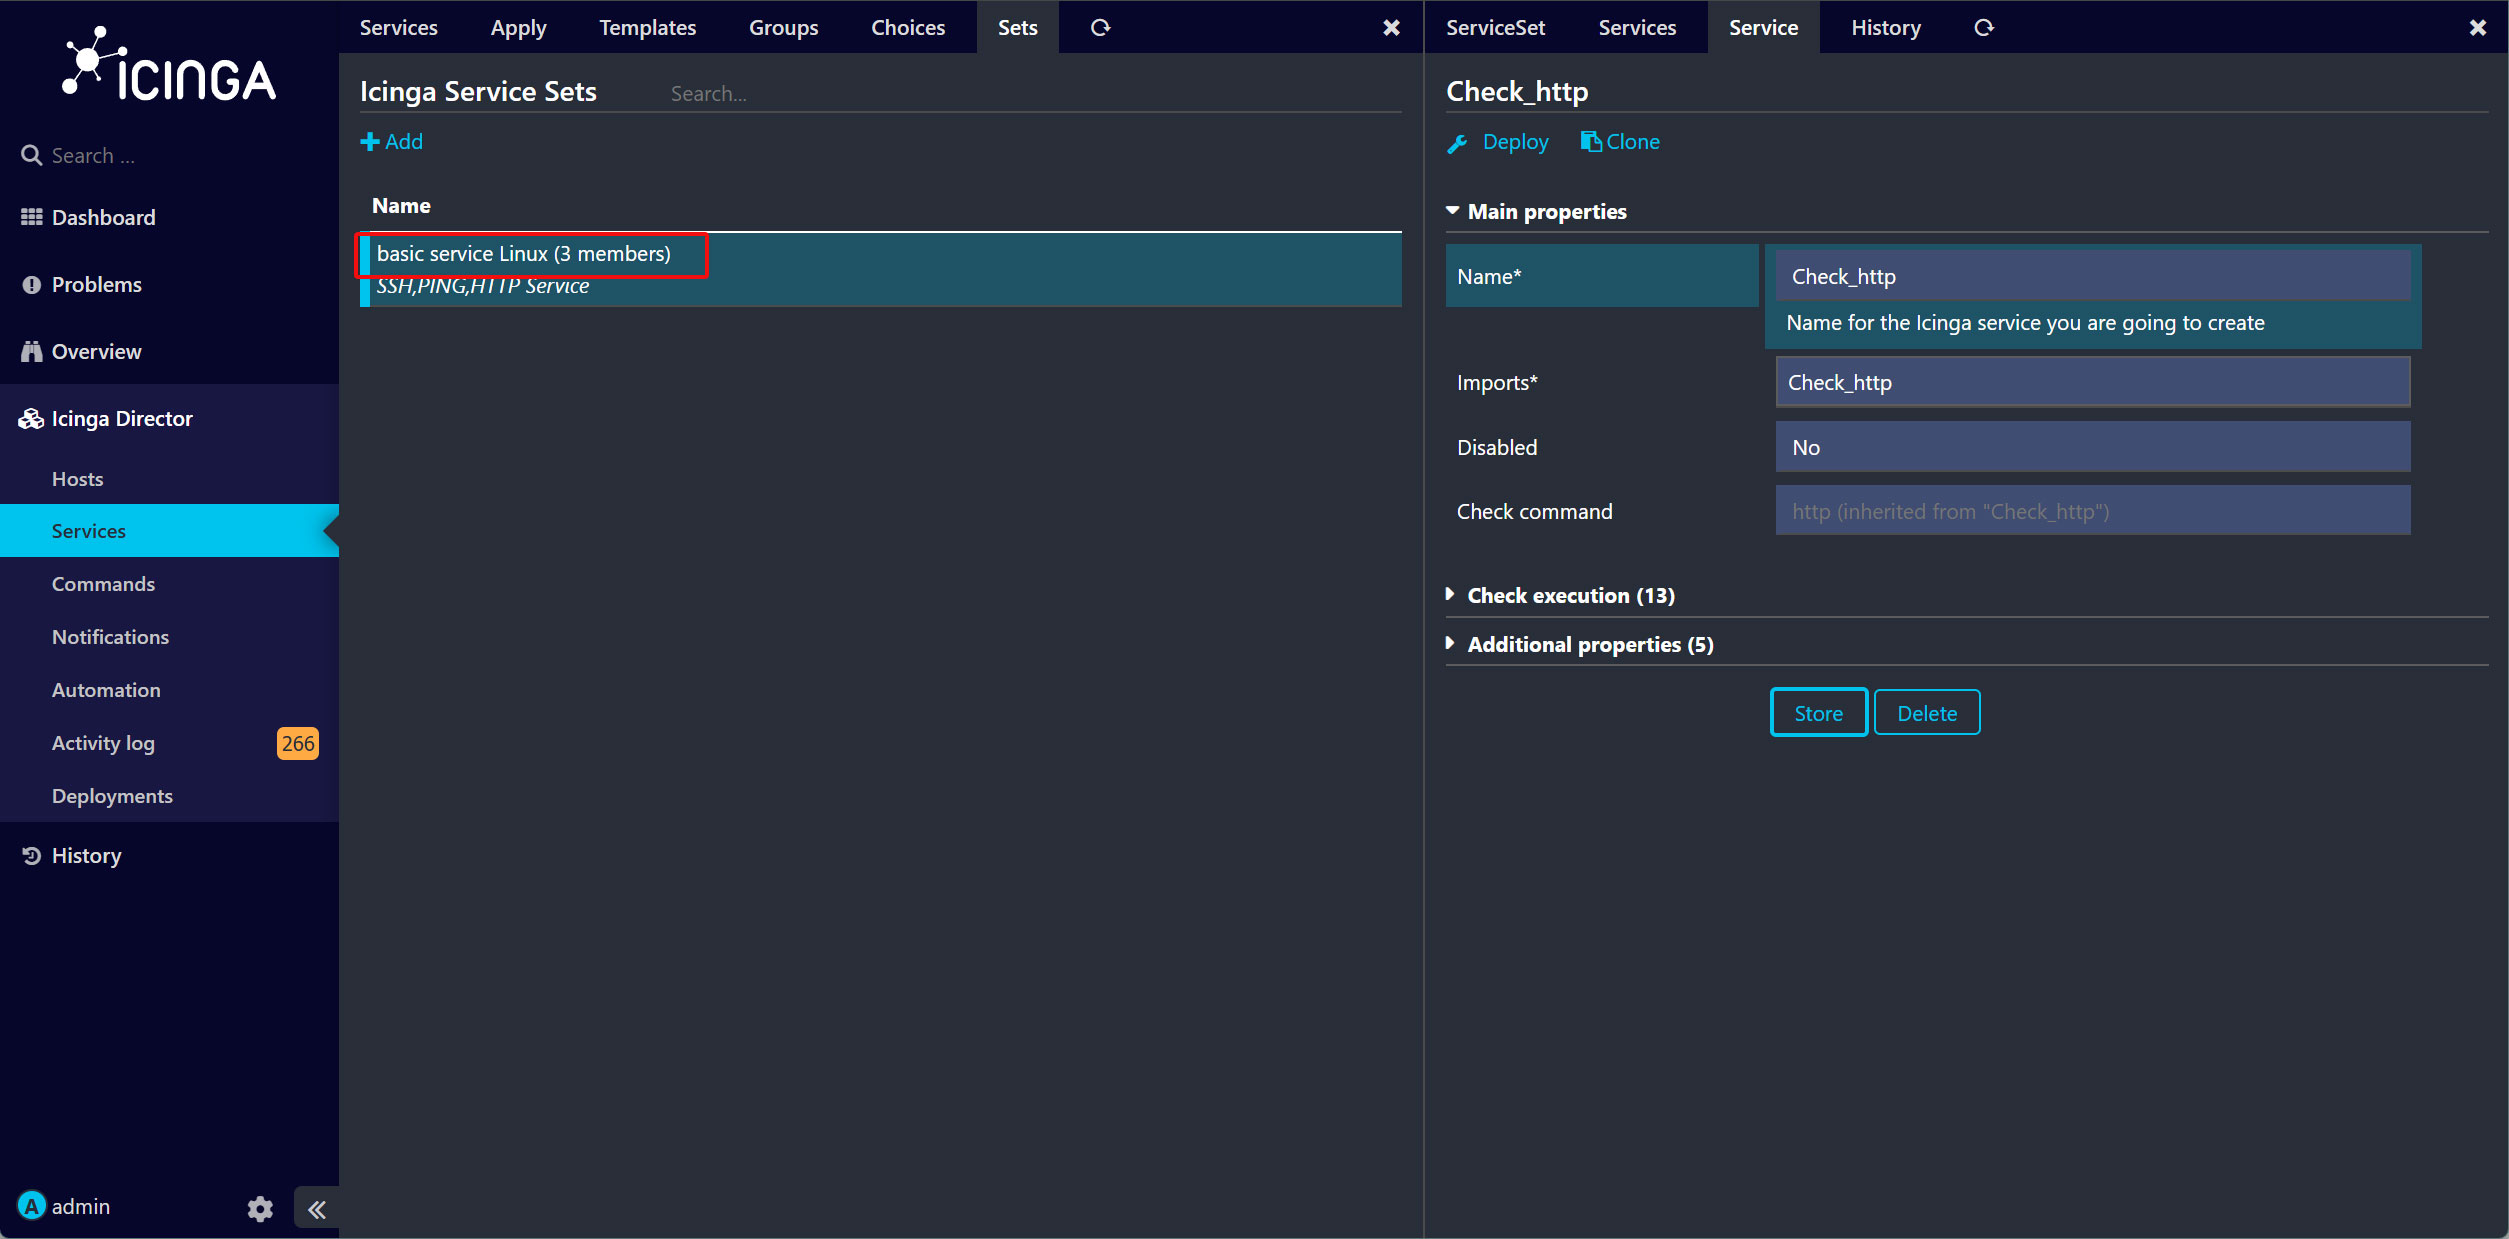
最終的に"3 members"になっている
9.3 ホストテンプレートを作成し、Service Setsを追加する
Director を通じて Icinga2 に新しいホストを追加するには、ホストテンプレートを作成する必要があります
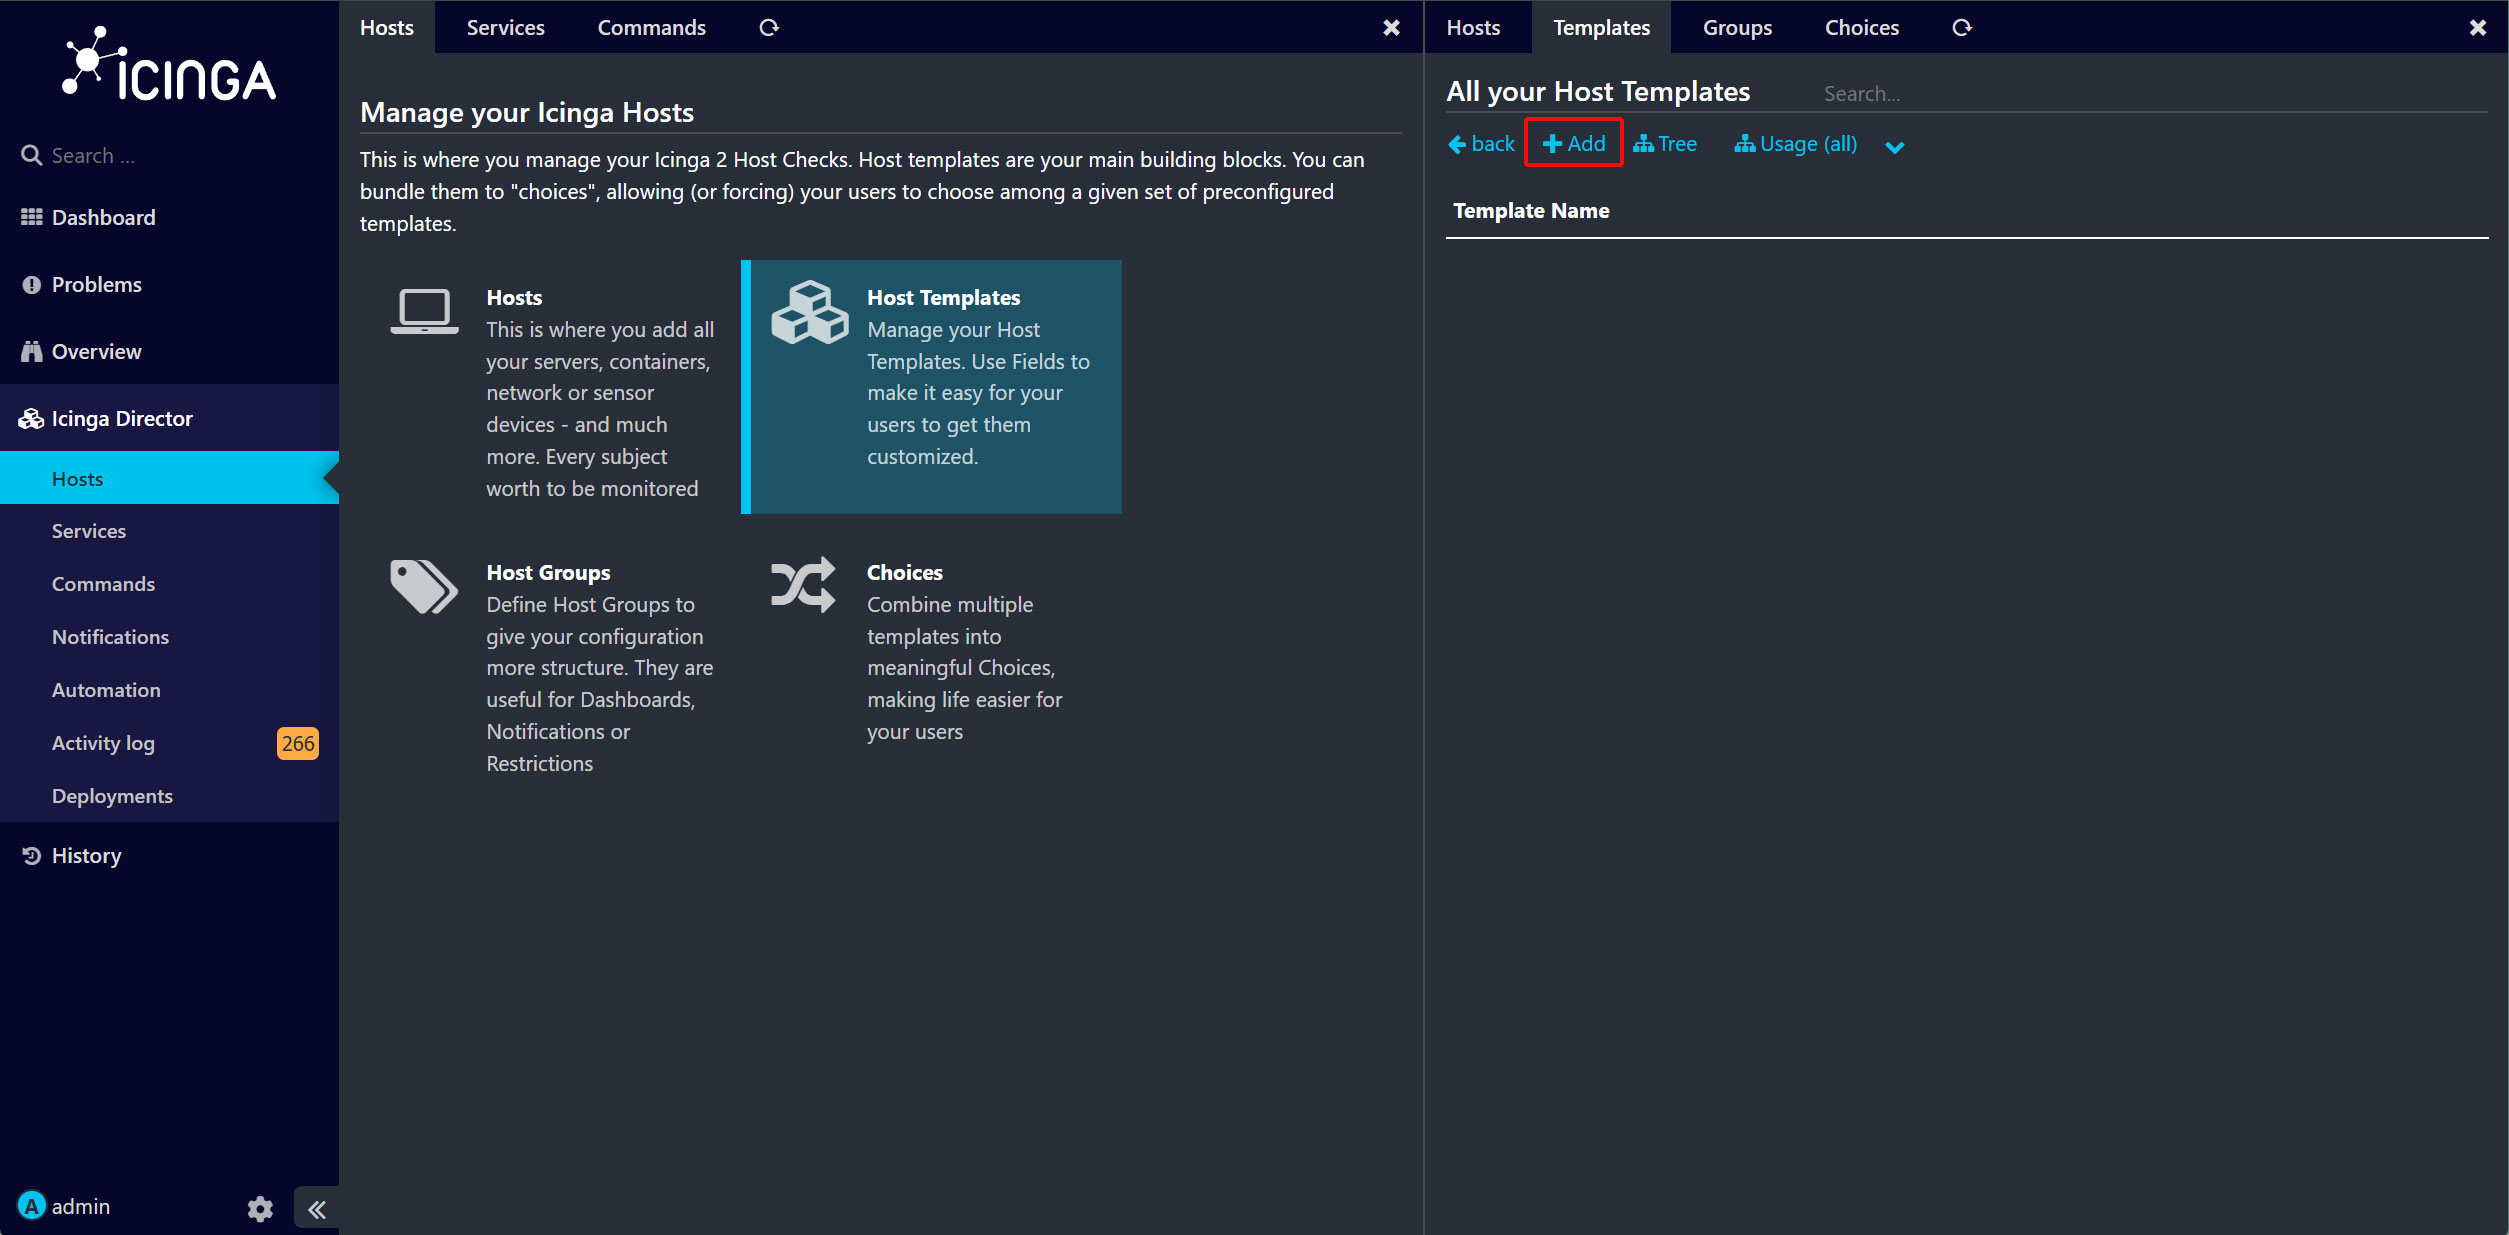
Icinga Director のメニューで、「Hosts」と「Host Templates」の順にクリック
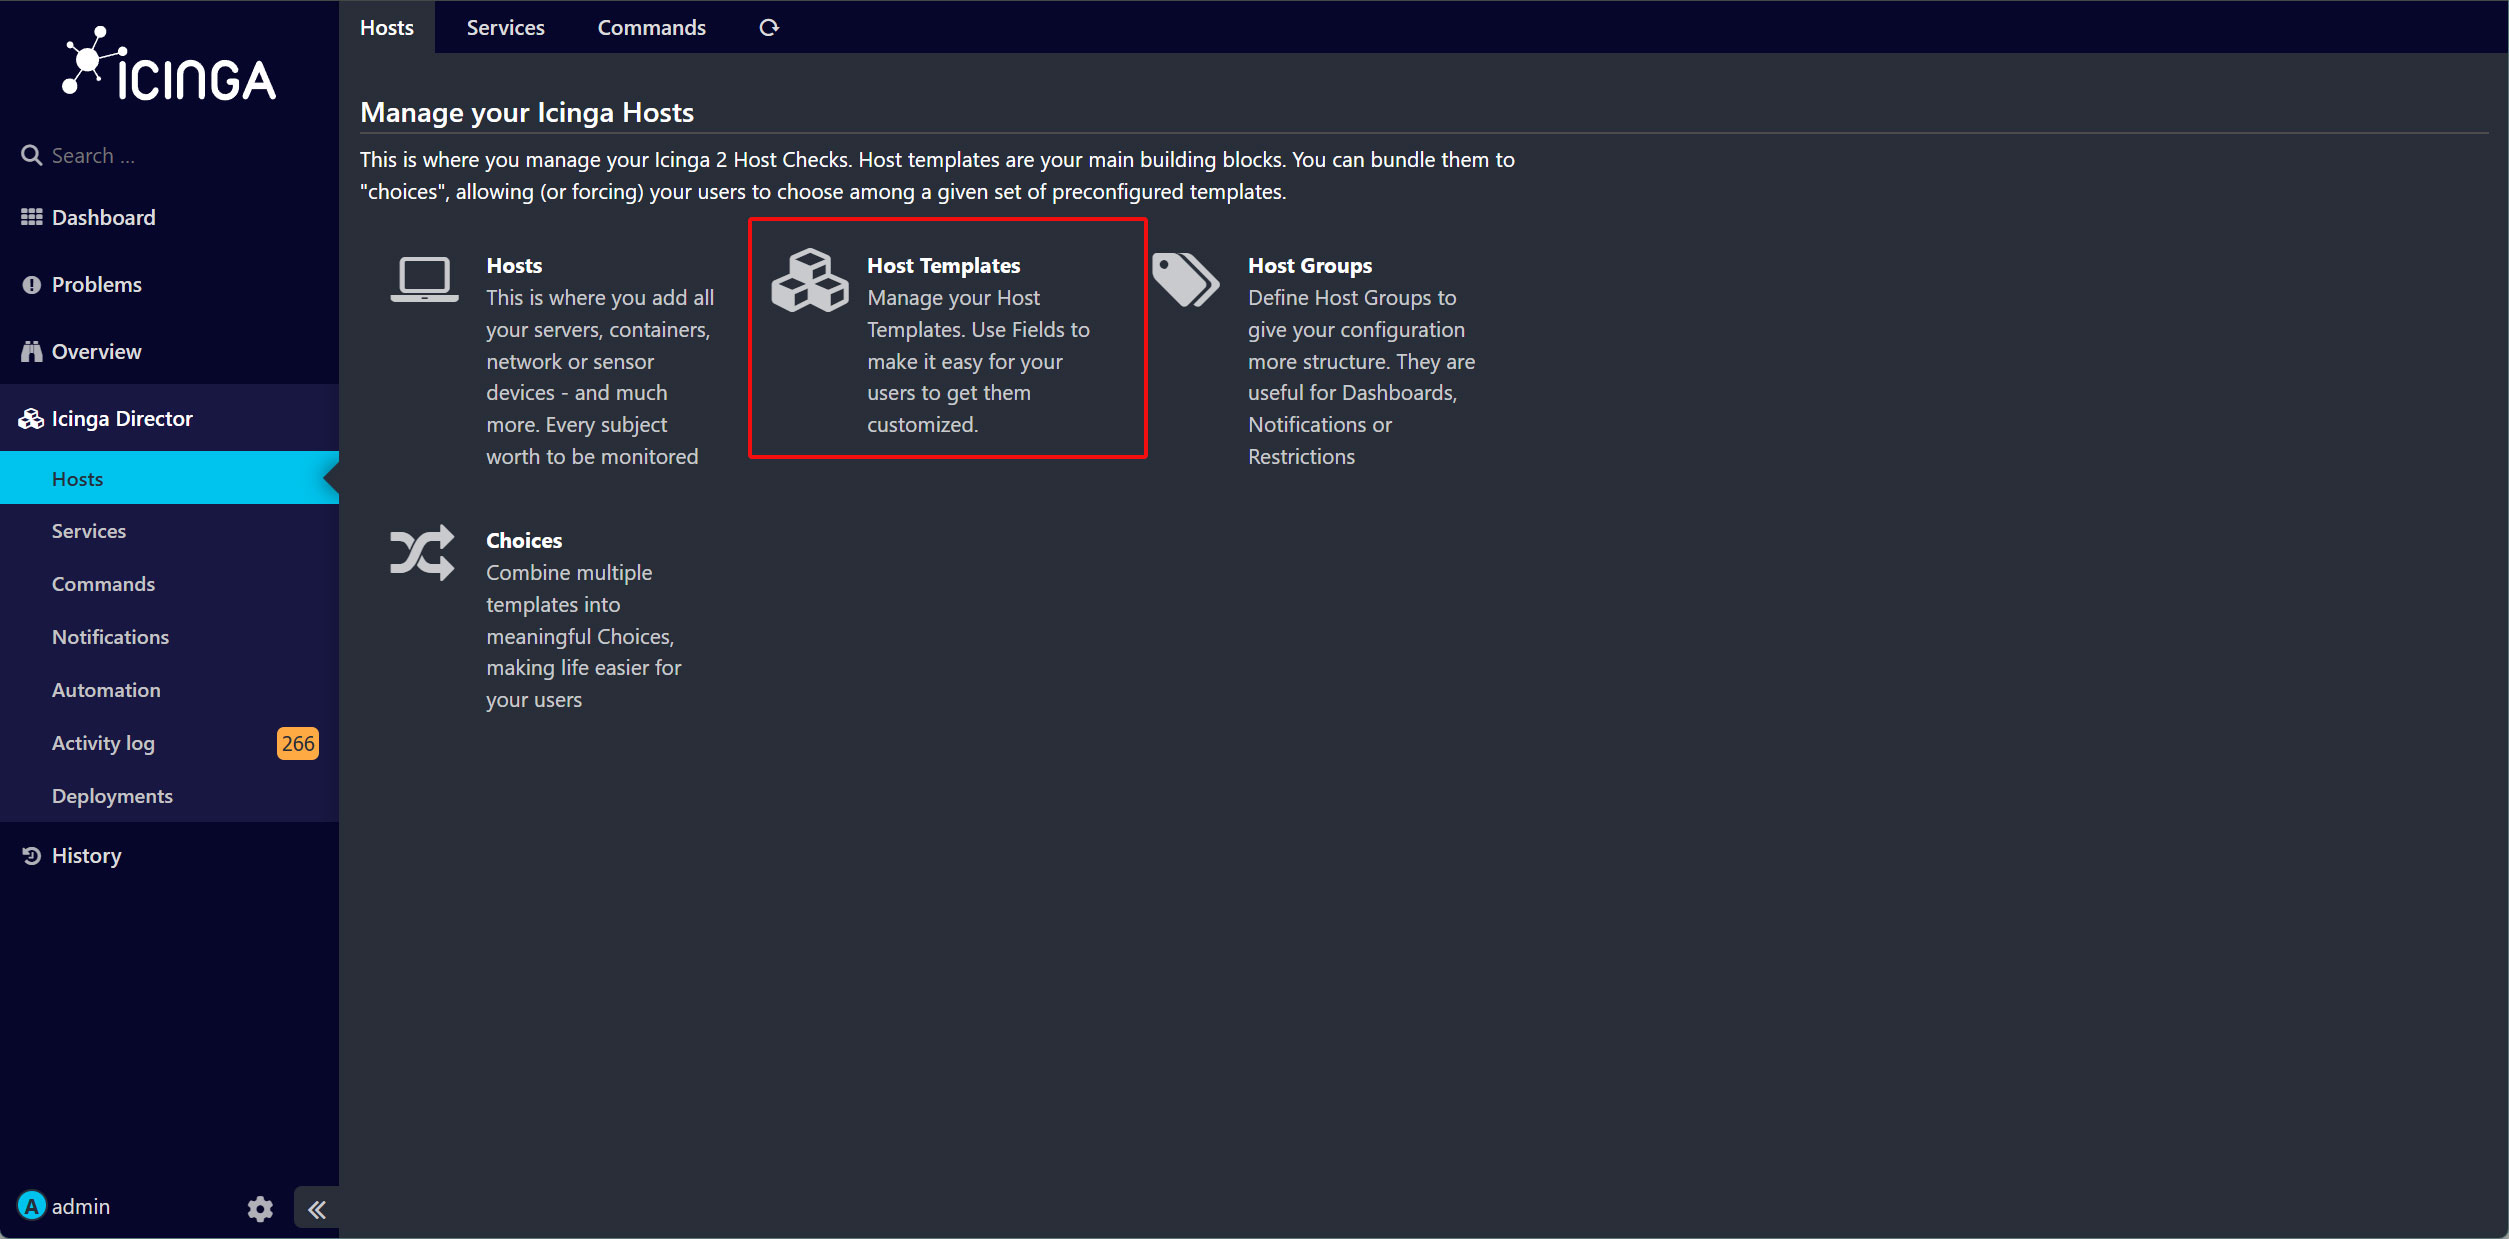
「Add」ボタンをクリック
「Host template」に関する詳細を、以下のように入力してください。
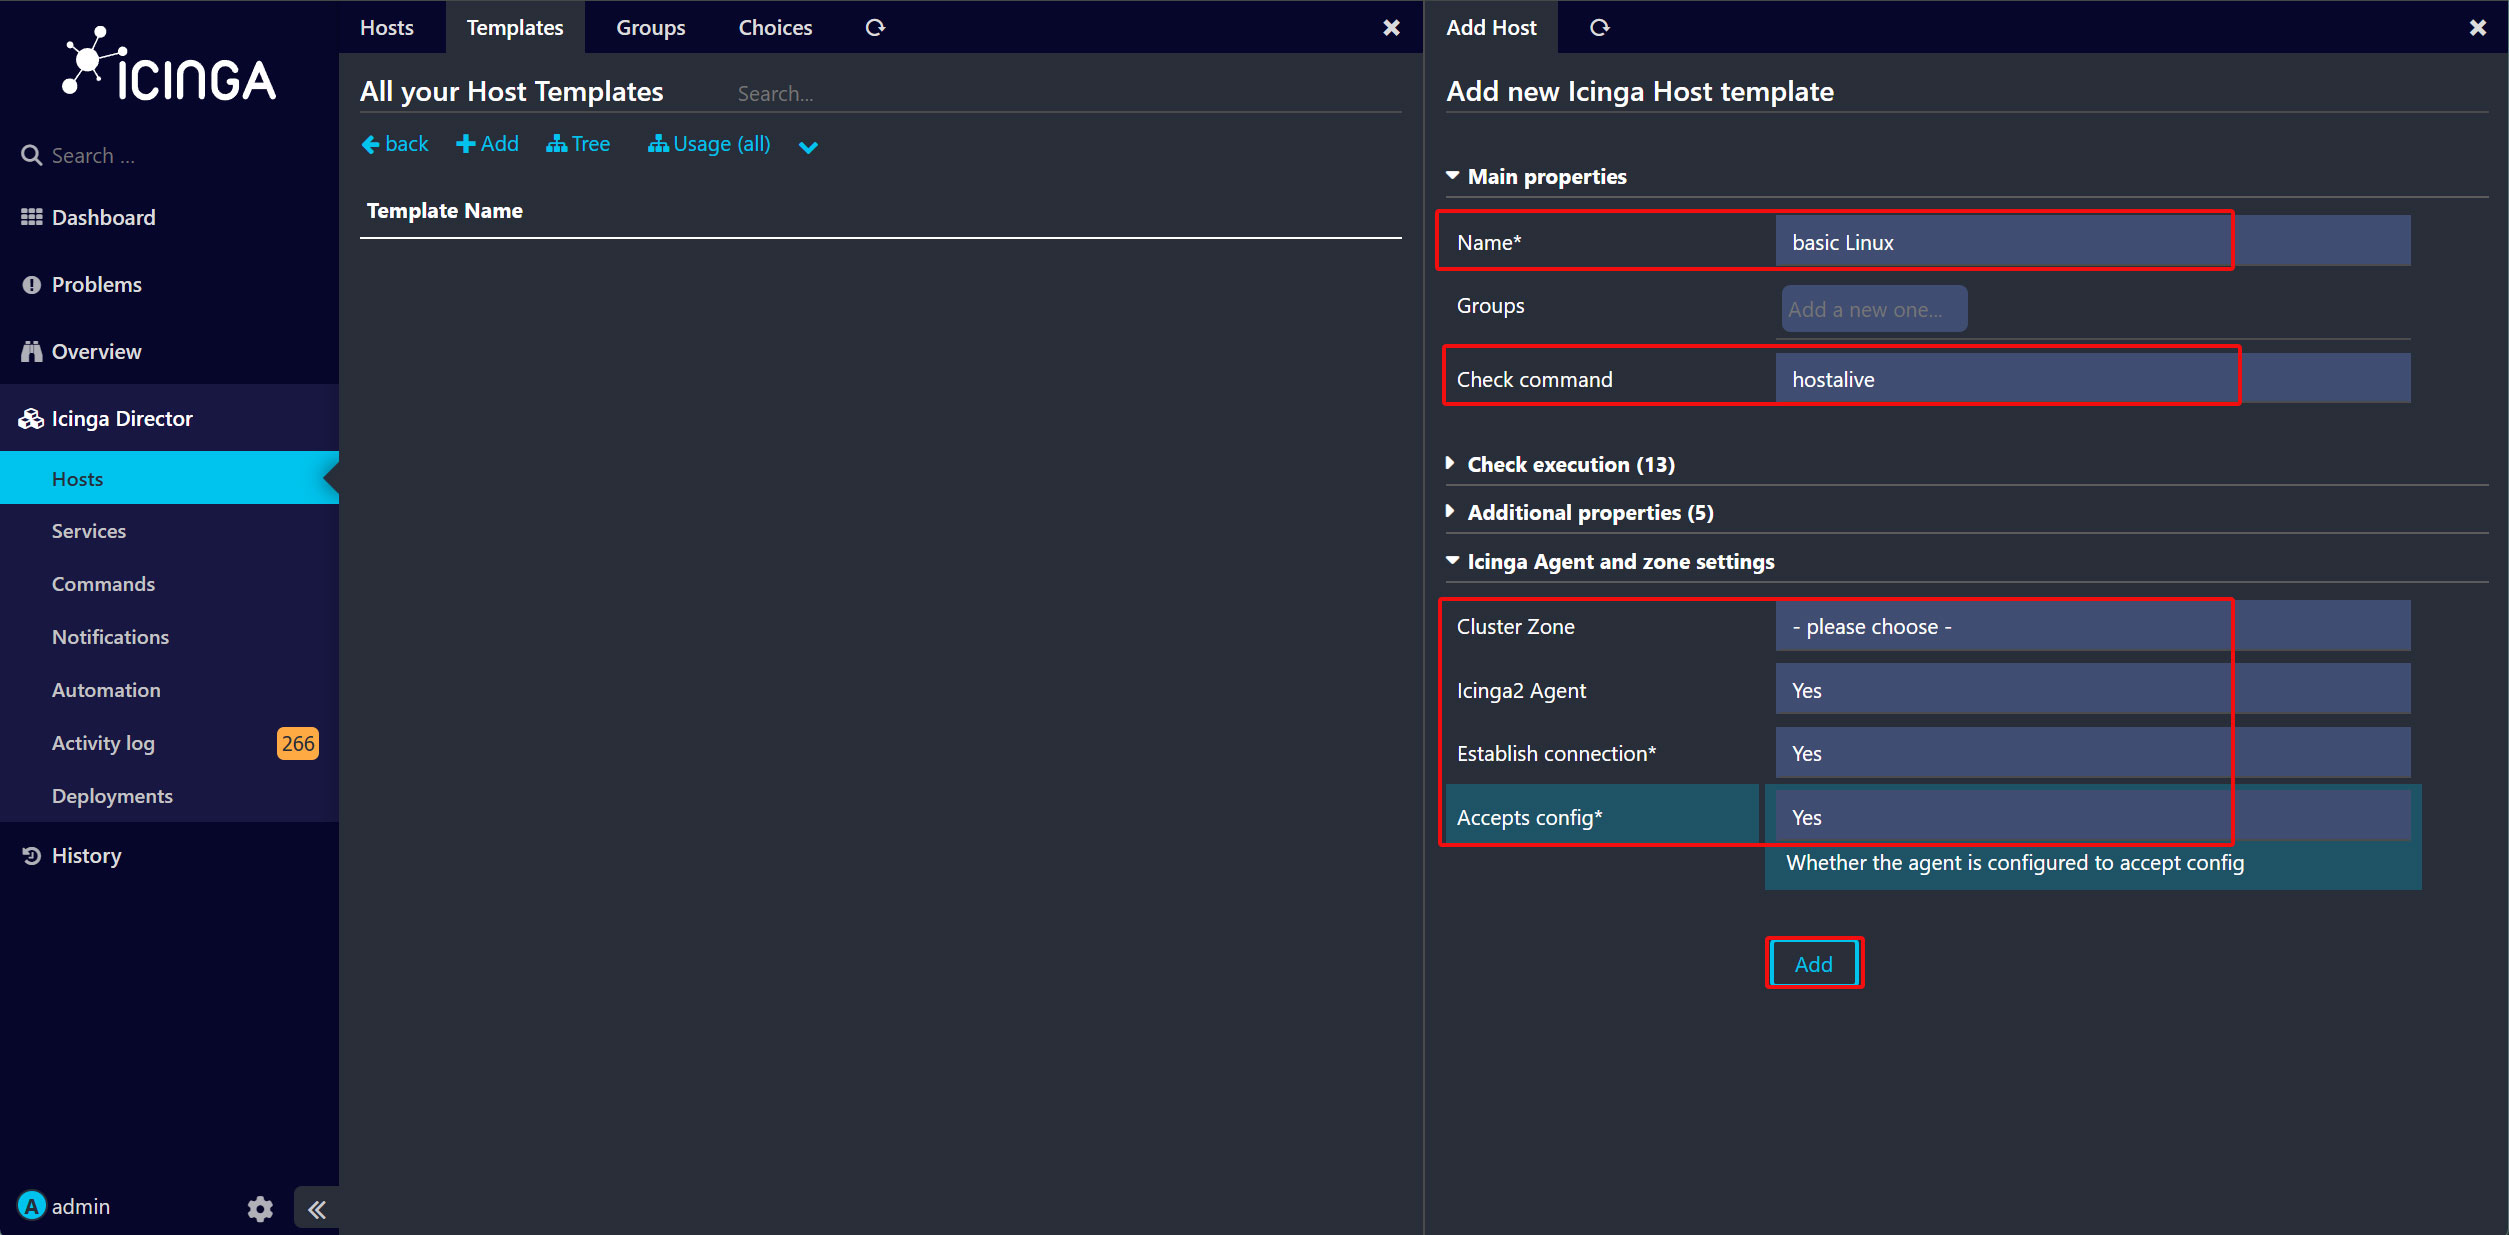
もう一度「Add」ボタンをクリックすると、「basic Linux」という名前のホストテンプレートが作成されます。
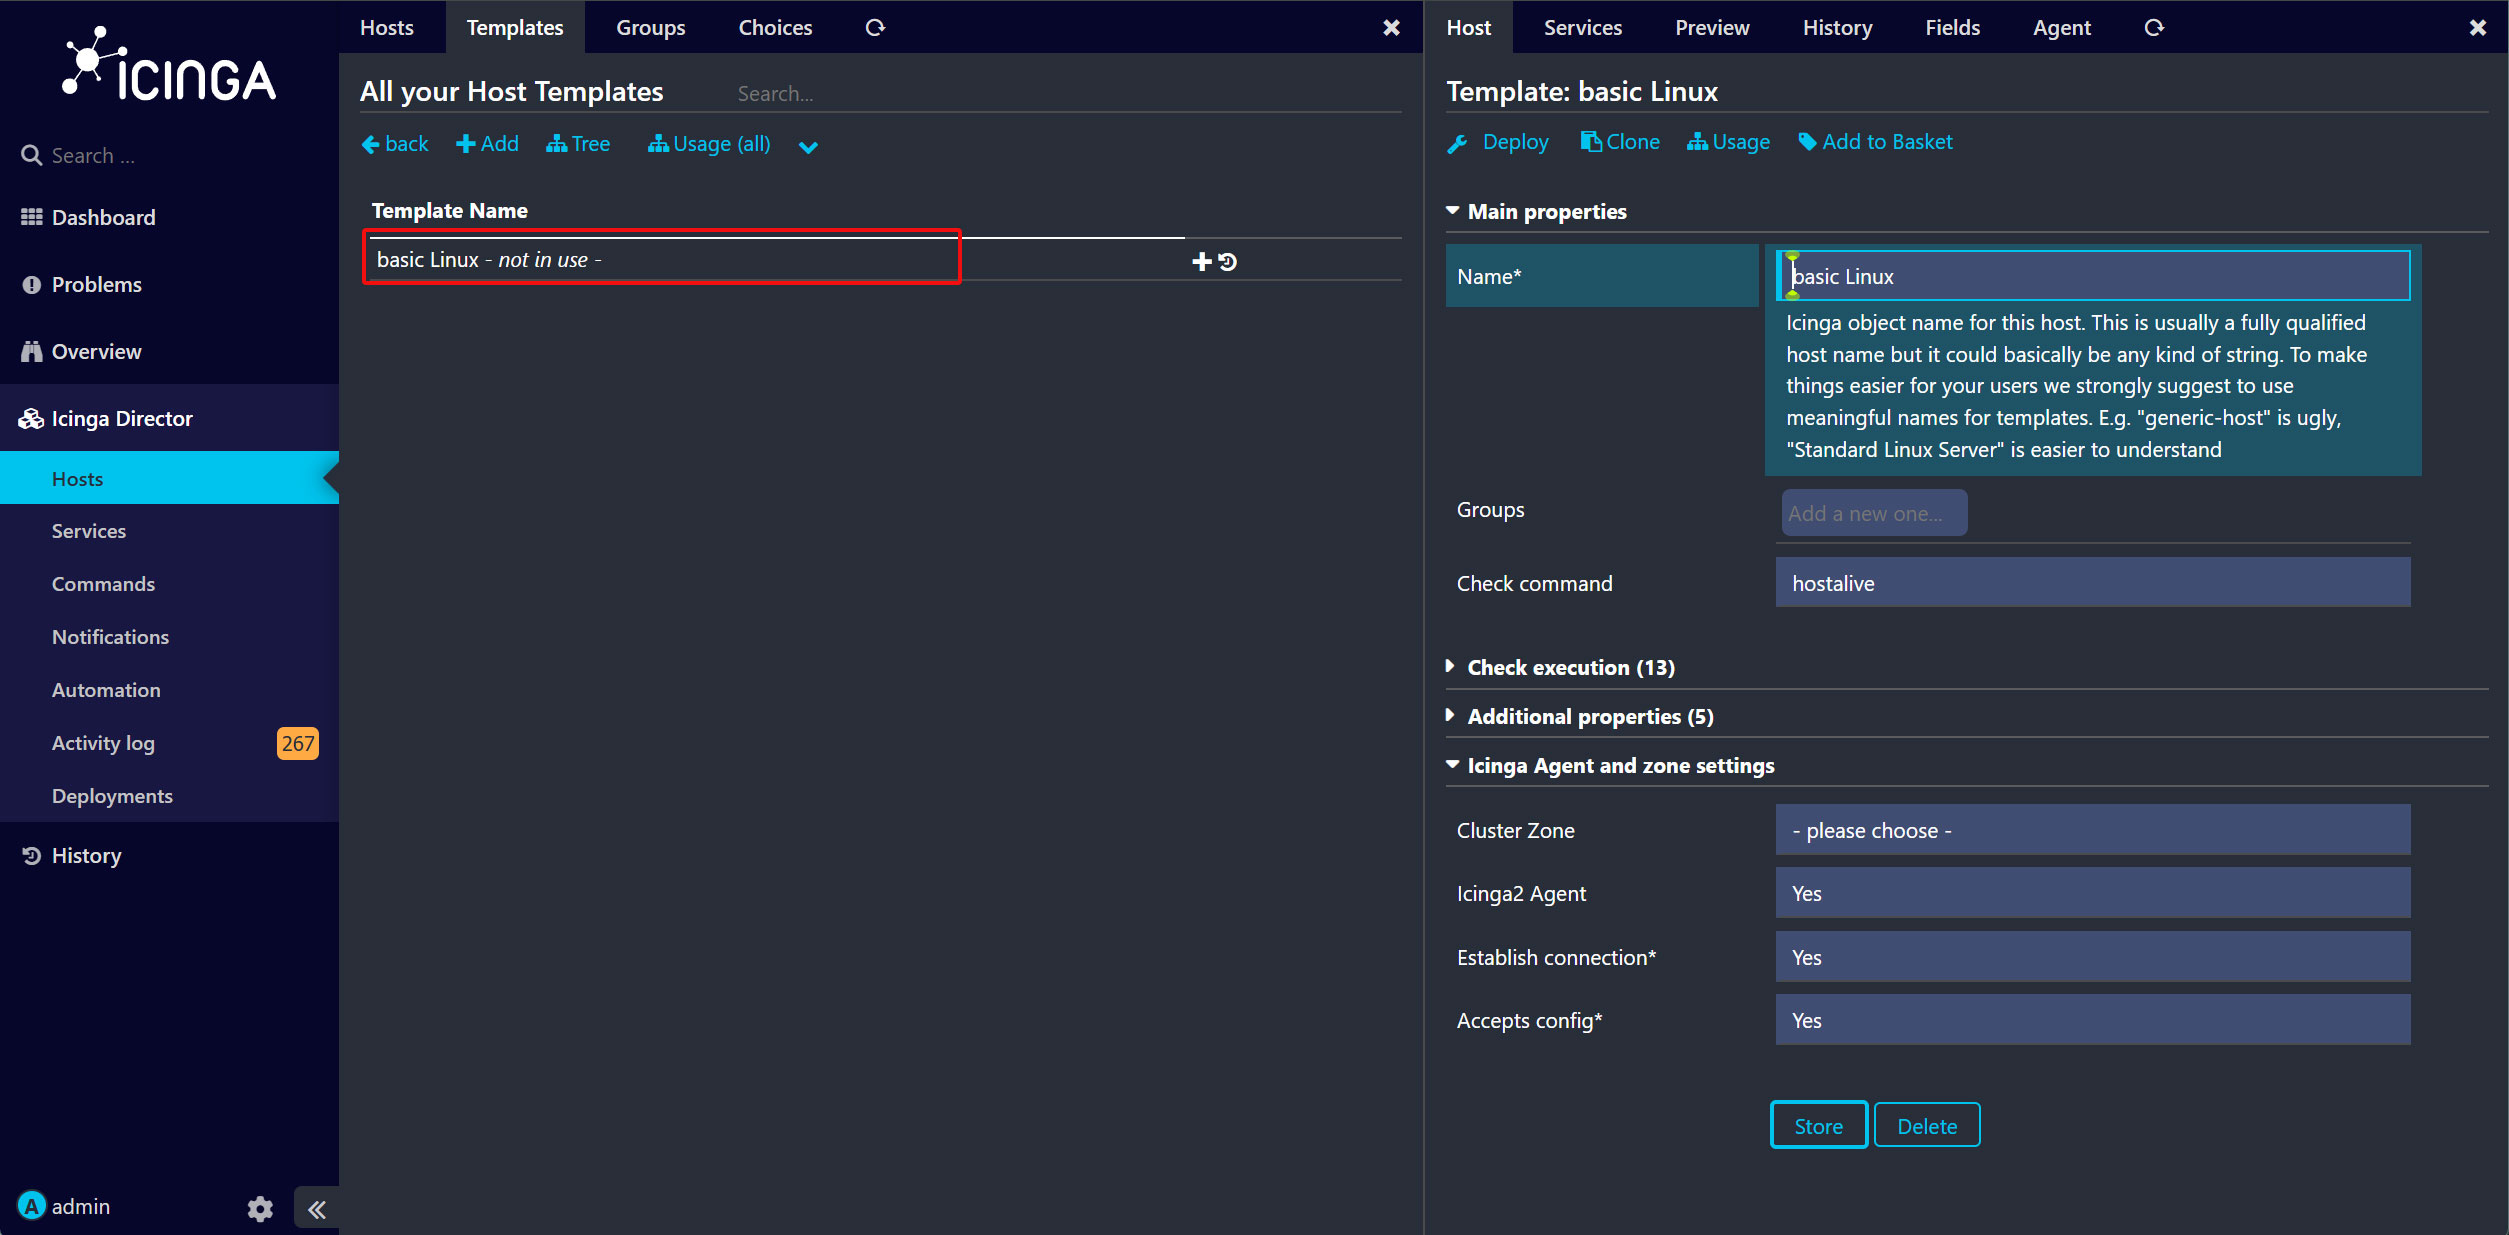
次に、Host Templateに「basic services Linux」という名前のServiceSetを追加します。
Host Template名をクリックし、右側の画面にある「Services」タブをクリックします。
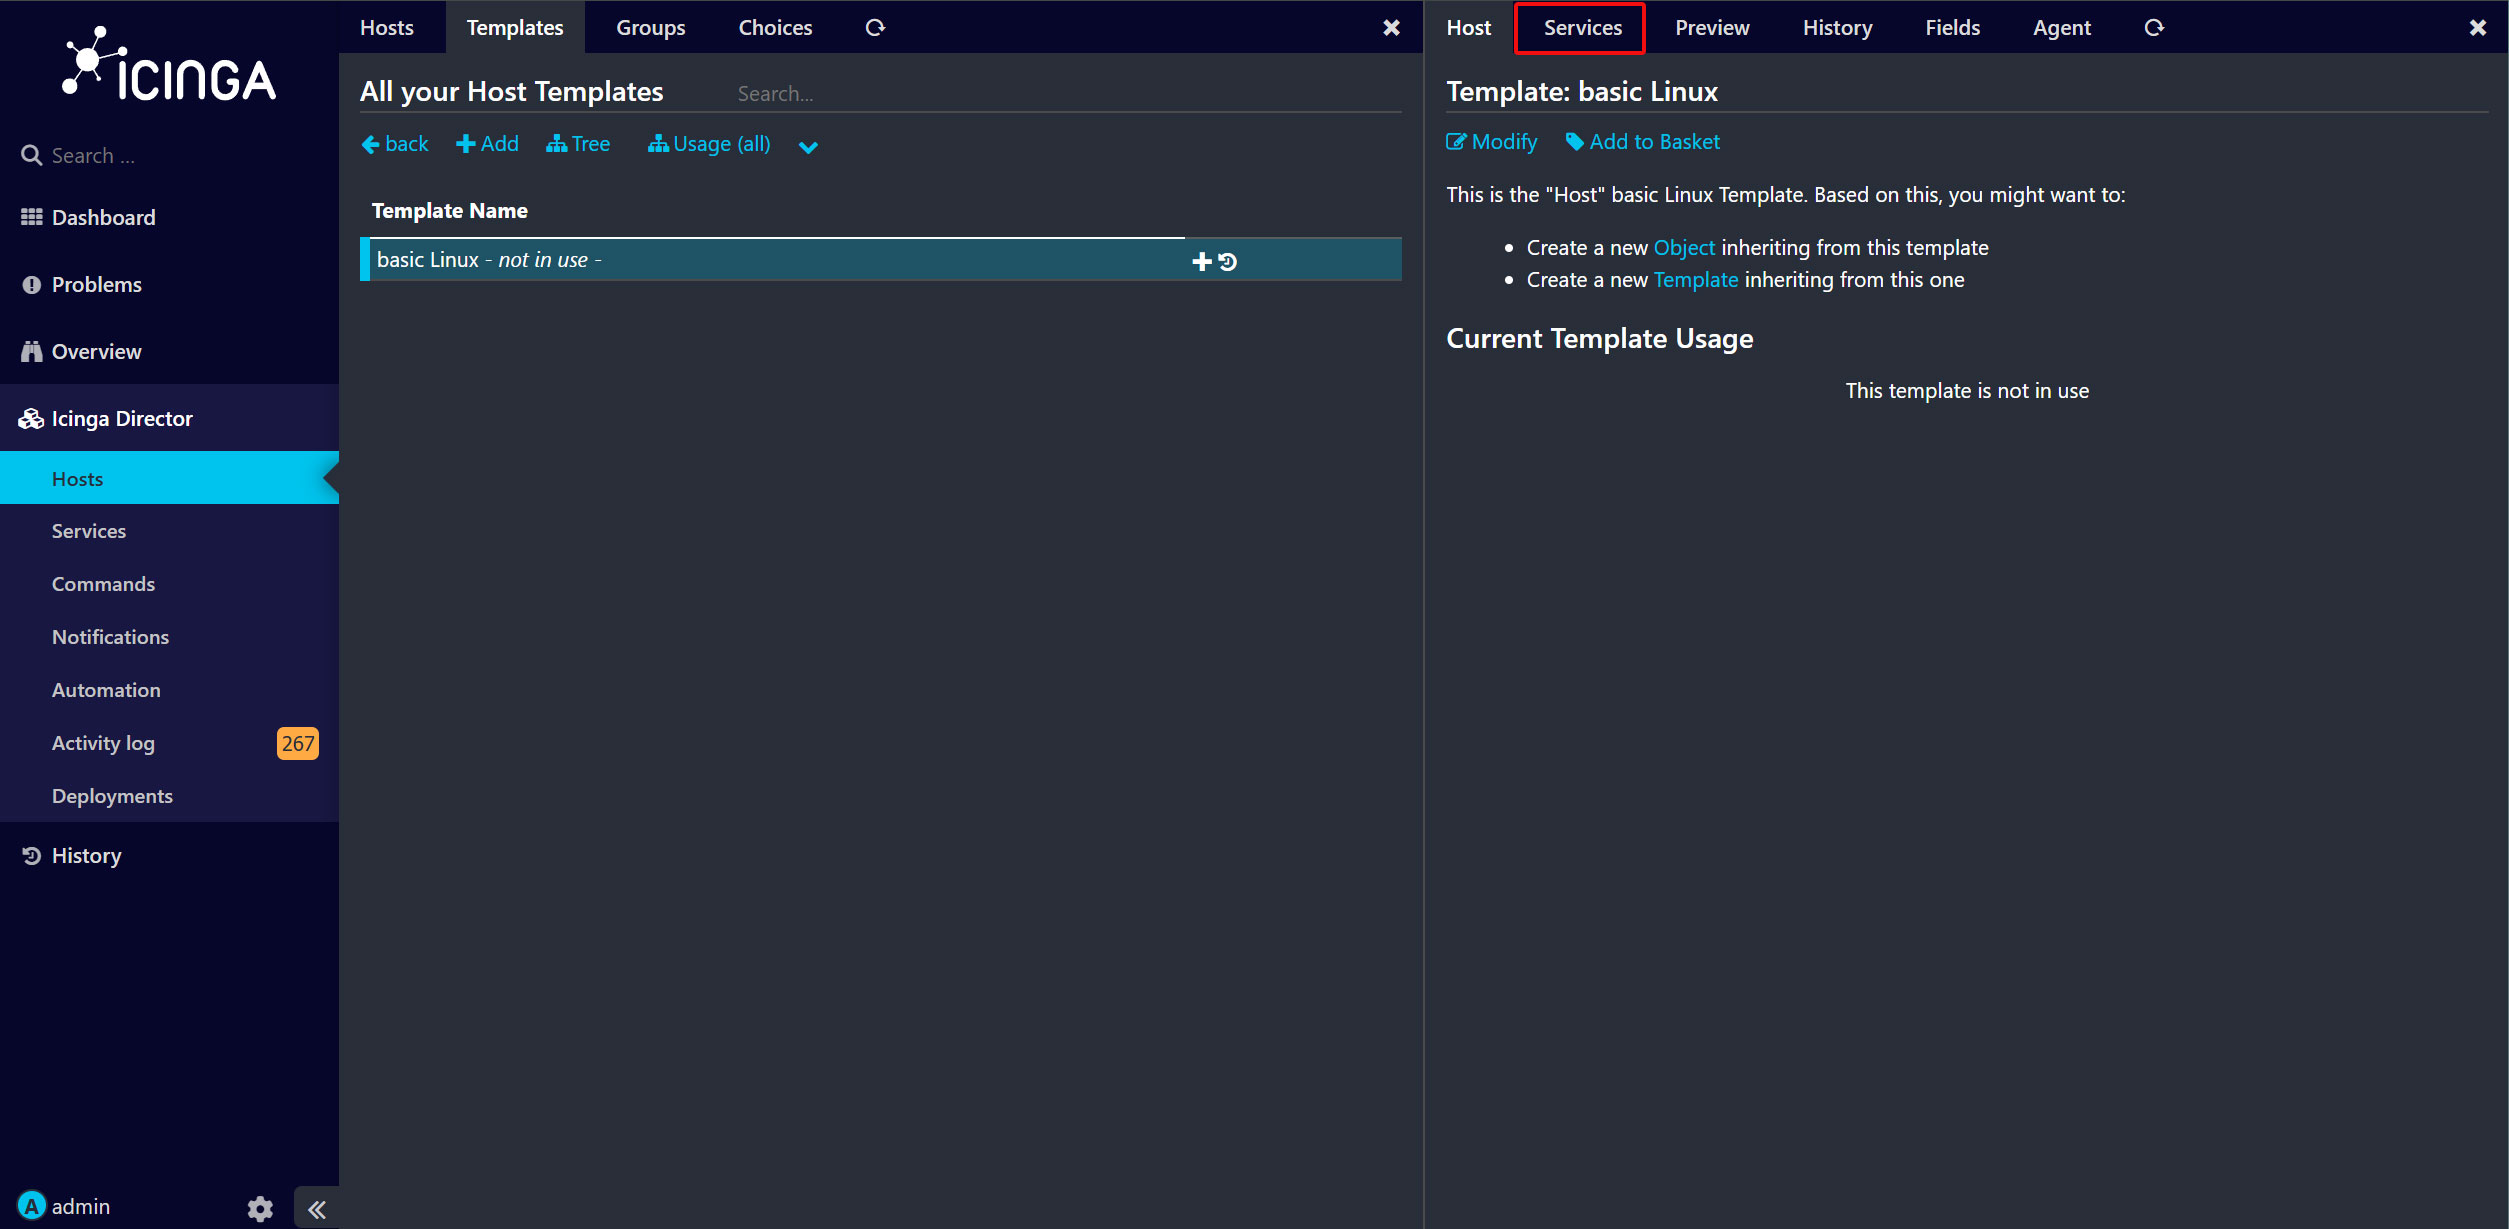
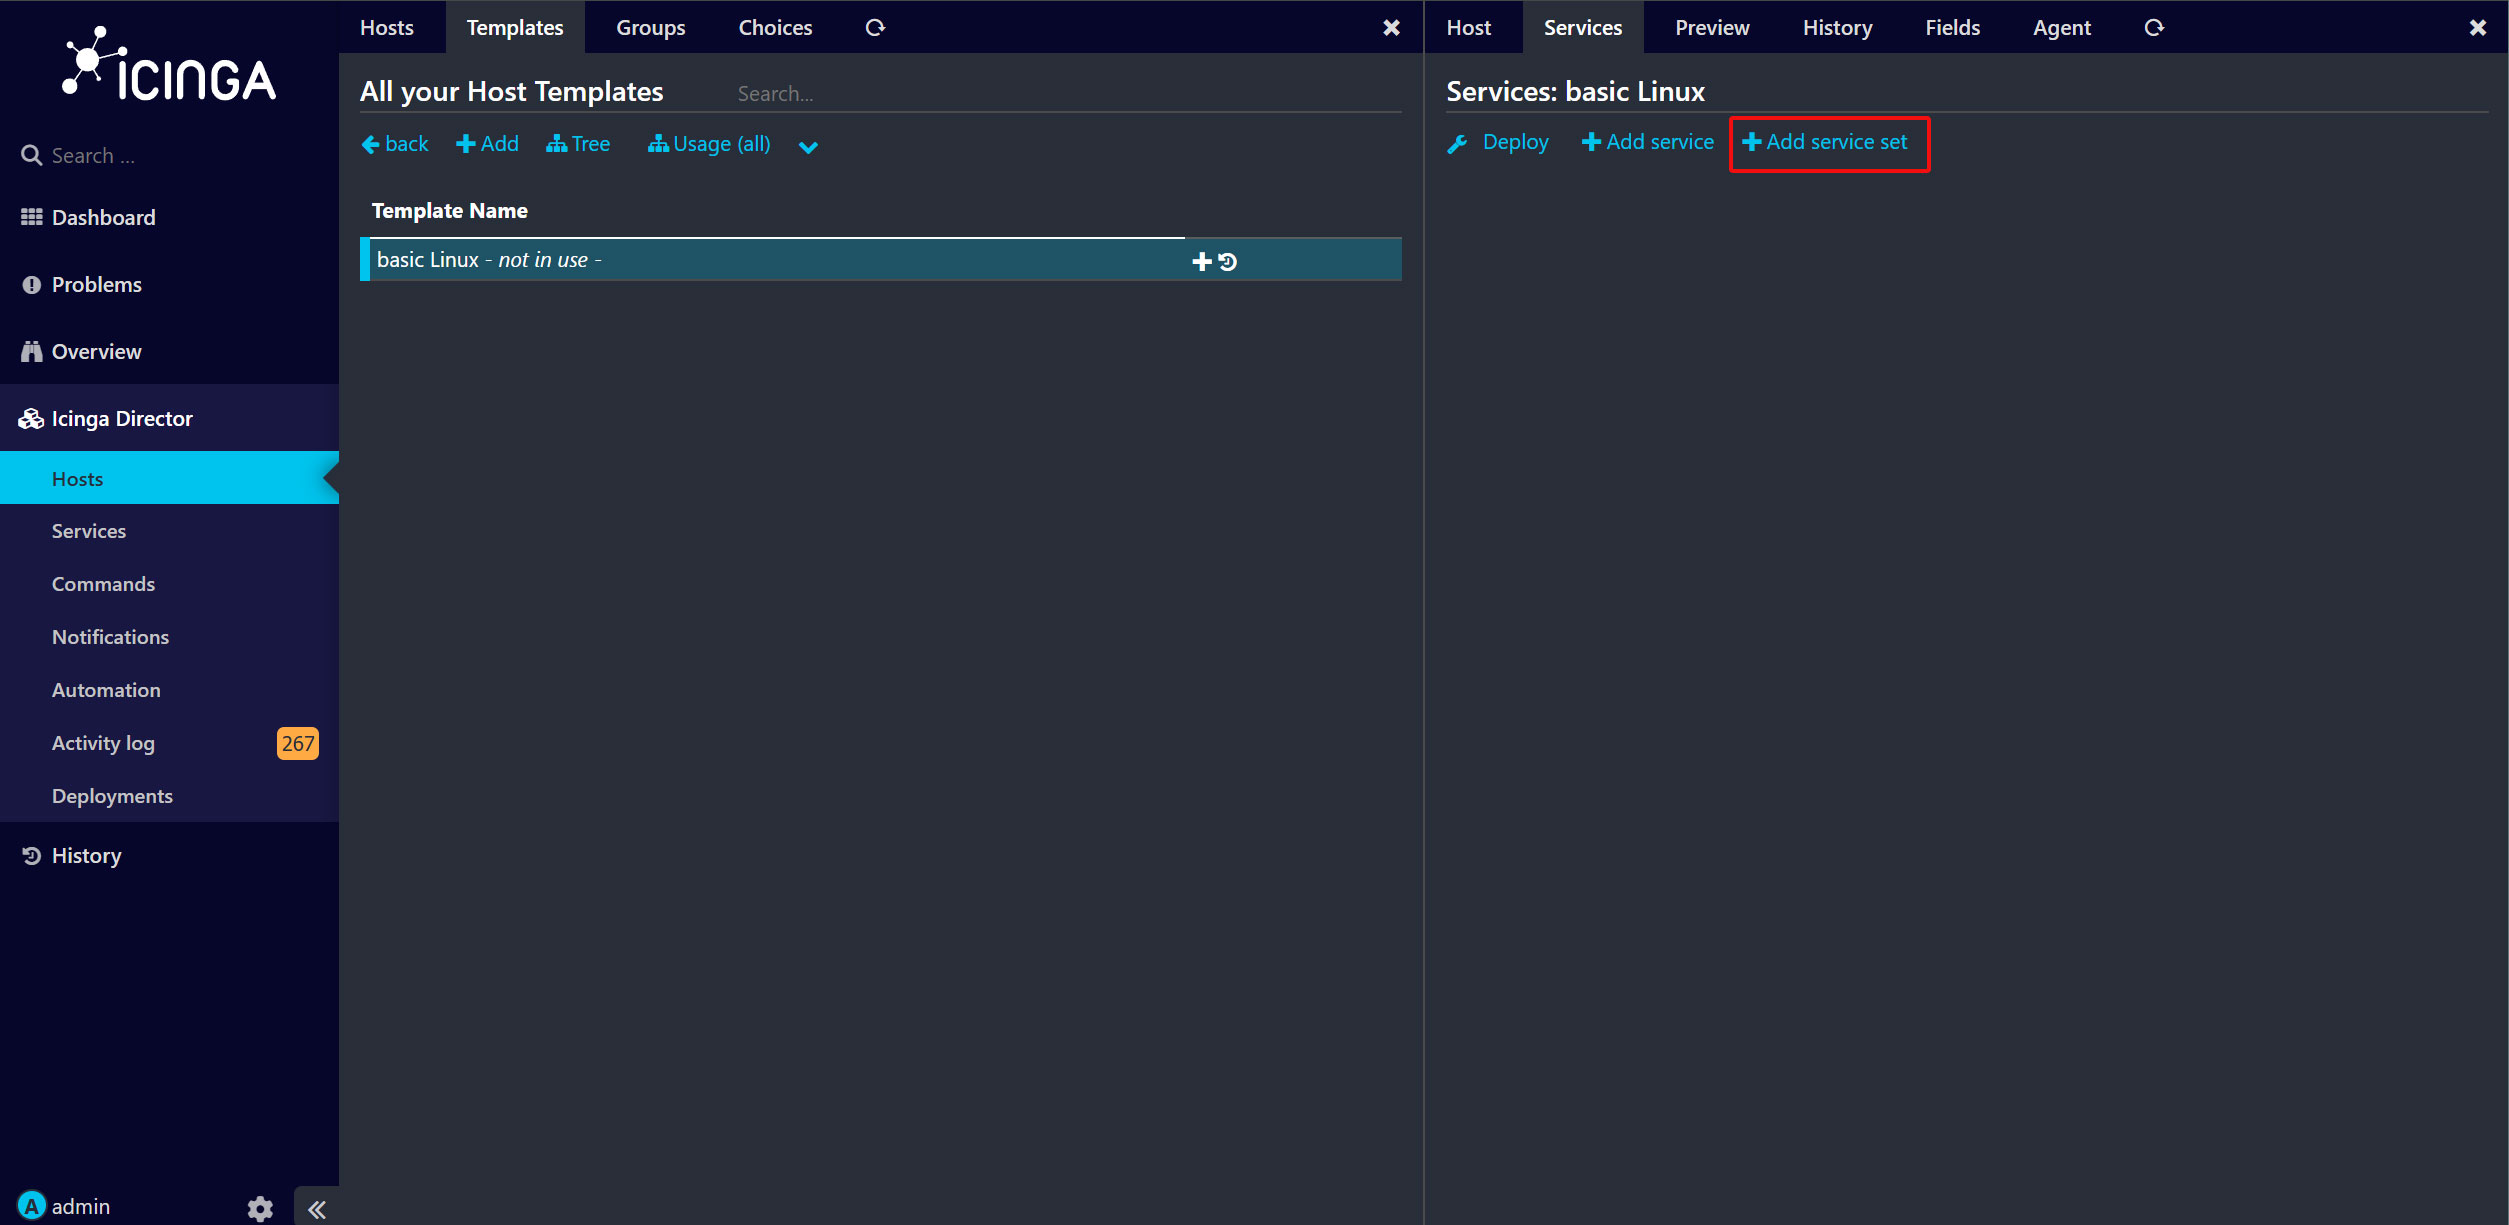
「Add Service set」ボタンをクリックします。
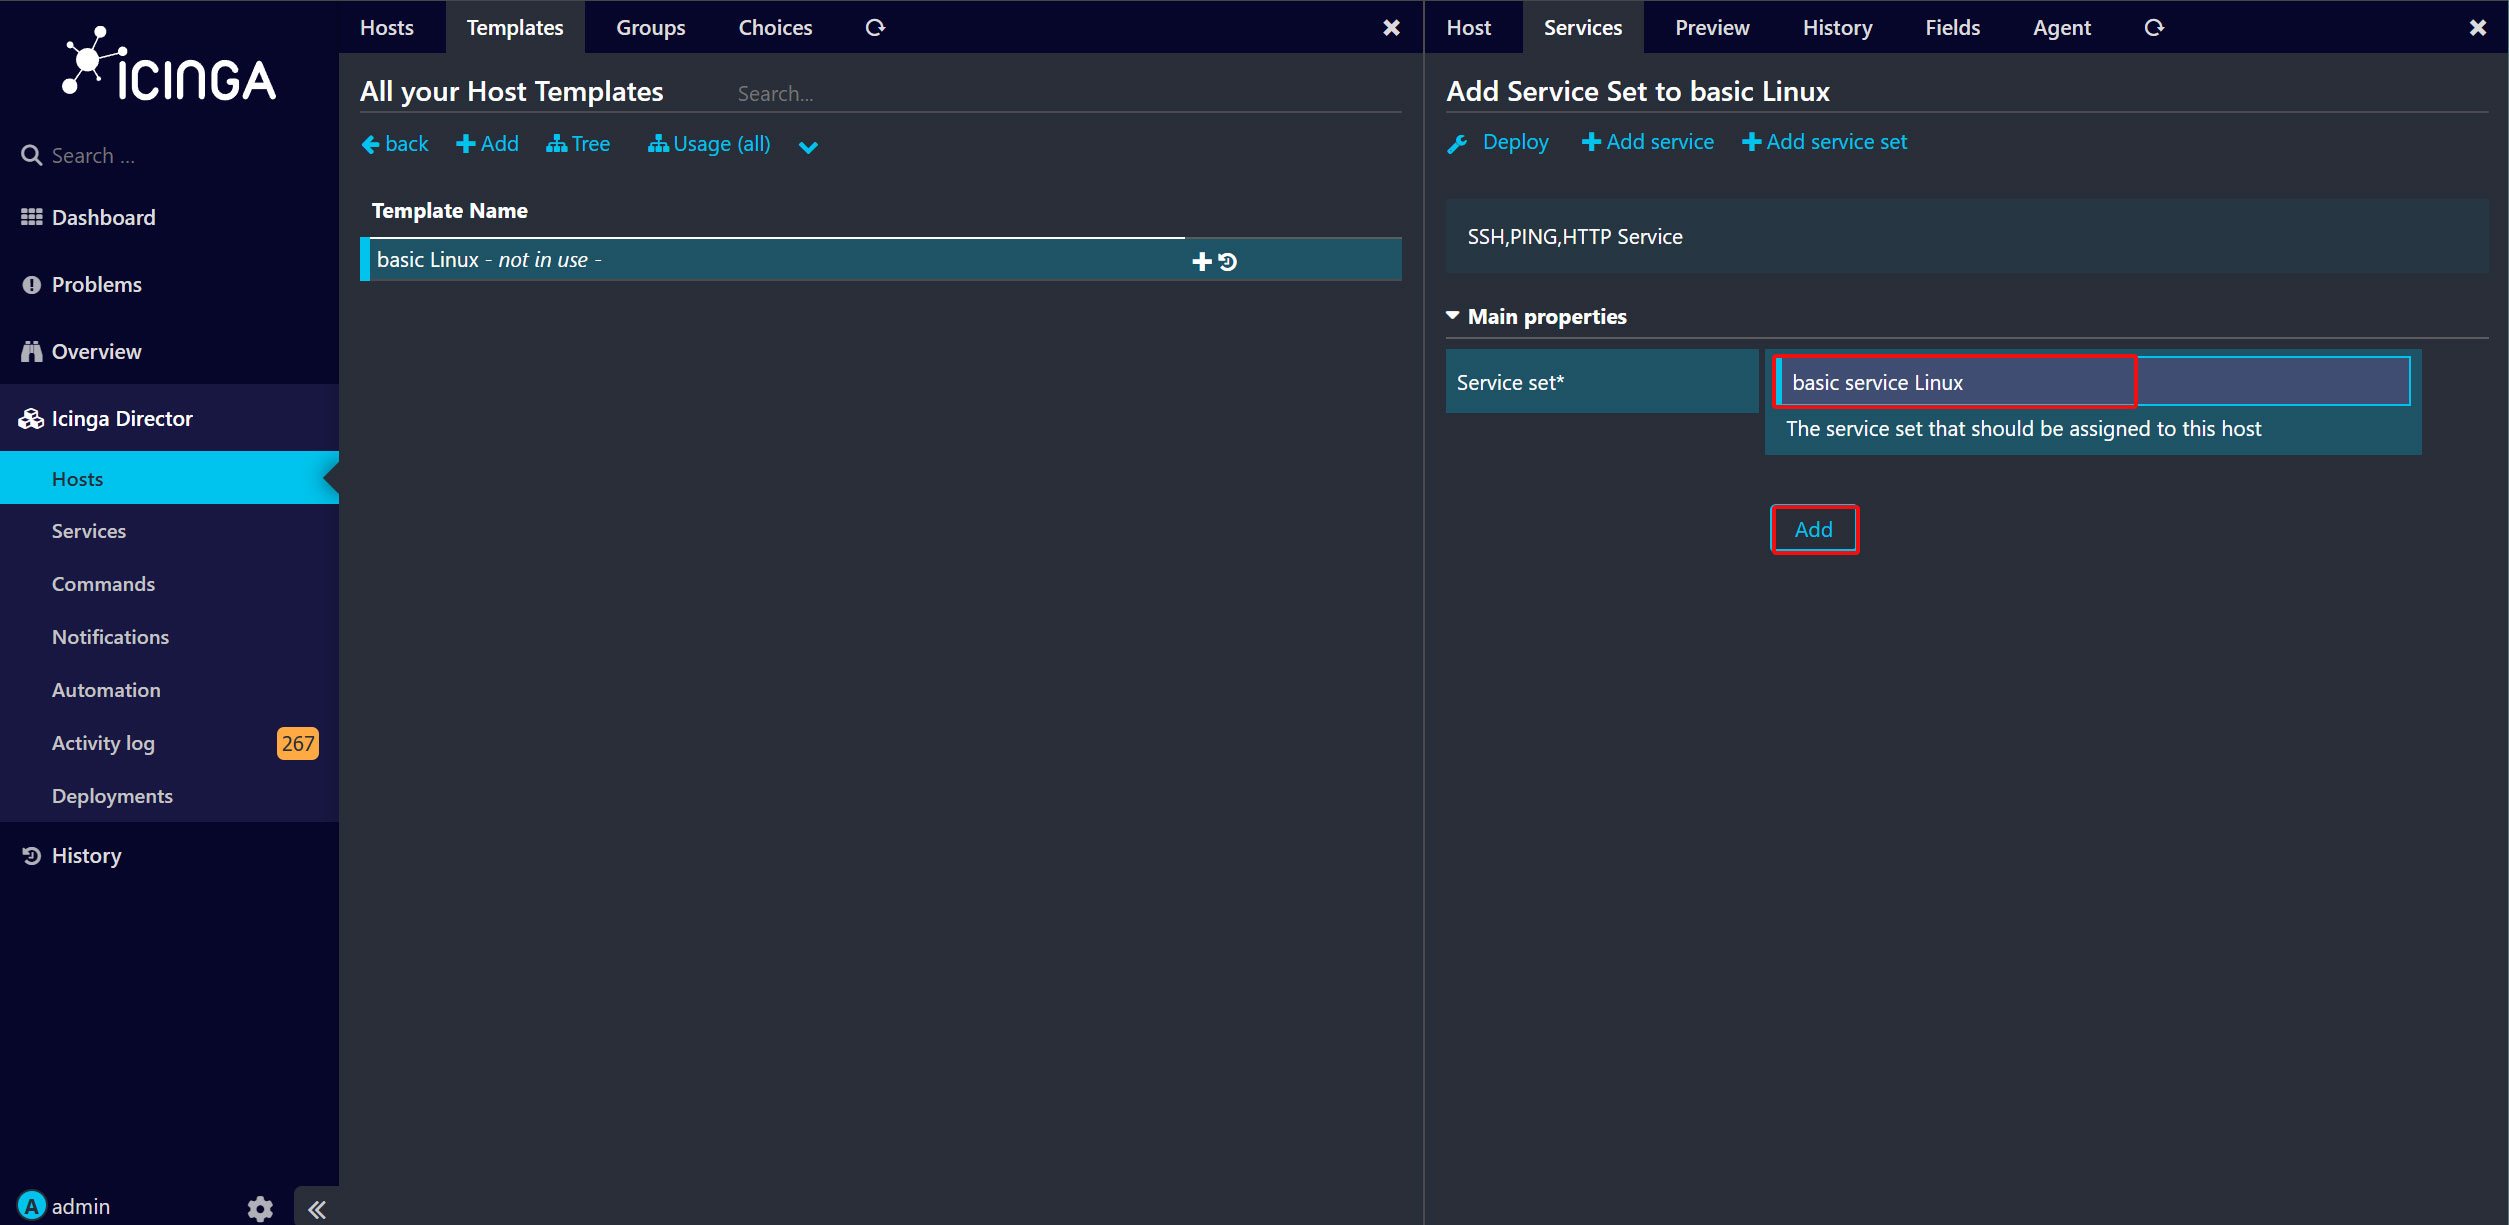
「basic service Linux」という名前のサービスセットを選択し、「Add」をクリックします。
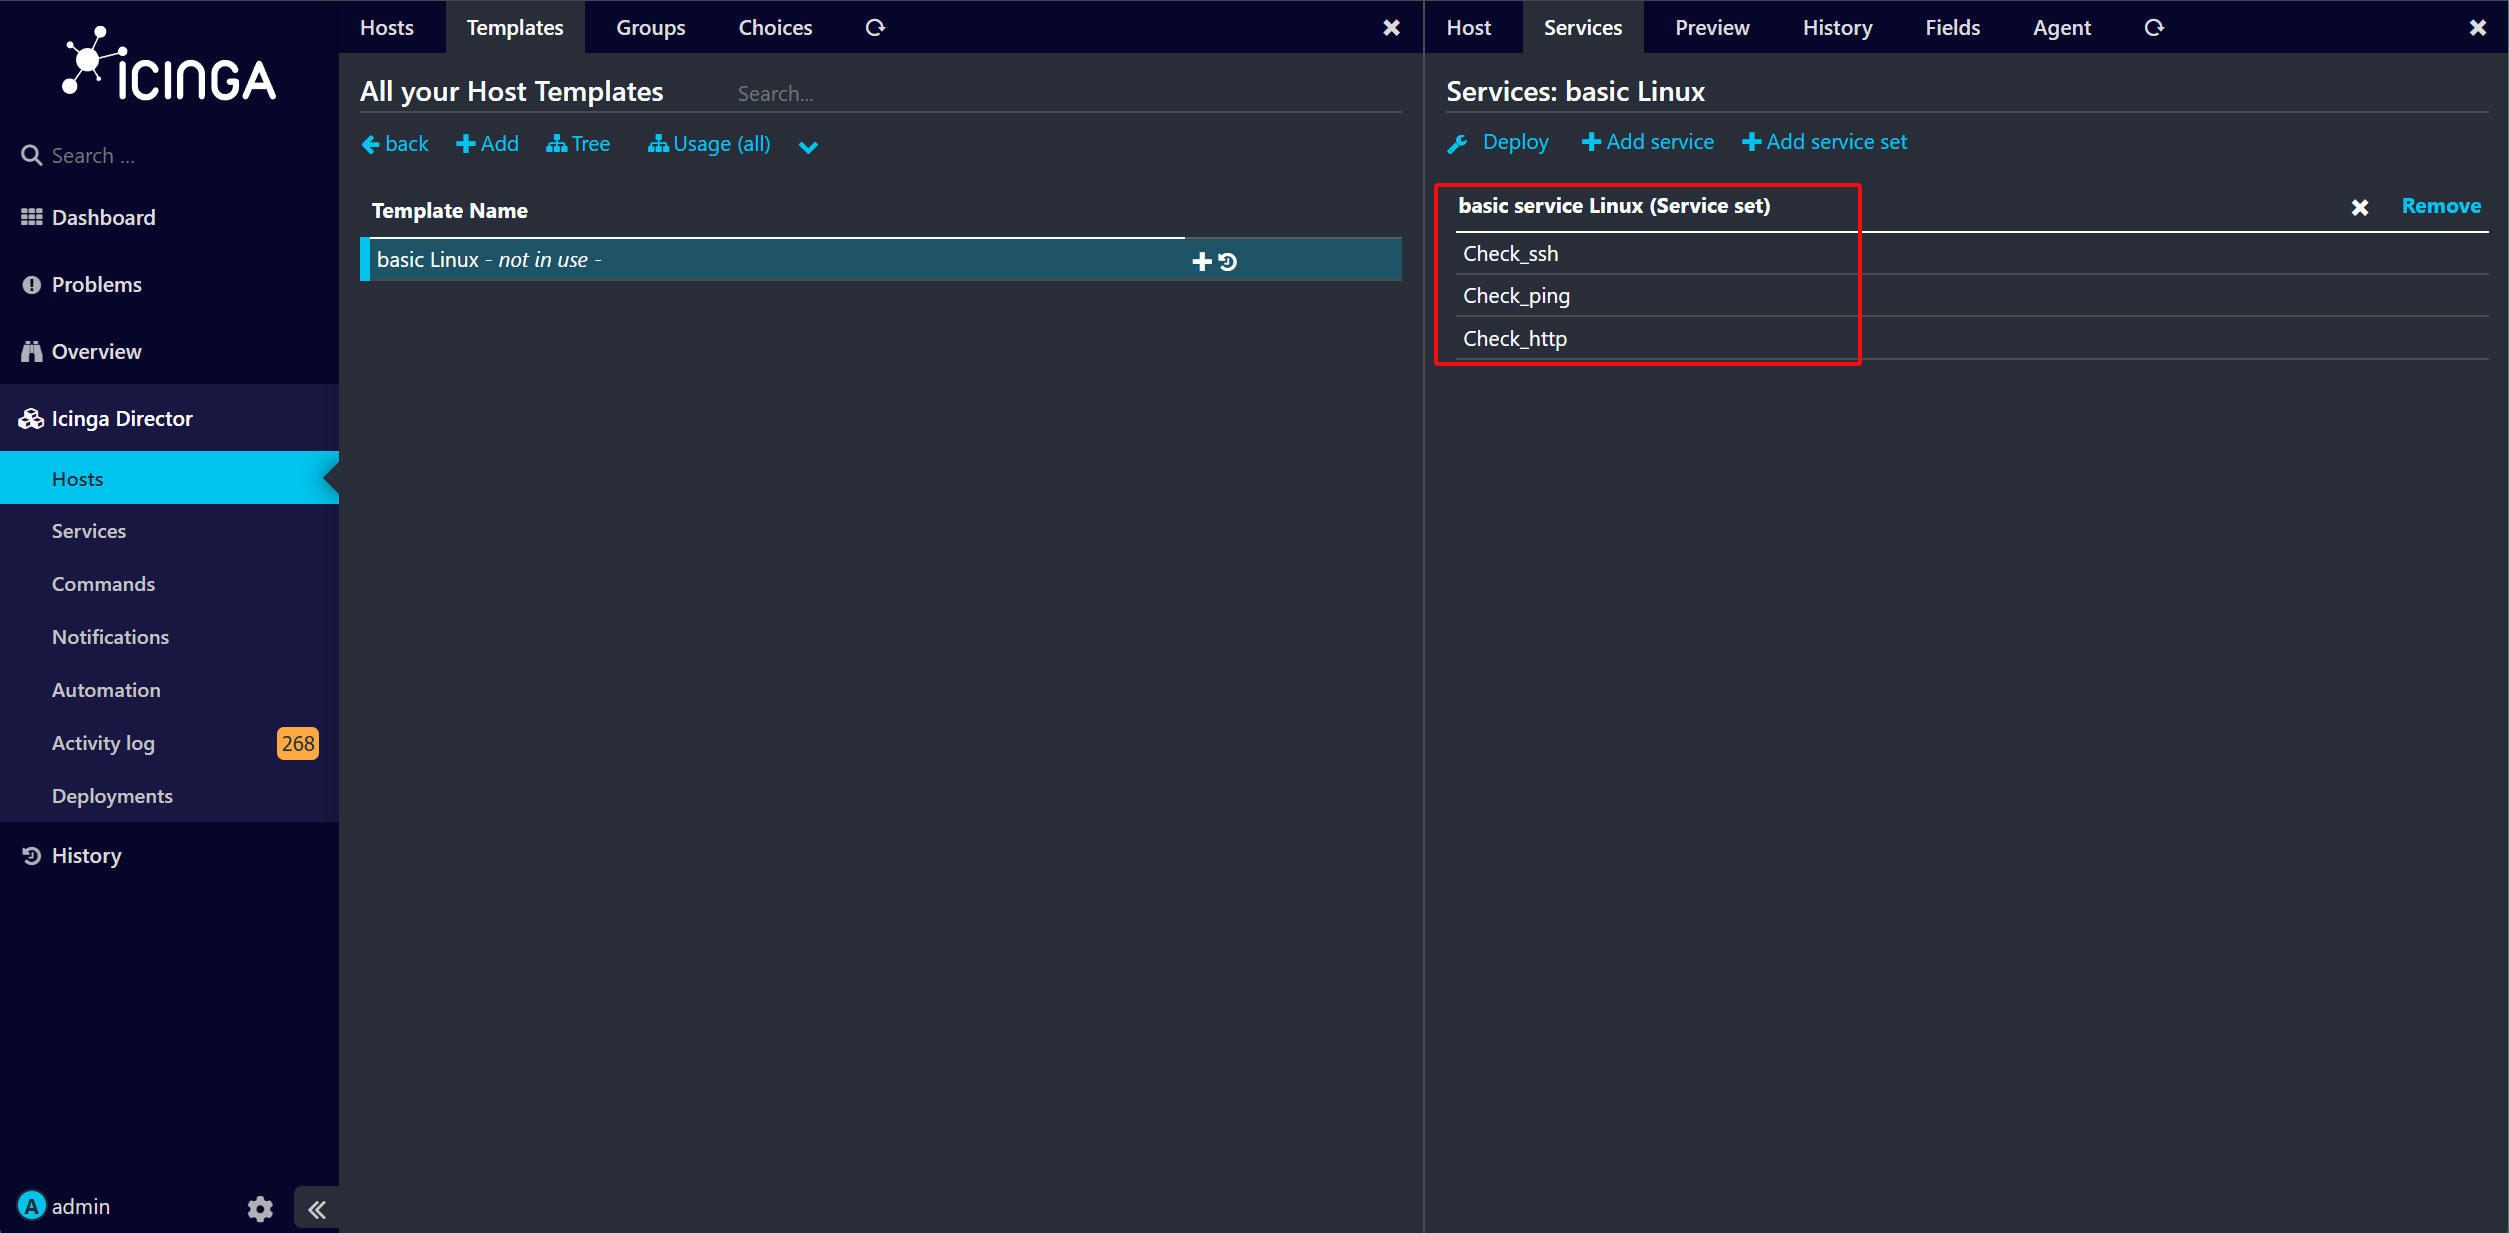
ServiceSetが追加されたホストテンプレートが作成されました。これで、Icinga2に新しいホストを追加する準備が整いました。
10. Icinga Directorで監視ホストの追加
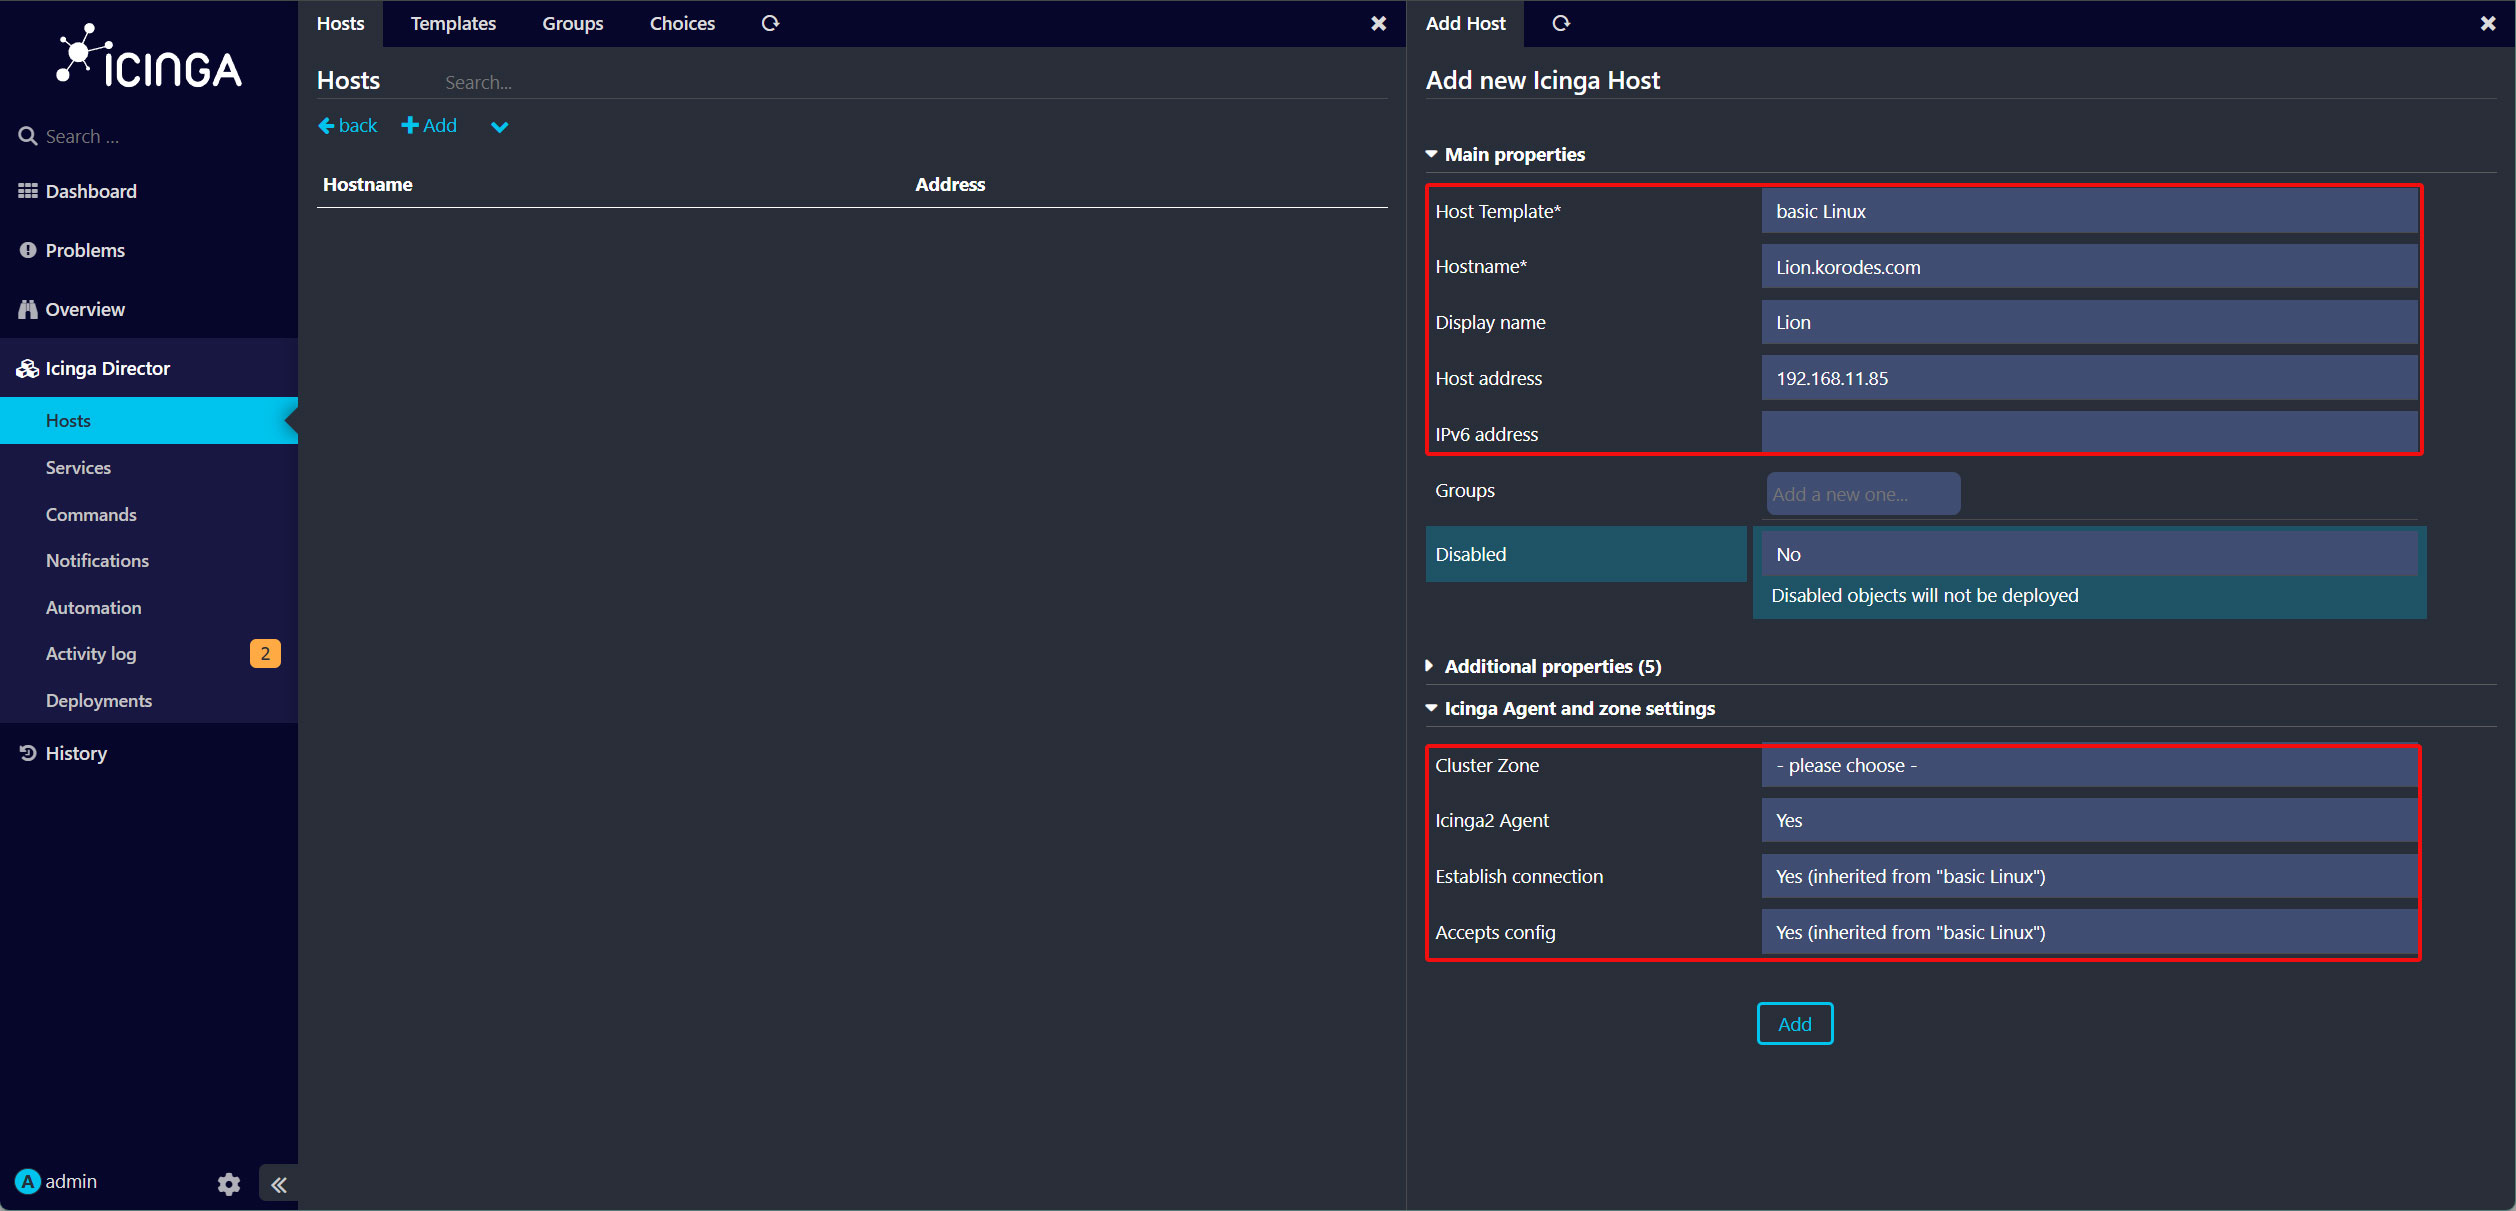
ホスト名「Lion.korodes.com」(hostname -fで確認)、IPアドレス「192.168.11.85」を持つDebianLinux 12を追加します。
Icinga2のダッシュボードで、「Icinga Director」メニューをクリックし、「Hosts」→[Hosts]をクリック
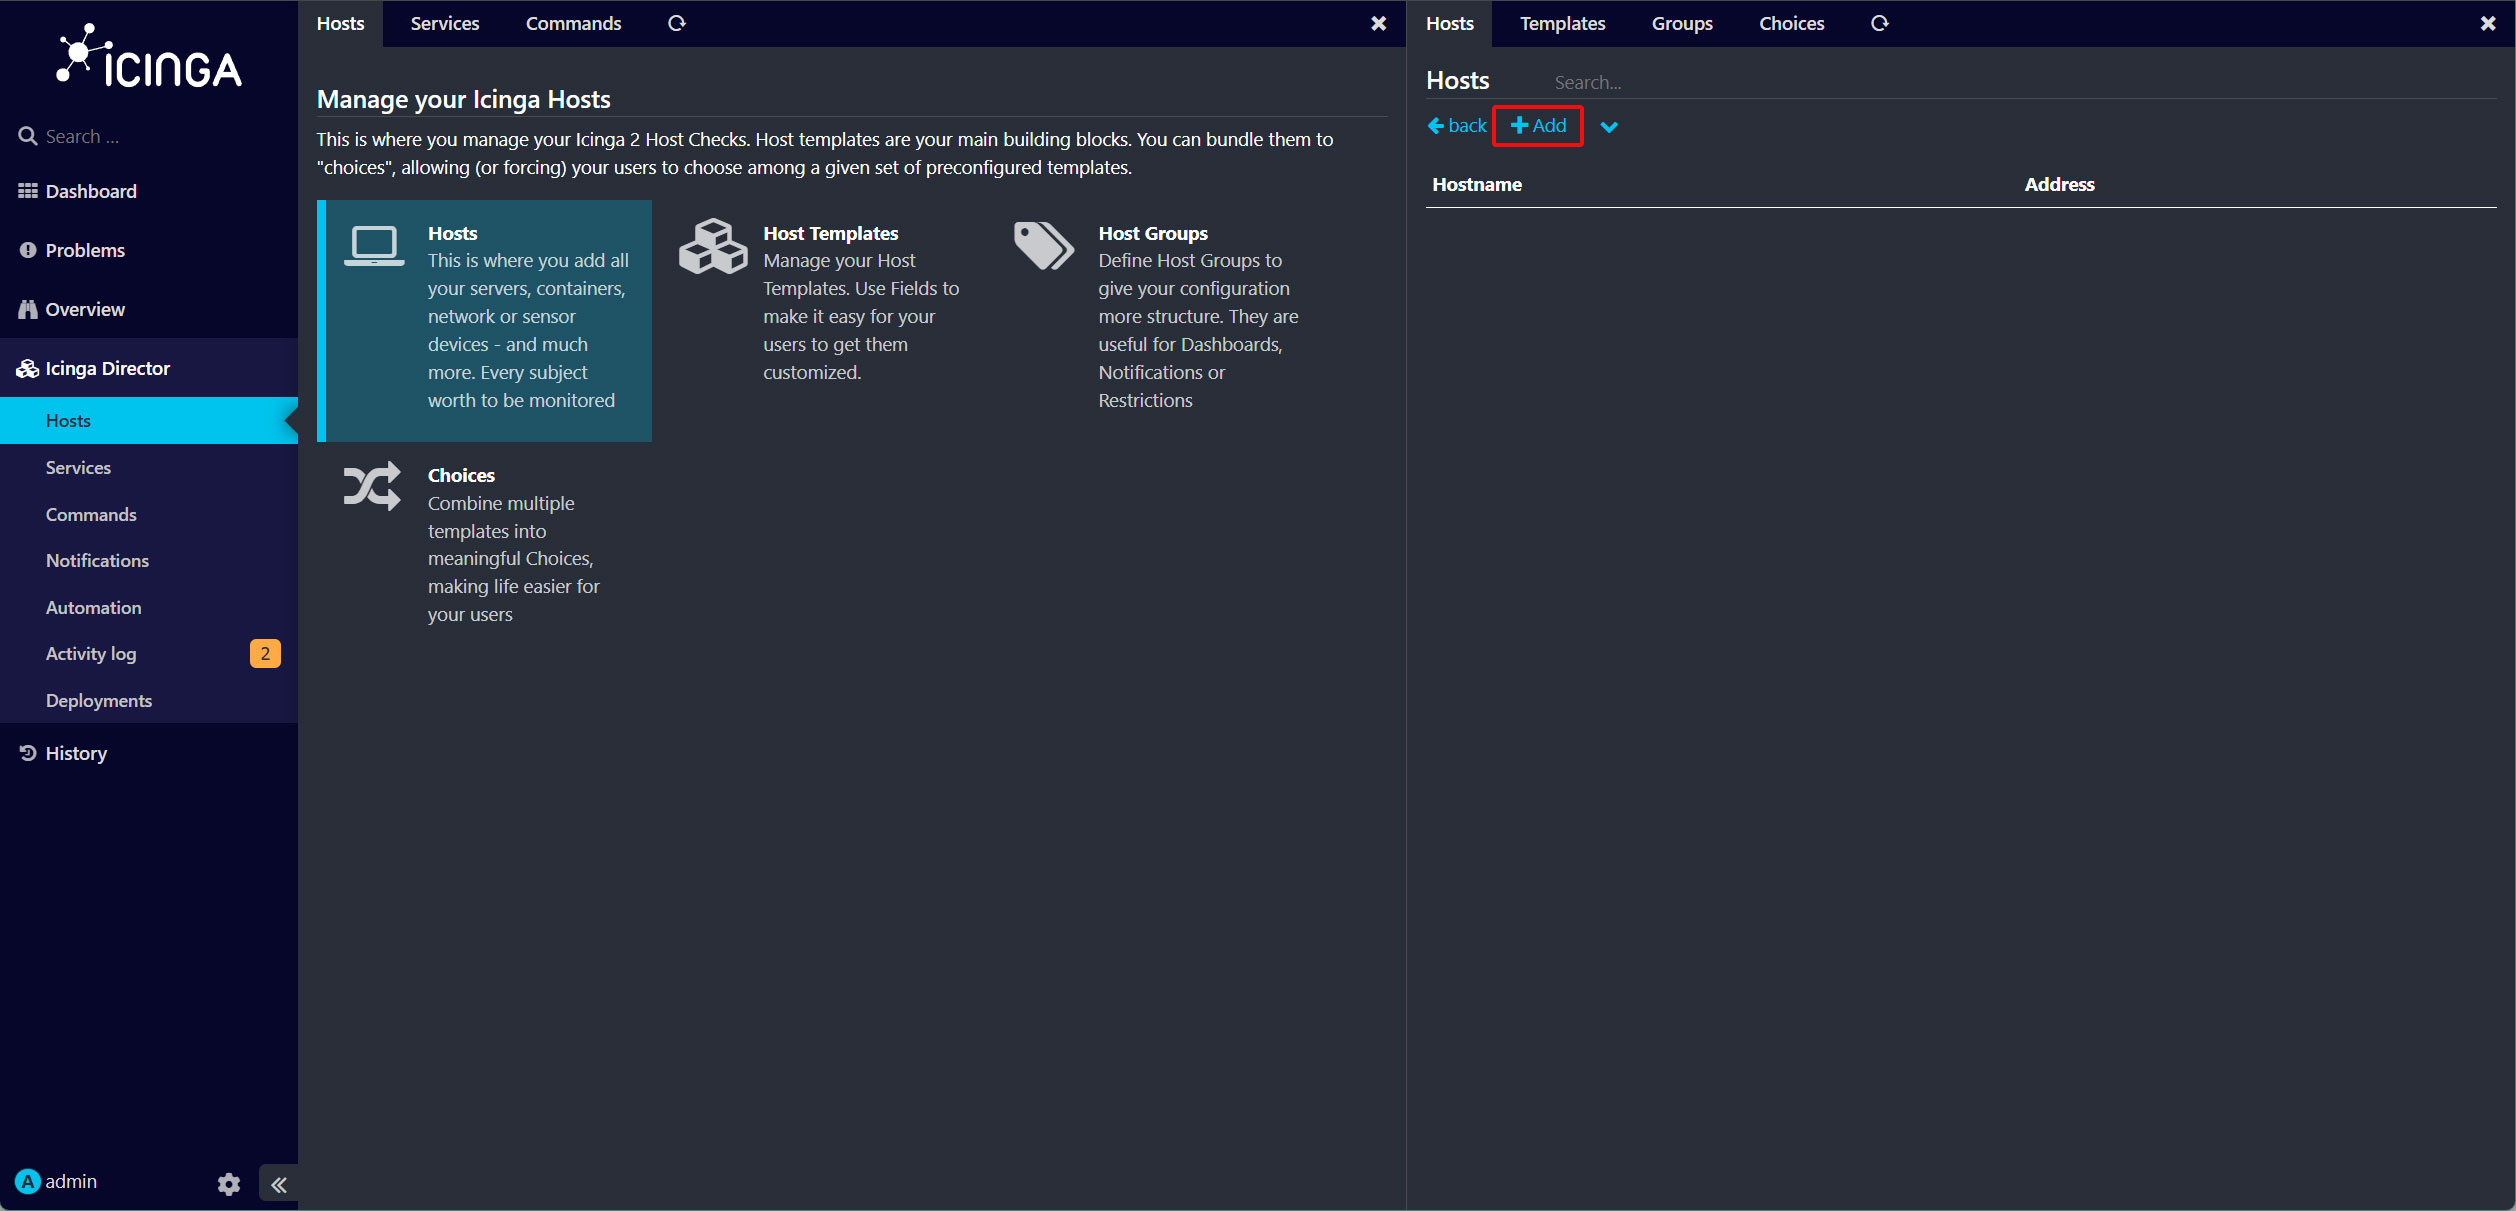
画面右側の「Add」ボタンをクリックしてください。
「basic Linux」ホストテンプレートを選択し、詳細なホスト設定を入力し、「Add」ボタンをクリック
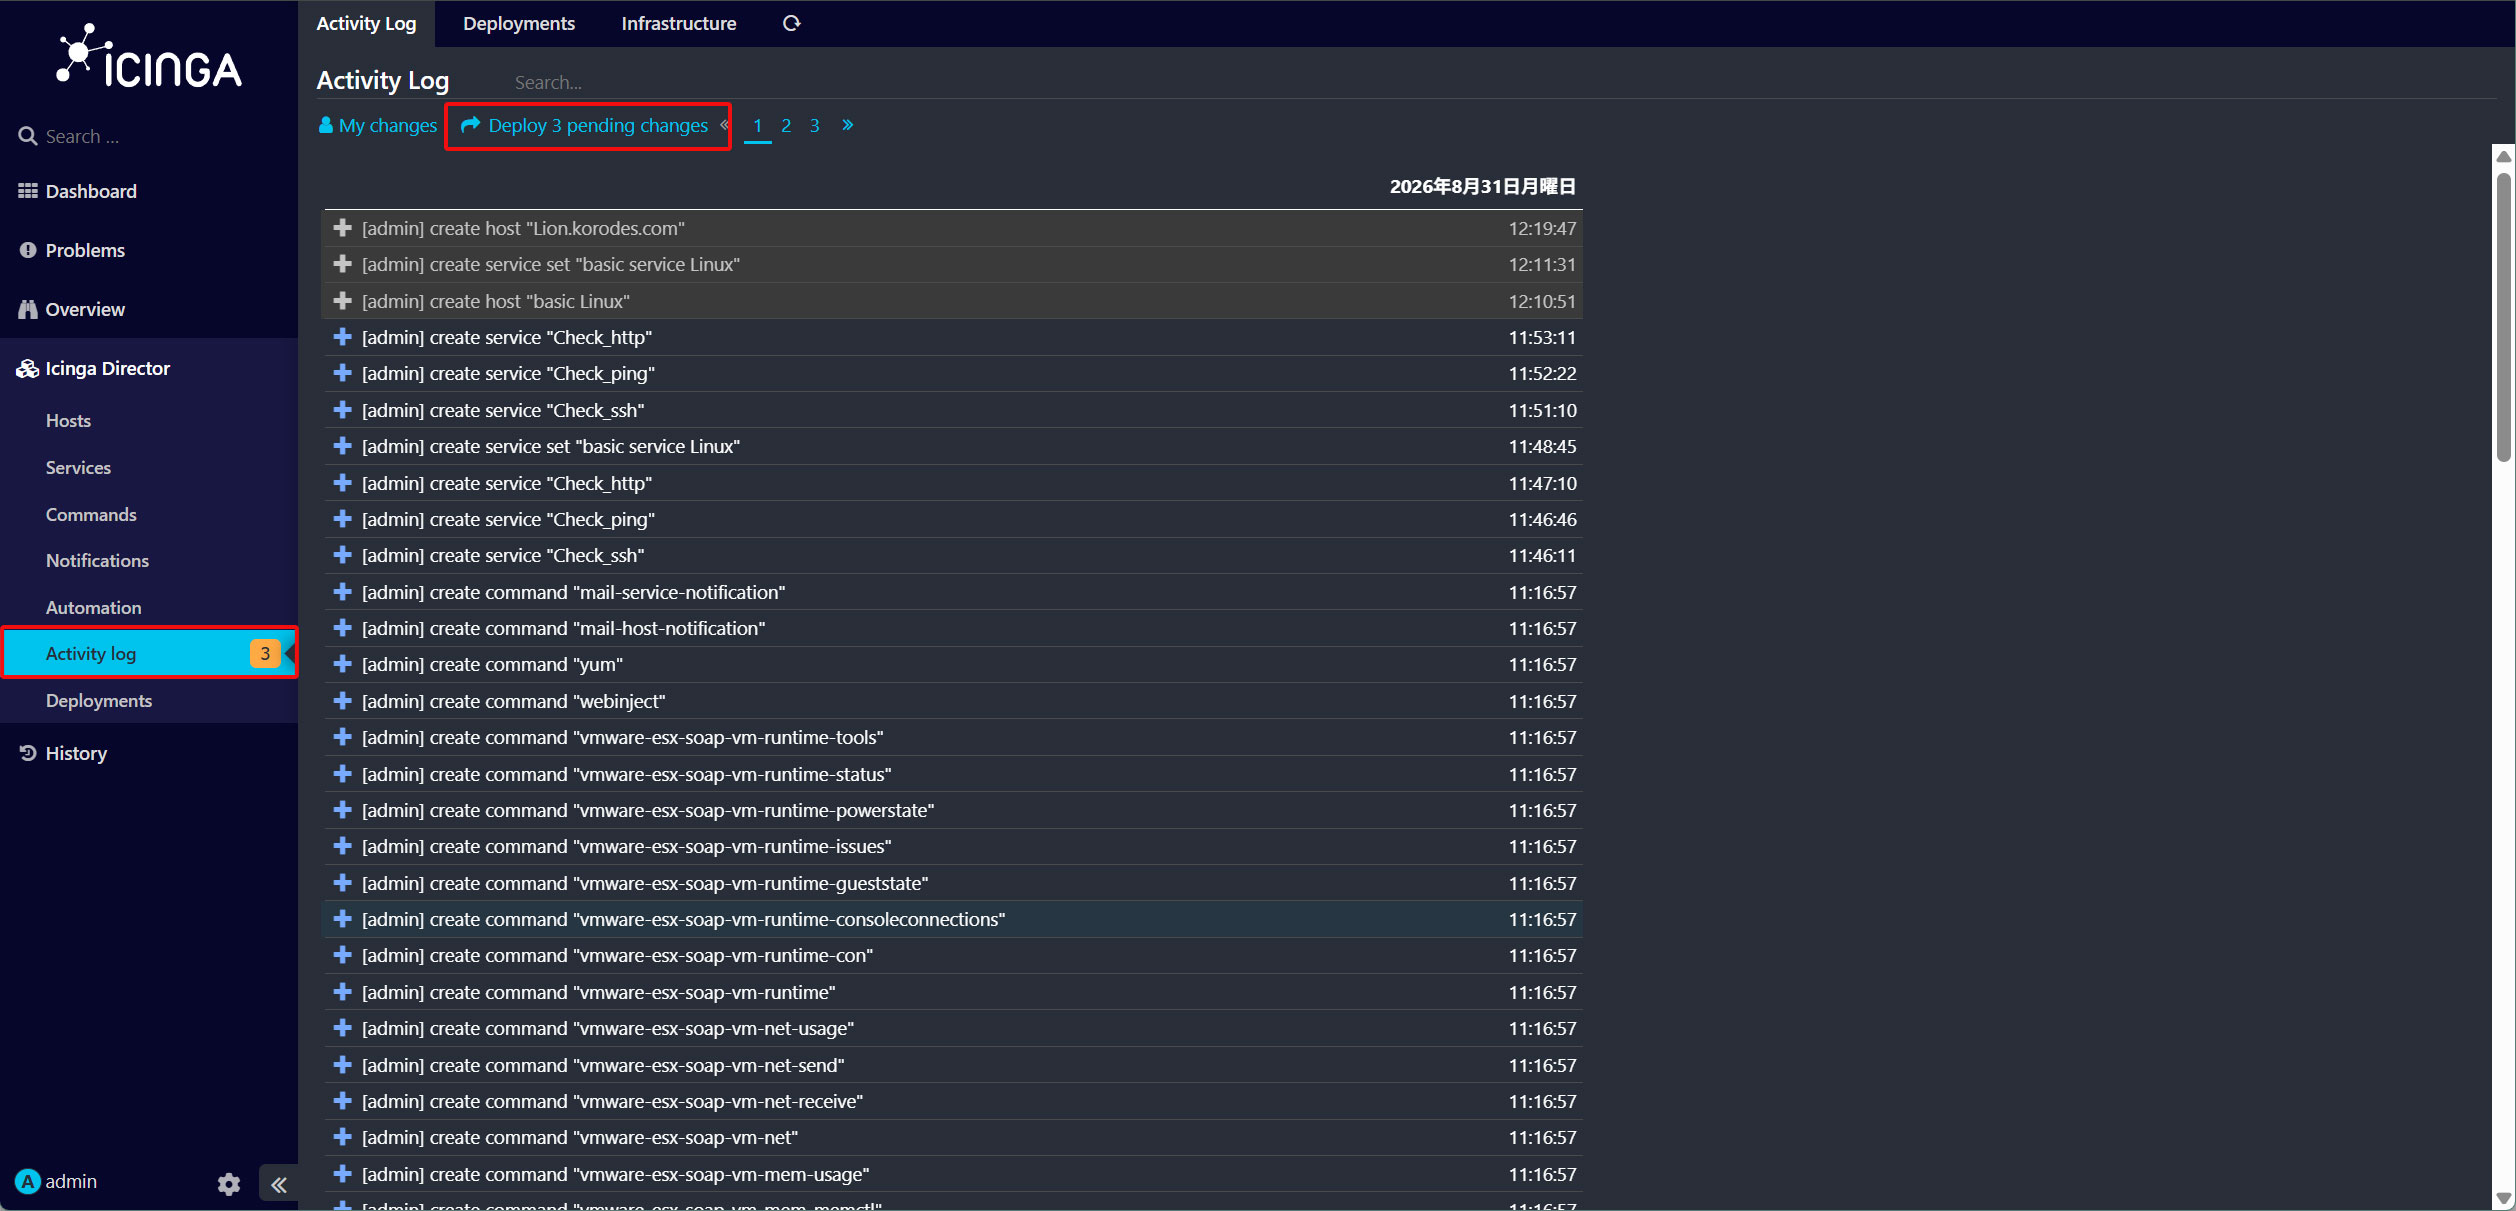
左側の「Activity log」メニューをクリックし、「Deploy xxx pendingchanges」をクリックして設定を適用します。
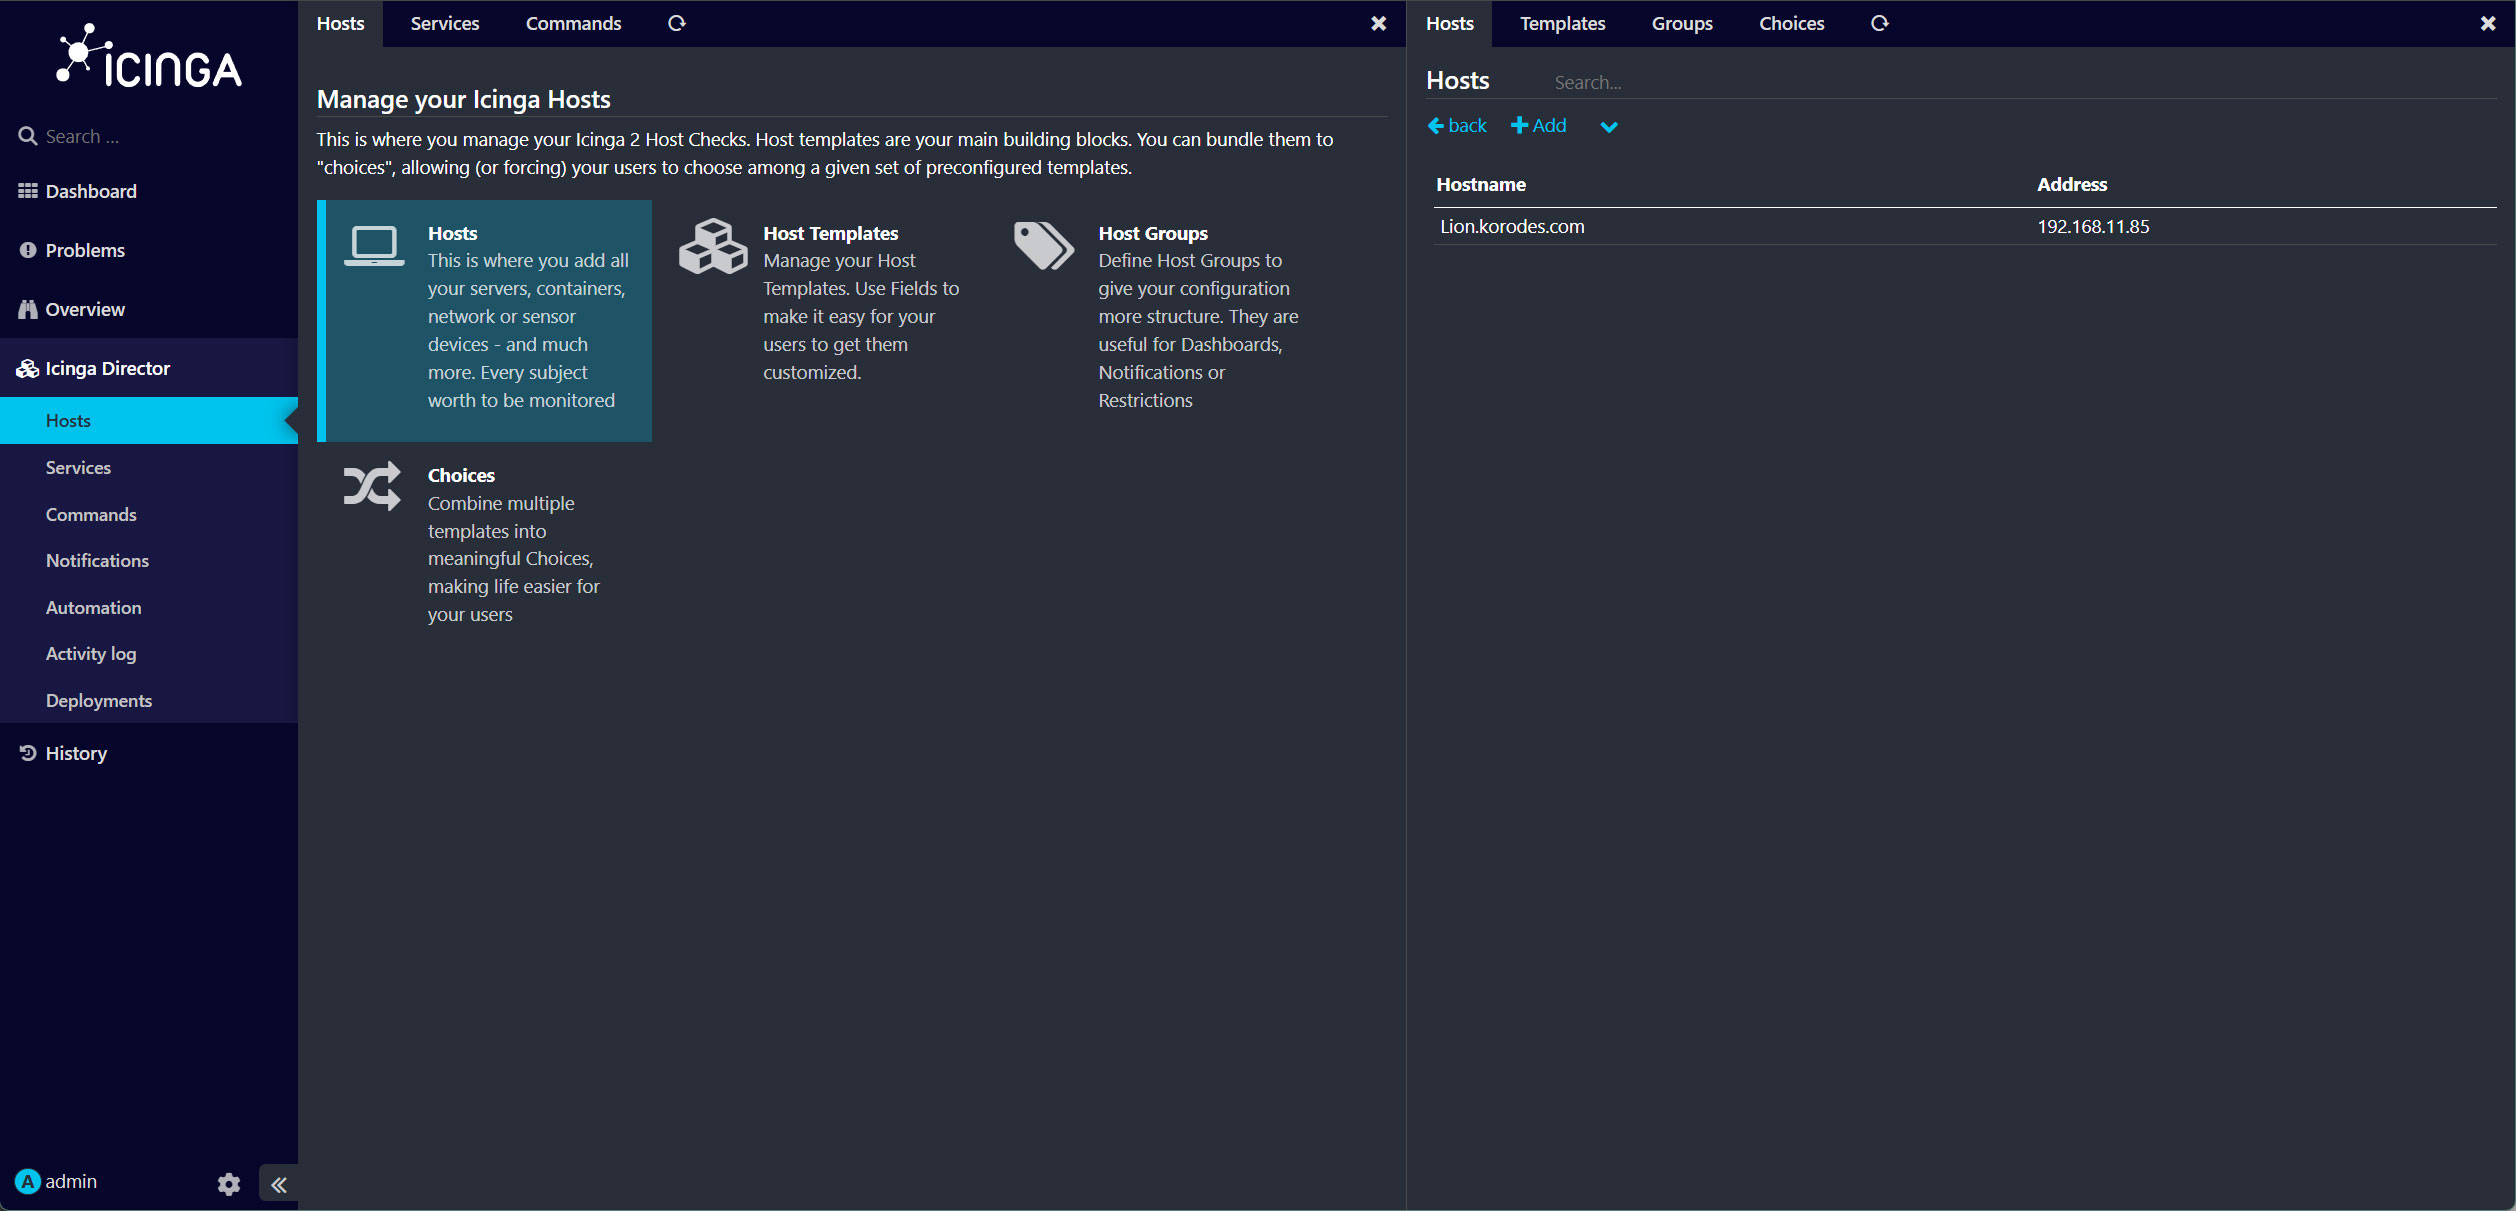
「Lion」ホストがIcinga2に追加されました。
11. 監視対象サーバー(エージェント)側の設定手順
監視対象サーバーDebian12(IP : 192.168.11.85)で作業する
必要なトランスポートパッケージをインストール
# apt update
# apt -y install apt-transport-https wget gnupg
11.1 Icinga2 をインストール
① Icingaアーカイブキーリングをインストール
# wget -O /tmp/icinga-archive-keyring.deb "https://packages.icinga.com/icinga-archive-keyring_latest+debian$(. /etc/os-release; echo "$VERSION_ID").deb"
# apt install -y /tmp/icinga-archive-keyring.deb
➁ icinga2やコンポーネントをインストールするリポジトリを追加
# . /etc/os-release
DIST=$(lsb_release -c | awk '{print $2}')

# echo "deb [signed-by=/usr/share/keyrings/icinga-archive-keyring.gpg] https://packages.icinga.com/debian icinga-${DIST} main" > /etc/apt/sources.list.d/${DIST}-icinga.list
# echo "deb-src [signed-by=/usr/share/keyrings/icinga-archive-keyring.gpg] https://packages.icinga.com/debian icinga-${DIST} main" >> /etc/apt/sources.list.d/${DIST}-icinga.list
➂ Icinga2と監視プラグインをインストール
# apt update
# apt -y install icinga2 monitoring-plugins
④ Icinga2サービスを有効にして起動
# systemctl enable --now icinga2
Synchronizing state of icinga2.service with SysV service script with /usr/lib/systemd/systemd-sysv-install.
Executing: /usr/lib/systemd/systemd-sysv-install enable icinga2
# vi /etc/hosts
192.168.11.83   lepard
192.168.11.85   Lion.korodes.com
11.2 監視ホストの初期化
Hosts Hostsで次に、Lion ホストをクリックし、「Agent」タブをクリック
もし、A ticket for this agent could not have been requested from your deployment endpoint: Ticket salt is not configured in ApiListener object と表示されエラーとなる場合はIcinga2サーバーのconstants.conf に TicketSalt を設定されていませんので、下記の通り設定する
# vi /etc/icinga2/constants.conf

最終行あたり
const TicketSalt = "" となっていれば、任意の複雑なキーを設定する
const TicketSalt = "****************"
/etc/icinga2/features-enabled/api.confの中にticket_salt = TicketSaltが定義されていることを確認する
Icinga 2 サービスを再起動
# icinga2 daemon -C

エラーがなければ再起動
# systemctl restart icinga2
これでエラーが表示されないと思います
次にエージェントの展開用Linuxスクリプトをコピーしてください。
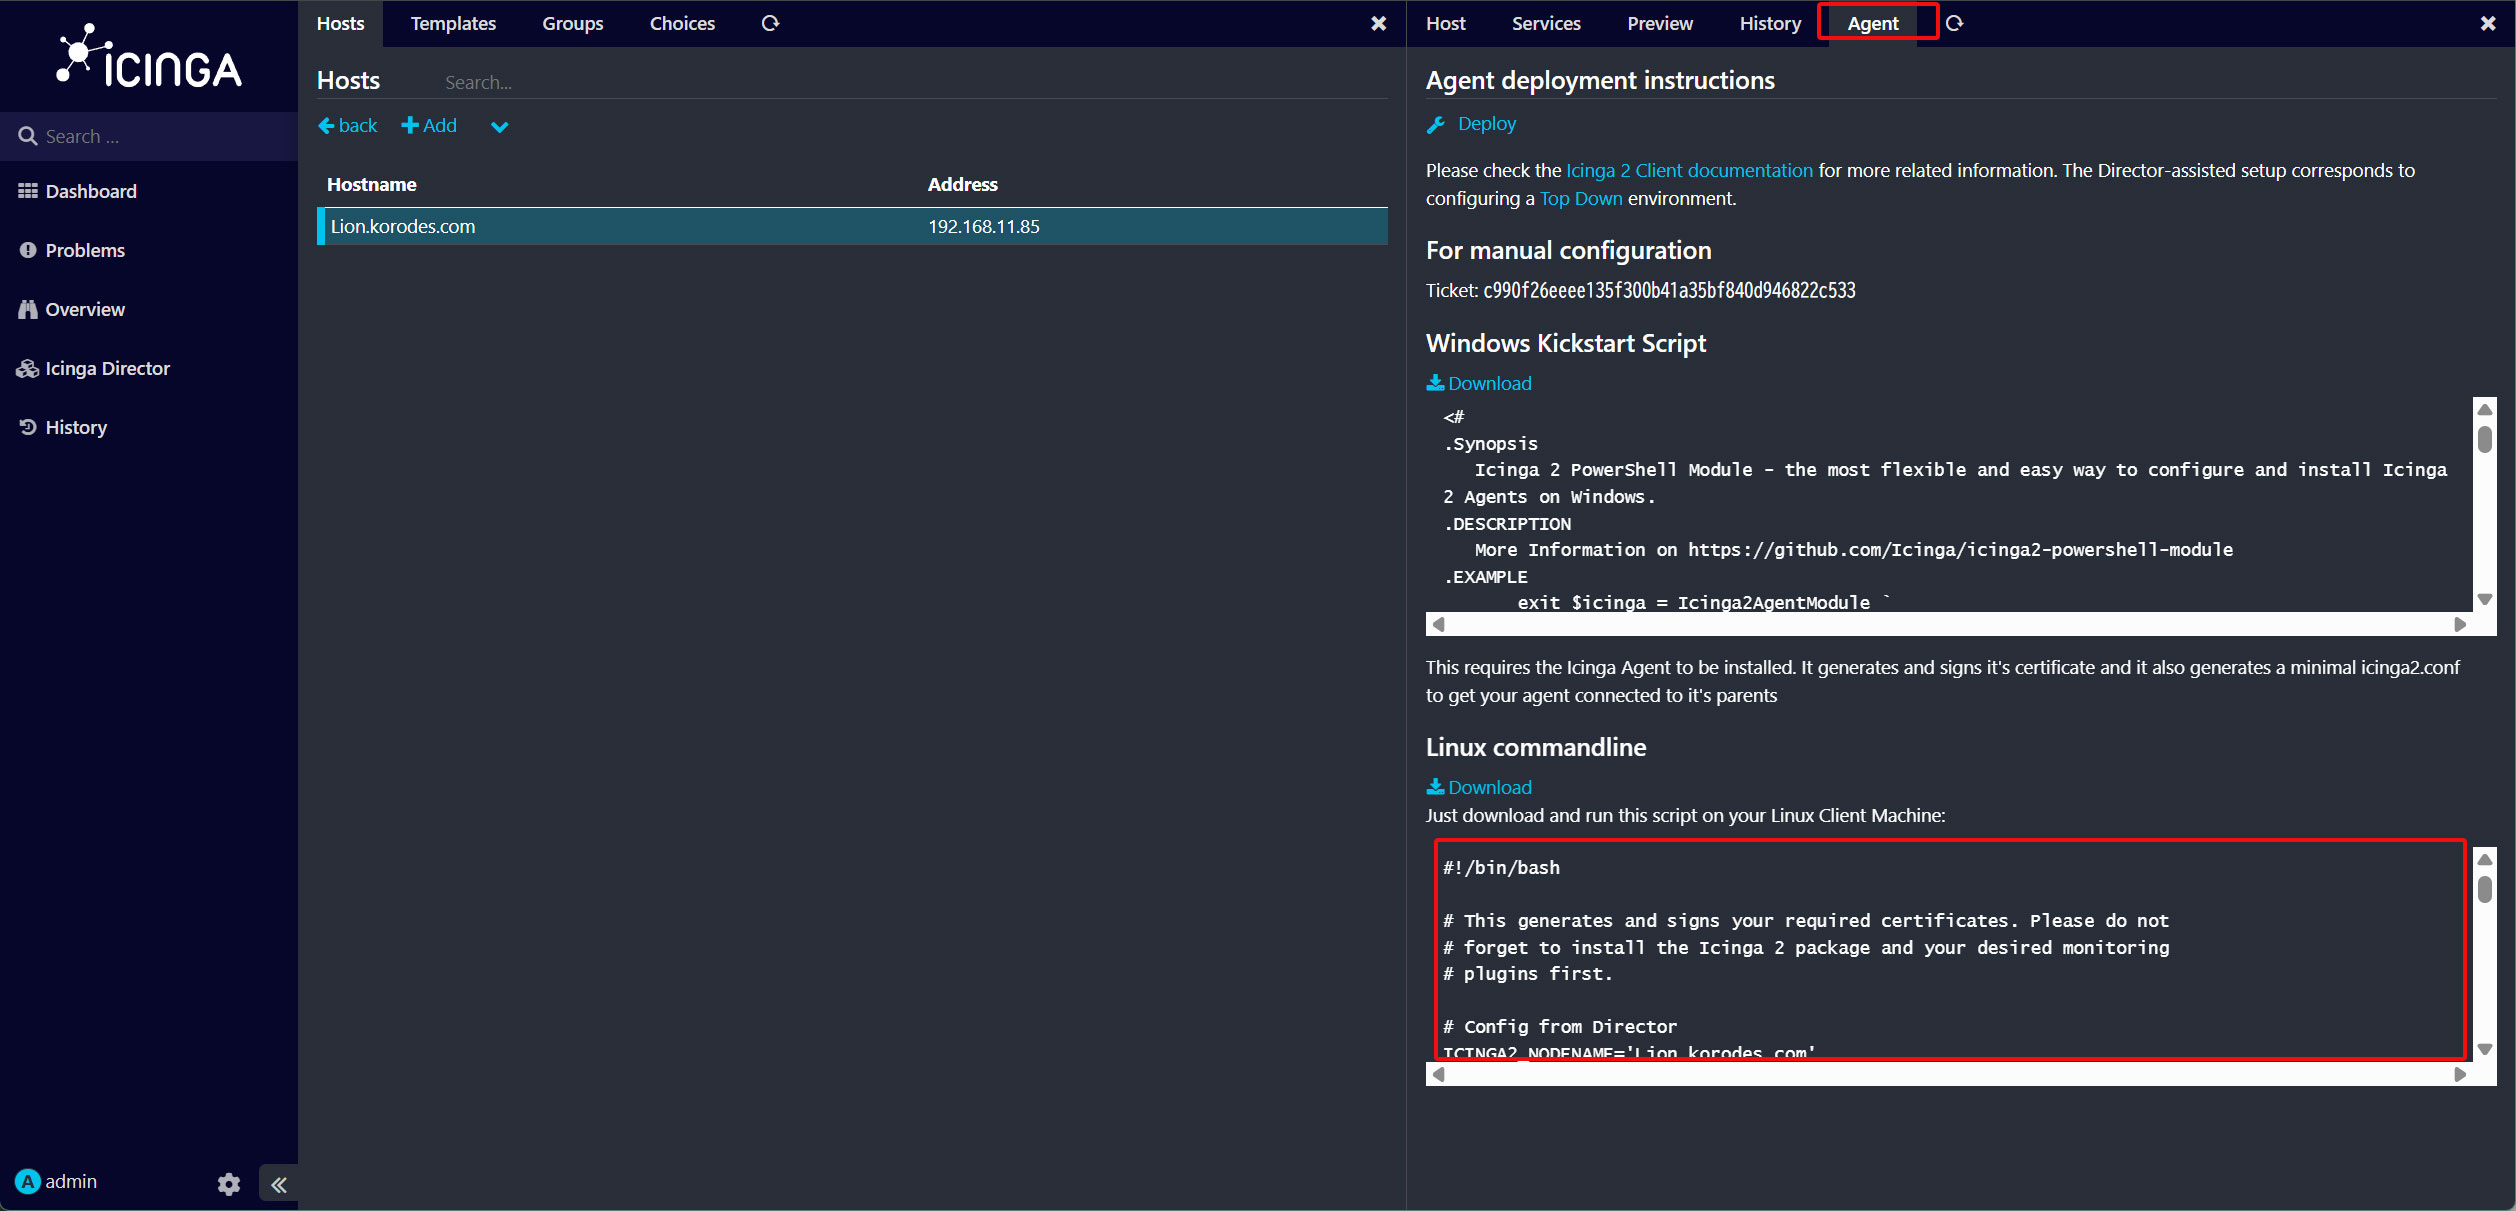
監視対象サーバーでの作業
「deploy-agent.sh」という名前の新しい設定を作成します。そこにエージェントの展開スクリプトを貼り付けてください。
# vi deploy-agent.sh

例として下記のようなもの

#!/bin/bash

# This generates and signs your required certificates. Please do not
# forget to install the Icinga 2 package and your desired monitoring
# plugins first.

# Config from Director
ICINGA2_NODENAME='Lion'
ICINGA2_CA_TICKET='c57eb4089de93f1fb38ebc2102083b09bd800620'
ICINGA2_PARENT_ZONE='lepard'
ICINGA2_PARENT_ENDPOINTS=('lepard,lepard')
ICINGA2_CA_NODE='lepard'
ICINGA2_GLOBAL_ZONES=('director-global')

# Internal defaults
: "${ICINGA2_OSFAMILY:=}"
: "${ICINGA2_HOSTNAME:="$(hostname -f)"}"
: "${ICINGA2_NODENAME:="${ICINGA2_HOSTNAME}"}"
: "${ICINGA2_CA_NODE:=}"
: "${ICINGA2_CA_PORT:=5665}"
: "${ICINGA2_CA_TICKET:=}"
: "${ICINGA2_PARENT_ZONE:=master}"
: "${ICINGA2_PARENT_ENDPOINTS:=()}"
: "${ICINGA2_GLOBAL_ZONES:=director-global}"
: "${ICINGA2_DRYRUN:=}"
: "${ICINGA2_UPDATE_CONFIG:=}"

# Helper functions
fail() {
  echo "ERROR: $1" >&2
  exit 1
}

warn() {
  echo "WARNING: $1" >&2
}

info() {
  echo "INFO: $1" >&2
}

check_command() {
  command -v "$@" &>/dev/null
}

install_config() {
  if [ -e "$1" ] && [ ! -e "${1}.orig" ]; then
    info "Creating a backup at ${1}.orig"
    cp "$1" "${1}.orig"
  fi
  echo "Writing config to ${1}"
  echo "$2" > "${1}"
}

[ "$BASH_VERSION" ] || fail "This is a Bash script"

errors=
for key in NODENAME CA_NODE CA_PORT CA_TICKET PARENT_ZONE PARENT_ENDPOINTS; do
  var="ICINGA2_${key}"
  if [ -z "${!var}" ]; then
    warn "The variable $var needs to be configured!"
    errors+=1
  fi
done
[ -z "$errors" ] || exit 1

# Detect osfamily
if [ -n "$ICINGA2_OSFAMILY" ]; then
  info "Assuming supplied osfamily $ICINGA2_OSFAMILY"
elif check_command rpm && ! check_command dpkg; then
  info "This should be a RedHat system"
  if [ -e /etc/sysconfig/icinga2 ]; then
    # shellcheck disable=SC1091
    . /etc/sysconfig/icinga2
  fi
  ICINGA2_OSFAMILY=redhat
elif check_command dpkg; then
  info "This should be a Debian system"
  if [ -e /etc/default/icinga2 ]; then
    # shellcheck disable=SC1091
    . /etc/default/icinga2
  fi
  ICINGA2_OSFAMILY=debian
elif check_command apk; then
  info "This should be a Alpine system"
  if [ -e /etc/icinga2/icinga2.sysconfig ]; then
    # shellcheck disable=SC1091
    . /etc/icinga2/icinga2.sysconfig
  fi
  ICINGA2_OSFAMILY=alpine
else
  fail "Could not determine your os type!"
fi

# internal defaults
: "${ICINGA2_CONFIG_FILE:=/etc/icinga2/icinga2.conf}"
: "${ICINGA2_CONFIGDIR:="$(dirname "$ICINGA2_CONFIG_FILE")"}"
: "${ICINGA2_DATADIR:=/var/lib/icinga2}"
: "${ICINGA2_SSLDIR_OLD:="${ICINGA2_CONFIGDIR}"/pki}"
: "${ICINGA2_SSLDIR_NEW:="${ICINGA2_DATADIR}"/certs}"
: "${ICINGA2_SSLDIR:=}"
: "${ICINGA2_BIN:=icinga2}"

case "$ICINGA2_OSFAMILY" in
debian)
  : "${ICINGA2_USER:=nagios}"
  : "${ICINGA2_GROUP:=nagios}"
  ;;
redhat)
  : "${ICINGA2_USER:=icinga}"
  : "${ICINGA2_GROUP:=icinga}"
  ;;
alpine)
  : "${ICINGA2_USER:=icinga}"
  : "${ICINGA2_GROUP:=icinga}"
  ;;
*)
  fail "Unknown osfamily '$ICINGA2_OSFAMILY'!"
  ;;
esac

icinga_version() {
  "$ICINGA2_BIN" --version 2>/dev/null | grep -oPi '\(version: [rv]?\K\d+\.\d+\.\d+[^\)]*'
}

version() {
   echo "$@" | awk -F. '{ printf("%03d%03d%03d\n", $1,$2,$3); }'
}

# Make sure icinga2 is installed and running
echo -n "check: icinga2 installed - "
if version=$(icinga_version); then
  echo "OK: $version"
else
  fail "You need to install icinga2!"
fi

if [ -z "${ICINGA2_SSLDIR}" ]; then
  if [ -f "${ICINGA2_SSLDIR_OLD}/${ICINGA2_NODENAME}.crt" ]; then
    info "Using old SSL directory: ${ICINGA2_SSLDIR_OLD}"
    info "Because you already have a certificate in ${ICINGA2_SSLDIR_OLD}/${ICINGA2_NODENAME}.crt"
    ICINGA2_SSLDIR="${ICINGA2_SSLDIR_OLD}"
  elif [ $(version $version) -gt $(version 2.8) ]; then
    info "Using new SSL directory: ${ICINGA2_SSLDIR_NEW}"
    ICINGA2_SSLDIR="${ICINGA2_SSLDIR_NEW}"
  else
    info "Using old SSL directory: ${ICINGA2_SSLDIR_OLD}"
    ICINGA2_SSLDIR="${ICINGA2_SSLDIR_OLD}"
  fi
fi

if [ ! -d "$ICINGA2_SSLDIR" ]; then
  mkdir "$ICINGA2_SSLDIR"
  chown "$ICINGA2_USER.$ICINGA2_GROUP" "$ICINGA2_SSLDIR"
fi

if [ -f "${ICINGA2_SSLDIR}/${ICINGA2_NODENAME}.crt" ]; then
  warn "ERROR: a certificate for '${ICINGA2_NODENAME}' already exists"
  warn "Please remove ${ICINGA2_SSLDIR}/${ICINGA2_NODENAME}.??? in case you want a"
  warn "new certificate to be generated and signed by ${ICINGA2_CA_NODE}"

  if [ -z "${ICINGA2_UPDATE_CONFIG}" ] && [ -z "${ICINGA2_DRYRUN}" ]; then
    warn "Aborting here, you can can call the script like this to just update config:"
    info " ICINGA2_UPDATE_CONFIG=1 $0"
    exit 1
  fi
elif [ -z "${ICINGA2_DRYRUN}" ]; then
  if ! "$ICINGA2_BIN" pki new-cert --cn "${ICINGA2_NODENAME}" \
    --cert "${ICINGA2_SSLDIR}/${ICINGA2_NODENAME}.crt" \
    --csr "${ICINGA2_SSLDIR}/${ICINGA2_NODENAME}.csr" \
    --key "${ICINGA2_SSLDIR}/${ICINGA2_NODENAME}.key"
  then fail "Could not create self signed certificate!"
  fi

  if ! "$ICINGA2_BIN" pki save-cert \
    --host "${ICINGA2_CA_NODE}" \
    --port "${ICINGA2_CA_PORT}" \
    --key "${ICINGA2_SSLDIR}/${ICINGA2_NODENAME}.key" \
    --trustedcert "${ICINGA2_SSLDIR}/trusted-master.crt"
  then fail "Could not retrieve trusted certificate from host ${ICINGA2_CA_NODE}"
  fi

  if ! "$ICINGA2_BIN" pki request \
    --host "${ICINGA2_CA_NODE}" \
    --port "${ICINGA2_CA_PORT}" \
    --ticket "${ICINGA2_CA_TICKET}" \
    --key "${ICINGA2_SSLDIR}/${ICINGA2_NODENAME}.key" \
    --cert "${ICINGA2_SSLDIR}/${ICINGA2_NODENAME}.crt" \
    --trustedcert "${ICINGA2_SSLDIR}/trusted-master.crt" \
    --ca "${ICINGA2_SSLDIR}/ca.crt"
  then fail "Could not retrieve final certificate from host ${ICINGA2_CA_NODE}"
  fi
else
  info "Would create certificates under ${ICINGA2_SSLDIR}, but in dry-run!"
fi

# Prepare Config Files
content_config=$(cat << EOF
/** Icinga 2 Config - proposed by Icinga Director */

include "constants.conf"

$([ "${ICINGA2_HOSTNAME}" != "${ICINGA2_NODENAME}" ] || echo '// ')const NodeName = "${ICINGA2_NODENAME}"

include "zones.conf"
include "features-enabled/*.conf"

include <itl>
include <plugins>
include <plugins-contrib>
include <manubulon>
include <windows-plugins>
include <nscp>
EOF
)

endpoint_list=''
for item in "${ICINGA2_PARENT_ENDPOINTS[@]}"; do
  endpoint=$(echo "$item" | cut -d, -f1)
  endpoint_list+="\"${endpoint}\", "
done

content_zones=$(cat << EOF
/** Icinga 2 Config - proposed by Icinga Director */

object Endpoint "${ICINGA2_NODENAME}" {}

object Zone "${ICINGA2_NODENAME}" {
  parent = "${ICINGA2_PARENT_ZONE}"
  endpoints = [ "${ICINGA2_NODENAME}" ]
}

object Zone "${ICINGA2_PARENT_ZONE}" {
  endpoints = [ ${endpoint_list%, } ]
}
EOF
)

for item in "${ICINGA2_PARENT_ENDPOINTS[@]}"; do
  endpoint=$(echo "$item" | cut -d, -f1)
  host=$(echo "$item" | cut -s -d, -f2)

  content_zones+=$(cat << EOF

object Endpoint "${endpoint}" {
$([ -n "$host" ] && echo "  host = \"${host}\"" || echo "  //host = \"${endpoint}\"")
}
EOF
)
done

for zone in "${ICINGA2_GLOBAL_ZONES[@]}"; do
  content_zones+=$(cat << EOF

object Zone "${zone}" {
  global = true
}
EOF
)
done

content_api="/** Icinga 2 Config - proposed by Icinga Director */

object ApiListener \"api\" {"

if [ "${ICINGA2_SSLDIR}" = "${ICINGA2_SSLDIR_OLD}" ]; then
content_api+="
  cert_path = SysconfDir + \"/icinga2/pki/${ICINGA2_NODENAME}.crt\"
  key_path = SysconfDir + \"/icinga2/pki/${ICINGA2_NODENAME}.key\"
  ca_path = SysconfDir + \"/icinga2/pki/ca.crt\"
"
fi
content_api+="
  accept_commands = true
  accept_config = true
}
"

if [ -z "${ICINGA2_DRYRUN}" ]; then
  install_config "$ICINGA2_CONFIGDIR"/icinga2.conf "$content_config"
  install_config "$ICINGA2_CONFIGDIR"/zones.conf "$content_zones"
  install_config "$ICINGA2_CONFIGDIR"/features-available/api.conf "$content_api"

  "$ICINGA2_BIN" feature enable api

  "$ICINGA2_BIN" daemon -C

  echo "Please restart icinga2:"
  case "$ICINGA2_OSFAMILY" in
  debian)
    echo "  systemctl restart icinga2"
    ;;
  redhat)
    echo "  systemctl restart icinga2"
    ;;
  alpine)
    echo "  rc-service icinga2 restart"
    ;;
  *)
    fail "Unknown osfamily '$ICINGA2_OSFAMILY'!"
    ;;
  esac
else
  output_code() {
    sed 's/^/    /m' <<<"$1"
  }
  echo "### $ICINGA2_CONFIGDIR"/icinga2.conf
  echo
  output_code "$content_config"
  echo
  echo "### $ICINGA2_CONFIGDIR"/zones.conf
  echo
  output_code "$content_zones"
  echo
  echo "### $ICINGA2_CONFIGDIR"/features-available/api.conf
  echo
  output_code "$content_api"
fi
スクリプトに実行権限を設定して、実行してください。
※ 事前にIcingaサーバー側で5665ポートを開放していることを確認する
# chmod +x deploy-agent.sh
 # ./deploy-agent.sh

INFO: This should be a Debian system
check: icinga2 installed - OK: 2.16.5-1
INFO: Using new SSL directory: /var/lib/icinga2/certs
information/base: Writing private key to '/var/lib/icinga2/certs/Lion.korodes.com.key'.
information/base: Writing X509 certificate to '/var/lib/icinga2/certs/Lion.korodes.com.crt'.
information/base: Writing certificate signing request to '/var/lib/icinga2/certs/Lion.korodes.com.csr'.
information/cli: Retrieving TLS certificate for 'lepard:5665'.

 Version:             3
 Subject:             CN = lepard
 Issuer:              CN = Icinga CA
 Valid From:          Aug 31 06:27:28 2026 GMT
 Valid Until:         Oct  2 06:27:28 2027 GMT
 Serial:              CC0957C67C46B01C9A81F6799705AD226AEB90D6

 Signature Algorithm: sha256WithRSAEncryption
 Subject Alt Names:   lepard
 Fingerprint:         27 7B 36 CD DE 23 46 82 46 EE 58 8E D2 2C 92 2A 44 36 44 54 26 60 B9 B3 BC A7 81 24 5B 3C 93 FC

***
*** You have to ensure that this certificate actually matches the parent
*** instance's certificate in order to avoid man-in-the-middle attacks.
***

information/pki: Writing certificate to file '/var/lib/icinga2/certs/trusted-master.crt'.
information/cli: Writing CA certificate to file '/var/lib/icinga2/certs/ca.crt'.
information/cli: Writing signed certificate to file '/var/lib/icinga2/certs/Lion.korodes.com.crt'.
INFO: Creating a backup at /etc/icinga2/icinga2.conf.orig
Writing config to /etc/icinga2/icinga2.conf
INFO: Creating a backup at /etc/icinga2/zones.conf.orig
Writing config to /etc/icinga2/zones.conf
INFO: Creating a backup at /etc/icinga2/features-available/api.conf.orig
Writing config to /etc/icinga2/features-available/api.conf
Enabling feature api. Make sure to restart Icinga 2 for these changes to take effect.
[2026-08-31 16:16:23 +0900] information/cli: Icinga application loader (version: r2.16.5-1)
[2026-08-31 16:16:23 +0900] information/cli: Loading configuration file(s).
[2026-08-31 16:16:23 +0900] information/ConfigItem: Committing config item(s).
[2026-08-31 16:16:23 +0900] information/ApiListener: My API identity: Lion.korodes.com
[2026-08-31 16:16:23 +0900] warning/ApiListener: Security notice:
    Currently, all ApiUsers are allowed to use Icinga 2 DSL filter expressions
    in API queries because enforce_filter_expression_permission is set to false.
    This can pose a security risk as filters are evaluated within the Icinga 2
    process and their complexity can be used for denial of service attacks. The
    new 'filter-expression' permission can be used to allow this for individual
    ApiUsers, which should only be granted to trusted users. It is recommended
    to set enforce_filter_expression_permission to true to enforce the
    permission. This will become the default in v2.17.
[2026-08-31 16:16:23 +0900] information/ConfigItem: Instantiated 1 IcingaApplication.
[2026-08-31 16:16:23 +0900] information/ConfigItem: Instantiated 1 FileLogger.
[2026-08-31 16:16:23 +0900] information/ConfigItem: Instantiated 3 Zones.
[2026-08-31 16:16:23 +0900] information/ConfigItem: Instantiated 1 CheckerComponent.
[2026-08-31 16:16:23 +0900] information/ConfigItem: Instantiated 2 Endpoints.
[2026-08-31 16:16:23 +0900] information/ConfigItem: Instantiated 1 ApiListener.
[2026-08-31 16:16:23 +0900] information/ConfigItem: Instantiated 1 NotificationComponent.
[2026-08-31 16:16:23 +0900] information/ConfigItem: Instantiated 250 CheckCommands.
[2026-08-31 16:16:23 +0900] information/ScriptGlobal: Dumping variables to file '/var/cache/icinga2/icinga2.vars'
[2026-08-31 16:16:23 +0900] information/cli: Finished validating the configuration file(s).
Please restart icinga2:
  systemctl restart icinga2
Icingaを再起動
# systemctl restart icinga2
12. Icingaweb2画面で確認
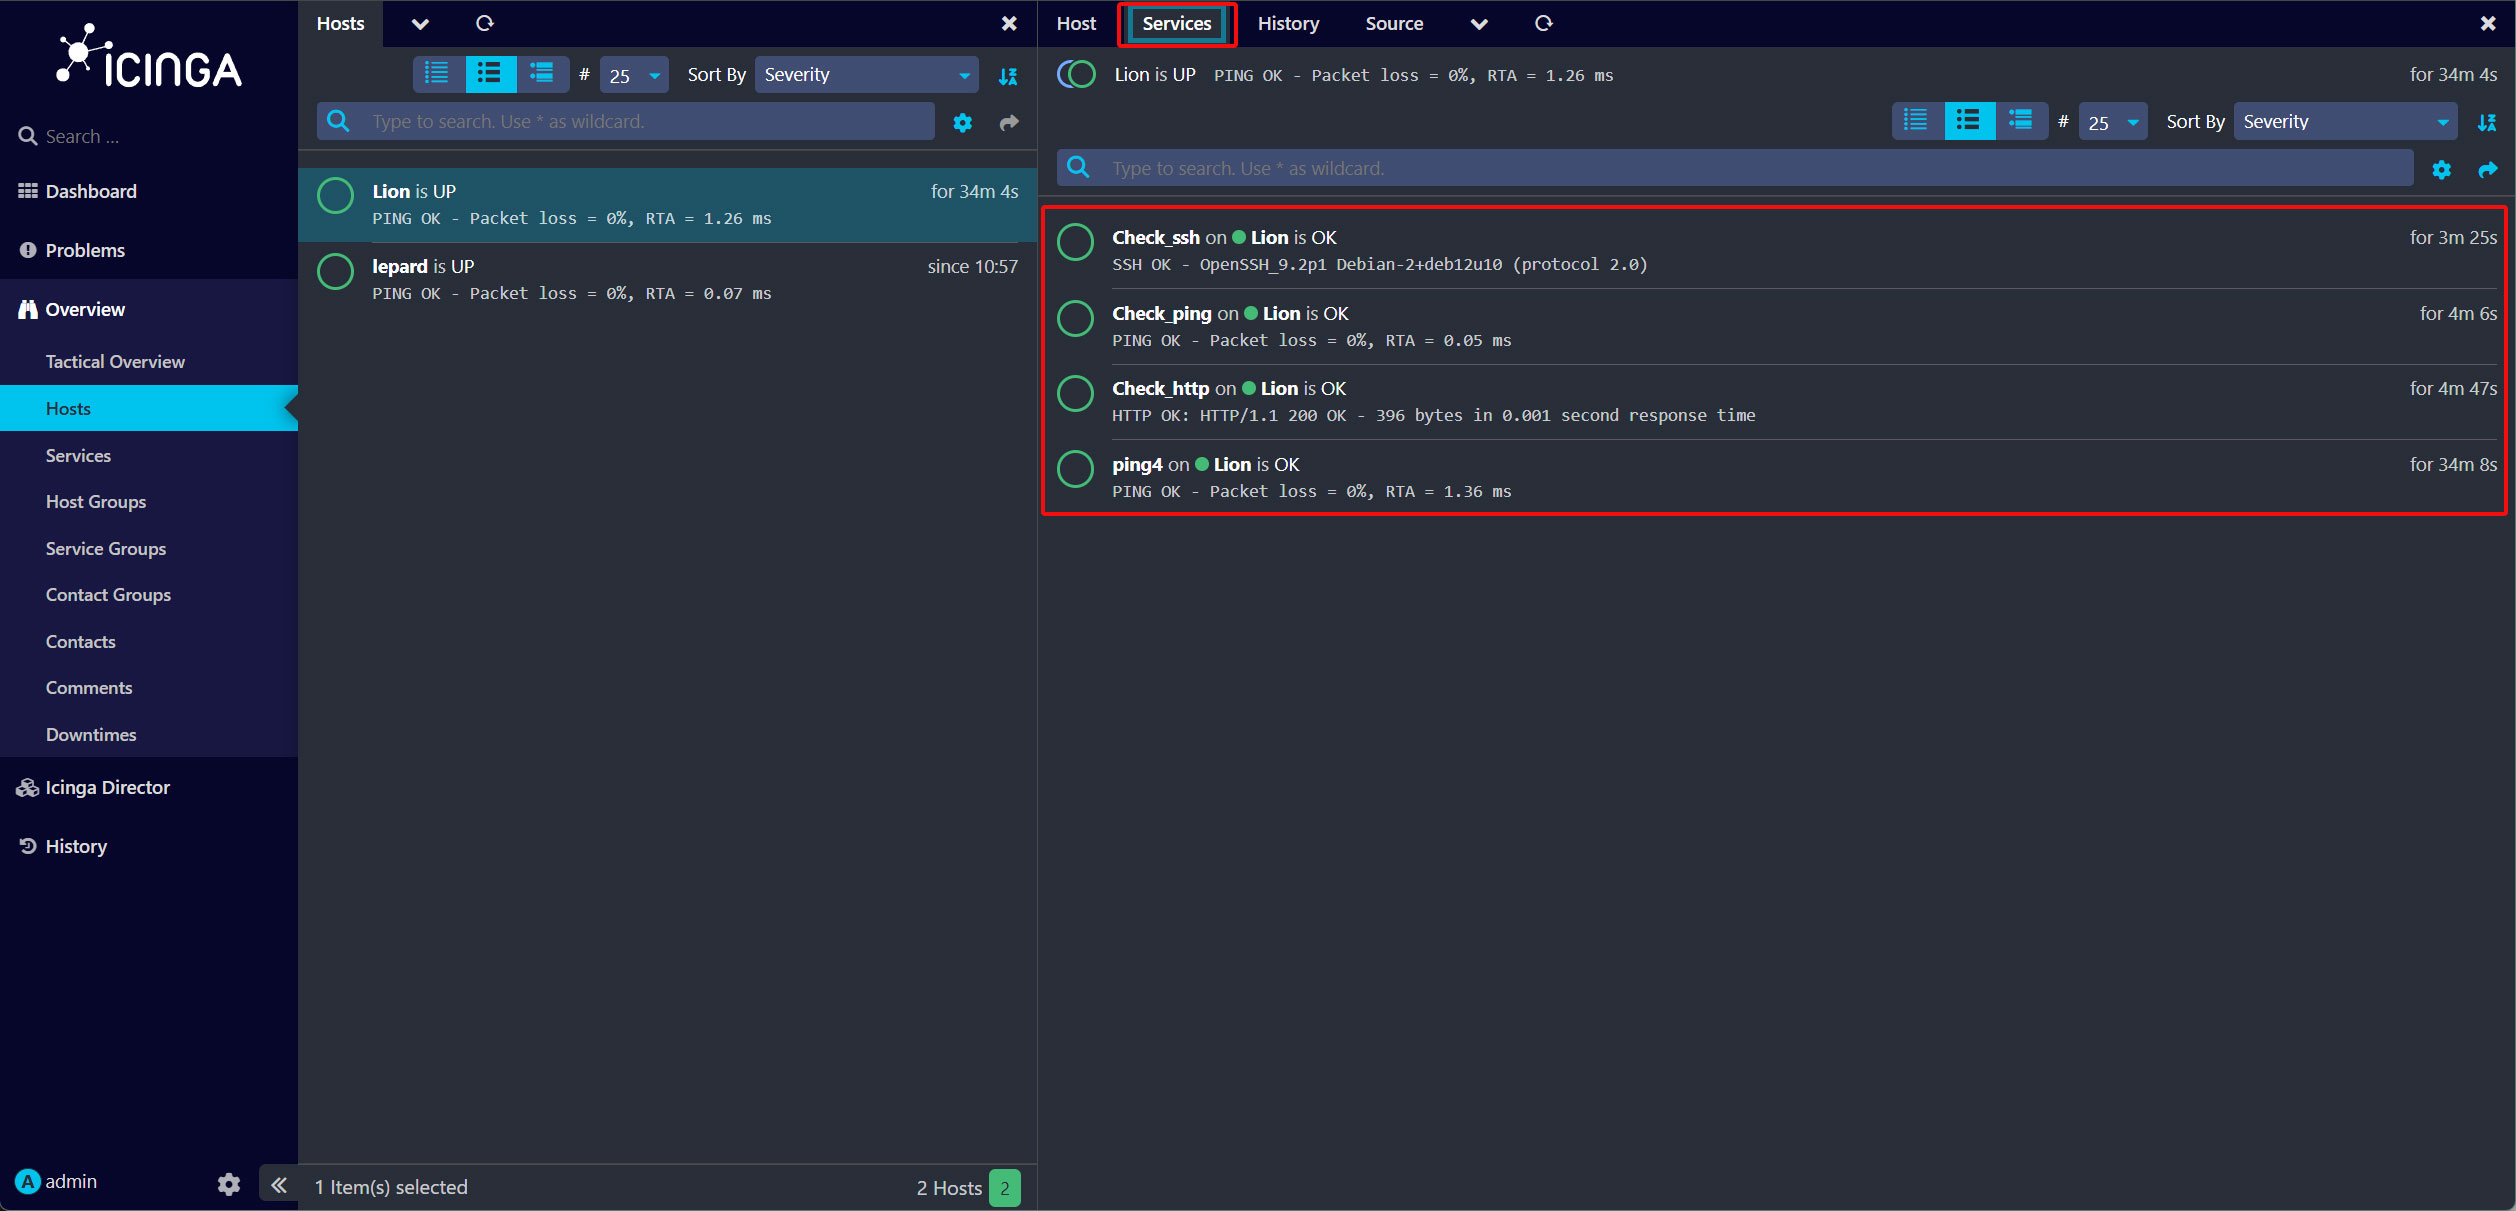
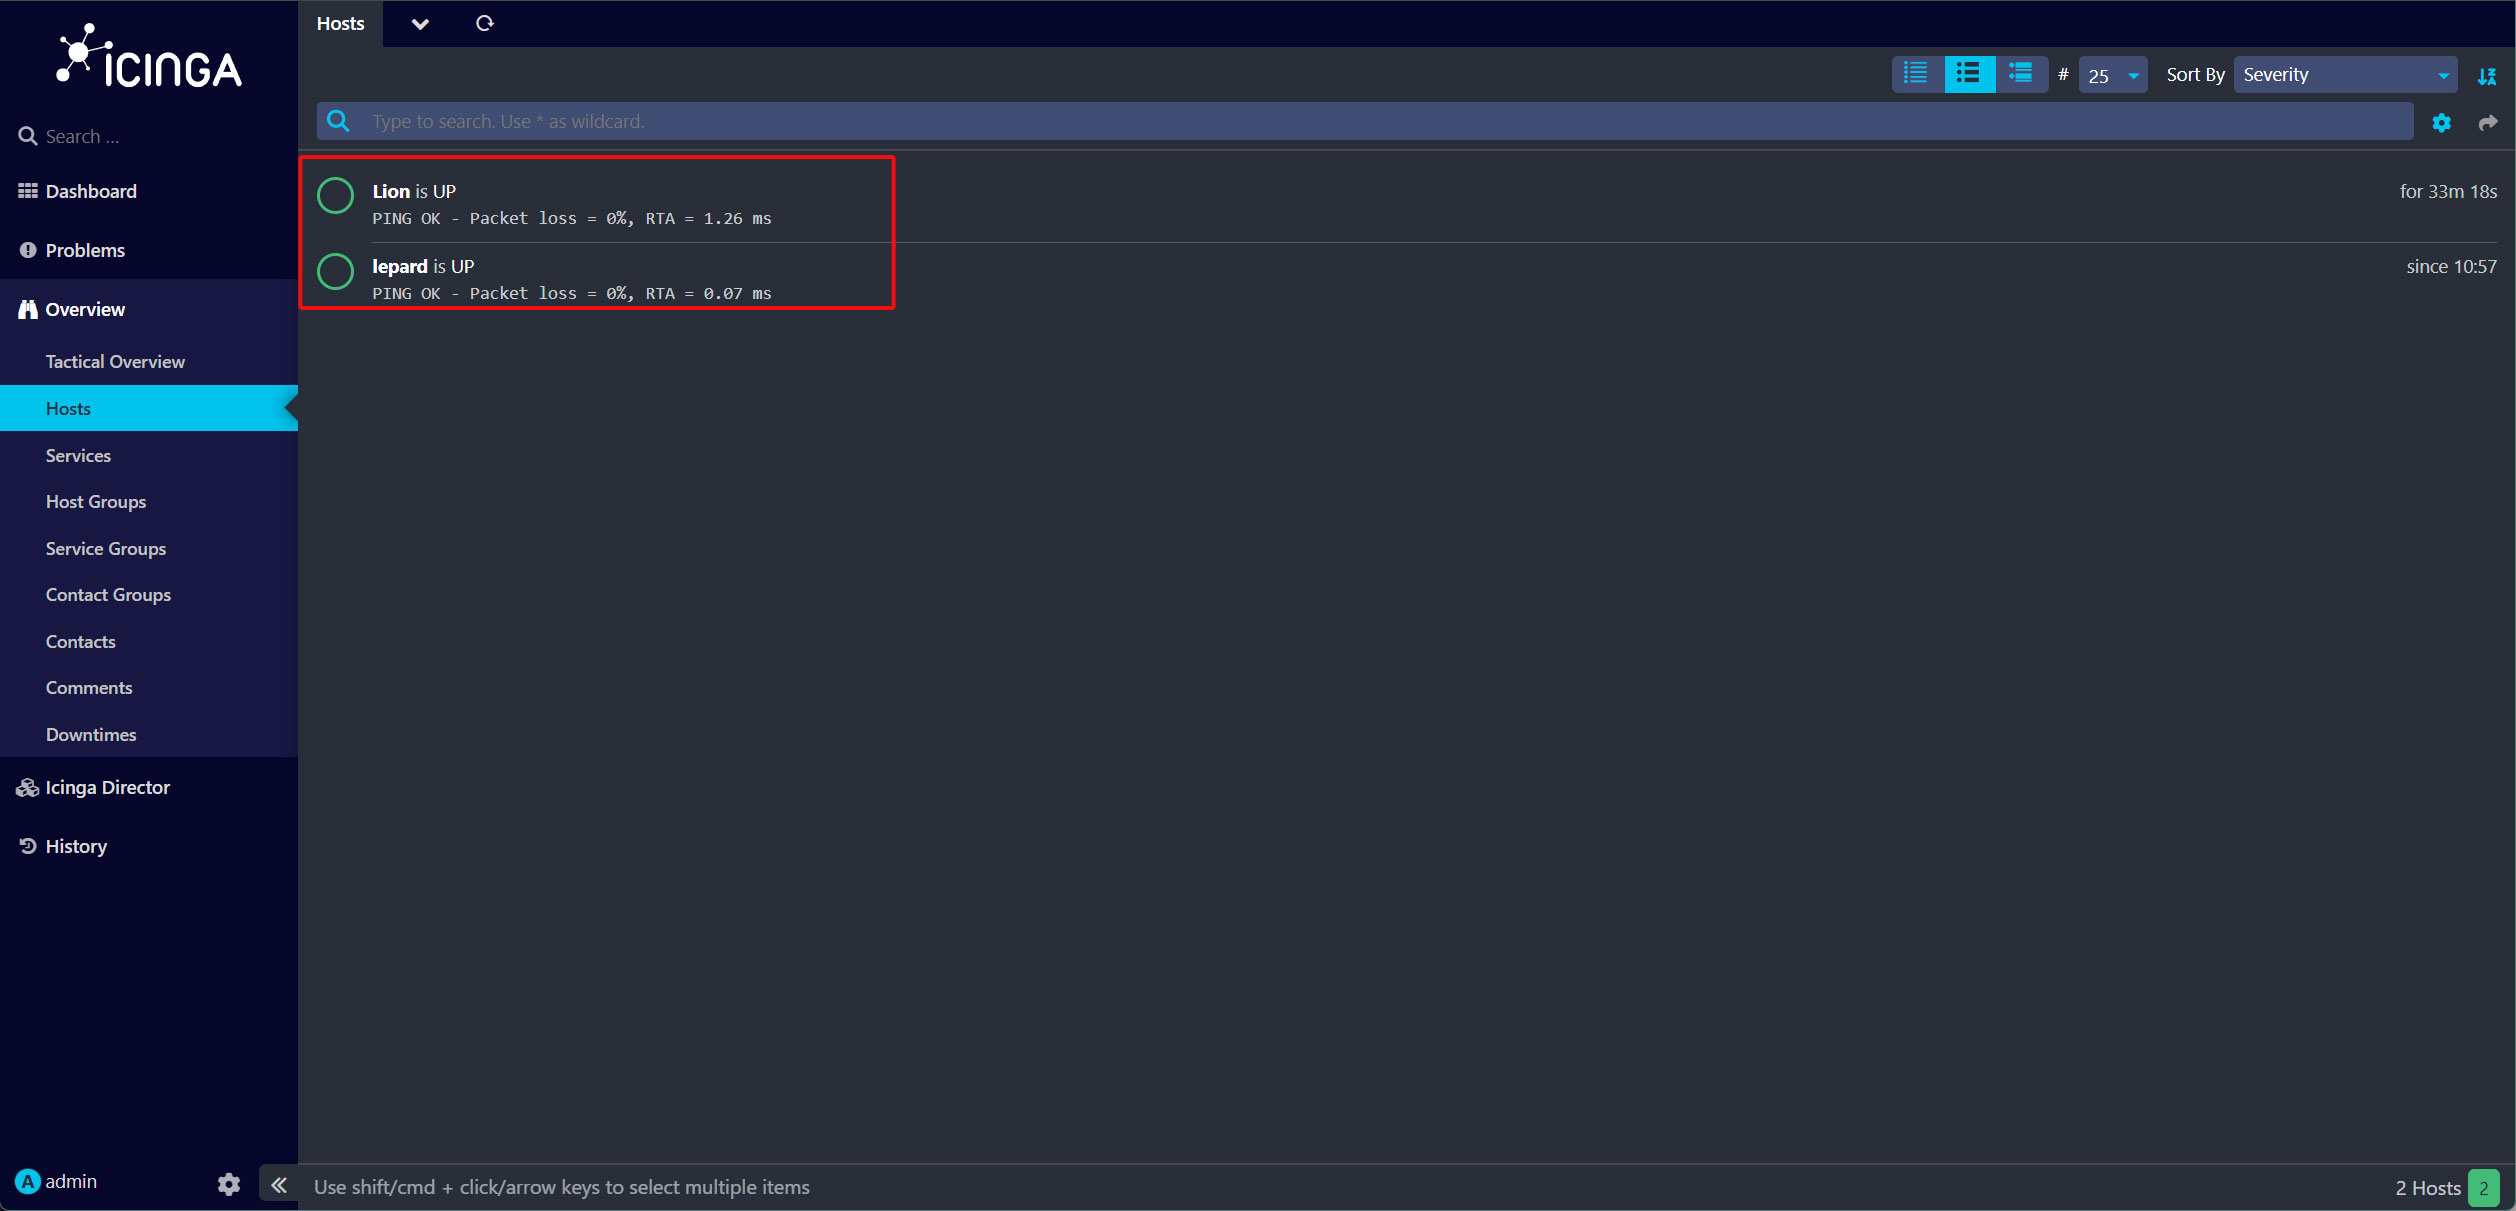
Icinga2 Dashboard メニューの, 'Overview' 'Hosts'. をクリックするとIcinga2サーバーと「Lion」という2つのホストが表示され、クライアントが起動して実行されていることが確認できます。
「Lion」サーバーをクリックして詳細を表示
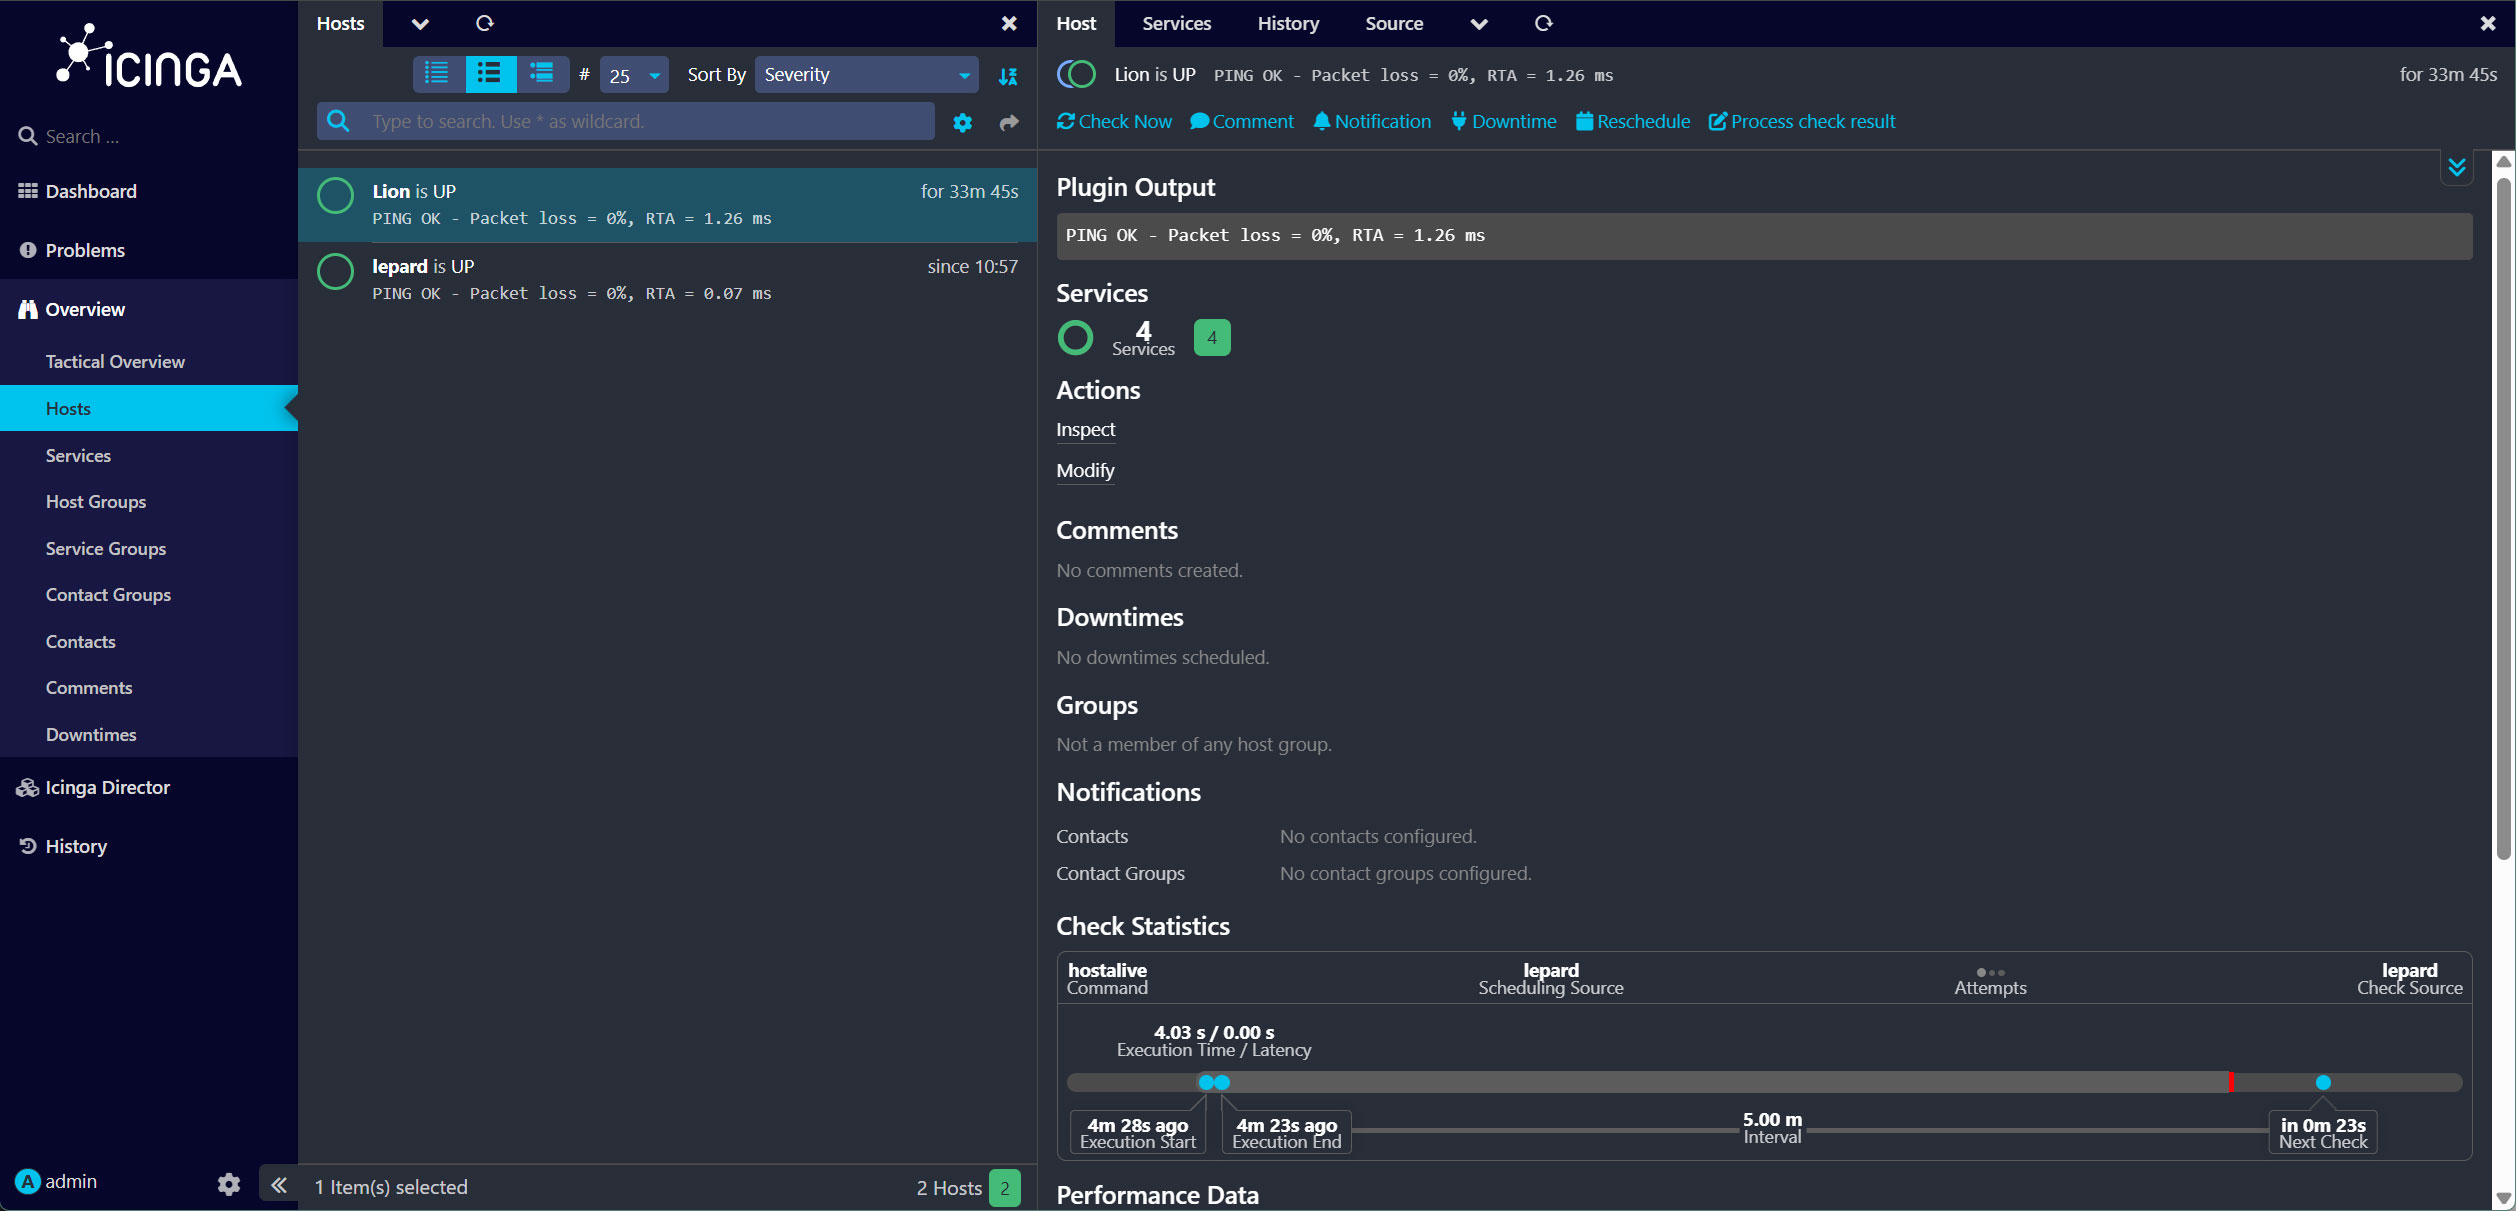
Lion ホストの監視対象サービスを確認するには、「サービス」タブをクリックしてください。