Contents
FTP server
1. Vsftpd Installation and configuration
①Install
|
1 |
# apt install -y vsftpd |
②Allow PORT 21 at UFW
|
1 2 |
# ufw allow ftp # ufw reload |
③Configuration File Changes
|
1 |
# vi /etc/vsftpd.conf |
Line 14 : Change
Listen=YES
Line 22 : Change
Listen_ipv6=NO
Line 31 : Uncomments
write_enable=YES
Line 35 : Uncomments
local_umask=022
Line 99-100 : Uncomments(Allow uploads and downloads via ASCII)
ascii_upload_enable=YES
ascii_download_enable=YES
Line 122 : Uncomments
chroot_local_user=YES
Line 123 : Uncomments
chroot_list_enable=YES
Line 125 : Uncomments
chroot_list_file=/etc/vsftpd.chroot_list
Line 131 : Uncomments(Enable bulk transfer of entire directories)
ls_recurse_enable=YES
④Creating vsftpd.chroot_list
|
1 2 3 |
# vi /etc/vsftpd.chroot_list Fill in only the user name (huong) in the new file and finish saving. huong |
⑤Restart vsftpd
|
1 2 3 4 5 |
# systemctl start vsftpd # systemctl enable vsftpd Synchronizing state of vsftpd.service with SysV service script with /usr/lib/systemd/systemd-sysv-install. Executing: /usr/lib/systemd/systemd-sysv-install enable vsftpd |
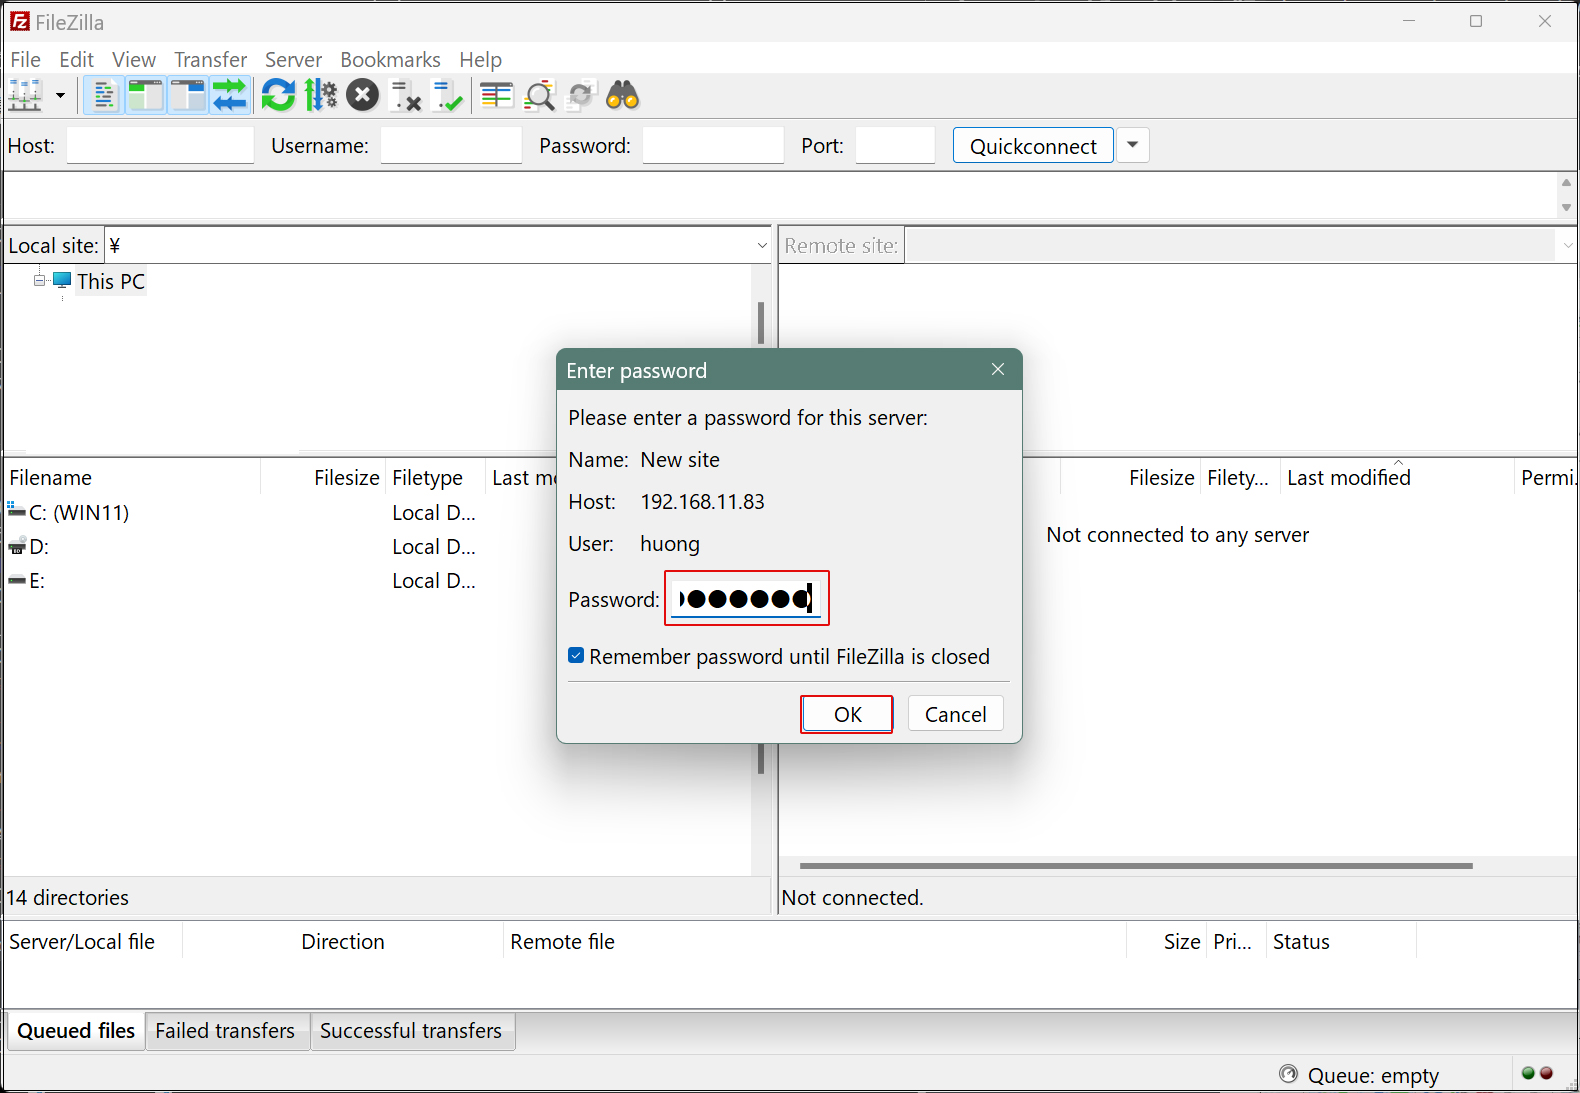
Start FileZilla and select "Site Manager" from the "File" menu.
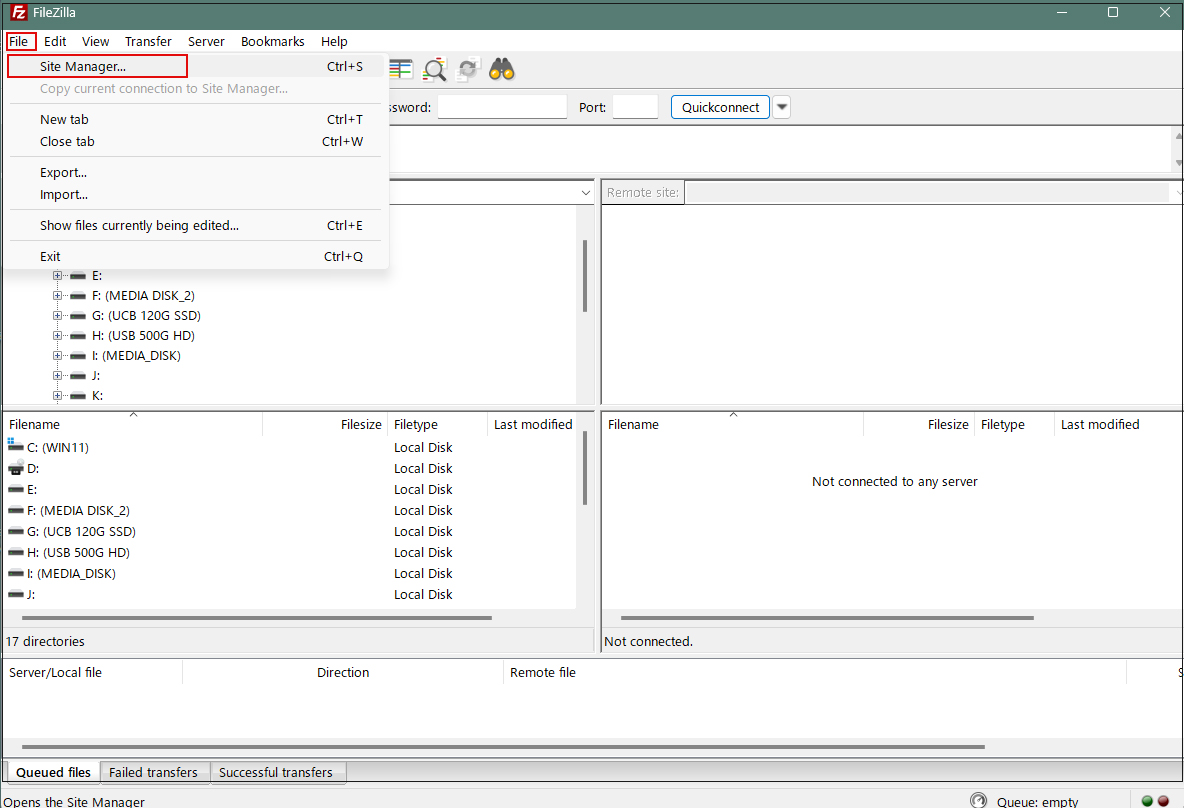
Click on "New site"
Enter the following settings for each item and click "Connect"
Protocol : FTP- File Transfer Protocol
Host : IP address of the server
Port :
Logon Ask for password
User : General user name (server login user)
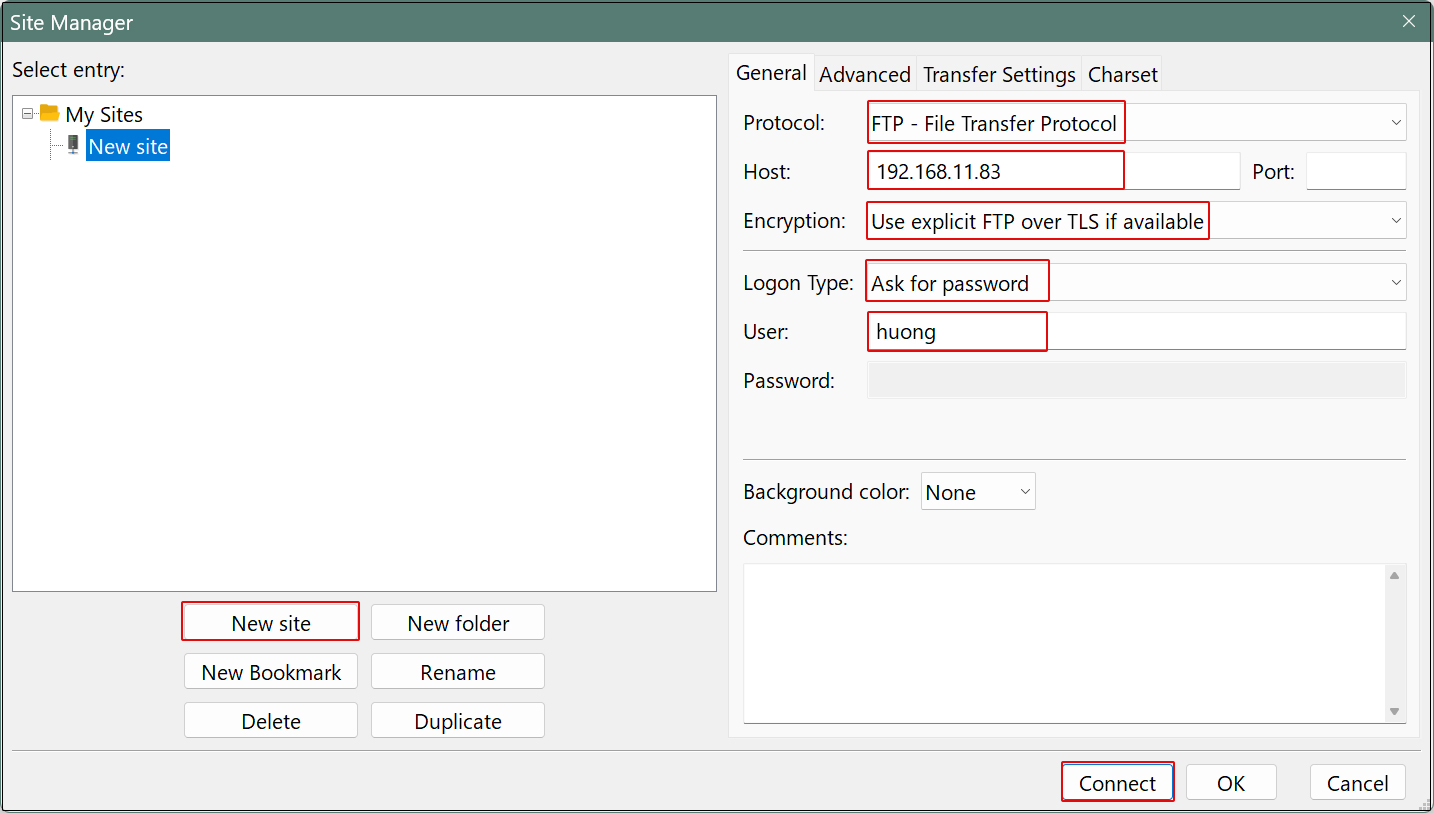
Password : logd in user password
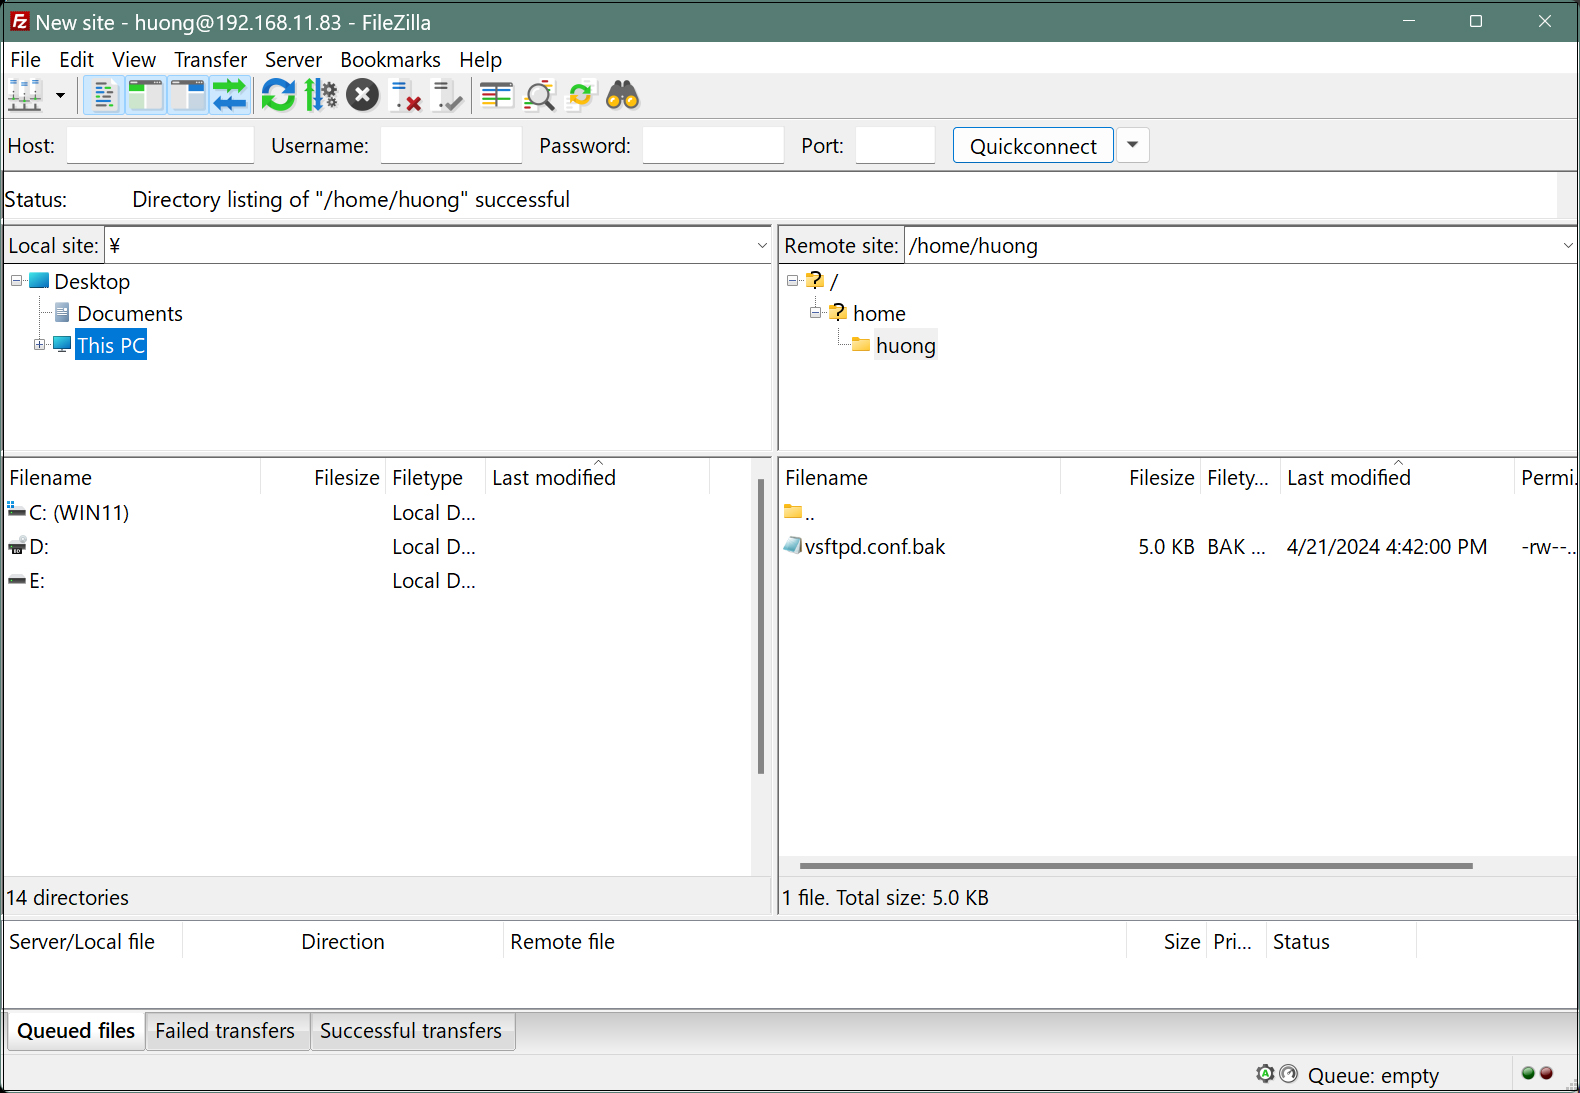
If the connection is successful, the server directory is displayed on the right and the Windows directory on the left.
2. Vsftpd Over SSL/TLS
①Create a self-signed certificate.
If you are using a trusted, legitimate certificate such as Let's Encrypt, you do not need to do this work.
|
1 2 3 4 5 6 7 8 9 10 11 12 13 14 15 16 17 18 |
# cd /etc/ssl/private # openssl req -x509 -nodes -newkey rsa:3072 -keyout vsftpd.pem -out vsftpd.pem -days 3650 --------------------------------------------------------------------------- You are about to be asked to enter information that will be incorporated into your certificate request. What you are about to enter is what is called a Distinguished Name or a DN. There are quite a few fields but you can leave some blank For some fields there will be a default value, If you enter '.', the field will be left blank. ----- Country Name (2 letter code) [AU]:JP State or Province Name (full name) [Some-State]:Osaka Locality Name (eg, city) []:Sakai Organization Name (eg, company) [Internet Widgits Pty Ltd]:private Organizational Unit Name (eg, section) []:Admin Common Name (e.g. server FQDN or YOUR name) []:Lepard Email Address []:[管理者アドレス] |
➁Edit Vsftpd configuration file
|
1 |
# vi /etc/vsftpd.conf |
Line 149,150: comment out
#rsa_cert_file=/etc/ssl/certs/ssl-cert-snakeoil.pem
#rsa_private_key_file=/etc/ssl/private/ssl-cert-snakeoil.key
Line 151 : Change
ssl_enable=YES
Add the following after line 152:
rsa_cert_file=/etc/ssl/private/vsftpd.pem
rsa_private_key_file=/etc/ssl/private/vsftpd.pem
ssl_ciphers=HIGH
force_local_data_ssl=YES
force_local_logins_ssl=YES
Restart Vsftpd
|
1 |
# systemctl restart vsftpd |
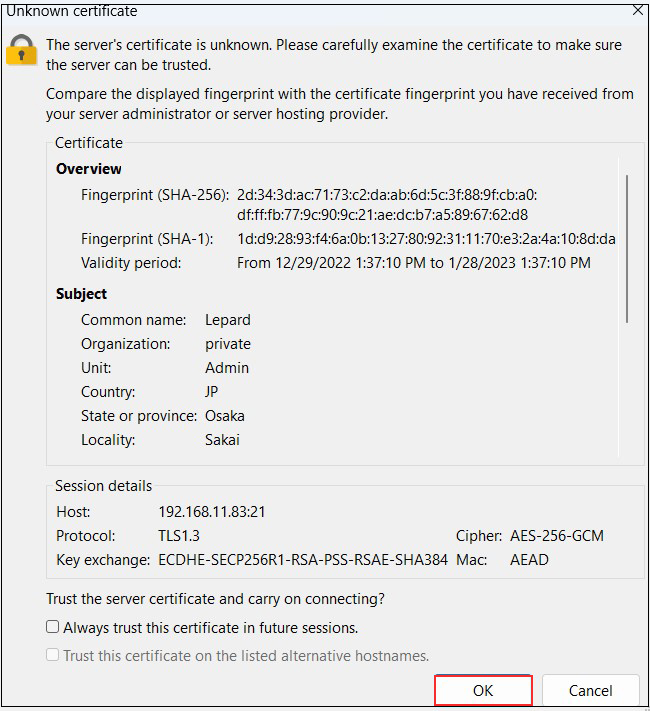
Start FileZilla and check
As before, select "Site Manager" from the "File" menu, select the appropriate server, click "Connect," and the following screen will appear.
File server installation with Samba
Build a file server with access rights that requires user authentication with Samba.
Installation Procedure
(1) Create a shared folder with access rights that requires user authentication.
(2) Create a group with access rights
(3)Create users belonging to groups that can be accessed
(4)Edit configuration file
3.1 samba Install
|
1 |
# apt -y install samba |
3.2 Create a shared folder (smbshare)
|
1 |
# mkdir /home/smbshare |
3.3 Create accessible group (smbgroup)
|
1 2 3 |
# groupadd smbgroup # chgrp smbgroup /home/smbshare # chmod 770 /home/smbshare |
3.4 Configuration File Edit
|
1 |
# vi /etc/samba/smb.conf |
Line 25 :
[global]
unix charset = UTF-8 # Add
dos charset = CP932 # Add
Line 41 : Add networks to allow access
interfaces = 127.0.0.0/8 192.168.11.0/24 ens33
Line 101 : Comment out and add below
#map to guest = bad user
security = user
Add to the last line
Set any shared name
[Smbshare]
# Specify a shared folder
path = /home/smbshare
# Allow posting
writable = yes
# Do not allow guest users
guest ok = no
# [smbgroup] Allow access only to the group
valid users = @smbgroup
# Set the group to [smbgroup] when creating files
force group = smbgroup
# Set the permissions to [770] when creating the file.
force create mode = 770
# Set the permissions to [770] when creating folders.
force directory mode = 770
# Inherit permissions from the parent folder
inherit permissions = yes
3.5 SMB Restart
|
1 2 3 4 5 |
# systemctl enable smbd Synchronizing state of smbd.service with SysV service script with /lib/systemd/systemd-sysv-install. Executing: /lib/systemd/systemd-sysv-install enable smbd # systemctl start smbd |
3.6 User (smbuser) registration, password setting, group registration
|
1 2 3 4 5 6 7 8 |
# useradd smbuser # smbpasswd -a smbuser New SMB password: # Password Setup Retype new SMB password: Added user smbuser. Change smbuser to smbgroup # usermod -aG smbgroup smbuser |
3.7 UFW to allow Samba services
|
1 2 |
# ufw allow samba # ufw reload |
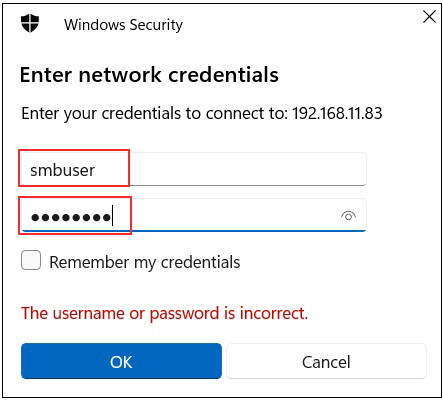
3.8 Accessing shared directories from Windows 11
Connect from Windows Explorer
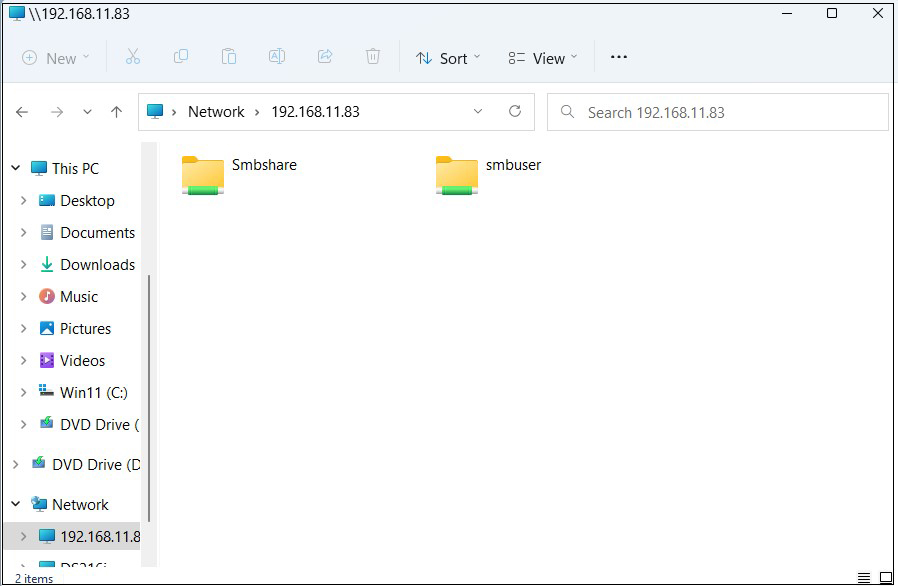
Open Explorer and enter "\\server IP" (in this case 192.168.11.83) in the address field.
Access the server.
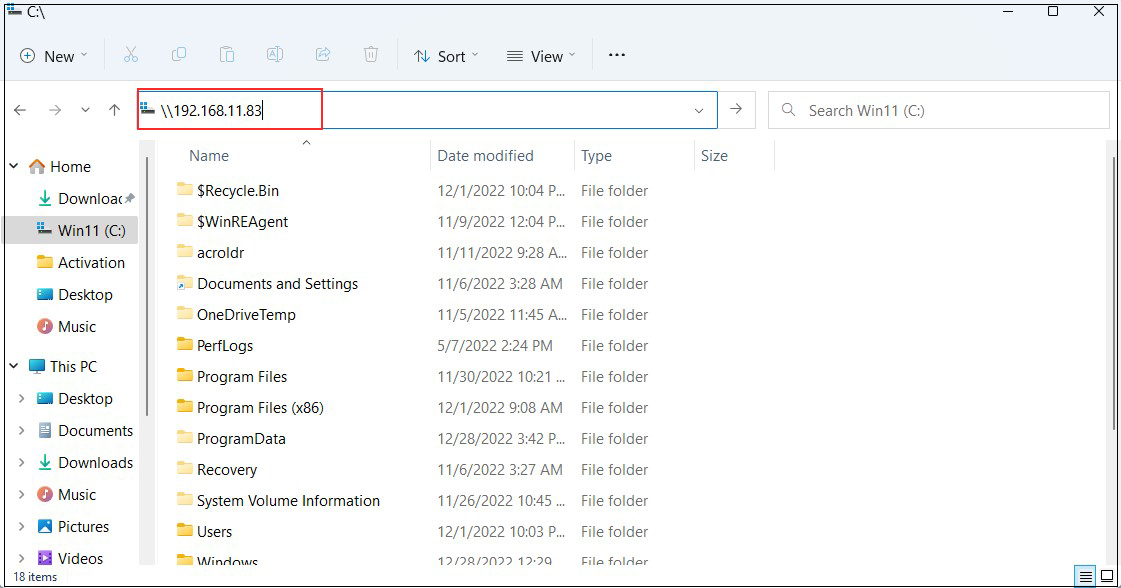
You will be asked to enter your authentication information.
User name : User name created in "3.6 User (smbuser) Registration, Password Setting, Group Registration"
Password : Password for the above user
Click "OK"
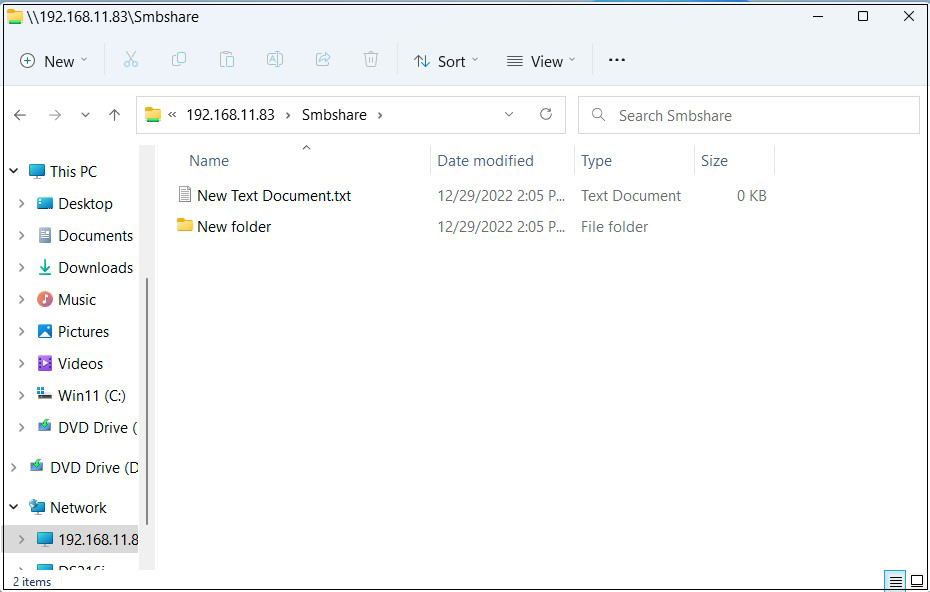
Confirm that files and folders are newly created when the shared directory information is displayed.