

FTP Server (Vsftpd)
1. Create a self-signed certificate
①Private Key Creation
|
1 2 3 4 |
# cd /etc/ssl # openssl genrsa -des3 -out server.key 2048 Enter PEM pass phrase: Verifying - Enter PEM pass phrase: |
➁Passphrase Deletion
|
1 2 3 |
# openssl rsa -in server.key -out server.key Enter pass phrase for server.key: ←Enter the passphrase you just entered writing RSA key |
➂change of access permission
|
1 |
# chmod 400 server.key |
④Self-certification
|
1 2 3 4 5 6 7 8 9 10 11 12 13 14 15 16 |
# cd /etc/ssl/ # openssl req -new -x509 -days 3650 -key server.key -out ftp.crt You are about to be asked to enter information that will be incorporated into your certificate request. What you are about to enter is what is called a Distinguished Name or a DN. There are quite a few fields but you can leave some blank For some fields there will be a default value, If you enter '.', the field will be left blank. ----- Country Name (2 letter code) [AU]:JP ←country name State or Province Name (full name) [Some-State]:Osaka ←prefecture name Locality Name (eg, city) []:Sakai ←municipalities Organization Name (eg, company) [Internet Widgits Pty Ltd]:Lepard ←Host name (or company name)) Organizational Unit Name (eg, section) []: ←Enter Common Name (e.g. server FQDN or YOUR name) []:Admin ←Host name (or administrator name) Email Address []:hoge@hoge.com ←Administrator's email address |
|
1 2 |
# cat server.key ftp.crt > ftp.pem # chmod 400 ftp.* |
2. vsftpd
2.1 vsftpd Install
|
1 2 |
# cd /usr/ports/ftp/vsftpd # make BATCH=yes WITH_VSFTPD_SSL=yes install clean |
2.2 Edit vsftpd configuration file
|
1 2 3 4 5 6 7 8 9 10 11 12 13 14 15 16 17 18 19 20 21 22 23 24 25 26 27 28 29 30 31 32 33 34 35 36 37 38 39 40 41 42 43 44 45 46 47 48 49 50 51 52 53 54 55 56 57 58 59 60 61 62 63 64 |
# chmod 640 /usr/local/etc/vsftpd.conf # vi /usr/local/etc/vsftpd.conf Line 12 : Change (do not allow anonymous login) anonymous_enable=NO Line 15 : Uncomment (Allow local login) local_enable=YES Line 18 : Uncomment (Allow to write) write_enable=YES Line 22 : Uncomment (new file permission setting) local_umask=022 Line 51 : Uncomment (specify log file) xferlog_file=/var/log/vsftpd.log Line 80 : Uncomment (Allow uploading in ASCII mode) ascii_upload_enable=YES Line 81 : Uncomment (Allow downloading in ASCII mode) ascii_download_enable=YES Line 98 : Uncomment chroot_local_user=YES Line 99 : Uncomment chroot_list_enable=YES Line 101 : Uncomment (user-specified file above) chroot_list_file=/etc/vsftpd.chroot_list Line 107 : Uncomment (allow per-directory deletion) ls_recurse_enable=YES Line 112 : IPv4 enabled listen=YES Line 134 : Uncomment background=YES # Add the following to the last line # PASV mode enabled pasv_enable=YES # pasv_address pasv_addr_resolve=YES # pasv mode port number range pasv_min_port=4000 pasv_max_port=4009 # Use local time use_localtime=YES # Allow SSL connections ssl_enable=YES # Specify SSL certificate file rsa_cert_file=/etc/ssl/ftp.pem # Do not reuse SSL sessions require_ssl_reuse=NO # Disable Forced SSL Connection force_local_logins_ssl=NO # Disable Forced SSL Connection force_local_data_ssl=NO # Show dot file force_dot_files=YES |
Edit /etc/hosts.allow
|
1 |
# echo "vsftpd: ALL" >> /etc/hosts.allow |
Edit chroot_list
This time wrote the general user huong
|
1 |
# echo huong >> /etc/vsftpd.chroot_list |
Auto Start Enabled
|
1 2 3 |
# sysrc vsftpd_enable="YES" # service vsftpd start |
2.3 Open passive ports on the firewall
Open ports 4000-4009 and restart the server
# # vi /usr/local/etc/ipfw.rules
下記を追加する、但し400~419は他と重ならないようにする
$IPF 400 allow tcp from any to any 4000 in
$IPF 401 allow tcp from any to any 4000 out
$IPF 402 allow tcp from any to any 4001 in
$IPF 403 allow tcp from any to any 4001 out
$IPF 404 allow tcp from any to any 4002 in
$IPF 405 allow tcp from any to any 4002 out
$IPF 406 allow tcp from any to any 4003 in
$IPF 407 allow tcp from any to any 4003 out
$IPF 408 allow tcp from any to any 4004 in
$IPF 409 allow tcp from any to any 4004 out
$IPF 410 allow tcp from any to any 4005 in
$IPF 411 allow tcp from any to any 4005 out
$IPF 412 allow tcp from any to any 4006 in
$IPF 413 allow tcp from any to any 4006 out
$IPF 414 allow tcp from any to any 4007 in
$IPF 415 allow tcp from any to any 4007 out
$IPF 416 allow tcp from any to any 4008 in
$IPF 417 allow tcp from any to any 4008 out
$IPF 418 allow tcp from any to any 4009 in
$IPF 419 allow tcp from any to any 4009 out
Please refer to the following page.
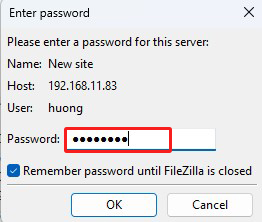
2.4 Connect with FileZilla
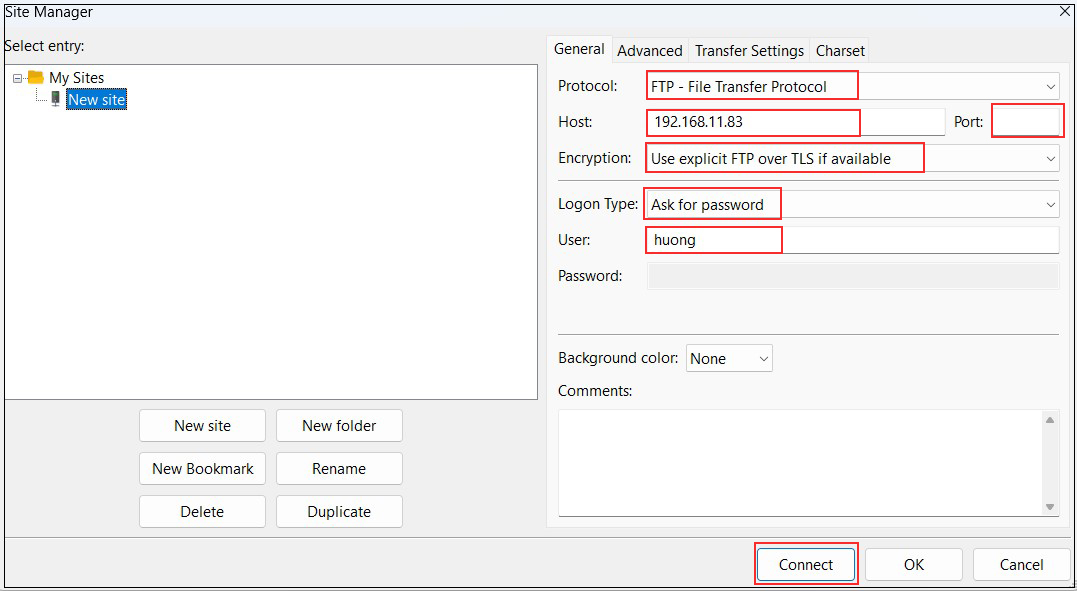
Password : General user huong password
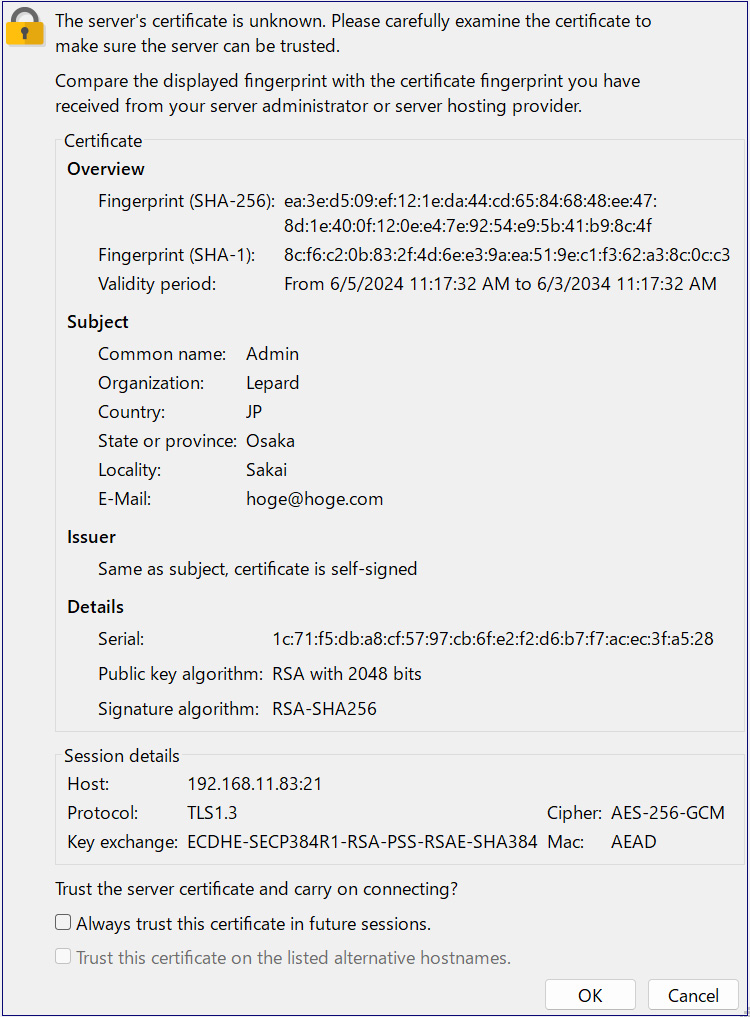
The following security confirmation screen will appear, click OK to connect to the server
File Server with Samba
Use Samba to build a file server for Windows and Mac file sharing
1. Samba Install
|
1 |
# pkg install samba420 |
2. Samba Configuration
Create a new /usr/local/etc/smb4.conf
|
1 2 3 4 5 6 7 8 9 10 11 12 13 14 15 16 17 18 19 20 21 |
# cd /usr/local/etc/ # vi smb4.conf [global] dos charset = CP932 ←Character encoding used for communication with Windows clients unix charset = UTF-8 ←Character encoding used by FreeBSD on the Samba server side workgroup = WORKGROUP ←Match the workgroup name set on the Windows side. server string = FreeBSD ←Any name netbios name = freebsd ←Any name security = user [share] path = /home/share ←Path of the directory to be shared create mask = 0770 ←Permissions for files/directories created in shared directories directory mask = 0770 ←Permissions for files/directories created in shared directories guest only = No ←No guest users allowed guest ok = No ←No guest users allowed browseable = No read only = No ←Shared directories are writable writable = Yes ←Shared directories are writable |
Create shared directory
Set the shared directory as /home/share, the owner as huong (a general user registered in Freebsd), and the access permissions as read/write/execute for general users and the wheel group
|
1 2 3 |
# mkdir /home/share # chown huong:wheel /home/share # chmod -R 0770 /home/share |
Configure Samba to start automatically and start it.
|
1 2 3 |
# sysrc samba_server_enable="YES" # service samba_server start |
Register huong (a general user registered with Freebsd) as a Samba user and set a password (using the pdbedit command)
|
1 2 3 4 5 6 7 8 9 10 11 12 13 14 15 16 17 18 19 20 21 22 23 24 25 26 |
# pdbedit -a -u huong new password: Password retype new password: again Password Unix username: huong NT username: Account Flags: [U ] User SID: S-1-5-21-765060340-2891991016-3678477325-1000 Primary Group SID: S-1-5-21-765060340-2891991016-3678477325-513 Full Name: huong Home Directory: \\FREEBSD\huong HomeDir Drive: Logon Script: Profile Path: \\FREEBSD\huong\profile Domain: FREEBSD Account desc: Workstations: Munged dial: Logon time: 0 Logoff time: Thu, 07 Feb 2036 00:06:39 JST Kickoff time: Thu, 07 Feb 2036 00:06:39 JST Password last set: Thu, 04 Dec 2025 14:12:42 JST Password can change: Thu, 04 Dec 2025 14:12:42 JST Password must change: never Last bad password : 0 Bad password count : 0 Logon hours : FFFFFFFFFFFFFFFFFFFFFFFFFFFFFFFFFFFFFFFFFF |
f firewall is enabled, open samba use port (445)
xxx should be different from other rule numbers.
|
1 2 3 4 5 6 7 |
# vi /usr/local/etc/ipfw.rules Add the following $IPF xxx allow tcp from any to any 445 in $IPF xxx allow tcp from any to any 445 out system reboot # shutdown -r now |
2.3 Confirmation of Samba startup
Windows Settings
・Confirm that the workgroup name is "WORKGROUP
In the File Explorer address bar, type "\\<Samba Server IP address>\<shared directory name>".
(This time '\\192.168.11.83\share')
Enter your registered user name and password when the login screen appears.