Contents
1. FTP(Vsftpd)
1.1 advance preparation
①Private Key Creation
|
1 2 3 4 |
# cd /etc/ssl # openssl genrsa -des3 -out server.key 2048 Enter PEM pass phrase: Verifying - Enter PEM pass phrase: |
➁Passphrase Deletion
|
1 2 3 |
# openssl rsa -in server.key -out server.key Enter pass phrase for server.key: ←Enter the passphrase from earlier writing RSA key |
➂change of access permission
|
1 |
# chmod 400 server.key |
④Self-certification
|
1 2 3 4 5 6 7 8 9 10 11 12 13 14 15 16 |
# cd /etc/ssl/ # openssl req -new -x509 -days 3650 -key server.key -out ftp.crt You are about to be asked to enter information that will be incorporated into your certificate request. What you are about to enter is what is called a Distinguished Name or a DN. There are quite a few fields but you can leave some blank For some fields there will be a default value, If you enter '.', the field will be left blank. ----- Country Name (2 letter code) [AU]:JP ←country name State or Province Name (full name) [Some-State]:Osaka ←prefecture name Locality Name (eg, city) []:Sakai ←municipalities Organization Name (eg, company) [Internet Widgits Pty Ltd]:Lepard ←Host name (or company name)) Organizational Unit Name (eg, section) []: ←Enter Common Name (e.g. server FQDN or YOUR name) []:Admin ←Host name (or administrator name) Email Address []:hoge@hoge.com ←Administrator's email address |
|
1 2 |
# cat server.key ftp.crt > ftp.pem # chmod 400 ftp.* |
1.2 vsftpd Install
1.1 Install
|
1 2 |
# cd /usr/ports/ftp/vsftpd # make BATCH=yes WITH_VSFTPD_SSL=yes install clean |
1.2 Edit vsftpd configuration file
|
1 2 3 4 5 6 7 8 9 10 11 12 13 14 15 16 17 18 19 20 21 22 23 24 25 26 27 28 29 30 31 32 33 34 35 36 37 38 39 40 41 42 43 44 45 46 47 48 49 50 51 52 53 54 55 56 57 58 59 60 61 62 63 64 |
# chmod 640 /usr/local/etc/vsftpd.conf # vi /usr/local/etc/vsftpd.conf Line 12 : Change (do not allow anonymous login) anonymous_enable=NO Line 15 : Uncomment (Allow local login) local_enable=YES Line 18 : Uncomment (Allow to write) write_enable=YES Line 22 : Uncomment (new file permission setting) local_umask=022 Line 51 : Uncomment (specify log file) xferlog_file=/var/log/vsftpd.log Line 80 : Uncomment (Allow uploading in ASCII mode) ascii_upload_enable=YES Line 81 : Uncomment (Allow downloading in ASCII mode) ascii_download_enable=YES Line 98 : Uncomment chroot_local_user=YES Line 99 : Uncomment chroot_list_enable=YES Line 101 : Uncomment (user-specified file above) chroot_list_file=/etc/vsftpd.chroot_list Line 107 : Uncomment (allow per-directory deletion) ls_recurse_enable=YES Line 112 : IPv4 enabled listen=YES Line 134 : Uncomment background=YES # Add the following to the last line # PASV mode enabled pasv_enable=YES # pasv_address pasv_addr_resolve=YES # pasv mode port number range pasv_min_port=4000 pasv_max_port=4009 # Use local time use_localtime=YES # Allow SSL connections ssl_enable=YES # Specify SSL certificate file rsa_cert_file=/etc/ssl/ftp.pem # Do not reuse SSL sessions require_ssl_reuse=NO # Disable Forced SSL Connection force_local_logins_ssl=NO # Disable Forced SSL Connection force_local_data_ssl=NO # Show dot file force_dot_files=YES |
Edit /etc/hosts.allow
|
1 |
# echo "vsftpd: ALL" >> /etc/hosts.allow |
Edit chroot_list
This time wrote the general user huong
|
1 |
# echo huong >> /etc/vsftpd.chroot_list |
Auto Start Enabled
|
1 2 3 4 |
# vi /etc/rc.conf vsftpd_enable="YES" ←add # service vsftpd start |
1.3 Passive port opening with Firewall
Refer to the following page to open ports 4000-4009
1.4 Connect with FileZilla
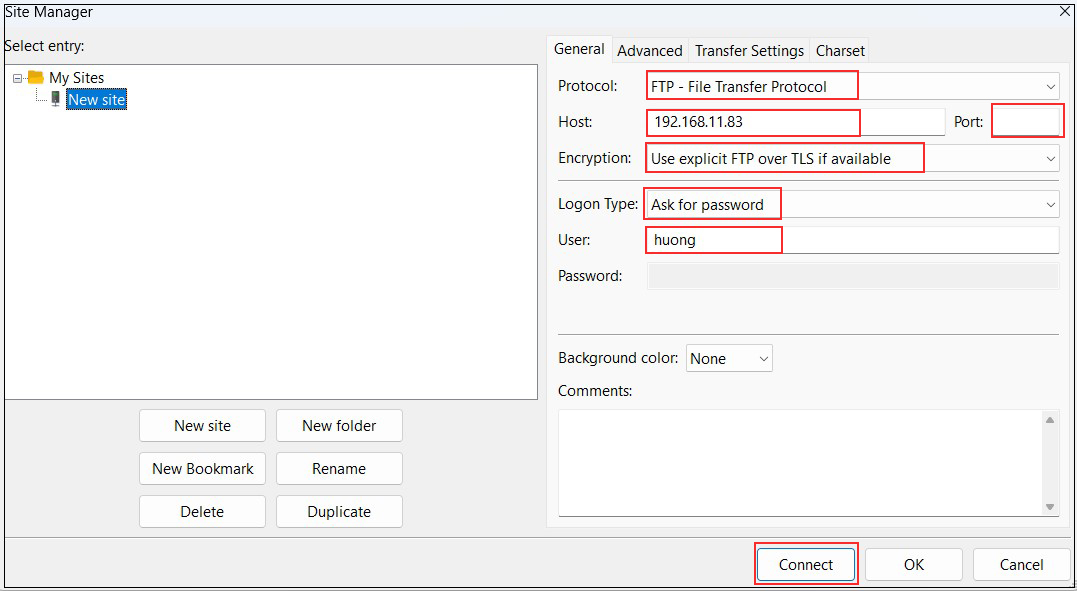
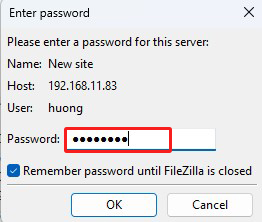
Password : General user huong password
The following security confirmation screen will appear, click OK to connect to the server
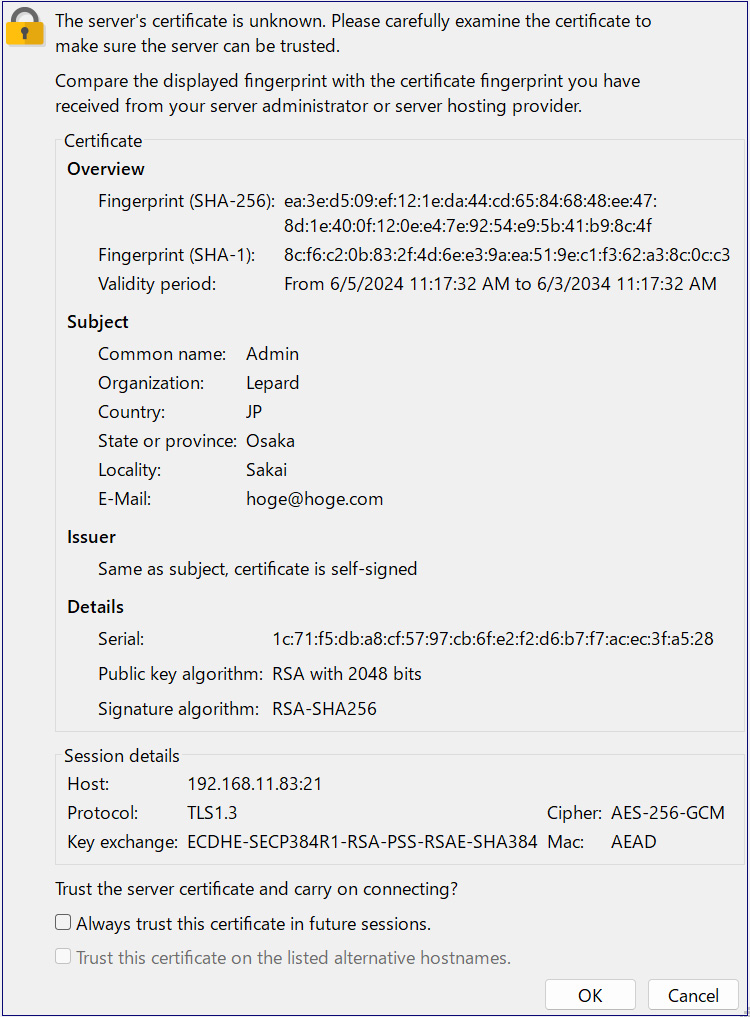
2. File Server with Samba
Use Samba to build a file server for Windows and Mac file sharing
2.1 Samba Install
|
1 2 |
# cd /usr/ports/net/samba416/ # make config |
Remove the active directory relationships for ADS and AD_DC, as they will not be used this time.
LDAP is also removed because account management is not done through LDAP.
By default, Zeroconf Support is checked for AVAHI, but change it to MDNSRESPONDER
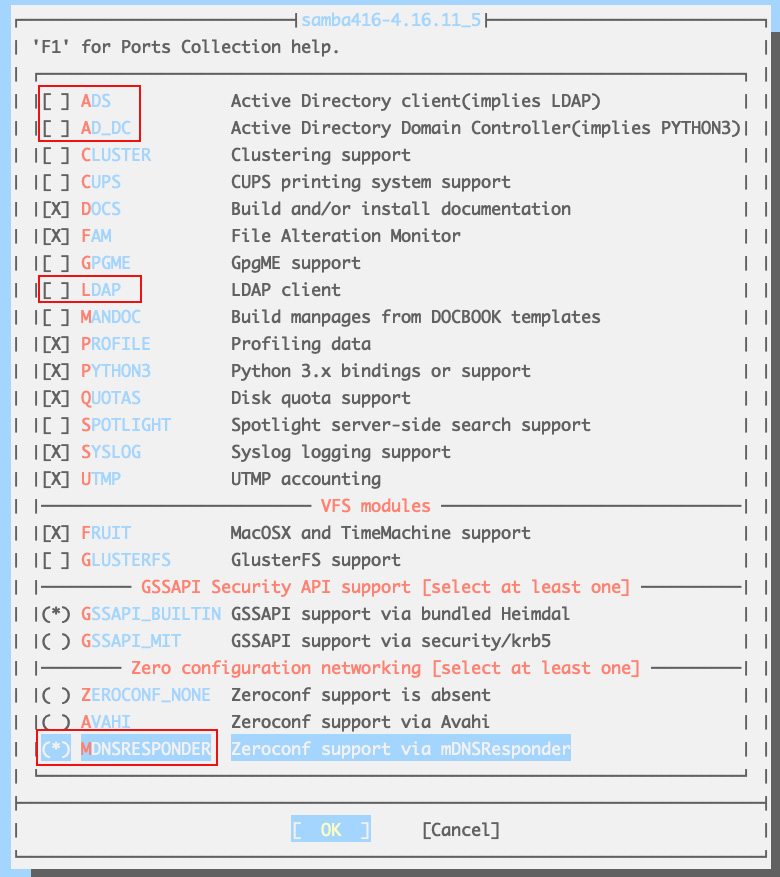
Other options installed by default
|
1 |
# make install clean |
2.2 Samba Configuration
Create a new /usr/local/etc/smb4.conf
|
1 2 3 4 5 6 7 8 9 10 11 12 13 14 15 16 17 18 19 20 21 |
# cd /usr/local/etc/ # vi smb4.conf [global] dos charset = CP932 ←Character encoding used for communication with Windows clients unix charset = UTF-8 ←Character encoding used by FreeBSD on the Samba server side workgroup = WORKGROUP ←Match the workgroup name set on the Windows side. server string = FreeBSD ←Any name netbios name = freebsd ←Any name security = user [share] path = /home/share ←Path of the directory to be shared create mask = 0770 ←Permissions for files/directories created in shared directories directory mask = 0770 ←Permissions for files/directories created in shared directories guest only = No ←No guest users allowed guest ok = No ←No guest users allowed browseable = No read only = No ←Shared directories are writable writable = Yes ←Shared directories are writable |
Create shared directory
Set the shared directory as /home/share, the owner as huong (a general user registered in Freebsd), and the access permissions as read/write/execute for general users and the wheel group
|
1 2 3 |
# mkdir /home/share # chown huong:wheel /home/share # chmod -R 0770 /home/share |
Open /etc/rc.conf and add samba_server_enable="YES"
Register huong (a general user registered with Freebsd) as a Samba user and set a password (using the pdbedit command)
|
1 2 3 |
# pdbedit -a -u huong new password: Password retype new password: again Password |
f firewall is enabled, open samba use port (445)
xxx should be different from other rule numbers.
|
1 2 3 4 5 6 7 |
# vi /usr/local/etc/ipfw.rules Add the following $IPF xxx allow tcp from any to any 445 in $IPF xxx allow tcp from any to any 445 out system reboot # shutdown -r now |
Start samba
|
1 2 3 4 |
# service samba_server start Performing sanity check on Samba configuration: OK Starting nmbd. Starting smbd. |
2.3 Confirmation of Samba startup
Windows Settings
・Confirm that the workgroup name is "WORKGROUP
In the File Explorer address bar, type "\\<Samba Server IP address>\<shared directory name>".
(This time '\\192.168.11.83\share')
Enter your registered user name and password when the login screen appears.


