Postfix Installation
①Edit postfix configuration file
To prevent unauthorized mail relay, configure Postfix to require authentication for outgoing mail as well, using Dovecot's SASL function.
|
1 2 3 4 5 6 7 8 9 10 11 12 13 14 15 16 17 18 19 20 21 22 23 24 25 26 27 28 29 30 31 32 33 34 35 36 37 38 39 40 |
# vi /etc/postfix/main.cf ●Added around line 96 #myhostname = virtual.domain.tld myhostname = mail.<domain> ●Add your domain name around line 103 #mydomain = domain.tld mydomain = <domain> ●Delete comment out per line 118 myorigin = $mydomain ●Delete comment out per line 132 inet_interfaces = all ●Added around line 183 mydestination = $myhostname, localhost.$mydomain, localhost, $mydomain ●Added around line 282 #mynetworks = 168.100.189.0/28, 127.0.0.0/8 #mynetworks = $config_directory/mynetworks #mynetworks = hash:/etc/postfix/network_table mynetworks = 192.168.11.0/24, 127.0.0.0/8 ←192.168.11.0/24 to suit your environment ●Delete comment per line 434 Set the mail storage format. #home_mailbox = Mailbox home_mailbox = Maildir/ ●Added around line 442 mail_spool_directory = /var/spool/mail ●Added around line 570 #smtpd_banner = $myhostname ESMTP $mail_name #smtpd_banner = $myhostname ESMTP $mail_name ($mail_version) smtpd_banner = $myhostname ESMTP unknown ●Add the following to the last line # Limit send/receive mail size to 10M message_size_limit = 10485760 # Limit mailbox size to 1G mailbox_size_limit = 1073741824 # SMTP-Auth Settings smtpd_sasl_type = dovecot smtpd_sasl_path = private/auth smtpd_sasl_auth_enable = yes smtpd_sasl_security_options = noanonymous smtpd_sasl_local_domain = $mydomain smtpd_recipient_restrictions = permit_mynetworks, permit_auth_destination, permit_sasl_authenticated, reject |
➁Start Postfix
|
1 2 |
# chmod +x /etc/rc.d/rc.postfix # /etc/rc.d/rc.postfix start |
➂Release SMTP port (port 25)
|
1 2 |
# ufw allow smtp # ufw reload |
Dovecot Installation
①Edit dovecot.conf file
|
1 2 3 4 5 6 7 |
# vi /etc/dovecot/dovecot.conf ●Add around line 25 # protocols = imap pop3 lmtp protocols = imap pop3 ●Line 30 : Uncomment # Remove [::] if listening for IPv4 only listen = * |
➁Edit 10-auth.conf file
|
1 2 3 4 5 6 |
# vi /etc/dovecot/conf.d/10-auth.conf ●Line 10 : Uncomment and change If plain text authentication is also allowed disable_plaintext_auth = no ●Line 100 : Addition auth_mechanisms = plain login |
➂Edit 10-mail.conf file
|
1 2 3 |
# vi /etc/dovecot/conf.d/10-mail.conf ●Line 31 : Addendum mail_location = maildir:~/Maildir |
④Edit 10-master.conf file
|
1 2 3 4 5 6 7 8 |
# vi /etc/dovecot/conf.d/10-master.conf ●Lines 107-109 : Uncomment and add # Postfix smtp-auth unix_listener /var/spool/postfix/private/auth { mode = 0666 user = postfix group = postfix } |
⑤Edit 10-ssl.conf file
|
1 2 3 4 |
# vi /etc/dovecot/conf.d/10-ssl.conf ●Line 11,12 Comment. #ssl_cert = </etc/ssl/certs/dovecot.pem #ssl_key = </etc/ssl/private/dovecot.pem |
⑥Start dovecot
|
1 2 |
# chmod +x /etc/rc.d/rc.dovecot # /etc/rc.d/rc.dovecot start |
⑦Open ports for POP/IMAP services.
POP is [110/TCP], IMAP is [143/TCP].
|
1 2 3 |
# ufw allow pop3 # ufw allow imap # ufw reload |
Create mail user and check operation
①advance preparation
Pretreatment for new users
When a new user is added, set up the system to automatically send and receive e-mail.
|
1 2 3 4 |
# mkdir -p /etc/skel/Maildir/{new,cur,tmp} # chmod -R 700 /etc/skel/Maildir/ # echo "~/Maildir/"> /etc/skel/.forward # chmod 600 /etc/skel/.forward |
Mail environment pre-processing for existing users
Configure the already created users to be able to send and receive e-mail.
|
1 2 3 4 |
# mkdir -p /home/huong/Maildir/{new,cur,tmp} # chown -R huong:huong /home/huong/Maildir/ # chmod 700 /home/huong/Maildir # chmod 700 /home/huong/Maildir/{new,cur,tmp} |
➁operation check
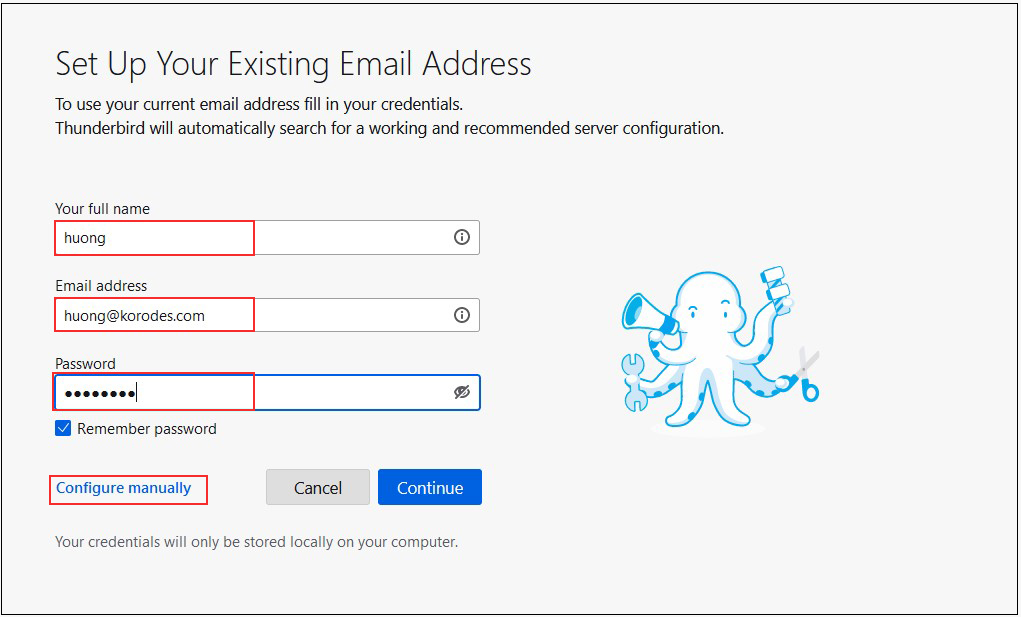
Set up and confirm your account in Mozilla Thunderbird (for OS user huong as mail user)
①Start Thunderbird
Your full name : Any name
Email addtess : huong@korodes.com
Password : Password for huong
Click on "Configure manually"
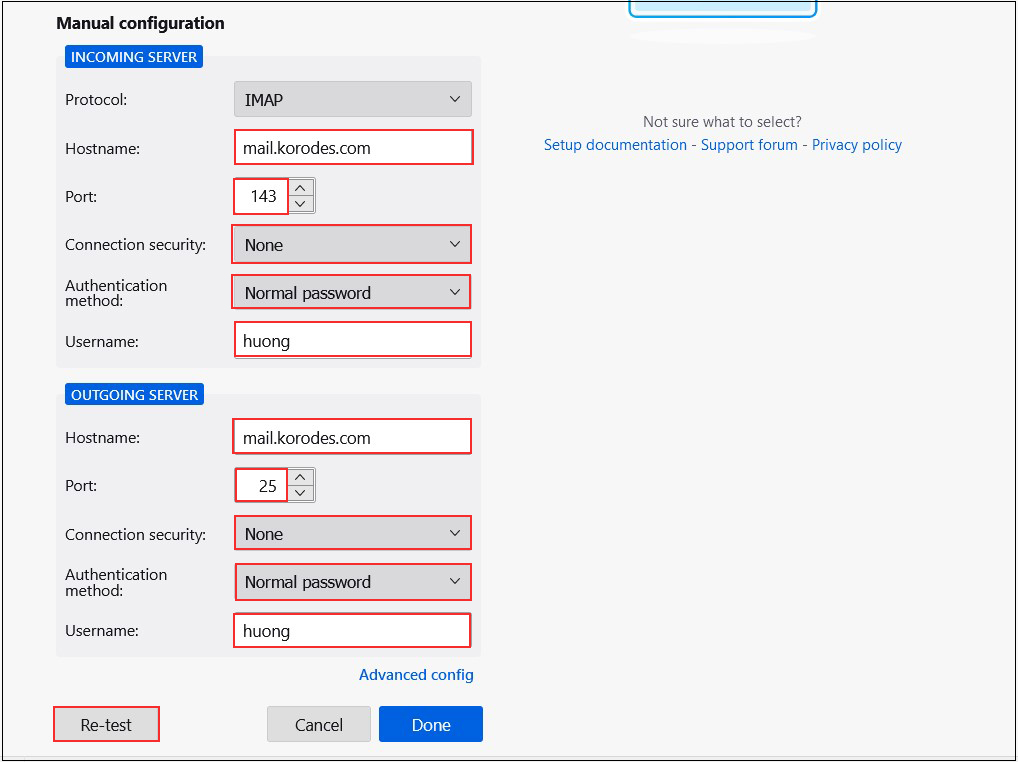
➁Set "INCOMMING SERVER" and "OUTGOING SERVER" as shown below and click "Re-test".
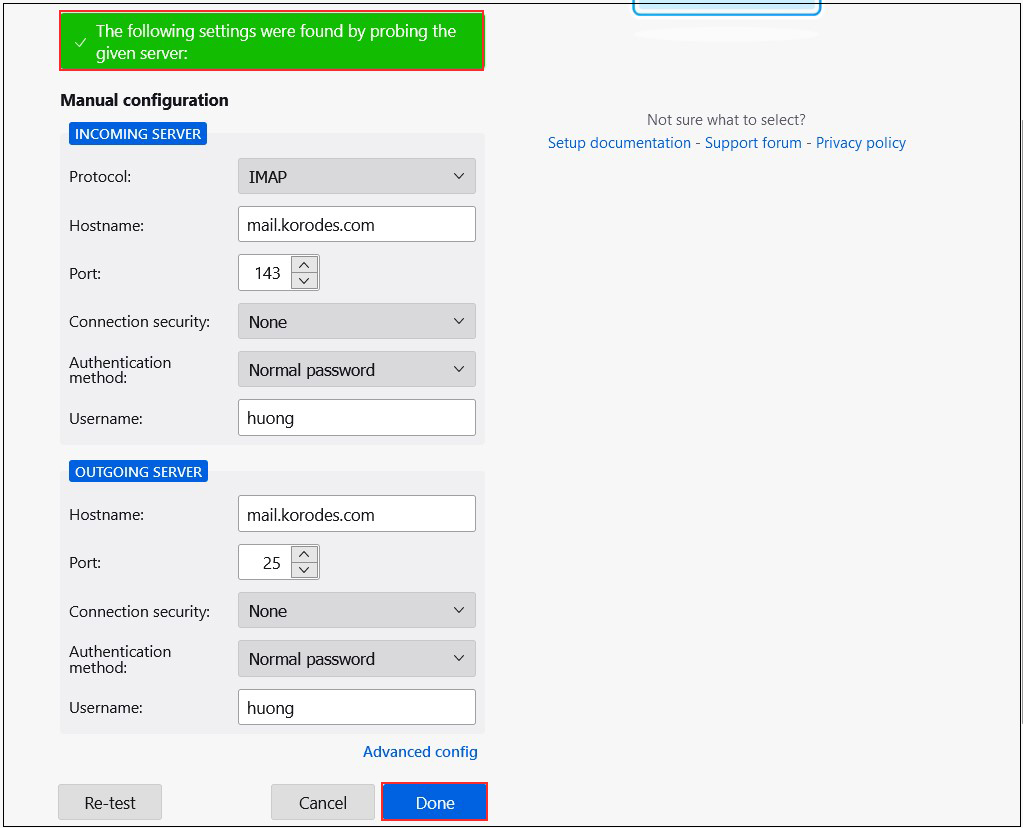
➂The following settings were found by probinfg the given server
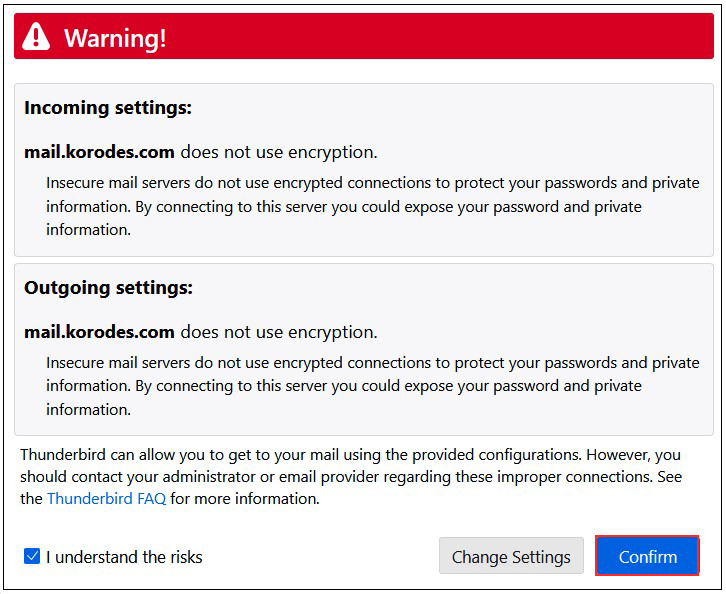
After clicking "Done," the following "Warning" appears, but there is no problem, so click "Confirm."
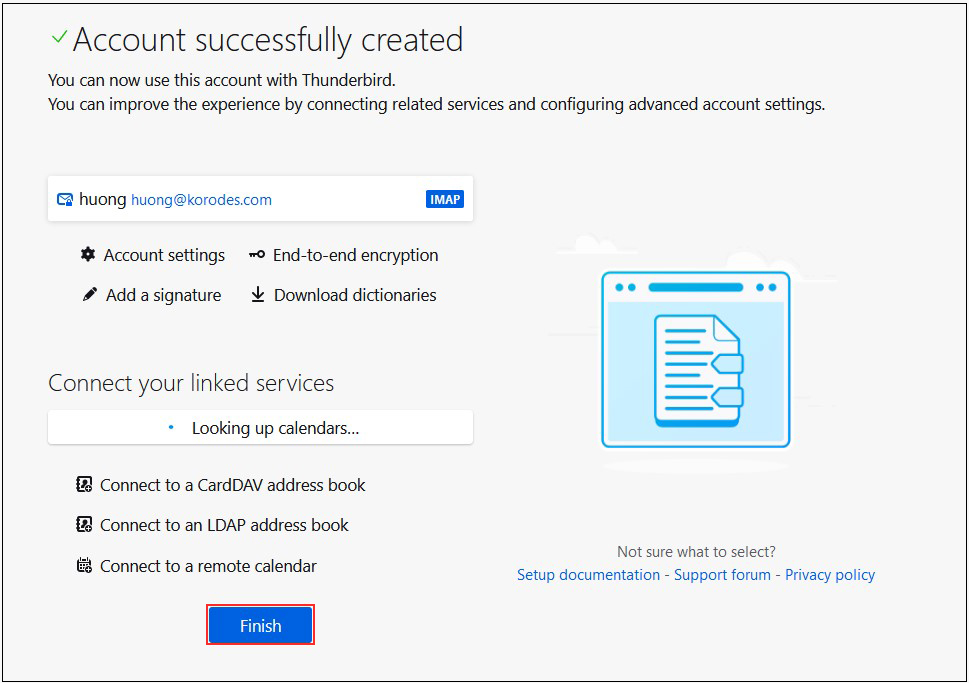
④Click "Finish" when "Account syccessfuly created" is displayed.
