Contents
SSH public key cipher setting
Create an SSH private key on Windows and an SSH public key on the server to allow login by key pair authentication.
1.Create key pair with ECDSA
Become an ordinary user and create a key pair in ECDSA
|
1 2 3 4 5 6 7 8 9 10 11 12 13 14 15 16 17 18 19 20 21 22 23 |
# su - <user name> $ ssh-keygen -t ecdsa Generating public/private ecdsa key pair. Enter file in which to save the key (/home/huong/.ssh/id_ecdsa): <Enter> Created directory '/home/huong/.ssh'. Enter passphrase (empty for no passphrase): <any password> Enter same passphrase again: <again same password> Your identification has been saved in /home/huong/.ssh/id_ecdsa Your public key has been saved in /home/huong/.ssh/id_ecdsa.pub The key fingerprint is: SHA256:Ny30WR280uUqLAcsRkI55snlQRf0xNL1rnsj1MvwVLo huong@Lepard The key's randomart image is: +---[ECDSA 256]---+ | ..o..++..o. | | = +..oo +o| | + B o... o.=| | + +.oo + +o| | .S.+o+ ooo| | ..o+oo+ | | o..*..| | .E*.| | o..| +----[SHA256]-----+ |
|
1 2 |
$ mv ~/.ssh/id_ecdsa.pub ~/.ssh/authorized_keys $ chmod 600 ~/.ssh/authorized_keys |
2.Private Key Login Settings
|
1 2 3 4 5 6 7 8 |
$ su - Password: # vi /etc/ssh/sshd_config ■Delete "#" at the beginning of the line per line 46 Before change) #PubkeyAuthentication yes After change) PubkeyAuthentication yes |
Restart SSH
|
1 |
# systemctl restart sshd.service |
Copy the private key to the client PC (using WinSCP) Set up WinSCP
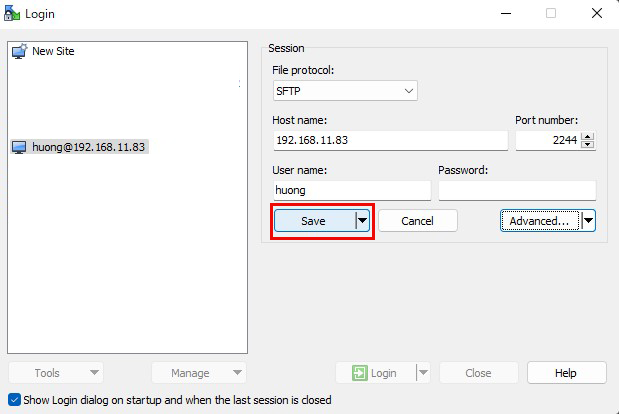
①Start WinSCP, configure the following settings in "New Site" and click "Save"
Host name : Server IP Address
Port number : SSH port number
User name : General username
Password : General username Password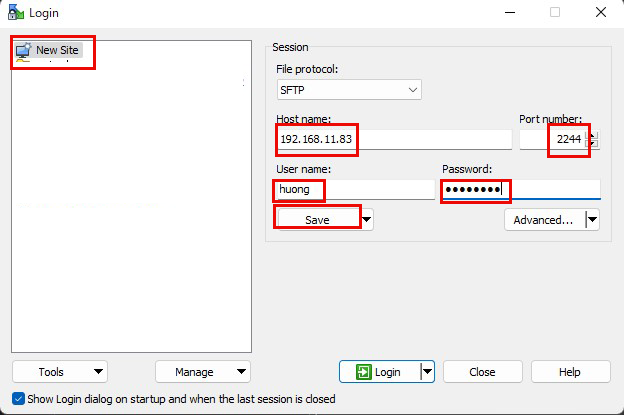
Any connection name ↓
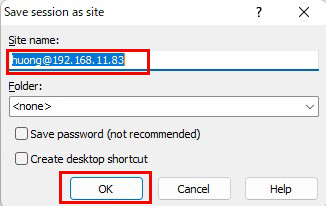
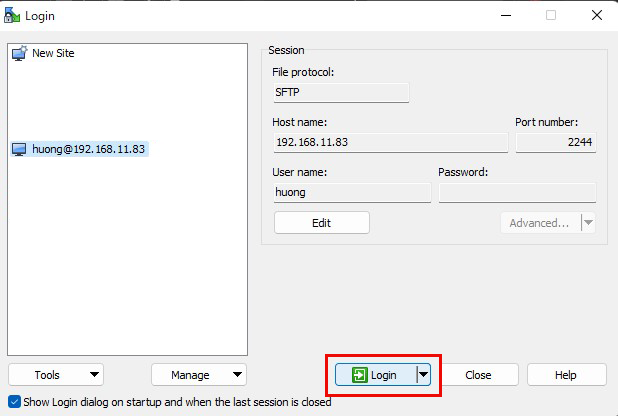
You will be returned to the following screen.「Login」 ↓
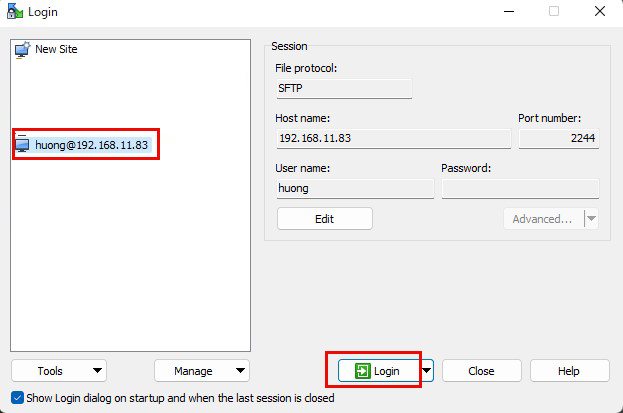
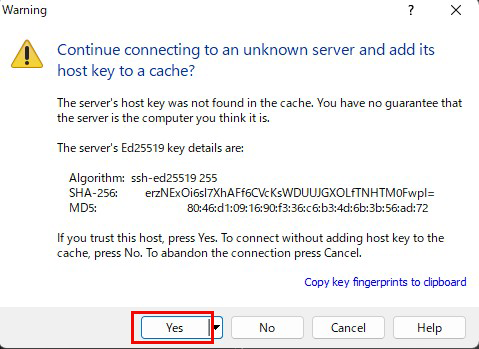
If the following screen appears, say "Yes." ↓
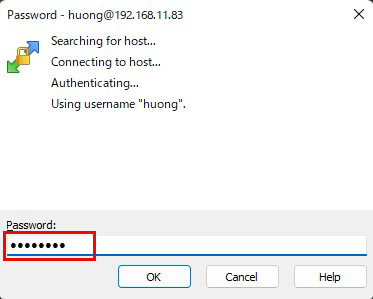
In the following screen, enter the user's password in the "Pasword" field.
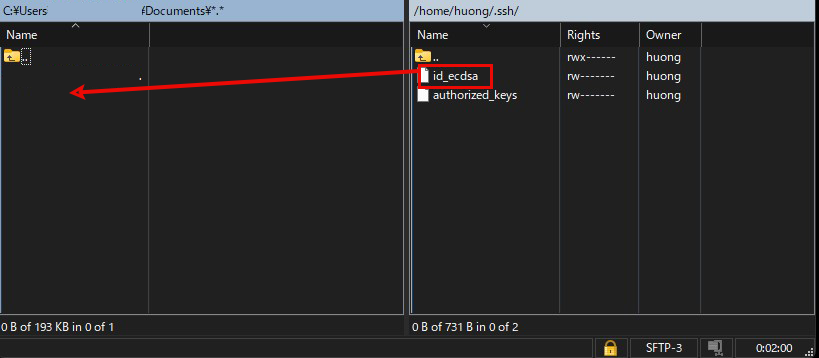
Copy id_ecdsa in "/home/<user name>/.ssh" directory to any location on the windows side.(Select id_ecdsa, drag & copy to the left)
3.Change to log in only with private key
|
1 2 3 4 5 |
# vi /etc/ssh/sshd_config ■Per line 66 Add "PasswordAuthentication no" under "#PasswordAuthentication yes" #PasswordAuthentication yes PasswordAuthentication no |
|
1 |
# systemctl restart sshd.service |
4.Creating a private key using PuTTYgen
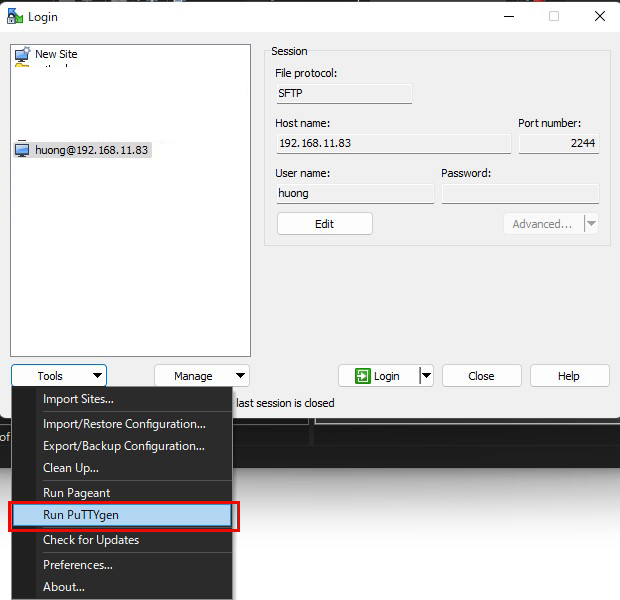
Start Winscp, select the appropriate server, and launch Run PuTTYgen from Tools.
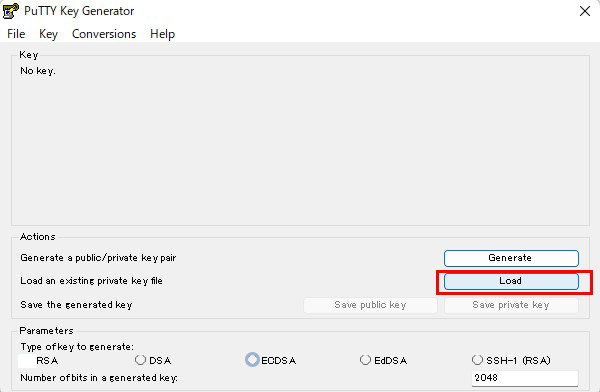
Click Load [ Open File Dialog ], change the file type to [ All Files (*. Change the file type to [ All Files (*. *) ] and load the private key id_ecdsa transferred from the Linux server.
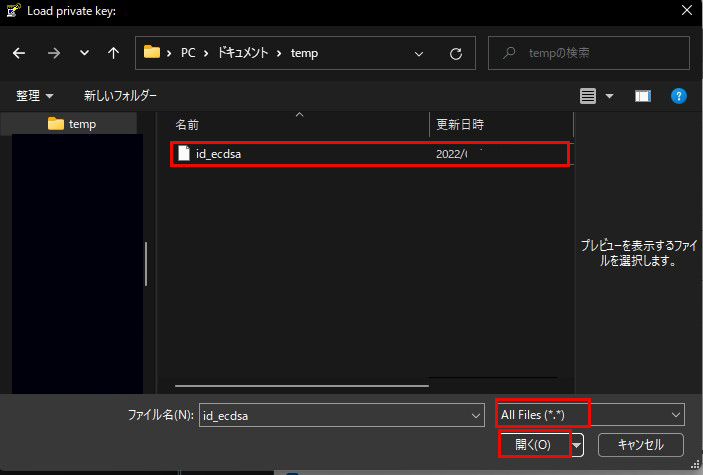
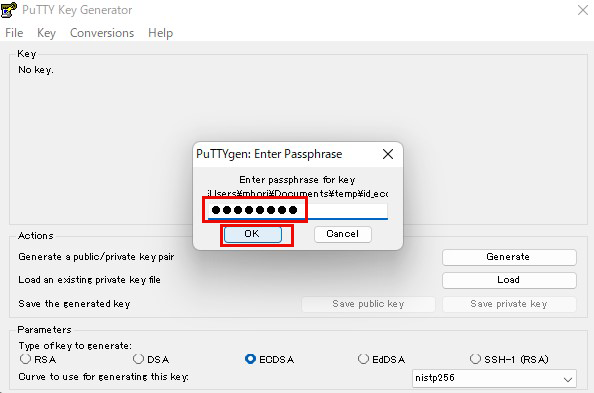
Enter the passphrase you entered when you created the private key on the server side
Click the [ OK ] button when the following appears
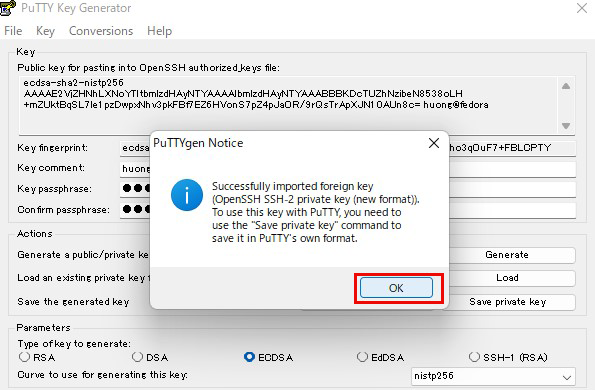
Click the [ Save private key ] button to save the private key.
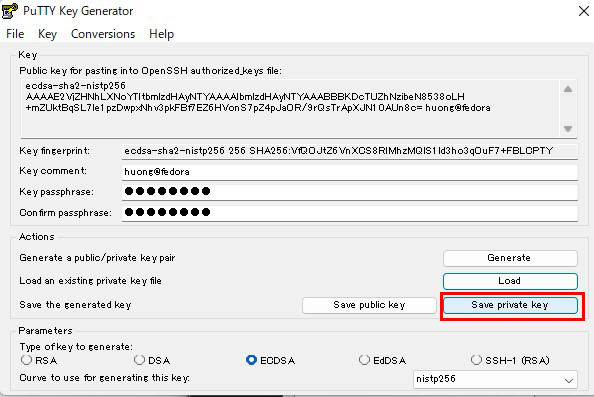
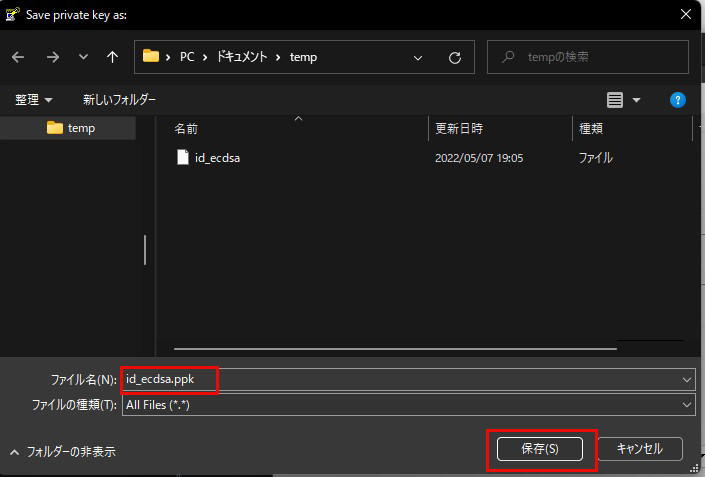
Here we save it as id_ecdsa.ppk (in Windows).
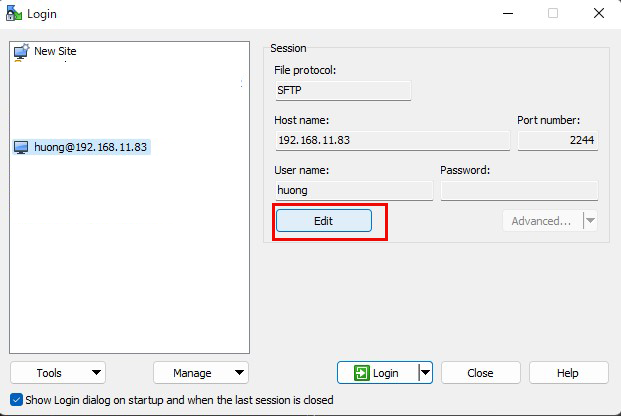
Connect to SSH server with private key
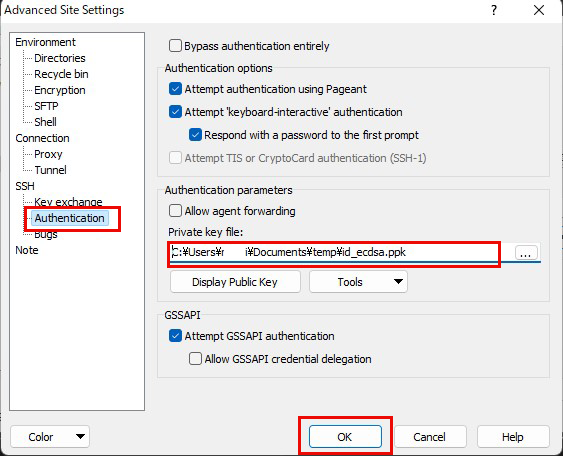
Start Winscp, specify the target server, open "Edit", "Advanced", and "Authentication".
Specify id_ecdsa.ppk saved in windows in the "Private key file" field.
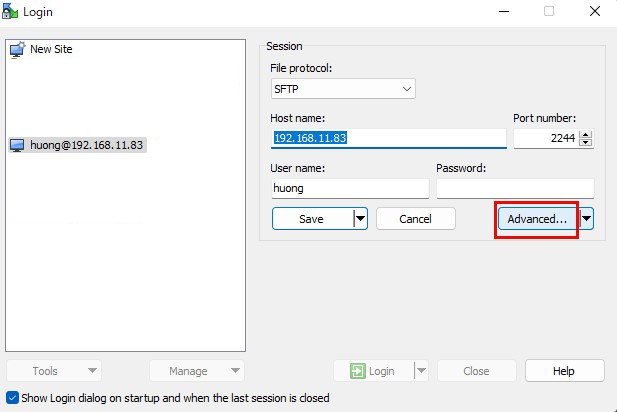
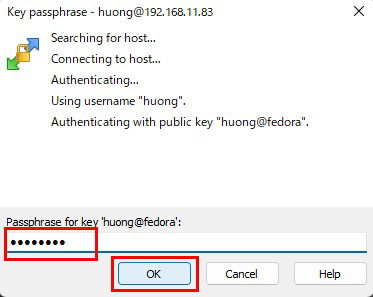
Enter the passphrase you entered when you created the private key on the server side
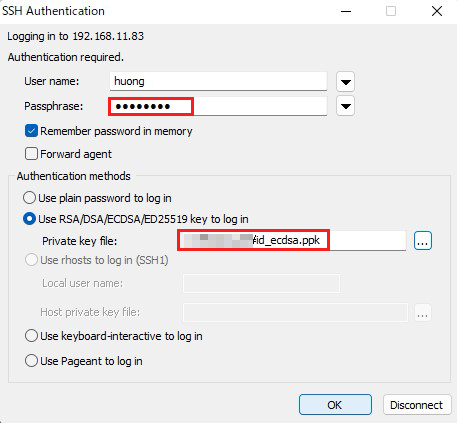
When connecting with Tera Term, use the following
Use RSA/DSA/ECDSA/..." Specify "id_ecdsa.ppk" saved in windows in the "Use RSA/DSA/ECDSA/..." field.
This completes the security configuration for the SSH service.

