Misskeyは、オープンソースの分散型ソーシャルネットワークで、誰もがサーバーを立ち上げることができる。
Contents
X(旧Twitter)との違い
分散型ソーシャルメディア
Xが運営元企業が一元的に管理する中央集権型SNSに対して、Misskeyは、誰でも自由にサーバー(インスタンス)を開設し、各開設者が管理者として独自のルールや利用規約を定めて運営することが出来る「分散型ソーシャルメディア」の形態をしています。
ユーザーは、既存の「インスタンス」と呼ばれるサーバーの中から自身の目的に合ったものを選ぶか、自らサーバーを立ち上げて、アカウントを作成・利用することが出来、管理者は自身のインスタンスを自由に操作することが可能。
投稿機能
Misskeyの投稿は「note」として知られ、他のSNSと比べても非常に高い文字数制限(3,000文字)を持っています。
さらに、MFM機能(Misskey上で使用できる専用コード)を使用して、文字の色やフォントなど変えたり、投稿のデザインやレイアウトをカスタマイズすることも可能です。
タイムライン
Misskeyにはタイムラインが次の4種類あります
①ホーム……自分がフォローした人の投稿
②ローカル……自身が所属しているインスタンス内の投稿
③ソーシャル……ホームとローカルを同時に
④グローバル……所属インスタンスとつながっているインスタンスすべての投稿
絵文字やカスタムスタンプを投稿につけられる
Misskeyには、MastdonやXにあるような、「いいね」が存在しません。その代わりに、絵文字やカスタムスタンプを投稿につけることができます。
Misskeyサーバー(インスタンス)構築
次の条件で構築する
・Linux : Ubuntu22.04
・Domain :独自ドメインを取得し、ローカルIPアドレスと紐づいている
1. ユーザーの作成
Misskey専用のユーザー(misskey)を作成
|
1 |
# adduser --disabled-password --disabled-login misskey |
2. 必要なパッケージインストール
|
1 2 3 |
# apt update -y # apt upgrade -y # apt install curl -y |
3.Node.js インストール
Node.js リポジトリ追加
|
1 |
# curl -sL https://deb.nodesource.com/setup_20.x | bash - |
Node.js インストール
|
1 |
# apt install nodejs -y |
Node.jsバージョン確認
|
1 2 |
# node -v v20.11.1 |
corepack 有効化
|
1 |
# corepack enable |
4. PostgreSQL のインストール・設定
PostgreSQL インストール
|
1 2 |
# apt install -y postgresql-common # sh /usr/share/postgresql-common/pgdg/apt.postgresql.org.sh -i -v 15; |
PostgreSQL ステータス確認
|
1 2 3 4 5 6 7 8 9 |
# systemctl status postgresql ● postgresql.service - PostgreSQL RDBMS Loaded: loaded (/lib/systemd/system/postgresql.service; enabled; vendor pr> Active: active (exited) since Tue 2024-03-05 09:02:54 JST; 1min 41s ago Main PID: 22638 (code=exited, status=0/SUCCESS) CPU: 1ms Mar 05 09:02:54 Lepard systemd[1]: Starting PostgreSQL RDBMS... Mar 05 09:02:54 Lepard systemd[1]: Finished PostgreSQL RDBMS. |
PostgreSQL サービスを開始
|
1 |
# systemctl start postgresql |
PostgreSQL シェルにログイン
|
1 |
# sudo -u postgres -i psql |
Misskeyで使うユーザーを作成
今回は例としてユーザー名をmisskey_user、パスワードをhogeとする
|
1 2 |
postgres=# CREATE ROLE misskey_user LOGIN PASSWORD 'hoge'; CREATE ROLE |
Misskey 用のデータベース(misskey_db)を作成
|
1 2 |
postgres=# CREATE DATABASE misskey_db OWNER misskey_user; CREATE DATABASE |
PostgreSQL シェルを終了
|
1 |
postgres=#\q |
5. Redisのインストール
|
1 2 3 4 5 6 7 8 9 |
# apt install -y ca-certificates gnupg2 lsb-release # curl -fsSL https://packages.redis.io/gpg | gpg --dearmor -o /usr/share/keyrings/redis-archive-keyring.gpg # echo "deb [signed-by=/usr/share/keyrings/redis-archive-keyring.gpg] https://packages.redis.io/deb $(lsb_release -cs) main" | tee /etc/apt/sources.list.d/redis.list # apt update # apt install -y redis |
redis-serverのステータス確認
|
1 2 3 4 5 6 7 8 9 10 11 12 13 14 15 16 |
# systemctl status redis-server ● redis-server.service - Advanced key-value store Loaded: loaded (/lib/systemd/system/redis-server.service; disabled; vendor> Active: active (running) since Tue 2024-03-05 09:21:30 JST; 1min 4s ago Docs: http://redis.io/documentation, man:redis-server(1) Main PID: 25030 (redis-server) Status: "Ready to accept connections" Tasks: 5 (limit: 4515) Memory: 2.8M CPU: 144ms CGroup: /system.slice/redis-server.service mq25030 "/usr/bin/redis-server 127.0.0.1:6379" "" "" "" "" "" "" "" Mar 05 09:21:30 Lepard systemd[1]: Starting Advanced key-value store... Mar 05 09:21:30 Lepard systemd[1]: Started Advanced key-value store. |
6. nginx のインストールと設定
|
1 2 3 4 5 6 7 8 9 10 11 |
前提条件をインストール # apt install ubuntu-keyring nginx署名鍵をインポートします。鍵を取得します # curl https://nginx.org/keys/nginx_signing.key | gpg --dearmor | tee /usr/share/keyrings/nginx-archive-keyring.gpg >/dev/null 適切なキーが含まれていることを確認 # gpg --dry-run --quiet --no-keyring --import --import-options import-show /usr/share/keyrings/nginx-archive-keyring.gpg pub rsa2048 2011-08-19 [SC] [expires: 2024-06-14] 573BFD6B3D8FBC641079A6ABABF5BD827BD9BF62 uid nginx signing key <signing-key@nginx.com> |
|
1 2 3 4 5 6 7 8 |
aptリポジトリをセットアップ # echo "deb [signed-by=/usr/share/keyrings/nginx-archive-keyring.gpg] http://nginx.org/packages/ubuntu `lsb_release -cs` nginx" | tee /etc/apt/sources.list.d/nginx.list # echo -e "Package: *\nPin: origin nginx.org\nPin: release o=nginx\nPin-Priority: 900\n" | tee /etc/apt/preferences.d/99nginx # apt update # apt install -y nginx |
nginxの起動、ステータス確認
|
1 2 3 4 5 6 7 8 9 10 11 12 13 14 15 16 17 18 19 20 21 22 |
# systemctl start nginx # systemctl enable nginx Synchronizing state of nginx.service with SysV service script with /lib/systemd/systemd-sysv-install. Executing: /lib/systemd/systemd-sysv-install enable nginx # systemctl status nginx ● nginx.service - nginx - high performance web server Loaded: loaded (/lib/systemd/system/nginx.service; enabled; vendor preset:> Active: active (running) since Tue 2024-03-05 09:37:34 JST; 40s ago Docs: https://nginx.org/en/docs/ Main PID: 26055 (nginx) Tasks: 3 (limit: 4515) Memory: 2.6M CPU: 6ms CGroup: /system.slice/nginx.service tq26055 "nginx: master process /usr/sbin/nginx -c /etc/nginx/nginx> tq26056 "nginx: worker process" "" "" "" "" "" "" "" "" "" "" "" "> mq26057 "nginx: worker process" "" "" "" "" "" "" "" "" "" "" "" "> Mar 05 09:37:34 Lepard systemd[1]: Starting nginx - high performance web server> Mar 05 09:37:34 Lepard systemd[1]: Started nginx - high performance web server. |
7. ファイアウォールの設定
UFWでhttp,httpsポート開放
|
1 2 3 |
# ufw allow http # ufw allow https # ufw reload |
8. Let's Encrypt証明書を取得する
下記を参照して取得しておく
9. Misskeyのインストール
Gitでファイル類を展開
|
1 2 3 4 5 6 7 |
# su - misskey $ git clone -b master https://github.com/misskey-dev/misskey.git --recurse-submodules $ cd misskey $ git checkout master |
必要なnpmパッケージをインストール
|
1 |
$ NODE_ENV=production pnpm install --frozen-lockfile |
Misskeyを設定
設定ファイル.config/default.ymlを作成
|
1 |
$ vi .config/default.yml |
|
1 2 3 4 5 6 7 8 9 10 11 12 13 14 15 16 17 18 19 20 21 22 23 24 25 |
# ● Misskeyを公開するURL url: https://[FQDN]/ # ポートを3000とする。 port: 3000 # ● PostgreSQLの設定。 db: host: localhost port: 5432 db : misskey_db # 〇 PostgreSQLのデータベース名 user: misskey_user # 〇 PostgreSQLのユーザー名 pass: hoge # ● PostgreSQLのパスワード # Redisの設定。 redis: host: localhost port: 6379 # IDタイプの設定。 id: 'aid' # syslog syslog: host: localhost port: 514 |
nginxの設定
/etc/nginx/conf.d/misskey.confを作成する。設定例は
|
1 |
# vi /etc/nginx/conf.d/misskey.conf |
Misskey Hubの設定例をコピー&ペーストし、次の部分を自分のものに書き換える。
example.tldを自分の取得したドメインに置き換える
ssl_certificateとssl_certificate_keyはLet's Encryptで取得した証明書のパスになるようにする
CloudflareなどのCDNを使う場合は、「If it's behind another reverse proxy or CDN, remove the following.」から4行を削除する
設定例
|
1 2 3 4 5 6 7 8 9 10 11 12 13 14 15 16 17 18 19 20 21 22 23 24 25 26 27 28 29 30 31 32 33 34 35 36 37 38 39 40 41 42 43 44 45 46 47 48 49 50 51 52 53 54 55 56 57 58 59 60 61 62 63 64 65 66 67 68 69 70 71 |
# For WebSocket map $http_upgrade $connection_upgrade { default upgrade; '' close; } proxy_cache_path /tmp/nginx_cache levels=1:2 keys_zone=cache1:16m max_size=1g inactive=720m use_temp_path=off; server { listen 80; listen [::]:80; server_name example.tld; # For SSL domain validation root /var/www/html; location /.well-known/acme-challenge/ { allow all; } location /.well-known/pki-validation/ { allow all; } location / { return 301 https://$server_name$request_uri; } } server { listen 443 ssl http2; listen [::]:443 ssl http2; server_name example.tld; ssl_session_timeout 1d; ssl_session_cache shared:ssl_session_cache:10m; ssl_session_tickets off; # To use Let's Encrypt certificate ssl_certificate /etc/letsencrypt/live/example.tld/fullchain.pem; ssl_certificate_key /etc/letsencrypt/live/example.tld/privkey.pem; # To use Debian/Ubuntu's self-signed certificate (For testing or before issuing a certificate) #ssl_certificate /etc/ssl/certs/ssl-cert-snakeoil.pem; #ssl_certificate_key /etc/ssl/private/ssl-cert-snakeoil.key; # SSL protocol settings ssl_protocols TLSv1.2 TLSv1.3; ssl_ciphers ECDHE-ECDSA-AES128-GCM-SHA256:ECDHE-RSA-AES128-GCM-SHA256:ECDHE-ECDSA-AES256-GCM-SHA384:ECDHE-RSA-AES256-GCM-SHA384:ECDHE-ECDSA-CHACHA20-POLY1305:ECDHE-RSA-CHACHA20-POLY1305:DHE-RSA-AES128-GCM-SHA256:DHE-RSA-AES256-GCM-SHA384; ssl_prefer_server_ciphers off; ssl_stapling on; ssl_stapling_verify on; # Change to your upload limit client_max_body_size 80m; # Proxy to Node location / { proxy_pass http://127.0.0.1:3000; proxy_set_header Host $host; proxy_http_version 1.1; proxy_redirect off; # If it's behind another reverse proxy or CDN, remove the following. proxy_set_header X-Real-IP $remote_addr; proxy_set_header X-Forwarded-For $proxy_add_x_forwarded_for; proxy_set_header X-Forwarded-Proto https; # For WebSocket proxy_set_header Upgrade $http_upgrade; proxy_set_header Connection $connection_upgrade; # Cache settings proxy_cache cache1; proxy_cache_lock on; proxy_cache_use_stale updating; proxy_force_ranges on; add_header X-Cache $upstream_cache_status; } } |
設定ファイルが正常に読み込まれるか確認
|
1 2 3 |
# nginx -t nginx: the configuration file /etc/nginx/nginx.conf syntax is ok nginx: configuration file /etc/nginx/nginx.conf test is successful |
nginxデーモンを再起動
|
1 |
# systemctl restart nginx |
Misskeyのビルド
|
1 2 3 |
# su - misskey $ cd misskey $ NODE_ENV=production pnpm run build |
データベースの初期化
|
1 |
$ pnpm run init |
Misskeyを起動
|
1 |
$ NODE_ENV=production pnpm run start |
Now listening on port 3000 on http://example.tld と表示されたら、設定したURLにアクセスする
※http://example.tldは各自取得したドメイン名
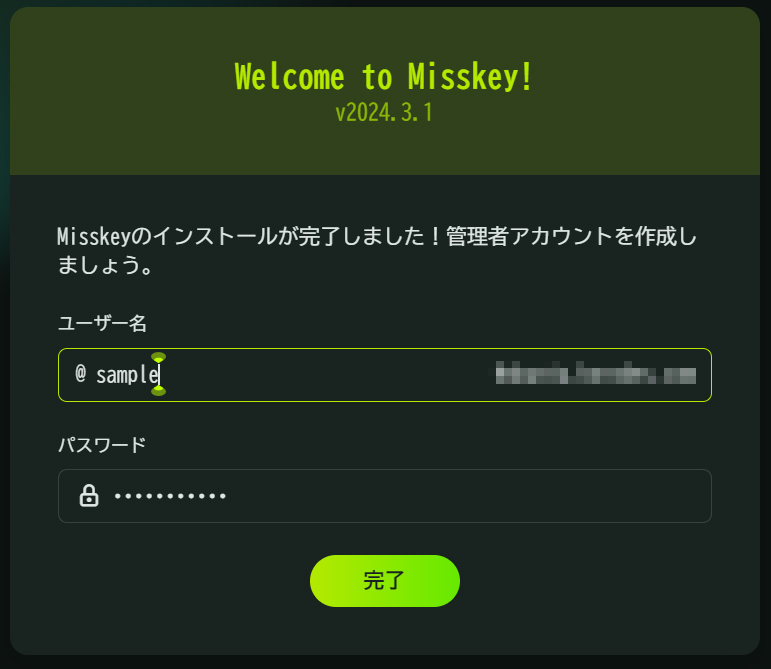
下図のようなアカウント作成画面が出るのでアカウントを作成する

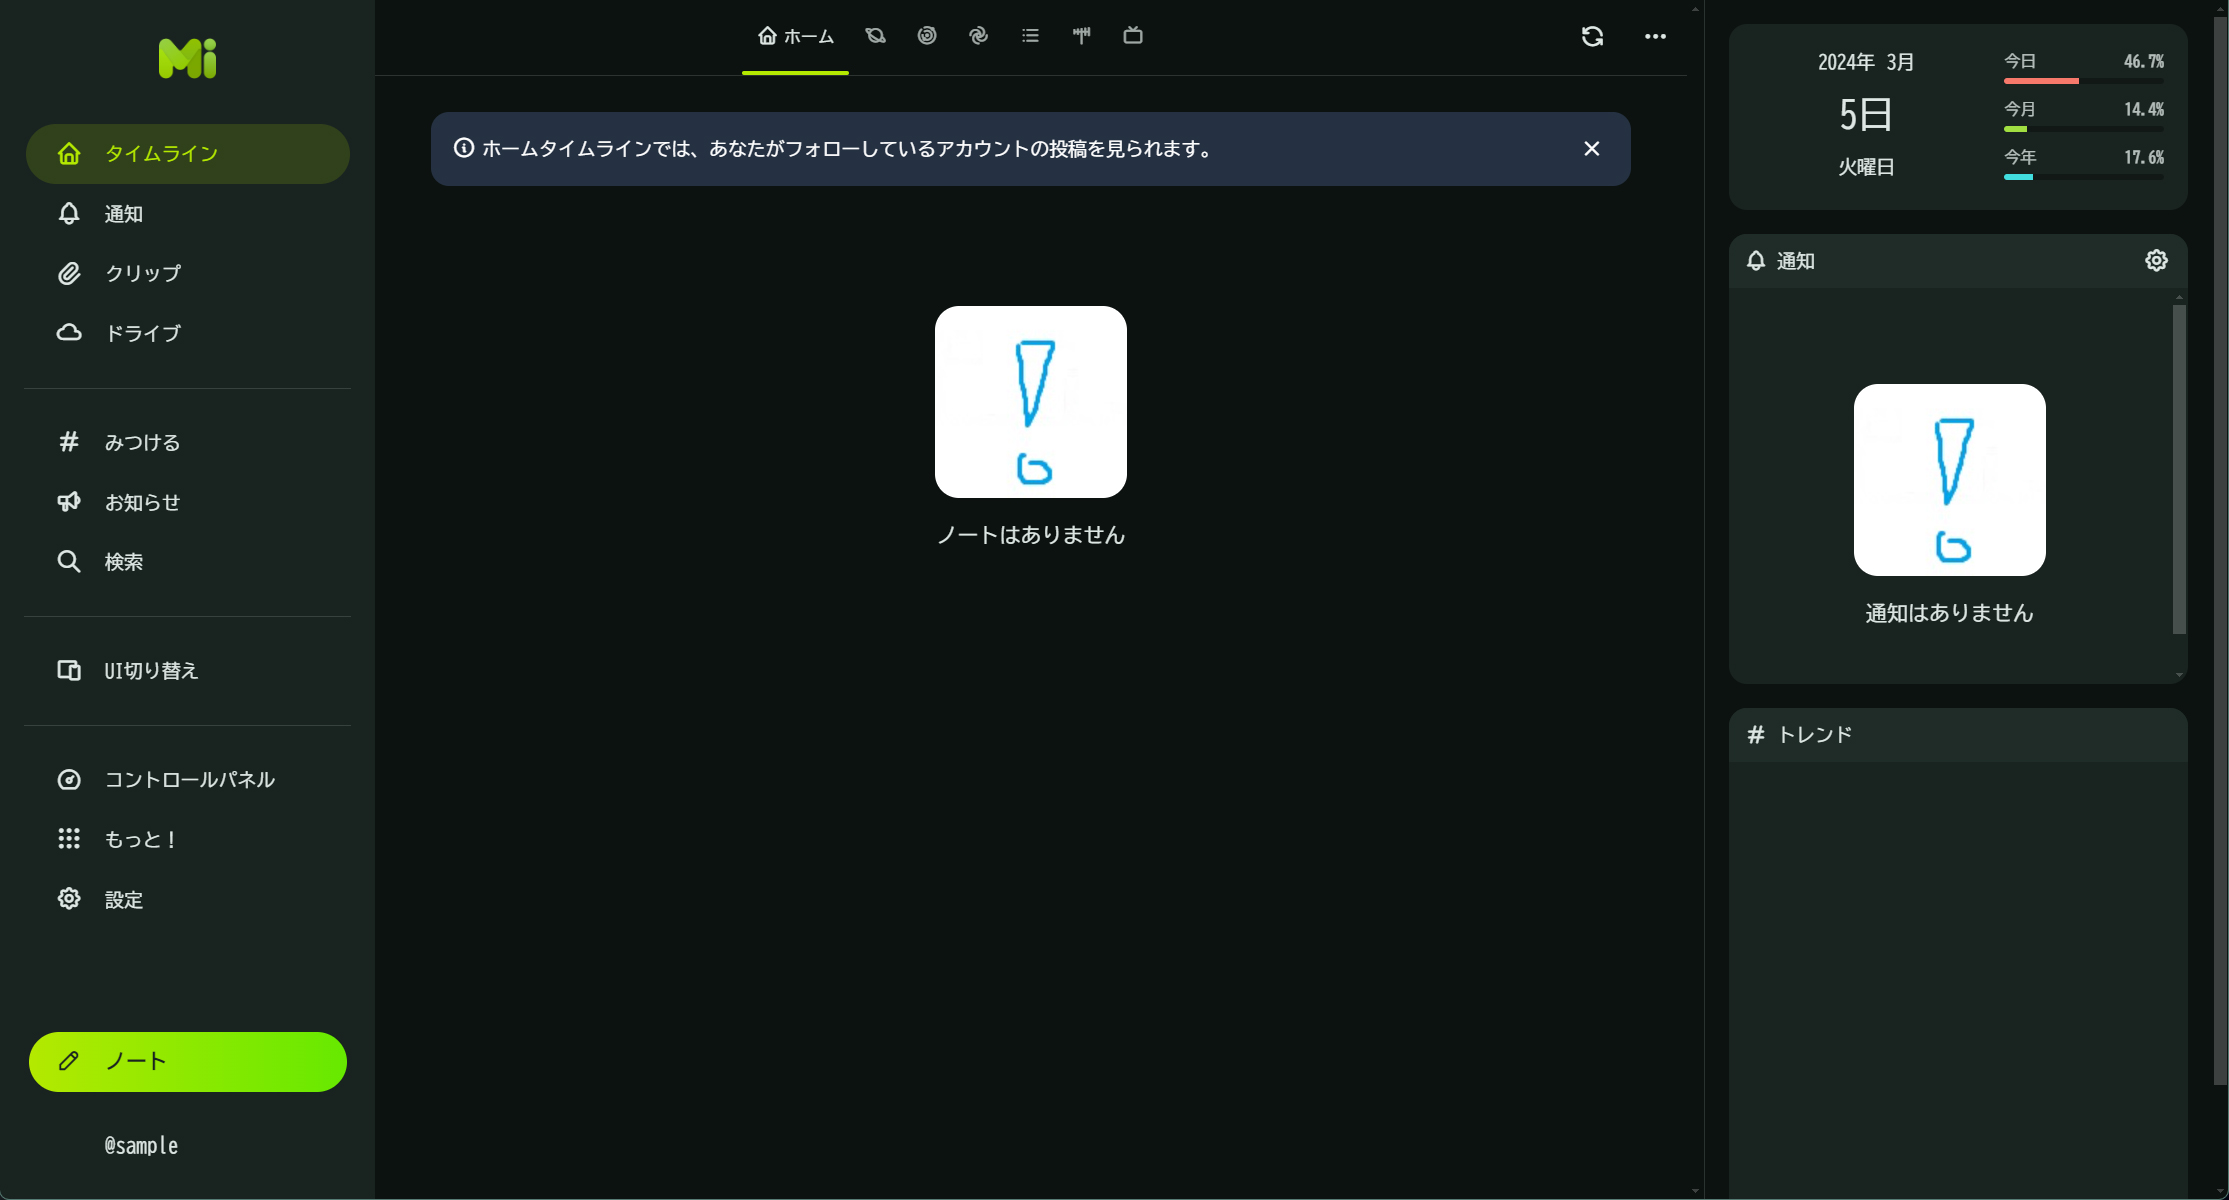
アカウントを作成しログインすると下図のようなダッシュボードが表示される


10.Misskeyのデーモンを作成
systemd serviceを作成
|
1 |
# vi /etc/systemd/system/misskey.service |
misskeyデーモンを開始
|
1 2 3 4 5 |
# systemctl daemon-reload # systemctl enable misskey # systemctl start misskey |
misskeyデーモンのステータス確認
|
1 2 3 4 5 6 7 8 9 10 11 12 13 14 15 16 17 18 19 20 21 22 23 24 |
# systemctl status misskey ● misskey.service - Misskey daemon Loaded: loaded (/etc/systemd/system/misskey.service; enabled; vendor preset: enabled) Active: active (running) since Tue 2024-03-05 13:47:37 JST; 1min 15s ago Main PID: 28017 (npm start) Tasks: 34 (limit: 4515) Memory: 388.0M CPU: 10.577s CGroup: /system.slice/misskey.service tq28017 "npm start" "" "" "" "" "" "" "" "" "" "" "" "" "" "" tq28028 sh -c "pnpm check:connect && cd packages/backend && node ./built/boot/entry.js" tq28064 "Misskey (master)" "" "" "" "" "" "" "" "" "" "" mq28077 "Misskey (worker)" "" "" "" "" "" "" "" "" "" "" "" "" "" "" "" "" "" "" "" "" "" "" "" "" "" "" "" "" > Mar 05 13:47:45 Lepard misskey[28077]: INFO 1 [core nest] NestFactory: Starting Nest application... Mar 05 13:47:45 Lepard misskey[28077]: INFO 1 [core nest] InstanceLoader: QueueModule dependencies initialized Mar 05 13:47:45 Lepard misskey[28077]: INFO 1 [core nest] InstanceLoader: GlobalModule dependencies initialized Mar 05 13:47:45 Lepard misskey[28077]: INFO 1 [core nest] InstanceLoader: RepositoryModule dependencies initia> Mar 05 13:47:45 Lepard misskey[28077]: INFO 1 [core nest] InstanceLoader: CoreModule dependencies initialized Mar 05 13:47:45 Lepard misskey[28077]: INFO 1 [core nest] InstanceLoader: QueueProcessorModule dependencies in> Mar 05 13:47:45 Lepard misskey[28064]: DONE * [core boot] All workers started Mar 05 13:47:45 Lepard misskey[28064]: DONE * [core boot] Now listening on port 3000 on http://ubuntu.korodes.> Mar 05 13:47:45 Lepard misskey[28077]: INFO 1 [queue check-expired-mutings] Checking expired mutings... Mar 05 13:47:45 Lepard misskey[28077]: DONE 1 [queue check-expired-mutings] All expired mutings checked. |


