

1. Using the su command
If you set the root password during installation, this step is unnecessary.
If you choose to set the root password, configure it as follows:
After logging in as a regular user:
|
1 2 3 4 5 6 7 8 9 10 11 12 |
huong@localhost:~>sudo passwd root We trust you have received the usual lecture from the local System Administrator. It usually boils down to these three things: #1) Respect the privacy of others. #2) Think before you type. #3) With great power comes great responsibility. [sudo] password for root: New password: Retype new password: passwd: password updated successfully |
|
1 2 3 |
huong@localhost:~>su – Password: <The root user password set above> localhost:~ # |
2. Update the system
To update the system, enter the following command:
|
1 |
# zypper -n update && reboot |
3. Install locate
When searching for specific files across an entire Linux system, the find command is often used. However, specifying options for find can be somewhat confusing. In such cases, the locate command is convenient. The locate command can extract all files with the specified filename.
Install
|
1 |
# zypper -n install mlocate |
Create a database
|
1 |
# updatedb |
Executing the locate command
|
1 2 3 4 5 6 7 8 9 10 11 12 13 14 15 16 17 18 19 20 21 22 |
# locate sshd /etc/ssh/sshd_config.d /etc/systemd/system/multi-user.target.wants/sshd.service /usr/etc/ssh/sshd_config /usr/etc/ssh/sshd_config.d /usr/etc/ssh/sshd_config.d/40-suse-crypto-policies.conf /usr/lib/pam.d/sshd /usr/lib/systemd/system/sshd.service /usr/lib/systemd/system/sshd.socket /usr/lib/systemd/system/sshd@.service /usr/lib/sysusers.d/sshd.conf /usr/libexec/ssh/sshd-auth /usr/libexec/ssh/sshd-session /usr/sbin/sshd /usr/sbin/sshd-gen-keys-start /usr/sbin/sshd.hmac /usr/share/augeas/lenses/dist/sshd.aug /usr/share/man/man5/sshd_config.5.gz /usr/share/man/man8/sshd.8.gz /usr/share/vim/vim91/ftplugin/sshdconfig.vim /usr/share/vim/vim91/syntax/sshdconfig.vim /var/lib/sshd |
4. Services suspended for security reasons
Disable unnecessary services and keep them disabled even after restarting.
|
1 2 3 4 5 6 7 8 |
# systemctl stop auditd.service # systemctl disable auditd.service # systemctl stop mdmonitor.service # systemctl disable mdmonitor.service # systemctl stop smartd.service # systemctl disable smartd.service # systemctl stop dm-event.socket # systemctl disable dm-event.socket |
5. Vim
Vim Configuration
|
1 2 3 4 5 6 7 8 9 10 11 12 13 14 15 16 17 18 19 20 21 22 23 24 25 26 27 28 29 30 31 32 33 34 35 36 37 38 39 40 41 42 43 44 45 |
# vi ~/.vimrc " Use Vim's proprietary extensions (not compatible with vi) set nocompatible " Specify character encoding set encoding=utf-8 " Specify file encoding (read sequentially from the beginning until successful) set fileencodings=utf-8,iso-2022-jp,sjis,euc-jp " Specify the line break code for automatic recognition set fileformats=unix,dos " Take a backup " The opposite is [ set nobackup ] set backup " Specify the directory to back up set backupdir=~/backup " Number of generations to retain search history set history=50 " Searches are case-insensitive set ignorecase " If you include uppercase letters in your search terms, the search will distinguish between uppercase and lowercase letters. set smartcase " Highlight words matching the search term set hlsearch " Use incremental search (starts searching for matching strings as soon as you begin typing the search term) set incsearch " Show line numbers " The opposite is [ set nonumber ] set number " Visualize line breaks ( $ ) and tabs ( ^I ) set list " Highlight the corresponding bracket when entering a bracket set showmatch " Do not add a line break at the end of the file. set binary noeol " Enable auto-indentation " The opposite is [ noautoindent ] set autoindent " Syntax highlighting " The opposite is [syntax off ] syntax on " Change the color of comment statements when [syntax on] is enabled highlight Comment ctermfg=LightCyan " Wrap lines to fit the window width " The opposite is [ set nowrap ] set wrap |
6. Network Settings
6.1 Hostname and Static IP Address Configuration
If you change it as follows for testing purposes:
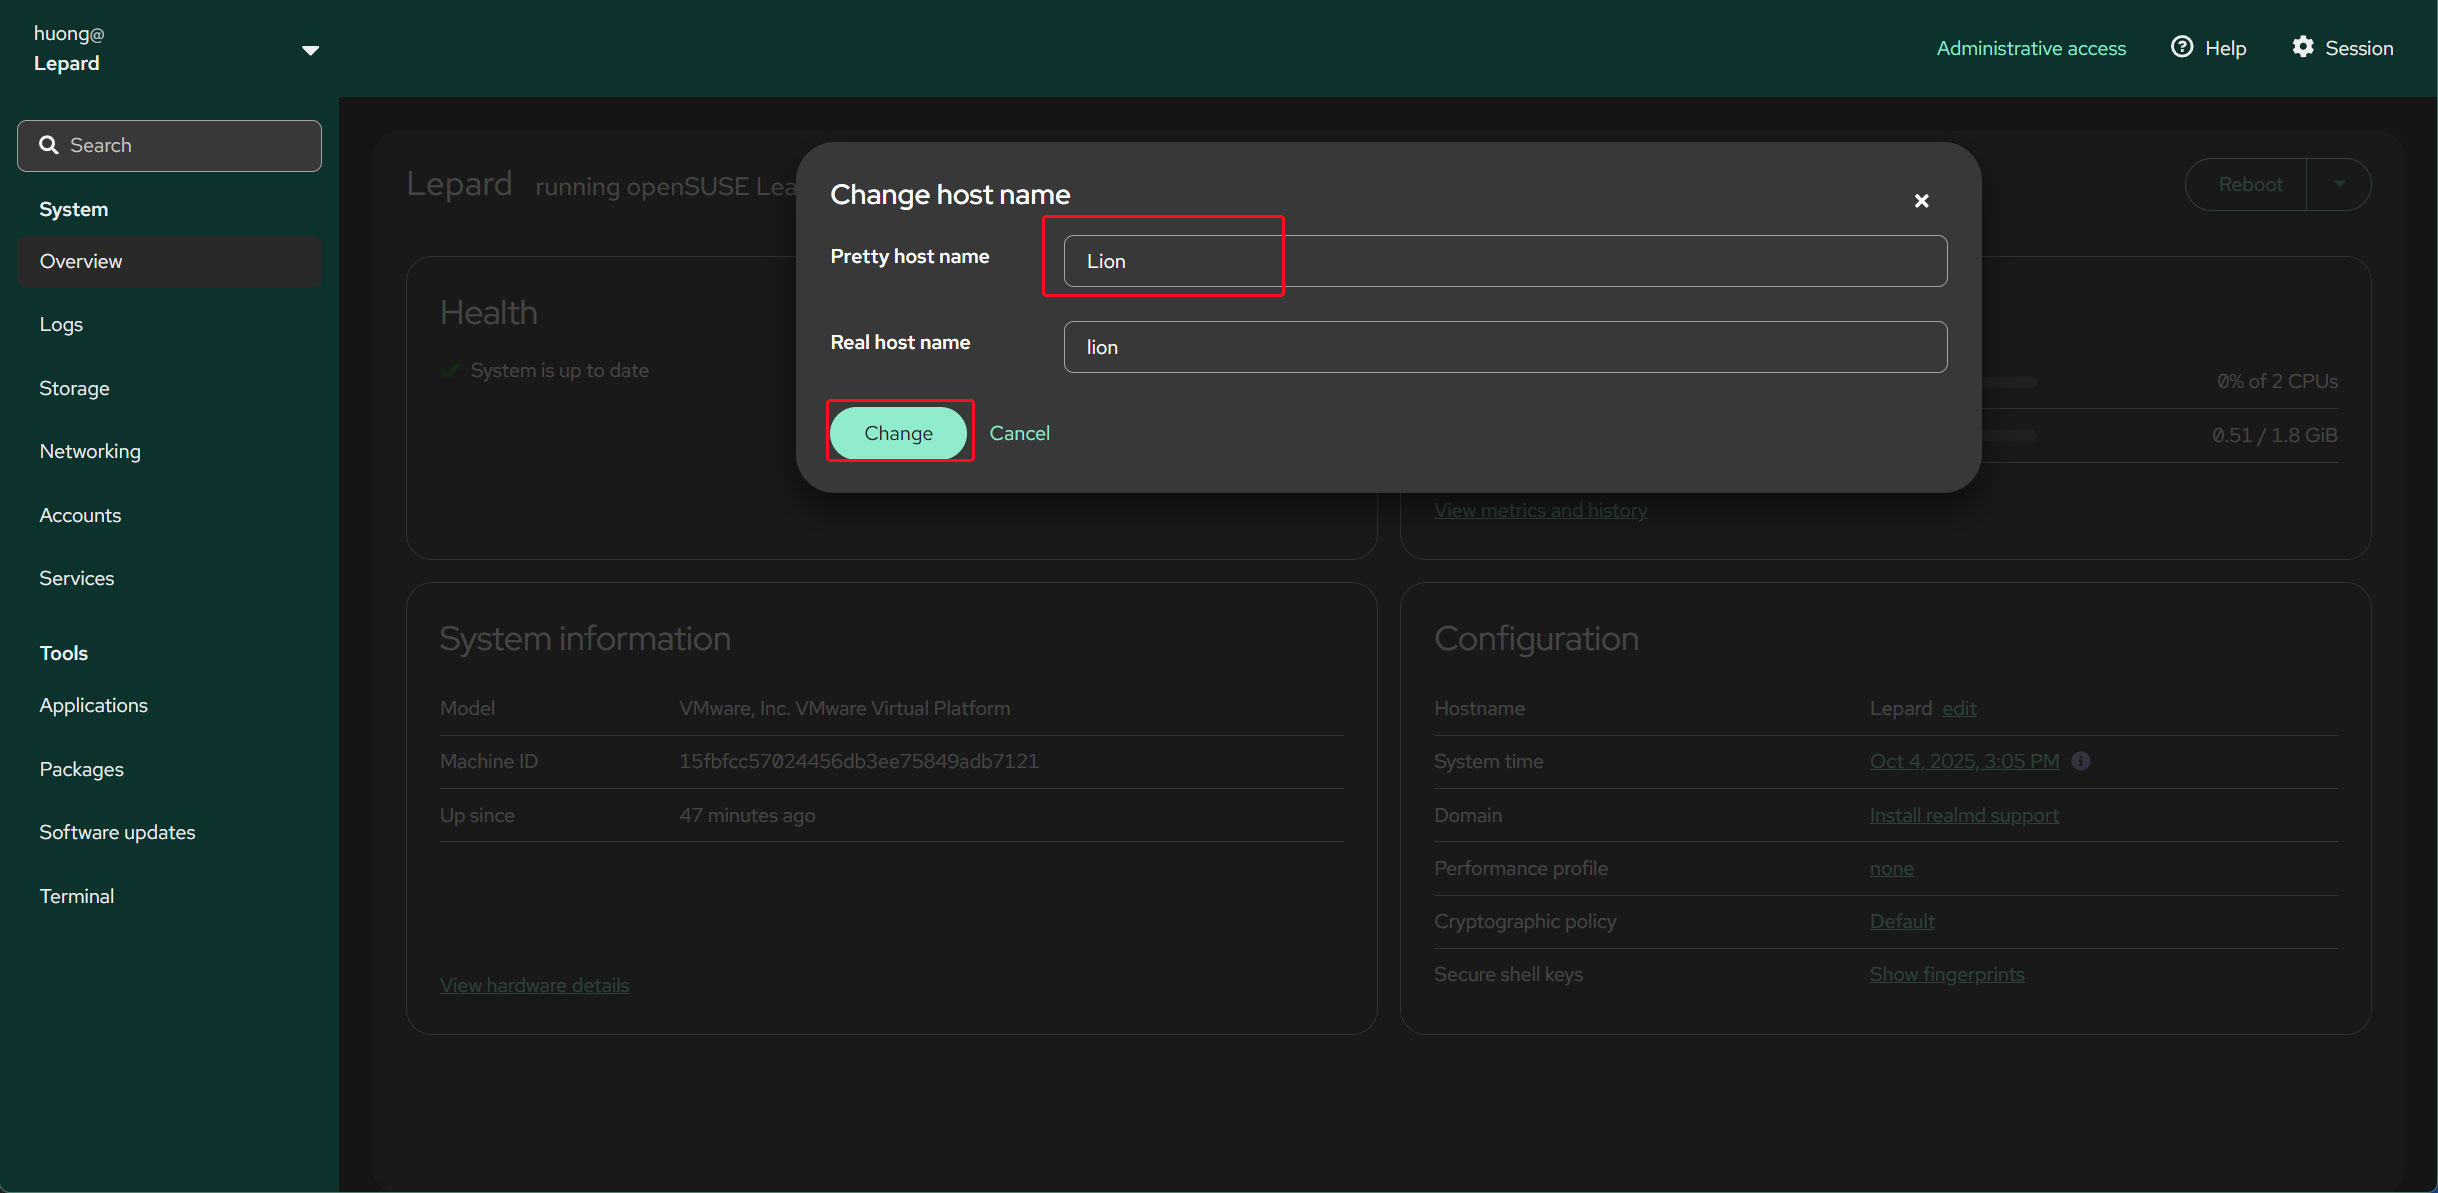
・Change the hostname to Lion
・Set a static IP address (192.168.11.84)
In most cases, the router's address is something like "192.168.11.1" or "192.168.0.1." For this example, we'll proceed using "192.168.11.1."
Starting with openSUSE 16, we will be using Cockpit instead of YaST 2, so we will install Cockpit.
|
1 |
# zypper install cockpit |
Enable the cockpit service and start it.
|
1 2 3 4 5 6 7 8 9 10 11 12 13 14 15 16 17 18 19 |
# systemctl enable --now cockpit.socket # systemctl status cockpit.socket ● cockpit.socket - Cockpit Web Service Socket Loaded: loaded (/usr/lib/systemd/system/cockpit.socket; enabled; preset: enabled) Active: active (listening) since Sat 2025-10-04 15:20:53 JST; 5min ago Invocation: 688c8badb1fe4a18a0bebacfea8fb6a8 Triggers: ● cockpit.service Docs: man:cockpit-ws(8) Listen: [::]:9090 (Stream) Process: 759 ExecStartPre=/usr/libexec/check_cockpit_users (code=exited, status=0/SUCCESS) Process: 784 ExecStartPost=/usr/share/cockpit/issue/update-issue localhost (code=exited, status=0/SUCCESS) Process: 809 ExecStartPost=/bin/ln -snf active.issue /run/cockpit/issue (code=exited, status=0/SUCCESS) Tasks: 0 (limit: 2228) CPU: 41ms CGroup: /system.slice/cockpit.socket Oct 04 15:20:53 lepard systemd[1]: Starting Cockpit Web Service Socket... Oct 04 15:20:53 lepard systemd[1]: Listening on Cockpit Web Service Socket. |
Open Port:9090
It appears to have already been released during the cockpit installation.
|
1 2 3 4 5 |
# firewall-cmd --permanent --add-service=cockpit Warning: ALREADY_ENABLED: cockpit success # firewall-cmd --reload success |
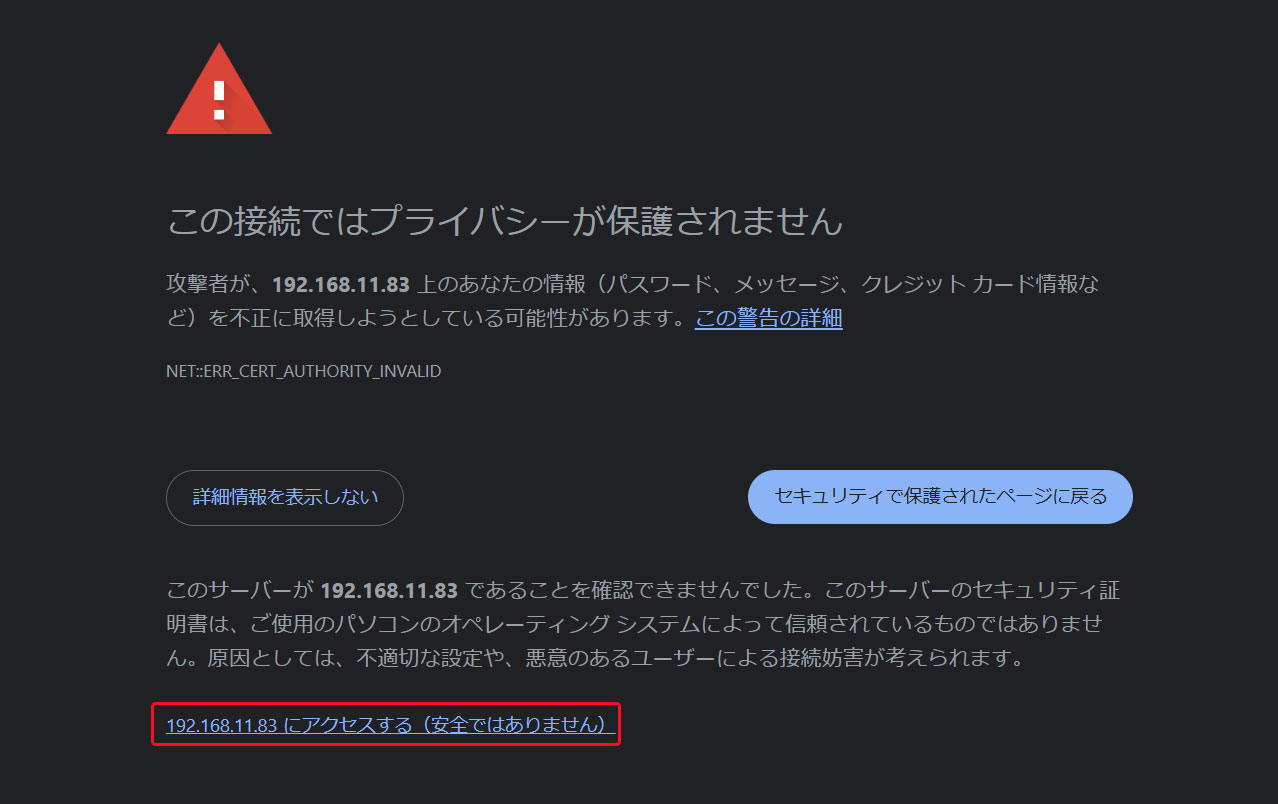
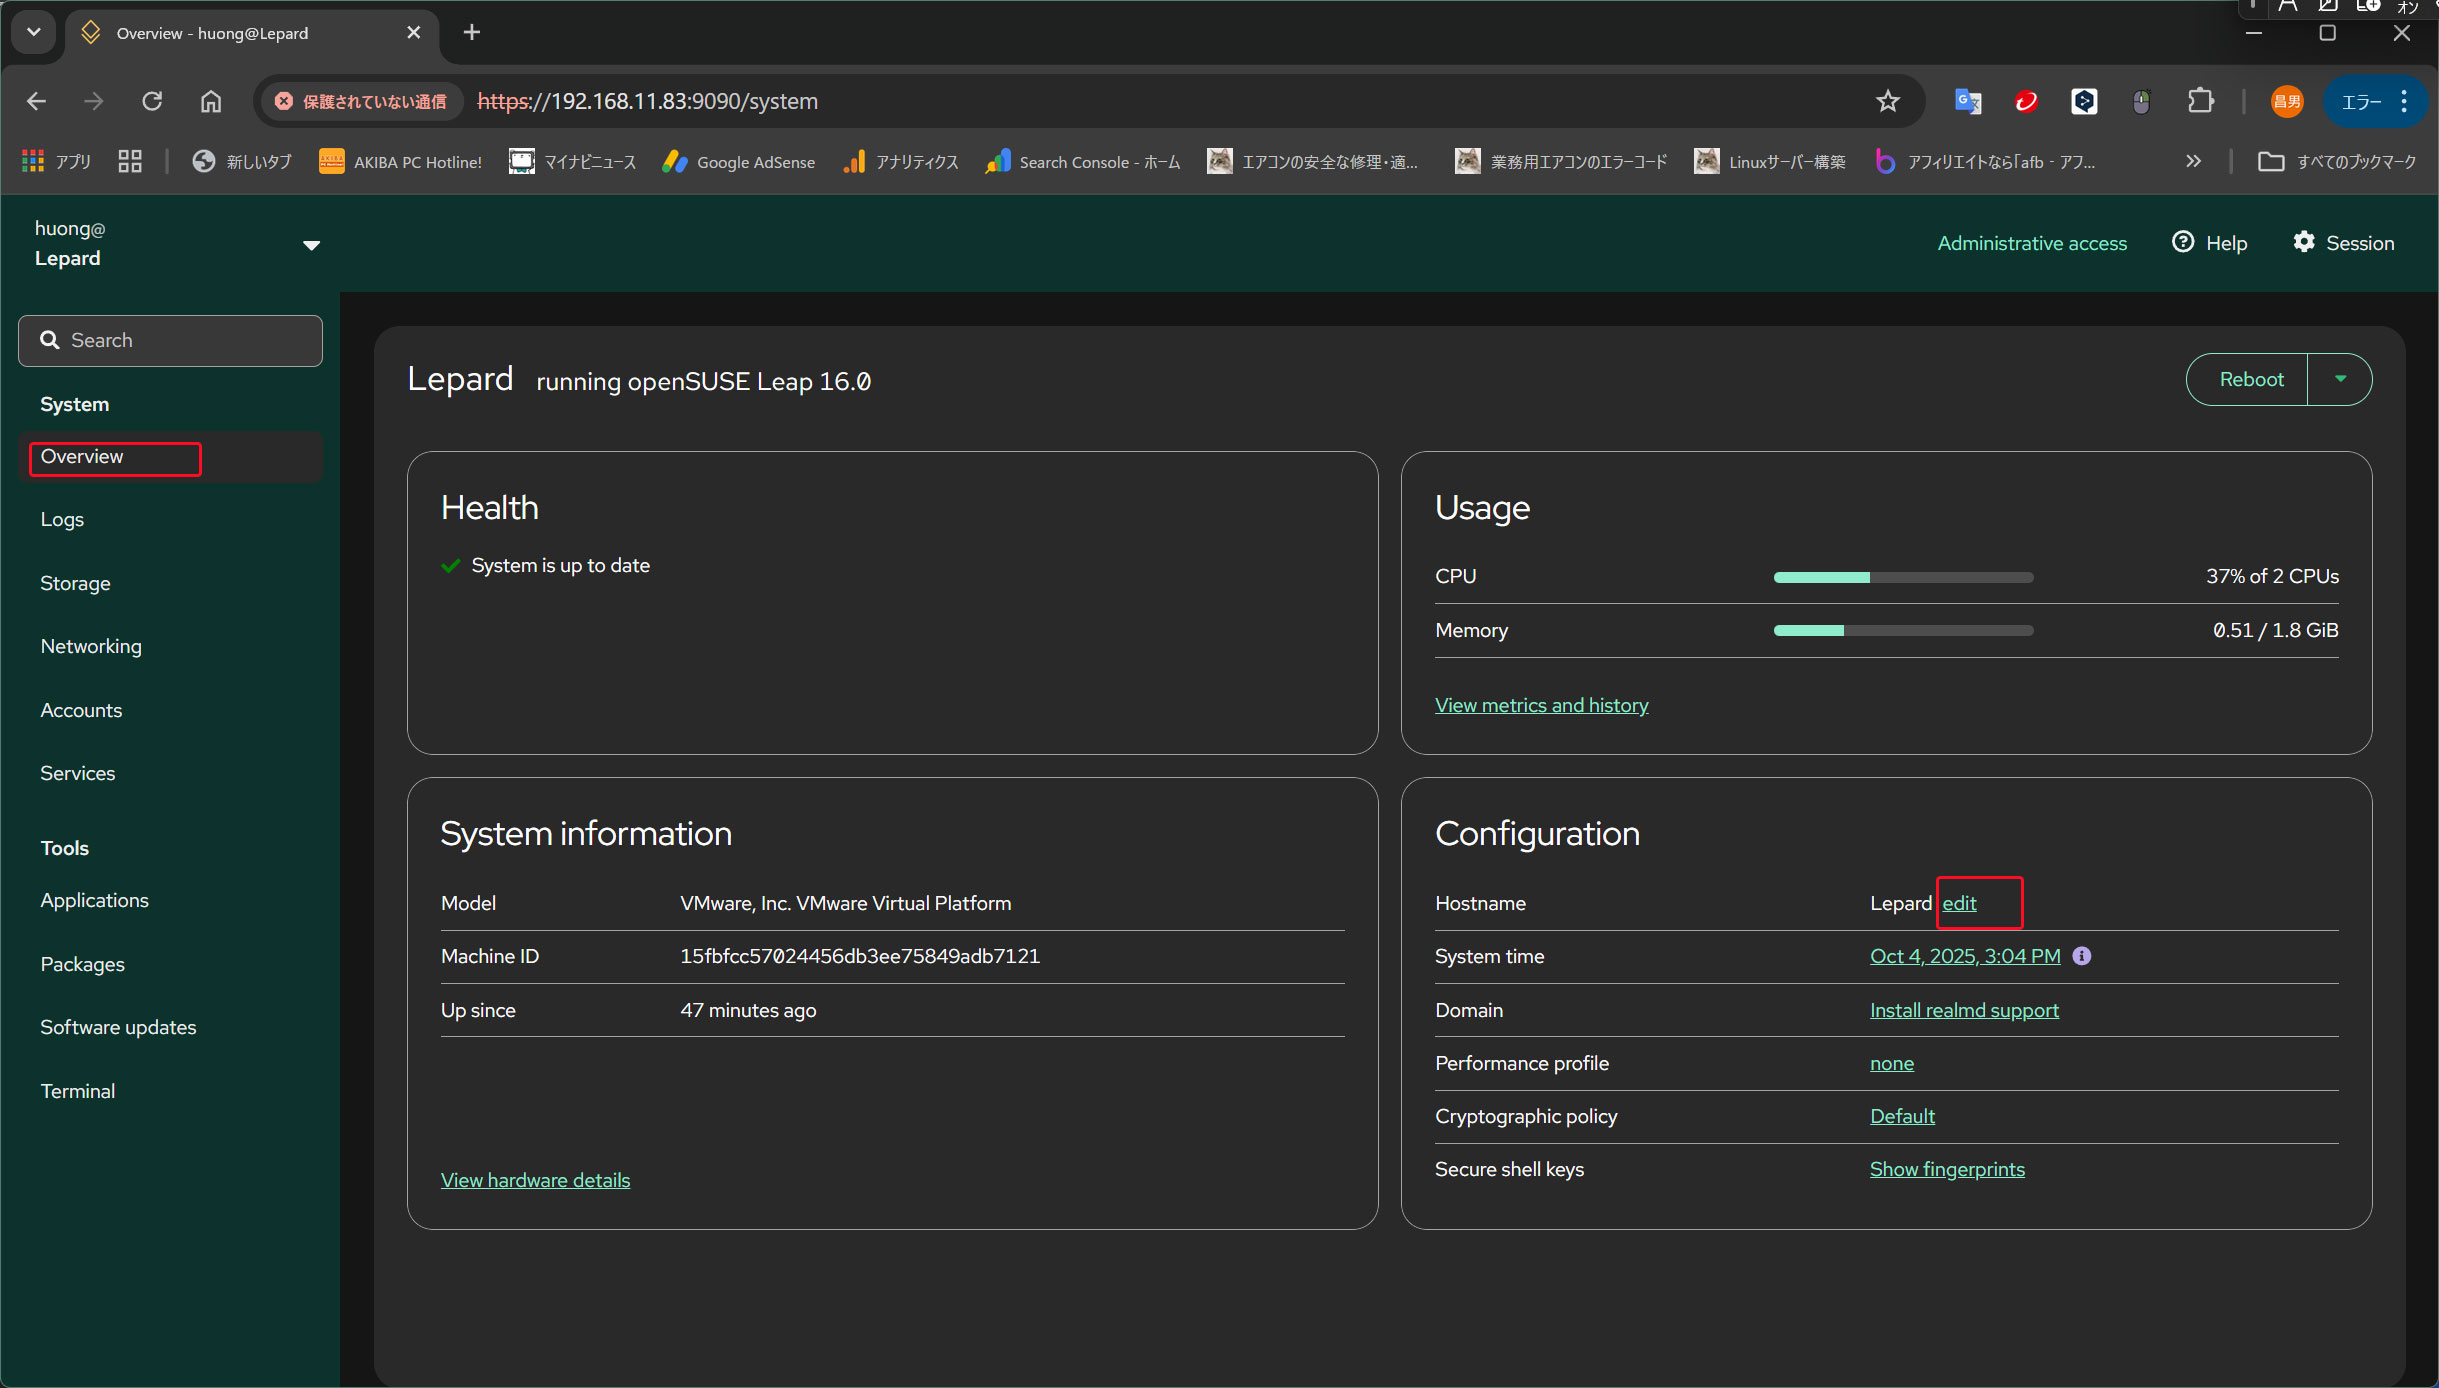
Access http://[Server IP address]:9090 in your web browser.
If the screen below appears, click the section shown in the figure below.
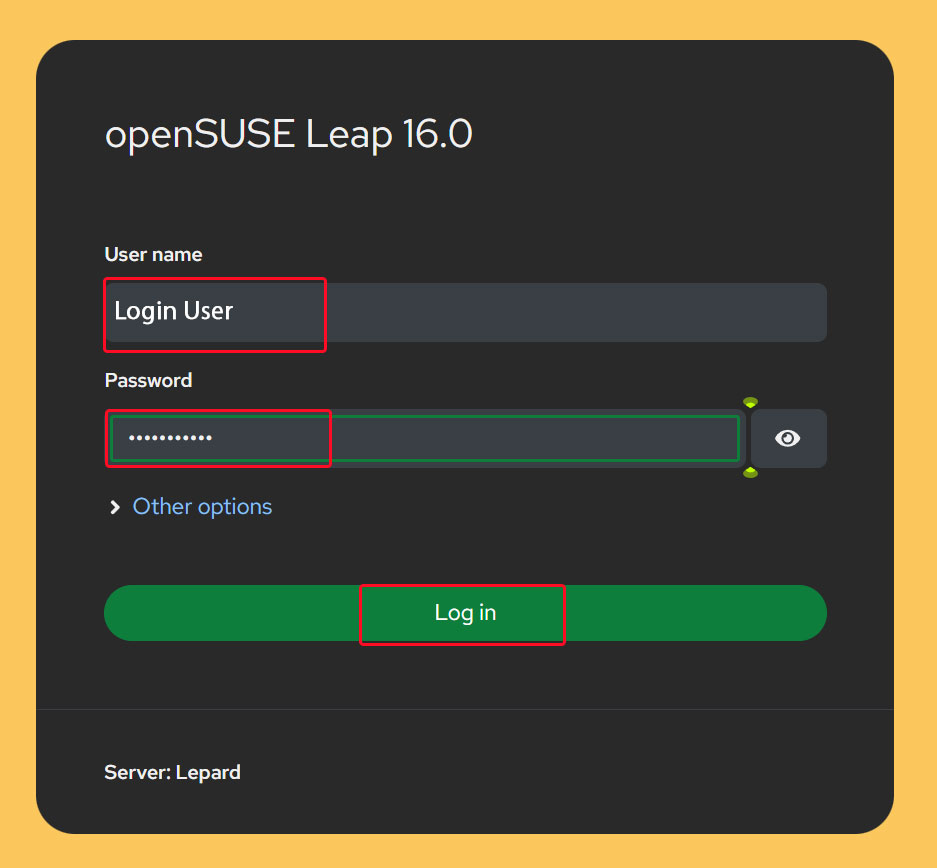
The login screen will appear. Enter your login username and password to log in.
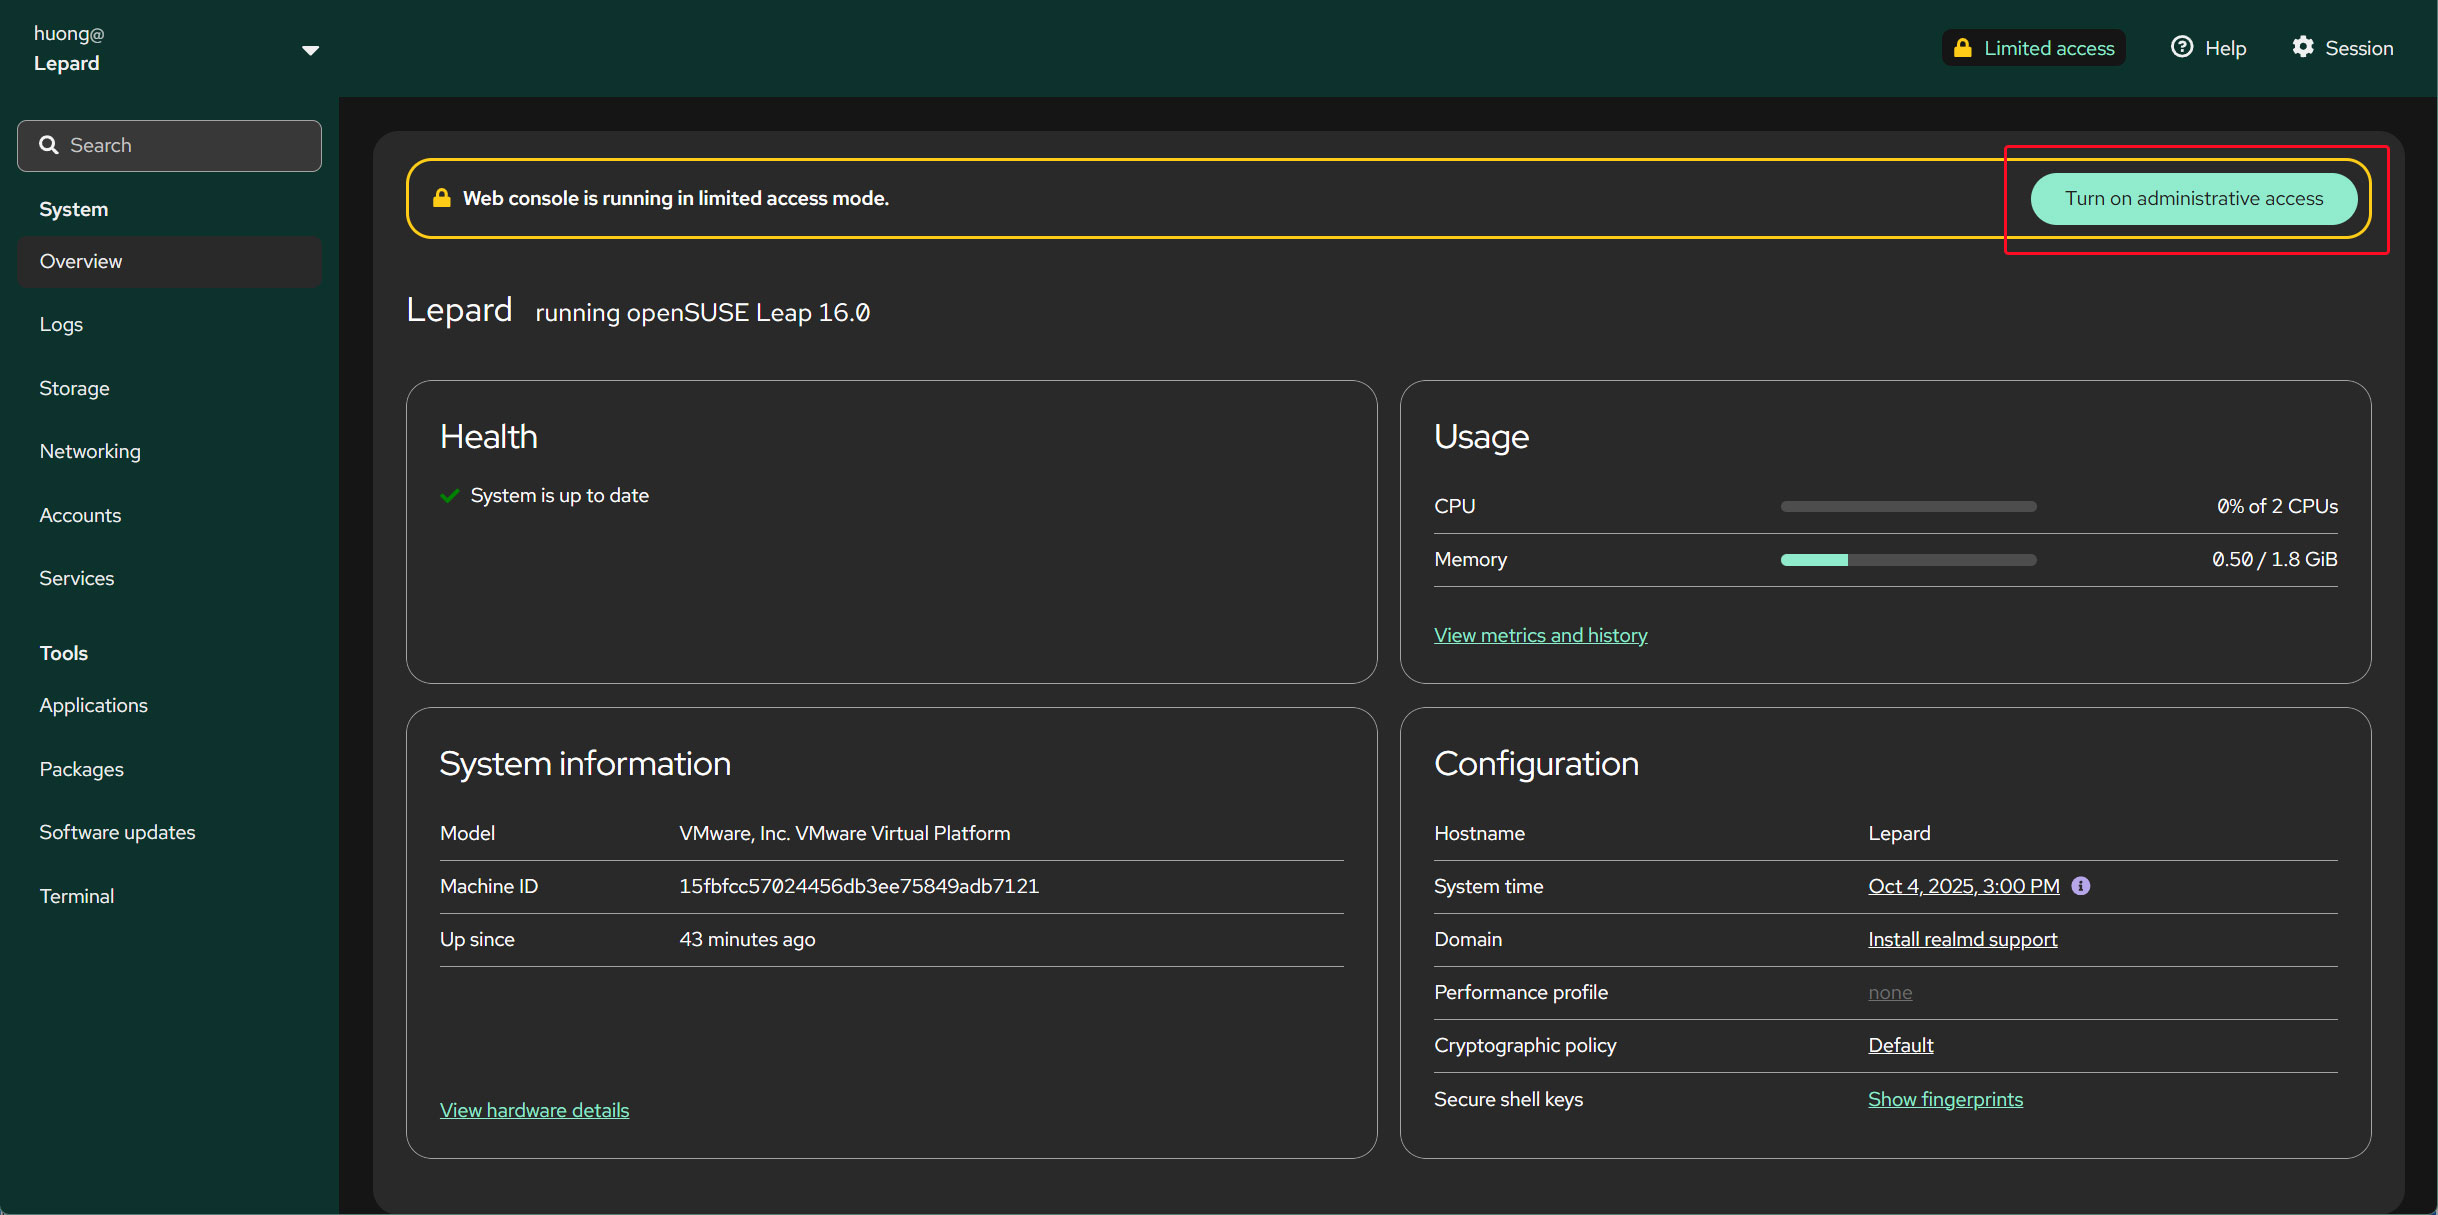
Click "Turn on administrative access" and edit with administrator privileges.
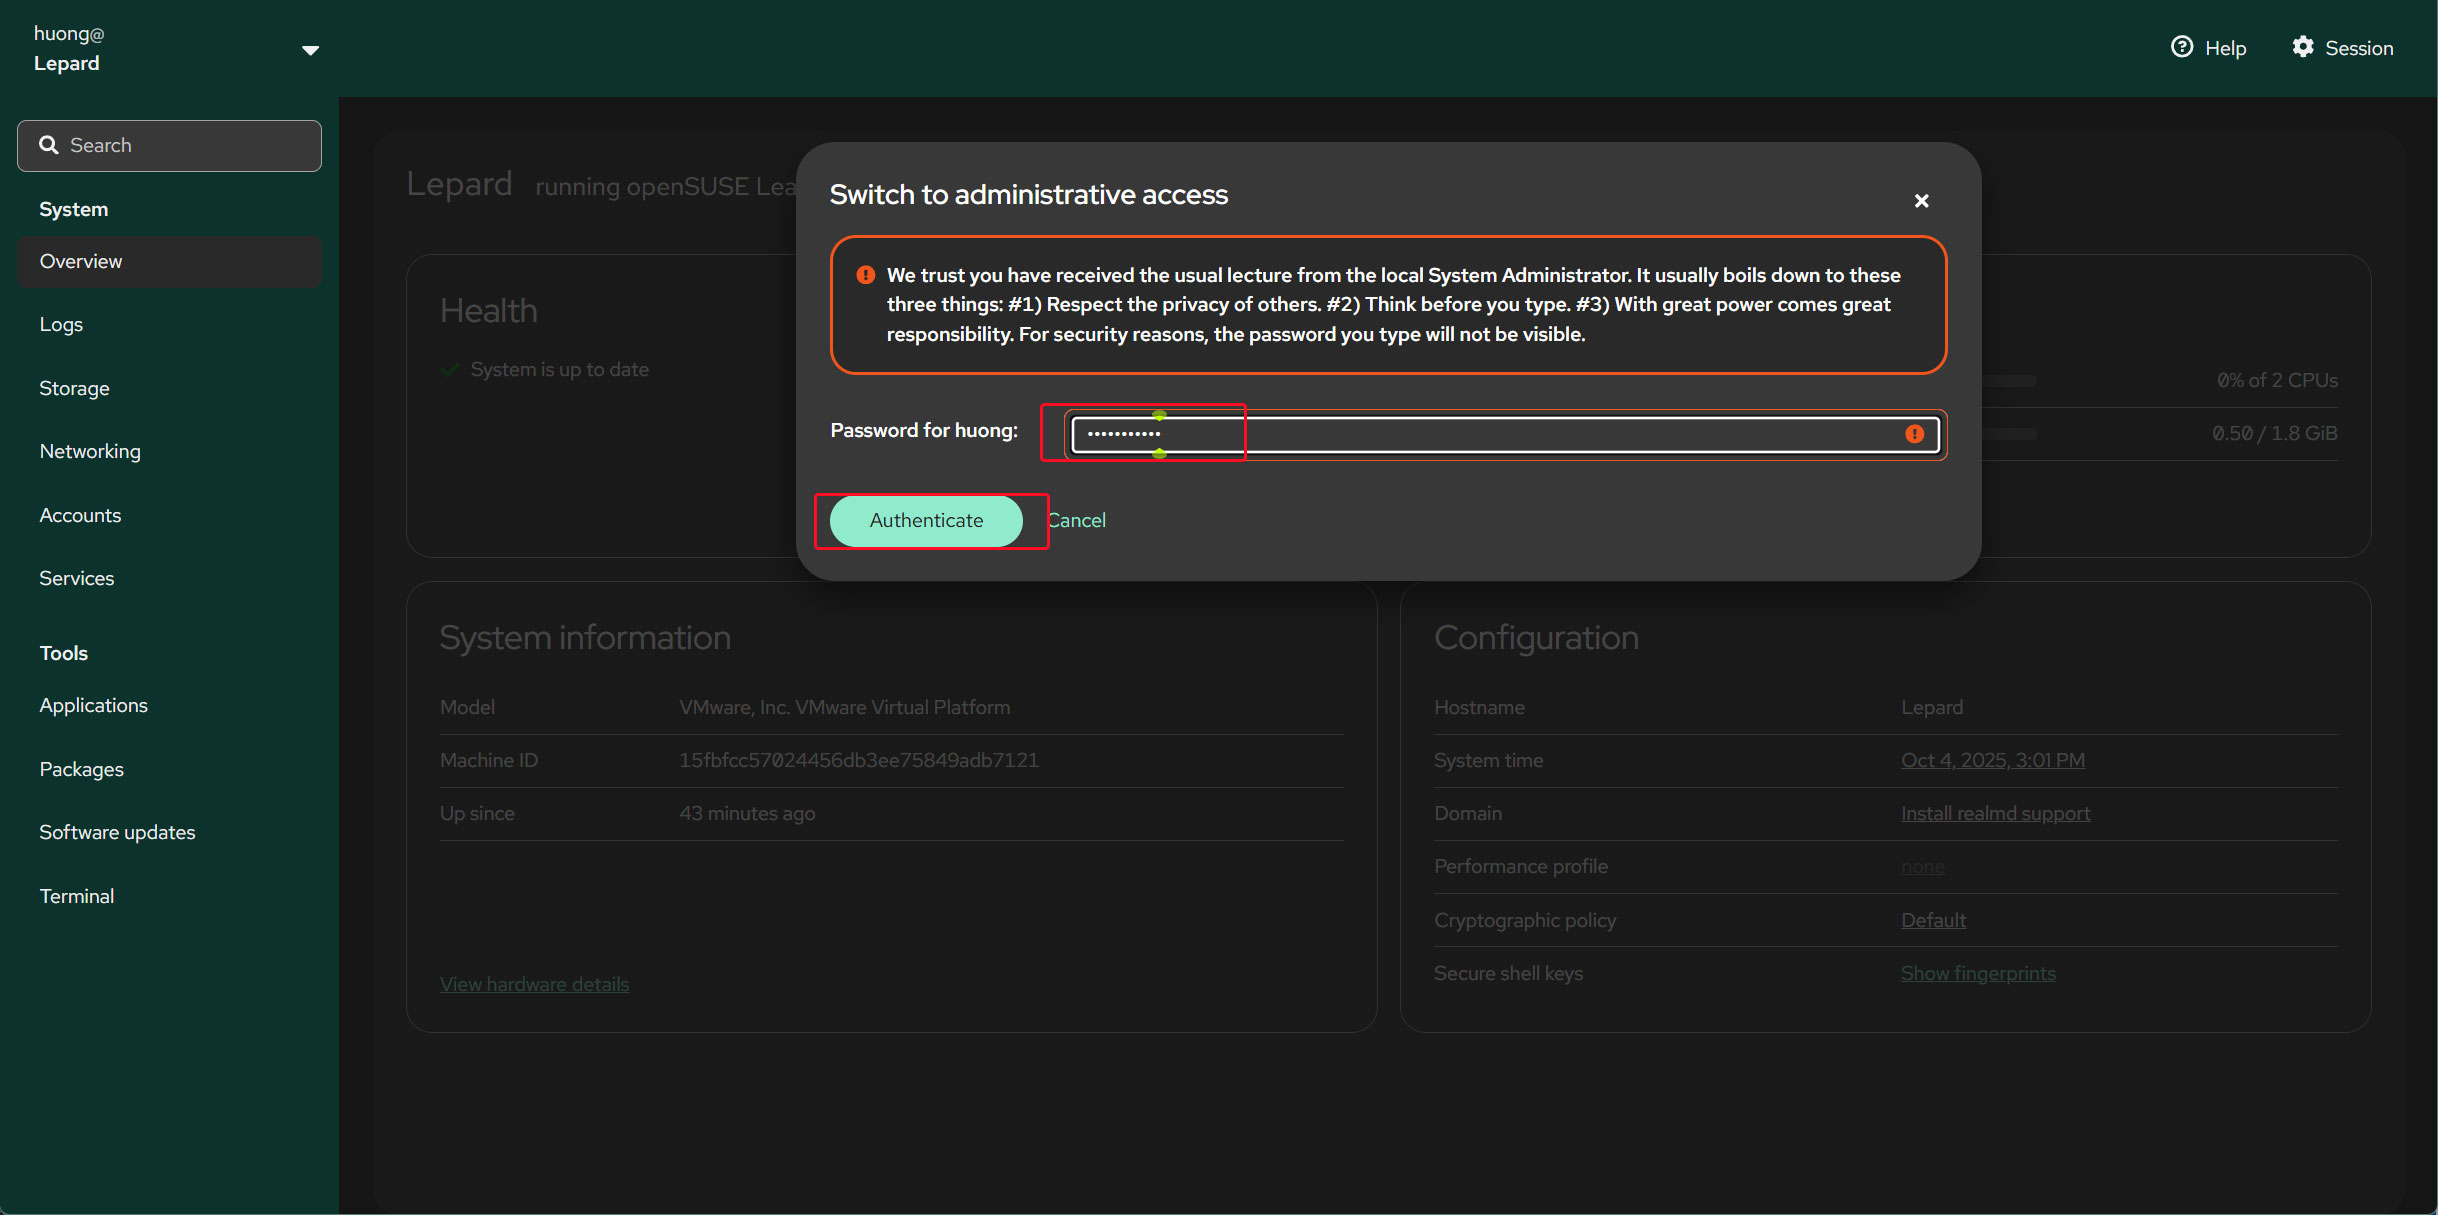
Enter the login user's password and click "Authenticate".
Changing the Hostname
Open the "Overview" pane on the right and click "edit" next to "Hostname".
Enter the hostname you want to change, then click "Change" below.
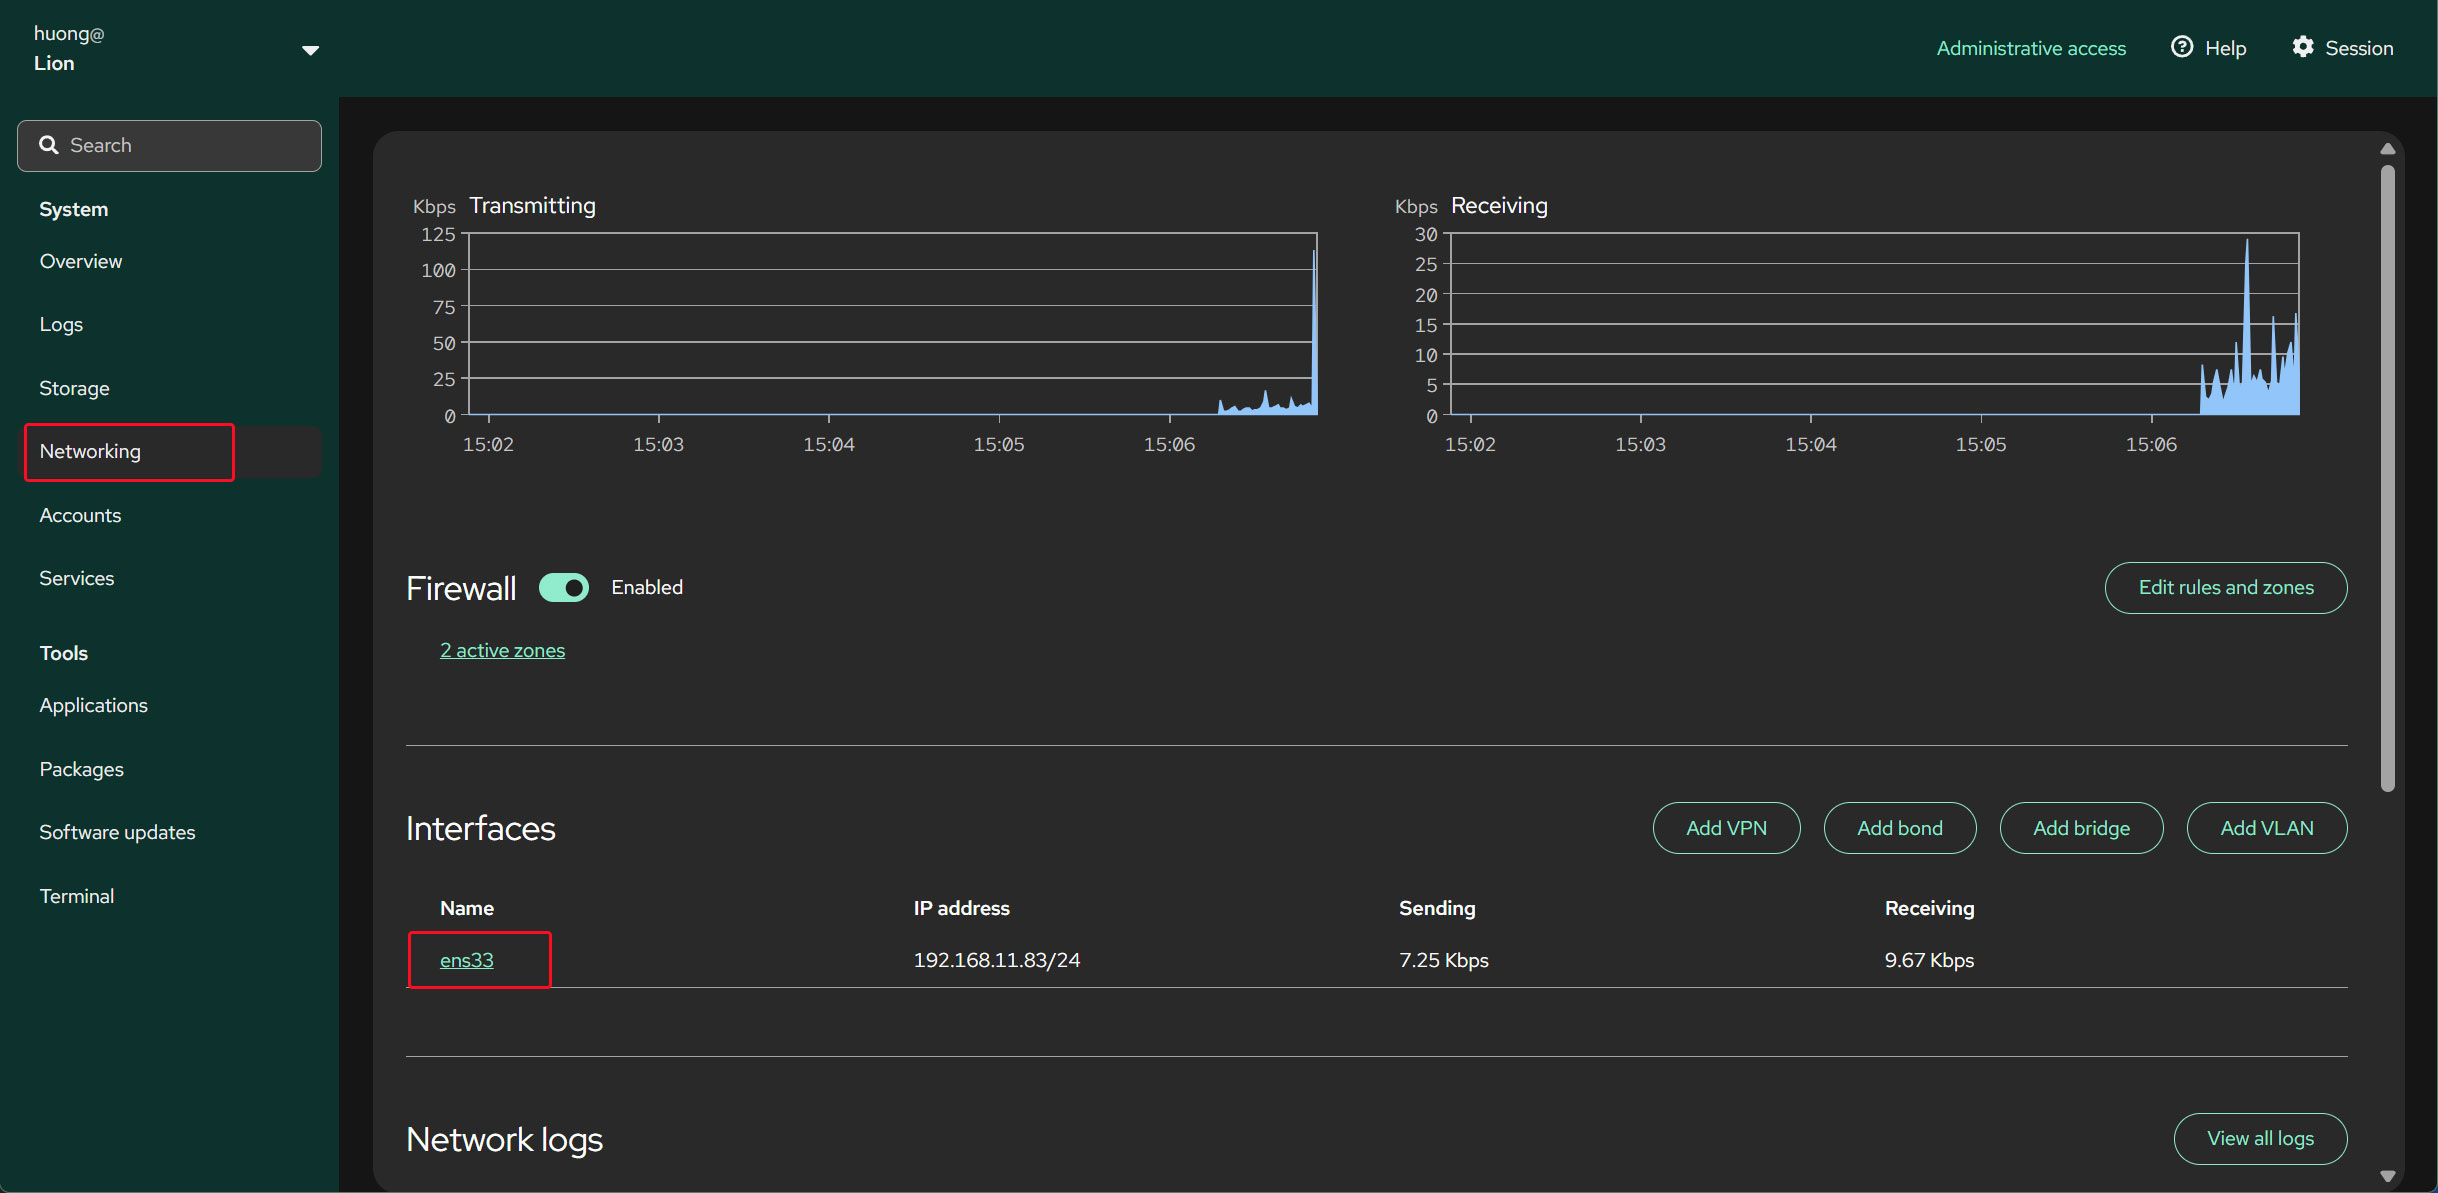
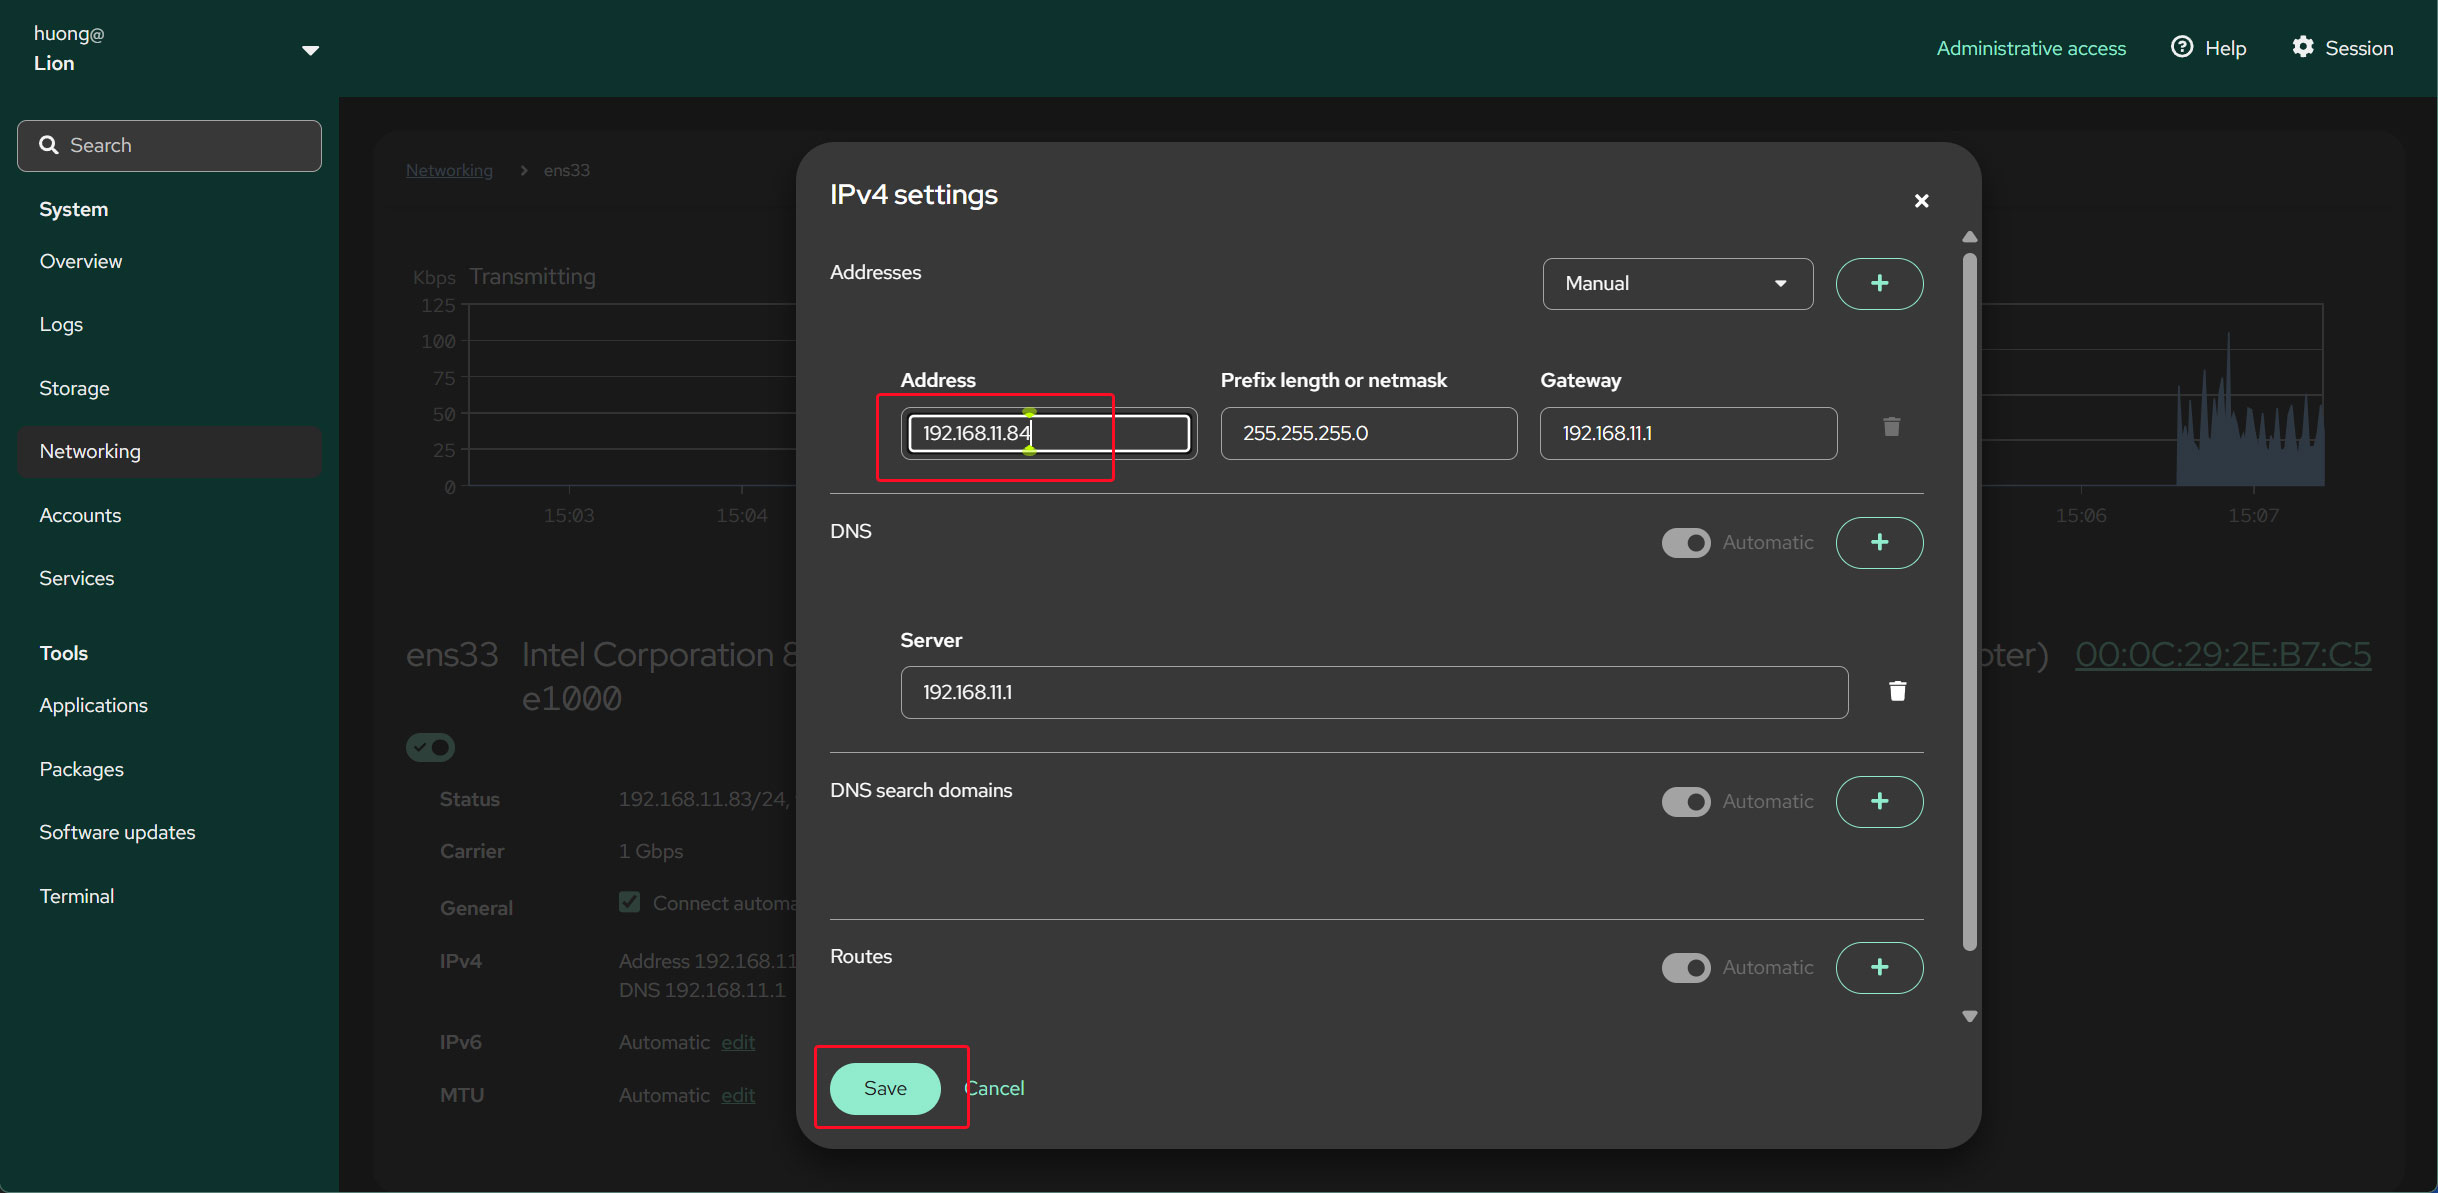
Changing a Static IPv4 Address
Open the "Networking" pane on the right and click the interface name under "Interfaces".
Click "edit" for IPv4
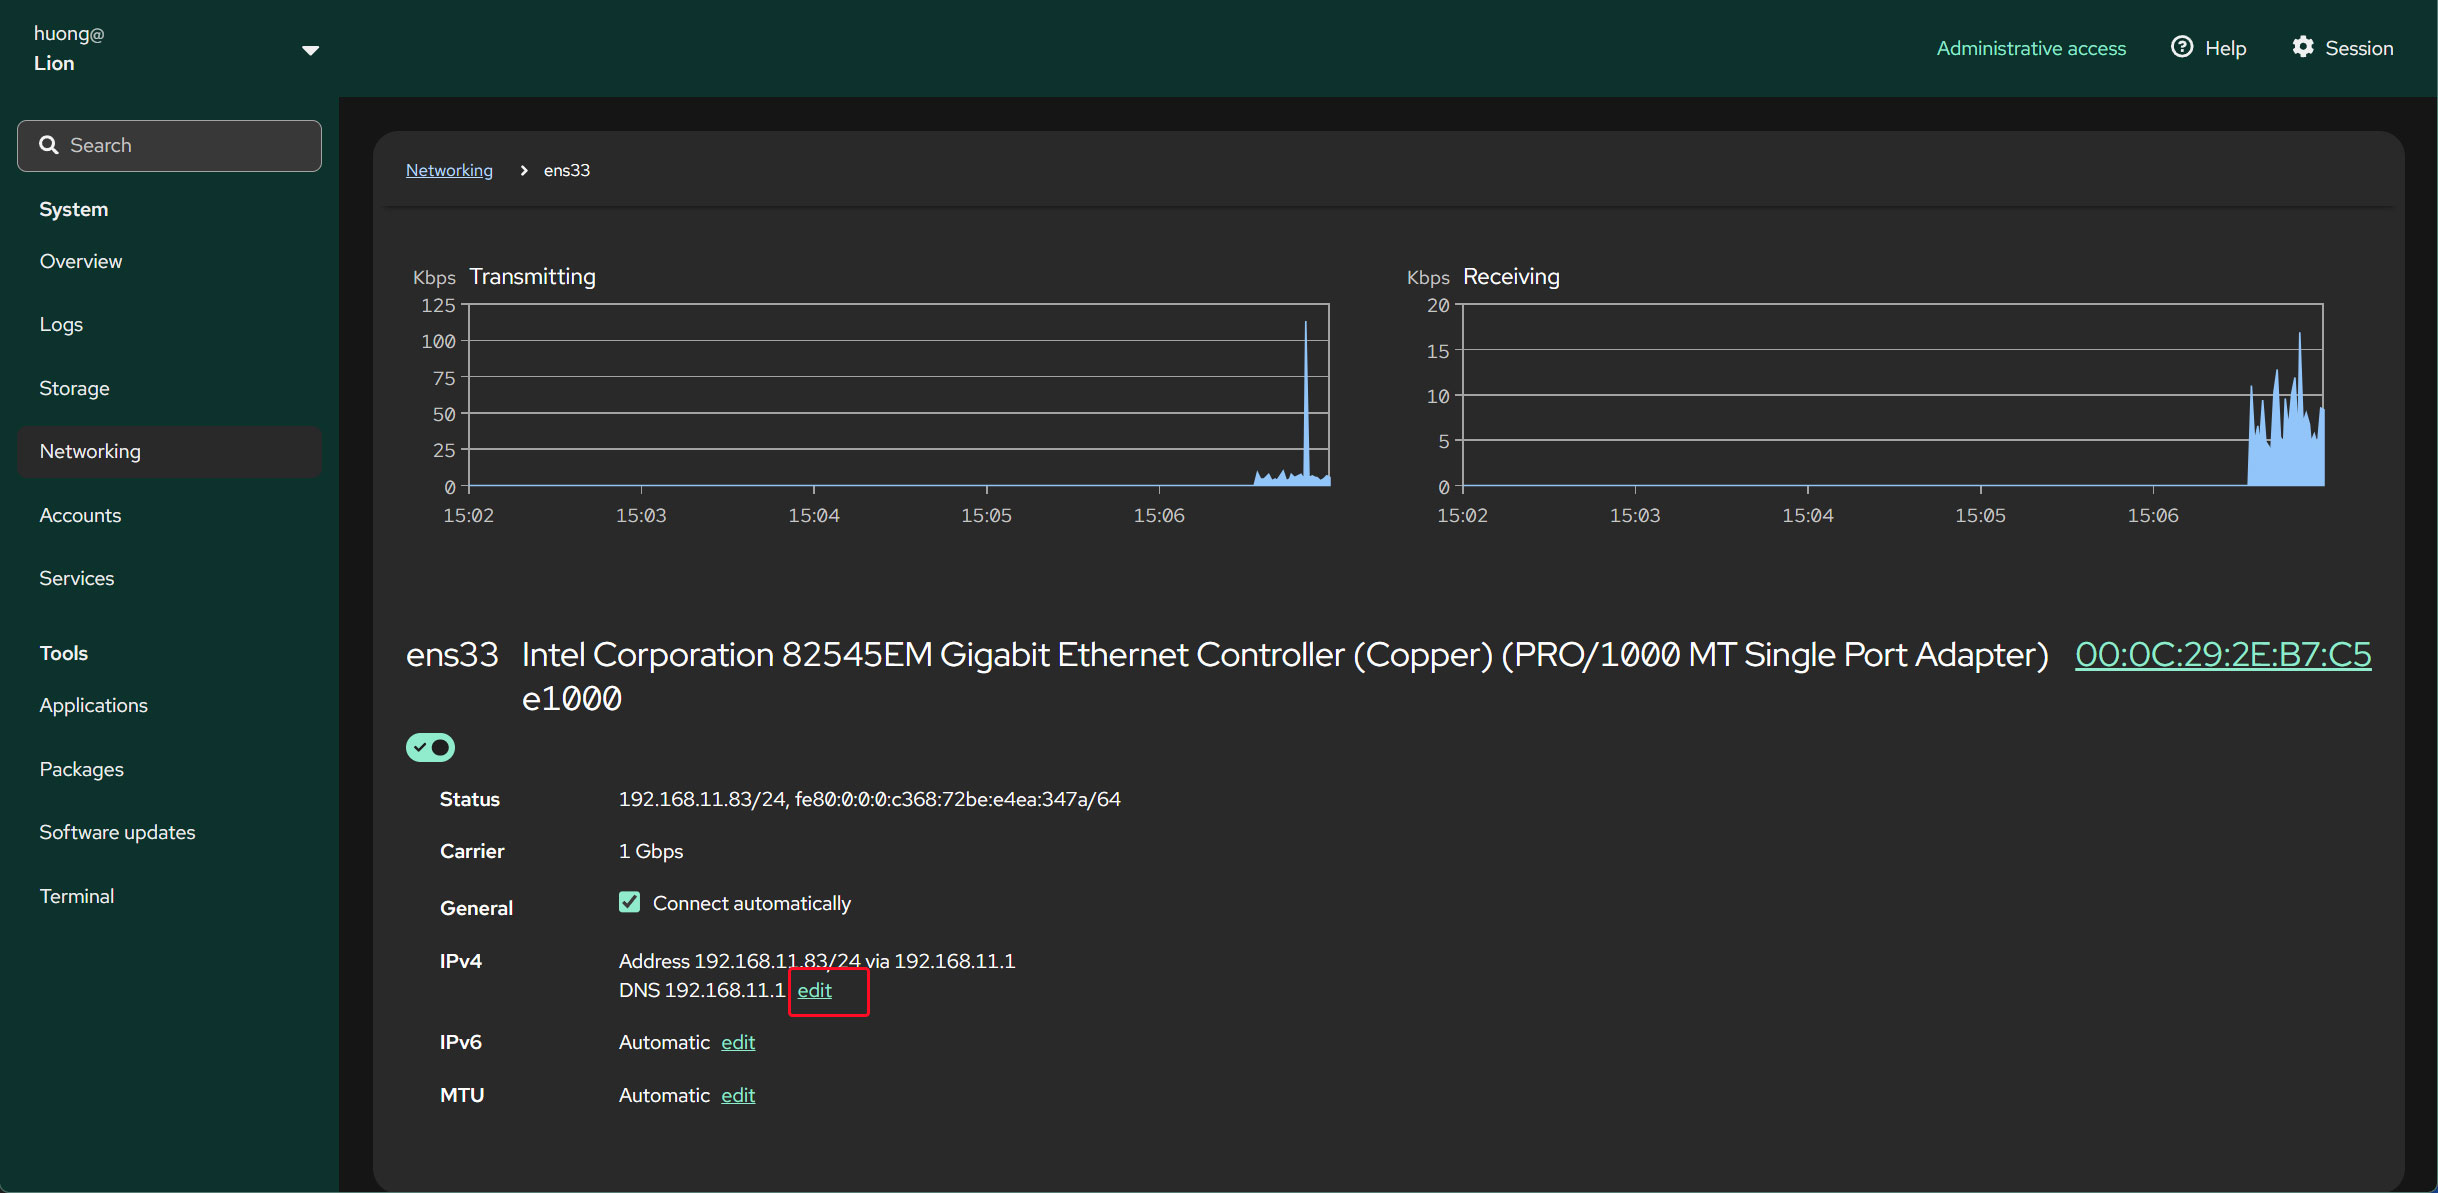
Enter the IP address you want to change to, then click "Save".
Click "Change the settings"
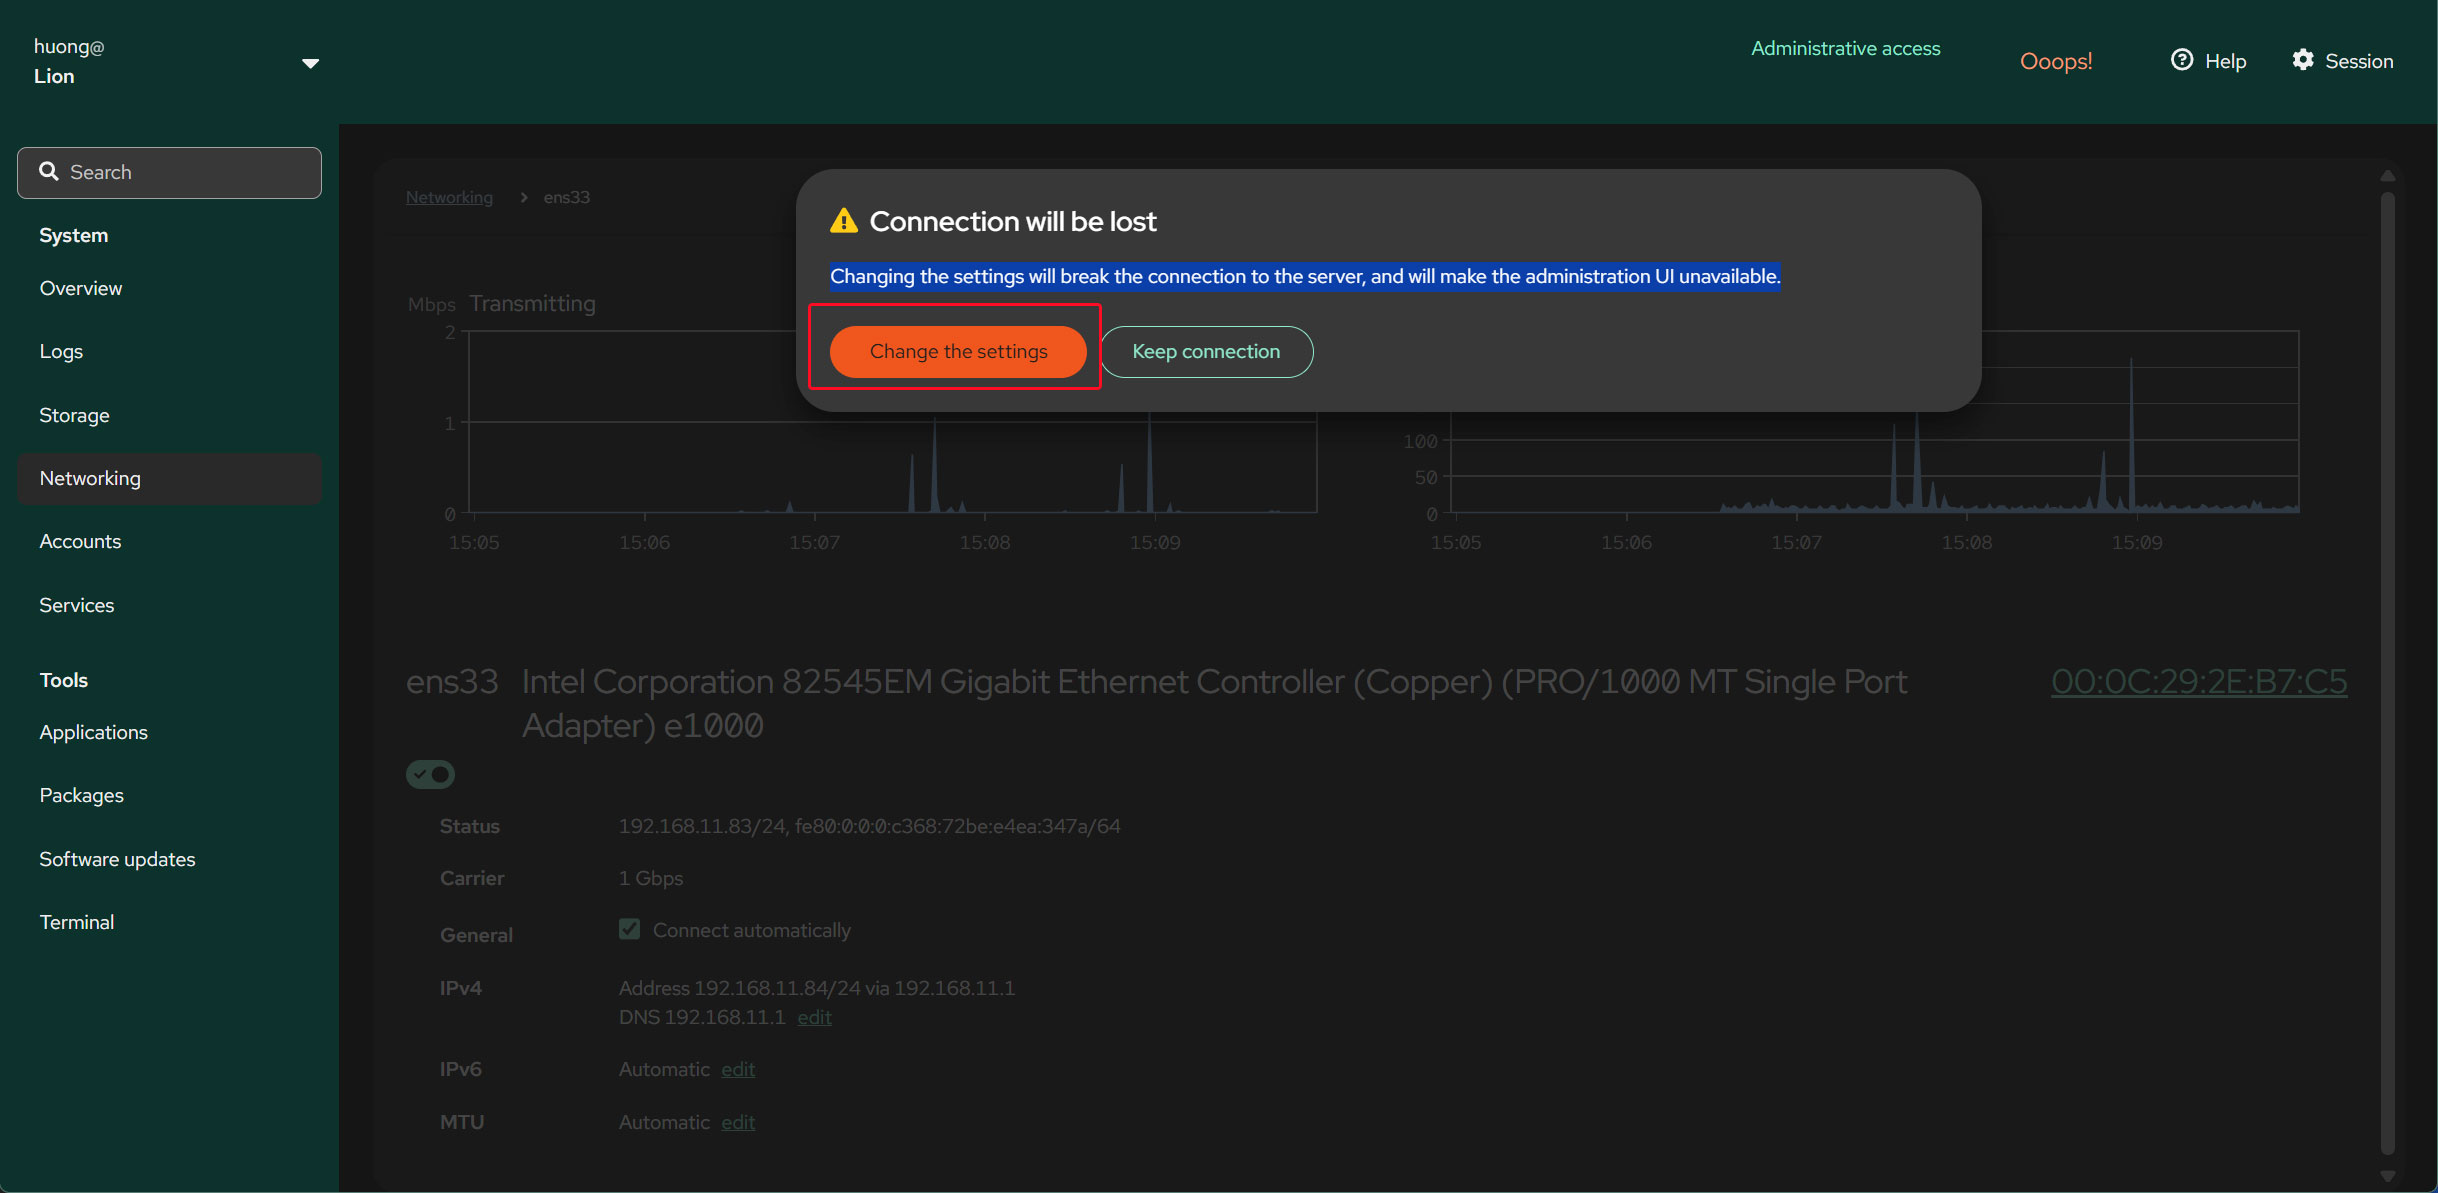
To apply the new settings, restart the system.
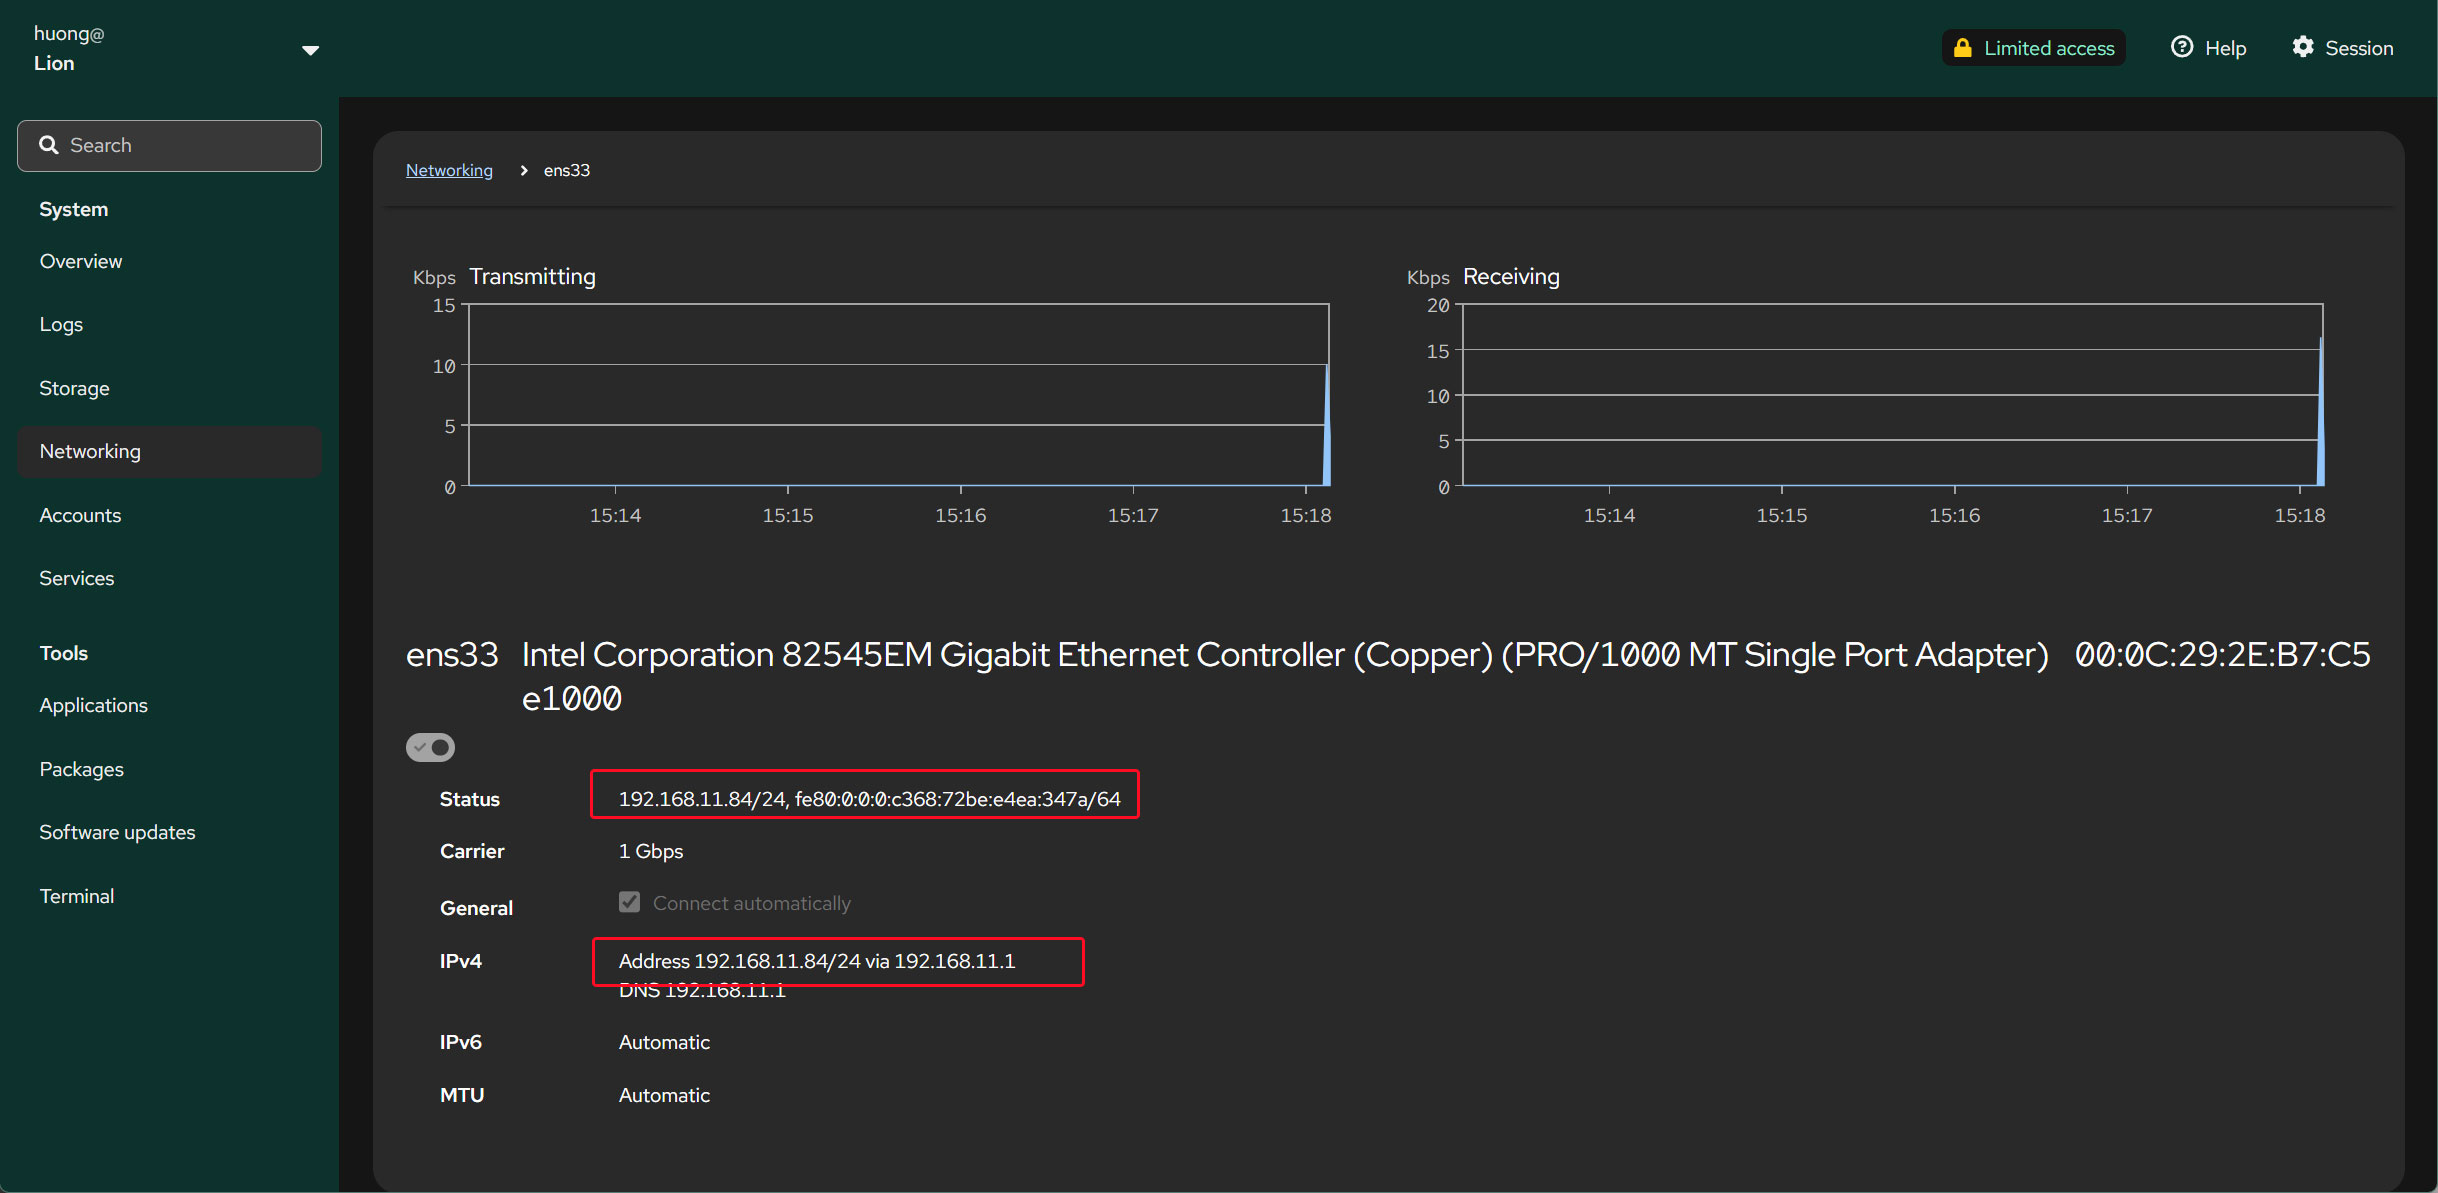
After restarting, perform the above steps and verify that the IP address has changed.
Please restore the original hostname (Lepard) and IP address (192.168.11.83).
6.2 Disable IPv6
|
1 2 3 4 |
# vi /etc/default/grub # Line 12: Addendum GRUB_CMDLINE_LINUX="ipv6.disable=1" |
# Reflect changes
|
1 2 3 4 5 6 7 8 9 10 |
# grub2-mkconfig -o /boot/grub2/grub.cfg Generating grub configuration file ... Found theme: /boot/grub2/themes/openSUSE/theme.txt Found linux image: /boot/vmlinuz-6.12.0-160000.5-default Found initrd image: /boot/initrd-6.12.0-160000.5-default Warning: os-prober will be executed to detect other bootable partitions. Its output will be used to detect bootable binaries on them and create new boot entries. 5122.839029 | DM multipath kernel driver not loaded Adding boot menu entry for UEFI Firmware Settings ... done |
|
1 |
# reboot |
7.Disabling SELinux
To permanently disable SELinux, edit /etc/selinux/config
Change SELINUX=enforcing to SELINUX=disabled
|
1 2 3 4 |
# vi /etc/selinux/config Line 14: Change SELINUX=enforcing → SELINUX=disabled |