
Contents
1.Setting up remote connection by SSH
SSH is a service for connecting remotely to a server and is basically running immediately after the OS is installed, but the default settings are somewhat insecure.
Here we will configure the default settings to increase the security of ssh connections.
1.1 SSH service configuration file changes
Modify the configuration file to change the SSH service settings.
The SSH service configuration file is "/usr/etc/ssh/sshd_config". Open the configuration file with a vi editor
|
1 |
# vi /usr/etc/ssh/sshd_config |
|
1 2 3 4 5 6 7 8 |
Line 20 : Uncomment and change to any port number other than the Wernon port. Port 2244 Line 22 : Uncomment ListenAddress 0.0.0.0 Line 39 : Uncomment and change PermitRootLogin prohibit-password |
Restart SSH
|
1 |
# systemctl restart sshd.service |
If this is not done, the next time you reboot, you will not be able to connect remotely via SSH. Please allow SSH port 2244 in the following firewall settings.
2.How to set up a firewall (firewalld)
In openSUSE, the firewall is set to firewalld by default and is enabled during OS installation.
①Check firewalld operation status
|
1 |
# firewall-cmd --state |
If "firewalld" is running, "running" will be displayed; if it is not running, "not running" will be displayed.
OR
|
1 2 3 4 5 6 7 8 9 10 11 12 13 14 |
# systemctl status firewalld ● firewalld.service - firewalld - dynamic firewall daemon Loaded: loaded (/usr/lib/systemd/system/firewalld.service; enabled; preset: enabled) Active: active (running) since Sat 2026-02-07 08:48:07 JST; 7min ago Invocation: aa56bab0f40f4c78b1face7e54d0e904 Docs: man:firewalld(1) Main PID: 778 (firewalld) Tasks: 2 (limit: 2220) CPU: 464ms CGroup: /system.slice/firewalld.service └─778 /usr/bin/python3.13 /usr/sbin/firewalld --nofork --nopid Feb 07 08:48:06 Lepard systemd[1]: Starting firewalld - dynamic firewall daemon... Feb 07 08:48:07 Lepard systemd[1]: Started firewalld - dynamic firewall daemon. |
※If stopped
Active: inactive (dead) is displayed, indicating that firewalld is stopped
➁Show default zone settings
|
1 2 3 4 5 6 7 8 9 10 11 12 13 14 15 16 17 |
# firewall-cmd --list-all public (default, active) target: default ingress-priority: 0 egress-priority: 0 icmp-block-inversion: no interfaces: ens33 sources: services: dhcpv6-client ssh ports: protocols: forward: yes masquerade: no forward-ports: source-ports: icmp-blocks: rich rules: |
In the above example, the "public" zone is the "default" setting and is assigned to the "eth0" NIC, and the services "dhcpv6-client" and "ssh" are allowed, etc.
➂About the "--permanent" option
In order to prevent the settings from being lost when the server is restarted or the "firewalld" service is restarted, the "--permanent" option must be used.
To prevent the settings from being lost when the server is restarted or the "firewalld" service is restarted, the "--permanent" option must be used to configure the settings. In this case, if the "--permanent" option is specified, the settings will not be reflected in "firewalld" as they are, so it is necessary to reflect the settings using "fiewall-cmd --reload".
As an example, to use the HTTP service permanently without being initialized even if the system is rebooted
|
1 2 |
# firewall-cmd --add-service=http --permanent # firewall-cmd --reload |
④How to start and stop
Since "firewalld" is controlled by "systemd", use the "systemctl" command to start and stop it.
|
1 2 3 4 |
Start firewalld # systemctl start firewalld Stop firewalld # systemctl stop firewalld |
2.2 Allow modified SSH port 2244
|
1 2 |
# firewall-cmd --add-port=2244/tcp --permanent # firewall-cmd --reload |
3.Remote connection from Windows
Configuration in Windows
Start setting up a remote connection from Windows, using "Tera Term" as the terminal emulator.
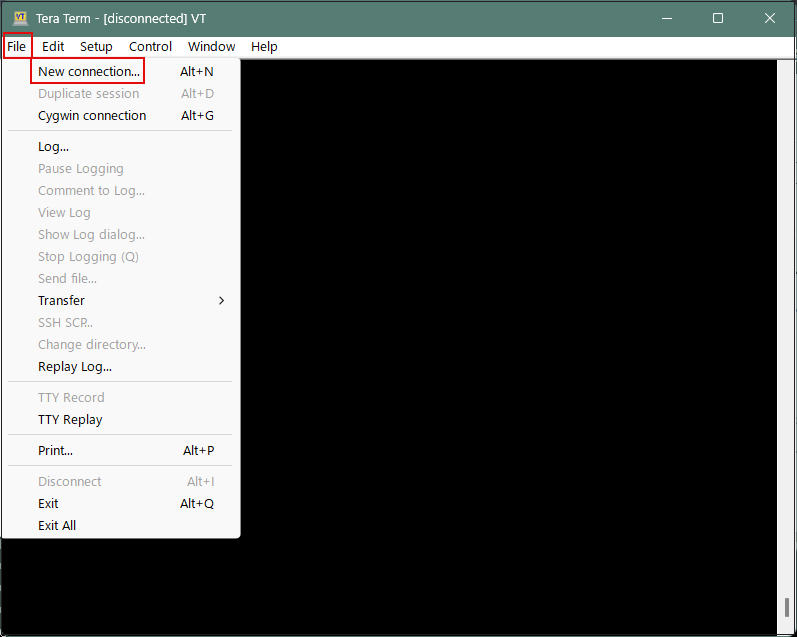
Start Tera Term, cancel the startup screen, and then select "New Connection" from "File" in the Tera Term menu.
Enter the following information on the next screen.
Host : Server IP Address
TCP port : SSH port number changed above
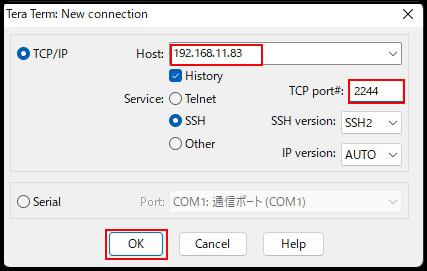
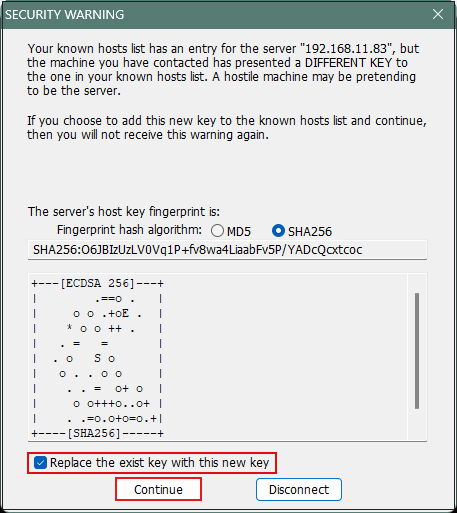
After clicking "OK," click "Continue" on the security confirmation screen.
Enter the following information on the next screen.
User name : General Login Username
Passphrase : Password for the above user
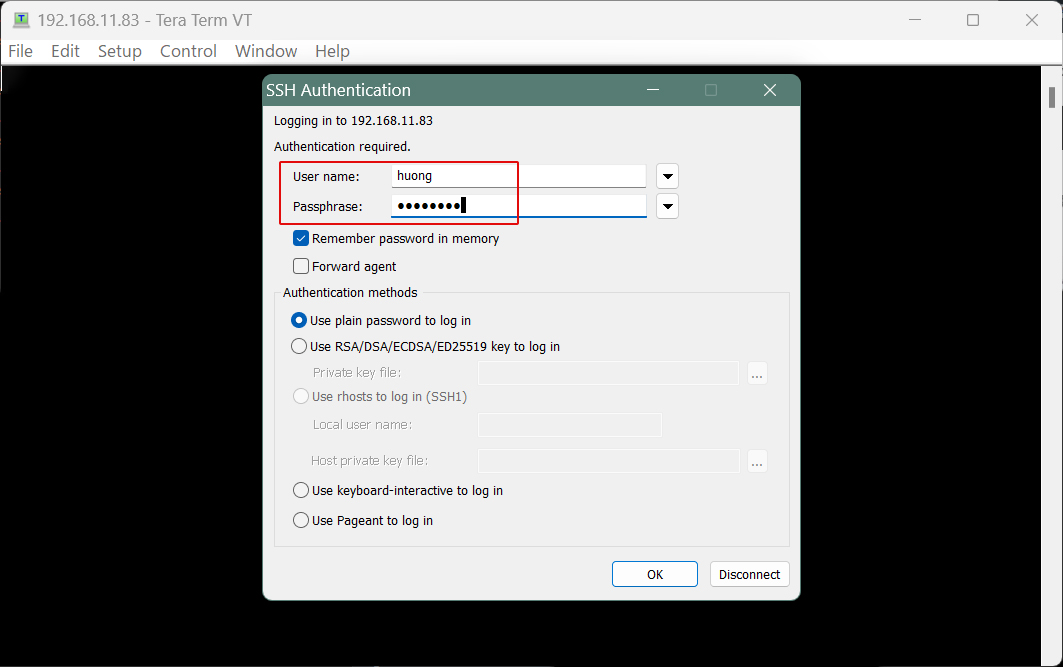
If the information is correct, you should be able to log in successfully.
4. NTP Server Settings
Install Chrony and build an NTP server for time synchronization. Note that NTP uses 123/UDP.
4.1 Chrony Install
|
1 |
# zypper -n install chrony |
4.2 Chrony Settings
|
1 2 3 4 5 6 7 8 9 |
# vi /etc/chrony.conf # Line 8 : Comment #! pool pool.ntp.org iburst # Line 9: Memorabilia server ntp.nict.jp iburst server ntp1.jst.mfeed.ad.jp iburst # Around line 30: Add the range where time synchronization is permitted. allow 192.168.11.0/24 |
|
1 2 |
# systemctl start chronyd # systemctl enable chronyd |
4.3 Open NTP port
If Firewalld is enabled, permission for NTP service is required. Note that NTP uses 123/UDP.
|
1 2 3 4 |
# firewall-cmd --add-service=ntp --permanent success # firewall-cmd --reload success |
4.4 operation check
|
1 2 3 4 5 6 7 |
# chronyc sources MS Name/IP address Stratum Poll Reach LastRx Last sample =============================================================================== ^* ntp-a3.nict.go.jp 1 6 17 42 +465us[-1231us] +/- 7110us ^- ntp1.jst.mfeed.ad.jp 2 6 17 42 +2011us[ +315us] +/- 32ms ^- 103.131.151.20 3 6 17 42 +3936us[+2241us] +/- 45ms |