

Contents
1.ウイルス対策ソフトClamav導入
1.1 インストール
|
1 |
# apt install clamav clamav-daemon |
尚、clamav関連の設定ファイルは、/etc/clamav/フォルダにインストールされる
1.2 ウイルス定義の更新
|
1 2 |
# systemctl stop clamav-freshclam # freshclam |
|
1 |
# systemctl start clamav-freshclam |
設定ファイルを変更
|
1 2 3 4 5 6 |
# vi /etc/logrotate.d/clamav-freshclam 7行目 create 640 clamav adm ↓ create 640 clamav clamav |
1.3 ウイルスチェックの確認
①手動でウイルスチェックの実行
|
1 2 3 4 5 6 7 8 9 10 11 12 13 |
# clamscan --infected --remove --recursive /home ----------- SCAN SUMMARY ----------- Known viruses: 3627220 Engine version: 1.4.3 Scanned directories: 5 Scanned files: 7 Infected files: 0 Data scanned: 0.00 MB Data read: 0.00 MB (ratio 0.00:1) Time: 11.910 sec (0 m 11 s) Start Date: 2026:01:10 14:18:16 End Date: 2026:01:10 14:18:28 |
Infected files: 0 なのでウイルスはありません
②テストウイルスをダウンロードしてウイルス検出
お試し無害ウィルスをダウンロードして検出するかテストしてみる
|
1 2 3 4 5 6 7 8 9 10 11 12 13 14 15 16 17 |
# cd # wget https://secure.eicar.org/eicar.com.txt # clamscan --infected --remove --recursive /root/eicar.com.txt: Eicar-Test-Signature FOUND /root/eicar.com.txt: Removed. ----------- SCAN SUMMARY ----------- Known viruses: 3627220 Engine version: 1.4.3 Scanned directories: 2 Scanned files: 7 Infected files: 1 Data scanned: 0.02 MB Data read: 0.01 MB (ratio 2.00:1) Time: 8.436 sec (0 m 8 s) Start Date: 2026:01:10 14:19:13 End Date: 2026:01:10 14:19:22 |
このように「FOUND」という表示と「Infected files: 1」という表示でウイルスを通知してくれる。又、「--remove」オプションを付けているので、テストウイルスは削除された
1.4 フルスキャンするスクリプトファイルを作成
|
1 2 3 |
# mkdir /opt/script (/opt/scriptがない場合) # cd /opt/script # vi clam-full.sh |
①clam-full.sh の内容(新規作成)
|
1 2 3 4 5 6 7 8 9 10 11 12 13 14 15 16 17 18 19 |
#!/bin/sh echo ========================================= date hostname clamscan / \ --infected \ --recursive \ --log=/var/log/clamav/clamscan.log \ --move=/var/log/clamav/virus \ --exclude-dir=^/boot \ --exclude-dir=^/sys \ --exclude-dir=^/proc \ --exclude-dir=^/dev \ --exclude-dir=^/var/log/clamav/virus if [ $? = 0 ]; then echo "virus undetected" else echo "Virus detected!!" fi |
②実行権限を与える
|
1 |
# chmod +x /opt/script/clam-full.sh |
③ウイルス隔離用フォルダを作成(既にあればOKだが、無いと上記スクリプトで除外ディレクトリに指定しているので実行時エラーになる)
|
1 |
# mkdir /var/log/clamav/virus |
④試しに実行してみる
|
1 2 3 4 5 6 7 8 9 10 11 12 13 14 |
# /opt/script/clam-full.sh ----------- SCAN SUMMARY ----------- Known viruses: 3627220 Engine version: 1.4.3 Scanned directories: 11814 Scanned files: 76173 Infected files: 0 Data scanned: 4325.84 MB Data read: 3882.09 MB (ratio 1.11:1) Time: 889.108 sec (14 m 49 s) Start Date: 2026:01:10 14:23:36 End Date: 2026:01:10 14:38:25 virus undetected |
⑤cronでウイルススキャンの定期実行
|
1 2 |
# crontab -e 0 2 * * mon /opt/script/clam-full.sh >> /var/log/clamav/clamascan.log |
2. Mail サーバー
2.1 Postfix : インストール/設定
Postfix をインストールして SMTPサーバーを構築します。SMTP は 25/TCP を使用します。
メール不正中継防止に、後述の Dovecot の SASL機能を利用し、送信にも認証が必要なように Postfix を設定します
①インストール
|
1 |
# apt -y install postfix sasl2-bin |
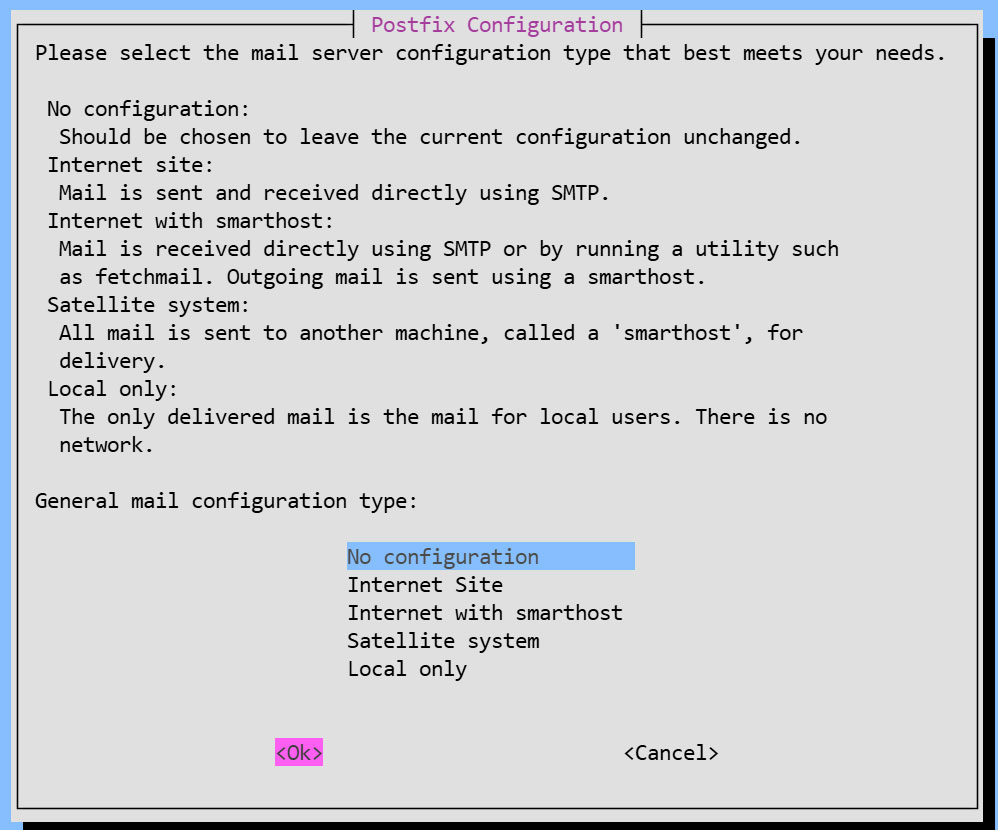
インストール状況画面
一般的な構成設定の選択を求められるが、後で手動設定するため [No Configuration] を選択
②設定ファイル編集
|
1 2 |
# cp /usr/share/postfix/main.cf.dist /etc/postfix/main.cf # vi /etc/postfix/main.cf |
82行目:コメント解除
mail_owner = postfix
108行目:ホスト名指定追加
myhostname = mail.[domain name]
115行目:ドメイン名指定追加
mydomain = [domain name]
133行目 : コメント
#myorigin = /etc/mailname
135行目:コメント解除
myorigin = $mydomain
149行目:コメント解除
inet_interfaces = all
197行目:コメント解除
mydestination = $myhostname, localhost.$mydomain, localhost, $mydomain
240行目:コメント解除
local_recipient_maps = unix:passwd.byname $alias_maps
285行目:コメント解除
mynetworks_style = subnet
302行目:自ネットワーク追記
mynetworks = 127.0.0.0/8, 192.168.11.0/24
423行目:コメント解除
alias_maps = hash:/etc/aliases
434行目:コメント解除
alias_database = hash:/etc/aliases
456行目:コメント解除
home_mailbox = Maildir/
592行目:コメントにしてその下に追記
#smtpd_banner = $myhostname ESMTP $mail_name (Ubuntu)
smtpd_banner = $myhostname ESMTP
666行目:追加
sendmail_path = /usr/sbin/postfix
670行目:コメント解除
newaliases_path = /usr/bin/newaliases
675行目:コメント解除
mailq_path = /usr/bin/mailq
681行目:コメント解除
setgid_group = postdrop
#最終行へ追記:
#送受信メールサイズを10Mに制限
message_size_limit = 10485760
#メールボックスサイズを1Gに制限
mailbox_size_limit = 1073741824
#SMTP-Auth 設定
smtpd_sasl_type = dovecot
smtpd_sasl_path = private/auth
smtpd_sasl_auth_enable = yes
smtpd_sasl_security_options = noanonymous
smtpd_sasl_local_domain = $myhostname
smtpd_recipient_restrictions = permit_mynetworks, permit_auth_destination, permit_sasl_authenticated, reject
③master.cf編集
|
1 |
# vi /etc/postfix/master.cf |
19,23行目 : コメント解除
submission inet n - y - - smtpd
# -o syslog_name=postfix/submission
# -o smtpd_forbid_unauth_pipelining=no
# -o smtpd_tls_security_level=encrypt
-o smtpd_sasl_auth_enable=yes
# -o smtpd_tls_auth_only=yes
④設定内容反映
|
1 2 3 4 5 |
# touch /etc/aliases # vi /etc/aliases postmaster: root huong: huong |
|
1 2 |
# newaliases # systemctl restart postfix |
2.2 Dovecot : インストール/設定
DovecotをインストールしてPOP/IMAPサーバーを構築します。POP は 110/TCP, IMAP は 143/TCP を使用します
|
1 |
# apt -y install dovecot-core dovecot-pop3d dovecot-imapd |
①Postfix に SASL機能が提供できるように Dovecot を設定
|
1 2 3 4 |
# vi /etc/dovecot/dovecot.conf 30行目:コメント解除 listen = *, :: |
|
1 2 3 4 5 6 7 |
# vi /etc/dovecot/conf.d/10-auth.conf 12行目:コメント解除(プレーンテキスト認証も許可する) auth_allow_cleartext = yes 95行目:コメント解除 auth_mechanisms = plain login |
|
1 2 3 4 5 6 7 8 9 |
# vi /etc/dovecot/conf.d/10-mail.conf # 36-39行目 : コメントにしてその下に追記 (Maildir 形式に変更) #mail_driver = mbox #mail_home = /home/%{user|username} #mail_path = %{home}/mail #mail_inbox_path = /var/mail/%{user} mail_driver = maildir mail_path = ~/Maildir |
|
1 2 3 4 5 6 7 8 9 |
# vi /etc/dovecot/conf.d/10-master.conf 110-112行目:コメント解除し追記 # Postfix smtp-authi unix_listener /var/spool/postfix/private/auth { mode = 0666 user = postfix group = postfix } |
②設定反映
|
1 |
# systemctl restart dovecot |
2.3 ポートの開放
|
1 2 3 4 |
# ufw allow pop3 # ufw allow imap # ufw allow smtp # ufw reload |
2.4 メールユーザーアカウント登録
メール用のユーザーアカウントを登録します。
OS上のユーザーアカウントでメールも利用する場合の設定です
OS上のユーザーアカウントでメールを利用する場合は、追加の設定は不要で OSユーザーを登録するのみです。
①メールクライアントインストール
|
1 |
# apt -y install mailutils |
②メールボックスは Maildir を参照するよう設定
|
1 |
# echo 'export MAIL=$HOME/Maildir/' >> /etc/profile.d/mail.sh |
2.5 動作確認 ①
①メールの送信テスト
自身にテストメール送信 [mail (ユーザー名)@(ホスト名)](今回は一般ユーザーhuong)
|
1 2 3 4 5 6 7 8 |
# su - [user name] $ mail [user name]@localhost # Cc の宛先 Cc: # 件名 Subject: Test Mail # 本文 This is the first mail. |
本文を終了する場合は Ctrl + D キー
➁受信メール確認
|
1 2 3 4 5 6 7 8 9 10 11 12 13 14 15 16 17 18 19 20 |
$ mail "/home/huong/Maildir/": 1 message 1 new >N 1 huong Sat Jan 10 06:41 13/427 Test Mail ? 1 Return-Path: <huong@lepard> X-Original-To: huong@localhost Delivered-To: huong@localhost Received: by mail.korodes.com (Postfix, from userid 1000) id 5C490409AD; Sat, 10 Jan 2026 15:41:13 +0900 (JST) To: <huong@localhost> Subject: Test Mail User-Agent: mail (GNU Mailutils 3.20) Date: Sat, 10 Jan 2026 15:41:13 +0900 Message-Id: <20260110064113.5C490409AD@mail.korodes.com> From: huong <huong@lepard> This is the first mail. ? q Saved 1 message in /home/huong/mbox Held 0 messages in /home/huong/Maildir/ |
2.6 動作確認 ➁
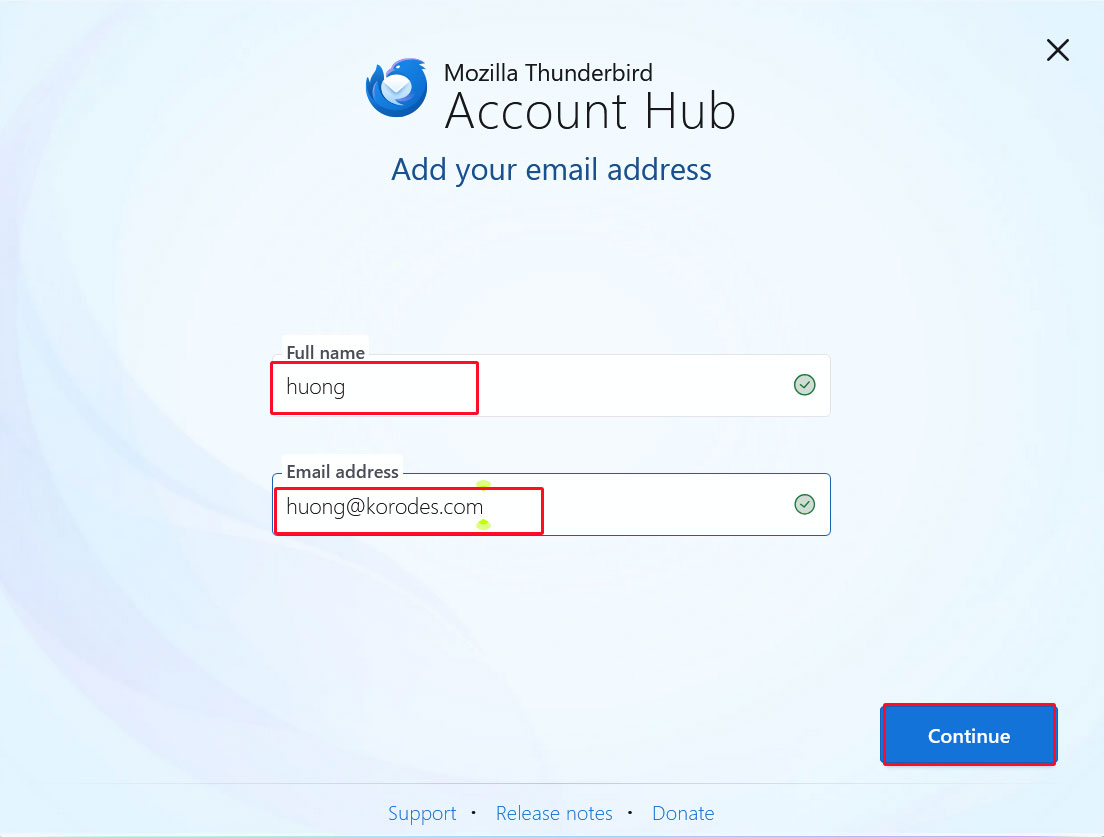
Mozilla Thunderbirdにアカウントを設定し、確認します(メールユーザーとしてOSユーザーhuongの場合)
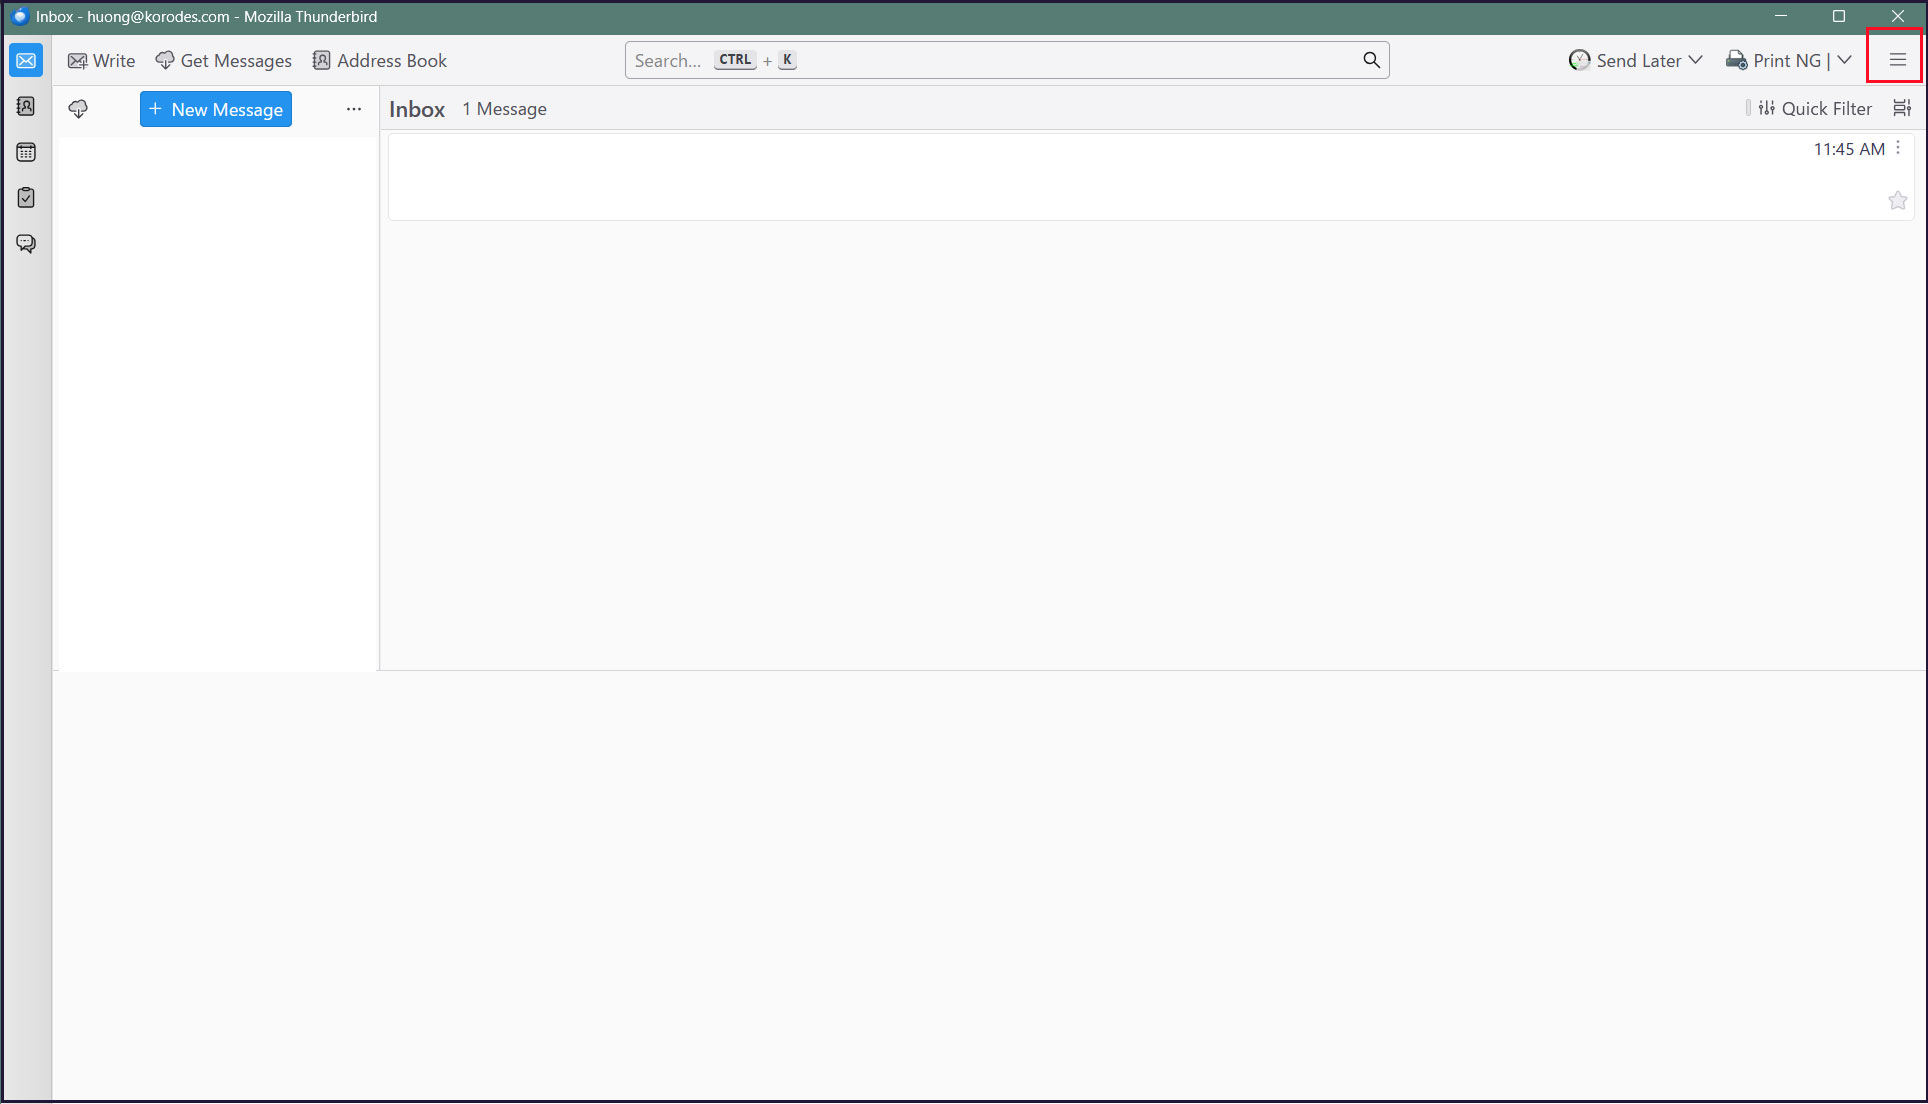
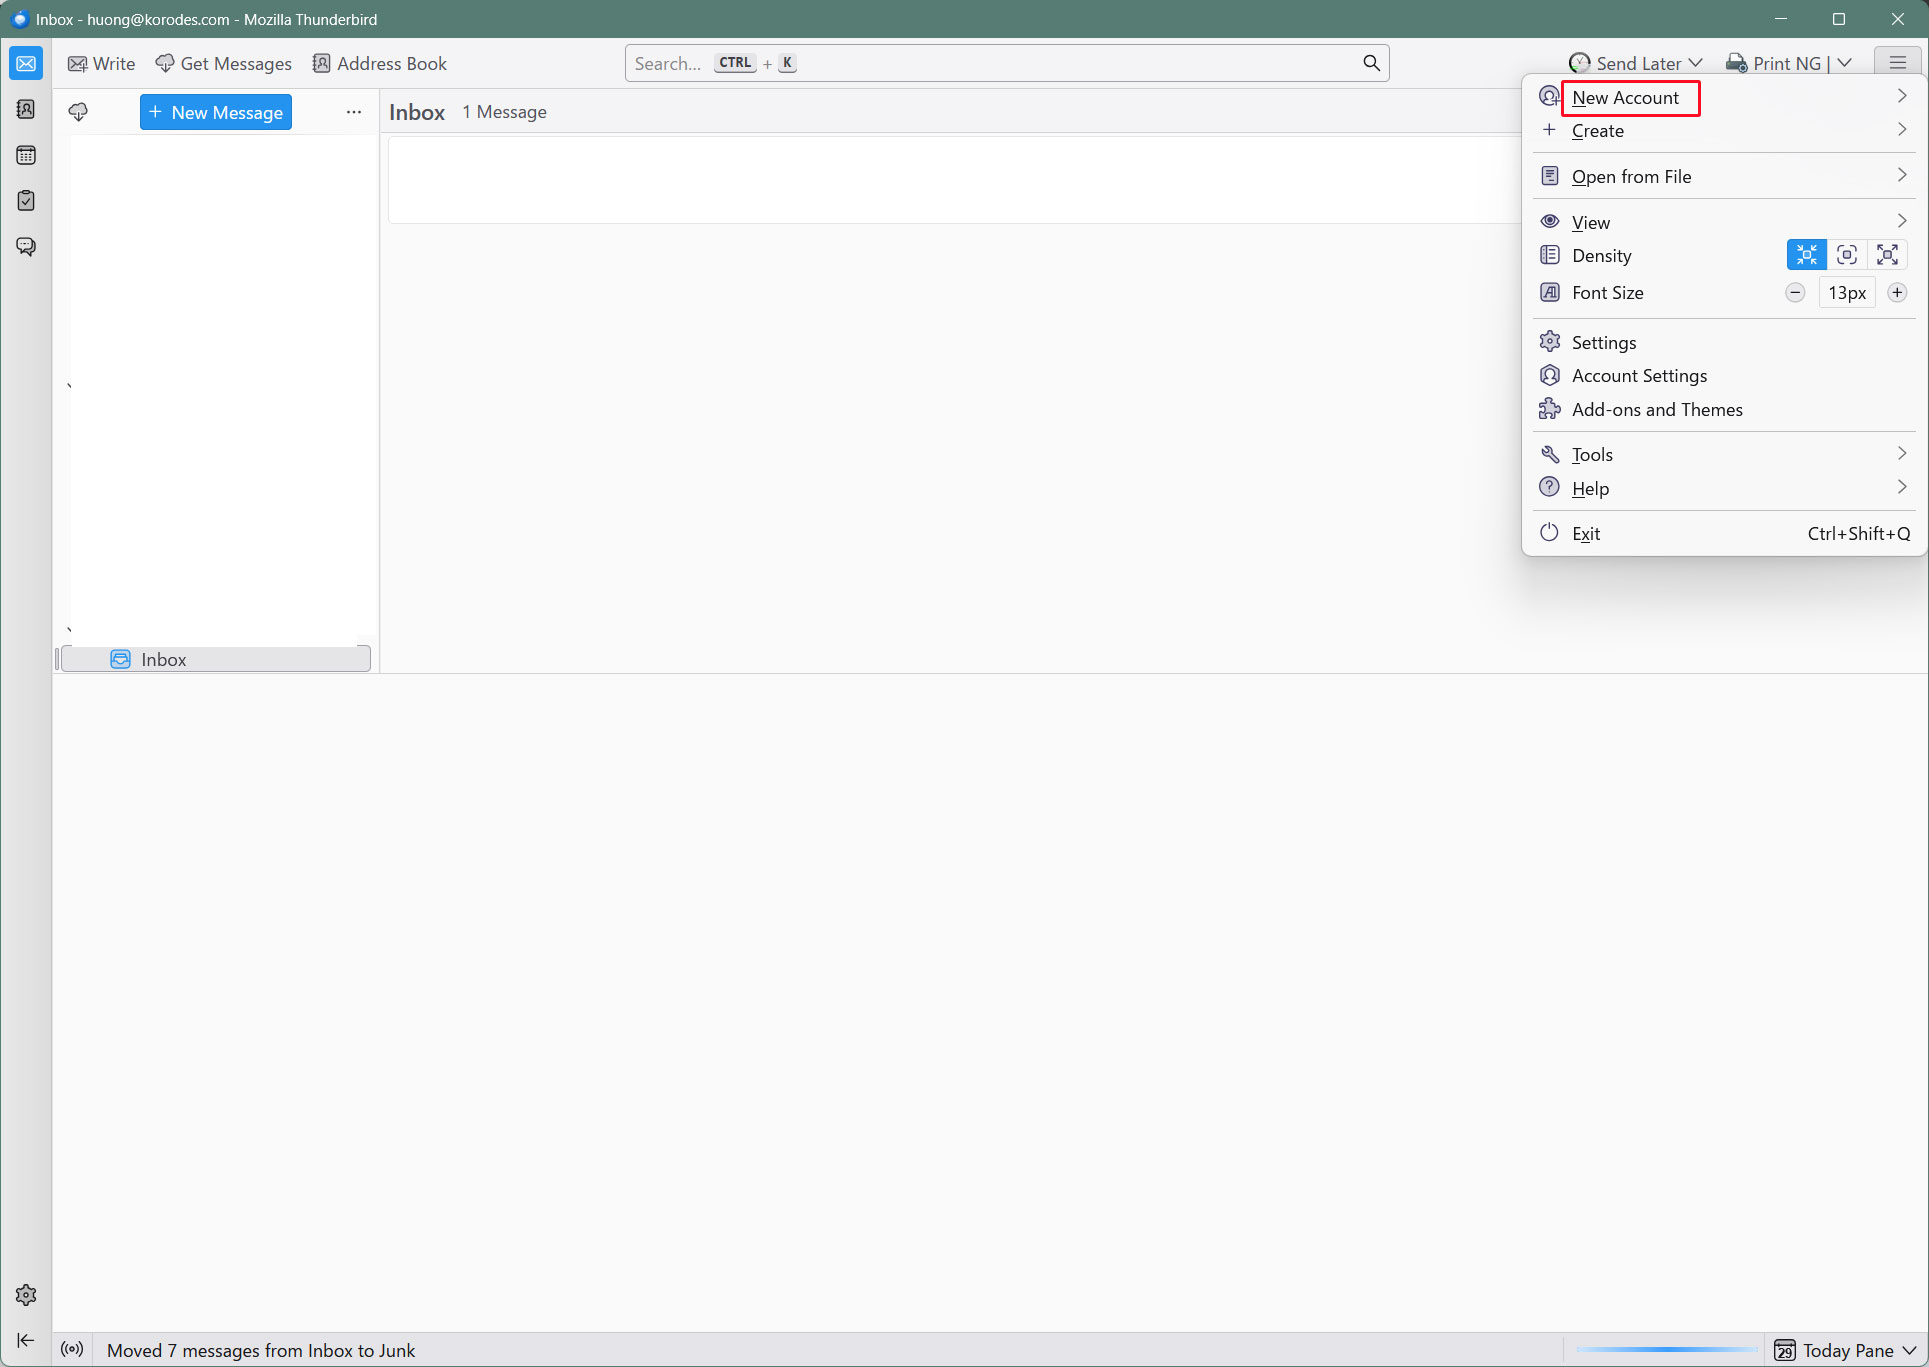
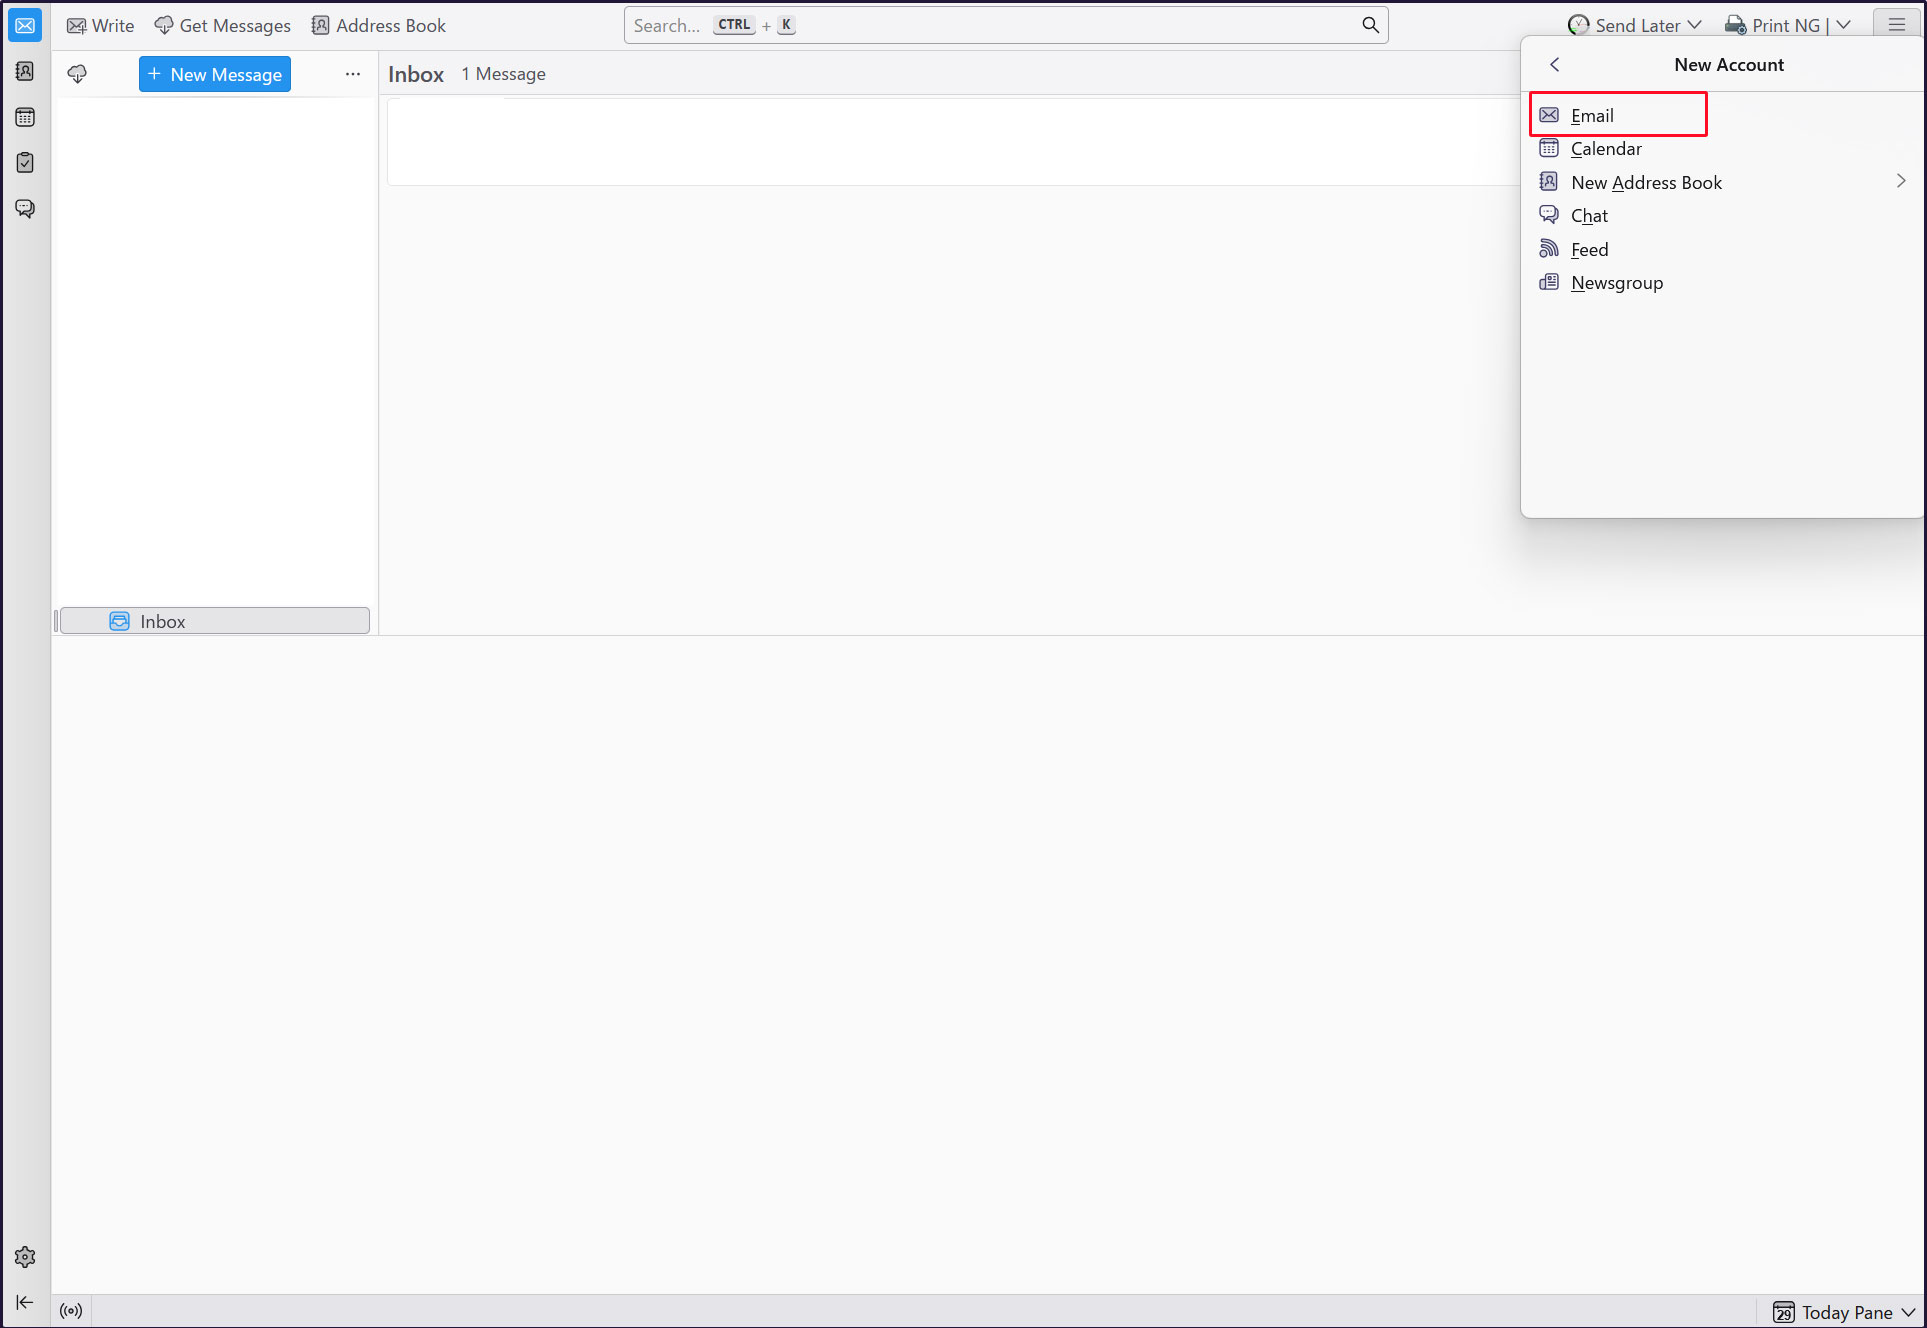
①Thunderbirdを起動し、右上の[三本]メニューの[New Account][Email]をクリック
Full name : 任意の名称
Email address : huong@<domain-name>
をそれぞれ入力し、「Continue」クリック
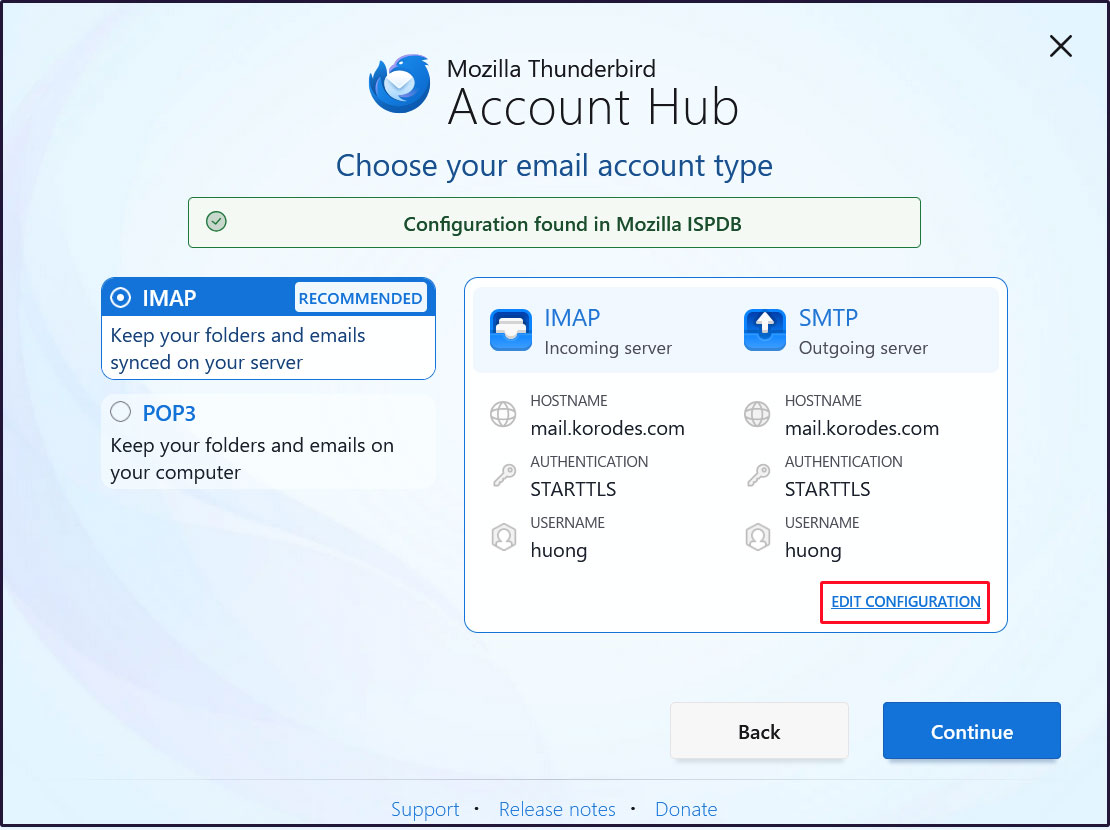
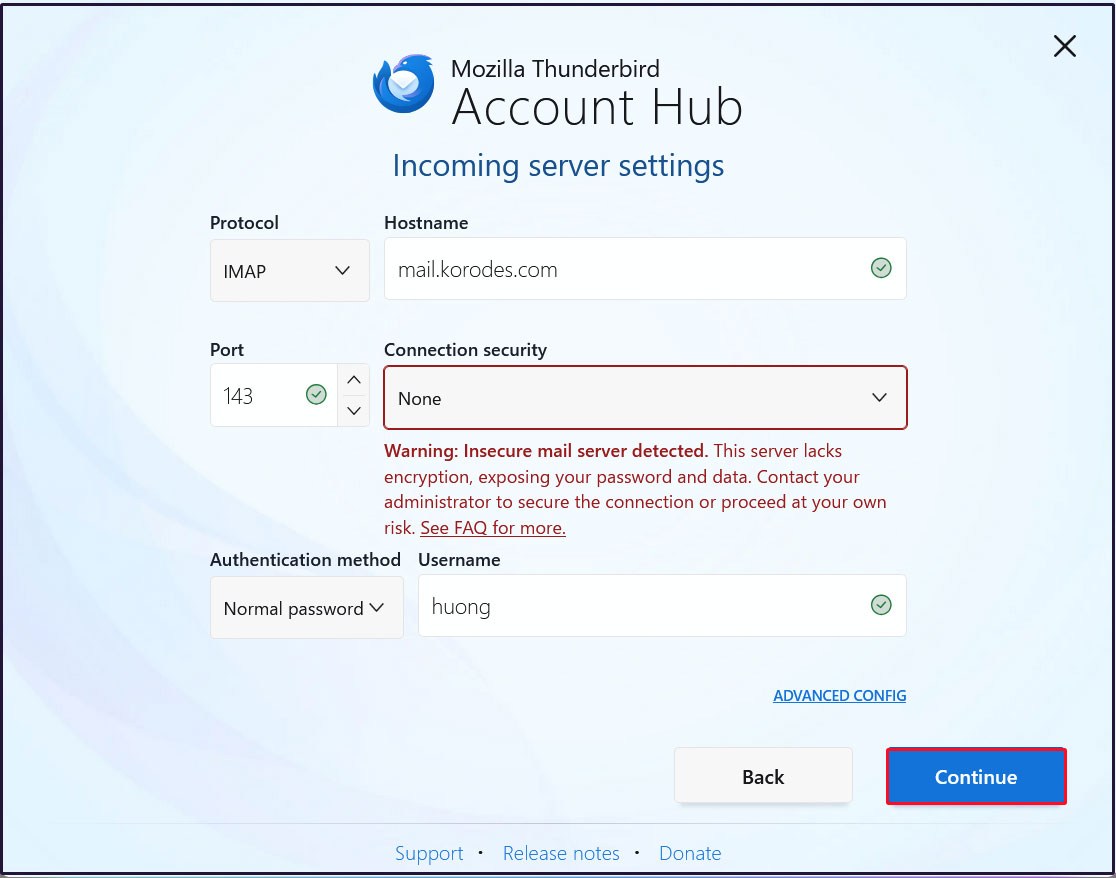
受信サーバーの設定
[Connection security]を[None]にして[Continue]をクリック
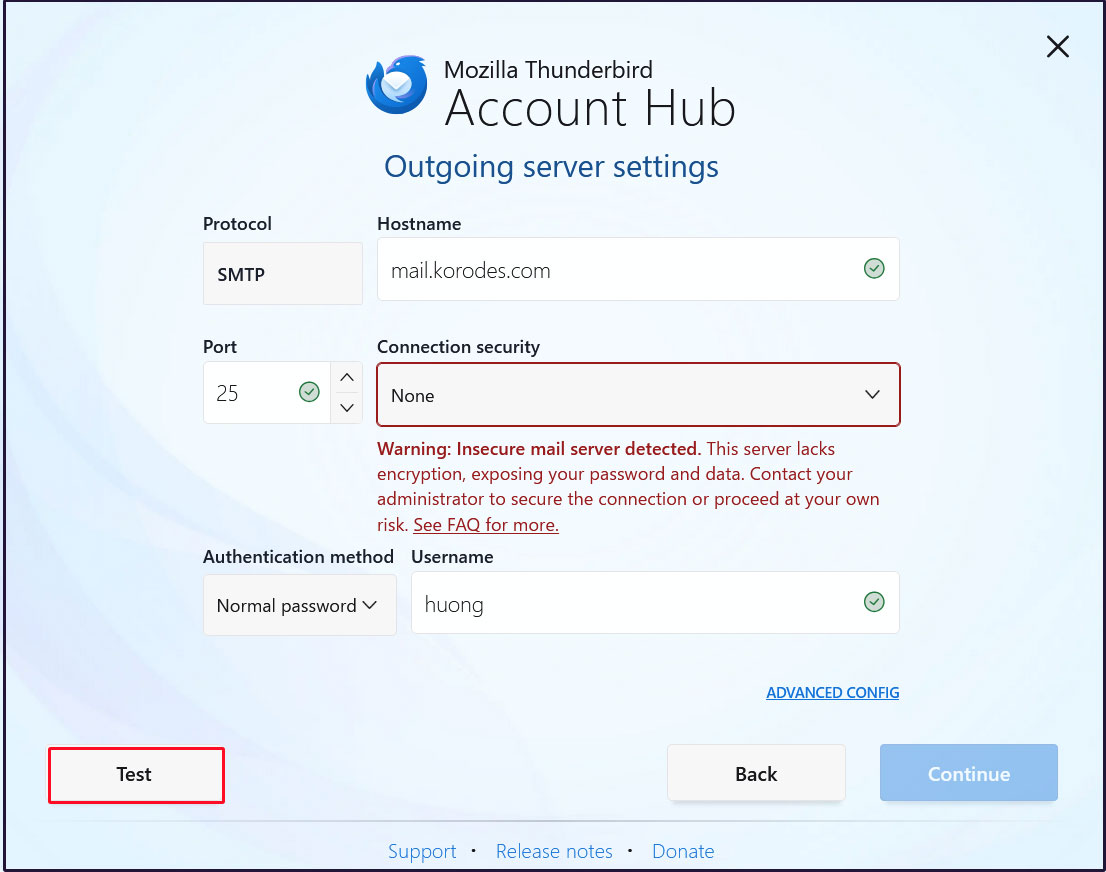
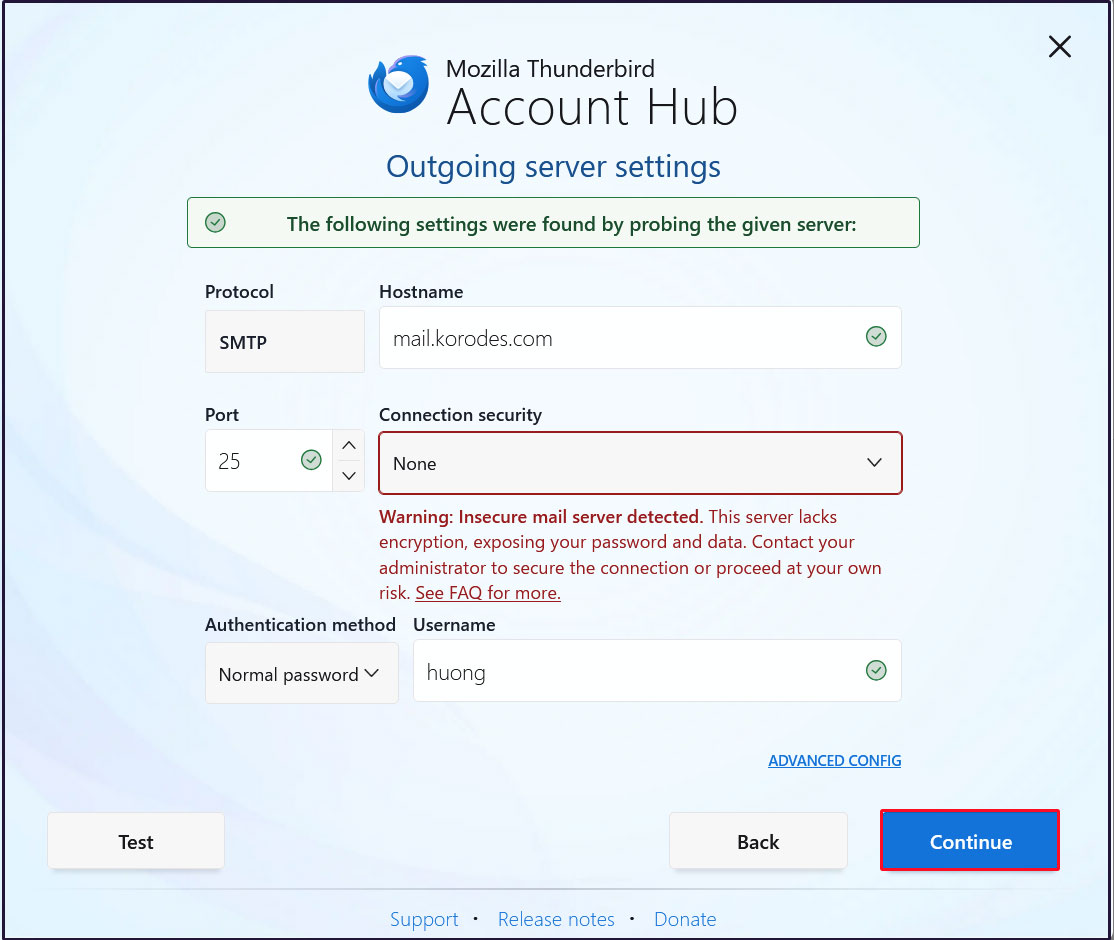
送信サーバーの設定
[Connection security]を[None]にして[Test]をクリック
メールアカウントの作成が成功しましたので、[Finish]をクリック

2.7 メールサーバーPostfixに ClamAV適用
Postfix と Clamav を連携させて 送受信メールをリアルタイムスキャンできるように設定します
①Amavisd および Clamav Daemon をインストールして Clamav Daemon を起動
|
1 2 3 |
$ su - Password: # apt -y install clamav-daemon amavisd-new |
サーバーがホスト名として完全修飾ドメイン名(FQDN)を使用していない場合、Amavisの起動に失敗する可能性があります。また、OSのホスト名が変更される可能性があるため、有効なホスト名をAmavis構成ファイルに直接設定します
|
1 2 3 4 5 6 7 8 9 10 11 12 13 14 15 16 |
# vi /etc/amavis/conf.d/05-node_id 11行目 コメント解除し変更 use strict; # $myhostname is used by amavisd-new for node identification, and it is # important to get it right (e.g. for ESMTP EHLO, loop detection, and so on). chomp($myhostname = `hostname --fqdn`); # To manually set $myhostname, edit the following line with the correct Fully # Qualified Domain Name (FQDN) and remove the # at the beginning of the line. # $myhostname = "mail.[domain name]"; 1; # ensure a defined return |
②15-content_filter_modeの編集
|
1 2 3 4 |
# vi /etc/amavis/conf.d/15-content_filter_mode 13,14行目コメント解除してウィルススキャン有効化 @bypass_virus_checks_maps = ( \%bypass_virus_checks, \@bypass_virus_checks_acl, \$bypass_virus_checks_re); |
③自身のドメイン名を登録
|
1 |
# echo '<yourDomain>' > /etc/mailname |
④Main.cf編集
|
1 2 3 4 |
# vi /etc/postfix/main.cf 最終行へ追記 content_filter=smtp-amavis:[127.0.0.1]:10024 |
⑤master.cf編集
|
1 2 3 4 5 6 7 8 9 10 11 12 13 14 15 16 17 18 19 20 21 |
# vi /etc/postfix/master.cf # 最終行へ以下全行追記 smtp-amavis unix - - n - 2 smtp -o smtp_data_done_timeout=1200 -o smtp_send_xforward_command=yes -o disable_dns_lookups=yes 127.0.0.1:10025 inet n - n - - smtpd -o content_filter= -o local_recipient_maps= -o relay_recipient_maps= -o smtpd_restriction_classes= -o smtpd_client_restrictions= -o smtpd_helo_restrictions= -o smtpd_sender_restrictions= -o smtpd_recipient_restrictions=permit_mynetworks,reject -o mynetworks=127.0.0.0/8 -o strict_rfc821_envelopes=yes -o smtpd_error_sleep_time=0 -o smtpd_soft_error_limit=1001 -o smtpd_hard_error_limit=1000 |
⑥設定反映
|
1 2 3 |
# usermod -G clamav amavis # usermod -G amavis clamav # systemctl restart clamav-daemon amavis postfix |
⑦Thuderbird等で自己宛にメールを送ると、受信メールのヘッダーに次のようなメッセージがあれば成功です。
X-Mozilla-Status: 0001
X-Mozilla-Status2: 00000000
Return-Path: xxxxx@xxxxxxx.com
X-Original-To: xxxxx@xxxxxxx.com
Delivered-To: xxxxx@xxxxxxx.com
Received: from localhost (localhost [127.0.0.1])
by mail.xxxxxxx.com (Postfix) with ESMTP id 88BD160EF5
for xxxxx@xxxxxxx.com; Sun, 11 Jan 2026 10:04:39 +0900 (JST)
X-Virus-Scanned: Debian amavis at xxxxxxx.com
Received: from mail.xxxxxxx.com ([127.0.0.1])
by localhost (mail.xxxxxxx.com [127.0.0.1]) (amavis, port 10024) with ESMTP
id vpD7gdZWgTMP for xxxxx@xxxxxxx.com;
Sun, 11 Jan 2026 10:04:39 +0900 (JST)
Received: from [192.168.11.8] (xxxxxxx.setup [192.168.11.1])
by mail.xxxxxxx.com (Postfix) with ESMTPA id 732CA60EF4
for xxxxx@xxxxxxx.com; Sun, 11 Jan 2026 10:04:39 +0900 (JST)
Message-ID: 39ea6861-71c6-429e-b84e-0435eea70093@xxxxxxx.com
Date: Mon, 21 Apr 2025 06:49:39 +0900
MIME-Version: 1.0
User-Agent: Mozilla Thunderbird
From: xxxxx xxxxx@xxxxxxx.com
Content-Language: en-US
To: xxxxx xxxxx@xxxxxxx.com
Content-Type: text/plain; charset=UTF-8; format=flowed
Content-Transfer-Encoding: 7bit
自分自身にメール本文が「X5O!P%@AP[4\PZX54(P^)7CC)7}$EICAR-STANDARD-ANTIVIRUS-TEST-FILE!$H+H*」のメールを送ってみて、メールが破棄されて届かないことを確認する
2.8 メールサーバーPostfixに spamassassin適用
2.5.1 spamassassin をインストール
①インストール
|
1 2 3 |
# apt update # apt upgrade # apt -y install spamassassin spamass-milter |
②SpamAssassin の設定
|
1 2 3 4 |
# vi /etc/mail/spamassassin/v310.pre 24 行目あたり行頭の#を削除 loadplugin Mail::SpamAssassin::Plugin::DCC |
➂SpamAssassin 設定ファイル最新化スクリプト
|
1 |
# vi /opt/script/spamassassin-update.sh |
#!/bin/bash
cd /etc/mail/spamassassin
wget -q https://github.com/kittyfreak/spamassassin_user_prefs/archive/refs/heads/main.zip
[ $? -ne 0 ] && exit
unzip main.zip >/dev/null 2>&1
[ $? -ne 0 ] && exit
rm -f main.zip
mv spamassassin_user_prefs-main/user_prefs .
rm -rf spamassassin_user_prefs-main
diff user_prefs user_prefs.org > /dev/null 2>&1
if [ $? -ne 0 ]; then
cp user_prefs local.cf
echo "report_safe 0" >> local.cf
echo "rewrite_header Subject SPAM" >> local.cf
if [ -f /etc/init.d/spamd ]; then
/etc/init.d/spamd restart > /dev/null
else
systemctl restart spamd > /dev/null
fi
fi
cp user_prefs user_prefs.org
spamassassin-update スクリプトに実行権限を付与し、実行
|
1 2 |
# chmod 700 /opt/script/spamassassin-update.sh # /opt/script/spamassassin-update.sh |
/etc/mail/spamassassin ディレクトリにSpamAssassin 設定ファイル(local.cf)が当日日付で
作成されていることを確認
※ 事前にunzipをインストールしておく
|
1 2 3 4 5 6 7 8 9 10 11 12 13 14 15 16 17 18 19 20 21 22 |
# ls -l /etc/mail/spamassassin/ total 1664 -rw-r--r-- 1 root root 1292 Feb 8 2025 65_debian.cf -rw-r--r-- 1 root root 1644 Aug 12 03:34 init.pre -rw-r--r-- 1 root root 500630 Jan 11 10:14 local.cf -rw-rw-r-- 1 root root 127072 Jan 11 10:14 main.zip.1 -rw-r--r-- 1 root root 118 Feb 8 2025 sa-compile.pre drwxr-xr-x 2 root root 4096 Jan 11 09:58 sa-update-hooks.d -rw-rw-r-- 1 root root 500588 Apr 30 2023 user_prefs -rw-rw-r-- 1 root root 500588 Jan 11 10:14 user_prefs.org -rw-r--r-- 1 root root 2257 Jan 11 10:09 v310.pre -rw-r--r-- 1 root root 1163 Aug 12 03:34 v312.pre -rw-r--r-- 1 root root 2411 Aug 12 03:34 v320.pre -rw-r--r-- 1 root root 1232 Aug 12 03:34 v330.pre -rw-r--r-- 1 root root 1015 Aug 12 03:34 v340.pre -rw-r--r-- 1 root root 1310 Aug 12 03:34 v341.pre -rw-r--r-- 1 root root 1514 Aug 12 03:34 v342.pre -rw-r--r-- 1 root root 1261 Aug 12 03:34 v343.pre -rw-r--r-- 1 root root 1477 Aug 12 03:34 v400.pre -rw-r--r-- 1 root root 1118 Aug 12 03:34 v401.pre -rw-r--r-- 1 root root 1145 Aug 12 03:34 v402.pre |
SpamAssassin 設定ファイルを最新化するスクリプトが毎日自動実行されるようcron に設定
|
1 2 |
# crontab -e 0 2 * * * /opt/script/spamassassin-update.sh > /dev/null 2>&1 |
④spamass-milter起動・自動起動設定
|
1 2 3 4 5 |
# systemctl start spamass-milter # systemctl enable spamass-milter spamass-milter.service is not a native service, redirecting to systemd-sysv-install. Executing: /usr/lib/systemd/systemd-sysv-install enable spamass-milter |
- スパムメール保存用のディレクトリ「.Spam」を Maildir 形式で作成
- 作成には対象のユーザで行う
|
1 2 3 4 5 6 7 |
# su - <user name> $ cd ~ 「.Spam」という名のディレクトリを作成 $ cd Maildir $ /usr/bin/maildirmake.dovecot .Spam $ su - Password: |
2.5.2 Procmail の前準備
①Procmail のインストール
|
1 |
# apt -y install procmail |
インストールされていれば、以下の結果が返ってきます
|
1 2 |
# which procmail /usr/bin/procmail |
②Procmail の設定
メールフィルタの全体をつかさどる「 /etc/procmailrc 」に記述すると全ユーザに適応されます。
各ユーザ個別のメールフィルタファイルである「 /home/[user]/.procmailrc 」に記述するとそのユーザのみにフィルタが適応されます。
今回は全ユーザに適応させるために「 /etc/procmailrc 」に記述します
|
1 |
# vi /etc/procmailrc |
#パスを設定
PATH=/bin:/usr/bin:/usr/local/bin
#メールボックスの設定
MAILDIR=$HOME/Maildir
DEFAULT=$MAILDIR/
#Procmailのログファイル出力先を指定
LOGFILE=$MAILDIR/procmaillog
#ロックファイルのパスを指定
LOCKFILE=$HOME/.lockmail
#メールヘッダー中に「 X-Spam-*** 」の記述がなければ spamassassin を起動します
:0fw
*!^X-Spam.*
|spamassassin
#メールヘッダー中に「 X-Spam-Status: Yes 」の記述があれば、「 .Spam 」ディレクトリにメールを格納します
:0
*^X-Spam-Status: Yes
$MAILDIR/.Spam/
2.5.3 Postfix の設定
① main.cfの編集
|
1 2 3 4 |
# vi /etc/postfix/main.cf 484行目コメント解除 mailbox_command = /usr/bin/procmail |
②設定の反映と起動
|
1 2 |
# systemctl start spamd # systemctl restart postfix |
2.5.4 スパムメールの学習
すべてのユーザの「.Spam」ディレクトリの中身を全てスパムメールとして学習させます
①スパムメールの学習
|
1 2 |
# /usr/bin/sa-learn --spam /home/*/Maildir/.Spam/cur Learned tokens from 0 message(s) (0 message(s) examined). |
②通常のメールの学習
|
1 2 |
# /usr/bin/sa-learn --ham /home/*/Maildir/cur Learned tokens from 4 message(s) (4 message(s) examined). |
③スクリプトを作成し、Cron に登録
ファイル名は適当に「 spam-learns.sh 」とし、/opt/script/配下に設置する
スクリプトを保存した後は、「 chmod 750 spam-learns.sh 」として実行可能なアクセス権を与える。
|
1 |
# vi /opt/script/spam-learns.sh |
#! /bin/sh
#スパムメールの学習
/usr/bin/sa-learn --spam /home/*/Maildir/.Spam/cur
#通常のメールを学習
/usr/bin/sa-learn --ham /home/*/Maildir/cur
#スパムメール保存ディレクトリの中身を強制的に消去してよいのなら以下の記述を追加
/bin/rm -f /home/*/Maildir/.Spam/cur
|
1 |
# chmod 750 /opt/script/spam-learns.sh |
spam-learns.shができたら、定義ファイルを/lib/systemd/system直下に作成する。名前はspam-learns.serviceのように末尾が.serviceになるようにする。
Typeはsimpleで定義する
|
1 2 |
# cd /lib/systemd/system # vi spam-learns.service |
Description=demo sample node.js program [Service]
Type=simple
ExecStart= /opt/script/spam-learns.sh
Restart=always [Install]
WantedBy=multi-user.target
|
1 2 |
# crontab -e 0 4 * * * /opt/script/spam-learns.sh |
|
1 2 |
# systemctl enable spam-learns Created symlink '/etc/systemd/system/multi-user.target.wants/spam-learns.service' → '/usr/lib/systemd/system/spam-learns.service'. |
④Thunderbird等で自己宛に空メールを送付し、受信メールヘッダーを確認すると次のようなメッセージあれば成功です
X-Mozilla-Status: 0001
X-Mozilla-Status2: 00000000
Return-Path: xxxxx@xxxxxxx.com
X-Spam-Checker-Version: SpamAssassin 4.0.2-rc2 (2025-08-11) on Lepard
X-Spam-Level: **
X-Spam-Status: No, score=2.3 required=13.0 tests=ALL_TRUSTED,
CONTENT_TYPE_PRESENT,EMPTY_MESSAGE autolearn=no autolearn_force=no
version=4.0.2-rc2
X-Original-To: xxxxx@xxxxxxx.com
Delivered-To: xxxxx@xxxxxxx.com
Received: from localhost (localhost [127.0.0.1])
by mail.xxxxxxx.com (Postfix) with ESMTP id B35F3416EE
for xxxxx@xxxxxxx.com; Sun, 11 Jan 2026 10:29:51 +0900 (JST)
X-Virus-Scanned: Debian amavis at xxxxxxx.com
Received: from mail.xxxxxxx.com ([127.0.0.1])
by localhost (mail.xxxxxxx.com [127.0.0.1]) (amavis, port 10024) with ESMTP
id mkU1ZPnLVwqK for xxxxx@xxxxxxx.com;
Sun, 11 Jan 2026 10:29:51 +0900 (JST)
Received: from [192.168.11.6] (buffalo.setup [192.168.11.1])
by mail.xxxxxxx.com (Postfix) with ESMTPA id 9A9A8416E9
for xxxxx@xxxxxxx.com; Sun, 11 Jan 2026 10:29:51 +0900 (JST)
Message-ID: a9f5dc53-7a3a-4ea1-ba34-92cc76bf13b4@xxxxxxx.com
Date: Sun, 11 Jan 2026 10:29:52 +0900
MIME-Version: 1.0
User-Agent: Mozilla Thunderbird
From: xxxxx xxxxx@xxxxxxx.com
Content-Language: en-US
To: xxxxx xxxxx@xxxxxxx.com
Content-Type: text/plain; charset=UTF-8; format=flowed
Content-Transfer-Encoding: 7bit
Subject:
⑤スパムチェック確認
自分自身にメール本文が「XJS*C4JDBQADN1.NSBN3*2IDNEN*GTUBE-STANDARD-ANTI-UBE-TEST-EMAIL*C.34X」のメールを送るとメールは配信されずSpamフォルダへ振り分けられていることを確認する
ヘッダーには次のように表示されている
/home/[user]/Maildir/.Spam/new/ 配下のメールを確認する
Return-Path: <xxxxx@xxxxxxx.com>
X-Spam-Checker-Version: SpamAssassin 4.0.2-rc2 (2025-08-11) on Lepard
X-Spam-Flag: YES
X-Spam-Level: xxxxxxxxxxxxxxxxxxxxxxxxxxxxxxxxxxxxxxxxxxxxxxxxxxx
X-Spam-Status: Yes, score=1001.8 required=13.0 tests=ALL_TRUSTED,
CONTENT_TYPE_PRESENT,GTUBE,HTML_MESSAGE,MPART_ALT_DIFF,
MULTIPART_ALTERNATIVE autolearn=no autolearn_force=no
version=4.0.1
X-Spam-Report:
* 0.1 ALL_TRUSTED Passed through trusted hosts only via SMTP
* 1000 GTUBE BODY: Generic Test for Unsolicited Bulk Email
* -0.1 CONTENT_TYPE_PRESENT exists:Content-Type
* 0.1 MULTIPART_ALTERNATIVE Multipart/alternative
* 0.7 MPART_ALT_DIFF BODY: HTML and text parts are different
* 1.0 HTML_MESSAGE BODY: HTML included in message