

オープンソースの統合監視ソフトウェア「Nagios Server」インストール
Nagiosは、Linux 上で実行するオープンソースの監視ソリューションです。
Nagiosは、 Ethan Galstadによって開発され、 1999 年に最初にリリースされました。その後、このプロジェクトは、いくつかの貢献者によってオープンソース プロジェクトとして改良されました。
Nagiosは、ネットワーク、アプリケーション、またはサーバーの重要なパラメーターを定期的にチェックするように設計されています。これらのパラメータには、マイクロプロセッサの負荷、実行中のプロセス数、ログ ファイル、ディスクおよびメモリの使用量の他、SMTP (Simple Mail Transfer Protocol)、HTTP (Hypertext Transfer Protocol)、POP3 ( Post Office Protocol 3)の他の多くのサービスもチェックできます。
Nagoisを実行するにはPHP、MySQLなどのデータベース、ApacheやNginxなどのWebサーバーが必要です。今回はこれらすべてが構成済みという前提で進めます。
1. 必要なパッケージをインストール
|
1 2 |
# apt update # apt install autoconf gcc libc6 make wget unzip libgd-dev |
2. Nagios Coreのインストール
①ダウンロード
|
1 |
# wget https://go.nagios.org/get-core/4-5-9 |
②インストール
|
1 2 3 4 5 |
# apt install libssl-dev # tar zxvf 4-5-9 # cd nagios-4.5.9 # ./configure |
以下のように表示される
|
1 2 3 4 5 6 7 8 9 10 11 12 13 14 15 16 17 18 19 20 21 22 23 24 25 |
General Options: ------------------------- Nagios executable: nagios Nagios user/group: nagios,nagios Command user/group: nagios,nagios Event Broker: yes Install ${prefix}: /usr/local/nagios Install ${includedir}: /usr/local/nagios/include/nagios Lock file: /run/nagios.lock Check result directory: /usr/local/nagios/var/spool/checkresults Init directory: /lib/systemd/system Apache conf.d directory: /etc/apache2/sites-available Mail program: /usr/bin/mail Host OS: linux-gnu IOBroker Method: epoll Web Interface Options: ------------------------ HTML URL: http://localhost/nagios/ CGI URL: http://localhost/nagios/cgi-bin/ Traceroute (used by WAP): /usr/sbin/traceroute Review the options above for accuracy. If they look okay, type 'make all' to compile the main program and CGIs. |
コンパイル
|
1 |
# make all |
以下のように表示される
|
1 2 3 4 5 6 7 8 9 10 11 12 13 14 15 16 17 18 19 20 21 22 23 24 25 26 27 28 29 30 31 32 33 34 35 36 37 38 39 40 41 42 43 44 45 46 47 48 49 50 51 52 53 54 55 56 57 58 59 60 61 62 63 64 65 66 67 68 69 70 71 72 |
*** Compile finished *** If the main program and CGIs compiled without any errors, you can continue with testing or installing Nagios as follows (type 'make' without any arguments for a list of all possible options): make test - This runs the test suite make install - This installs the main program, CGIs, and HTML files make install-init - This installs the init script in /lib/systemd/system make install-daemoninit - This will initialize the init script in /lib/systemd/system make install-groups-users - This adds the users and groups if they do not exist make install-commandmode - This installs and configures permissions on the directory for holding the external command file make install-config - This installs *SAMPLE* config files in /usr/local/nagios/etc You'll have to modify these sample files before you can use Nagios. Read the HTML documentation for more info on doing this. Pay particular attention to the docs on object configuration files, as they determine what/how things get monitored! make install-webconf - This installs the Apache config file for the Nagios web interface make install-exfoliation - This installs the Exfoliation theme for the Nagios web interface make install-classicui - This installs the classic theme for the Nagios web interface *** Support Notes ******************************************* If you have questions about configuring or running Nagios, please make sure that you: - Look at the sample config files - Read the documentation on the Nagios Library at: https://library.nagios.com before you post a question to one of the mailing lists. Also make sure to include pertinent information that could help others help you. This might include: - What version of Nagios you are using - What version of the plugins you are using - Relevant snippets from your config files - Relevant error messages from the Nagios log file For more information on obtaining support for Nagios, visit: https://support.nagios.com ************************************************************* Enjoy. |
Nagios ユーザーとグループを作成
|
1 2 3 |
# make install-groups-users groupadd -r nagios useradd -g nagios nagios |
Nagios グループに Apache ユーザーを追加
|
1 |
# usermod -aG nagios www-data |
Nagios Core をインストール
|
1 |
# make install |
Nagios の init スクリプトをインストール
|
1 2 3 |
# make install-init /usr/bin/install -c -m 755 -d -o root -g root /lib/systemd/system /usr/bin/install -c -m 755 -o root -g root startup/default-service /lib/systemd/system/nagios.service |
外部コマンド ファイルと権限をインストール
|
1 2 3 4 5 6 |
# make install-commandmode /usr/bin/install -c -m 775 -o nagios -g nagios -d /usr/local/nagios/var/rw chmod g+s /usr/local/nagios/var/rw *** External command directory configured *** |
Nagios 構成ファイルをインストール
|
1 2 3 4 5 6 |
# make install-config *** Config files installed *** Remember, these are *SAMPLE* config files. You'll need to read the documentation for more information on how to actually define services, hosts, etc. to fit your particular needs. |
Nagios 用の Apache 構成ファイルをインストール
|
1 2 3 4 5 6 7 |
# make install-webconf /usr/bin/install -c -m 644 sample-config/httpd.conf /etc/apache2/sites-available/nagios.conf if [ 1 -eq 1 ]; then \ ln -s /etc/apache2/sites-available/nagios.conf /etc/apache2/sites-enabled/nagios.conf; \ fi *** Nagios/Apache conf file installed *** |
|
1 2 |
# a2enmod cgi # systemctl restart apache2 |
3. Nagios プラグインをインストール
①Nagios Pluginsページから最新の codeをダウンロード
|
1 |
# wget https://nagios-plugins.org/download/nagios-plugins-2.4.9.tar.gz |
②インストール
|
1 2 3 4 5 |
# tar -xvf nagios-plugins-2.4.9.tar.gz # cd nagios-plugins-2.4.9 # ./configure --with-nagios-user=nagios --with-nagios-group=nagios # make # make install |
③必要なディレクトリを作成
|
1 2 |
# mkdir -p /usr/local/nagios/var/spool/checkresults # chown -R nagios:nagios /usr/local/nagios/var/spool/checkresults |
4. Nagios Web ユーザーの作成
Nagios Web ダッシュボードにアクセスするためのユーザー アカウントを作成する。このユーザーアカウントは、認証に使用される。
ユーザーのデフォルト名はnagiosadminで、/usr/local/nagios/etc/cgi.cfgファイル内に優先ユーザー名として定義されています。
|
1 2 3 4 |
# htpasswd -c /usr/local/nagios/etc/htpasswd.users nagiosadmin New password: [password] Re-type new password: [again password] Adding password for user nagiosadmin |
所有権と権限を設定
|
1 2 |
# chown www-data:www-data /usr/local/nagios/etc/htpasswd.users # chmod 640 /usr/local/nagios/etc/htpasswd.users |
Apache を再起動
|
1 |
# systemctl restart apache2 |
ファイアウォールで HTTP サービスポートを解放します
|
1 2 |
# ufw allow http # ufw reload |
Nagios サービスを開始と有効
|
1 2 |
# systemctl enable nagios --now Created symlink /etc/systemd/system/multi-user.target.wants/nagios.service → /lib/systemd/system/nagios.service. |
システムを再起動
|
1 |
# shutdown -r now |
サービスが実行しているか確認
|
1 2 3 4 5 6 7 8 9 10 11 12 13 14 15 16 17 18 19 20 21 22 23 24 25 26 27 |
# systemctl status nagios ● nagios.service - Nagios Core 4.5.9 Loaded: loaded (/usr/lib/systemd/system/nagios.service; enabled; preset: enabled) Active: active (running) since Thu 2025-08-21 08:41:24 JST; 3min 26s ago Invocation: 461dbf4dfcdd4c8f8b4b0bfaa2a3fc92 Docs: https://www.nagios.org/documentation Main PID: 991 (nagios) Tasks: 6 (limit: 4595) Memory: 7.8M (peak: 9.1M) CPU: 589ms CGroup: /system.slice/nagios.service tq 991 /usr/local/nagios/bin/nagios -d /usr/local/nagios/etc/nagios.cfg tq1032 /usr/local/nagios/bin/nagios --worker /usr/local/nagios/var/rw/nagios.qh tq1033 /usr/local/nagios/bin/nagios --worker /usr/local/nagios/var/rw/nagios.qh tq1034 /usr/local/nagios/bin/nagios --worker /usr/local/nagios/var/rw/nagios.qh tq1036 /usr/local/nagios/bin/nagios --worker /usr/local/nagios/var/rw/nagios.qh mq1055 /usr/local/nagios/bin/nagios -d /usr/local/nagios/etc/nagios.cfg Aug 21 08:41:24 Lepard nagios[991]: qh: core query handler registered Aug 21 08:41:24 Lepard nagios[991]: qh: echo service query handler registered Aug 21 08:41:24 Lepard nagios[991]: qh: help for the query handler registered Aug 21 08:41:24 Lepard nagios[991]: wproc: Successfully registered manager as @wproc with query handler Aug 21 08:41:25 Lepard nagios[991]: wproc: Registry request: name=Core Worker 1033;pid=1033 Aug 21 08:41:25 Lepard nagios[991]: wproc: Registry request: name=Core Worker 1036;pid=1036 Aug 21 08:41:25 Lepard nagios[991]: wproc: Registry request: name=Core Worker 1032;pid=1032 Aug 21 08:41:25 Lepard nagios[991]: wproc: Registry request: name=Core Worker 1034;pid=1034 Aug 21 08:41:25 Lepard nagios[991]: Successfully launched command file worker with pid 105 |
5. Nagios Web インターフェイスにアクセス
任意のブラウザで http://[IP_Address]/nagios/にアクセスし[Username]にnagiosadmin、[Password]には上記でユーザーを作成したとき指定したパスワードを入力し、[Sign in]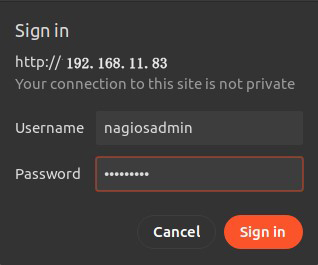
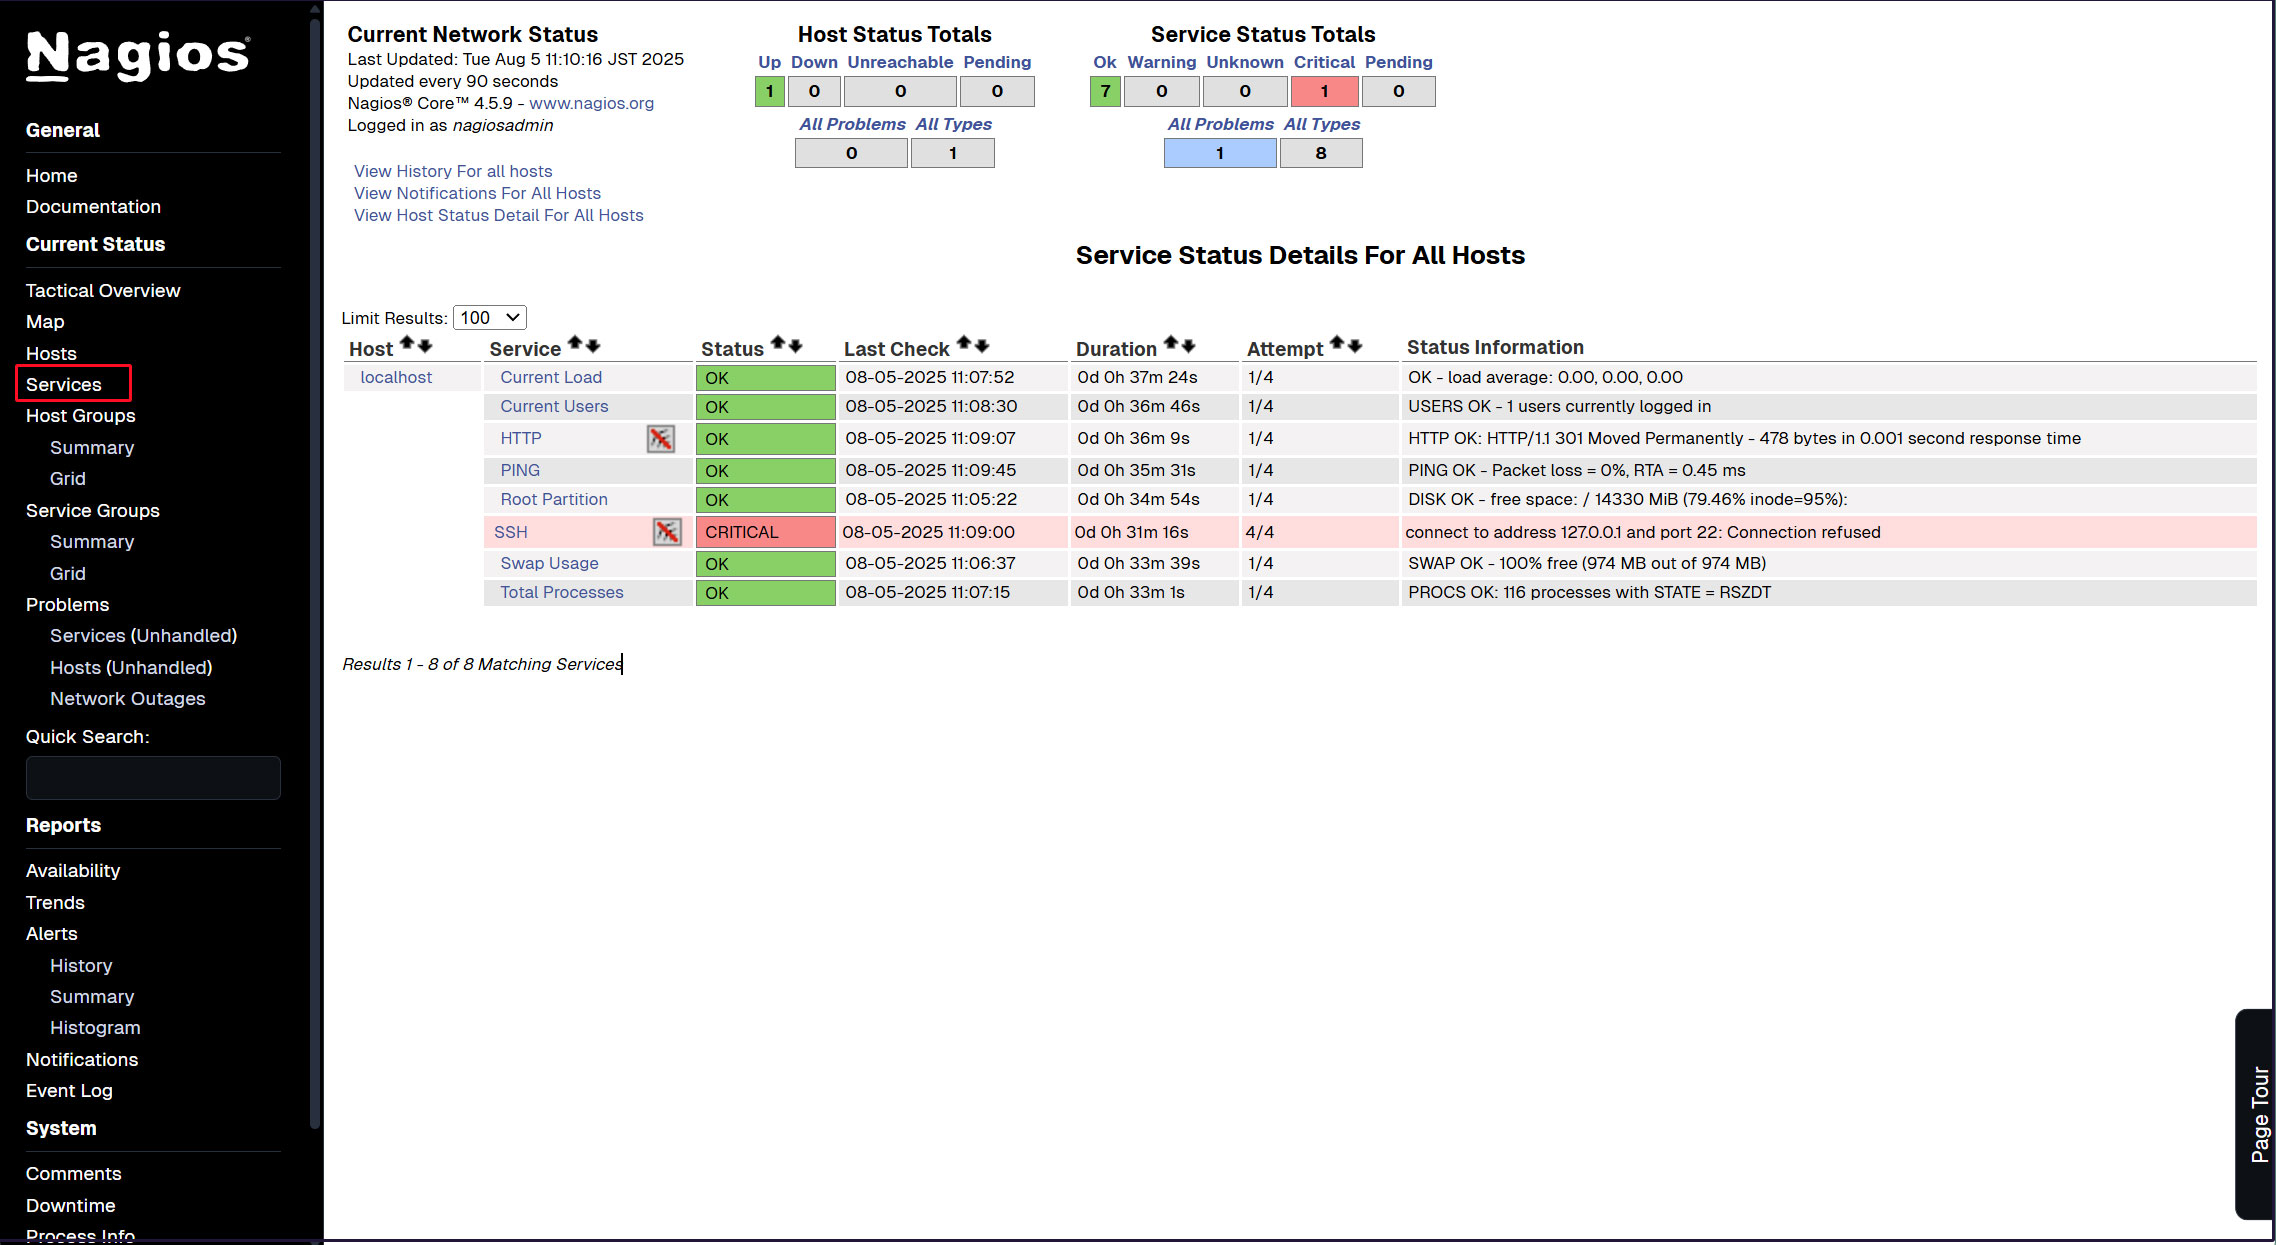
ログインに成功すると、以下のダッシュボードが表示されます。
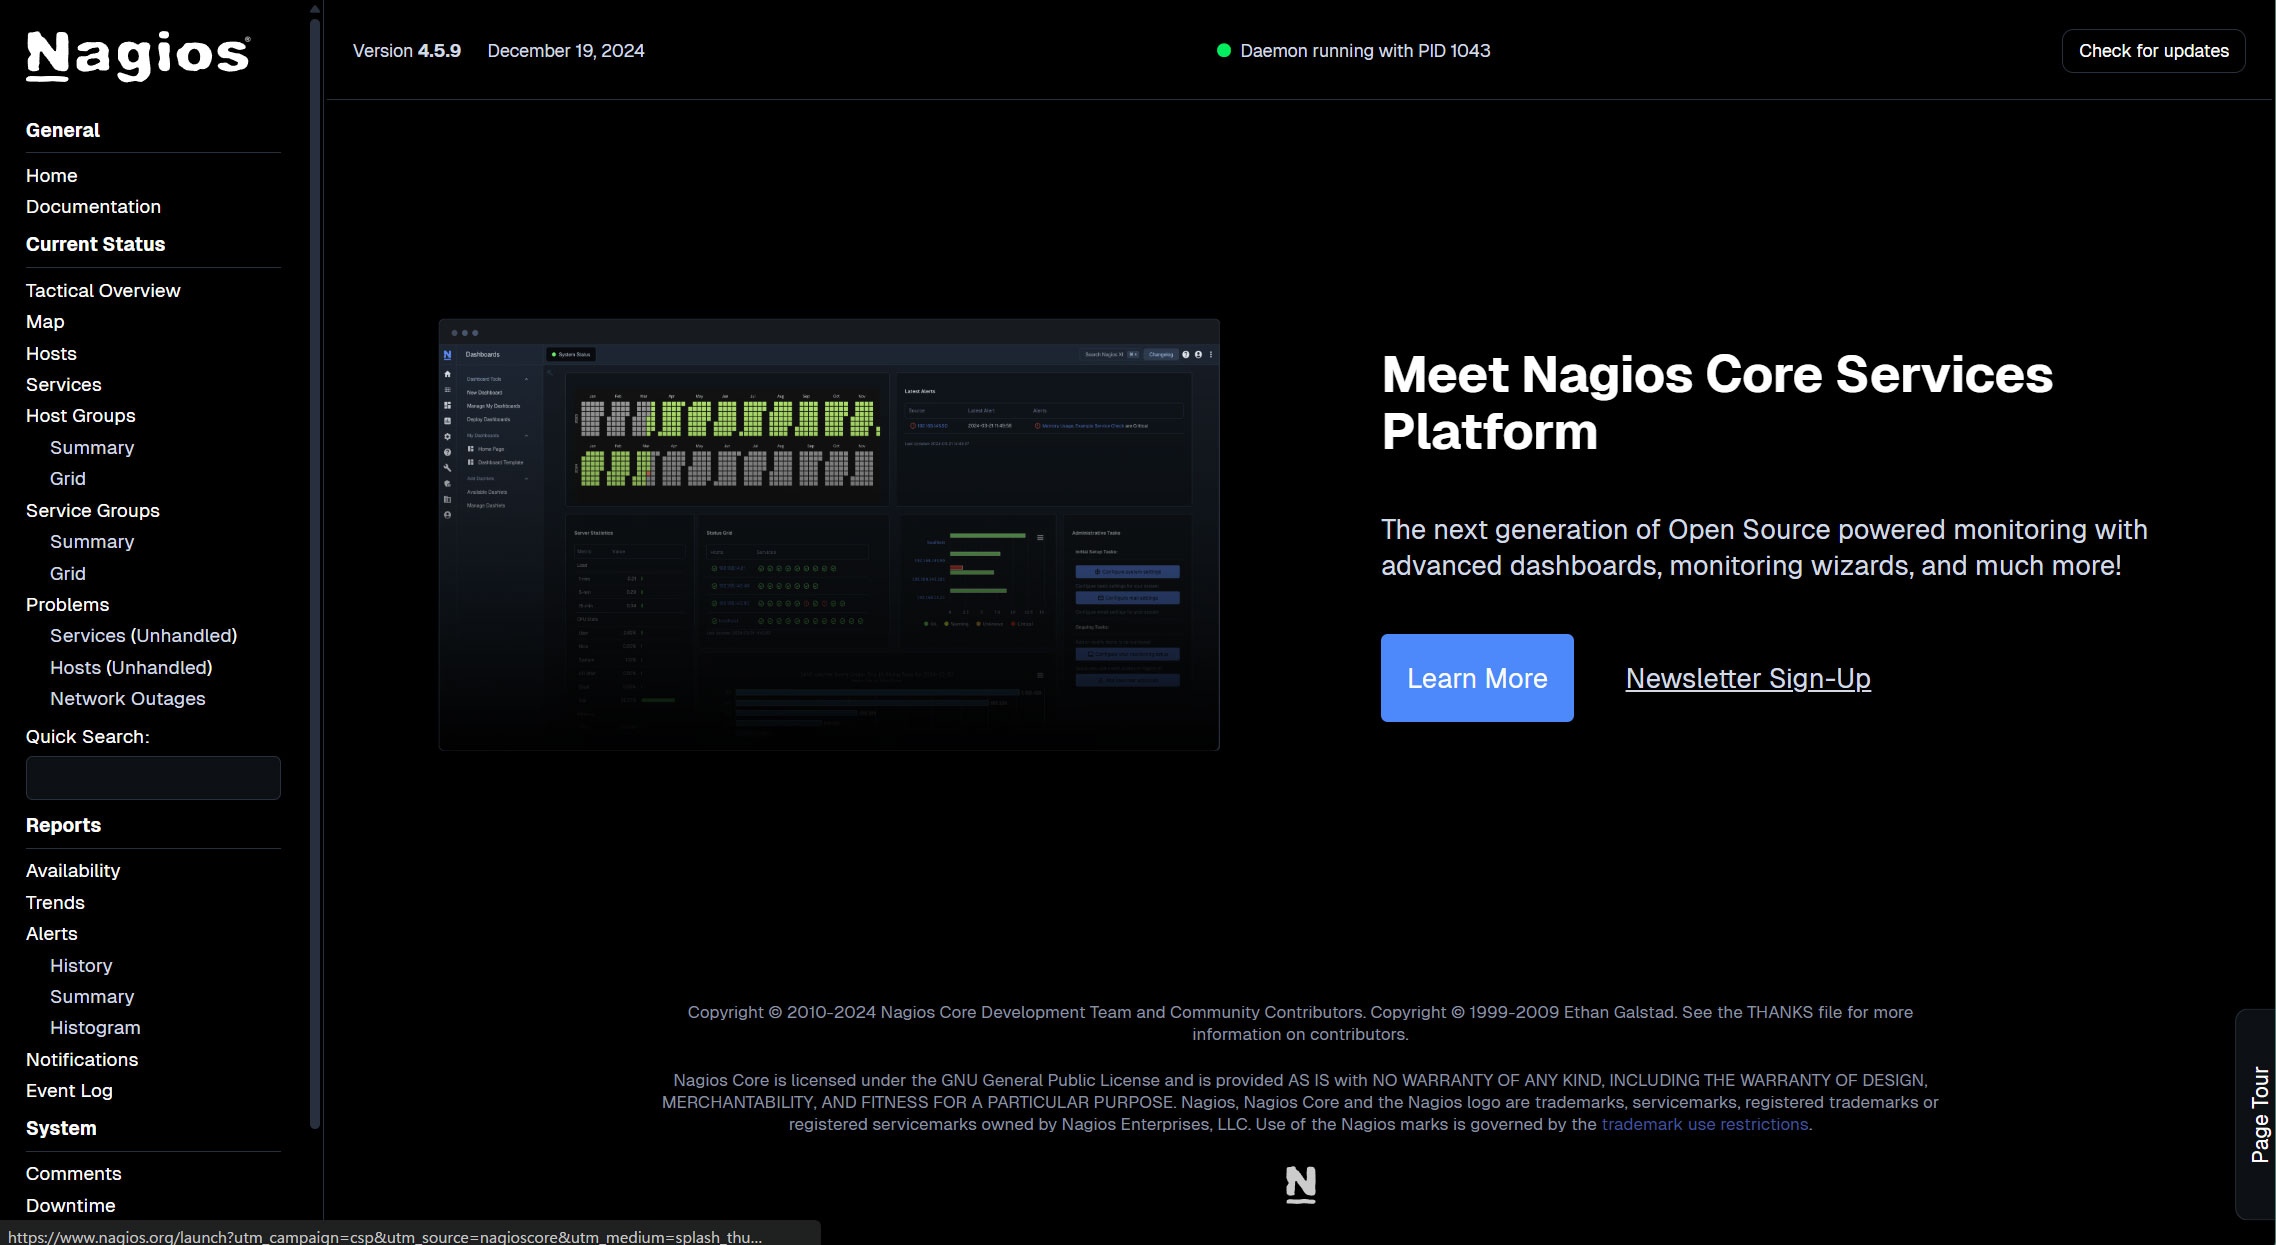
ホストの可用性を表示
左メニューの[Hosts]をクリック
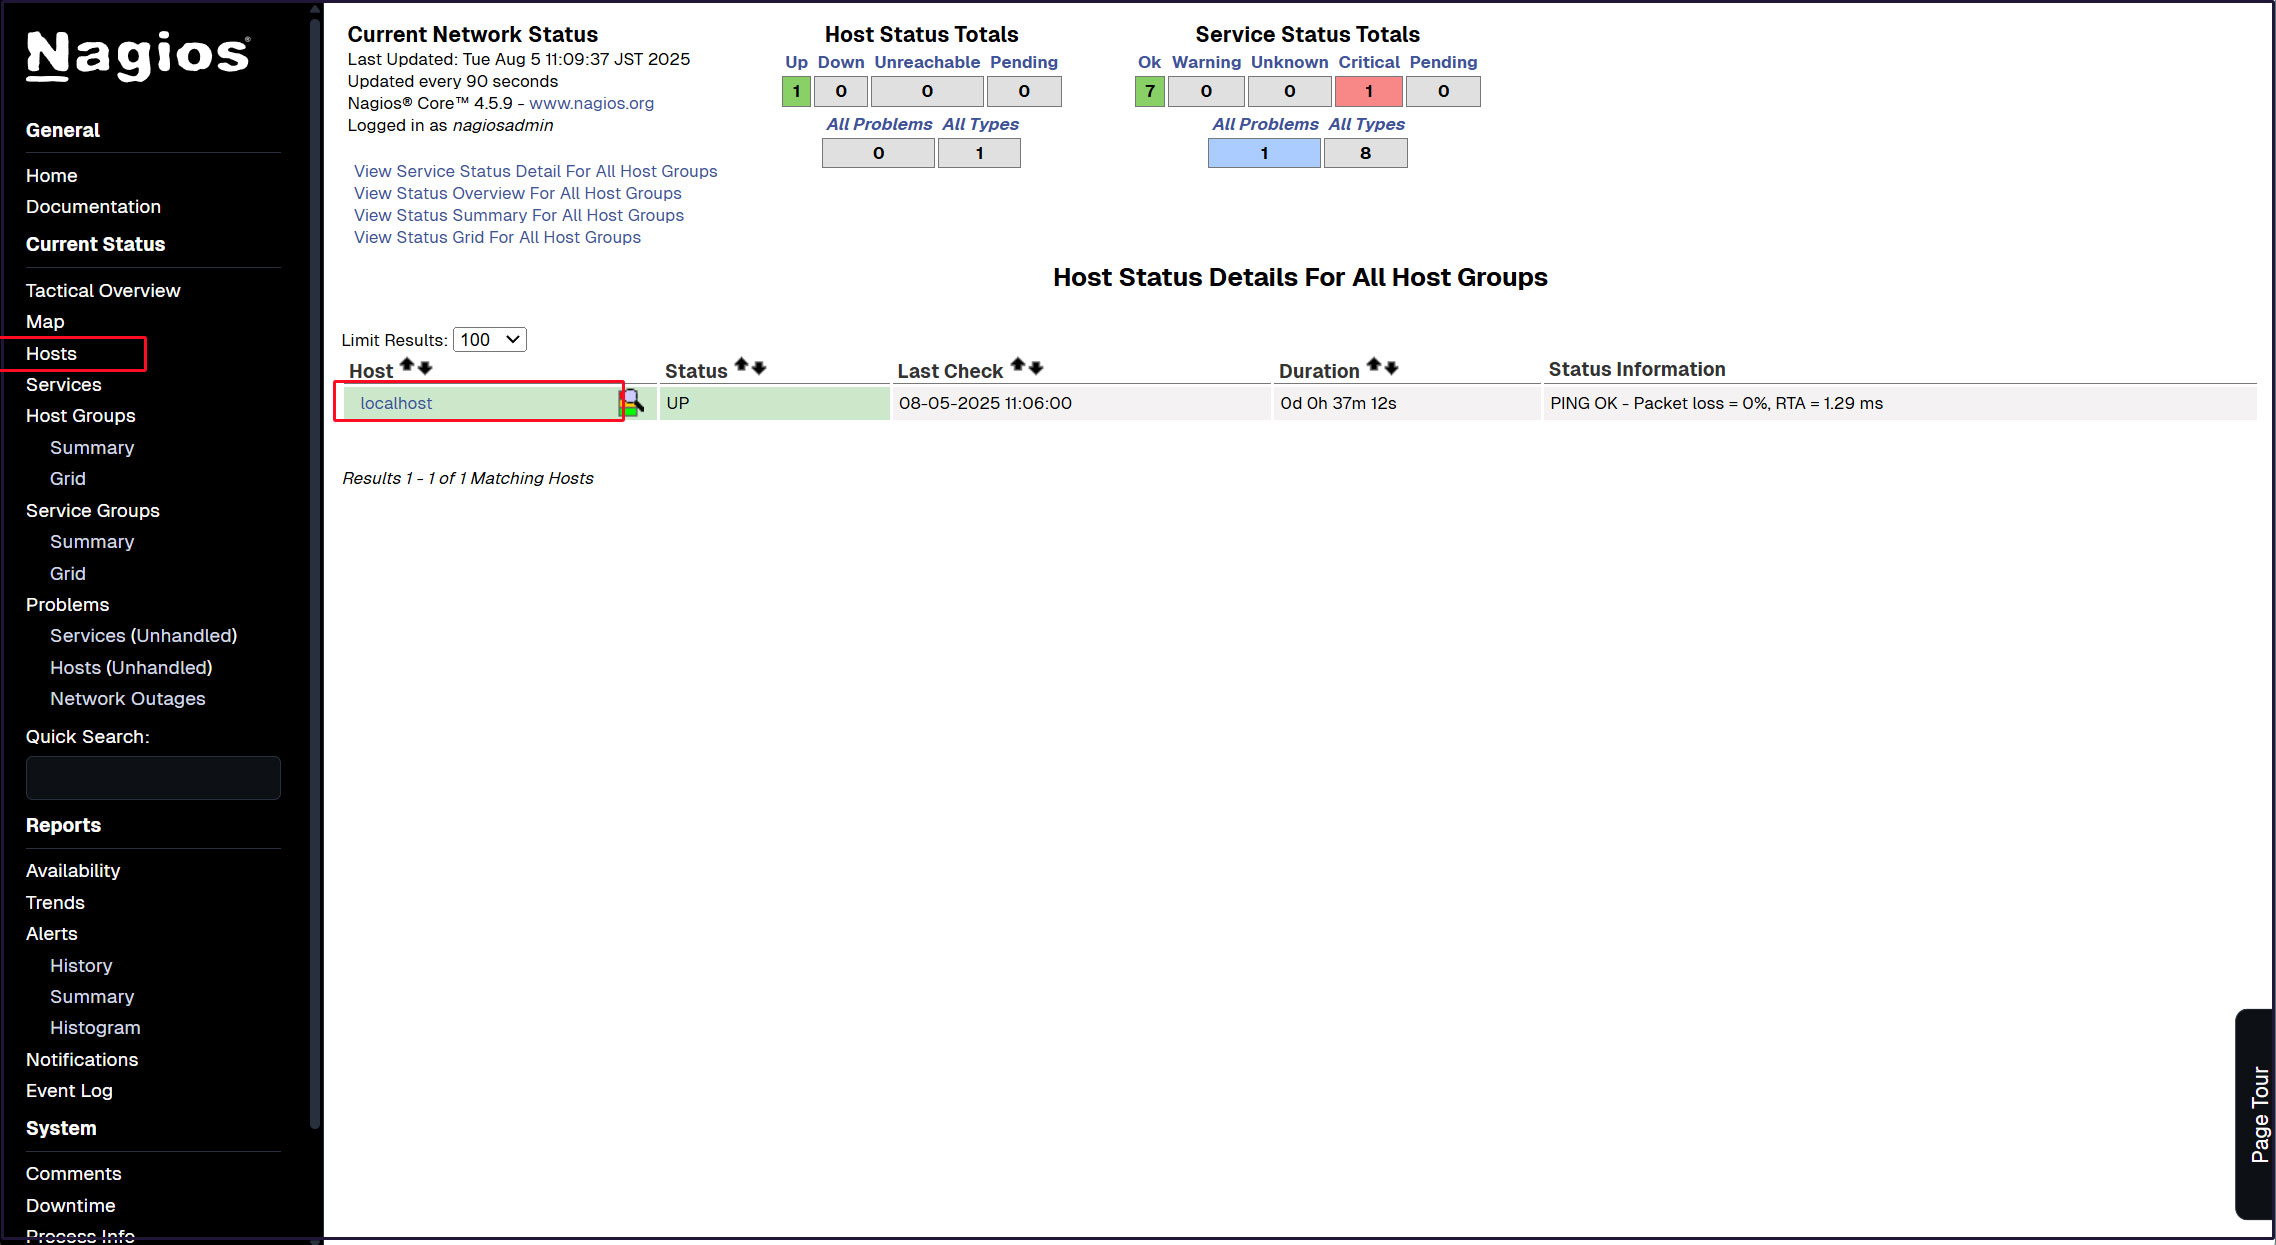
左メニューの [Tactical Overview] をクリックすると監視データを閲覧できる
左メニューの [Current Status] [Services] をクリック
6. Nagios エージェントの構成
エージェントを監視するため。以下をインストールする
• データ収集用のNagios plugins
• プラグインを実行するNRPE Agent
6.1 Nagios pluginsのダウンロードとインストール
|
1 2 3 4 5 6 7 8 |
# wget https://github.com/nagios-plugins/nagios-plugins/archive/refs/heads/master.zip # unzip master.zip # cd nagios-plugins-master # ./tools/setup # ./configure # make # make install |
Nagios プラグインは、/usr/local/nagios/libexec/ ディレクトリにあります。システム内で使用可能なすべてのプラグインを表示するには、このディレクトリをリストします。
|
1 |
# ls /usr/local/nagios/libexec/ |
下記のとおりnagios-pluginsが利用可能である
|
1 2 3 4 5 6 7 8 9 10 11 12 13 14 15 16 |
check_apt check_ide_smart check_ntp check_ssl_validity check_breeze check_ifoperstatus check_ntp_peer check_ssmtp check_by_ssh check_ifstatus check_ntp_time check_swap check_clamd check_imap check_nwstat check_tcp check_cluster check_ircd check_oracle check_time check_dhcp check_jabber check_overcr check_udp check_dig check_load check_ping check_ups check_disk check_log check_pop check_uptime check_disk_smb check_mailq check_procs check_users check_dns check_mrtg check_real check_wave check_dummy check_mrtgtraf check_rpc negate check_file_age check_nagios check_sensors remove_perfdata check_flexlm check_nntp check_simap urlize check_ftp check_nntps check_smtp utils.pm check_http check_nrpe check_spop utils.sh check_icmp check_nt check_ssh |
インストールされたプラグインを適用するために Nagios デーモンを再起動
|
1 |
# systemctl restart nagios.service |
6.2 Nagios NRPE Agentのインストール
NRPE エージェントは、デフォルトの Debian リポジトリで利用可能
|
1 2 3 4 5 6 7 |
# apt-cache policy nagios-nrpe-server nagios-nrpe-server: Installed: (none) Candidate: 4.1.3-1 Version table: 4.1.3-1 500 500 http://deb.debian.org/debian trixie/main amd64 Packages |
|
1 |
# apt install nagios-nrpe-server |
バージョン確認
|
1 2 3 |
# nrpe -V NRPE - Nagios Remote Plugin Executor Version: 4.1.3 |
サービスを開始して有効にする
|
1 2 3 4 |
# systemctl enable --now nagios-nrpe-server Synchronizing state of nagios-nrpe-server.service with SysV service script with /lib/systemd/systemd-sysv-install. Executing: /lib/systemd/systemd-sysv-install enable nagios-nrpe-server |
NRPEエージェントのステータスを確認
|
1 2 3 4 5 6 7 8 9 10 11 12 13 14 15 16 17 18 19 20 |
# systemctl status nagios-nrpe-server ● nagios-nrpe-server.service - Nagios Remote Plugin Executor Loaded: loaded (/usr/lib/systemd/system/nagios-nrpe-server.service; enabled; preset: enabled) Active: active (running) since Thu 2025-08-21 10:20:46 JST; 3s ago Invocation: 36add760f500462f82123d3be94487a8 Docs: http://www.nagios.org/documentation Main PID: 16783 (nrpe) Tasks: 1 (limit: 4595) Memory: 1.4M (peak: 1.8M) CPU: 67ms CGroup: /system.slice/nagios-nrpe-server.service mq16783 /usr/sbin/nrpe -c /etc/nagios/nrpe.cfg -f Aug 21 10:20:46 Lepard systemd[1]: Started nagios-nrpe-server.service - Nagios Remote Plugin Executor Aug 21 10:20:46 Lepard nrpe[16783]: Starting up daemon Aug 21 10:20:46 Lepard nrpe[16783]: Server listening on 0.0.0.0 port 5666. Aug 21 10:20:46 Lepard nrpe[16783]: Server listening on :: port 5666. Aug 21 10:20:46 Lepard nrpe[16783]: Listening for connections on port 5666 Aug 21 10:20:46 Lepard nrpe[16783]: Allowing connections from: 127.0.0.1,::1 |
ファイアウォールでNRPEのポートを開く
NRPEはデフォルトでTCP 5666ポートを使用します。ファイアウォールが動作している場合は、Nagiosモニタリングサーバーからの外部チェックを許可するために、このポートを開きます。
|
1 2 |
# ufw allow 5666/tcp # ufw reload |
ポート5666/tcpがリッスンされているか確認
|
1 2 3 4 |
# ss -altnp | grep 5666 LISTEN 0 5 0.0.0.0:5666 0.0.0.0:* users:(("nrpe",pid=21947,fd=4)) LISTEN 0 5 [::]:5666 [::]:* users:(("nrpe",pid=21947,fd=5)) |
7. 監視ホストの追加
下記サーバーをホストに追加し、 単純なPing による死活監視対象として設定
OS : Ubuntu24.04
IPアドレス : 192.168.11.85
7.1 設定ファイル編集
|
1 2 3 |
# vi /usr/local/nagios/etc/nagios.cfg 51行目 cfg_dir=/usr/local/nagios/etc/servers コメント解除 |
7.2 ディレクトリー作成
|
1 2 3 |
# mkdir /usr/local/nagios/etc/servers # chgrp nagios /usr/local/nagios/etc/servers # chmod 750 /usr/local/nagios/etc/servers |
7.3 定義ファイル新規作成
|
1 2 3 4 5 6 7 8 9 10 11 12 13 14 |
# vi /usr/local/nagios/etc/servers/korodes.cfg define host { use linux-server host_name korodes alias korodes address 192.168.11.85 } define service { use generic-service host_name korodes service_description PING check_command check_ping!100.0,20%!500.0,60% } |
7.4 Nagiosサーバー再起動
|
1 |
# systemctl restart nagios.service |
Nagios サーバーにログイン(http://[サーバーIPアドレス]/nagios)しHostsを見るとホストが追加されている

8. 監視サービスの追加
上記で追加したホストに監視サービスを追加する
OS : Ubuntu24.04
IPアドレス : 192.168.11.85
8.1 監視対象サーバー側の設定
8.1.1 監視対象ホストにエージェントをインストール
|
1 |
# apt install nagios-nrpe-server |
8.1.2 設定ファイル編集
# vi /etc/nagios/nrpe.cfg
106行目 : 接続を許可するホストを追記 (Nagios サーバーを指定)
allowed_hosts=127.0.0.1,::1,192.168.11.83
122行目 : コマンドの引数を許可
dont_blame_nrpe=1
300-304行目コメントにし、追加
# command[check_users]=/usr/lib/nagios/plugins/check_users -w 5 -c 10
# command[check_load]=/usr/lib/nagios/plugins/check_load -r -w .15,.10,.05 -c .30,.25,.20
# command[check_hda1]=/usr/lib/nagios/plugins/check_disk -w 20% -c 10% -p /dev/hda1
# command[check_zombie_procs]=/usr/lib/nagios/plugins/check_procs -w 5 -c 10 -s Z
# command[check_total_procs]=/usr/lib/nagios/plugins/check_procs -w 150 -c 200
pluginの一部を追加する
command[check_by_ssh]=/usr/lib/nagios/plugins/check_by_ssh $ARG1$
command[check_dhcp]=/usr/lib/nagios/plugins/check_dhcp $ARG1$
command[check_disk]=/usr/lib/nagios/plugins/check_disk $ARG1$
command[check_file_age]=/usr/lib/nagios/plugins/check_file_age $ARG1$
command[check_ftp]=/usr/lib/nagios/plugins/check_ftp $ARG1$
command[check_http]=/usr/lib/nagios/plugins/check_http $ARG1$
command[check_imap]=/usr/lib/nagios/plugins/check_imap $ARG1$
command[check_load]=/usr/lib/nagios/plugins/check_load $ARG1$
command[check_log]=/usr/lib/nagios/plugins/check_log $ARG1$
command[check_mysql]=/usr/lib/nagios/plugins/check_mysql $ARG1$
command[check_ntp]=/usr/lib/nagios/plugins/check_ntp $ARG1$
command[check_ntp_peer]=/usr/lib/nagios/plugins/check_ntp_peer $ARG1$
command[check_ntp_time]=/usr/lib/nagios/plugins/check_ntp_time $ARG1$
command[check_ping]=/usr/lib/nagios/plugins/check_ping $ARG1$
command[check_pop]=/usr/lib/nagios/plugins/check_pop $ARG1$
command[check_spop]=/usr/lib/nagios/plugins/check_spop $ARG1$
command[check_procs]=/usr/lib/nagios/plugins/check_procs $ARG1$
command[check_smtp]=/usr/lib/nagios/plugins/check_smtp $ARG1$
command[check_ssmtp]=/usr/lib/nagios/plugins/check_ssmtp $ARG1$
command[check_ssh]=/usr/lib/nagios/plugins/check_ssh $ARG1$
command[check_swap]=/usr/lib/nagios/plugins/check_swap $ARG1$
command[check_tcp]=/usr/lib/nagios/plugins/check_tcp $ARG1$
command[check_udp]=/usr/lib/nagios/plugins/check_udp $ARG1$
command[check_ups]=/usr/lib/nagios/plugins/check_ups $ARG1$
command[check_users]=/usr/lib/nagios/plugins/check_users $ARG1$
8.1.3 nrpeサーバー有効化、起動
|
1 2 3 4 5 6 7 8 9 10 11 12 13 14 15 16 17 18 19 20 21 22 23 24 |
# /etc/init.d/nagios-nrpe-server status ● nagios-nrpe-server.service - Nagios Remote Plugin Executor Loaded: loaded (/usr/lib/systemd/system/nagios-nrpe-server.service; enabled; preset: enabled) Active: active (running) since Tue 2025-08-05 11:40:19 JST; 1min 6s ago Docs: http://www.nagios.org/documentation Main PID: 5129 (nrpe) Tasks: 1 (limit: 4547) Memory: 1.0M (peak: 1.0M) CPU: 9ms CGroup: /system.slice/nagios-nrpe-server.service mq5129 /usr/sbin/nrpe -c /etc/nagios/nrpe.cfg -f Aug 05 11:40:19 Lion systemd[1]: Started nagios-nrpe-server.service - Nagi…utor. Aug 05 11:40:19 Lion (nrpe)[5129]: nagios-nrpe-server.service: Referenced b…OPTS Aug 05 11:40:19 Lion nrpe[5129]: Starting up daemon Aug 05 11:40:19 Lion nrpe[5129]: Server listening on 0.0.0.0 port 5666. Aug 05 11:40:19 Lion nrpe[5129]: Server listening on :: port 5666. Aug 05 11:40:19 Lion nrpe[5129]: Warning: Daemon is configured to accept c…ents! Aug 05 11:40:19 Lion nrpe[5129]: Listening for connections on port 5666 Aug 05 11:40:19 Lion nrpe[5129]: Allowing connections from: 127.0.0.1,::1,…11.83 Hint: Some lines were ellipsized, use -l to show in full. # systemctl enable --now nagios-nrpe-server # systemctl start nagios-nrpe-server |
8.1.4 ファイアウォールでNRPEのポート5666/tcp,5666/udpを開く
|
1 2 3 |
# ufw allow 5666/tcp # ufw allow 5666/udp # ufw reload |
8.2 Nagios サーバー側の設定
8.2.1 nrpeプラグインのインストール
|
1 |
# apt install nagios-nrpe-plugin |
8.2.2 nagiosプラグインディレクトリーにコピー
|
1 |
# cp /usr/lib/nagios/plugins/check_nrpe /usr/local/nagios/libexec/ |
8.2.3 commands.cfg編集
|
1 2 3 4 5 6 7 |
# vi /usr/local/nagios/etc/objects/commands.cfg # 最終行に追記 define command { command_name check_nrpe command_line $USER1$/check_nrpe -H $HOSTADDRESS$ -c $ARG1$ } |
8.2.4 先ほどホスト追加したときに作成した korodes.cfg を編集追加する
今回はHTTP,SSH,FTPを追加してみる
|
1 2 3 4 5 6 7 8 9 10 11 12 13 14 15 16 17 18 19 20 21 22 23 24 25 |
# vi /usr/local/nagios/etc/servers/korodes.cfg # 以下を追加する # 'HTTP' command definition define service{ use local-service host_name korodes service_description HTTP check_command check_http } # 'SSH' command definition define service{ use local-service host_name korodes service_description SSH check_command check_ssh } # 'FTP' command definition define service{ use local-service host_name korodes service_description FTP check_command check_ftp } |
8.2.5 Nagios 再起動
|
1 |
# systemctl restart nagios.service |
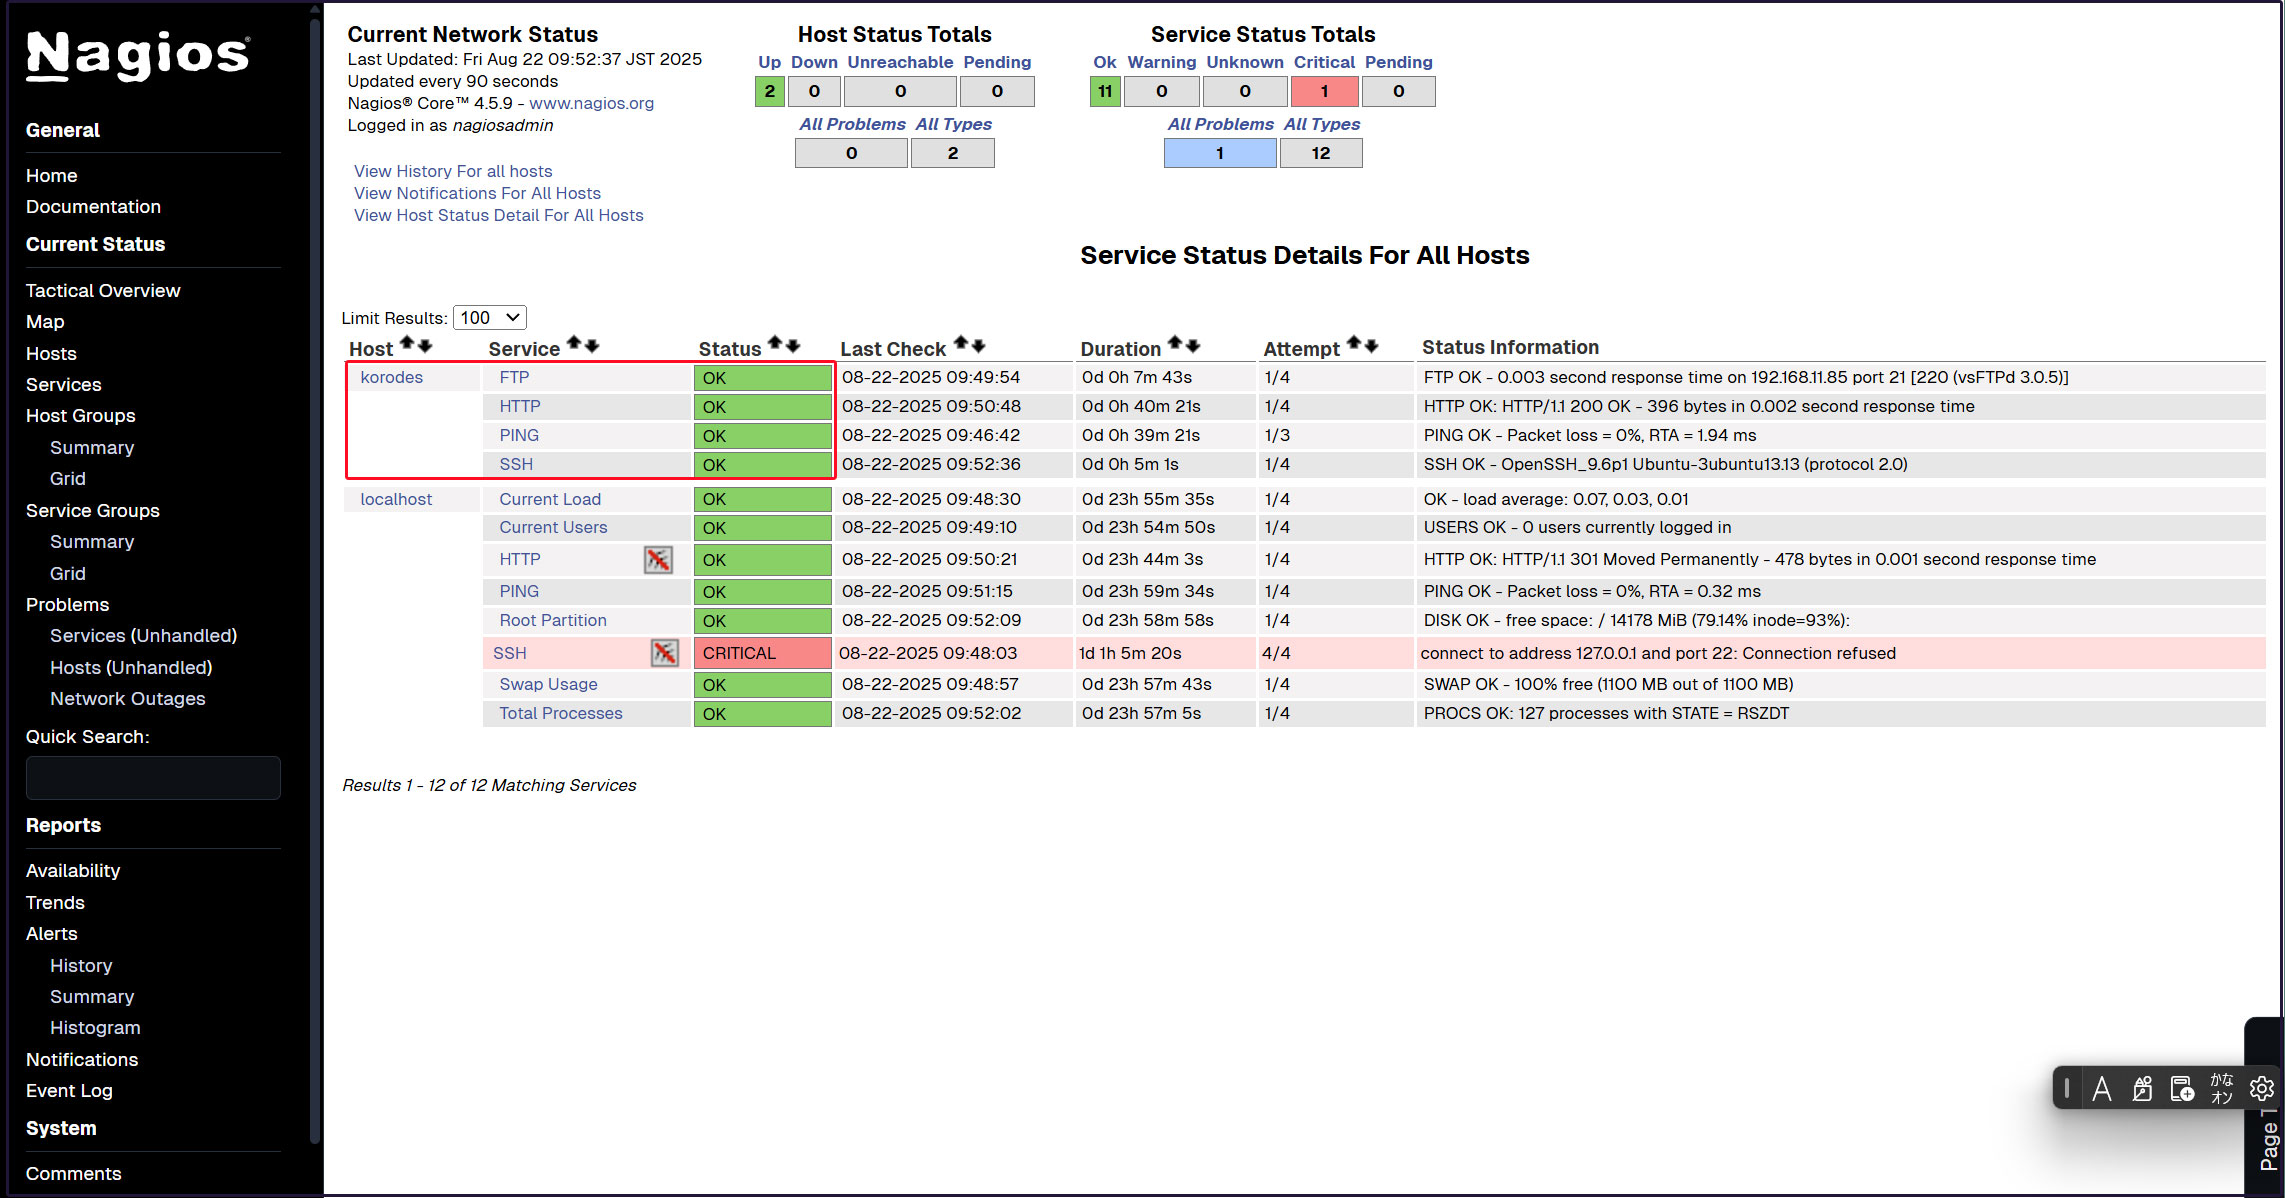
8.2.6 http://[Nagios Server IP Address]/nagios にアクセスする
下図のように新しく追加した監視サービスが追加されている
Tripwireインストール
クラッカーによるLinuxサーバーのファイルの改竄を検知するシステムを導入する。
今回は、ファイル改竄検知システムにホスト型IDS(IDS=Intrusion Detection System)のTripwireを導入する。
Tripwireは、導入時のファイル状態をデータベース化し、そのデータベースとファイルの現状を比較することにより、ファイルの追加/変更/削除を検知する。
1 インストールと構成
|
1 |
# apt install tripwire |
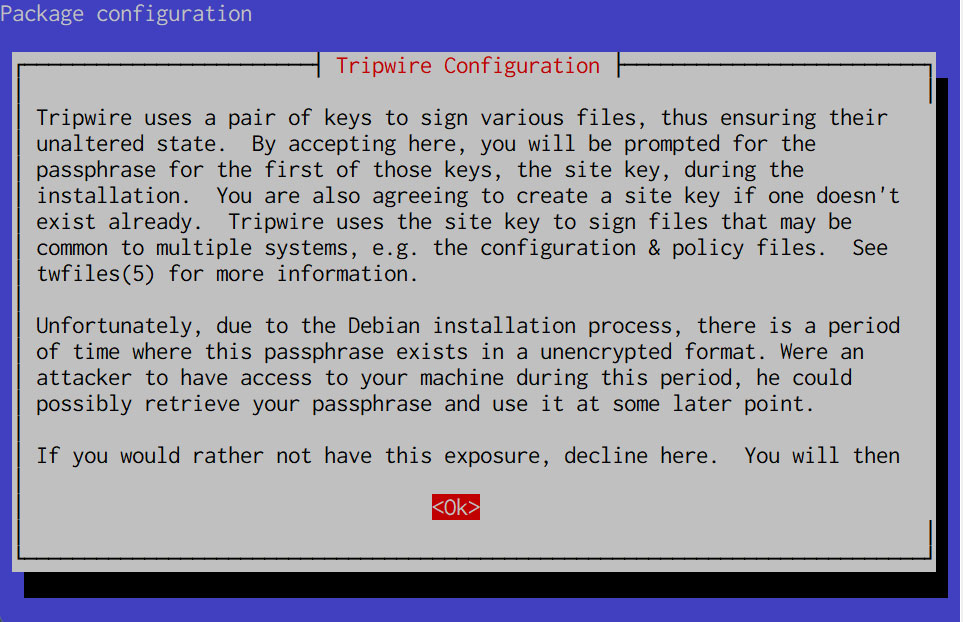
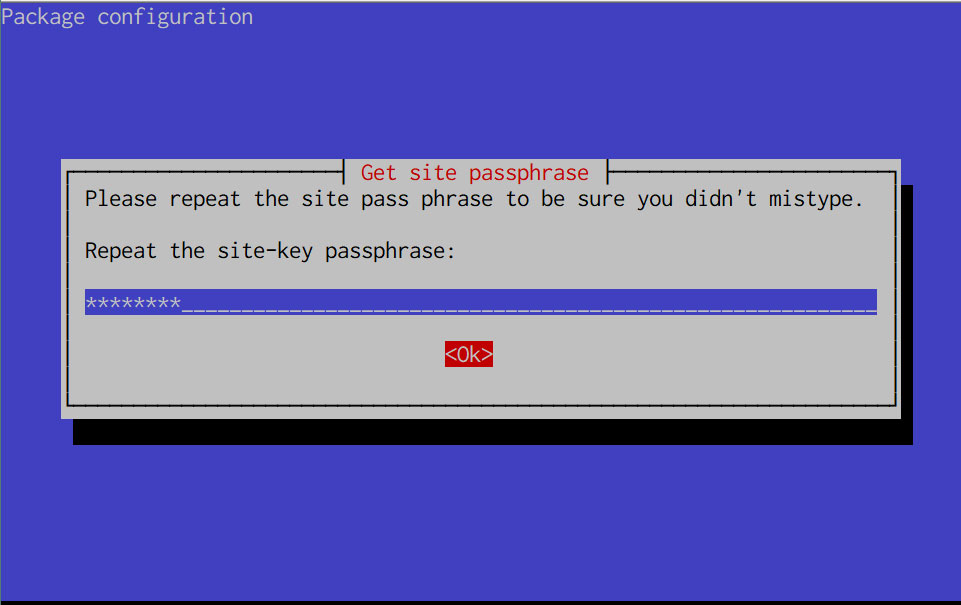
Tripwire は、「tw.cfg」tripwire構成ファイルと 「tw.pol」tripwireポリシーファイルをセキュリティで保護するためにサイトパスフレーズを必要とします。指定されたパスフレーズを使用して両方のファイルを暗号化します。 サイトパスフレーズは、単一インスタンスのtripwireに対しても必要です。
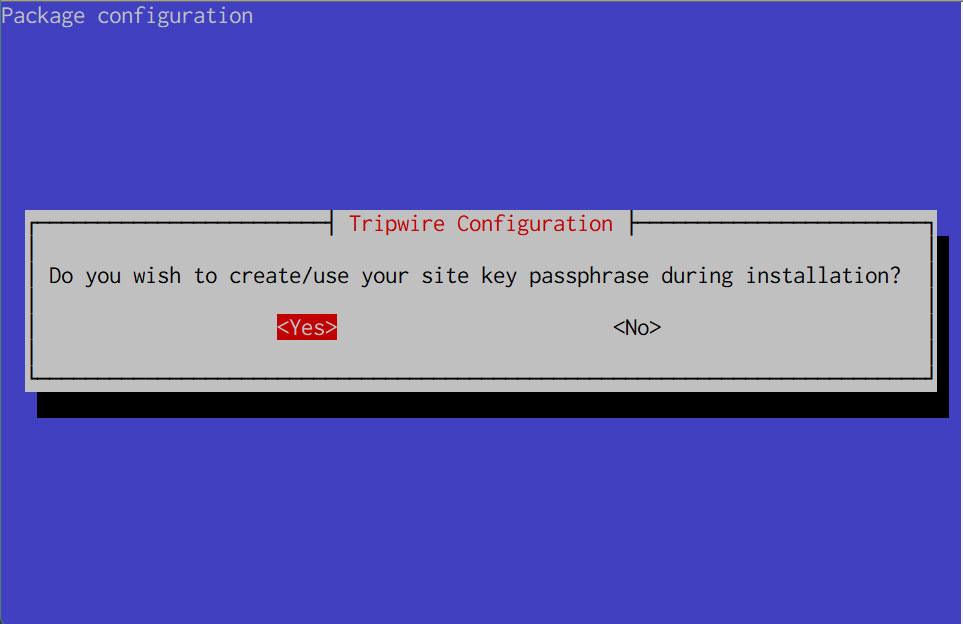
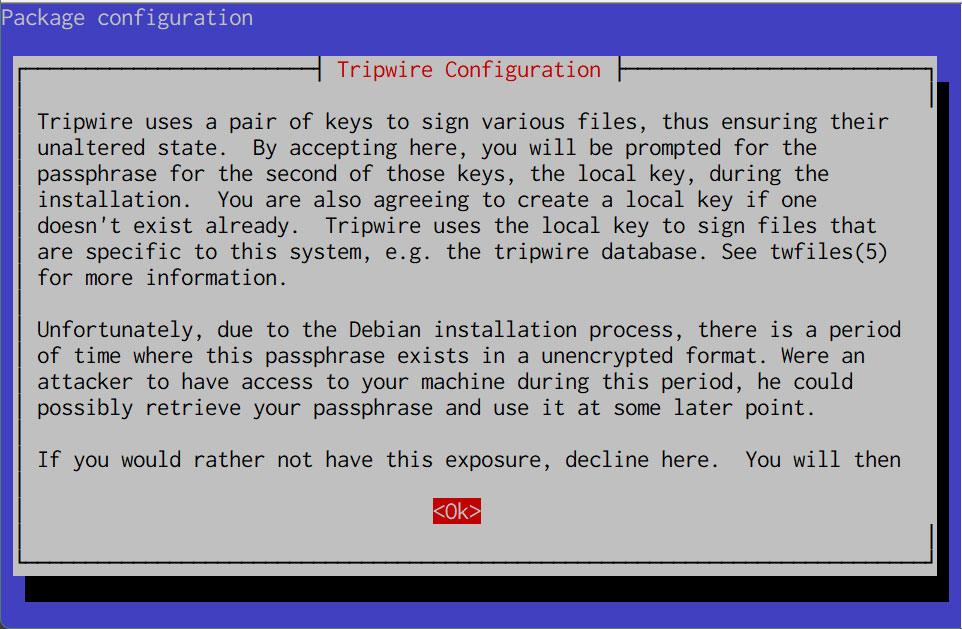

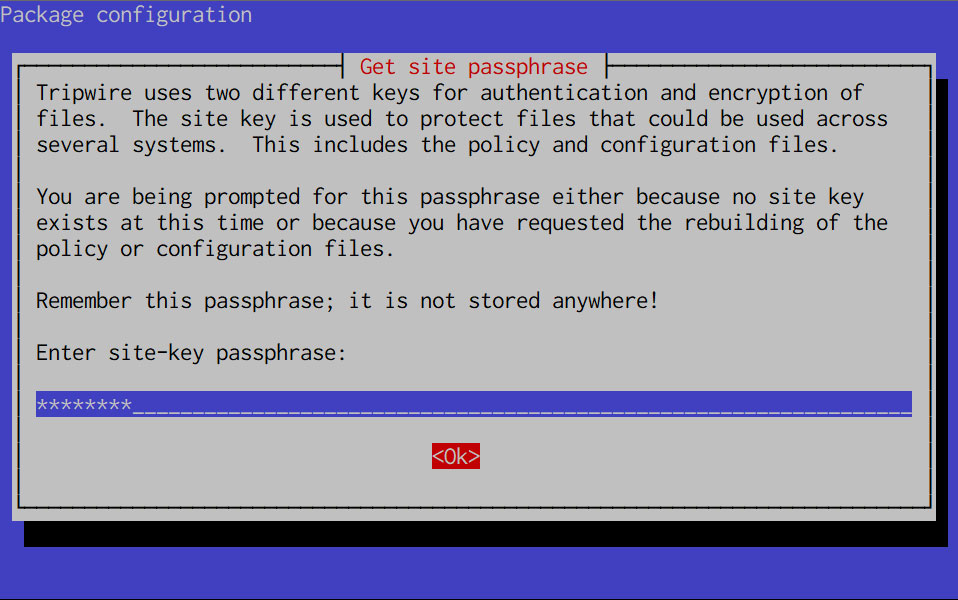
①サイト キーの作成
Tripwire は、「tw.cfg」tripwire構成ファイルと 「tw.pol」tripwireポリシーファイルをセキュリティで保護するためにサイトパスフレーズを必要とします。指定されたパスフレーズを使用して両方のファイルを暗号化します。 サイトパスフレーズは、単一インスタンスのtripwireに対しても必要です。
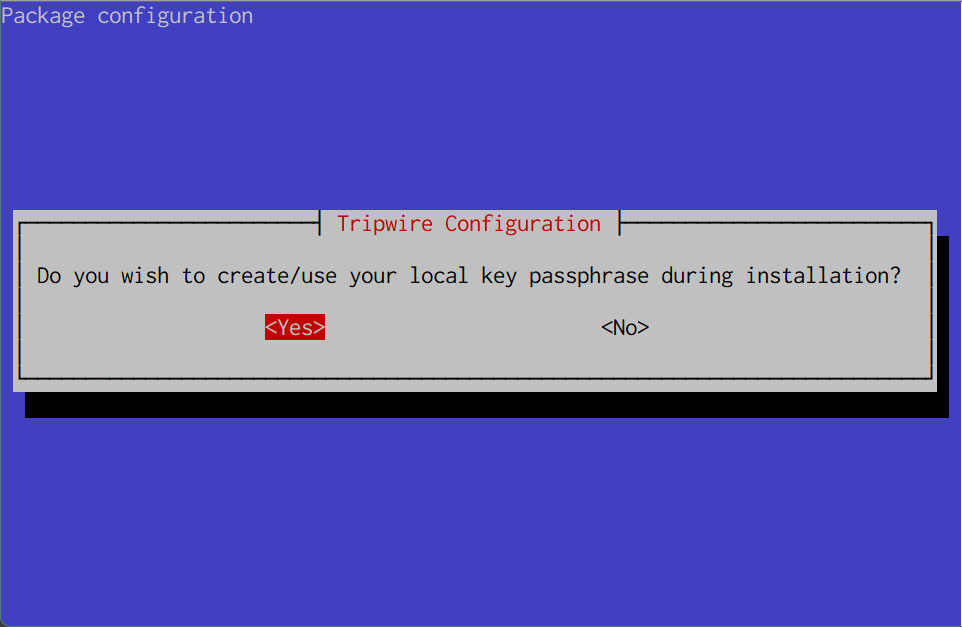
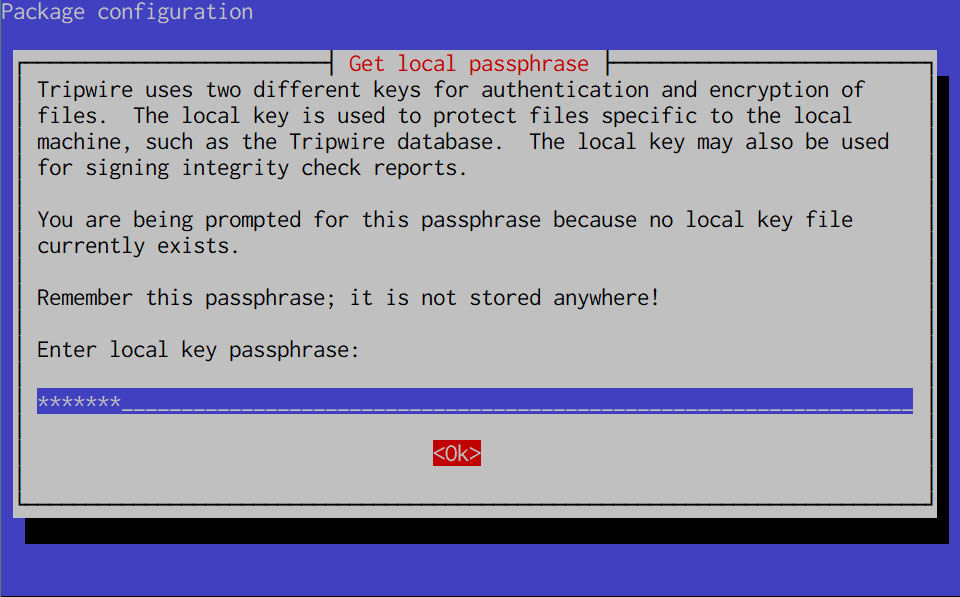
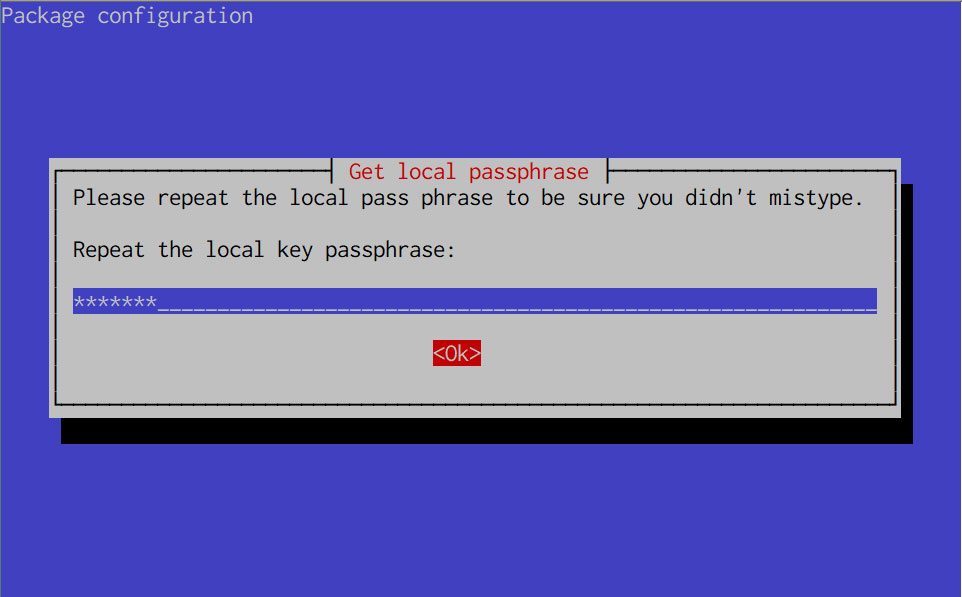
②ローカルキーパスフレーズ
tripwireデータベースとレポートファイルの保護にはローカルパスフレーズが必要です。tripwireベースラインデータベースの不正な変更を避けるためにtripwireが使用するローカルキー。
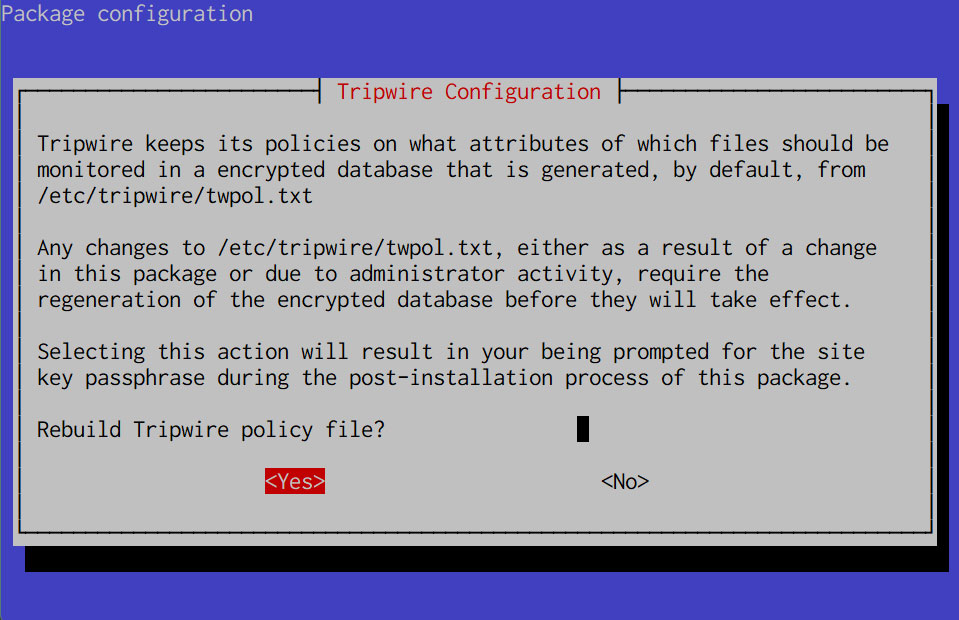
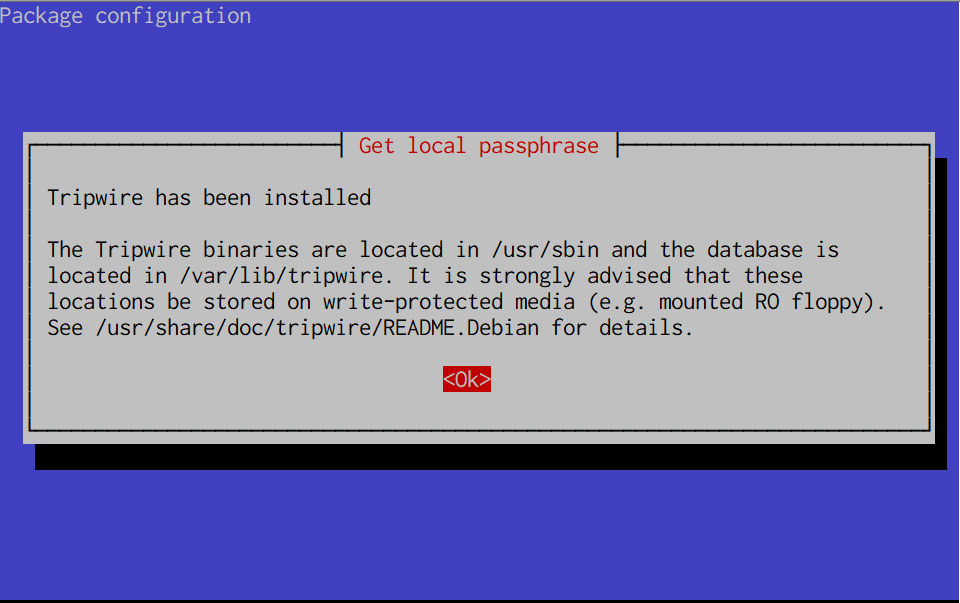
③インストールが進み完了します
2 構成ファイルの設定
①トリップワイヤ構成ファイル (twcfg.txt)
トリップワイヤ構成ファイル (twcfg.txt) の詳細を以下の通りです。暗号化されたポリシー ファイル (tw.pol)、サイトキー (site.key)、およびローカルキー (ホスト名ローカル.key) などのパスは以下の通りです。
|
1 2 3 4 5 6 7 8 9 10 11 12 13 14 15 16 17 |
ROOT =/usr/sbin 実行ファイル POLFILE =/etc/tripwire/tw.pol DBFILE =/var/lib/tripwire/$(HOSTNAME).twd データベースファイル REPORTFILE =/var/lib/tripwire/report/$(HOSTNAME)-$(DATE).twr SITEKEYFILE =/etc/tripwire/site.key LOCALKEYFILE =/etc/tripwire/$(HOSTNAME)-local.key EDITOR =/usr/bin/editor LATEPROMPTING =false LOOSEDIRECTORYCHECKING =false MAILNOVIOLATIONS =true EMAILREPORTLEVEL =3 REPORTLEVEL =3 SYSLOGREPORTING =true MAILMETHOD =SMTP SMTPHOST =localhost SMTPPORT =25 TEMPDIRECTORY =/tmp |
3 キーの作成やデータベース作成等の初期設定
①twcfg.txt編集
|
1 2 3 4 5 6 |
# cd /etc/tripwire # vi twcfg.txt 9 行目 : 変更 LOOSEDIRECTORYCHECKING =true 12行目:必要に応じて変更 (レポートレベル : 4 が最大) REPORTLEVEL =4 |
② 設定ファイル生成
|
1 2 3 |
# twadmin -m F -c tw.cfg -S site.key twcfg.txt Please enter your site passphrase: <サイトキーパスフレーズ> Wrote configuration file: /etc/tripwire/tw.cfg |
③ ポリシーを最適化
次のポリシー最適化スクリプトを利用し、ポリシーを最適化する
|
1 |
# vi twpolmake.pl |
ポリシー最適化スクリプト内容
|
1 2 3 4 5 6 7 8 9 10 11 12 13 14 15 16 17 18 19 20 21 22 23 24 25 26 27 28 29 30 31 32 33 34 35 36 |
#!/usr/bin/perl $POLFILE=$ARGV[0]; open(POL,"$POLFILE") or die "open error: $POLFILE" ; my($myhost,$thost) ; my($sharp,$tpath,$cond) ; my($INRULE) = 0 ; while (<POL>) { chomp; if (($thost) = /^HOSTNAME\s*=\s*(.*)\s*;/) { $myhost = `hostname` ; chomp($myhost) ; if ($thost ne $myhost) { $_="HOSTNAME=\"$myhost\";" ; } } elsif ( /^{/ ) { $INRULE=1 ; } elsif ( /^}/ ) { $INRULE=0 ; } elsif ($INRULE == 1 and ($sharp,$tpath,$cond) = /^(\s*\#?\s*)(\/\S+)\b(\s+->\s+.+)$/) { $ret = ($sharp =~ s/\#//g) ; if ($tpath eq '/sbin/e2fsadm' ) { $cond =~ s/;\s+(tune2fs.*)$/; \#$1/ ; } if (! -s $tpath) { $_ = "$sharp#$tpath$cond" if ($ret == 0) ; } else { $_ = "$sharp$tpath$cond" ; } } print "$_\n" ; } close(POL) ; |
|
1 |
# perl twpolmake.pl twpol.txt > twpol.txt.new |
|
1 2 3 |
# twadmin -m P -c tw.cfg -p tw.pol -S site.key twpol.txt.new Please enter your site passphrase: <サイトキーパスフレーズ> Wrote policy file: /etc/tripwire/tw.pol |
Tripwireデータベース自体をチェック対象外にする
|
1 |
# echo ! "/var/lib/tripwire/`hostname`.twd ;" >> /etc/tripwire/twpol.txt.new |
④データベース作成
|
1 2 |
# tripwire -m i -s -c tw.cfg Please enter your local passphrase: <ローカールキーパスフレーズ> |
4 チェックを実行
①テスト用ファイルを作成
|
1 |
# echo test > /root/test.txt |
②Tripwire の動作確認
|
1 |
# tripwire -m c -s -c /etc/tripwire/tw.cfg |
成功すると次ような表示が出る
|
1 2 3 4 5 6 7 8 9 10 11 12 13 14 15 16 17 18 19 20 21 22 23 24 25 26 27 28 29 30 31 32 33 34 35 36 37 38 39 40 41 42 43 44 45 46 47 48 49 50 51 52 53 54 55 56 57 58 59 60 61 62 63 64 65 66 67 68 69 70 71 72 73 74 75 76 77 78 79 80 81 82 83 84 85 86 87 |
Open Source Tripwire(R) 2.4.3.7 Integrity Check Report Report generated by: root Report created on: Thu 21 Aug 2025 02:34:03 PM JST Database last updated on: Never =============================================================================== Report Summary: =============================================================================== Host name: Lepard Host IP address: Unknown IP Host ID: None Policy file used: /etc/tripwire/tw.pol Configuration file used: /etc/tripwire/tw.cfg Database file used: /var/lib/tripwire/Lepard.twd Command line used: tripwire -m c -s -c /etc/tripwire/tw.cfg =============================================================================== Rule Summary: =============================================================================== ------------------------------------------------------------------------------- Section: Unix File System ------------------------------------------------------------------------------- Rule Name Severity Level Added Removed Modified --------- -------------- ----- ------- -------- Other binaries 66 0 0 0 Tripwire Binaries 100 0 0 0 Other libraries 66 0 0 0 Root file-system executables 100 0 0 0 * Tripwire Data Files 100 1 0 0 System boot changes 100 0 0 0 Root file-system libraries 100 0 0 0 (/lib) Critical system boot files 100 0 0 0 Other configuration files 66 0 0 0 (/etc) Boot Scripts 100 0 0 0 Security Control 66 0 0 0 * Root config files 100 1 0 0 Devices & Kernel information 100 0 0 0 (/dev) Invariant Directories 66 0 0 0 Total objects scanned: 37366 Total violations found: 2 =============================================================================== Object Summary: =============================================================================== ------------------------------------------------------------------------------- # Section: Unix File System ------------------------------------------------------------------------------- ------------------------------------------------------------------------------- Rule Name: Tripwire Data Files (/var/lib/tripwire/Lepard.twd) Severity Level: 100 ------------------------------------------------------------------------------- Added: "/var/lib/tripwire/Lepard.twd" ------------------------------------------------------------------------------- Rule Name: Root config files (/root) Severity Level: 100 ------------------------------------------------------------------------------- Added: "/root/test.txt" =============================================================================== Error Report: =============================================================================== No Errors ------------------------------------------------------------------------------- *** End of report *** Open Source Tripwire 2.4 Portions copyright 2000-2018 Tripwire, Inc. Tripwire is a registered trademark of Tripwire, Inc. This software comes with ABSOLUTELY NO WARRANTY; for details use --version. This is free software which may be redistributed or modified only under certain conditions; see COPYING for details. All rights reserved. |
テストファイルを削除しておく
|
1 |
# rm -f /root/test.txt |
5 Tripwire 自動実行
①自動実行スクリプト(tripwire.sh)を作成し、自動実行させる
|
1 2 3 |
# mkdir /opt/script # cd /opt/script # vi tripwire.sh |
自動実行スクリプト(tripwire.sh)の内容
|
1 2 3 4 5 6 7 8 9 10 11 12 13 14 15 16 17 18 19 20 21 22 |
#!/bin/bash PATH=/usr/sbin:/usr/bin:/bin:/usr/local/tripwire/sbin # パスフレーズ設定 LOCALPASS=xxxxxxxx # ローカルキーパスフレーズ SITEPASS=xxxxxxxx # サイトキーパスフレーズ cd /etc/tripwire # Tripwireチェック実行 tripwire -m c -s -c tw.cfg|mail -s "Tripwire(R) Integrity Check Report in `hostname`" root # ポリシーファイル最新化 twadmin -m p -c tw.cfg -p tw.pol -S site.key > twpol.txt perl twpolmake.pl twpol.txt > twpol.txt.new twadmin -m P -c tw.cfg -p tw.pol -S site.key -Q $SITEPASS twpol.txt.new > /dev/null rm -f twpol.txt* *.bak # データベース最新化 rm -f /usr/local/tripwire/lib/tripwire/*.twd* tripwire -m i -s -c tw.cfg -P $LOCALPASS |
②実行権限を与え、Cronで定期実行する
|
1 2 3 |
# chmod 700 tripwire.sh # crontab -e 0 5 * * * /opt/script/tripwire.sh |
参考: メールで結果報告用スクリプト
|
1 2 3 4 5 6 7 8 9 10 11 12 13 14 15 16 17 18 19 20 21 22 23 24 25 |
#!/bin/bash PATH=/usr/sbin:/usr/bin:/bin:/usr/local/tripwire/sbin # パスフレーズ設定 LOCALPASS=xxxxx # ローカルキーパスフレーズ SITEPASS=xxxxx # サイトキーパスフレーズ #通知先メールアドレス指定 MAIL="<your mailaddress> " cd /etc/tripwire # Tripwireチェック実行 tripwire -m c -s -c tw.cfg|mail -s "Tripwire(R) Integrity Check Report in `hostname`" $MAIL # ポリシーファイル最新化 twadmin -m p -c tw.cfg -p tw.pol -S site.key > twpol.txt perl twpolmake.pl twpol.txt > twpol.txt.new twadmin -m P -c tw.cfg -p tw.pol -S site.key -Q $SITEPASS twpol.txt.new > /dev/null rm -f twpol.txt* *.bak # データベース最新化 rm -f /usr/local/tripwire/lib/tripwire/*.twd* tripwire -m i -s -c tw.cfg -P $LOCALPASS |
下記を実行し、指定メールアドレスに結果が届くか確認する
|
1 |
# /opt/script/tripwire.sh |