Rocky Linux9.0
The Rocky Release Engineering team announced the latest version of Rocky Linux 9.0 on July 14, 2022.
Rocky Linux is a Linux distribution compatible with Red Hat Enterprise Linux; Rocky Linux 9 is a compatible release with RHEL 9 released in May and will be supported until the end of May 2032.
In security, password-based root user authentication via SSH is now disabled by default.
SSH keys can be used to access remote systems instead of root passwords.
OpenSSL supports version 3.0.1, enhanced support for HTTPS clients, and a new FIPS module.
1.Rocky Linux 9.0 Download
Rocky Linux 9.1 installation image can be downloaded from the following site: Rocky-9.1-x86_64-dvd.iso
http://dl.rockylinux.org/vault/rocky/9.1/isos/x86_64
2.Rocky Linux 9.0 Install
Install USB media Change BIOS settings to boot from USB media.
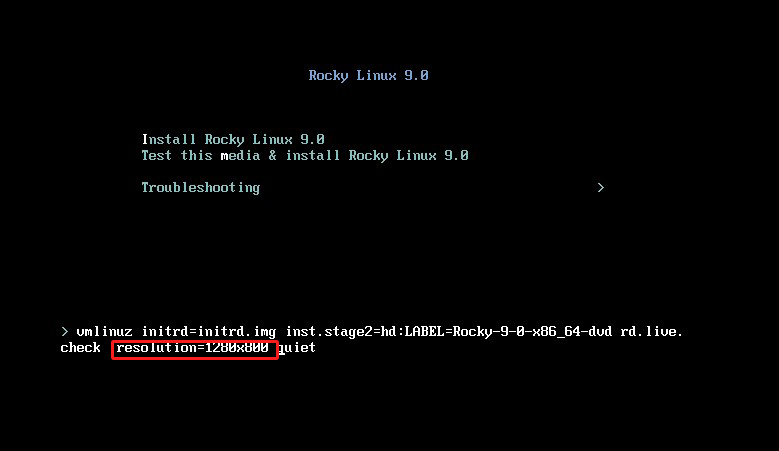
2.1 Installation initial screen
Press the [tab] key, enter "resolution=1280x800" and press the [Enter] key.
This way, the right edge of the installation screen is displayed without being cut off.
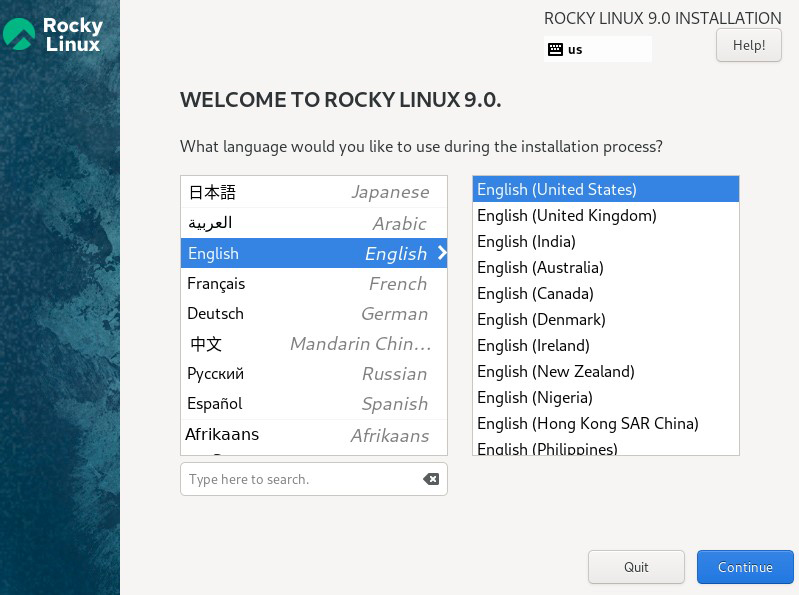
2.2 Language Selection
On the next language selection screen, select "English" and click "Continue". (The server will be set up in English.)
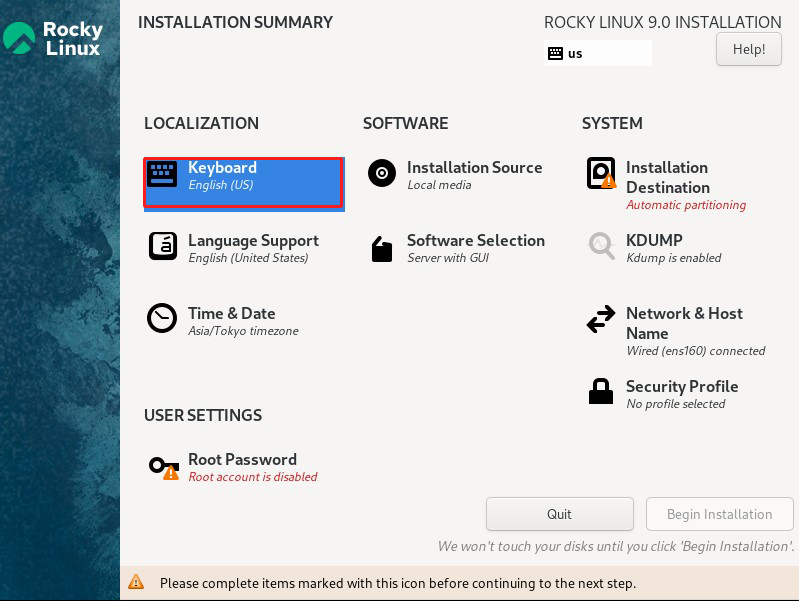
2.3 "Keyboard Layout" setting [Keyboard] Click
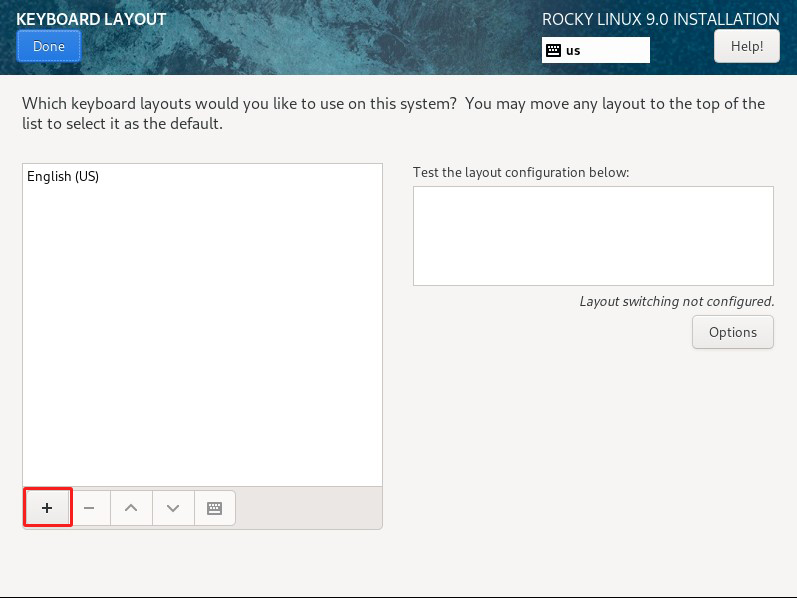
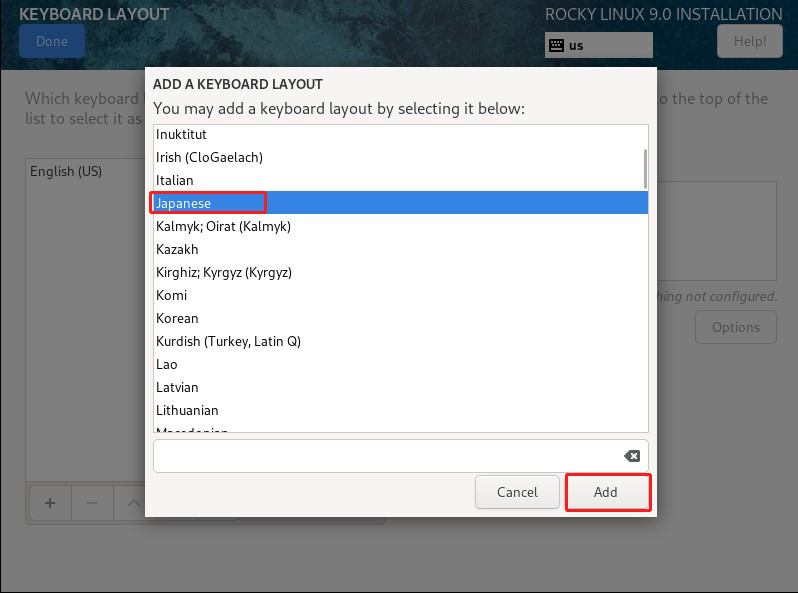
Click the [+] button
Select [Japanese] and click the [Add] button.
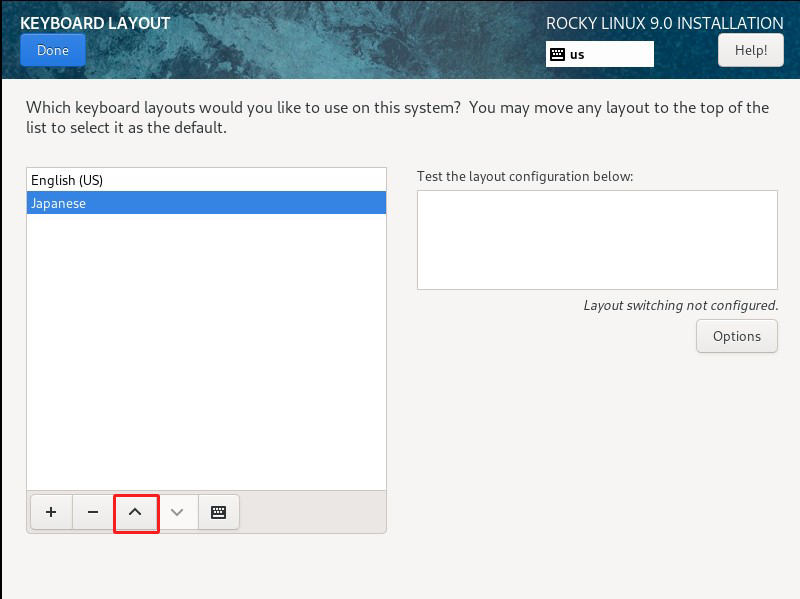
To change the priority, select [Japanes] and click the [^]button
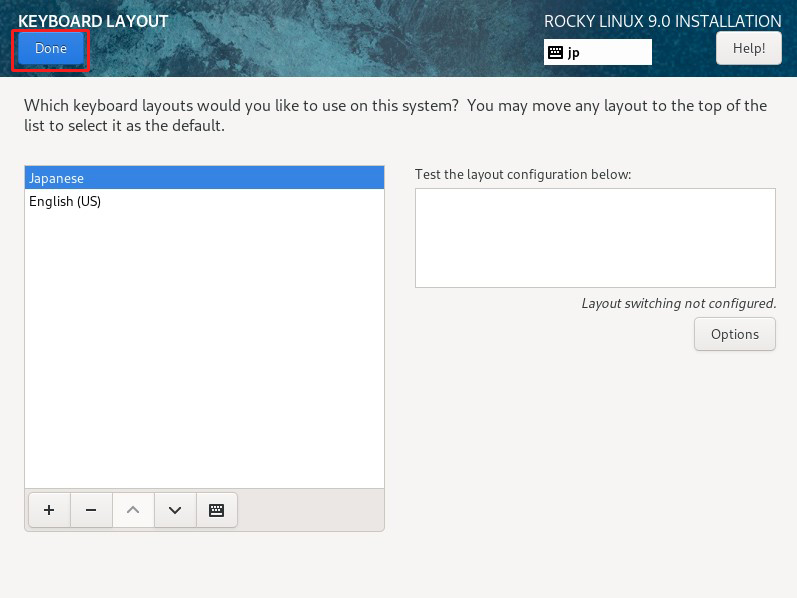
Click the [Done] button
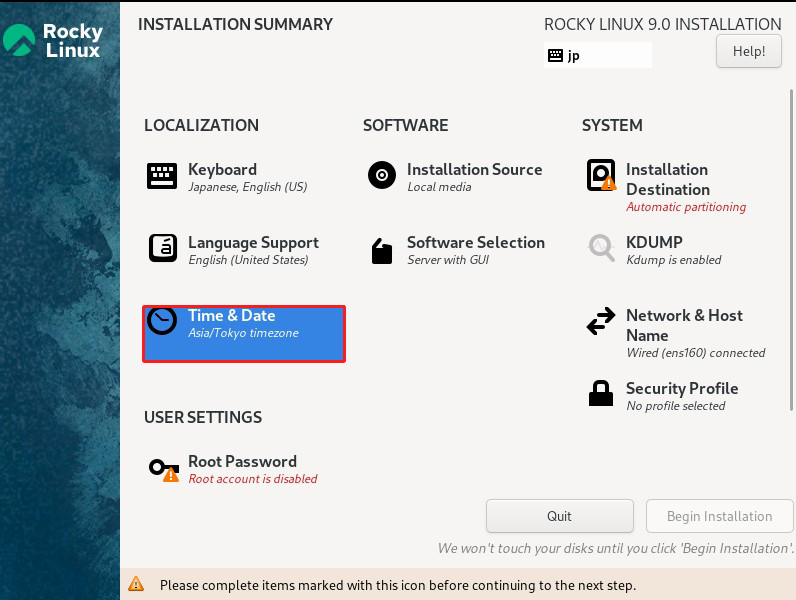
2.4 Click on [Time & Date]
Make sure that [Region} is [Asia] and [City] is [Tokyo], and click [Done].

2.5 Click on [Software Selection] setting.
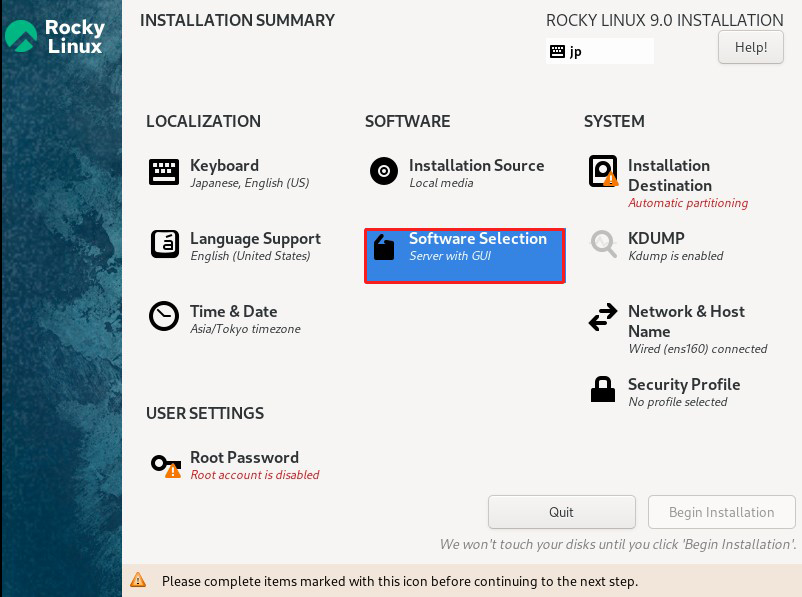
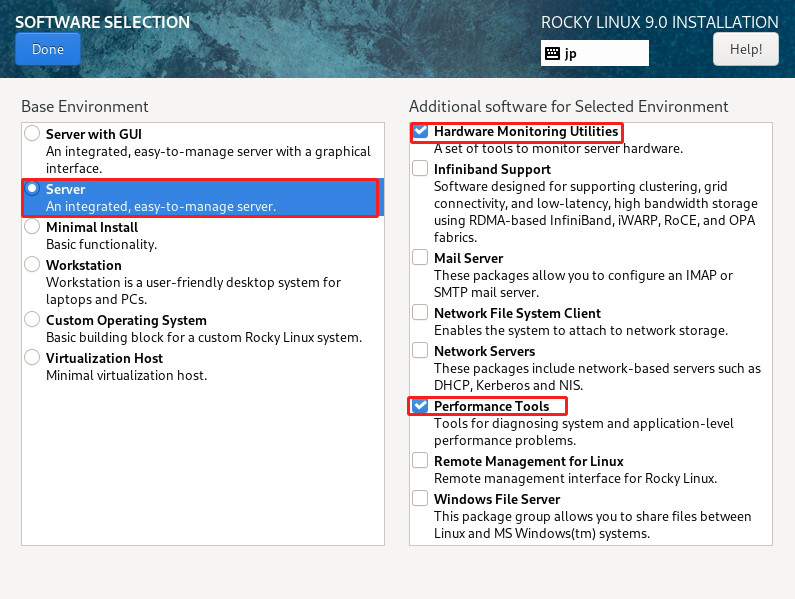
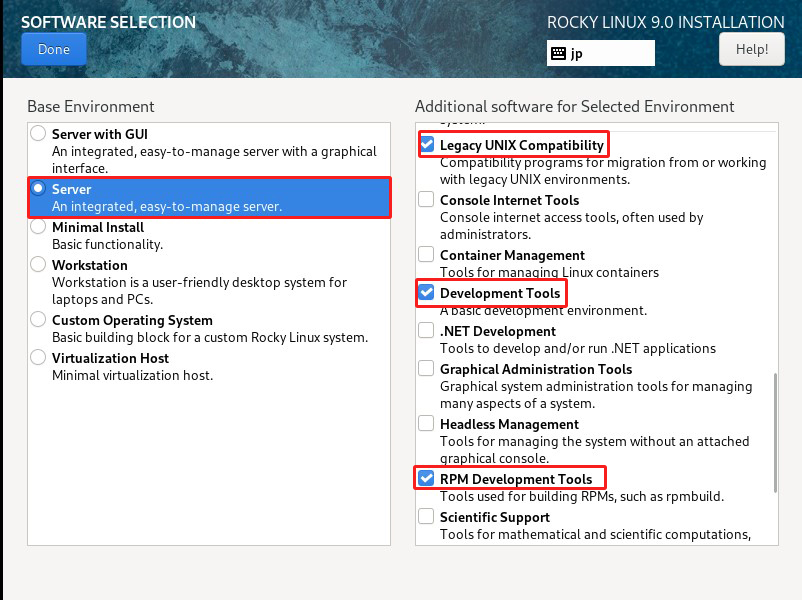
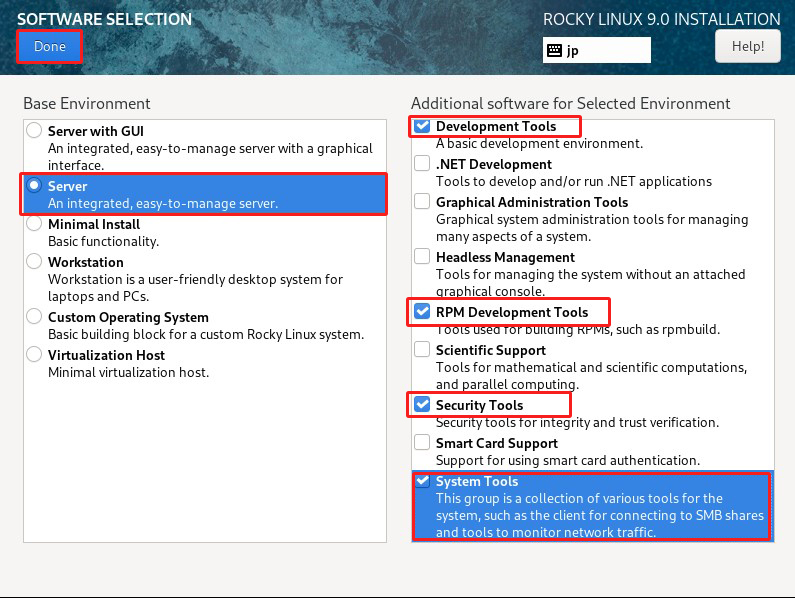
Select [Server] for [Base Environment] and the following for Software in the right column
①Hardware Monitoring Utilities
②Performance Tools
③Legacy UNIX Compatibility
④Development Tools
⑤RPM Development Tools
⑥Security Tools
⑦System Tools
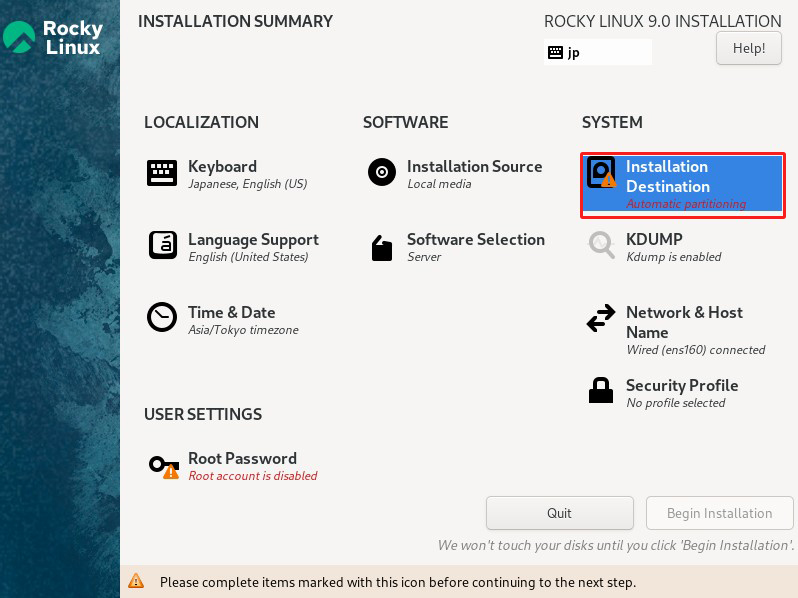
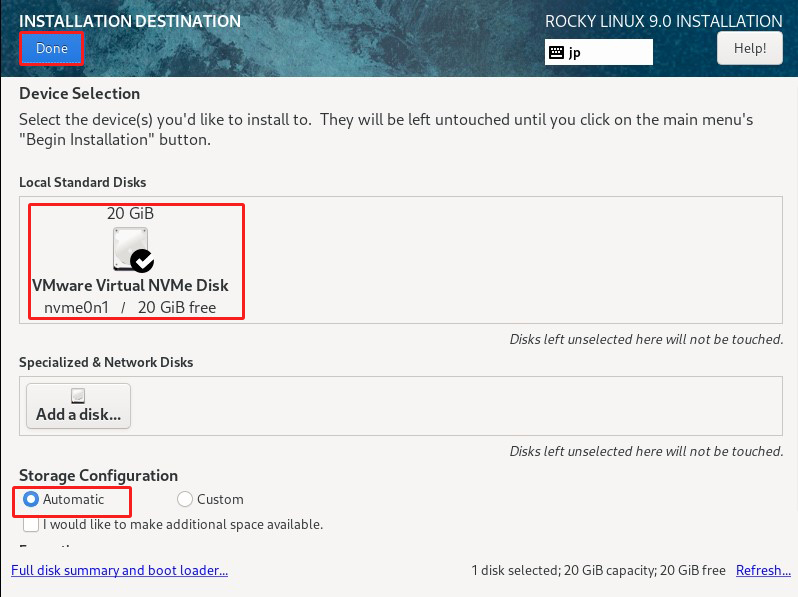
2.6 Click on [Installtion Destination]
Set "Storage Configuration" to "Automatic" and click "Done" after confirming that the disk is marked with a ✔
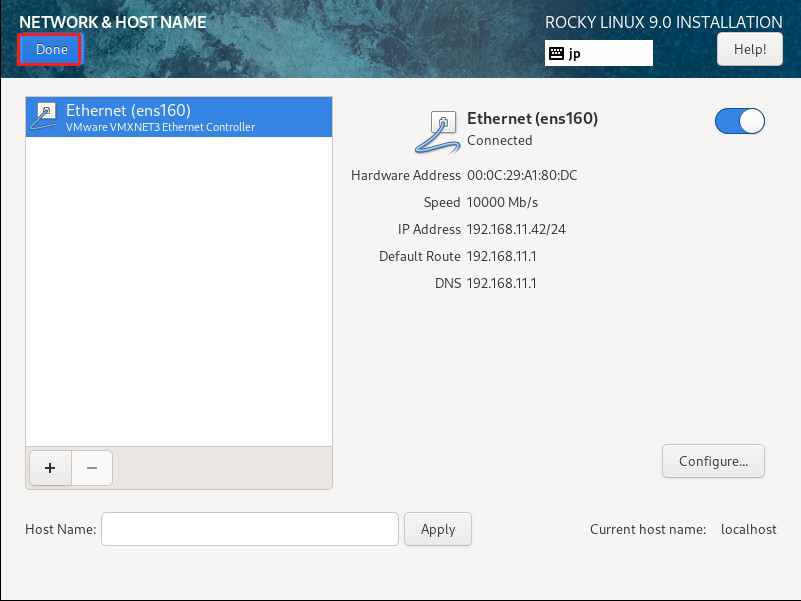
2.7 [Network & Host Name] setting

Do not set [Host Name], and click [Done] to proceed with the default server address with DHCP enabled.
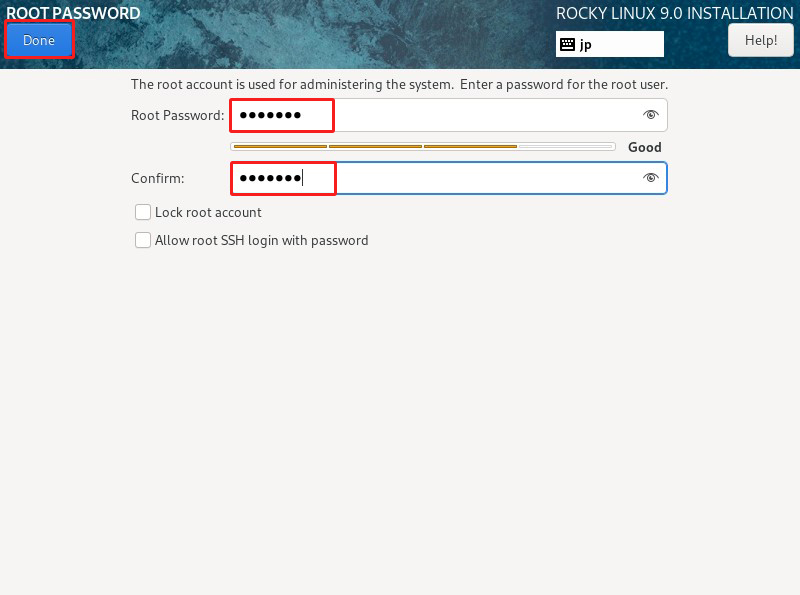
2.8 Setting [Root Password]

Enter root password and click [Done]
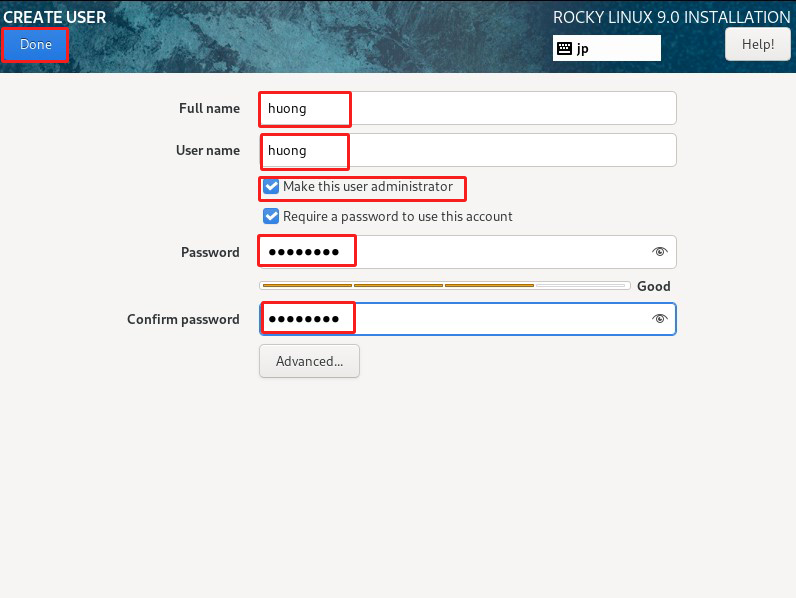
2.9 Create user and set password
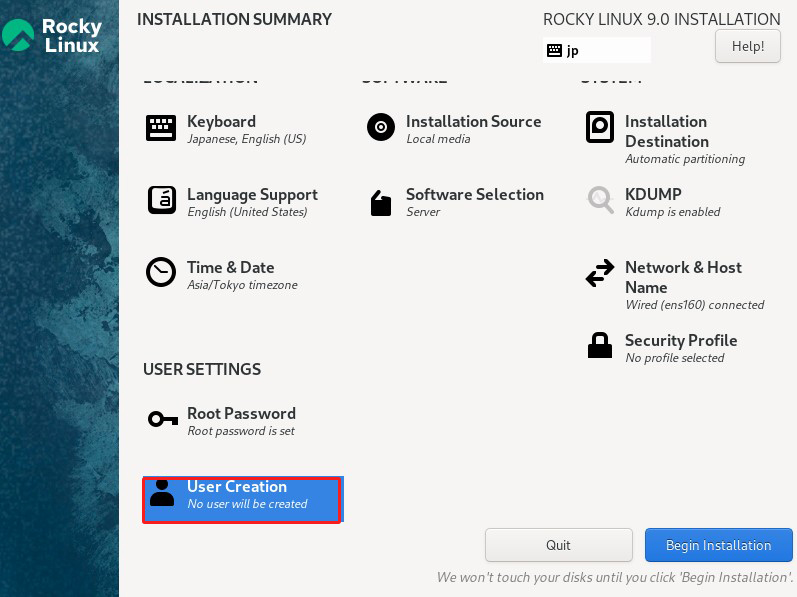
Enter any name in [Full name] [User name] and check [Make this user administrator].
Keep [Password] strong.
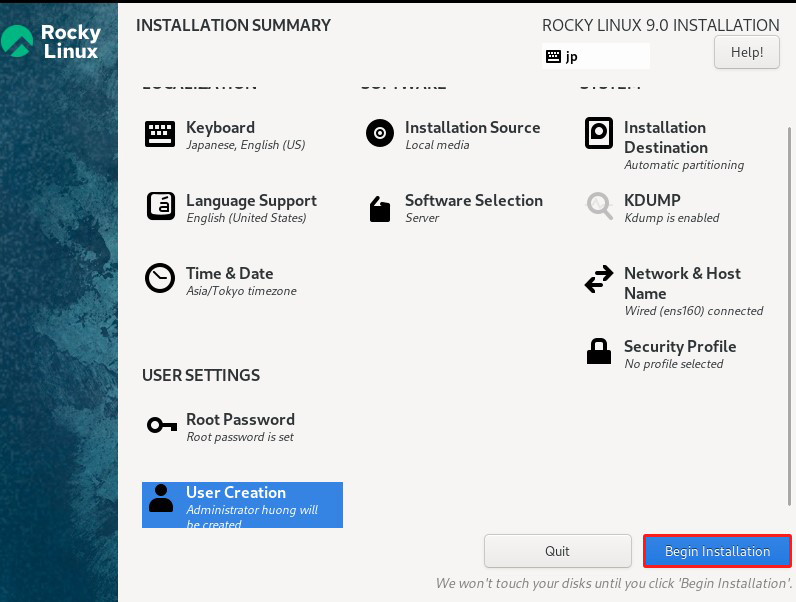
2. 10 Click on [Begin Installation]
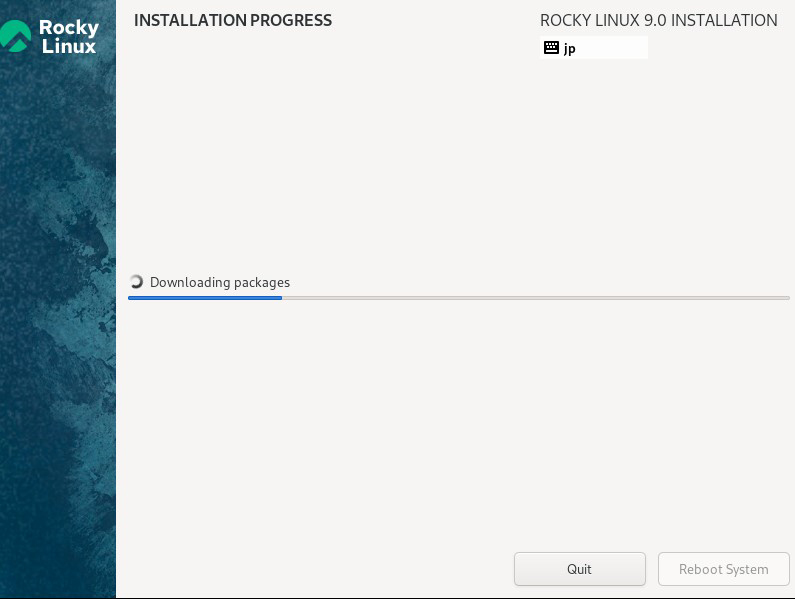
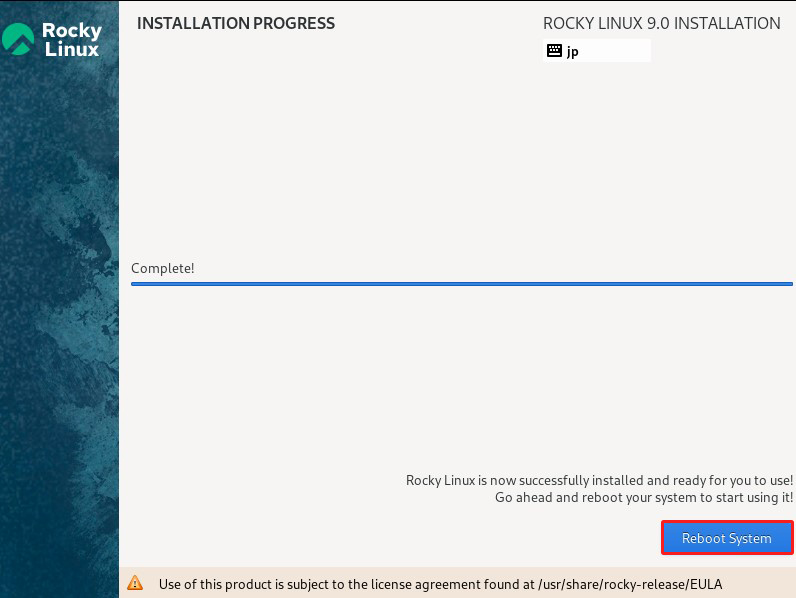
After installation is complete, click on [Reboot System]
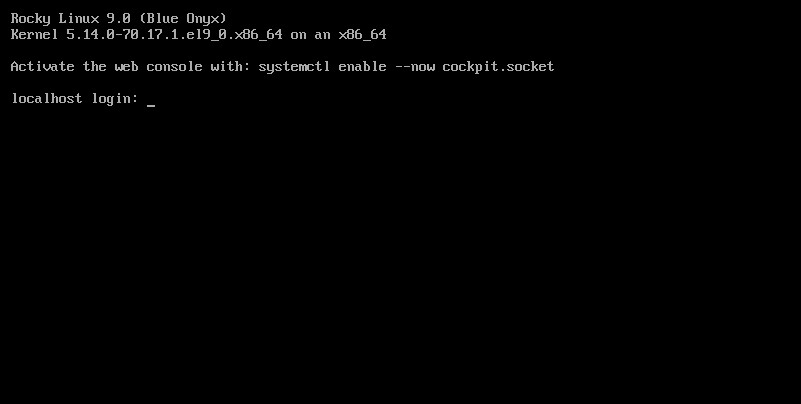
After clicking restart, the "hostname login:" screen appears as follows
</spa

